CodeWarrior软件与编程的讲解(完整版)
CodeWarrior 使用教程
第一课认识CodeWarrior
Translated from https://www.360docs.net/doc/8a13235510.html,
CodeWarrior 能做些什么?
当你知道自己能写更好的程序时,你一定不会再使用别人开发的应用程序。但是常常会发生这种情况,就是当你写了无数行代码后,却找不到使得整个程序出错的那一行代码,导致根本没法编译和链接整个程序。这可能更令人灰心丧气。
本文将告诉你如何使用CodeWarrior 这一工具解决上述问题。
从现在开始,我们将集中精力学习如何在CodeWarrior 中使用C/C++ 进行编程。为了学习本课程,你必须已经能够比较熟练地使用上述两种语言之一。CodeWarrior 也可以支持Java 开发,但那是另一门课程的内容。本课程仅限于在Windows 平台上使用CodeWarrior 进行的开发。一旦你精通了CodeWarrior 编程后,你可以试试在其它平台上使用CodeWarrior。本文中讨论过的大部分内容都可以应用到开发Mac 应用程序中。
CodeWarrior 能够自动地检查代码中的明显错误,它通过一个集成的调试器和编辑器来扫描你的代码,以找到并减少明显的错误,然后编译并链接程序以便计算机能够理解并执行你的程序。你所使用过的每个应用程序都经过了使用象CodeWorrior 这样的开发工具进行编码、编译、编辑、链接和调试的过程。现在你在我们的指导下,自己也可以去做这些工作了。
你可以使用CodeWarrior 来编写你能够想象得到的任何一种类型的程序。如果你是一个初学者,你可以选择编写一个应用程序(比如一个可执行程序),比如象微软公司的文本编辑器WordPad 这样的应用程序。
应用程序可能是最容易编写的程序了,而那些庞大的商业软件,比如象Adobe Photoshop,Microsoft Word 以及CodeWarrior 软件都是极其复杂的。其它类型的程序指的是控制面板(control panels),动态链接库(dynamic linked libraries,DLLs) 和插件(plug-ins)。我们先来简单的讨论一下这些类型的程序。
在Windows 中,控制面板程序是一些(通常比较小的)存放在控制面板目录下的程序,可以在开始菜单的控制面板项中看到它们。控制面板实际上是设置系统功能的一个简单界面,比如可以在控制面板中完成诸如设置音量和鼠标移动速度这样一些参数。
动态链接库(DLLs) 提供了一些很有用的被系统和应用程序共享的函数。通常它们都是没有用户界面的。
插件(Plug-ins) 有点类似于DLLs,插件也是可供其它软件使用的小程序,但插件只能被特定的软件使用。比如说,Photoshop 的插件允许程序员方便地扩展Photoshop 的功能,而不需要去修改它的源代码。同样的,许多Web 浏览器也使用插件来增加功能,或者为了让你能够看到页面上的新的内容类型。实际上,有许多程序,包括CodeWarrior,都使用这种插件结构。
一旦你掌握了CodeWarior 和你所使用的操作系统的编程接口时,你可以编写许多其它类型的程序。实际上,本课程也是你深入学习其它编程方法的基础课程。你已经找到了一个最优秀的地方开始你的编程之旅。好,现在请坐好,放松,去吸取这门课程的精华吧,你将踏上一条成为一个编程武士的道路!
CodeWarrior 入门
CodeWarrior 是一个复杂的应用程序,你必须花点时间来了解它的各种各样的组件和功能。第一课将讲述CodeWarrior IDE 的安装。我们将学习菜单、窗口和其它的一些方面。建议你最好一边学习本课程,一边学习使用CodeWarrior 的集成开发环境。我们从运行CodeWarrior 开始,如果你按照默认方式安装的CodeWarrior 软件,那么在Windows 的桌面上将会有一个该软件的快捷方式图标。双击该图标启动CodeWarrior 的集成开发环境。如果在Windows 桌面上没有这个快捷图标(这种情况经常发生),你可以在
C:\Program Files\Metrowerks\CodeWarrior\Bin 中找到IDE.exe 文件,然后运行它。
工具条
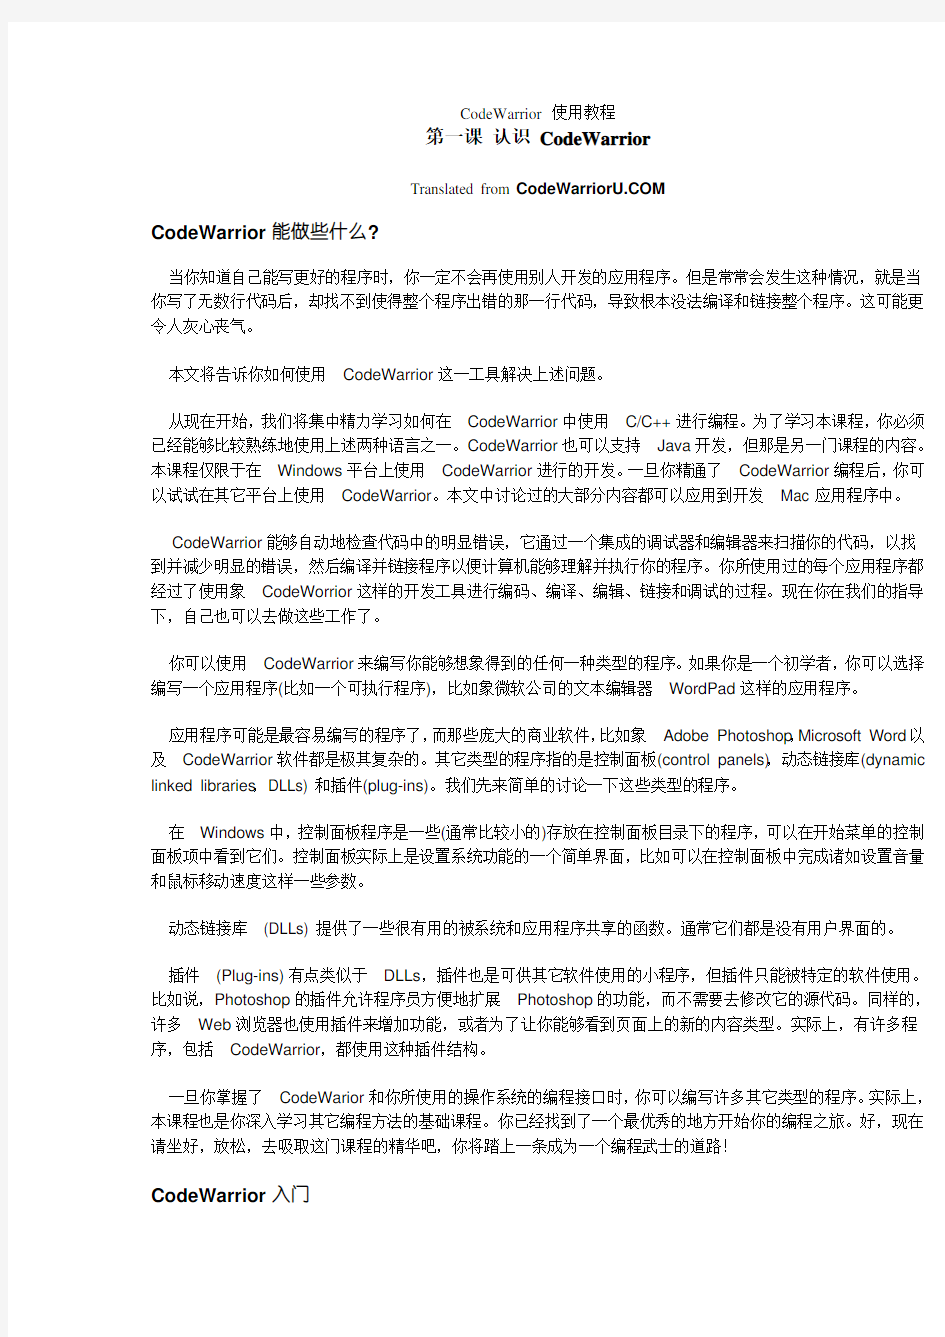
启动CodeWarrior 后,你将会看到,在屏幕上方的菜单下面有一个工具条。这个工具条(见图1-1)包含了一些常用菜单项的快捷方式。在后面的章节中,你将学到如何设置这个工具条,甚至是整个IDE 环境。现在,你应记住,这个工具条用于快捷使用IDE 中的功能。
图1-1: CodeWarrior IDE 的工具条
文件菜单
CodeWarrior IDE 的菜单是按照标准方式设置的。其中的文件菜单用于处理和文件相关的一些操作,比如创建、打开、保存和打印等等。
编辑菜单
CodeWarrior 的编辑菜单和其它的 Windows 应用程序也很相像。其中包括了剪切、复制和粘贴等操作,以及其它一些使得程序员能够更方便地管理源码版面布局的选项。在编辑菜单中还有一个 Preferences 项,我们在这一课的后面将提到它。
查看菜单
查看菜单(图1-2)用于安排工具条和其它窗口在 CodeWarrior 环境中如何显示的选项。所谓的“其它窗口”包括许多特殊的窗口,比如观察点(Watchpoints)窗口,表达式(Expressions)窗口,过程(Processes)窗口和全局变量(Global Variables)窗口等。
图 1-2: 查看菜单中的工具条子菜单
查找菜单
查找菜单用于在单个文件或硬盘的目录中查找指定的代码。你可以使用它来方便地替换文本块或在你的代码中搜索指定的项目。即使是在小工程中使用这个工具也非常方便。
工程菜单
工程菜单中的工具用于管理 CodeWarrior 工程。一个工程包括组成你正在编写的程序的所有的文件,包括头文件、源代码和库文件。工程窗口显示了所有这些文件的名称。我们将在第二课中深入讨论这部分内容。
调试菜单
这是在编制程序中最常用到的工具。我们将在第五课中详细介绍它的使用方法。
窗口菜单
用于在 CodeWarrior 环境管理窗口显示方式的菜单。
帮助菜单
通过帮助菜单可以到网上寻求关于 CodeWarrior 任何问题的在线解答。够酷的吧?
了解 CodeWarrior 集成开发环境的设置
CodeWarrior IDE 提供了许多设置以便让你定制你的工作环境。当你选择了编辑菜单中的 Preferences 项时,你将会看到一个设置对话框(如图1-3)。在该对话框中,有控制 CodeWarrior 编辑器、调试器和其它许多功能的界面和行为的选项。在这一节中,我们将学习这些设置的使用。
图1-3: 设置对话框
你可以在自己的 CodeWarrior 中试试上述这些设置项。你可以先点击问号标志,然后点击你感兴趣的项目,就可以得到一个有关该项目的用途的简短介绍,也可以从帮助菜单中得到更详细的信息。
通用设置
?编译设置(Build Settings):选择是否在执行编译之前保存已打开的源文件,以及有多少内存被用于编译工作;
?IDE 之外(IDE Extras):几个独立的设置。比如指定 CodeWarrior 是否使用一个第三方的文本编辑器——因为集成的编辑器并不是很完美,这可以通过指定一个你惯用的编辑器来替代它;
?插件设置(Plug-In Settings): 供插件开发商调试他们的插件;
?隐藏文件夹(Shielded Folders):在这里指定的文件夹在工程设计期间,或执行查找和比较操作期间,将要被忽略掉。如果在你的工程级有一个巨大的“数据”文件目录,而你又不想让这些文件降低
CodeWarrior 的操作速度时,这个设置就很管用了;
?资料树(Source Trees):用于指定 CodeWarrior 在编译程序时用不着的目录。
编辑器设置
?编辑器设置(Editor Settings):几个用于定制编辑器显示、管理文本和窗口的设置项;
?字体和制表符(Fonts and Tabs):设置编辑器中的文本大小、字体、制表符和其它显示设置;
?文本颜色(Text Colors):用于指定特定语言元素(比如程序的注释)在编辑窗口中的显示的颜色。
调试器设置
?显示设置(Display Settings):几个用于定制调试器显示的设置项;
?视窗化(Windowing):设定调试器如何管理它的窗口(比如隐藏所有打开的编辑器窗口);
?全局设置(Global Settings):几个用于定制调试器在全局层次如何工作的设置。比如当一个包含了程序调试信息的文件被打开时,是否启动这个程序;
?远程连接(Remote Connections):允许通过 TCP/IP 进行远程调试。这样,你就可以在地球的另一边调试你的软件了;
?Java 设置/Java 调试(Java Settings/Java Debugging):允许你设置特定的 Java 编程语言选项。本课程不涉及这部分内容。
RAD 工具
?Layout 编辑器:几个用于在 CodeWarrior 中定制快速应用程序开发工具的使用的设置。
正如你所见到的,CodeWarrior 有许多设置项和选项。设置完后点击“Save”按钮保存你所作的修改,点击“Close”按钮将忽略你所作的所有修改。在进入下一节课之前,多练习几次。最后请确认“默认的文本文件格式(Default Text File Format)”(在编辑器设置面板中)保持为 DOS 设置。
(待续)
附原文:
Lesson 1: Getting to Know CodeWarrior
What Will CodeWarrior Do for Me?
It can be frustrating to use other people's applications when you know you can make something better. But it can also be frustrating when you have a zillion lines of code and can't find the one typo that's making the whole application go kablooey -- not to mention getting it all compiled and linked and so on.
This is why you are here. And this is why CodeWarrior was created.
For now, we'll focus on writing programs in CodeWarrior using the C or C++ programming languages. This course assumes that you're pretty comfortable using at least one of these languages. CodeWarrior also supports Java development, but that will be covered in a separate class. This course concerns itself with Windows platform development. Once you get really good at programming with CodeWarrior, you can explore the other platforms for which tools have been designed. Much of what will be discussed here can also be applied to developing Mac applications.
CodeWarrior automatically checks your code for obvious errors, helps you scan it for less obvious ones (via an integrated debugger and editor), and then compiles and links the code so that your computer can understand and execute your program. Every application that you have used has been through the coding, compiling, editing, linking, and debugging process, using tools like CodeWarrior. Now you can do it too! But we still have to teach you how.
Using CodeWarrior, you can write just about any type of program you can imagine. If you are a beginner, you may choose to write an application (also known as an executable) as your first program. You might choose to create something as basic as WordPad, Microsoft's text editor, for example.
Applications are probably the simplest type of program to write, though large commercial ones like Adobe Photoshop, Microsoft Word and even CodeWarrior itself are quite complex. Other program types include control panels, dynamic linked libraries (DLLs), and plug-ins. Let's talk about these types for a minute.
Under Windows, control panels are those (usually small) programs that are stored in your Control Panels directory and visible in the Control Panel section on the Start menu. The control panel itself is simply an interface to a system-wide feature, like setting the sound volume or the mouse's motion speed, for example.
DLLs supply useful functions that are shared by the operating system and applications. They typically don't have a user interface
Plug-ins are similar to DLLs in that they provide small pieces of code that are used by other software. However, a single program typically uses this code. For example, Photoshop plug-ins allow programmers to easily extend the capabilities of the Photoshop application without having access to its source code. Likewise, many Web browsers use plug-ins that add extra features to the application or allow you to manipulate new content types on the Web. Many programs, including CodeWarrior, make use of this plug-in architecture.
There are plenty of other types of programs you can write once you master CodeWarrior and the programming interfaces for your operating system. In fact, once you complete this course, you can take other courses in which you will learn more in-depth methods of programming your computer. You've chosen an excellent place to begin your journey, however. So sit back, relax, and absorb the lessons in this course, and you'll be well on your way to becoming a CodeWarrior!
An Introduction to the CodeWarrior Application
CodeWarrior is a complex application. If you really want to benefit from all of its features, you should take this
time to get to know its various components and the capabilities that will be available to you. This first lesson will give you a basic overview of how the CodeWarrior IDE is set up. (That acronym gets thrown around a lot, and it's short for Integrated Development Environment. ) We'll take a look at menus, windows, and other aspects of the program. Follow along with the CodeWarrior IDE while you read through these lessons. Start by launching the IDE application. If you followed the defaults for the CodeWarrior software installation, there will be an icon that represents a shortcut to the program. Double-click on it to start the IDE. If the shortcut icon is absent (these things happen), you can typically find the program at C:\Program
Files\Metrowerks\CodeWarrior\Bin\IDE.exe.
Toolbar
When you launch the CodeWarrior IDE, you'll notice a toolbar attached to the menu at the top of your screen. This toolbar (Figure 1-1) contains buttons that are shortcuts to frequently used menu items. You'll learn how to customize this toolbar -- and even the entire IDE -- in a later lesson. For now, notice that this toolbar can be used to quickly access features within the IDE.
Figure 1-1: The CodeWarrior IDE toolbar.
File Menu
The menus in the CodeWarrior IDE are set up in a relatively standard manner. The File menu contains choices that manage the care and feeding of files. It has standard items that let you create, open, save, and print files.
Edit Menu
The Edit menu will also seem familiar if you use other Windows applications. You'll find commands that cut, copy, and paste text, as well as a few other options to help programmers more easily manage source code layout. There is also a Preferences item in the Edit menu that we'll discuss later in this lesson.
View Menu
The View menu (Figure 1-2) gives you options to manage which toolbars and other windows are displayed in the CodeWarrior environment. Some of these windows include various specialty windows, such as the Watchpoints window, Expressions window, Processes window, and Global Variables window.
Figure 1-2: The Toolbar submenu of the View Menu.
Search Menu
The Search menu's commands allow you to locate source code within a single file, or within the directories of your hard disk. You can also easily replace large blocks of text or search your source code for references to other source code. These tools can be very handy, even for small projects.
Project Menu
Tools in the Project menu allow you to manage CodeWarrior projects. A project includes all of the files that make up a program you are writing, including its headers, source code, and libraries. The Project window serves as a container for these files. We'll discuss this in more depth in Lesson 2.
Debug Menu
When your source code doesn't do exactly what you want it to (or your computer crashes when you run your program), you'll develop a close relationship with the items on the Debug menu. We'll discuss debugging in Lesson 5.
Window Menu
The Window menu gives you the basic options to manage cascading and tiling windows in the CodeWarrior environment.
Help Menu
Lastly, use the Help menu to get online help with just about any item in CodeWarrior. Pretty cool setup, huh?
Getting to Know IDE Preferences
The CodeWarrior IDE has numerous preferences that you can use to customize your work environment. You may only want to change the text color, or you might want to get more personal, changing lots of settings. When you select Preferences from the Edit menu, you are presented with the IDE Preferences dialog box (Figure 1-3). There, you'll find options that control the appearance and behavior of the CodeWarrior editor, debugger, and lots more. In this section, we'll take a look at these preferences.
Figure 1-3: The Preferences dialog box.
As each item is described below, follow along in your own copy of CodeWarrior, and check out the various options available. You can get additional help by clicking on the question mark, then the item you're interested in. You'll see a terse description of the selected item's purpose. More detailed information is also available from the Help menu.
The General Preferences
?Build Settings: Choose whether to save open-source code files before performing a build and how much memory to use while building.
?IDE Extras: Various settings that don't belong anywhere else. Here's where you can have CodeWarrior interoperate with a third-party text editor. The integration of editors with the IDE is often
less than perfect, but this limitation may be offset by the ability to use an editor that you know and like.
?Plug-In Settings: Used by plug-in developers to assist in the debugging of plug-ins.
?Shielded Folders: Directories listed here are skipped (ignored) during project and/or find and compare operations. This can be useful if you have a large directory of "data" files inside your project hierarchy yet you do not want those files to slow down certain operations of CodeWarrior.
?Source Trees: This lets you specify directories other than the standard ones CodeWarrior searches when it builds a program.
Editor Preferences
?Editor Settings: Various settings to customize the way the Editor displays and manages text and windows.
?Fonts and Tabs: Text size, font, tab, and other display settings for the Editor windows.
?Text Colors: Like the browser display, you choose the color in which certain language elements (such as comments) appear in the Editor window.
Debugger Preferences
?Display Settings: Various settings to customize the display of the debugger.
?Windowing: How the debugger manages its windows (e.g., hiding any open editor windows).
?Global Settings: Various settings that customize how the debugger works on a global level, such as whether to launch a program when you open a file that contains the program's debugging information.
?Remote Connections: Allows debugging over TCP/IP. You can debug software on a computer on the other side of the Earth!
?Java Settings/Java Debugging: Allows you to set specific java programming language options, not covered in this course.
RAD Tools
?Layout Editor: Various settings to customize the use of rapid application development tools within CodeWarrior.
As you can see, there are numerous settings and options that can be set. Clicking the Save button will save any changes you've made. Clicking the Close box for the Preferences window will cause CodeWarrior to ignore any changes you've made. Go ahead and play with it a little before you proceed to the next lesson. Make sure the Default Text File Format (in the Editor Settings panel) remains set for DOS.
第二课显示和定制工程和目标文件(1)
Translated from https://www.360docs.net/doc/8a13235510.html,
本课将讲述CodeWarrior 操作文件的方式以及介绍它的工程(Project)窗口。
什么是工程文件
为了使用CodeWarrior 来创建一个应用程序,你必须创建许多文件来构成一个工程(Project)。该工程的设置和所有这些文件的指针都被存放在一个工程文件中。这些设置包括编译和链接设置、源文件、库文件以及它们之间用于产生最终程序的相互关系。你可以将这个工程文件看作该工程的大脑:它保存了所有文件相互依存的关系并知道如何将它们组合成为一个可用的应用程序。工程窗口依次显示了这些关于你的程序和该程序所包含的文件的信息,并允许你只需轻松点击就可以修改这个工程。图2-1显示了工程窗口的外观。
图2-1: 显示工程信息的工程窗口(图示为空的情况)
大多数组成你的程序的文件都是原始的文本文件。这些文件包含了你在CodeWarrior的编辑器中键入的源代码。在某些情况下,你还将使用一些预编译的源码和头文件。在进行数学运算和I/O 操作时,你还要使用到一些库文件,比如Metrowerks 标准库(Metrowerks Standard Library,MSL)
通常,你都是使用 C 或C++ 来编写源代码,但通过给CodewWarrior 的集成开发环境加装相应的插件(plug-in),你也可以在CodeWarrior 中使用其它语言来进行编程。别忘了,CodeWarrior 可是一个可扩展的集成开发环境。通过给它安装一些插件,你就可以扩展它的功能。比如说,加入有人开发了一种新的叫
做Z++ 的编程语言,你就可以为CodeWarrior 创建一个相应的插件使之能够支持Z++ 语言,而且你还可以拿这个插件卖好多钱,让所有使用CodeWarrior 编程的人都使上Z++ 语言。那该多好!:)
现在你知道了CodeWarrior 是如何使用文件的了。下面我们来详细地学习有关工程窗口的知识。
工程窗口
当你启动CodeWarrior 并打开或创建一个工程时,工程窗口就会显示出来。该窗口用于管理整个工程的所有文件以及这个工程将要产生的目标(targets)文件。一个工程包含了足够的信息来编译一个或多个目标文件。所谓的目标(target)文件就是当你编译程序时,由CodeWariior 创建出来的(通常是)一个应用程序或库文件。一些程序可以编译产生多个目标文件。比如,你可以编写一个程序来创建一个DLL 和一个调用
该DLL 的主应用程序。在CodeWarrior 的工程中,你可以定义一个目标来产生DLL,定义另一个目标
来产生应用程序。通过这种方式,你的工程只需编译一次就可产生所有需要的目标文件或片断。图2-2 显示了“Hello World”程序的工程窗口。
图2-2: Hello World 程序的工程窗口(其中显示了所有包含于该程序中或用于编译该程序的文件)
你可以看到,在这个工程窗口中确实包含了一些项目。在窗口的顶端有三个标签(tab)页:文件标签(如图2-2显示)、链接顺序标签页和目标文件标签页(后两个标签页将在后续课程中讲述)。在这几个标签页的上方,有一个用于选择要编译的目标文件的下拉菜单。在本例中,我们选择的是Hello World 工程的调试版本。在下拉菜单的右边有几个图标,它们的存在允许你不必使用菜单命令就可以方便地编译、链接和运行这个工程。
注意:在某些版本的CodeWarrior 中,链接标签被称为段(segments)标签。有些人可能在某些X86 的处理器上编程时使用的是分段(segmented)代码。但使用Windows 版的CodeWarrior 工具时就不是这样,这是产生的X86 代码使用的是"扁平的"(flat),或者叫做非分段的(unsegmented) 内存空间。
顾名思义,文件标签页列出了在工程中所有可能用到的文件。你可以通过创建一些组(用文件夹图标表示)来分门别类地管理这些文件,并可以帮助你方便地了解哪些文件将被使用。在本例中,我们将 C 程序(以.c 为后缀名的文件)全都放到一个叫做Source 的组中,同时将库文件放到另一个组中,以便整洁明了地管理这些文件。
在Sources 组中有一个main.c 文件。因为我们还没有编译这个工程,所以在每个文件对应
的Code 和Data 栏中显示数字的都是零。一旦我们编译了这个工程,这些数字就将显示出来,表示源码转换为机器代码后实际的代码量和数据量。可是,库文件ANSICX86.LIB 和MWCRTL.LIB 后面显示的
是n/a 。这表示索虽然这些文件被显示在这里,但是它们并不是Hello World 目标文件的一部分。这两个文件是用于不可调试(non-debugging)开发的,而本例不是这种情况。如果我们从菜单中修改本例的目标文件为Release(发布) 版本时,这两个文件就用得上了。这时这些文件后面的Code 和Data 栏目就会显示相应的数值。
注意: 在Data 和Code 栏右端的Target 栏目中的小子弹头也是用来表示该文件是否被当前编译生成的目标文件使用到。
再往右边去,是Debug 栏(用一个绿色的小虫子表示),它是用于告诉你对应的文件在编译时是否要产生调试信息。我们将在第五课中详细论述这部分内容。最后,我们来看看在每一行最右端的弹出菜单,它是用于打开文件、更新源码、打开包含的头文件等等操作的快捷方式,具体是什么才作,要看它所代表的项目的类型而定。
现在让我们来编译这个Hello World 工程并看看编译后的工程窗口的情况。我们从Project 菜单中选
择Make 命令来编译该工程。这将更新所有需要编译的文件并产生相应的输出文件——在本例中是Hello World 这个应用程序。
图2-3: 编译工程后的工程窗口的显示情况
从图2-3中我们可以看到,工程窗口发生了一些变化。Code 和Data 栏都显示了当前工程中对应项的相应的数字。如果你打算看看编译前后存放这些文件的目录的话,你会发现编译后在该目录下产生了一些新的文件,如图2-4所示。
图2-4: 编译后将在工程目录中产生一些新的文件
在本例中,编译工程后在工程目录中产生了一个新的文件。这就是X86 目标文件输出——生成一个叫
做Hello World x86 的应用程序。其它一些一直存在于这个目录中的文件是:.mcp 文件—工程文件本省,以及.c 源文件—包含了应用程序源码的文件。Hello World Data 目录中还包含了由CodwWarrior 生成的各种各样的支持文件。现在你还不必去关心这些文件。如果你正在编译目标文件的调试版本,你会看到更多的文件被产生出来,这些文件中可能包含着符号(symbolic)调试信息。集成开发环境的调试器使用这些符号信息来记录在高层次源码中的操作轨迹。我们将在第五课中详细讲述这方面内容。
现在你已经了解了这些文件是如何结合在一起被编译生成一个目标文件的。让我们来运行这个目标文件并看看它的运行结果是什么样。你双击Hello World x86 应用程序,就会有如图2-5所示的结果显示出来。
图2-5: Hello World 应用程序的运行结果
你来试试看
总有一天,你自己也能编写出象Hello World 这样充满激情和意义深远的程序来。这是完全有可能的。只要你有决心努力工作,学完本课你就可以编写这个程序了。下面我们给出该程序的源代码:
#include
void main(void) {
int c;
printf("Hello World on Windows!\n");
c = getchar();
}
就这么多!你没想到会这么简单吧?你可以试试看将"Hello World on Windows!" 这句话换成一句别的什么内容。要不了多久,你就能自己编写一些不仅能显示文本而且还能执行你指定的其它任务的应用程序了。但在此之前,你还需要学习第四课,有关链接的知识。
关于getchar()函数
那些有经验的 C 程序员可能会问,上述代码中使用的字符输入函数getchar() 用在这里是什么意思。通常地,当一个应用程序执行完毕后,它就会终止,然后操作系统就会立即清除该应用程序输出。这样,当上述应用程序显示完“Hello World on Windows!”后,为了避免系统立即将该程序地输出清除,我们在程序中添加了一个getchar() 函数,使程序在此处暂停,直到有键盘输入时整个程序会终止。这样我们才有足够的时间来看清楚该程序的输出。
这是一个正常的操作,而不是一个bug。实际上,CodeWarrior 也提供了一个适用于此处的库函数,这个库函数中的C 控制台I/O 函数步不仅可以在程序显示完毕后锁定应用程序,而且还可以让你将输出的文本信息存储到一个文件中去。
第一部分第二部分
附原文:
Displaying and Customizing Projects and Targets
In this section of the lesson, I'll introduce you to the way CodeWarrior handles files and give you a tour of the Project window.
Understanding the Project File
To create programs in CodeWarrior, you will use a number of files that work together to form a project. A project's settings and pointers to other files are stored within a project file. These settings include compiler and linker options, source files, libraries, and information about how they interact with one another to build the final product -- your program. For now, just think of the project file as the brain of your project: it keeps track of everything that is going on and knows how to combine files and settings into a working application program. The Project window in turn displays this information about your program and its files and allows you to modify the project by just pointing and clicking. Figure 2-1 shows the Project window.
Figure 2-1: Each project you create appears in the Project window. This one is empty.
Most of the files that make up your program are ordinary text files. These files contain your source code. You'll create them by typing the source code into the CodeWarrior editor. In some cases, you will also use prebuilt source code and header files. There are also library files, such as the Metrowerks Standard Library (MSL) which provides valuable functions for math calculations and I/O operations.
Your source code will usually be written in C or C++, but can also be in any other language that is supported by a CodeWarrior IDE plug-in. Recall that CodeWarrior is an extensible IDE. In other words, by inserting (or writing) a plug-in, you can extend the capabilities of the CodeWarrior IDE. For example, if someone develops a new programming language, say Z++, you could create a plug-in to support that language and sell it for a zillion bucks, and then anyone using the CodeWarrior IDE could program in Z++. Neat, huh?
Now that you understand how CodeWarrior uses files, let's take a closer look at the Project window.
The Project Window
When you launch CodeWarrior and open or create a project, a Project window greets you. To recap, it allows you to manage the project, all of its files, and the targets that it builds. A project contains all of the information necessary to build one or more targets. A target is the file that CodeWarrior creates when you build your program -- usually an application or library. Some projects build multiple targets. For example, you may write a program that has a DLL, as well as the main application that calls it. In the CodeWarrior project, you can define one target to generate the DLL, and another target to generate the application. In this way, your project can build all the necessary targets, or pieces, in one fell swoop. Figure 2-2 shows the Project window for a program called Hello World.
igure 2-2: The Project window for a program called Hello World lists all of the files that are included in the program
or that are needed to build it.
You can see that the Project window contains quite a few items. At the top are three tabs: the Files tab (displayed in Figure 2-2), the Link Order tab, and the Targets tab (both discussed later in this lesson). Above the tabs is a pull-down menu that allows you to choose which target to build. In this case, we have chosen the Debug version of the Hello World project. The icons to the right of this pull-down menu allow us to easily compile, link, and run the project without having to use menu commands.
Note: The Link Order tab is called the Segments tab in some versions of CodeWarrior. Some of you might have programmed certain x86 processors using segmented code. This is not the case with the Windows CodeWarrior tools. They generate x86 code that uses a "flat," or unsegmented, memory space.
As its name implies, the Files tab lists all of the files that could possibly be used in the project. You can create groups (represented by the folder icon) in the window to help manage the files hierarchically and make it easier to keep track of which files are being used. In our case, we place our C language source code files (indicated by the .c extension) in a group called Sources. We've organized libraries into other groups to keep things tidy.
The Sources group for our example holds the main.c file. Since we have yet to build this project, the numbers in the Code and Data columns are all set to zero. When we build the project for the first time, these numbers will reflect the actual amount of code and data the compiler creates when it translates the source code into machine language. However, the library files ANSICX86.LIB and MWCRTL.LIB have n/a next to them. This indicates that even though these files are listed, they are not used as part of the Hello World target. That's because these two libraries are used for non-debugging development, which is not applicable for this target. If we were to switch targets by picking the Release version of Hello World from the
menu, these columns would change to reflect the use of these other libraries.
Note : The small bullet in the Target column to the right of the Data column also indicates whether or not the file is being used by the current target.
Other columns in the main window include the Debug column, to the right (see the little green bug?), which tells you whether this file is currently set to generate debug information when it is compiled. We will discuss this in more detail in Lesson 5. And lastly, the pop-up menu at the far right of each row acts as a shortcut that allows you to quickly open files and/or update sources for compilation, open included header files, etc., depending on the type of item it represents.
Let's build the Hello World project and see what the window looks like after it is built. To build this project, select Make from the Project menu. This will update all files that need to be built and will produce the output file -- in this case, the Hello World application.
Figure 2-3: When you build a project, the Code and Data items for each column are filled in.
Notice in Figure 2-3 that the window has changed a bit. The Code and Data columns now contain numbers for the items that are in the current project. If you were to look at a before and after screenshot of the folder on your hard disk where these items are stored, you would see that some new files have been generated. Let's take a quick look at those items in Figure 2-4.
Figure 2-4: Building a project generates new files within your project folder.
Notice in our example that there is a new file in the project directory. This is the x86 target's output -- the application called Hello World x86. Other files in this directory that exist all of the time are the .mcp file -- the project file itself -- and the .c source file, which contains the source code for the application. The Hello World Data directory contains various other support files generated by CodeWarrior. You need not be concerned with these items at this time. If you are building a debug version of the target, you'll see even more files, which can contain symbolic debugging information. The IDE's debugger uses the symbolic information to help it present tracking operations in high-level source code. These details are discussed later in Lesson 5.
Now that you understand how the files work together to build a target, let's run the target and see what it looks like. When you double-click the Hello World x86 application, the following (Figure 2-5) appears on the screen.
Figure 2-5: When you run the Hello World program, a window containing the
words "Hello World" appears on screen.
Putting It into Play
Someday, you too may create something as lyrical and profound as Hello World. Possibly, with hard work and determination, you can do this by the end of the day. The source code to make this work is as follows:
#include
void main(void) { int c; printf("Hello World on
Windows!\n"); c = getchar();
}
That's it! Who knew it could be so easy? Go on, you know you want to try it, but with some sort of profound statement instead of "Hello World on Windows!" Soon you'll be writing your own applications that not only can display text but can also perform other tasks for you. Before you know it, you'll be customizing AIBO dogs! That's Lesson 4. Well, okay, not really. Lesson 4 is Linking.
What's That Other Function Doing There?
Those already seasoned in the C language might be wondering what the character input function, getchar(), is doing here. Typically, when an application completes its job, it terminates, and the OS cleans up after the program. This means the Hello World window disappears moments after the application finishes drawing the phrase "Hello World on Windows!" So that we can admire our handiwork, we put the brakes on the program by having it wait for a final keystroke before it terminates.
This is not a bug, but normal behavior. Honest. CodeWarrior does provide an alternate library that provides the C console I/O functions used here. This alternate library will not only halt the application after it finishes writing to a window but will also let you save the text output to a file.
Link Order
When you build a program using multiple source files, the link order is very important. After compiling your source code, you must link the items in the proper order. You will use the Link Order tab to determine this order. In the case of the Hello World x86 target we've been working with (Figure 2-6), note that the main.c source file is first on the list, with the libraries used by the program following. To reach the Link Order tab, open the project and click the tab. To change the order by which files are linked, you simply drag items up and down the list within this window. We will discuss Linking in more detail in Lesson 4.
codewarrior软件与编程的讲解完整版
CodeWarrior 使用教程 第一课认识CodeWarrior Translated from?https://www.360docs.net/doc/8a13235510.html, CodeWarrior?能做些什么? ????当你知道自己能写更好的程序时,你一定不会再使用别人开发的应用程序。但是常常会发生这种情况,就是当你写了无数行代码后,却找不到使得整个程序出错的那一行代码,导致根本没法编译和链接整个程序。这可能更令人灰心丧气。 ????本文将告诉你如何使用?CodeWarrior?这一工具解决上述问题。 ????从现在开始,我们将集中精力学习如何在?CodeWarrior?中使用?C/C++?进行编程。为了学习本课程,你必须已经能够比较熟练地使用上述两种语言之一。CodeWarrior?也可以支持?Java?开发,但那是另一门课程的内容。本课程仅限于在?Windows?平台上使用?CodeWarrior?进行的开发。一旦你精通了?CodeWarrior?编程后,你可以试试在其它平台上使用?CodeWarrior。本文中讨论过的大部分内容都可以应用到开发?Mac?应用程序中。 ??? CodeWarrior?能够自动地检查代码中的明显错误,它通过一个集成的调试器和编辑器来扫描你的代码,以找到并减少明显的错误,然后编译并链接程序以便计算机能够理解并执行你的程序。你所使用过的每个应用程序都经过了使用象?CodeWorrior?这样的开发工具进行编码、编译、编辑、链接和调试的过程。现在你在我们的指导下,自己也可以去做这些工作了。
????你可以使用?CodeWarrior?来编写你能够想象得到的任何一种类型的程序。如果你是一个初学者,你可以选择编写一个应用程序(比如一个可执行程序),比如象微软公司的文本编辑器?WordPad?这样的应用程序。 ????应用程序可能是最容易编写的程序了,而那些庞大的商业软件,比如象?Adobe Photoshop,Microsoft Word?以及?CodeWarrior?软件都是极其复杂的。其它类型的程序指的是控制面板(control panels),动态链接库(dynamic linked libraries,DLLs)?和插件(plug-ins)。我们先来简单的讨论一下这些类型的程序。 ????在?Windows?中,控制面板程序是一些(通常比较小的)存放在控制面板目录下的程序,可以在开始菜单的控制面板项中看到它们。控制面板实际上是设置系统功能的一个简单界面,比如可以在控制面板中完成诸如设置音量和鼠标移动速度这样一些参数。????动态链接库?(DLLs)?提供了一些很有用的被系统和应用程序共享的函数。通常它们都是没有用户界面的。 ????插件?(Plug-ins)?有点类似于?DLLs,插件也是可供其它软件使用的小程序,但插件只能被特定的软件使用。比如说,Photoshop?的插件允许程序员方便地扩展?Photoshop?的功能,而不需要去修改它的源代码。同样的,许多?Web?浏览器也使用插件来增加功能,或者为了让你能够看到页面上的新的内容类型。实际上,有许多程序,包括?CodeWarrior,都使用这种插件结构。 ????一旦你掌握了?CodeWarior?和你所使用的操作系统的编程接口时,你可以编写许多其它类型的程序。实际上,本课程也是你深入学习其它编程方法的基础课程。你已经找到了一个最优秀的地方开始你的编程之旅。好,现在请坐好,放松,去吸取这门课程的精
LCF文件资料使用说明书
序言:Codewarrior 2.10是飞思卡尔32位汽车级单片机Qorriva 系列的集成开发环境,与之前版本2.8、2.9完全兼容。Codewarrior 10.3是飞思卡尔最新的集成开发环境,是一个开放源代码的、基于Java 的可扩展开发平台。许多新用户对codewarrior 链接文件不是十分了解,本文将针对链接文件的常见问题以及段的定义进行介绍帮助用户快速了解和使用CodeWarrior 。 目录 第一节 LCF 文件定义及使用说明 1: LCF 文件介绍 2:LCF 文件中各个预定义段的说明 3:常用关键字和宏定义说明 第二节 EPPC 链接器介绍及使用说明 第三节 代码重定向 第一节 LCF 文件定义及使用说明 1:LCF 文件介绍 链接文件用来控制不同类型数据代码、数据以某种排列方式在最终在生成的可执行文件或者二进制文件,调试文件中的放置位置。它可以通过在EPPC linker 的面板中进行配置,也可以直接在lcf 文件中直接进行修改。 Lcf 文件中首先是对整个memory map(MEMORY )地址空间内的所有RAM,ROM 进行分割,将其分为几个区域,便于放置不同类型的存储内容,而这些区域内包含的内容可以是用户自定义的段或者系统预定义的段(SECTION )。关于段的定义和使用将在lcf 文件介绍结束后进行介绍。 一个工程通常在建立的时候默认的调试方式都是在RAM 中进行调试,由于RAM 中执行的效率高于FLASH ,并且下载速度快。在生成的ROM Image 中常量,初始化过的数据或者代码如果没有被定义在ROM 区域则假设为这部分代码要在程序开始执行的时候从ROM 去拷贝到RAM 区。 下面是一个完整的lcf 文件,其中包括每行的解释及用法。 /* lcf file for MPC5604B M27V (debug RAM version) 文件的名字及对应单片机(RAM 版本) */ //RAM 版本和ROM 版本的区别在于RAM 版本不将程序下载到ROM 中去,而在RAM 中执行程序 /* 512KB Flash, 32KB SRAM */ //单片机的FLASH 和SRAM 大小 MEMORY 下面是对单片机存储空间的定义,不同的段的起始地址,不能叠加地址空间 {
codewarrior v10.x快速指南
Quick Start for Microcontrollers V10.1
CodeWarrior Development Studio for Microcontrollers V10.x Quick Start SYSTEM REQUIREMENTS Hardware Windows? OS: PC with 1 GHz Intel? Pentium? compatible processor Linux? OS: 1.8 GHz Intel Pentium class processor (or better) 2GB of RAM CD-ROM drive Depending on host-target connection: Parallel Port, 9-pin Serial Port, or USB Port Operating System Microsoft? Windows XP 32-bit and 64-bit (Professional Edition), Microsoft Windows Vista? 32-bit and 64-bit (Home Premium Edition and Business Edition), or Microsoft Windows 7 32-bit and 64-bit (Home Premium Edition and Professional Edition) Red Hat Enterprise Edition 5.2 Disk Space 2 GB total 400MB on Windows system disk This Quick Start explains how to install the CodeWarrior Development Studio for Microcontrollers V10.x software on Windows and Linux operating systems, and how to use the CodeWarrior IDE to create, build, and debug a project. Section A:Installing CodeWarrior Software NOTE This section describes how to download and install CodeWarrior for Microcontrollers V10.x from the Web or install it from the CD. The Web version has a time-bombed license.
CodeWarriorV软件使用指南
Code Warrior V5.1软件使用指南 一、软件安装指南 二、关于BDM驱动 三、创建一个新的工程 四、编写与运行你的程序 2011年10月16日陈万忠
Code Warrior V5.1软件使用指南 一、软件安装指南 1. 打开文件安装文件夹 2. 找到安装文件 3. 双击此文件,出现安装界面: 4. 点击“NEXT”按钮,出现安装路径信息。如果修改系统默认路径,点击“change”按钮,然后修改安装路径,否则点击“NEXT”按钮。
5. 在安装过程中,根据提示信息,完成每一步的安装。 6. 安装完毕后,在所有程序中找到Code Warrior V5.1执行文件,点击执行即可进入Code Warrior V5.1集成环境。
7. 也可以拖到桌面上。此时桌面出现如下图标: 二、关于BDM驱动 请将“BDM使用说明和驱动”文件夹下的文件: OpenSourceBDM.dll 和 tblcf.dll以及 tblcf_gdi.dll 三个文件,复制到: C:\Program Files\Freescale\CWS12v5.1\Prog\gdi目录下(或者你安装时修改过的Code Warrior V5.1所在目录\Prog\gdi子目录下),在调试时选择Open Source BDM 调试接口即可。
三、创建一个新的工程 创建一个新的工程,要按照下面向导选项的8个步骤来选择完成。 双击桌面快捷图标,进入 Code Warrior集成开发环境窗口。 第一步:创建一个新的工程。
第二步:选择CPU类型,选择HCS12X目录下的HCS12X Family。 第三步:选择CPU芯片型号和BDM工具TBDML。 第四步:选择编程语言,我们选择C语言编程。
Codewarrior License制作教程(优选.)
目录 第1章 Codewarrior License制作教程 (1) 1.1 准备工作 (1) 1.2 制作步骤 (1) 1.2.1 确定FlexLm版本号 (1) 1.2.2 找FEATURE (2) 1.2.3 找vendor (5) 1.2.4 找计算seed的关键数据 (6) 1.2.5 计算ENCRYPTION_SEED (8) 1.2.6 制作License生成器 (9) 1.2.7 生成License (9)
第1章Codewarrior License制作教程 声明 作者出于学习的目的撰写此文,读者需承担文章使用或传播过程中产生的一切后果,作者概不负责。 我们以飞思卡尔Codewarrior for HC08 v6.0为例,来介绍制作过程。 1.1 准备工作 我们需要事先准备如下软件: z Lmtools z OllyICE z Calcseed z Lmcryptgui 1.2 制作步骤 破解Flexlm最主要的是找到4样东西: z确定Flexlm版本号 z找FEATURE z找vendor z计算ENCRYPTION_SEED 1.2.1确定FlexLm版本号 运行Lmtools,选择Utilities标签页,点击Browse选择Codewarrior安装目录bin目录下lmgr8c.dll,然后点击Find Version,如图 1.1。 图 1.1 确定Flexlm版本号
1.2.2找FEATURE 运行OllyICE,界面如图 1.2。 图 1.2 OllyICE运行界面 点击“文件/打开”,选择Codewarrior安装目录bin目录下IDE.exe,界面如图 1.3。 图 1.3 打开IDE.exe界面
codewarrior快速使用手册
CodeWarrior? Development Studio for Microcontrollers V6.x Quick Start SYSTEM REQUIREMENTS Hardware PC with 1 GHz Intel? Pentium? compatible processor 512 MB of RAM (1 GB recommended) CD-ROM drive Depending on host-target connection: Parallel Port, 9-pin Serial Port, or USB Port Operating System Microsoft? Windows? XP or Microsoft Windows Vista? Operating Systems 32-bit (Home Premium Edition and Business Edition) Disk Space 2 GB total 400MB on Windows system disk This Quick Start explains how to install the CodeWarrior Development Studio for Microcontrollers V6.x software, and how to use the IDE to create, build, and debug a project. Section A:Installing CodeWarrior Software NOTE You must install the CodeWarrior software on the equipment on which you intend to use the software. 1.Insert CodeWarrior Development Studio CD into CD-ROM drive — CW Auto Install begins NOTE If Auto Install does not start, run launch.exe, which is located in the root directory of the CD. The CodeWarrior software may be part of a DVD included with your kit. In this case, click Install CodeWarrior Development Studio for Microcontrollers, follow the on-screen instructions, and skip to step "Check for updates".
CodeWarrior 10.2简明手册(V1.1)
CodeWarrior 10.2简明手册 CodeWarrior 10.2简明手册 (1) 1 下载安装CW v10.2 (1) 2 安装BDM驱动 (2) 3 导入现有工程 (3) 4 编译、下载源码工程 (4) 5. 带有操作系统程序的编译、下载 (6) 5.1 带有操作系统模板程序的打开 (6) 5.2 带有操作系统模板程序的编译 (7) 5.3 带有操作系统模板程序的下载 (7) 6 CodeWarrior 10.2常用操作 (8) 7 常见问题说明 (9) 基于Eclipse的CodeWarrior Development Studio for Microcontroller v10.2(简称CW10.2)作为一个完整的集成开发环境,提供了高度可视化操作及自动创建复杂嵌入式系统应用的功能,为使用Freescale嵌入式产品开发提供了便利。官方推荐使用CW v10.2进行Freecale Kinetis嵌入式产品的开发。本文将对使用CW v10.2开发K60项目的操作进行简要说明。本文安装的cw10.2 版本是特别版的,支持128KB的代码大小。用户若需要更大的代码空间和更多的功能的话,则需要向飞思卡尔申请license,这些license都是要收费的。 1 下载安装CW v10.2 飞思卡尔半导体为注册用户在其官方网站的网址链接处 下载后,双击可执行安装文件,如图1所示,根据提示即可完成安装。由于有的CW10.2版本安装完成后默认是中文版的,有的默认是英文版的。集成开发环境的原版是英文版的,所以英文版的运行速度比中文版的快很多。 这里建议用英文版的CW10.2,不建议用户使用中文版集成开发环境,所以本章介绍的使用说明都是基于英文版的。想将飞思卡尔的CW10.2集成开发环境变成英文版,首先
CodeWarrior V10.1 使用方法快速入门
CodeWarrior V10.1 使用方法快速入门 CodeWarrior V10.1 Quick Start Guide 1.启动CodeWarrior。 如果是首次启动该软件,需要设定一个工作空间。选定工作空间后,如果是第一次运行CodeWarrior,则首先进入“欢迎”界面,点击该界面左上角“×”按钮,关闭该界面后即进入“C/C++项目”编程界面。 2.新建工程:在工具栏中选择 “文件->新建->BareBoard Project”,如图1所示。 图1 1)设定文件名 在缺省状态下,该新建工程将保存在当前工作空间的文件夹下。完成后点击“下一步”,如图2所示。
图2 2)选择芯片类型。 此处以MK10N512VMD100为例。选择好芯片类型后,点击“下一步”,如图3所示。
图3 3)选择调试器类型(可多选) 如果成功安装了新的USBBDM并且patch成功,此处会出现USBDM选项,如图4所示。 如果要在该工程中添加一些已有文件、或者希望生成一个默认的main.c文件,则完成后点击“下一步”。 如无上述需求,则直接点击“完成”。此时将生成一个包含Startup Code、但不含main.c 的新工程。 图4
4)选择导入的默认文件以及是否生成main.c,完成后点击“下一步”。 CodeWarrior的默认编程语言是C,也支持C++和汇编,如果使用C语言编程,此处也可直接单击“完成”,具体操作如图5所示。 图5 5)选择编程语言,完成后点击“下一步”,如图6所示。 图6
6)选择是否需要调用一些快速开发工具(如Processor Expert、Device Initialization),完成后点击“完成”,如图7所示。 图7 至此,CodeWarrior将为您生成一个包含Startup.c和main.c的新工程。在编程界面(C/C++项目)下的工程窗口下,您可以浏览该工程含有的全部文件。 如果您无法找到上述窗口,可在CodeWarrior界面左下角的视图管理器中寻找。如图8所示。 图8
我的整理CodeWarrior生成lib文件一
写给CodeWarrior初学者 1.运行CodeWarrior IDE,打开软件界面; 2.点击“File”菜单下的“New”选项,然后在“Project”选项卡中选择“HC(S)12 New Project Wizard”,也就是新建工程向导,在右侧输入你要键入的工程名和你要放在哪个文件夹下面; 3.点击“确定”后下面选择你采用的单片机型号,比如你选择“MC9S12D64”或者(其中如果选择MC9S12NE64,则必须安装光盘上的NE64补丁插件)“MC9S12NE64”;
4.点击“下一步”后,选择你采用哪种编程语言,尽量不要选第三个“C++”,因为好像我试的有问题,如果你单纯的C,则选择第二个,如果你是C和汇编混合编程,则前两个都要选的; 5.选择是否采用“处理器专家”,该项功能可以方便程序的寄存器设置,但我用过感觉比较糊涂,所以我一般选择“No”;
6.下面就是选择是否采用“PC-lint”,选择“No”; 7.选择是不是支持浮点数,如果你的工程采用浮点数则选择下面的两个中一个,否则选择“No”;
8.选择采用哪种内存定位模式,一般选择第一个“Small”模式 9.最后一步,选择前面两项,如果仅选择第一项,则仅可以软件调试,前两项都选择可以支持软件和硬件调试。
10.完成后,软件会自动创建一个工程,如下图所示,,其中左侧的sources 文件夹下面的main.c就是你的主程序文件,你可以在里面添加代码,同时在左侧按鼠标右键,会弹出菜单,里面有“Add Files”或“Create Group”等,可以根据你的需要往新创建的工程里添加你自己的头文件或者C文件。 11.你可以在main.c里面编辑你的代码,如果需要加入中断,则在左侧找到Prm文件夹下面打开“P&E_ICD_Linker.prm”,然后在右侧该文件里你可以加入你自己的中断函数和中断向量入口地址,记住:你在这个Prm里定义的自己的中断函数名,要和主函数里面的中断函数名对应起来;比如我在Prm文件里定义了串口接收中断:
9S12XS128(CodeWarrior_for_HCS12_使用说明_免费版)
9S12XS128单片机开发工具包清华Freescale MCU/DSP 应用开发研究中心
9S12XS128单片机开发工具包 (1) 概述 (3) 9S12XS128单片机 (3) 9S12XS128开发工具包组件 (3) 9S12XS128开发板及与PC通信 (4) 9S12XS128 开发板 (4) 开发板的硬件连接 (5) PC机的设置 (6) 监控程序及监控命令详解 (8) 命令详解 (8) 复位、中断向量表 (12) 用户可以使用的RAM空间 (12) 编译器CodeWarrior for HCS12 使用方法入门 (13) 建立工程文件 (13) 编写main.c 程序 (15) 定义存储空间分配 (17) 应用程序的编译 (18) 向开发板下载程序 (20) 运行应用程序 (21)
概述 这里描述的是一套9S12XS128系列单片机开发系统套件。以后的更新的版本见清华Freescale单片机应用开发研究中心的网站:https://www.360docs.net/doc/8a13235510.html,。 开发系统主要由两个部分组成,分别是调试下载用的TBDML和开发用目标板。其中TBDML的使用请参见文档“BDM for S12(TTBDM)用户手册V 34.pdf”。 目标板是有异步串行口的驱动的基本系统。针对9S12XS128芯片我们编写了9S12XS128目标板监控程序,可以方便地完成应用系统的开发。用户可以在此基础上设计自己所需的目标母板,完成项目的初期开发。应用软件完成后,用开发工具板擦除监控程序,下载最终的应用程序。 9S12XS128单片机 S12XS 16位微控制器系列针对一系列成本敏感型汽车车身电子应用进行了优化。S12X产品满足了用户对设计灵活性和平台兼容性的需求,并在一系列汽车电子平台上实现了可升级性、硬件和软件可重用性、以及兼容性。 S12XS系列可以经济而又兼容地扩展至带XGate协处理器的S12XE系列单片机,从而为用户削减了成本,并缩小了封装尺寸。S12XS系列帮助设计者迅速抓住市场机遇,同时还能降低移植成本。 主要特性: S12X CPU, 最高总线速度40MHz 64KB、128KB和256KB闪存选项,均带有错误校正功能(ECC) 带有ECC的、4KB至8KB DataFlash,用于实现数据或程序存储 可配置8- 、10- 或12- 位模数转换器(ADC),转换时间3μs 支持控制区域网(CAN)、本地互联网(LIN)和串行外设接口(SPI)协议模块 带有16-位计数器的、8-通道定时器 出色的EMC,及运行和停止省电模式 9S12XS128开发工具包组件 9S12XS128开发工具包硬件系统包括以下组件: (1) 驻留监控程序的9S12XS128开发板一块; (2) 带USB接口的TBDML调试器一个,简称BDM头; (3) BDM 6芯扁带电缆一根; (4)USB电缆一根; (5) RS-232串口通信线一根; (6) 220V AC~DC +5V电源一个; (7) CD光盘一张,含CodeWarrior V4.7,可下载的S12X监控程序.S19。
CodeWarrior学习笔记--Win7不能启动CW的问题
CodeWarrior学习笔记 --Win7不能启动的CW的问题 --skyline 2012/02/21 由于本人正在努力学习中,如有错误,望指正之,万分感激。Email:pjz47@https://www.360docs.net/doc/8a13235510.html, 工作关系,又用到飞思卡尔的芯片了,重新安装CodeWarrior5.1版本软件。我的电脑是Win7旗舰版,但是启动一段时间后,或者执行某个操作后,就会出现如图的画面。 我首先是以为是Win7系统不兼容的原因。因为软件在我家里台式机的XP系统安装过,是没有问题的。后来在软件的介绍发现是支持Win7的,并且我一同事也是Win7系统,却可以正常的跑。然后我认为是我安装软件出的问题。卸载再重新安装,还是如此。耗费了我不少时间。后来根据错误搜索了一下,发现也有人遇到过类似的问题。刚好这个问题有一个人给了个很好的解决方法。他说这是Win7开了毛玻璃窗口的问题。“将你的桌面主题不要设成毛玻璃效果的就可以了.在桌面上右击->个性化->Win7 Basic即不会出现该问题.当然也可以选择更早的主题!!”我修改了主题之后,问题到现在还没有出现过。应该是解决掉了。感谢帮我解决这个问题的人。这个看似没有联系的,看似没有影响的设置居然会引起问题,太奇怪了,呵呵。Mark下来,看看有没有人需要。 解决引用自:https://www.360docs.net/doc/8a13235510.html,/question/321218092.html?seed=0 同时我也搜到另外一种解决方法,就是在图标点击右键-属性,在“兼容性”页面选中“禁用桌面主题”“禁用桌面元素”还有用XP兼容模式,个人感觉问题也应该跟桌面主题的关系导致IDE运行不正常。 解决引用自: https://www.360docs.net/doc/8a13235510.html,/question/263503425.html?fr=qrl&cid=89&index=3&fr2=query
Codewarrior使用指南
Codewarrior 使用指南
飞思卡尔 HC08/HCS12 系列微控制器开发环境 - Codewarrior 使用指南(草稿)
tyf01@https://www.360docs.net/doc/8a13235510.html, 2005 年 10 月
仅供学习参考,请勿用于商业目的
1
Codewarrior 使用指南
第一章 Codewarrior IDE 概述
在软件开发过程中,通常需要经过以下几个步骤: ? 新建:创建新项目,源文件 ? 编辑:按照一定的规则编辑源代码,注释 ? 编译:将源代码编译成机器码,同时还会检查语法错误和进行编译优化 ? 链接:将编译后的独立的模块链接成一个二进制可执行文件 ? 调试:对软件进行测试并发现错误 在软件开发中,每个过程都会用到不同的工具。如果每个工具都单独存在,这样就 会给开发人员带来很多不便。所以很多公司为开发人员提供了集成开发环境。开发 人员可以在同一个工具或平台上完成以上全部的工作。 Codewarrior 是 Metrowerks 公司开发的软件集成开发环境(以后简称 IDE)。飞思 卡尔所有系列的微控制器都可以在 codewarrior IDE 下进行软件开发。
Codewarrior IDE 特点
Codewarrior IDE 为软件开发提供了一系列的工具,其中包括: 项目管理器:为软件开发人员管理上层的文件;将项目进行分组管理,比如文件或 目标系统;跟踪状态信息,比如修改日期;决定编译顺序或每次编译应包括哪些文 件;与插件一起提供版本控制功能 编辑器:利用颜色来区分不同的关键字;允许用户利用颜色机制自定义关键字;自 动检查括号范围;利用菜单在不同的文件或函数中导航 搜索器:搜索一个特定的字符串;用特定的字符串代替查找到的字符串;允许使用 常规表达式;提供文件比较功能; 源代码浏览器:标志符(变量名称,函数名称)数据库;利用数据库来对代码快速 定位;对所有的标志符连接到用到它的代码中; 编译系统:编译器将源代码编译成机器码;链接器将目标文件链接成可执行文件 调试器:利用标志符数据库进行源代码级调试;支持各种标志符数据库,比如: codeview, DWARF, SYM 等
Codewarrior IDE 优点
?
交叉平台开发
2
CodeWarrior for ColdFire简明使用方法
CodeWarrior for ColdFire简明使用方法(V1.0/2009年1月) 苏州大学飞思卡尔嵌入式系统研究与开发中心 1.硬件连接PC和实验板 通过与实验板配套的USB口BDM for ColdFire 连接PC 和实验板。一端连接PC机并行接口,另一端连接实验板上的BDM接口。 2.打开工程 在CodeWarrior下打开一个现有的工程的方法是:菜单File>Open…,选择要打开的工程中后缀名为mcp的文件即可。也可以通过File>Open Recent打开一个最近访问的工程。3.创建一个ColdFire工程 1.启动CodeWarrior IDE。 2.从主菜单选择File> New…,弹出新建窗口。 3.创建工程,创建一个MCF52233DEMO的工程。(需要将本书提供的…\第04章阅读材料\MCF52233DEMO文件夹放到Freescale安装目录中的…\Stationery\ColdFire目录下)。 4.编辑源代码 a.单击Sources夹旁边的+标志。双击main.c编辑窗口将会打开main.c文件。 b.可以按需要改变main.c的内容。选择File > Save保存改变。 5.如果需要可以添加文件 右键Sources 夹Add Files打开对话框。选择想要加入的文件单击open。被添加的文件出现在Sources夹下。 4.编译并链接源文件 1.选择工具栏上的Make“”,IDE将会编译并链接工程;Error & Warnings窗口将会打开显示被检测到的错误和警告信息。 5.下载程序 1.选择File>Flash Programmer,弹出Flash Programmer对话框。 2.选择Target configuration,单击Load Settings按钮,在打开的对话框中选择CFM_MCF52233_25MHz.xml打开,在connection中选择PEMICRO_PARALLEL(并口)或PEMICRO_USB(USB接口)或tblcf,在这里我们选择tblcf。 3.选择Erase/Blank Check,单击Erase。整体擦除FLASH。 4.选择Program/Verify,通过Use Selected File选择希望写入的文件,单击Program即可写入程序。
CodeWarriorV.软件使用指南
Code Warrior 软件使用指南 一、软件安装指南 二、关于BDM驱动 三、创建一个新的工程 四、编写与运行你的程序 2011年10月16日陈万忠 Code Warrior 软件使用指南 一、软件安装指南 1. 打开文件安装文件夹 2. 找到安装文件 3. 双击此文件,出现安装界面: 4. 点击“NEXT”按钮,出现安装路径信息。如果修改系统默认路径,点击“change”按钮,然后修改安装路径,否则点击“NEXT”按钮。 5. 在安装过程中,根据提示信息,完成每一步的安装。 6. 安装完毕后,在所有程序中找到Code Warrior 执行文件,点击执行即可进入Code Warrior 集成环境。 7. 也可以拖到桌面上。此时桌面出现如下图标: 二、关于BDM驱动 请将“BDM使用说明和驱动”文件夹下的文件: 和 以及 三个文件,复制到: C:\Program Files\Freescale\\Prog\gdi目录下(或者你安装时修改过的Code Warrior 所在目录\Prog\gdi子目录下),在调试时选择Open Source BDM 调试接口即可。 三、创建一个新的工程 创建一个新的工程,要按照下面向导选项的8个步骤来选择完成。 双击桌面快捷图标,进入 Code Warrior集成开发环境窗口。 第一步:创建一个新的工程。
第二步:选择CPU类型,选择HCS12X目录下的HCS12X Family。 第三步:选择CPU芯片型号和BDM工具TBDML。 第四步:选择编程语言,我们选择C语言编程。 第五步:添加文件到工程,一般直接按“下一步”。 第六步:快速开发应用程序选择,选None。 第七步:选择中的用户自定义模式。 第八步:选择不使用PC-Lint(TM)链接工具软件,点击“完成”按钮,Code Warrior集成开发环境就会自动生成整个工程的文件系统。 四、编写与运行你的程序 在Code Warrior集成开发环境中,利用其自动生成的函数模板,就可以编写和调试你的应用程序了。 例如,最简单的程序,试着在函数模板上添加两条语句: PORTB=0XAA;//让接在B口上的8个LED间隔点亮 DDRB=0XFF //B口8个引脚全部设为输出单击“编译”按钮,如果有错误,会指出错误类型和位置,可修改后重新编译;如果没有错误,单击“运行”按钮就会弹出仿真和实时调试窗口,由于选择了TBDML调试方式,程序会在单击运行后,被自动下载到单片机中。 其他的实验程序,请试着自主设计完成。 I/O口输出程序 #include <> /* common defines and macros */ #include "" /* derivative-specific definitions */ 延时子程序: void delay(void) { unsigned int i,j; for(i=0;i<100;i++) for(j=0;j<10000;) j++; } 主程序: void main(void) { DDRB=0xFF; PORTB=0xaa; for(;;){ delay(); PORTB=~PORTB; 隔位点亮程序 }
1.Freescale CodeWarrior 简要使用说明
Freescale CodeWarrior 使用说明在智能车竞赛中,我们主要使用Freescale公司提供的CodeWarrior软件开发环境对单片机进行编程,在应用中,我们使用的是CodeWarrior4.7或CodeWarrior5.0的版本,在这里以CodeWarrior5.0为例,给大家说明CodeWarrior软件的一些使用说明。 点击桌面或开始菜单中的CodeWarrior IDE的图标,就可以进入CodeWarrior集成开发环境,具体结果如图一所示。 图一 我们点击Startup中的第一个选项”Create New Project”,来新建工程。 之后进入向导菜单,如图二所示 图二
智能车使用的MC9S12XS128单片机作为主控芯片,所以我们在器件中选择相应的芯片,同时,在智能车校赛过程中,大家都是使用学校提供的BDM作为下载区,所以在Connections 中选择TBDML。然后点击下一步。 下一步界面如图三所示 图三 在这一界面中,我们首先选择编程的语言,我们主要使用C语言进行编程,所以我们需要选中C的复选框,同时我们还需要在project name和location中对我们工程的名称和路径进行设定,这里我们给出的例子的工程名为SMARTCAR,路径在D盘根目录,这里每个人都可以根据喜好自由设定,然后点击下一步。之后的界面如图四所示 图四
在这里,我们可以将一些已经编写好的文件纳入到工程中,这里由于我们是建立一个空白的全新的工程,所以,我们跳过此步,直接点击下一步。之后的界面如图五所示 图五 这里我们不进行修改,直接点击下一步。 下一步菜单如图六所示,这里我们对C或C++语言进行一些设置。 图六 在实际使用中,我们主要对第三项”Select the floating point format supported”进行修改,默认选择了”None”,这样我们在编程中就无法使用浮点数”float”,这是非常不方便的。所以这里我们一定要将其改为第二项”float is IEEE32, double is IEEE32”或者第三项”float is IEEE32, double is IEEE64”。这样我们在实际编程中才可以使用浮点数。然后点击下一步
CodeWarrior 安装教程修正版
CW安装教程: 提醒: 1.安装说明:WIN 7 32位系统安装版本为CW 5.0 WIN 7 64位系统和WIN 8系统安装版本为CW 5.1 2.Win7和win8前面安装相同,主要区别在于驱动安装方式不同,安装步骤如下,安装过程部分步骤需要耐心等待,切勿安装过程随意取消。 步骤如下: 1.找到资料中下面文件,双击打开 2.点击“next”下一步至此,修改安装路径(切记不要使用中文路径名称) 3.继续点击下一步 4.点击下一步,再次修改路径,两次路径不可重复(切记不要使用中文路径名称)
5.点击下一步 6.连续点击“安装” 点击“install” 7.安装完成 8.然后将上传资料中USBDM_V2文件夹USBDM_V2\Debug DLLs\tbdml.dll和SBDM_V2\tbdml_gdi_dll\tbdml_gdi12.dll拷贝至安装目录C:\Program
Files\Freescale\CodeWarrior for S12(X) V5.0\Prog\gdi\中,(注意:此处即为安装时第二次更改的路径) 9.接下来进行驱动的安装 A.win8安装:WIN8系统的驱动安装需要禁用数字签名,可参照以下网址提示教程:https://www.360docs.net/doc/8a13235510.html,/article/3f16e003d1f4612591c103ce.html 或按照以下安装步骤(由于无法进行截图,图片为手机拍摄,部分不清晰,请谅解) 1首先按“Shift”+重启,重启后会出现以下界面,点击疑难解答 2.点击高级选项 点击启动设置 选择重启 3.重启后会出现以下界面,选择第七项,按“F7” 7.接下来点击“我的电脑—管理—设备管理器”,双击未知设备,点击“更新驱动程序”,注意操作时需要插上BDM进行;然后如图所示点击浏览驱动程序软件,
我的整理CodeWarrior_使用教程
CodeWarrior 使用教程 课程目录 Translated from https://www.360docs.net/doc/8a13235510.html, CodeWarrior 使用教程 第一课认识 CodeWarrior Translated from https://www.360docs.net/doc/8a13235510.html, CodeWarrior 能做些什么? 当你知道自己能写更好的程序时,你一定不会再使用别人开发的应用程序。但是常常会发生这种情况,就是当你写了无数行代码后,却找不到使得整个程序出错的那一行代码,导致根本没法编译和链接整个程序。这可能更令人灰心丧气。 本文将告诉你如何使用 CodeWarrior 这一工具解决上述问题。 从现在开始,我们将集中精力学习如何在 CodeWarrior 中使用 C/C++ 进行编程。为了学习本课程,你必须已经能够比较熟练地使用上述两种语言之一。CodeWarrior 也可以支持 Java 开发,但那是另一门课程的内容。本课程仅限于在 Windows 平台上使用 CodeWarrior 进行的开发。一旦你精通了 CodeWarrior 编程后,你可以试试在其它平台上使用 CodeWarrior。本文中讨论过的大部分内容都可以应用到开发 Mac 应用程序中。 CodeWarrior 能够自动地检查代码中的明显错误,它通过一个集成的调试器和编辑器来扫描你的代码,以找到并减少明显的错误,然后编译并链接程序以便计算机能够理解并执行你的程序。你所使用过的每个应用程序都经过了使用象 CodeWorrior 这样的开发工具进行编码、编译、编辑、链接和调试的过程。现在你在我们的指导下,自己也可以去做这些工作了。 你可以使用 CodeWarrior 来编写你能够想象得到的任何一种类型的程序。如果你是一个初学者,你可以选择编写一个应用程序(比如一个可执行程序),比如象微软公司的文本编辑器 WordPad 这样的应用程序。 应用程序可能是最容易编写的程序了,而那些庞大的商业软件,比如象 Adobe Photoshop,Microsoft Word 以及 CodeWarrior 软件都是极其复杂的。其它类型的程序指的是控制面板(control panels),动态链接库(dynamic linked libraries,DLLs) 和插件(plug-ins)。我们先来简单的讨论一下这些类型的程序。 在 Windows 中,控制面板程序是一些(通常比较小的)存放在控制面板目录下的程序,可以在开始菜单的控制面板项中看到它们。控制面板实际上是设置系统功能的一个简单界面,比如可以在控制面板中完成诸如设置音量和鼠标移动速度这样一些参数。 动态链接库 (DLLs) 提供了一些很有用的被系统和应用程序共享的函数。通常它们都是没有用户界面的。 插件 (Plug-ins) 有点类似于 DLLs,插件也是可供其它软件使用的小程序,但插件只能被特定的软件使用。比如说,Photoshop 的插件允许程序员方便地扩展 Photoshop 的功能,而不需要去修改它的源代码。同样的,许多 Web 浏览器也使用插件来增加功能,或者为了让你能够看到页面上的新的内
使用CodeWarrior调试U
使用CodeWarrior调试U-Boot 2011-04-19 16:15 1667人阅读评论(1) 收藏举报 使用USBTAP仿真器,CodeWarrior可以直接跟踪和调试已经烧写在NOR Flash上的 U-Boot。下面以MPC8306 U-Boot为例,介绍如何配置CodeWarrior,让它能连接和调试U-Boot,以及如何跟踪和调试。 在此之前,我们首先介绍一下PowerPC体系架构处理器的上电复位知识,PowerPC体系架构处理器包括内核是603e,G2,e300,e600的处理器,对于这些PowerPC体系架构的处理器来说,它们的上电复位过程基本上是一致的。在此,我们只介绍包含e300内核的MPC83xx处理器的上电时序,其它都基本与它类似。 对于MPC83xx处理器,上电后,/POR信号拉低有效,/HRESET同时拉低有效, SYS_CLK_IN提供时钟和复位配置输入信号CFG_RESET_SOURCE,待该时钟稳定,至少32个时钟周期后,/POR开始拉高为无效,此后,设备开始锁存复位配置输入管脚信号CFG_RESET_SOURCE,以决定是从何处读入复位配置字RCW;接着,开始读取RCW,至于读取RCW所耗的时间长短,依赖于读入的设备和RCW的长度。读到RCW后,就可以决定板子的其中模式,由此,开始板子的其中过程。 RCWHR[BMS]确定e300内核MSR[IP]位的初始值,它用来决定中断是量表的位置: 0 — 8M的引导内存空间是0x0000_0000到0x007F_FFFF,如果内核引导使能,它将从0x0000_0100地址处取第一条指令执行 1 — 8M的引导内存空间是0xFF80_0000到0xFFFF_FFFF,如果内核引导使能,它将从0xFFF0_0100地址处取第一条指令执行 RCWHR[ROMLOC]和RCWHR[RLEXT]一起来确定Boot ROM的位置是NOR,NAND还是DDR SDRAM设备。 下面开始介绍如何配置CodeWarrior来跟踪和调试U-Boot。 1. 建立一个新的MPC8306工程,因为需要一个工程来承载配置信息,建立工程的过程需要5步选择: 1) EPPC New Project Wizard,输入工程名字如mpc8306