xmlns:android="https://www.360docs.net/doc/e615049514.html,/apk/res/android"
android:id="@+id/button"
android:text=""
android:layout_width="fill_parent"
android:layout_height="fill_parent"/>
部件,按钮的类名称形成XML元素的名称。因为按钮是Android提供的部件,我们可以只使用裸类的名称。如果您创建自己的部件作为android.view.View 子小部件,您也将需要提供一个完整的包声明(如https://www.360docs.net/doc/e615049514.html,monsware.android.MyWidget)。
根元素需要Android的XML命名空间声明:
xmlns:android="https://www.360docs.net/doc/e615049514.html,/apk/res/android"
所有其他要素将成为子根并继承该命名空间的声明。
因为我们要引用这个来自Java代码的按钮,我们需要通过android给它一个标识符:id属性。我们将在本章后面更详细的介绍这个概念。
其余的属性是此按钮实例属性:
?android:文字表示的初始文本将显示在按钮(这种情况显示空字符串)?android:layout_width和Android:layout_height命令android有按钮的宽度和高度填写“parent”,这种情况下,整个屏幕。将这些属性将在第7章中详解。
由于这个单一部件是activity的仅有内容,我们只需要这一个因素。复杂的用户界面将需要整个树的元素,代表工具和容器,控制自己的定位。所有的这本书余下的章节将使用XML布局,所以还有数十种更复杂的其他布局实例,请前进到第七章仔细阅读。
@符号有什么用途?
许多部件和容器只需要出现在XML布局文件,不须引用在Java代码。例如,一个静态标签(TextView)只需要在布局文件中以表明它应该出现在那里。在XML 文件中各种元素文件不需要有android:id属性给他们一个名称。
任何你想要在Java资源中使用的东西,都需要一个android:id.
该公约是使用@ +id...作为ID值,其中的...代表你locallyunique名称有问题的部件。在上一节的XML布局的例子中,@ +id是按钮控件的标识符。
android提供了一些特殊的android:ID值,形式@android:id/...我们将在这本书的不同章节中看到这些,例如第八章和第十章。
我们将这些附加到Java…如何?
既然你有意建立一个XML配置文件的工具和容器,名为main.xml存储res/layout,所有你需要的是一个在您activity的OnCreate()回调以使用该版式:
setContentView(https://www.360docs.net/doc/e615049514.html,yout.main);
这是相同的setContentView(),我们前面使用,通过它的一个视图子类的实例(在这种情况下,一个按钮)。该android制造的观点,来自我们的布局,是从访问该代码生成的R类。所有的布局都可以访问https://www.360docs.net/doc/e615049514.html,yout,由基地键控布局文件的名称- main.xml result in https://www.360docs.net/doc/e615049514.html,yout.main.
要访问确定部件,使用findViewById(),在数字标识符传递有问题的部件。
这一数字标识符生成的R类由android在R.id.something(其中一些是你正在寻找的具体部件)。这些部件是只是子类的视图,就像我们在第四章中创建Button 实例。
剩下的部分
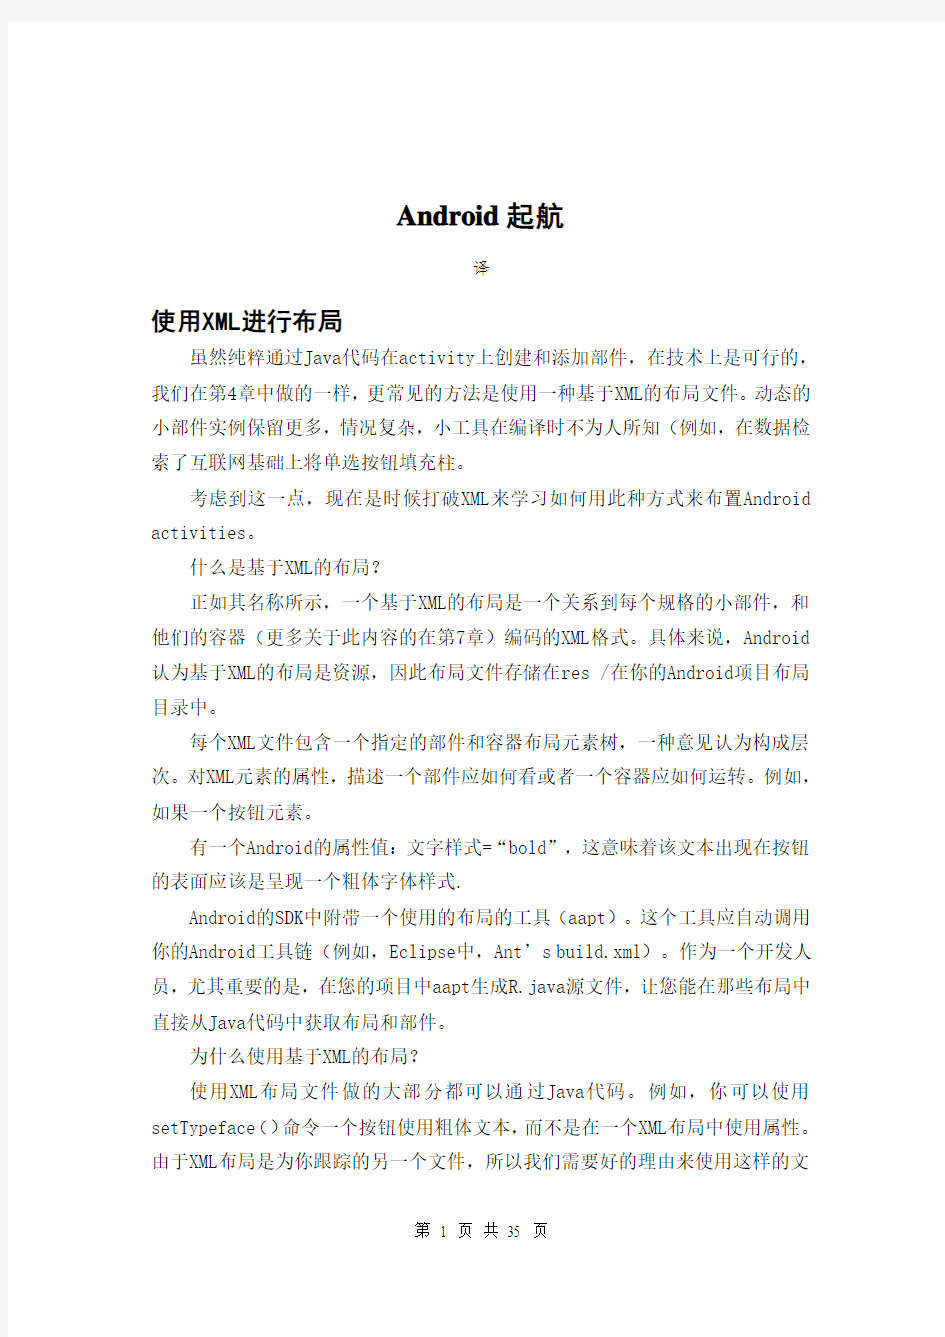
在原始的Now演示中,按钮的表面便会显示当前的时间,这将反映当按钮被最后按下时显示的时间(或者如果在按钮尚未被按下时显示)。
这种逻辑仍然适用,即使在该修订演示(NowRedux)中。尽管如此,在activity’s onCreate() callback中的实例,我们可以从XML的布局参考一个例子:
package https://www.360docs.net/doc/e615049514.html,youts;
import android.app.Activity;
import android.os.Bundle;
import android.view.View;
import android.widget.Button;
import java.util.Date;
public class NowRedux extends Activity
implements View.OnClickListener {
Button btn;
@Override
public void onCreate(Bundle icicle) {
super.onCreate(icicle);
setContentView(https://www.360docs.net/doc/e615049514.html,yout.main);
btn=(Button)findViewById(R.id.button);
btn.setOnClickListener(this);
updateTime();
}
public void onClick(View view) {
updateTime();
}
private void updateTime() {
btn.setText(new Date().toString());
}
}
第一个区别是,在Java代码中设置内容视图作为视图,我们将它设置为引用的XML布局(setContentView(https://www.360docs.net/doc/e615049514.html,yout.main))。该R.java源文件将被更新,当我们重建这个项目,包括对我们布局参考文件(存储在main.xml in our project’s res/layout directory )。
另一个不同是,我们需要亲手实验按钮实例,我们使用findViewById()调用。既然我们发现按钮为@ +id/button,我们可以参考按钮的标识符R.id.button。现在,随着手手头上的
实例,我们可以设置回调并根据需要设置标签。
正如你可以看到如图5-1,结果看起来与原始的Now演示一样。
图5-1 样本的NowRedux活动
使用基本部件
每一个GUI工具包都有一些基本的部件:字段,标签,按钮等,Android的工具包在范围内没有不同,其基本部件将提供一个良好的介绍,关于这些部件在Android activities中是如何运行的。
指派标签
最简单的部件是标签,在Android提到的作为一个TextView。像大多数的GUI 工具包,标签的文本是不可被用户直接编辑的。通常情况下,它们被用来确定相邻部件(例如,一个“姓名:”一个填充姓名前的标签)。
在Java中,你可以通过创建一个TextView的实例l来创建一个标签。更常见的,虽然,
你将通过添加一个TextView元素到布局来在XML布局文件中创建标签,与一个Android:文本属性来设置标签的本身价值。如果您需要交换基于某些标准的标签,例如国际化,你可能想使用XML中的资源参考代替,这些将在第9章叙述。TextView有许多相关的其他标签属性,如:
? android:typeface to set the typeface to use for the label (e.g., monospace)
? android:textStyle to indicate that the typeface should be made bold (bold), italic (italic),
or bold and italic (bold_italic)
? android:textColor to set the color of the label’s text, in RGB hex format (e.g., #FF0000
for red)
例如,在Basic/Label项目中,你将找到下列布局文件:
android:layout_height="wrap_content"
android:text="You were expecting something profound?"
/>
正如你看到的图6-1,
图6-1 示例应用程序的LabelDemo
只是单独的布局,由android的项目生成器提供的Java源的(如activityCreator),生成应用程序。
按钮,归属于谁?
我们已经在第4和第5章看到了按钮部件用法。按钮是文本视图的一个子类,所以一切都在上一节讨论了,按钮格式所面临的问题仍然成立。
短暂的图像
Android有两个部件,来帮助你将照片嵌入activities:ImageView和ImageButton。
正如名称所暗示的,他们是分别对于文本视图和按钮基于图像的类似物。
每个部件带有一个android:src属性(在一个XML布局中),指明使用什么图片。这些通常引用一个可绘制的资源,在讲资源的这个章节中更详细地描述了。您还可以通过setImageURI()从内容提供商在Uri基础上设置图像。
ImageButton控件,一个ImageView子类,混合在标准按钮行为中,应对点击和诸如此类的东西。
例如,从Basic/ImageView样本项目中看main.xml布局,这可以在
https://www.360docs.net/doc/e615049514.html,以及所有其他代码示例种找到。
android:layout_width="fill_parent"
android:layout_height="fill_parent"
android:adjustViewBounds="true"
android:src="@drawable/molecule"
/>
结果,只用代码生成activity,如图6-2所示。
图6-2 示例应用程序的ImageViewDemo
绿色字段或者其他色彩
紧接着按钮和标签,字段是大多数GUI工具包的第三个“锚”。在Android 中,他们通过EditText部件运行,它是标签的一个子类TextView。
随着标准TextView属性(例如,Android:文本样式),EditText有许多其
他方面可以帮助你创建字段,包括:
? android:autoText, to control if the field should provide automatic spelling assistance
? android:capitalize, to control if the field should automatically capitalize the first letter
of entered text (e.g., first name, city)
? android:digits, to configure the field to accept only certain digits ? android:singleLine, to control if the field is for single-line input or multiple-line input
(e.g., does move you to the next widget or add a newline?)
除了这些,你可以使用专门配置字段输入方法,如android:仅数字输入numeric,android:为笼罩密码输入密码,还有Android:phoneNumber进入电话号码。如果你想创建自己的输入
法计划(如邮政编码,社会安全号码),您需要创建自己的执行情况InputMethod接口,然后通过android设定字段来使用:inputMethod。
例如,从the Basic/Field项目,这里是一个XML布局文件显示 EditText:
xmlns:android="https://www.360docs.net/doc/e615049514.html,/apk/res/android"
android:id="@+id/field"
android:layout_width="fill_parent"
android:layout_height="fill_parent"
android:singleLine="false"
/>
请注意android:singleLine是错误的,因此,用户将能够输入几行文字。对于这一项目,FieldDemo.java文件填充了一些散文输入栏:
package https://www.360docs.net/doc/e615049514.html,monsware.android.basic;
import android.app.Activity;
import android.os.Bundle;
import android.widget.EditText;
public class FieldDemo extends Activity {
@Override
public void onCreate(Bundle icicle) {
super.onCreate(icicle);
setContentView(https://www.360docs.net/doc/e615049514.html,yout.main);
EditText fld=(EditText)findViewById(R.id.field);
fld.setText("Licensed under the Apache License, Version 2.0 " + "(the \"License\"); you may not use this file " +
"except in compliance with the License. You may " +
"obtain a copy of the License at " +
"https://www.360docs.net/doc/e615049514.html,/licenses/LICENSE-2.0");
}
}
结果,一旦建成并投入安装成模拟器,如图6-3所示。
图6-3 示例应用程序的FieldDemo
注意:Android的模拟器只允许在每一个独特的Java包发射器中应发射用。由于本章中的所有演示共享https://www.360docs.net/doc/e615049514.html,monsware.android.basic包,您将只能在你的模拟器发射的任何时候的看到这些演示之一。
另一个字段的特色,提供自动完成,以帮助用户在整个无文本输入一个值。这是作为AutoCompleteTextView部件在Android中提供的并将在第8章讨论。
另一种复选框
经典的复选框有两种状态:选中的和未选中的。在这两种状态之间点击复选框切换来
指示选择(例如,“添加快递到我的命令”)。
在Android中,还有一个CheckBox控件,以满足这种需要。它作为一个TextView先驱,因此您可以像Android使用TextView性能:格式部件添加文字颜色。
在Java中,你可以调用:
? isChecked() to determine if the checkbox has been checked
? setChecked() to force the checkbox into a checked or unchecked state ? toggle() to toggle the checkbox as if the user checked it
此外,当复选框的状态发生改变时,你可以注册一个侦听器(这种情况下,一个OnCheckedChangeListener实例)来提醒。
例如,从the Basic/CheckBox的项目,这里是一个简单的复选框的布局:
xmlns:android="https://www.360docs.net/doc/e615049514.html,/apk/res/android"
android:id="@+id/check"
android:layout_width="wrap_content"
android:layout_height="wrap_content"
android:text="This checkbox is: unchecked" />
相应的CheckBoxDemo.java检索和配置checkbox的行为:
public class CheckBoxDemo extends Activity
implements CompoundButton.OnCheckedChangeListener {
CheckBox cb;
@Override
public void onCreate(Bundle icicle) {
super.onCreate(icicle);
setContentView(https://www.360docs.net/doc/e615049514.html,yout.main);
cb=(CheckBox)findViewById(R.id.check);
cb.setOnCheckedChangeListener(this);
}
public void onCheckedChanged(CompoundButton buttonView,
boolean isChecked) {
if (isChecked) {
cb.setText("This checkbox is: checked");
}
else {
cb.setText("This checkbox is: unchecked");
}
}
}
请注意为复选框的状态变化activity作为其自身监听器,因为它执行OnCheckedChangeListener 分界面(通过
cb.setOnCheckedChangeListener(this))。回调侦听器在onCheckedChanged(),它接收复选框的状态有什么新的变化和状态。在这种情况下,我们更新了文本的复选框来反映复选框中包含的实际内容。
结果呢?点击复选框立即更新其内容,你可以看图6-4和6-5。
图6-4 CheckBoxDemo示例应用程序,未选中的复选框
图6-5 同样的应用,选中的复选框
打开收音机
由于与其他单选按钮在其他工具包执行时,Android的单选按钮是两种状态,如复选框,但可分为这样,只有一组中的单选按钮可以随时选中。
像复选框,RadioButton从CompoundButton中继承,从而继承了TextView。因此,所有的标准TextView的字体,样式,颜色等特性,可用于控制单选按钮的外观。同样,您可以在一个单选按钮上调用isChecked(),看看它是否被选中,切换()来选择它,等等,就像你可以用一个复选框。
大多数时候,你会想要在RadioGroup里面放进一个RadioButton的小部件。该RadioGroup表明其状态的单选按钮设置联系在一起,这意味着只有一个按钮退出组可以在任何时间选择。如果您指派一个android:在您的XML布局中ID到你的RadioGroup,您可以访问您的Java代码和调用组:
? check() to check a specific radio button via its ID (e.g., group.check(R.id.radio1))
? clearCheck() to clear all radio buttons, so none in the group are checked
? getCheckedRadioButtonId() to get the ID of the currently-checked radio button (or -1 if
none are checked)
例如,the Basic/ RadioButton的示例应用程序,这里是一个XML布局显示一个RadioGroup包装的RadioButton的部件集合:
xmlns:android="https://www.360docs.net/doc/e615049514.html,/apk/res/android"
android:orientation="vertical"
android:layout_width="fill_parent"
android:layout_height="fill_parent"
>
android:layout_width="wrap_content"
android:layout_height="wrap_content"
android:text="Rock" />
android:layout_width="wrap_content"
android:layout_height="wrap_content"
android:text="Scissors" />
android:layout_width="wrap_content"
android:layout_height="wrap_content"
android:text="Paper" />
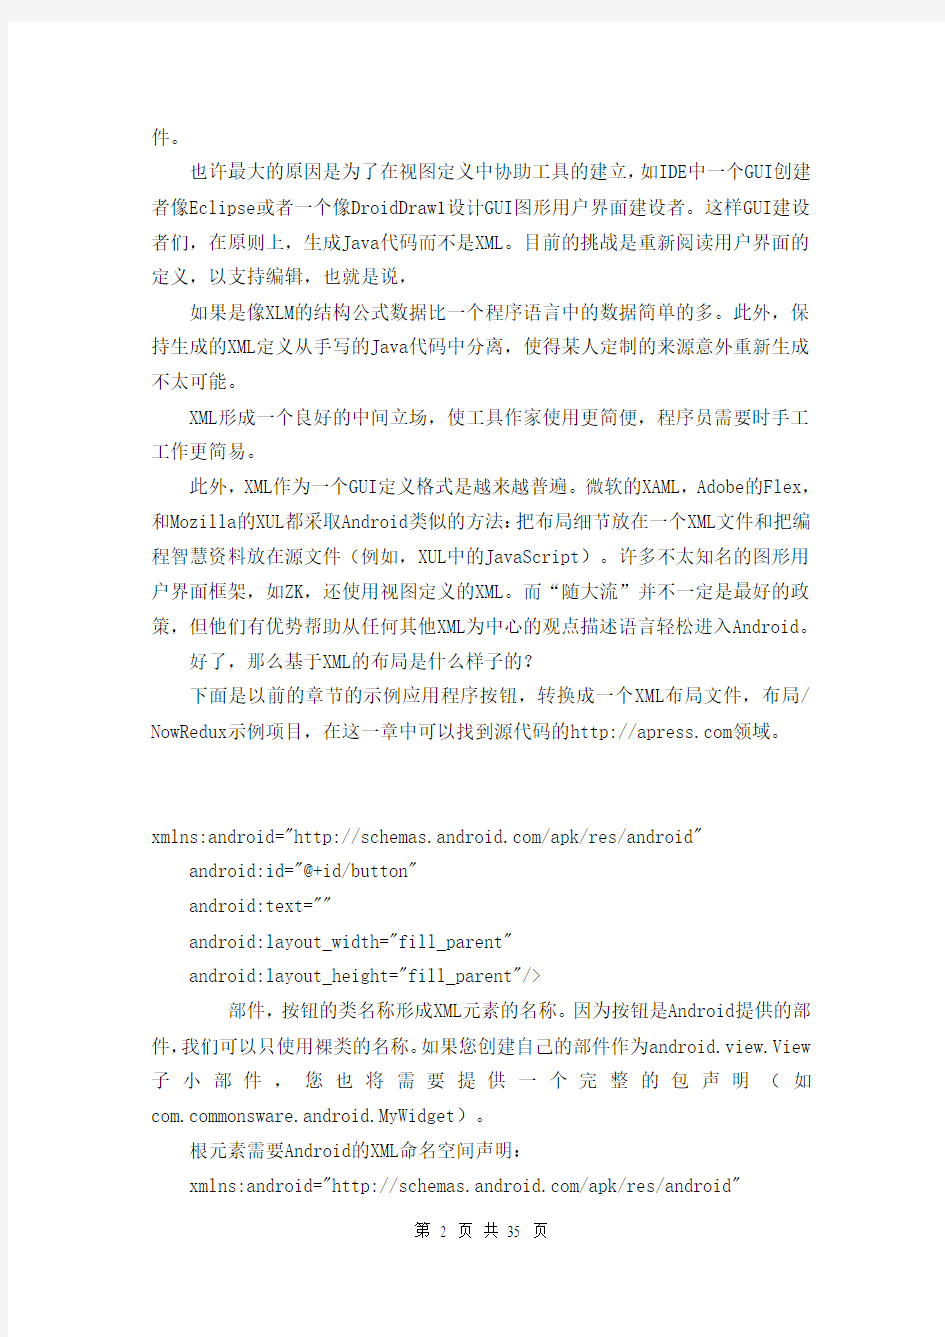
图6-6显示了使用Android生成的Java项目和此布局的结果
图6-6 示例应用程序的RadoiButtonDemo
请注意,单选按钮组最初设置为在一开始就完全畅通无阻。预先设定的一个单选按钮被选中,在RadioButton上使用setChecked()或从您的OnCreate()在activity中回调,在RadioGroup上选中()。
所有部件,包括以前的那些示例,扩展视图,这样使所有部件一系列有用的性能,并超越那些已经介绍的方法。
视图中最有可能被使用的某些属性,包括:
? Controls the focus sequence:
? android:nextFocusDown
? android:nextFocusLeft
? android:nextFocusRight
? android:nextFocusUp
? android:visibility, which controls whether the widget is initially
visible
? android:background, which typically provides an RGB color value (e.g., #00FF00 for green)
to serve as the background for the widget
您可以切换是否通过setEnabled()启用了一个小装置,看看它是否是通过isEnabled()启用的。这是禁用一个复选框或单选按钮选择一些小部件的常用方式。
你可以通过requestFocus()给出一个部件重点,看看它是否是通过isFocused()为重点。
你可能会如前所述用禁用插件来使用,以确保一旦您禁用操作完成,正确的部件具有焦点。
为了帮助操纵部件树和容器,组成一个activity的整体视图,你可以使用:? getParent() to find the parent widget or container
? findViewById() to find a child widget with a certain ID
? getRootView() to get the root of the tree (e.g., what you provided to the activity via
setContentView())
Beginning Android
Mark L. Murphy write
Using XML-Based Layouts
W hile it is technically possib le to create and attach wid gets to our activity purely through Java code, the way we did in Chapter 4, the more co mmo n approach is to use an XML-based layout file. Dynamic instantiation of widgets is reserved for more comp licated scenarios, where the wid gets are not kno wn at co mpile-time (e g., populating a column of radio butto ns based on data retrieved off the Internet).
With that in mind, it’s time to break out the XML and learn how to lay out Android activities that way.
What Is an XML-Based Layout?
As the name suggests, an XML-based layout is a specifi cation of widgets’ relationships to each other—and to their containers (more on this in Chapter 7)—encoded in XML format. Specifically, Android considers XML-based layouts to be resources, and as such layout files are stored in the res/layout directory inside your Android project.
Each XML file contains a tree of elements specifying a layout of widgets and their containers that make up one view hierarchy. The attributes of the XML elements are properties, describing how a widget should look or how a container should behave. For example, if a Button element has an attrib ute value of android:textStyle = "bo ld", that means that the text appearing on the face of the button sho uld be rendered in a boldface font style.
Android’s SDK ships with a tool (aapt) whi ch uses the layouts. This tool should be automatically invoked by your Android tool chain (e.g., Eclipse, Ant’s build.xml). Of particular importance to you as a developer is that aapt generates the R.java source file within yo ur project, allowing you to access layo uts and widgets within those layouts directly fro m yo ur Java code.
Why Use XML-Based Layouts?
Most everything you do using XML layout files can be achieved through Java
code. For example, you could use setTypeface() to have a button render its text in bold, instead of using a property in an XML layout. Since XML layouts are yet another file for you to keep track of, we need good reasons for using such files.
Perhaps the biggest reason is to assist in the creation of tools for view definition, such as a GUI builder in an IDE like Eclipse or a dedicated Android GUI designer like DroidDraw1. Such GUI builders could, in principle, generate Java code instead of XML. The challenge is re-reading the UI definition to support edits—that is far simp ler if the data is in a structured format like XML than in a programming language. Moreover, keeping generated XML definitions separated from hand-written Java code makes it less likely that somebody’s custo m-crafted source will get clobbered by accident when the generated bits get re-generated. XML forms a nice middle ground between something that is easy for tool-writers to use and easy for programmers to work with by hand as needed.
Also, XML as a GUI definition format is becoming more commonplace. Microsoft’s XAML2, Adobe’s Flex3, and Mozilla’s XUL4all take a similar approach to that of Android: put layout details in an XML file and put programming smarts in source files (e.g., JavaScript for XUL). Many less-well-known GUI frameworks, such as ZK5, also use XML for view definition. While “following the herd” is not necessarily the best policy, it does have the advantage of help ing to ease the transition into Android from any other XML-centered view description language.
OK, So What Does It Look Like?
Here is the Button from the previous chapter’s samp le application, converted into an XML
layout file, found in the Layouts/NowRedux sample project. This code sample along with all others in this chapter can be found in the Source Code area of https://www.360docs.net/doc/e615049514.html,.
android:id="@+id/button"
andro id:text=""
andro id:layo ut_width="fill_parent"
andro id:layo ut_height="fill_parent"/>
The class name of the widget—Button—forms the name of the XML element. Since Button is an Android-supplied widget, we can just use the bare class name. If you create your own widgets as subclasses of android.view.View, you would need to provide a full package declaration as well.
The root element needs to declare the Android XML namespace:
xmlns:android="https://www.360docs.net/doc/e615049514.html,/apk/res/android"
All other elements will be children of the root and will inherit that namespace declaration.
Because we want to reference this button from our Java code, we need to give it an identifier via the android:id attribute. We will cover this concept in greater detail later in this chapter.
The remaining attributes are properties of this Button instance:
? android:text ind icates the initial te xt to be displayed on the button face (in this case, an empty string)
? android:layout_width and android:layo ut_height tell Android to have the button’s
width and height fill the “parent”, in this case the entire screen—these attributes will be covered in greater detail in Chapter 7.
Since this single widget is the only content in our activity, we only need this single element. Comp lex UIs will require a whole tree of elements, representing the widgets and containers that control their positio ning. All the remaining chapters of this book will use the XML layout form whenever practical, so there are dozens of other examples of more co mplex layouts for you to peruse fro m Chapter 7 onward.
What’s with the @ Signs?
Many wid gets and containers only need to appear in the XML layo ut file and do not need to be referenced in your Java code. For example, a static label (TextView) frequently only needs to be in the layo ut file to indicate where it
翻译译文 应用程序基础Android Developers Android应用程序使用Java编程语言开发。aapt工具把编译后的Java代码连同应用程序所需的其他数据和资源文件一起打包到一个Android包文件中,这个文件使用.apk作为扩展名。此文件是分发并安装应用程序到移动设备的载体;是用户下载到他们的设备的文件。单一.apk文件中的所有代码被认为是一个应用程序。 从多个角度来看,每个Android应用程序都存在于它自己的世界之中: 1 默认情况下,每个应用程序均运行于它自己的Linux进程中。当应用程序中的任何代码需要被执行时,Android启动此进程,而当不再需要此进程并且其它应用程序又请求系统资源时,则关闭这个进程。 每个进程都有其独有的虚拟机(VM),所以应用程序代码与所有其它应用程序代码是隔离运行的。 3 默认情况下,每个应用程序均被赋予一个唯一的Linux用户ID,并加以权限设置,使得应用程序的文件仅对此用户及此应用程序可见——尽管也有其它的方法使得这些文件同样能为其他应用程序所访问。 1 应用程序组件 Android的一个核心特性就是一个应用程序可以使用其它应用程序的元素(如果那个应用程序允许的话)。例如,如果你的应用程序需要显示一个图片卷动列表,而另一个应用程序已经开发了一个合用的而又允许别的应用程序使用的话,你可以直接调用那个卷动列表来完成工作,而不用自己再开发一个。你的应用程序并没有吸纳或链接其它应用程序的代码。它只是在有需求的时候启动了其它应用程序的那个功能部分。 为达到这个目的,系统必须能够在一个应用程序的任何一部分被需要时启动一个此应用程序的进程,并将那个部分的Java对象实例化。因此,不像其它大多数系统上的应用程序,Android应用程序并没有为应用程序提供一个单独的入口点(比如说,没有main()函数),而是为系统提供了可以实例化和运行所需的必备组件。一共有四种组件类型: 1 Activity activity是为用户操作而展示的可视化用户界面。例如,一个activity可以展示一个菜单项列表供用户选择,戒者显示一些包含说明文字的照片。一个短消息应用程序可以包括一个用于显示要发送消息到的联系人列表的activity,一个给选定的联系人写短信的activity以及翻阅以前的短信或改变设置的其他activity。
外文翻译-基于Android智能家居系统 通信工程学院 毕业设计外文翻译 毕业设计题目基于ANDRIO的智能家居 系统的设计与实现 外文题目UBIQUITOUS SMART HOME SYSTEM USING ANDROID APPLICATION 专业:通信工程 学号: 学生姓名: 指导教师姓名: 指导教师职称:副教授 日期:2015 年 1 月10 日
International Journal of Computer Networks & Communications (IJCNC) V ol.6, No.1, January 2014 基于Android应用的无处不在的智能家居系统 Shiu Kumar Department of Information Electronics Engineering, Mokpo National University, 534-729, Mokpo, South Korea 摘要 本文提出了一种灵活独立的,低成本的智能家居系统,它是基于Android应用与微web服务器通信,不仅仅提供交换功能。Arduino以太网的使用是为了避免使用个人电脑从而保证整个系统成本最低,语音激活时用来实现切换功能的。光开关,电源插头,温度传感器,湿度传感器,电流传感器,入侵检测传感器,烟雾/气体传感器和警报器等这些设备集成在系统中,表明了所提出的智能家居系统的有效性和可行性。经过检测,智能家居应用程序可以成功地进行智能家居操作,例如开关功能,自动环境监测,和入侵监测,在监测到有不法入侵后,系统会自动发送一个邮件,并响警笛。 关键字: Android智能手机,智能家居,物联网(loTs),远程控制 1.引言 随着移动设备受欢迎程度的不断增长和人们日常生活中对无处不在的先进的移动应用的功能需求不断增加,利用Web服务是提供远程访问服务的最开放和可互操作的方式,并且使应用程序能够彼此通信。一个有吸引力的市场产品自动化和网络化是忙碌的家庭和有生理缺陷的个人的代表。 loTs可以被描述为连接智能手机,网络电视,传感器等到互联网,实现人们之间沟通的新形势。过去几年中loTs的发展,创造了一个新层面的世界。这使得人们可以在任何时间,任何地点,联通任何期望的东西。物联网技术可用于为智能家居创建新的概念和广阔的空间,以提供智能,舒适的发展空间和完善生活质量。 智能家居是一个非常有前途的领域,其中有各种好处,如增加提供舒适性,更高安全性,更合理地使用能源和其他资源。这项研究的应用领域非常重要,未来它为帮助和支持有特殊需求老的人和残疾人士提供了强有力的手段。设计一个智能家居系统时需要考虑许多因素,该系统应该是经济实惠的,是可伸缩的,使得新的设备可以容易地集成到系统中,此外,它应该是用户友好的。 随着智能手机用户的急剧增加,智能手机已经逐渐变成了具备所有功能的便携式设备,为人们提供了日常使用。本文介绍了一种低成本的控制和监视家居环境控制的无线智能家居系统。利用Android设备,可以通过一个嵌入式微Web服务器与实际的IP连接,访问和控制电器和远程的其它设备,这可以利用任何支持Android的设备。Arduino Ethernet 用于微Web服务器从
外文翻译模板2010 中国石油大学(华东) 本科毕业设计(论文)外文翻译 学生姓名:王辰 学号:0607XXXX 专业班级:信息与计算科学06-2班 指导教师:陈华 2010年6月24日
(原文复印或打印材料,B5纸) In this paper based on the unique geometry and mechanical movement of beam pumping unit,we have presented a simple swing equation and computed motorial parameter;meanwhile under the conditions of the static load and inertial load of the polished-rod of a conventional pumping unit,we have also presented on equivalent dynamic model of the pumping unit system and the type-curves of net torque of the crankshaft with the characteristic of inertial counterbalance have been computed;Based on features and mechanical analysis of belt,a simple model for calculating belt transmission efficiency is developed the model can provide a theoretical base for study on the other transient variable of beam pumping unit;the cyclic loading coefficients is defined once and compute the nominal Power of the motor; at last we compare the beam pumping unit and the adjustable diameter and changeable toque pumping unit, based on this a program have been finished,and we also introduce other power saving pumping units. This graduation project mainly completes through the high accuracy data acquisition, the gain installs on the oil well oil extraction equipment the electric current, the voltage, the temperature, the pressure, the fluid position, the contact surface, the current capacity, contains water data and so on sensor, corresponds the connection with the many kinds of wireless communications (for example GPRS/CDMA) transmits it to the observation and control center, as well as will receive in the central server to the parameter carries on the real-time analysis and the processing parallel intergrowth becomes the database and the curve report form. Is advantageous for the oil field management level to carry on the prompt accurate management to the scene equipment. This system depends on in the Beijing Kunlun passing condition automation software science and technology limited company's entire center cultural work
(精品文献)Android外文翻译 本科毕业设计(论文)外文参考文献译文及原文 学院信息工程学院 专业测控技术与仪器 (光机电一体化方向) 年级班别 2011级(1)班 学号 学生姓名 指导教师
目录 1应用程序基础 (1) 1.1应用程序组件 (1) 1.2激活组件:intent (3) 1.3 关闭组件 (4) 1.4manifest文件 (5) 1.5Intent过滤器 (6) 1.6基于XML的布局 (7) 1Application Fundamentals (8) 1.1 Application Components (8) 1.2Activating components:intent (11) 1.3 Shutting down components (12) 1.4 The manifest file (13) 1.5Intent filters (14) 1.6XML-Based Layout (15)
1 应用程序基础 Android应用程序使用Java编程语言开发。aapt工具把编译后的Java代码连同应用程序所需的其他数据和资源文件一起打包到一个Android包文件中,这个文件使用.apk作为扩展名。此文件是分发并安装应用程序到移动设备的载体;是用户下载到他们的设备的文件。单一.apk文件中的所有代码被认为是一个应用程序。 从多个角度来看,每个Android应用程序都存在于它自己的世界之中: 1 默认情况下,每个应用程序均运行于它自己的Linux进程中。当应用程序中的任何代码需要被执行时,Android启动此进程,而当不再需要此进程并且其它应用程序又请求系统资源时,则就关闭了这个进程。 2 每个进程都有其独有的虚拟机(VM),所以应用程序代码与所有其它应用程序代码是隔离运行的。 3 默认情况下,每个应用程序均被赋予一个唯一的Linux用户ID,并加以权限设置,使得应用程序的文件仅对此用户及此应用程序可见——尽管也有其它的方法使得这些文件同样能为其他应用程序所访问。 1.1 应用程序组件 Android的一个核心的特性就是一个应用程序可以使用其它应用程序的元素(如果那个应用程序允许的话)。例如,如果你的应用程序需要显示一个图片卷动列表,而另一个应用程序已经开发了一个合用的而又允许别的应用程序使用的话,你可以直接调用那个卷动列表来完成工作,而不用自己再开发一个。你的应用程序并没有吸纳或链接其它应用程序的代码。它只是在有需求的时候启动了其它应用程序的那个功能部分。 为达到这个目的,系统必须能够在一个应用程序的任何一部分被需要时启动一个此应用程序的进程,并将那个部分的Java对象实例化。因此,不像其它大多数系统上的应用程序,Android应用程序并没有为应用程序提供一个单独的入口点(比如说,没有main()函数),而是为系统提供了可以实例化和运行所需的必备组件。一共有四种组件类型: (1)Activity
APP开发合同范本(标准版).docx 编号:_________________ APP开发合同范本 甲方:________________________________________________ 乙方:________________________________________________ 签订日期:_________年______月______日
甲方:________________________________(以下简称甲方) 地址:_______________________________________________ 法定代表人:_____________联系电话:_______________ 乙方:(以下简称乙方) 地址:_______________________________________________ 法定代表人:联系电话: 甲、乙双方经友好协议,就甲方委托乙方开发《____________________________________》(以下简称"本软件")的事宜达成一致并同意订本合同。 一、项目内容 1. 甲方委托乙方开发的软件《_XX系统APP,安卓系统APP,网络平台__》(以下简称"本三个软件") 在安卓,XX,PC环境下运行的软件,本三个软件需求(以下简称"需求")双方协商确定。
2.本合同APP和网络平台应用开发的栏目架构及相关功能开发细节由《APP和网络平台开发需求表》载明。 二、合同价款和付款方式 1.本合同总价款包括乙方相关的税费及软件开发期间办理相关手续的所有费用。该价款为固定包干价,除上述款项外,甲方无需支付任何其它款项。 2.付款方式: 前期不要源码的甲方总支付乙方费用是27500元,预付定金为10000元,软件和平台做好交付可以使用付清前期不要源码的费用的余额17500(留3000元质保金),即14500元 后期甲方要回乙方源码,乙方要另加收甲方27500元费用,并付清3000元的质保金 三、开发进度 自合同签订日起,甲方把钥匙交给乙方匹配乙方将在_____30_______个工作日内完成客户端开发,此时间并包括审核和测试时间。乙方的工作时间从本合同签订之日的次日起开始计算。
Android手机外文翻译---应用程序基础Android Developers 英文原文及译文 Application Fundamentals Android applications are written in the Java programming language. The compiled Java code —along with any data and resource files required by the application —is bundled by the aapt tool into an Android package, an archive file marked by an .apk suffix. This file is the vehicle for distributing the application and installing it on mobile devices; it's the file users download to their devices. All the code in a single .apk file is considered to be one application. In many ways, each Android application lives in its own world: 1. By default, every application runs in its own Linux process. Android starts the process when any of the application's code needs to be executed, and shuts down the process when it's no longer needed and system resources are required by other applications. 2. Each process has its own virtual machine (VM), so application code runs in isolation from the code of all other applications. 3. By default, each application is assigned a unique Linux user ID. Permissions are set so that the application's files are visible only to that user and only to the application itself — although there are ways to export them to other applications as well. It's possible to arrange for two applications to share the same user ID, in which case they will be able to see each other's files. To conserve system resources, applications with the same ID can also arrange to run in the same Linux process, sharing the same VM. Application Components A central feature of Android is that one application can make use of elements of other applications (provided those applications permit it). For example, if your application needs to display a scrolling list of images and another application has developed a suitable scroller and made it available to others, you can call upon that scroller to do the work, rather than develop your own. Your application doesn't incorporate the code of the other application or link to it. Rather, it simply starts up that piece of the other application when the need arises. For this to work, the system must be able to start an application process when any part of it is needed, and instantiate the Java objects for that part. Therefore, unlike applications on most other systems, Android applications don't have a single entry point for everything in the application (no main() function, for example). Rather, they have essential components that the system can instantiate and run as needed. There are four types of components: Activities
外文翻译模板 最佳分簇规模的水声传感器网络 Liang Zhao,Qilian Liang 德州大学阿灵顿分校电子工程系 Arlington, TX 76010, USA Email: https://www.360docs.net/doc/e615049514.html,, https://www.360docs.net/doc/e615049514.html, 摘要:在这篇论文中,我们主要关注的是的最优化分簇规模对水声传感器网络的影响。由于稀疏部署和信道属性的水声传感器网络是不同于地面传感器。我们的分析表明,最优分簇规模主要工作频率所决定的声音的传播。此外,区域数据聚合中也起着因素在很大程度上决定最佳分簇规模。 1引言 水下传感器网络(UW-ASN)可看成是个自组织网络,组成的传感器与一个声音进行分配感应的任务。为了达到这个目的,传感器必须自组织成一个独立的可以适应水下环境的网络,。UW-ASNs可以沿用许多通讯技术传统自组织网络和陆地的无线传感器网络,但仍有一些重要的区别为有限的能量和带宽约[1],[5],此协议对传统发展无线自组网路并不一定适合绝无仅有的网络的特点。当一个无线传感器可能要在一个微小的电池持续比较长的时间,能源效率就成为一个大问题。 由于广播的性质和有限的带宽,在浅水通信[6] [7],多跳可以引起传感器节点之间严重干扰。一个新的路由称为“矢量为基础的转移” (VBF)缓解了这个问题 [8]。 VBF本质上是一种基于位置的路由选择方法:节点紧邻“矢量”转发源宿信息。 通过这种方式,只有一小部分的节点参与路由。另一种解决办法是,每一个传感器分簇通信应该直接指向簇头和内部分簇通信应协调由簇头,以最大限度地提高带宽利用率以往的研究水下通信经常使用时间计划调度方法[9],[10],这可能是适合的小型网络简单。然而,扁平架构还可能限制网络的规模。特别是由于传播延迟声汇简单的时间调度算法方案并不适合较大的水下网络[11]。在文献[11]中,Salva-Garau 和 Stojanovic建议聚类水声载体网络的方案,这组相邻载体进入分簇,和使用的TDMA(时分多址)内每个群集。在分簇管理的干扰是分配到相邻的簇不同的扩频码,同时可扩展性是通过在空间复用码。网络运行开始初始化阶段,并移动到不断维修期间而流动性管理。他们还利用仿真分析,以获得最佳簇大小和传输功率为一种具有一定的载体密度网络。[12]提出了平台,同时使用光学和声汇水下通信。虽然光通信可以达到更高的数据速率,它的应用仅限于短距离点至点通信。该平台也使得移动使用data muling,,这对于大批量的理想延迟容许的应用程序。
基于Android的智能家居APP的设计与实现_过程检查记录表 - 南京邮电大学通达学院毕业设计(论文)过程检查记录 题目基于Android的智能家居APP的设计与实现 学生姓名班级学号专业计算机科学与技术指导教师姓名指导教师职称副教授日期指导记录 16.1.8-16.1.23 任务计划: 1. 了解课题,查找相关资料 2. 检索中文数据库 完成情况: 1. 首先,通过阅读李涛的《基于Android的智能家居APP的设计与实现》对于这个题目有了一个整体的了解。 2. 然后利用CNKI检索了城市交通与Android相关的学术期刊。下载与课题相关的期刊、论文,阅读资料并理解课题。 指导教师批阅意见: 指导教师签字: 16.1.24-16.2.8 任务计划: 1. 阅读《疯狂Android讲义》对安卓UI设计的技术做一定的了解 2. 了解智能家居App的发展趋势和前景。 完成情况: 1. 通过相关理论学习,初步掌握安卓UI设计。 2. 通过资料了解了智能家居APP的前景。 指导教师批阅意见: 指导教师签字: 16.2.9-16.2.24 任务计划: 1.理清自己题目的思路。 2.完成开题报告 完成情况: 1.在之前理论知识的积累上,对课题任务有了进一步的了解,完成开题报告初稿。 指导教师批阅意见: 指导教师签字: 16.2.25-16.3.4 任务计划: 1.提交开题报告 2.利用CNKI检索与课题相关的外文资料
完成情况: 1.经过老师的指导,不断修改,完成开题报告最终稿,经过审核,打印提交给老师。 2.搜索数据库,查找符合要求的外文资料。 指导教师批阅意见: 指导教师签字: 16.3.5-16.3.20 任务计划: 1.对外文资料开始进行翻译 2.查找Android开发的相关书籍 完成情况: 1.本周开始对外文资料进行翻译,外文资料专业性很强,下手有些困难,但是,仍继续尽全力去做。 2.阅读了《第一行代码》、《疯狂Android讲义》等入门级书籍,对于安卓开发整体有了较完整的理解。 指导教师批阅意见: 指导教师签字: 16.3.21-16.3.31 任务计划: 1.完成APP的需求分析。 2.进行界面设计。 完成情况: 1.将毕业设计的要求进行分析理解,并通过研究其他同类APP明白自己APP所要实现的功能。 2.根据现在世面上的智能家居应用,进行模仿并根据需求完成UI设计。 指导教师批阅意见: 指导教师签字: 16.4.1-16.4.11 任务计划: 1. 进行管理员模块的功能设计。 2. 编写管理员模块。 完成情况: 1. 根据需求分析,进行功能的分割,确定管理员模块的功能。 2. 根据的管理员模块的功能,进行代码编写,完成管理员模块的功能。 指导教师批阅意见: 指导教师签字: 16.4.12-16.4.22 任务计划: 1. 进行用户端的功能设计。 2. 编写用户端的实现功能代码。
基于安卓的大学生记账管理系统的设计与实现-外文翻译译文和原文 基于安卓的大学生记账管理系统的设计与实现-外文翻译译 文和原文 毕业设计外文文献翻译 院系: 计算机与信息工程学院年级专业: 12软件工程(金融服务)2 姓名: 学号: An Analysis of Personal Financial Lit Among 附件: College Students Among College Students 指导老师评语: 指导教师签名: 年月日 大学生个人理财知识分析 大学生个人理财知识分析 这项研究调查了924名大学生审视自己的个人财务知识;调查了学生的财务知识与学生的特性之间的关系,和理财知识对学生的意见和决定的影响。结果表明,参与者回答问题的正确性为53,。所调查的人包括非经营性专业、妇女、在下层阶级行列的学生、30岁以下并且很少有工作经验的人、知识水平较低者。懂得较少财务知识的学生往往有错误的观点和作出不正确的决定。结论是:大学生不太了解个人理财。低的财务知识水平会限制他们做出明智决策的能力。 I. 介绍 管理个人财务的能力在当今世界已经变得越来越重要。人们必须计划为他们的退休和子女的教育长期投资。他们还必须决定短期储蓄和借贷一个假期,向下支付
房子,汽车贷款和其他大件物品。此外,他们还必须管理自己的医疗保险和人寿保险的需求。 不幸的是,研究表明,美国人有个人认识不足财政(EBRI,1995年,毕马威会计师事务所,1995年; PSRA,1996年,1997年,奥本海默基金/女孩公司,1997年;先锋集团/货币杂志,1997年)。他们未能作出正确决策因为他们还没有收到良好的个人理财教育(HSR,1993年,希拉,1993;奥尼尔,1993年)。 这项研究有三个目的。首先,它提供大学生个人理财素养的证据。其次,它会检查为什么一些大学生相对比别人有更多的理财知识。该分析可以帮助我们识别出大学生所拥有决定能力水平的因素。第三个目的是检查学生的知识如何影响他/她的意见和个人财务问题上的决定。 本文的结构安排如下。第二部分回顾了以前对金融知识的研究。第三部分是讨论方法。第四部分是提出的结果。第五部分总结全文。 II. 文献回顾 大部分以前的研究都是由在金融服务行业的从业人员进行。他们专注于资金管理和投资有关的问题。这个重点与会计师财务策划师的调查结果一致,说明这些问题是个人理财规划的重要领域(NEFE,1993-1996)。这些研究结果表明,参与的调查者回答调查问题的正确率普遍只有不到60,。 此前高中生的研究均发现,他们在个人财务的基本知识上未受到良好的教育,并且知识贫乏(巴肯,1967; CFAJAMEX,1991; HSR,1993; Langrehr,1979; NAEP,1979)。在对来自63所学校的1509高中学生的调查研究中,曼德尔(1997)报告了一个平均正确的比分,57,在收入、资金管理、储蓄、投资和消费等领域。他的结论是:学生们离开学校时没有做出关键决策影响他们生活的能力。 难道成年人对个人理财和投资有一个很好的控制,几个结果研究表明,他们并 1
外文文献翻译封面格式及要求(模版) 毕业论文外文文献翻译 院 年级专业: 2009 级XXXXXXXXXXX 姓 名:学 号:附 件: 备注:(注意:备注页这一整页的内容都不需要打印,看懂了即可)
1.从所引用的与毕业设计(论文)内容相近的外文文献中选择一篇或一部分进行翻译(不少于3000实词); 2.外文文献翻译的装订分两部分,第一部分为外文文献;第二部分为该外文文献的中文翻译,两部分之间用分页符隔开。也就是说,第一外文文献部分结束后,使用分页符,另起一页开始翻译。 3.格式方面,外文文献的格式,除了字体统一使用Times new roman 之外,其他所有都跟中文论文的格式一样。中文翻译的格式,跟中文论文的格式一样。 (注意:备注页这一整页的内容都不需要打印,看懂了即可,定稿后,请删除本页.) 范文如下:注意,下面内容每一部份均已用分页符分开了,如果用本模板,请将每一模块单独删除,直接套用到每一模板里面,不要将全部内容一次性删除. 【Abstract】This paper has a systematic analysis on outside Marco-environment of herbal tea beverage industry and major competitors of brands inside the herbal tea market. Based on
the theoretic framework, this paper takes WONG LO KAT and JIA DUO BAO herbal tea as an example, and researches the strategy on brand positioning and relevant marketing mix of it. Through analysis on the prevention sense of WONG LO KAT herbal tea, it was positioned the beverage that can prevent excessive internal heat in body, a new category divided from the beverage market. the process of brand positioning of it in Consumers brain was finished. Based on this positioning strategy, WONG LO KAT reasonably organized and arranged its product strategy, price strategy, distribution strategy and promotion strategy, which not only served for and further consolidated the position of preventing excessive internal heat in body, but also elevated the value of brand. The JDB and WONG LO KAT market competition brings us enlightenment. Reference the successful experience from the JDB and lessons from the failure of the WONG LO KAT.,Times New Roman. 【Key Words】Brand positioning; Marketing mix; Positioning Strategy; enlightenment, lessons;ABC (本页为英文文献摘要,关键词两项一起单独一页,字体为:Times New Roman,小四号,1.5倍行距)
基于Android开发的外文文献 Android Android, as a system, is a Java-based operating system that runs on the Linux 2、6 kernel、The system is very lightweight and full featured、Android applications are developed using Java and can be ported rather easily to the new platform、If you have not yet downloaded Java or are unsure about which version you need, I detail the installation of the development environment in Chapter 2、Other features of Android include an accelerated 3-D graphics engine (based on hardware support), database support powered by SQLite, and an integrated web browser、 If you are familiar with Java programming or are an OOP developer of any sort, you are likely used to programmatic user interface (UI) development—that is, UI placement which is handled directly within the program code、Android, while recognizing and allowing for programmatic UI development, also supports the newer, XML-based UI layout、XML UI layout is a fairly new concept to the average desktop developer、I will cover both the XML UI layout and the programmatic UI development in the supporting chapters of this book、 One of the more exciting and compelling features of Android is that, because of its architecture, third-party applications—including those that are “home grown”—are executed with the same system priority as those that are bundled with the core system、This is a major departure from most systems, which give embedded system apps a greater execution priority than the thread priority available to apps created by third-party developers、Also, each application is executed within its own thread using a very lightweight virtual machine、 Aside from the very generous SDK and the well-formed libraries that are available to us to develop with, the most exciting feature for Android developers is that we now have access to anything the operating system has access to、In other words, if you want to create an application that dials the phone, you have access to the phone’s dialer; if you want to create an application that utilizes the phone’s internal
Android系统外文翻译 附录1:外文原文 What Is Android? It can be said that, for a while, traditional desktop application developers have beenspoiled. This is not to say that traditional desktop application development is easier thanother forms of development. However, as traditional desktop application developers, wehave had the ability to create almost any kind of application we can imagine. I amincluding myself in this grouping because I got my start in desktop programming. One aspect that has made desktop programming more accessible is that we havehad the ability to interact with the desktop operating system, and thus interact with anyunderlying hardware, pretty freely (or at least with minimal exceptions). This kind offreedom to program independently, however, has never really been available to thesmall group of programmers who dared to venture into the murky waters of cell phonedevelopment. For a long time, cell phone developers comprised a small sect of a slightly larger group of developers known as embedded device developers. Seen as a less “glamorous” sibling to desktop—and later web—development, embedded device development typically got the proverbial short end of the stick as far as hardware and operating system features, because embedded device manufacturers were notoriously stingy on feature support. Embedded device manufacturers typically needed to guard their hardware secrets closely, so they gave embedded device developers few libraries to call when trying to interact with a specific device. Embedded devices differ from desktops in that an embedded device is typically a “computer on a chip.” For example, consider your standard television remote control; it is not really seen as an overwhelming achievement of technological complexity. When any button is pressed, a chip interprets the signal in a way that has been programmed into the device. This allows the device to know what to expect from the input device (key pad), and how to respond to those commands (for example, turn on the television). This is a simple form of embedded device programming. However, believe it or not, simple devices such as these are definitely related to the roots of early cell phone devices and development. Most embedded devices ran (and in some cases still run) proprietary operating systems. The reason for choosing to create a proprietary operating system rather than use any consumer system was really a product of necessity. Simple devices did not need very robust and optimized operating systems. As a product of device evolution, many of the more complex embedded devices, such as early PDAs, household security systems, and GPSs, moved to somewhat standardized operating system platforms about five years ago. Small-footprint