智能散热器
散热器的温度控制与舒适度保障技术

散热器的温度控制与舒适度保障技术随着人们生活水平的提高,舒适度成为家庭居住和办公环境中不可或缺的一部分。
而散热器作为常见的供暖设备之一,在确保室内温暖的同时,温度的控制和舒适度的保障成为用户关注的重要问题。
本文将介绍散热器的温度控制与舒适度保障技术。
散热器的温度控制是指通过调节散热器的工作状态,控制室内温度在用户可接受范围内。
传统的散热器一般采用阀门或开关控制,通过调节水流量或开启关闭来控制散热器的热量输出。
然而,这种方式存在一定的局限性,无法精准控制散热器的温度。
近年来,随着智能技术的发展,一些新型散热器开始应用智能温控技术,能够实现更加精确的温度控制。
智能散热器采用温湿度传感器等装置感知室内环境,根据用户设定的温度要求,自动调节散热器的工作状态,以达到舒适的温度。
智能散热器不仅可以精确控制室内的温度,还可以实现多种功能。
一方面,智能散热器可以通过与手机等移动设备连接,用户可以通过手机APP远程控制散热器的工作状态,方便用户随时随地控制室内温度。
另一方面,一些智能散热器还具备学习功能,能够通过学习用户的习惯和喜好,自动调节散热器的工作模式,提供个性化的舒适度保障。
除了温度控制,散热器的舒适度保障也是用户非常关心的问题。
散热器使用过程中产生的噪音、气味和空气流动等因素都会影响用户的舒适感。
为了保障舒适度,散热器的设计应注重降低噪音和消除异味。
一些先进的散热器采用静音设计和净化功能,通过优化内部结构和增加过滤装置来降低噪音和净化空气,提供更加舒适的使用体验。
此外,散热器的热量分布均匀性也是影响舒适度的重要因素。
传统的散热器在热量输出方面存在局限性,会导致热量分布不均匀,局部温度过高或过低。
为了解决这个问题,一些新型散热器采用了更加先进的热传导技术,如铝合金导热片、多节片散热器等。
这些新技术能够提高散热器的热传导效率,实现更加均匀的热量分布,进一步提升舒适度。
除了温度控制与舒适度保障,散热器在节能环保方面也有很大的发展空间。
eQ-3 CC-RT-M-BLE-EQ 蓝牙智能散热器恒温器使用说明书

Operating ManualBLUETOOTH SmartRadiator ThermostatUKCC-RT-M-BLE-EQDocumentation © 2018 eQ-3 AG, GermanyAll rights reserved.Translation from the original version in German.153855Version 1.0 (05/2018)1. Information about this manualPlease read this manual completely and carefully before starting touse the device. The manual contains important information about theintended use of the device. Especially observe the safety notes. Keepthe manual for later consultation. If you hand over the device to otherpersons for use, please hand over this manual as well.Symbols used:Attention! This indicates a hazard.Note. This section contains important additional information.2. Package contents1x radiator thermostat1x adapter Danfoss RA1x adapter Danfoss RAV1x spigot extension Danfoss RAV1x adapter Danfoss RAVL1x support ring1x nut M41x cylinder head screw M4 x 12 mm2x 1.5 V mignon/LR6/AA2x operating manual (English and German)3. Device overviewA Bar chart of programmed heating phasesB Eco/comfort temperature (), open-window function(), manual mode (Manu), automatic mode (Auto)C Holiday function (), week day, empty battery symbol()D Mode/Menu button: Switch between auto mode, manu modeand holiday function (press button briefly); open setup menu(press button for at least 3 seconds)E Control wheel: Change settings, e.g. temperature (turn the con-trol wheel), activate the boost function and confirm/save set-tings in the menu (press control wheel briefly)F Union nut for fitting on the heating valveG Display of temperature, time and date, menu options, functionsH button: Switch between eco and comforttemperature4. FunctionThe electric BLUETOOTH® Smart Radiator Thermostat offers individualcontrol of the room temperature from a user-friendly and intuitive app.The app “calor BT” is available for free for iOS and Android smart-phones. The radiator thermostat enables the regulation of single ra-diators or the room temperature.Thanks to pre-programmed or individually tailored heating and cool-ing phases, the desired temperature can be comfortably adjusted.The radiator thermostat fits to all common radiator valves and is easy tomount - without having to drain any water or intervene in the heatingsystem. The additional boost function enables quick, short-term radia-tor heating by opening the valve for 5 minutes. This immediately bringsa comfortable warming to the room. Thanks to the automatic “openwindow detection”, additional energy can be saved during ventilation.5. Intended useThe radiator thermostat is used to control a conventional radiatorvalve. Only operate the device in inside rooms and avoid the influ-ence of moisture, dust and sunlight or external heat radiation. Usingthe device for any purpose other than that described in this operatingmanual does not fall within the scope of intended use and shall inval-idate any warranty or liability. This also applies to any conversion ormodification work.The device is intended for private use only.eQ-3 AG hereby declares that this device complies with the essentialrequirements and other relevant regulations of Directive 1999/5/EC.You can find the full declaration of conformity at www.eQ-3.de.6. Safety instructionsThe device is not a toy; do not allow children to play with it.Do not leave packaging material lying around. It can bed a n-gerous in the hands of a child.Do not open the device: it does not contain any componentsthat need to be serviced by the user. In the event of failure,please have the device checked by an expert.7. Disposal instructionsDo not dispose of the device with regular domestic waste!Electronic equipment must be disposed of at local collectionpoints for waste electronic equipment in compliance with theWaste Electrical and Electronic Equipment Directive.The CE sign is a free trading sign addressed exclusively to theauthorities and does not include any warranty of any proper-ties.Used batteries should not be disposed of with regular do-mestic waste! Instead, take them to your local batterydisposal point.8. Inserting (replacing) batteriesUpon delivery, the batteries are already inserted with an insu-lation strip. For the device to function, please remove this strip.• Press the battery compartment cover on both sides with your fin-gers and pull it away from the device body.• Insert 2 new LR6/mignon/AA (1.5 V) batteries in the batterycompartment, making sure they are the right way round.• Reattach the battery compartment cover and latch it into place.The service life of new alkaline batteries is approximately 2 years.A battery symbol () on the display indicates that the batteriesneed to be replaced. After removing the empty batteries, waitapprox. 1 minute before inserting the new ones. Operation withrechargeable batteries is not possible.Never recharge standard batteries. Doing so will present a riskof explosion. Do not throw the batteries into a fire. Do notshort-circuit batteries.9. Set date and timeAfter inserting batteries, the date and time is automatically request-ed after a brief display of the firmware version number and short mo-tor run (“InS”).• Set the year, month, day, hour and minute with the control wheeland confirm by pressing the control wheel briefly (E).You can adjust the time and date in the menu under “dAt”.The motor moves the control pin backwards during the setting ofdate and time.• If “InS” and the rotating activity symbol “” are displayed, themotor still reverses. When only “InS” is shown in the display, theradiator thermostat can be installed on the valve.The week program and other settings can be adjusted beforeinstallation. Press the Mode/Menu button for this, while “InS”is shown in the display. You will find further information in chap-ter “13. Operation and configuration”.• After the programming has been completed, “InS” is shown againin the display and installation can take place.The union nut attached to the radiator thermostat can be used uni-versally and without accessories for valves of the most popular man-ufacturers with a thread size of M30 x 1.5 mm.• Rotate the thermostat dial to the maximum value (anti-clockwise).The thermostat dial then no longer presses against the valve spin-dle, making it easier to remove.• Remove the mechanical thermostat head. If required, place thesupplied support ring or adapter first.• Attach the radiator thermostat to the valve.10.1 Adapters for DanfossBy means of the adapters included in the package, the device can beinstalled on radiator valves of types Danfoss RA, RAV and RAVL.The assignment of the suitable adapter ring to the relevant valve canbe found in the following illustrations.The Danfoss valve bodies have elongated notches (I) around their cir-cumference (see arrow), which also ensure that the adapter is properlyseated when it snaps on.If required, place the provided support ring (L) into the flangebefore installing the radiator thermostat.During installation, please ensure that the pins inside the adapt-er (J) are lined up with the notches (I) on the valve. Ensure thatthe adapter is properly clipped on.Take care during installation that you do not trap your fingersbetween the two halves of the adapter!The RA and RAV adapters have been manufactured with pre-tensionin order to provide a better seat. Use a screwdriver during installationif necessary, and bend it open slightly in the vicinity of the screw. Af-ter clipping onto the valve body, please attach the adapter using theprovided screw and nut.The spigot extension (K) must be fitted to the valve pin of RAV valvesprior to installation.IJKThe adapter RAVL does not have to be screwed.I10.2 Support ringThe valves from different manufacturers may have tolerance fluctu-ations that make the radiator thermostat more loosely seated on thevalve. In this case, the provided support ring (L) should be placed intothe flange before installing the radiator thermostat.11. Adaption runAfter inserting batteries and mounting on the valve an adapting run(“AdA”) is performed to adapt to the valve.• As soon as the radiator thermostat has been mounted to the valve,press the control wheel when “InS” is displayed.operation is possible.If the adaption run has been initiated prior to installing or if anerror message (F1, F2, F3) is displayed, press the Boost button;the motor reverses to the “InS” position.EN12. Display content in normal modeSwitching time periods, operating mode, set-point temperature and weekday are displayed in normal mode. The bars for switching time periods of the week program are displayed for every second time interval.13. Operation and configurationAfter the radiator thermostat has been mounted and set up, the device can be individually operated and configured. Operation and configu-ration can be performed either via BLUETOOTH ® with the app “calor BT” or directly on the device.13.1 Operation and configuration via appTo control the device via app, please proceed as follows:• Download the app “calor BT” from the iOS or Android store andinstall the app on your smartphone.• Follow the instructions in the app.Afterwards, you can control and configure the radiator thermostat via the app.13.2 Operation and configuration on the deviceOperation and configuration can be performed directly on the de-vice. Therefore, please proceed as described in the following sections.13.2.1 Setting the program for the week (Pro)For each day, up to 3 heating phases (7 change settings) can be set sep-arately. The programming is carried out for the selected days, where-by temperature settings have to be set for the entire period between 00:00 and 23:59.The device is pre-programmed with a schedule for the week (see sec-tion 11.1). To set your own schedule, please follow these instructions:• Press the Mode/Menu button for at least 3 seconds. The displaywill show “Pro”. Confirm by pressing the control wheel briefly.• “dAy” appears on the display. You can use the control wheel toselect a single day of the week, all weekdays, the weekend, or the entire week.• Confirm by pressing the control wheel briefly.• The first switching time point is displayed (00:00). This cannot bechanged. The heating times are displayed as bars. • Confirm by pressing the control wheel briefly.• Set the temperature which is desired from 0:00. • Confirm by pressing the control wheel briefly.• The next switching time point is displayed. You can adjust this byrotating the control wheel.• Finally set the temperature which should prevail from the select-ed time.• You can repeat this procedure until all the other desired temper-atures for the time period from 0:00 to 23:59 have been stored.• If all 7 switching time points have been allocated, 23:59 is displayedas the final switching point to be confirmed.In auto mode, the temperature can be changed at any time using the control wheel. The modified temperature will then remain the same until the next point at which the program changes.13.2.2 Setting date and time (dAt)Date and time can be adjusted via the menu at any time.• Press the Mode/Menu button for at least 3 seconds.• Select the menu item “dAT” with the control wheel.• Set the year, month, day, hour and minute with the control wheeland confirm by pressing the control wheel briefly.13.2.3 Switching between summer and winter time (dSt)The automatic switching between summer and winter (and vice versa) on the agreed European date occures in the early hours of the Sunday. The automatic switching is activated in the factory settings. It can be manually deactivated as below:• Press the Mode/Menu button for at least 3 seconds.• Select the menu item “dSt” with the control wheel.• Confirm by pressing the control wheel briefly.• The display will show “OFF” to deactivate the function or “On” toactivate the function.• Confirm by pressing the control wheel briefly.13.2.4 Open-window function (AEr)With a rapidly reducing temperature, the radiator thermostat automat-ically detects that a room is being ventilated. In order to save heating costs, the temperature is then reduced for a certain period of time (15 minutes, set at the factory). Whilst this function is active, the “window open” symbol ( ) appears on the display.• Press the Mode/Menu button for at least 3 seconds.• Select the menu item “AEr” with the control wheel and confirmby pressing the control wheel briefly.• The temperature and time can be set with the control wheel. Thefunction can be deactivated by selecting “0” for the time.13.2.5 Setting offset temperature (tOF)As the temperature is measured on the radiator, the temperature dis-tribution can vary throughout a room. To adjust this, a temperature offset of up to ±3.5 °C can be set. If a nominal temperature of e.g. 20 °C is set but the room presents with only 18 °C, an offset of -2.0 °C needs to be set.• Press the Mode/Menu button for at least 3 seconds.• Select the menu item “tOF” with the control wheel and confirmby pressing the control wheel briefly.• Turn the control wheel for as long as necessary until the desiredtemperature appears.• Confirm by pressing the control wheel briefly.13.2.6 Activate/deactivate BLUETOOTH ® (bLE)The BLUETOOTH ® function of the radiator thermostat can be activat-ed or deactivated manually.• Press the Mode/Menu button for at least 3 seconds.• Select the menu item “bLE” with the control wheel and confirmby pressing the control wheel briefly.• The display will show “OFF” to deactivate the function or “On” toactivate the function.• Confirm by pressing the control wheel briefly.13.2.7 Restore factory settings (rES)The factory settings of the radiator thermostat can be restored man-ually. If you do this, you will lose all your settings.• Press the Mode/Menu button for at least 3 seconds.• Select the menu item “rES” with the control wheel and confirm bypressing the control wheel briefly.• “COnF” then appears in the display.• Confirm by pressing the control wheel briefly.13.2.8 Boost functionIf, for example, you arrive home earlier than usual, the boost function will help you to heat the room up quickly. When activating the boost function, the heating valve is immediately opened to 80 % for 5 min-utes. The heating of a room takes longer than 5 minutes, but the heat given off by the radiator can be felt immediately.• Press the control wheel briefly to activate the boost button.• The remaining time for the function will be counted down in sec-onds (“b300” to “b000”).• After these 5 minutes have elapsed, the actuator changes to themode which was previously active (auto/manu) with the previous-ly set temperature.• The function can be deactivated prematurely at any time by press-ing the control wheel again.The boost function will not have an immediate effect if the ra-diator is covered or concealed (e.g. by a sofa). The open-window function is deactivated while the boost function is active.13.2.9 Setting the holiday functionIf you want to maintain a fixed temperature for a certain period, e.g. during your holidays or a party, the holiday function can be used.• Briefly press the Mode/Menu button repeatedly, until the suitcasesymbol () appears in the display.• Change the time until which the temperature shall remain with thecontrol wheel and confirm by pressing the control wheel briefly.• Then set the date and confirm by pressing the control wheel briefly.• Set the temperature and confirm by pressing the control wheelbriefly.The set temperature will remain until the set end time. Afterwards, the radiator thermostat will switch back to auto mode.13.2.10 Comfort and eco temperatureVia the comfort and eco temperature button () you can change be-tween these two temperatures. The factory setting for the comfort temperature is 21.0 °C and the eco temperature 17.0 °C.•Press and hold the comfort/eco temperature button () for atleast 3 seconds.• The sun symbol () and the currently stored comfort tempera-ture appear in the display.• Change the temperature with the control wheel and confirm bypressing the control wheel briefly.•The moon symbol () and the currently stored eco temperatureappear in the display.• Change the temperature with the control wheel and confirm bypressing the control wheel briefly.Even in auto mode, the temperature can be changed at any time using the button. It will then remain the same until the next point at which the program changes.13.2.11 Activate heating pause (battery saving)Battery life can be prolonged by switching the heating off in summer. To achieve this, the valve is opened fully. The calcification protectioncontinues to run.In order to save on battery life, you can also deactivate the BLUE-TOOTH ® function (see section “13.2.6 Activate/deactivate Blue-tooth ® (bLE)”).To activate the heating pause, proceed as follows:• Turn the control wheel in manu mode (Manu ) to the right until“On” appears in the display.• To end it, exit the manu mode (Manu ) or turn the selector dialto the left.13.2.12 Set frost protection modeIf a room is not to be heated, the valve can be closed. The valve is only opened if there is a risk of frost. The calcification protection contin-ues to run.• Turn the control wheel in manu mode (Manu ) to the left until “OFF”appears in the display.• To end it, exit the manu mode (Manu ) or turn the control wheelto the right.13.2.13 Child safeguard/operating lock The operation of the device can be locked.• To activate/deactivate the operating lock, press the Mode/Menuand button at the same time.• After it has been successfully activated, “LOC” appears in the display.• To deactivate the operating lock, press both buttons again.14. Troubleshooting and maintenanceError code on thedisplay ProblemSolution Battery symbol()Battery output too lowReplace batteries F1Valve drive sluggish Check installation,check the heating valveF2Actuating rangetoo wide Please checkmounting of the radiatorthermostat F3Adjustment rangetoo smallCheck the heating valveThe radiator thermostat performs a routine descaling run once a week on Saturday at 12:00 to protect against calcification of the valve. During this, “CAL” appears in the display.15. Technical dataDevice short description: CC-RT-M-BLE-EQ Supply voltage: 2x 1.5 V LR6/mignon/AA Current consumption: 100 mA max.Battery life: 2 years (typ.)Degree of protection: IP20Degree of pollution: 2Ambient temperature: 5 to 35 °C Surface temperature: 90 °C (at the radiator)Display: LCD Connection: M30 x 1.5 mm Method of operation: Type 1Linear travel: 4.3 mm Dimensions (W x H x D): 58 x 63 x 122 mm Weight: 176 g (incl. batteries)Radio frequency: 2.402 GHz - 2.480 GHz Open area RF range: 10 m (typ.)Subject to technical changes.The BLUETOOTH ® word mark and logos are registered trademarks owned by Bluetooth SIG, Inc. and any use of such marks by eQ-3 AG is under license. Oth-er trademarks and trade names are those of their respective owners.。
2024年手机散热器市场规模分析
2024年手机散热器市场规模分析引言背景介绍手机作为现代社会人们生活中不可或缺的工具,逐渐成为人们日常活动的重要组成部分。
随着手机的功能越来越强大,使用手机时产生的热量也越来越高,使得手机散热问题成为用户关注的焦点。
手机散热器因其能有效解决手机散热问题而逐渐兴起。
本文将对手机散热器市场规模进行分析。
发展趋势手机散热器市场应运而生,是因为随着智能手机的普及,用户对于手机散热问题的关注度日益增加。
热管理技术的进步使得手机散热器得以实现更高效的散热效果,进一步激发了用户对于手机散热器的需求。
此外,游戏、视频等高性能应用在手机上的广泛使用也加剧了手机散热问题,促使用户寻找解决方案,进一步推动手机散热器市场的发展。
市场规模分析手机散热器市场规模的分析需要从多个方面考虑。
市场份额目前,手机散热器市场中存在着多个竞争对手。
根据市场调研数据,市场上的手机散热器品牌众多,包括A、B、C等多个品牌。
其中,A品牌占据了市场的40%份额,B品牌占据了30%份额,C品牌占据了20%份额,其他品牌共占据了10%份额。
从市场份额来看,手机散热器市场表现出较高的竞争激烈程度。
市场增速手机散热器市场的增速可通过分析销售数据得出。
根据数据显示,过去几年中,手机散热器市场呈现稳步增长的趋势。
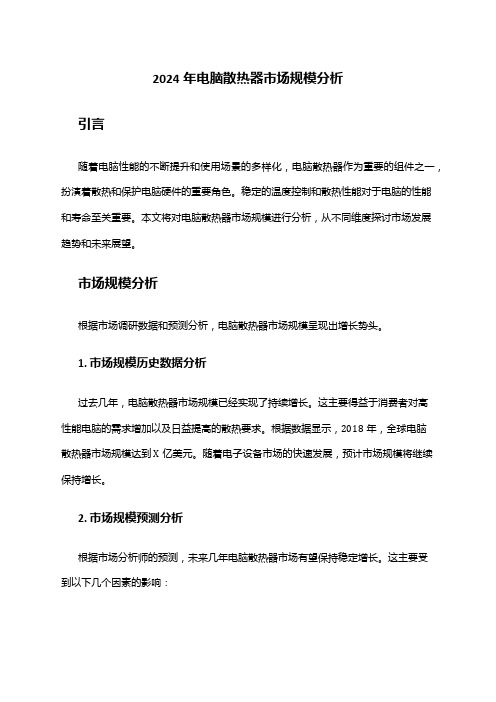
其中,2018年市场规模为X万美元,2019年增长至Y万美元,2020年达到Z万美元。
从这些数据可以看出,手机散热器市场在过去几年中保持了较高的增速。
增长预测根据市场专家对未来手机散热器市场的预测,预计市场将继续保持增长的趋势。
这主要归因于以下两方面原因:一方面,智能手机普及率将继续提高,用户对手机散热问题的关注度依然存在;另一方面,未来高性能应用的兴起将进一步增加用户对手机散热器的需求。
据预测,手机散热器市场规模有望在未来几年继续扩大,达到A万美元。
结论手机散热器市场规模的分析显示,手机散热器作为解决手机散热问题的关键产品,市场前景广阔。
市场上多个品牌的竞争激烈程度较高,市场规模呈现出较快增长的趋势。
散热器工作原理

散热器工作原理散热器是一种用于散热的设备,广泛应用于电子设备、汽车、空调等领域。
它的工作原理是通过传导、对流和辐射三种方式将热量从热源中转移出来,从而降低热源温度,确保设备正常运行。
1. 传导散热:传导是指热量通过物质的直接接触传递。
散热器通常由导热材料制成,如铝、铜等金属。
这些金属具有良好的导热性能,能够迅速将热量从热源传导到散热器表面。
散热器的设计通常采用一系列散热片或者散热鳍片,增加表面积以提高传导散热效果。
2. 对流散热:对流是指通过流体(如空气)的流动来传递热量。
散热器通常通过风扇或者风道等装置提供空气流动,增加对流散热效果。
当热空气接触到散热器表面时,热量会通过对流传递给空气,同时冷空气被吸入,形成循环流动,进一步提高散热效率。
3. 辐射散热:辐射是指热量通过电磁波的辐射传递。
散热器表面通常采用黑色或者银色涂层,这些颜色能够更好地吸收和辐射热量。
当热源温度高于周围环境温度时,散热器会通过辐射将热量传递给周围环境,从而降低热源温度。
散热器的工作原理可以综合利用传导、对流和辐射三种方式,以提高散热效率。
具体来说,热源通过传导将热量传递给散热器表面,然后通过对流将热量传递给空气,最后通过辐射将热量传递给周围环境。
这样,散热器能够快速将热量从热源中转移出来,保持设备的正常工作温度。
除了工作原理,散热器的设计也对散热效果有重要影响。
散热器的散热片或者散热鳍片的数量和形状、散热器表面积、风扇的风量和转速等因素都会影响散热效率。
因此,在设计散热器时,需要根据具体的应用场景和散热需求进行合理的选择和设计。
总结一下,散热器的工作原理是通过传导、对流和辐射三种方式将热量从热源中转移出来,降低热源温度。
传导散热通过导热材料将热量传递到散热器表面,对流散热通过空气流动将热量传递给空气,辐射散热通过辐射将热量传递给周围环境。
散热器的设计也对散热效果有影响,需要根据具体需求进行合理选择和设计。
手机智能散热器设计

手机智能散热器设计作者:张翰林隋晓莹来源:《工业设计》2021年第08期关键词:手机;智能;散热器设计1 研究背景在手机使用过程中,手机机体发热是大多数手机使用者需要面对的共同问题。
智能手机包含了许多能产生热量的部件,以及因为受热导致性能与使用方法不良而造成部件损坏。
其中,处理器是产生热量的主要部件,其他能够产生大量热量的部件还有锂离子电池、图像传感器、光源等。
手机发热的原因大多是手机通话时间过长、下载文件、运行游戏软件或者充电时产生大量热量等。
而手机发热则会导致手机信号不稳定、运行卡顿、电路老化加快、电池续航减弱、使用寿命缩短等问题发生,造成使用者安全性和舒适性的降低,以及维修费用上的经济损失[1]。
近年来,随着智能科技的稳定发展,智能制造已经成为诸多产品研发的重点,推进智能制造技术可以有效地提高产品的工作效率,以及降低其运行成本,因此在手机散热器方面,可以寻找一些升级的突破口,比如运用特定的装置来实现智能控温[2]。
在智能手机进入5G 时代后,手机的使用频率增多,其配件必将承受更大的使用压力,因此我们应当尽力排除外界因素的影响,以延长手机的使用寿命[3-4]。
目前国内大部分的手机散热器都无法有效解决以上困难,且同时存在噪音大、体积大且散热效率低的问题,导致大多数散热器使用者不再购买手机散热器,使得手机散热器市场越来越局限。
2 研究意义研究的意义在于加快手机散热效率,减少手机散热器体积来保证产品的实用性与便携性,并结合相关的技术和知识,达到高温感应、及时降温的目的,给产品使用者带来良好的手机使用环境。
3 手机智能散热器设计思路手机智能散热器设计的思路是在散热器中加入无线温度传感装置,感知手机温度,并实时向手机传送温度数据,让使用者通过配套APP 实时监测到手机的温度,自行选择是否开启散热器的降温模式。
同时,将它的散热模式分为先后两个步骤:当散热器感应到手机温度上升到一定程度时,散热器先自动开启冷夹散热系统进行手机的高温冷却处理,在温度降低到设定的正常值后再启动离心风扇持续恒定的降温。
电脑CPU散热器推荐降温与静音的最佳选择

电脑CPU散热器推荐降温与静音的最佳选择随着电脑的性能不断提升和使用时间的增长,CPU散热成为了一项日益重要的任务。
高温不仅会影响电脑的性能,还会缩短其使用寿命。
同时,为了提供更好的使用体验,静音也成为了很多用户的需求。
本文将推荐一些降温与静音的最佳选项,帮助您选择适合自己的电脑CPU散热器。
一、空气冷却器1. Noctua NH-D15Noctua NH-D15是一款被广泛认可的CPU冷却器。
它采用了两个大型散热塔,六根热导管以及两个140mm PWM风扇。
这个设计不仅能够提供卓越的散热性能,还能使噪音水平保持在最低。
此外,该散热器还具有出色的可靠性和耐久性,是一款值得考虑的选择。
2. be quiet! Dark Rock Pro 4be quiet! Dark Rock Pro 4是一款高性能的CPU散热器,专为需要更好散热表现和较低噪音的用户设计。
它采用了两个倒“U”型散热塔以及两个135mm风扇。
该散热器具有强大的散热能力,能够有效降低CPU温度,并且运行时非常静音。
二、水冷散热器1. Corsair Hydro Series H115iCorsair Hydro Series H115i是一款高品质的水冷散热器。
它采用了240mm的散热器和两个SP140L PWM风扇。
水冷散热器相较于空气冷却器,具有更好的散热效果和更低的噪音水平。
该散热器适用于那些需要高性能散热,又追求静音的用户。
2. NZXT Kraken X62NZXT Kraken X62是一款受欢迎的高性能水冷散热器。
它采用了280mm的散热器和两个Aer P140 PWM风扇。
该散热器不仅散热效果卓越,还具有令人印象深刻的外观设计。
此外,它还具有软件控制功能,可以通过调整风扇速度和RGB灯效来满足用户的个性化需求。
三、气体冷却散热器1. Coolchip Technologies (Kinetic Cooling)Coolchip Technologies是一家提供领先高效冷却系统解决方案的公司。
2024年电脑散热器市场规模分析
2024年电脑散热器市场规模分析引言随着电脑性能的不断提升和使用场景的多样化,电脑散热器作为重要的组件之一,扮演着散热和保护电脑硬件的重要角色。
稳定的温度控制和散热性能对于电脑的性能和寿命至关重要。
本文将对电脑散热器市场规模进行分析,从不同维度探讨市场发展趋势和未来展望。
市场规模分析根据市场调研数据和预测分析,电脑散热器市场规模呈现出增长势头。
1. 市场规模历史数据分析过去几年,电脑散热器市场规模已经实现了持续增长。
这主要得益于消费者对高性能电脑的需求增加以及日益提高的散热要求。
根据数据显示,2018年,全球电脑散热器市场规模达到X亿美元。
随着电子设备市场的快速发展,预计市场规模将继续保持增长。
2. 市场规模预测分析根据市场分析师的预测,未来几年电脑散热器市场有望保持稳定增长。
这主要受到以下几个因素的影响:• 2.1 技术发展驱动随着电脑硬件技术的不断演进,电脑散热器的需求也不断提高。
高性能处理器、显卡等硬件设备对于散热要求越来越高,推动了电脑散热器市场的增长。
• 2.2 游戏市场的快速发展电脑游戏市场的高速发展使得越来越多的消费者对于电脑散热器的需求增加。
高品质游戏画面的渲染和高强度的游戏运行对于电脑散热的要求很高,这催生了电脑散热器市场的增长。
3. 市场规模增长驱动因素分析电脑散热器市场规模的增长主要受以下因素的驱动:• 3.1 技术进步和创新制冷技术、散热材料以及散热器设计方面的技术进步和创新推动了电脑散热器市场的增长。
新材料的应用以及更高效的散热器设计使得散热性能更加出色,满足了消费者对于高性能电脑散热的需求。
• 3.2 电子设备市场的快速增长随着消费者对电子设备的依赖度和需求增加,电脑散热器作为关键组件之一,其市场需求也随之增加。
市场竞争态势分析电脑散热器市场竞争激烈,主要竞争者包括知名硬件厂商和专业散热器制造商。
市场竞争主要体现在以下几个方面:1.产品技术和性能的竞争:各家厂商不断投入研发资源,提升散热器的制冷效果和散热性能,以满足消费者对高性能电脑散热的需求。
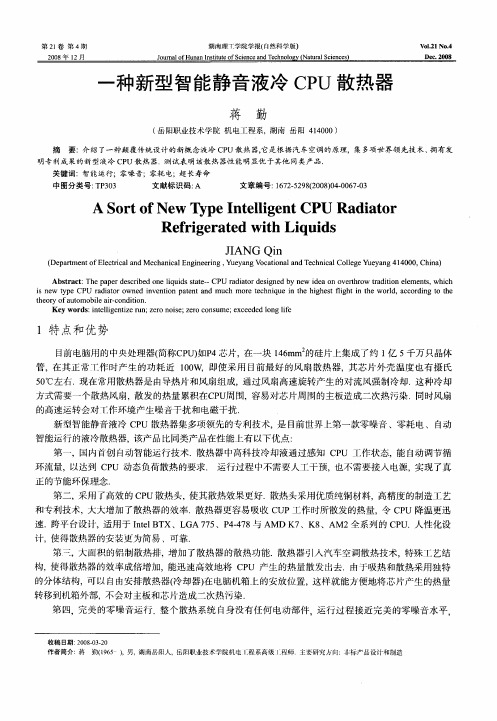
一种新型智能静音液冷CPU散热器
20 0 8年 1 2月
湖 南理 T学 院学 报( 自然 科 学版)
J u a f n n I si t fS i n ea dTe h olg Na u a ce c s o m l a t u eo ce c n c n o y( t r l in e o Hu n t S
5 ℃左右. 0 现在常用散热器是 由导热片和风扇组成, 通过风扇高速旋转产生 的对流风强制冷却. 这种冷却
方式 需要 一个 散热 风扇 ,散发 的 热量 累积 在C U 围,容易 对芯 片周 同的主 板造 成二 次热 污染 .同时风扇 P周
的高速运 转会对 T作 环境 产 生噪音 干扰 和 电磁 干扰 . 新 型 智能静 音液 冷 C U 散热 器集 多项 领先 的专 利技 术 , 目前 世界 上第 一 款零 噪音 、零耗 电 、 自动 P 是 智能运 行 的液冷 散热 器,该 产品 比同类 产 品在性 能 上有 以下 优点 : 第 一 ,国 内首 创 自动智 能运 行技 术 . 热 器 中高科 技冷 却液 通 过感 知 C U 二 作状 态 ,能 自动 调 节循 散 P r 环 流量 ,以达 到 C U 动态 负荷 散热 的要 求 . 运 行 过程 中不 需要 人工 干预 ,也不需 要 接入 电源 ,实现 了真 P
A o to w y eI t l g n S r f Ne T p n el e tCPU d a o i Ra i t r
Re rg r t d wih Li u d fie a e t q i s
JA I NG n Qi
( e a met f l tcl n ca i l n i eig, uy n o ai a adT cncl olg u y n 10 0 C ia D p r n Ee r a adMehnc gn r t o ci aE e n Y ea g ct n l n eh i l e e ag4 4 0 , hn ) V o aC e Y
- 1、下载文档前请自行甄别文档内容的完整性,平台不提供额外的编辑、内容补充、找答案等附加服务。
- 2、"仅部分预览"的文档,不可在线预览部分如存在完整性等问题,可反馈申请退款(可完整预览的文档不适用该条件!)。
- 3、如文档侵犯您的权益,请联系客服反馈,我们会尽快为您处理(人工客服工作时间:9:00-18:30)。
智能散热器
【教学内容分析】
散热器在日常生活中应用非常广泛,几乎所有涵盖了各个领域的机器设备。
本课让学生设计一个智能散热器模型。
【教学目标】
知识与技能:
1.掌握齿轮、传送带原理及简单应用
2.掌握机械模型的搭建
3.掌握用scratch编程与机械模型的调试
过程与方法:通过理解掌握齿轮、传送带的原理及应用基础上,设计出散热模型,让学生动手设计搭建出机械模型,再通过scratch编程实现散热器的功能。
情感态度与价值观:
1.学生在小组动手设计中培养团队合作精神。
2.主动展示分享成果,分享自己的设计思路,增强成就感。
【教学重难点】
重点:
1.掌握齿轮、传送带原理及简单应用。
2.掌握机械的搭建。
3.掌握散热器的机械原理及scratch编程。
难点:
1.齿轮、传送带的应用。
2.机械原理及机械的搭建。
【教学策略与方法】讲解法、演示法、实践法。
【教学资源及环境】计算机教室、Scratch程序、机械模型。
【教学套件】风扇、齿轮、传送带、双孔梁、主控板、转接模块、温度仪、电位器、电机,RJ25线,电源适配器、数据线。
【教学对象】五、六年级学生
【教学时间】3课时
【教学过程】
第一课时:
1.散热器原理讲解的功能介绍。
2.齿轮、传送带的原理讲解及搭建。
3.同学们考虑完成散热器模型所需要的机械模块。
第二课时:
散热器模型的搭建
第三课时:Scratch编程及散热器模型的控制与调试
知识拓展:如添加数码管的应用、增加设置风扇的方向等。
教学反思:。