Adobeacrobat使用数字签名说明
如何在 PDF 文件中添加日期和数字签名字段说明书
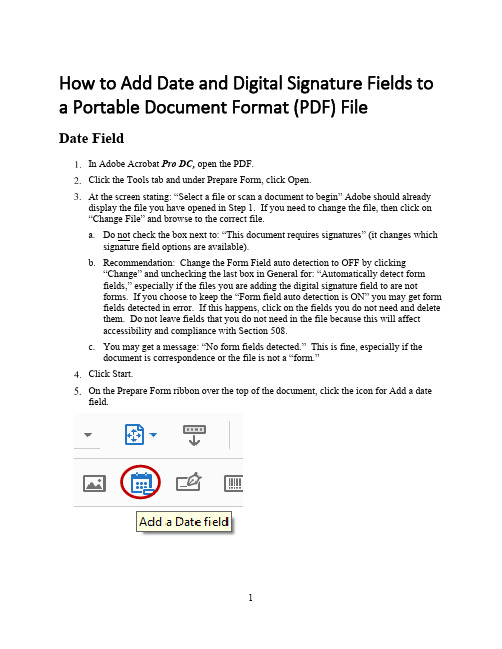
How to Add Date and Digital Signature Fields to a Portable Document Format (PDF) FileDate FieldIn Adobe Acrobat Pro DC, open the PDF.Click the Tools tab and under Prepare Form, click Open.At the screen stating: “Select a file or scan a document to begin” Adobe should alreadydisplay the file you have opened in Step 1. If you need to change the file, then click on“Change File” and browse to the correct file.a.Do not check the box next to: “This document requires signatures” (it changes whichsignature field options are available).b.Recommendation: Change the Form Field auto detection to OFF by clicking“Change” and unchecking the last box in General for: “Automatically detect formfields,” especially if the files you are adding the digital signature field to are notforms. If you choose to keep the “Form field auto detection is ON” you may get formfields detected in error. If this happens, click on the fields you do not need and deletethem. Do not leave fields that you do not need in the file because this will affectaccessibility and compliance with Section 508.c.You may get a message: “No form fields detected.” This is fine, especially if thedocument is correspondence or the file is not a “form.”Your mouse will turn into a light blue box for you to Left mouse click (and hold) > Draga box > Release mouse button (This is where you want the date stamp field in your document).Using the leader lines Release the date field under the letterhead even and centered on“OFFICE OF THE SECRETARY.” You will standardize the placement and size of box you create in Step 11.Within the Field Name properties box, enter “Date Signed” and check the box next to:“Required field.” In the bottom, right corner, click on the blue hyperlink “All Properties.”Click on the Appearance Tab and ensure the text font and font size matches your document.a.Note: Most DOI documents will be in Times New Roman and 12-point.Click on the Position Tab and ensure the Position Width is 2 inches and the PositionHeight is 0.25 inches. Click the box “Do not change height and width when changing the position.” This grays out the Width and Height fields. You may click and drag the box to center it under the Office of the Secretary, Washington, DC 20240 on the electronic letterhead, as necessary.Click on the Options Tab and change the Alignment Field to “Center” by clicking on thedrop-down menu arrow.Click on the Format Tab and scroll down to highlight “mmm d, yyyy”. Your date willappear in the “Example of current format:” field. Click Close.Close the Prepare Form Tool by clicking Close in the upper-right corner. Your date fieldappears as a light blue box. Hover your cursor in the blue date field box and the Tooltip appears, “Click to date stamp.” Again, you may click and drag to adjust placement of the field, as necessary.If you are date stamping the document, please continue to Steps 16 and 17. Otherwise,you are done creating the Date Stamp field. Proceed to “How to Add a Signature Field to a PDF”.Click in the date field and a drop-down menu arrow appears. Click on the drop-downarrow for a calendar to choose your date.Congratulations! You have date stamped your document. Now, proceed to adding adigital signature field to your PDF file.Digital Signature FieldIn the Digital Signature Properties, dialog box, click on the General Tab enter “Click toClick on the Appearance Tab, leave the font size default to Auto. The font defaults to Helvitica. You can scroll down to change the font to Times New Roman.If you just added the Date Field, Adobe remembers… Uncheck the box “Do not changeheight and width when changing the position.” On the Position Tab ensure the Position Width is 3 inches and the Position Height is 0.40 inches. Recheck the box “Do notchange height and width when changing the position.” This grays out the Width and Height fields. Click Close.a.NOTE: If you have more than one signature in your file (e.g., a “Through” line), youmust give each digital signature field a unique name. Repeat Steps 5-11 for eachsignature required. Click Close after adding each signature field.8.Close the Prepare Form Tool by clicking Close in the upper-right corner. Your signaturefield appears as a light blue box with the red “Sign here” flag. Hover your cursor in the blue date field box and the Tool Tip appears, “Click to sign, check box to lock document (Click to sign)”. Again, you may click and drag to adjust placement of the field, asnecessary.Congratulations! You have added a digital signature field.Save your document, adjusting the file name by adding “ready for signature”. Thisassists with version control.Run the Accessibility Checker Click Start Checking.The Accessibility Checker Menu appears on the left side of the document.Open all the arrows next to headings in bold, which indicates accessibility issues.You must address all issues marked with a question mark and red “X”.To correct the “Title Failed”, right click on it and click FixIn the Description Window, uncheck “Leave As Is” and enter the document Title. Youcan repeat for Subject, Author and Keywords if you wish. Click OK.The Title Failed changes to Title Passed.To correct the Tagged annotations – Failed, click on the Tag panel, highlight the main“Tags” at the top, right-click and select FindIn the Find Element dialog box, click on the dropdown menu, select “UnmarkedAnnotations,” then select the radio button next to Search Document, and click “Find.”The date field you added is highlighted. Click “Tag Element,” select “Form” in the“Type” field, and click OK. The next, if any, unmarked annotated field is automatically highlighted. As you can see, the digital signature field you added is now highlighted. The Find Element dialog box remains open until you close it; therefore, click “Tag Element” and “Form” should already be selected, then click OK. The Find Complete dialog box opens. Click OK and click Close in the Find Element dialog box.Rerun the Accessibility Checker by selecting “Full Check” and clicking “StartChecking.” Three manual checks should be displayed: Logical Reading Order – Needs manual check, Color contrast – Needs manual check, and Navigation links – Needs manual check. The logical reading order and color contrast will be in the Document heading and Navigation links will be in the Page heading. Click Close to close the Accessibility tool. Click the “X” in the upper-right corner of the Accessibility Checker to close the report.Save the file and continue to the “Fixing Reading Order for the Date and DigitalSignature Fields” to finalize the PDF file for digital signature.Fixing Reading Order for Date and Digital Signature FieldsThe Reading Order panel opens. Make sure the box next to: “Display like elements in a single block” is unchecked.You will notice tagged items in the PDF file are displayed in grey blocks with acorresponding number in the upper-left corner to the number listed in the Order panel. The date and digital signature fields are at the bottom of the order for Page 1. In this example, they are numbers 29 and 30. The fields need to be moved so a user using assistive technology has the date field read after the letterhead and the digital signature field read after the full name of the signatory official. To move the date field, you will hold your left mouse button and drag it above the word, “Memorandum” and release your left mouse button.Repeat the same steps for moving the digital signature before the signatory official’s title.Close the Reading Order dialog box by clicking “Close,” then close the Order panel byclicking the “X” in the upper-right corner.Save your file. It is recommended to add “Ready for Signature” to your filename toensure version control and decipher the final PDF to send to the signatory official. Congratulations! Your PDF file is ready for the signatory official’s digital signature. Asa reminder, the signatory official will select the date she or he is signing the PDF filefirst, then click on the digital signature field to digitally sign and click “Lock document after signing.”。
PDF数字签名的使用
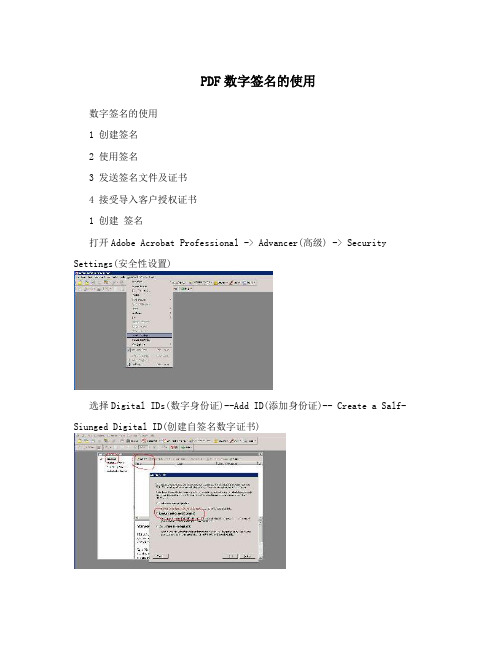
PDF数字签名的使用数字签名的使用1 创建签名2 使用签名3 发送签名文件及证书4 接受导入客户授权证书1 创建签名打开Adobe Acrobat Professional -> Advancer(高级) -> Security Settings(安全性设置)选择Digital IDs(数字身份证)--Add ID(添加身份证)-- Create a Salf-Siunged Digital ID(创建自签名数字证书)下一步选择新建PKCS#12数字身份证文件输姓名部门单位名称 E-mail 国家选择数字证书文件保存路径和数字证书密码 (一定要保存好此文件) 记住自己输入的密码点击“Finish”即可此为证书文件 ( 此文件妥为保管,不要丢失)创建完毕,见下图;2 使用签名1 建立自己的签名手迹扫描一张有自己签名的字迹样板大小适中,JPG图片文件即可; 如: 2打开Adobe Acrobat Professional -> Edit -- -Preferences 进入3,选择 Security (安全性) 在 Apperance (外观) New选择 Title (标题) 名称自定义再选择导入图形打开扫描好的自己签名的文件图片导入图片文件后,如图OK产生为“LUOJIE 名称的签名外观选择用 Adobe Acrobat Professional 打开要签名的文件选择“ 文档” ----- “数字签名“------ “ 在文本档上签名” 或工具栏上的“签名”选择继续签名下一步选择要签名文件的区域,在文件中用鼠标选择区域作为签名的位置输入创建签名时是自己设置的密码选择刚建立的签名外观选择” Sign and Save “ (签名并保存)完成签名,如图:3 发送签名文件及证书第一次发送已签名的文件给客户,需要同时传送自己的授权证书给客户,具体操作如下打开Adobe Acrobat Professional -> Advancer(高级) -> Security Settings(安全性设置) 选择Digital IDs(数字身份证)在已有自己的证书下,选择 Expoer Certificate (导出证书)保存文件即可第一次需要同时传送“ 已签名文件“ 及“ 自己的授权证书(CertExchangeLuoJie) “ 文件给客户4 接受导入客户授权证书接受到授权证书如何导入接受到证书文件直接双击运行对话框选择设置联系人信任选择将本证书用作可信任根OK 确定即导入成功查看导入的证书信息打开Adobe Acrobat Professional -> Advancer(高级) -> Trusted Identities (可信任身份)可看到” luojie “ 已在可信任身份。
如何使用acrobat reader的数字签名功能
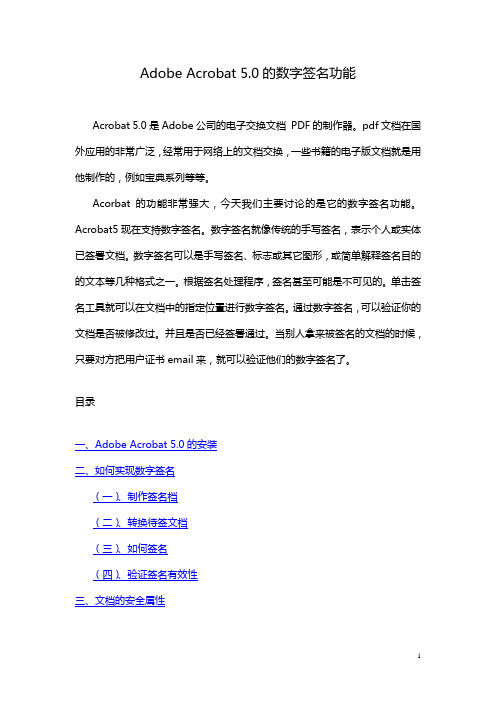
Adobe Acrobat 5.0的数字签名功能Acrobat 5.0是Adobe公司的电子交换文档PDF的制作器。
pdf文档在国外应用的非常广泛,经常用于网络上的文档交换,一些书籍的电子版文档就是用他制作的,例如宝典系列等等。
Acorbat的功能非常强大,今天我们主要讨论的是它的数字签名功能。
Acrobat5现在支持数字签名。
数字签名就像传统的手写签名,表示个人或实体已签署文档。
数字签名可以是手写签名、标志或其它图形,或简单解释签名目的的文本等几种格式之一。
根据签名处理程序,签名甚至可能是不可见的。
单击签名工具就可以在文档中的指定位置进行数字签名。
通过数字签名,可以验证你的文档是否被修改过。
并且是否已经签署通过。
当别人拿来被签名的文档的时候,只要对方把用户证书email来,就可以验证他们的数字签名了。
目录一、Adobe Acrobat 5.0的安装二、如何实现数字签名(一)、制作签名档(二)、转换待签文档(三)、如何签名(四)、验证签名有效性三、文档的安全属性一、Adobe Acrobat 5.0的安装安装过程非常简单,您只需要请选中并运行安装目录下的SETUP.EXE 程序,Acrobat就开始进行安装。
安装时您会遇到如下窗口,请在窗口中填写个人相关信息,注意,“序号”可以在安装目录下名为“SN”的文本文件中找到,如图1-1;图1-1后面出现的窗口无需进一步设置,只要连续点击“下一步”或“是”之类的按钮即可完成安装。
返回二、如何实现数字签名初次运行Acrobat,将会弹出注册窗口,请选择“请不要再显示此对话框”后点击“继续”按钮,如下图;Acrobat安装完成后会自动在Microsoft Word、Microsoft Excel等应用窗口的左上角添加将指定文档或表格转换成PDF格式文件的控件,如下图;下面的内容将详细讲述如何实现数字签名;返回(一)、制作签名档1.在纸上手写您的签名,并将这张带有您的签名的纸张放入扫描仪扫描;2.用图像工具处理该扫描文件,并将自己的签名尽可能大的转换成一个PDF文件,下图2-1为一个扫描后的签名PDF文件;图2-13.重新打开Acrobat程序,并选中“工具”——〉“自签名安全”——〉“登录”,开始制作自己的签名档,如图2-2;图2-24.选中“登录”后,将弹出如下对话框,我们在此窗口选择“新建用户配置文件”,如图2-3;图2-35.在弹出的新窗口中输入个人的相关信息,请注意,“姓名”、“组织名称”和“部门”均不支持中文输入,“国家”栏可通过下拉菜单选中CN-中国,并按要求设置该签名档的密码,密码位数不少于6位,填写如下图2-4,请记住该密码,否则您将无法使用该签名档;图2-46.点击“确定”后,弹出选择此配置文件的存放位置的窗口,选择好后点击“保存”,如图2-5;图2-57.此时弹出窗口,要求您进一步配置您的签名配置文件,如加载您的手写体签名等等,请选择“用户配置”按钮,如图2-6;图2-68.弹出“自签名安全”窗口,该窗口中包含了该签名档的所有信息,如图2-7;图2-79.选择“签名外观”,并在窗口中选中“导入图形”,如图2-8;图2-810.点击“PDF文件…”按钮,出现选择手写体签名扫描文件的窗口,我们选中第二步建立的“张三的签名.pdf”文件,如图2-9;图2-911.点击“选择”按钮后,出现如下图2-10窗口;图2-1012.点击确定按钮后,出现以下窗口,在“标题”栏填写名字,我们可以视需要钩选下方的“显示”项,张三的签名无需“显示”中的任何项,因此全部不钩选,如图2-11,签名的预览情况如下;图2-1113.点击“确定”,回到窗口图2-12;图2-1214.点击“关闭”即完成了张三的签名档的制作。
adobe acrobat用法
Adobe Acrobat 是一款功能强大的PDF编辑和阅读软件,广泛应用于办公、教育和个人领域。
它包含了丰富的功能和工具,可以帮助用户进行PDF文件的编辑、转换、共享和签名。
在这篇文章中,我将详细介绍Adobe Acrobat 的用法,并共享我对这个软件的个人观点和理解。
一、基本介绍Adobe Acrobat 是由Adobe Systems开发的一款专业的PDF文档创建、编辑、管理工具。
它具有创建高质量PDF、编辑PDF、转换PDF、共享和签名等功能。
用户可以使用Adobe Acrobat 轻松地编辑文档内容、插入图片、创建表单等。
通过Adobe Acrobat,用户可以轻松地实现电子文件的管理和共享。
二、基本使用在使用Adobe Acrobat时,用户可以打开已有的PDF文档或创建新的PDF文档。
在编辑PDF文档时,用户可以进行文字、图片、表格等内容的编辑和调整。
另外,用户还可以使用Adobe Acrobat 进行PDF文件的合并、拆分、转换和搜索。
Adobe Acrobat 还具有安全和签名的功能,用户可以对PDF文档进行数字签名,确保文件的安全性。
三、高级功能及扩展除了基本的编辑和转换功能,Adobe Acrobat 还具有一些高级的功能和扩展。
用户可以使用Adobe Acrobat 进行OCR文字识别,将扫描的纸质文件转换成可编辑的PDF文档。
另外,Adobe Acrobat 还支持多种多样的插件和扩展,用户可以根据自己的需求来扩展软件的功能,满足特定的需求。
四、个人观点和理解作为一款功能强大的PDF编辑和阅读软件,我认为Adobe Acrobat 在办公、教育和个人领域有着广泛的应用前景。
它为用户提供了丰富的工具和功能,可以满足不同用户的需求。
另外,Adobe Acrobat 的操作界面简洁清晰,用户体验良好,易于上手。
我认为Adobe Acrobat 是一款非常实用的文档处理工具,能够有效提高工作效率,实现电子文件的高效管理和共享。
pdf 验签方法
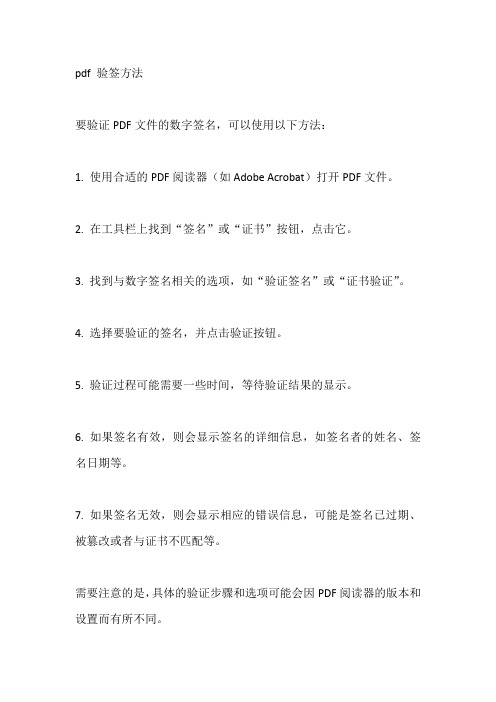
pdf 验签方法
要验证PDF文件的数字签名,可以使用以下方法:
1. 使用合适的PDF阅读器(如Adobe Acrobat)打开PDF文件。
2. 在工具栏上找到“签名”或“证书”按钮,点击它。
3. 找到与数字签名相关的选项,如“验证签名”或“证书验证”。
4. 选择要验证的签名,并点击验证按钮。
5. 验证过程可能需要一些时间,等待验证结果的显示。
6. 如果签名有效,则会显示签名的详细信息,如签名者的姓名、签名日期等。
7. 如果签名无效,则会显示相应的错误信息,可能是签名已过期、被篡改或者与证书不匹配等。
需要注意的是,具体的验证步骤和选项可能会因PDF阅读器的版本和设置而有所不同。
AcrobatX数字签名实用方法

Siemens Transformer (Guangzhou) Co., LTD.
ቤተ መጻሕፍቲ ባይዱ
Page 2
Wednesday, November 20, 2019
如何使用电子签名
View -> Tools -> Sign & Certify -> Sign Document 当第一次使用签名时,系统会提示创建数字签名
Page 3
Wednesday, November 20, 2019
小结
Power Point 以及所有 Office 工具,对我们日常工作都是非常 有帮助的。
以上只是一些 Power Point的小技巧,更多的新功能和用处还需 要大家自己在日常使用中去发掘。
希望这些小技巧能对大家的工作和生活起到帮助,并祝大家工作 愉快!
Page 4
谢谢
Wednesday, November 20, 2019
Adobe Acrobat X Pro EN 使用技巧
Presented by: Tang Yong
For Internal Use Only
为什么要使用数字签名?
在较大的公司,使用数字签名是非常重要的! 使用了数字签名: 1. 接收者能验证PDF文件的内容是否被修改过。 2.文档是否是当事人发出的。 3.一个签字者可以阻止其它人在已签过的文档上再 次签名。 4.不仅如此,它还能帮助我们节省大量纸张。 5.PDF文件通用性强,发送,传输便捷。
Adobe Acrobat 使用手册说明书
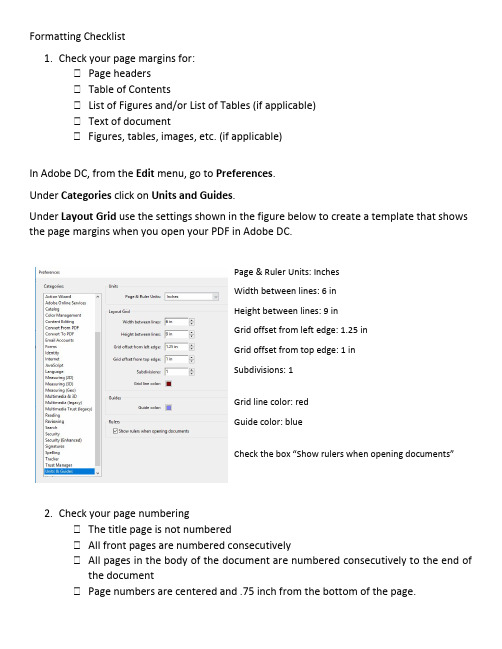
Formatting Checklist1. Check your page margins for:Page headersTable of ContentsList of Figures and/or List of Tables (if applicable) Text of documentFigures, tables, images, etc. (if applicable)In Adobe DC, from the Edit menu, go to Preferences.Under Categories click on Units and Guides.Under Layout Grid use the settings shown in the figure below to create a template that shows the page margins when you open your PDF in Adobe DC.Page & Ruler Units: InchesWidth between lines: 6 inHeight between lines: 9 inGrid offset from left edge: 1.25 inGrid offset from top edge: 1 inSubdivisions: 1Grid line color: redGuide color: blueCheck the box “Show rulers when opening documents” 2. Check your page numberingThe title page is not numberedAll front pages are numbered consecutivelyAll pages in the body of the document are numbered consecutively to the end ofthe documentPage numbers are centered and .75 inch from the bottom of the page.3.Check your line spacing on the front pages In MS Word on the Home tab, go to the Paragraph Settings section of the ribbon to find the Line and Paragraph Spacing icon (up and down arrows next to stacked horizontal lines). To check and change the setting for part of your document, highlight the text in question. If you see gray above or below the text you may need to adjust the settings. Generally, places you may need to check the line spacing are: Title Page Certification Page (for dissertations) After the page headers in the front pages For basic spacing, you may use the dropdown options in theLine and Paragraph Spacing dialog box. There are toggle switches to “Add Space Before Paragraph” and “Remove Space After Paragraph.” Vae 2021 Aug 30。
Adobe Acrobat DC for Macs 电子签名插件使用说明说明书

Plug-In How-To Guide Adobe Acrobat DC for MacsCopyright © Topaz Systems Inc. All rights reserved.Table of ContentsOverview (3)Setting Up Acrobat for Electronic Signatures (3)Pre-Placing Digital Signature Fields in Acrobat Reader (5)Pre-Placing Digital Signature Fields in Acrobat Pro (5)Signing a PDF (7)Trusting Certificates in Adobe to Validate PDFs (7)Signing an Existing Signature Field (8)Options for Existing Signatures (8)OverviewThe Topaz pDoc Adobe Acrobat and Reader Plug-In for Macs software allows users to electronically sign a PDF document using a Topaz HSB® or BSB® signature pad and pen. Each embedded signature is bound to the PDF at the time it is signed, so that any subsequent changes made to the PDF will be recorded and can be tracked. The Adobe Acrobat and Reader Plug-In is a multi-faceted tool that facilitates eSignatures in a number of different ways. You can download and install the plug-in from: /plugins.html.Setting Up Acrobat for Electronic SignaturesAfter installing the plug-in, open Acrobat and click “Acrobat Pro” →“Preferences” →“Signatures”. If you are using Adobe Acrobat Reader DC, click “Acrobat Reader” →“Preferences” →“Signatures”.1. Click the “More” button in the “Creation & Appearance” se ction.2. Select “pDoc for Acrobat” from the “Default Signing Method” dropdown menu.3. Click “OK”.4. Click the “More” button in the “Verification” section.5. Select “Always use the default method”.6. Select “Adobe Default Security” from the dropdown menu. Signa tures signed using theTopaz pDoc for Acrobat are compatible with the Adobe Digital Signature Framework and hence can be verified using Adobe’s Default Security Handler.7. Click “OK”.Pre-Placing Digital Signature Fields in Acrobat ReaderSigning with Acrobat on Mac is simple and straightforward. For signing in Acrobat Reader for Mac, the form to be signed is prepared in advance with various form fields and signature block(s). This can be done by upgrading to Acrobat Pro for Mac, or on various other PDF form creation software products for Mac. PDF forms designed on Windows applications, such as the Topaz pDoc Signer and Forms Designer, can also be signed on a Mac Acrobat Reader using the Topaz pDoc Plug-In. For more information on this application, see this page:/pdocsigner.html.Pre-Placing Digital Signature Fields in Acrobat ProClick “Tools” “Prepare Form”, and select the document you wish to sign. Near the top of the window, click the “Add a digital signature” button.Click and drag a signature box to the desired size and position with your mouse. After doing so, name the signature, check if it needs to be a “Required field”, and exit out of the signa ture box by clicking anywhere on the PDF.Click the “X” in the “Prepare Form” menu to exit out of the “Prepare Form” mode.Now, if you want to sign that field, click on the signature field you created; the “Signature Capture” window will appear.When you are finished entering your details and signing, click “OK”, and the signature will be embedded into the PDF. The PDF will be saved during the signing process.Signing a PDFClick “Tools” →“Certificates” →“Digitally Sign” (in the top toolbar).Click and drag a signature box to the desired size and position with your mouse; the “Signature Capture” window will appear. When you are finished entering your details and signing, click “OK”, and the signature will be embedded into the PDF.Trusting Certificates in Adobe to Validate PDFsTo be sure that signatures will be validated properly, follow the steps in the following guide after your first use of the Topaz pDoc Adobe Plug-In (these steps only need to be completed once): /software/download/adobecerttrust_osx.pdf.Signing an Existing Signature FieldAn existing blank signature field will show in a PDF with a red tag in the upper left corner. When hovering over a blank signature field, the mouse cursor will change from an open hand to a hand with a pointing finger. Click on the signature field and the “Signature Capture” window will appear. When you are finished entering your details and signing, click “OK”, and the signature will be embedded into the PDF.Options for Existing SignaturesClicking on a signature shows you its validity status.Right-clicking on a signature allows you to clear it.If the PDF is changed after the signature has been applied, you can always choose to view the signed version from the right-click menu.。
- 1、下载文档前请自行甄别文档内容的完整性,平台不提供额外的编辑、内容补充、找答案等附加服务。
- 2、"仅部分预览"的文档,不可在线预览部分如存在完整性等问题,可反馈申请退款(可完整预览的文档不适用该条件!)。
- 3、如文档侵犯您的权益,请联系客服反馈,我们会尽快为您处理(人工客服工作时间:9:00-18:30)。
图 12
12.输入口令,选择签名文档原因,点击“签名并保存”。
份证文件,如图 4
图4 5. 点击下一步,输入名称、部门、单位名称、电子邮件地址、国家/地区选择“CN‐中国”,
如图 5
图5 6. 点击下一步,提示创建数字身份证‐兼容性警告,点击“是”,如图 6
图6 7. 输入相应的 ASCII 字符,并在密钥算法那里选择“2048‐bit RSA”,如图 7
图7 8. 点击下一步,选择密钥存放的位置,并牢记自己的口令,备份一下自己密钥,防止系
图2 3. 点击安全性设置,添加身份证,创建自签名数字身份证,如图 3;
石 贺 天
数字签名人 石贺
天 DN:cn=石贺天, c=CN-中国,o=辽 宁同盛纸业,ou= 综合部, email=shi_hetia n@ 日期:2011.01.21 10:24:35 +08'00'
图3 4. 点击下一步,您将创建自签名“数字身份证”,点击下一步,选择新建 PKCS#12 数字身
数字签名人 孙文炎
孙文 DN:cn=孙文炎, c=CN-中国,o=辽宁
同盛纸业,ou=行政
部,
炎
email=463645773 @ 日期:2011.10.27
11:31:54 +08'00'
图 11 11. 点击“继续签名”,“在文档上显示证明”,点击“下一步”,确定,用鼠标左键拉动一
个方框位置,如图 12
统崩溃时无法使用,签名时要使用到口令,点击完9. 点击“导出证书”,这个是公钥,文件格式为.fdf,如果对方需要验证文档完整性,一
定需要这个公钥,如下图 9、图 10
图9
图 10 10.打开一个.pdf 文件,点击“签名”,选择在“本文档上签名”,如图 11
Adobe acrobat 7.0 电子证书签名说明文档
1. 打开 adobe acrobat 7.0 软件,如下图 1 所示;
图1 2. 点击高级菜单下面的安全性设置,如图 2;
石贺 天
数字签名人 石贺天 DN:cn=石贺天,c=CN-中国, o=辽宁同盛纸业,ou=综合 部,email=shi_hetian@qq. com 日期:2011.01.21 10:31:59 +08'00'
