虚拟机安装solaris10系统镜像文件
SOLARIS10系统配置文件

梯调系统配置文件一、Solaris 10安装说明将Solaris 10操作系统安装光盘(DVD版)放入光驱,在OK提示符下(# halt , 或按stop+A出现),键入boot cdrom。
1、在“Select a Language”窗口下,选择6:Simplified Chinese2、在“欢迎”窗口下,点击“下一步”3、在“网络连接”窗口下,选择“联网的”,点击“下一步”4、在“配置多个网络接口”窗口下,选择ce0、ce1,点击“下一步”5、在“主网络接口”窗口下,选择ce0,点击“下一步”6、在“ce0的DHCP”窗口下,选择“否”,点击“下一步”7、在“ce0的主机名”窗口下,输入主机名,点击“下一步”8、在“ce0的IP地址”窗口下,输入IP地址,点击“下一步”9、在“ce0的网络掩码”窗口下,输入255.255.255.0,点击“下一步”10、在“ce0的IPV6”窗口下,选择“否”,点击“下一步”11、在“ce0的缺省路由”窗口下,选择“无”,点击“下一步”12、在“ce1的DHCP”窗口下,选择“否”,点击“下一步”13、在“ce1的主机名”窗口下,输入主机名,点击“下一步”14、在“ce1的IP地址”窗口下,输入IP地址,点击“下一步”15、在“ce1的网络掩码”窗口下,输入255.255.255.0,点击“下一步”16、在“ce1的IPV6”窗口下,选择“否”,点击“下一步”17、在“ce1的缺省路由”窗口下,选择“无”,点击“下一步”18、在“Kerberos”窗口下,选择“否”,点击“下一步”19、在“名称服务”窗口下,选择“无”,点击“下一步”20、在“时区”窗口下,选择“地区性的洲/国家/地区”, 点击“下一步”21、在“洲与国家”窗口下,点击“亚洲”选择“中国”,点击“下一步”22、在“日期和时间”窗口下,输入正确时间,点击“下一步”23、在“超级用户(root)口令”窗口下,输入超级用户口令点击“下一步”24、在“确认信息”窗口下,选择“确认”25、在“欢迎”窗口下,点击“下一步”26、在“安装选项”窗口下,点击“下一步”27、在“指定媒体”窗口下,选择“CD/DVD”,点击“下一步”28、正在初始化…29、在“许可证”窗口下,选择“接受”,击“下一步”30、在“选择升级安装或初始安装”窗口下,选择“初始安装”,击“下一步”31、在“选择安装类型”窗口下,选择“自定义安装”,点击“下一步”32、在“选择软件语言环境”窗口下,选择“亚洲,中文(zh)”点击“下一步”33、在“选择系统语言环境”窗口下,选择“亚洲,中文(zh)”点击“下一步”34、在“选择附带软件”窗口下,选择“Solaris 10 Extra Value Software 87.3MB”,点击“下一步”35、在“附加产品”窗口下,选择“无”,点击“下一步”36、在“选择Solaris 软件组”窗口下,选择“整个郡组以及OEM”的“缺省包”,点击“下一步”37、在“选择磁盘”窗口下,点击“下一步”38、在“保存数据”窗口下,选择“否”,点击“下一步”39、在“分布文件系统”窗口下,选择“修改”选择“确定”,点击“下一步”31、在“准备安装”窗口下,点击“立即安装”32、重新引导后,出现“Do you need to override the system’s default NFS version 4 domain name (yes/no)?[no]:输入“no”,回车33、输入用户名:root34、输入密码:xxxx35、选择其中一个:选择“公用桌面环境”36、安装完毕二、Sun Fire V240磁盘镜像在安装系统时,到划分硬盘分区那一步时,给硬盘预留一部分的空间,可以是200MB。
转:Solaris10安装及SV...
转:Solaris10安装及SV.../forum/viewtopic.php?t=495806作者:freedemon先说一下安装准备Solaris 10我下载的是DVD正式版,包含6个>=420M的zip分包。
安装媒体的DVD iso需要先把6个zip包解包,然后合并成一个单独的ISO文件,然后刻录为DVD或使用虚拟光驱安装。
C:> unzip *.zipC:> copy /B sxxxxx-a+sxxxxx-b+......e solaris10.iso在windows下可以用copy /B a+b+c...e solaris.iso的命令把各部分合并;如果在Unix下则是cat *[a-e] >>solaris.iso 。
注意这个过程必须在支持>2G文件的文件系统分区上执行,例如大多数的现代Unix,以及使用NTFS的Windows2000等。
安装我是在Vmware GSX 3.1下测试安装的,和以前一样,选定Guest OS: Solaris 10(exp),设定网络为Bridge模式,12G IDE VirtualDisk。
安装引导过程和以前基本类似,在进入安装程序加载时多了几个选择,除了Interactive之外还有Text模式的Interactive安装,这避免了以前很可能遇到的一个变态问题--就是假如你的显卡不在Solaris支持之列的话,将无法或很难完成安装过程,或者只能忍受640x480分辨率的折磨。
选择Interactive继续,之后系统会自动开始硬件检测;在Solaris 10种不但能够检测单独的硬件信息,还根据厂商的OEM体系,内置了一系列的硬件profile,这就意味着,假如你的服务器是某大厂的畅销产品的话,那么一整套硬件都会得到系统完整的支持,这其中也包含Vmware虚拟的硬件体系。
检测完成后,按照现在默认的Interactive模式将会进入图形界面,之后的安装过程都会在一个X-Window终端窗口中完成,当然,步骤和以前还是一样的。
Unix初级(solaris10) 系统安装(详细)
北京神州泰岳软件股份有限公司网络管理事业部基础技能-UNIX初级(solaris10)北京神州泰岳软件股份有限公司2022年4月26日文档属性属性内容客户名称北京神州泰岳软件股份有限公司网络管理事业部项目名称基础技能培训教材文档主题基础技能-UNIX初级(solaris)文档副标题文档版本 1.0文档日期文档状态草案作者文档变更版本修订日期修订人描述文档送呈姓名目的目录1课程介绍 (6)1.1课程目标 (6)1.2参加培训学员能力要求 (6)1.3学员培训前的准备要求 (7)1.4培训周期与认证 (7)1.5培训资料、介质、常用工具获取 (7)2培训环境与场景介绍 (9)2.1场景设计与说明 (9)2.2培训环境介绍 (9)2.2.1培训的整体场景说明 (9)2.2.2虚拟机环境介绍 (10)2.2.3学员需要准备的操作 (10)3系统安装 (11)3.1创建solaris虚拟机 (11)3.2安装操作系统 (22)3.3更改虚拟网络IP (43)4系统检查 (45)4.1检查操作系统版本 (45)4.2检查内存大小 (46)4.3检查swap大小 (46)4.4检查文件系统 (47)5系统基本配置 (48)5.1允许root远程登录 (48)5.1.1Telnet方式 (48)5.1.2SSH方式 (50)5.2远程登录Solaris的常用方法 (53)5.2.1使用ssh远程登录系统 (53)5.2.2使用telnet远程登录系统 (55)5.3开机与关机操作 (57)5.4查看修改主机名 (57)5.4.1临时更改 (58)5.4.2永久更改 (58)5.5查看修改网络配置(IP与路由) (60)5.5.1临时更改 (60)5.5.2永久更改 (63)5.5.3增加nms别名 (66)6管理进程 (68)6.1进程介绍 (68)6.2查看与终止进程 (68)7配置snmp (71)7.1检查snmp状态 (71)7.2修改SNMP团体名 (71)8配置syslog (74)8.1Syslog介绍 (74)8.2配置syslog (75)9应用软件安装准备(oracle为例) (78)9.1安装软件包 (78)9.1.1检查软件包 (78)9.1.2安装软件包 (78)9.2修改系统内核参数 (80)9.3用户配置 (82)9.3.1创建组和用户 (82)9.3.2切换用户 (83)9.3.3修改用户配置文件 (83)9.4配置相关目录 (85)9.4.1创建相关目录 (85)9.4.2设置目录属主和组 (86)9.5使用FTP上传文件 (86)9.6解压安装介质 (87)9.7使用xmanager连接系统并安装Oracle (88)10其他操作 (92)10.1清理磁盘空间 (92)10.2删除用户和组 (92)10.3删除软件包 (93)10.4日常文件管理 (93)10.5查看系统日志 (95)10.6临时更改环境变量 (95)10.7查看系统时间 (95)10.8查看系统帮助(非常重要) (95)1 课程介绍讲师:闫彬彬部门:网络管理事业部-综合支撑部-优化集成部说明:如教材使用过程中存在问题或描述不清楚的地方,请与闫彬彬(************************.cn)联系;1.1 课程目标完成本课程后,使学员可以独立安装solaris操作系统、进行基本的如网络/SNMP/Syslog配置、并具有为安装Oracle数据库进行相关前期准备的操作能力,具体如下:◆能够安装soalris操作系统◆检查系统基本配置◆正确关闭重启主机◆创建用户和组◆安装系统软件包◆文件及目录及权限管理◆修改、检查系统内核参数◆进程管理◆配置IP地址◆修改主机名◆Unzip解压工具◆修改系统snmp团体名◆配置syslog并启停止相关服务1.2 参加培训学员能力要求无1.3 学员培训前的准备要求◆自带电脑,内存2G或以上,必须有一个硬盘剩余空间30G或以上◆已安装vmware,secucrt,xmanager工具软件1.4 培训周期与认证◆培训周期:1天◆认证方式:✧有实际物理小型机的情况下,以实际物理机进行操作系统安装与各种操作,如物理机不够,以虚拟机进行操作系统安装和各种操作;✧按本课程要求完成3-9章所有操作,并提交如下内容:按第4章操作检查结果的截图(所有操作结果在一张图里)/etc/hosts,/etc/netmasks,/etc/hostname.pcn0,/etc/defaultrouter文件修改后的内容截图(修改为192.168.18网段后的结果)在secuCRT终端,先执行date命令然后执行ifconfig –a命令的输出截图按照7.2章图138操作snmpwalk对团体名更改后测试结果进行截图(团体名为自己的姓名)按照8.2章节图143,使用logger命令手动产生一条带有学员自己姓名的消息时syslogwahtcher的弹出消息截图1.5 培训资料、介质、常用工具获取◆事业部FTP服务器(公网60.247.77.173、内网192.168.106.164、帐号nmbu、密码nmbu):“/07产品培训资料/unix初级”下载◆培训教材:分media、tools、documents三个目录附图1. FTP或光盘内容2 培训环境与场景介绍2.1 场景设计与说明为了使课程的操作性、实用性更强,更贴近项目实际,本教材模拟项目中Ultra-NMS 数据库服务器搭建为背景,依次讲解了操作系统安装、连接系统、系统配置检查、软件包安装、网络配置、内核参数修改、组和用户创建、进程管理、配置SNMP等操作,使大家在这一上机操作过程中掌握并达课程设定的目标与能力要求。
Solaris 10 sparc ZFS安装步骤

前期准备(安装之前务必每台服务器收集explorer,方便查看之前网络配置)1、去官网下载solaris-10-u11-sparc操作系统,将镜像保存好,最好再刻录成光盘带着。
2、电脑上安装VMware软件,在vmware里安装windows xp系统,然后在xp 上安装IE8和java,vmware自己下载,xp、IE8和java之前有提供给彭。
3、到现场之后跟大唐人员要一份所有服务器IP、掩码、主机名、默认路由、网络管理IP的规划表,到时安装时会用到。
4、网线连接交换机之后,跟现场人员要两个闲置IP,分别配给自己电脑和虚拟机xp系统,ping通即可。
5、在xp系统内打开IE浏览器,输入服务器网络管理口IP,如下图(用账号:root/changeme 登录管理系统)点击如下图所示的“Launch Remote Console”系统安装(安装过程根据实际情况,不一定和以下内容一样)1.选择远程管理界面上的Devices -> CD-ROM Image 如下图:2.选择本地机器上的ISO镜像文件,点击打开3.再次选择远程管理界面上的Devices,然后确认CD-ROM Image 被勾选,如下图所示:4.然后回到web 的管理界面(不能关闭远程管理Console),选择PowerControl5.在下拉列表中选择“Reset”,点击Save按钮如下图所示:6.同时远程管理Console界面的登录界面就会变成黑屏,说明机器已经重新启动,需要耐心等待,如下图所示:7.远程管理Console出现如下界面的时候,迅速点击F8键,然后等待,不要触碰任何键8.出现如下图的界面后,选择”AMI Virtual CDROM 1.00”项,然后点击回车键9.选择“Oracle Solaris”,下一界面“Configuring devices”选择“4“;10.“Keyboard Layout”界面选择“US-English”按“F2”;11.“Select a Language“界面选择Simplifiied Chinese输入“7”后按回车键;下一界面“The Oracle Solaris Installation Program”按“F2”继续;12.进入“Identify This System”界面,按“F2”13.进入“Network Connectivity”界面,选择“Yes”按“F2”;14.进入下一界面“Configure Multiple Network Interfaces”选择“ixgbe0”按“F2”;15.界面“DHCP for ixgbe0”选择“No”按“F2”;16.界面“Host Name for ixgeb0”输入主机名“根据规划填写”然后按“F2”;17.界面“IP Address for ixgbe0”输入IP地址“根据规划IP填写”然后按“F2”;18.界面“System part of a subnet”选择“Yes”按“F2”;19.界面“Netmask for ixgbe0”输入掩码“根据规划填写”按“F2”;20.界面“IPv6 for ixgbe0”选择“No”按“F2”;21.界面“Set the Default Route for ixgbe0”选择“Specify one”,按“F2”进入下一界面,输入默认路由,按“F2”;22.界面“Confirn Information for ixgbe0”确认以上填写内容正确后按“F2”继续下一步,如需修改按“F4;23.上一步骤选择“F2”继续后进入“Configure Security Ploicy”界面,选择“No”按“F2”;24.界面“Confirn Information”确认后按“F2”;25.下一界面“Name Service”选择“None”按“F2”;26.界面“Confirn Information”确认后按“F2”;27.界面“NFSv4 Domain Name”选择“Use the NFSv4 domain derived by thesystem”按“F2”进入确认界面,确认以上填写内容正确后按“F2”继续下一步,如需修改按“F4;28.上一步骤选择“F2”继续后进入“Time Zone”界面,选择“Asia”按“F2”;29.下一界面“Country or Region”选择“China”按“F2”,下一界面“Date and Time”输入即时的“年-月-日-时-分”具体数值。
【详细】SUN Solaris 10虚拟机安装手册

1.新建虚拟机,选择镜像文件,设置基本的信息后,进入系统初始化界面1.表示执行GUI安装,使用图形用户界面安装(下面使用此种安装方式)2.表示执行自动的自定义JumpStart 安装3.表示执行文本安装程序进行安装,会改写缺省的GUI 安装程序并运行文本安装程序。
4.表示执行文本安装程序在控制台会话中进行安装2.选择1后,系统检测安装组件3.选择安装语言:6(简体中文),按Enter4.显示将要安装的项目,点击’下一步’5.选择网络连接’联网的’,点击’下一步’6.选择是否用于DHCP,选择’否’,点击’下一步’7.设置主机名,任意输入,这里输入:solaris,点击’下一步’8.设置IP,输入:172.18.4.*.点击’下一步’[IP设置可以任意选择可用的IP即可]9.设置网络掩码’255.255.255.0’,点击’下一步’[默认为255.255.255.0]10.设置IPV6,选择’否’,点击’下一步’11.设置缺省路由,选择’无’,点击’下一步’[依情况而定,可以指定路由器]12.设置Kerberos,选择‘否’,点击‘下一步’13.设置服务,选择‘无’,点击‘下一步’【可以设置相应的服务】14.设置时区,选择‘地域性的洲、国家、地区’,点击‘下一步’15.选择‘亚洲---中国’,点击‘下一步’16.设置日期和时间,默认自动获取,点击‘下一步’17.设置超级用户的密码,输入密码并确认后点击‘下一步’18.确认安装信息,点击‘确认’19.开始安装系统,点击‘下一步’20.设置安装选项,均选择‘是’,在通知窗口点击‘确定’21.选择系统的介质,选择‘CD/DVD’22.接受许可证并点击‘下一步’23.选择安装类型,选择‘缺省安装’,点击‘下一步’24.立即安装25.正在安装系统,等待安装100%。
Solaris安装

本文档适用于太平洋安泰人寿保险公司版本历史本文包括的附属文件目录目录 (3)1SOLARIS 10 安装 (4)2SOLARIS 10 RAID 1说明 (15)Solaris 10 安装本过程说明如何从DVD 介质安装独立的基于SPARC 的系统。
在开始安装之前,请执行下列任务。
_ 确保您有下列介质。
_ 对于DVD 安装,Solaris 10 Operating System for SPARC Platforms DVD_ 验证你的系统满足最低要求。
系统必须满足以下要求。
_ 内存-128 MB 或更大_ 磁盘空间-6.8 GB 或更大_ 处理器速度-200 MHz 或更高_ 收集安装Solaris OS 所需的信息。
_ 对于没有联网的系统,请收集下列信息。
_ 要安装的系统的主机名_ 要在系统上使用的语言和语言环境_ 对于联网的系统,请收集下列信息。
_ 要安装的系统的主机名_ 要在系统上使用的语言和语言环境_ 主机IP 地址_ 子网掩码_ 名称服务的类型(如,DNS、NIS 或NIS+)_ 域名_ 名称服务器的主机名_ 名称服务器的主机IP 地址_ 超级用户口令1. 插入Solaris 10 Operating System for SPARC Platforms DVD2. 引导系统。
-通过console口,连接服务器.-如系统正在运行中可通过Ctrl+Break键进入ok提示模式将显示ok 提示符。
3. 启动Solaris 安装程序。
_键入以下命令。
ok boot cdrom4. 安装开始。
安装程序会提示您选择在安装过程中使用的语言。
选择要在安装过程中使用的语言,然后按下Enter 键。
5. 按”F2”继续,6.选择”Yes”.7.选择“No”,不使用DHCP。
8.按实际IP地址输入9.选择“Yes”10.输入子网掩码11.选择“No”,不使用IPV612.选择“Specify one”13.输入网关的地址14.选择“DNS”15.在时区这里选择“Asia”16.地区这里选择“China”17.查看时间是否正确18:输入ROOT用户密码,输两遍。
Sun-Solaris10SPARC网络安装操作系统-虚拟机
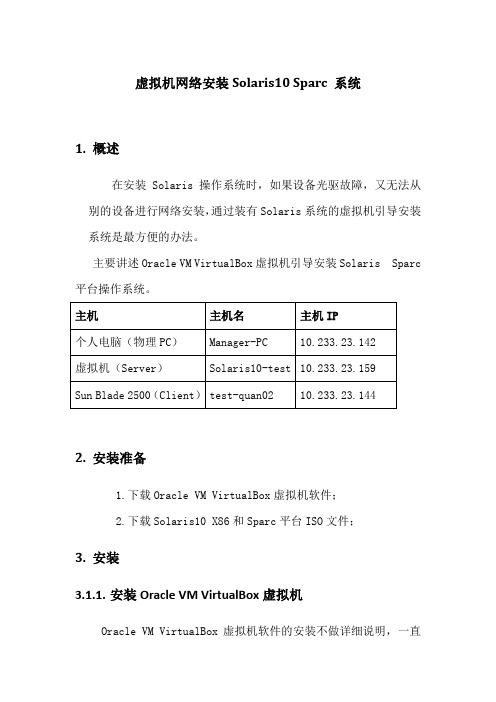
虚拟机网络安装Solaris10 Sparc 系统1.概述在安装Solaris 操作系统时,如果设备光驱故障,又无法从别的设备进行网络安装,通过装有Solaris系统的虚拟机引导安装系统是最方便的办法。
主要讲述Oracle VM VirtualBox虚拟机引导安装Solaris Sparc 平台操作系统。
2.安装准备1.下载Oracle VM VirtualBox虚拟机软件;2.下载Solaris10 X86和Sparc平台ISO文件;3.安装3.1.1.安装Oracle VM VirtualBox虚拟机Oracle VM VirtualBox虚拟机软件的安装不做详细说明,一直【下一步】即可;3.1.2.安装Solaris_X86虚拟机Solaris虚拟机的安装我们也不做详细说明,可参考《VirtualBox虚拟机安装Solaris10 X86系统》;3.1.3.Solaris配置和安装3.1.3.1.设置虚拟机:【网络】设置:连接到物理网卡(物理PC上配置上网IP为10.233.23.142的网卡)【存储】设置:光盘加载Solaris 10 sparc的ISO文件,显示如下:点击【启动】启动Solaris x86系统查看光盘文件:系统启动后,可以看到已经挂在的Solaris 10 for sparc的系统盘;3.1.3.2.检查个人电脑和网络个人电脑ip地址的配置需要跟虚拟机Solaris系统在同一网段,并且保证通信;虚拟机ip地址:个人电脑地址:连通性:注意:只有个人电脑网卡UP的时候,虚拟机才能ping通个人电脑IP地址;3.1.3.3.确定Blade2500安装网口和MAC地址个人电脑网口与Sun Blade 2500网口直连或在同一VLAN;ok show-nets //查看系统网卡列表a) /pci@1e,600000/pci@4/network@3b) /pci@1e,600000/pci@4/network@2c) /pci@1e,600000/pci@4/network@1d) /pci@1e,600000/pci@4/network@0e) /pci@1c,600000/network@3q) NO SELECTIONEnter Selection, q to quit: qok select /pci@1e,600000/pci@4/network@0/pci@1e,600000/pci@4/network@0: 1000 Mbps full duplex link up//用select 或watch-net-all查看Sun Blade 2500 UP状态的网卡ok watch-net-all/pci@1e,600000/pci@4/network@3/pci@1e,600000/pci@4/network@3: link down/pci@1e,600000/pci@4/network@2/pci@1e,600000/pci@4/network@2: link down/pci@1e,600000/pci@4/network@1/pci@1e,600000/pci@4/network@1: link down/pci@1e,600000/pci@4/network@0/pci@1e,600000/pci@4/network@0: 1000 Mbps full duplex link upWatch ethernet packets'.' is a good packet and 'X' is a bad packetPress any key to stop...../pci@1c,600000/network@31000 Mbps FDX Link upLooking for Ethernet Packets.'.' is a Good Packet. 'X' is a Bad Packet.Type any key to stop.okok选择Sun Blade 2500 安装网口并确认MAC地址;这里我们选择用PCI网卡板上的第一个网口(即/pci@1e,600000/pci@4/network@0)安装,确定该网卡MAC地址(00:14:4f:69:8e:00)ok cd /pci@1e,600000/pci@4/network@0 //进入网卡路径ok .properties //查看.properties文件确认该网卡MACmac-address 00 14 4f 69 8e 00link-clock autoduplex autospeed autoassigned-addresses 82020010 00000000 03200000 00000000 0020000082020030 00000000 03100000 00000000 00100000d-fru-len 00000000d-fru-off 0000e800d-fru-dev eeproms-fru-len 00000800s-fru-off 0000e000s-fru-dev eepromcompatible pci100b,35.30pci100b,35pciclass,020000pciclass,0200pci108e,abbareg 00020000 00000000 00000000 00000000 0000000002020010 00000000 00000000 00000000 0020000002020030 00000000 00000000 00000000 00100000address-bits 00000030max-frame-size 00004000network-interface-type ethernetdevice_type networkname networklocal-mac-address 00 14 4f 69 8e 00version Sun Quad Gigaswift PCI-X adapter FCode 2.13 04/11/09phy-type mifboard-model 501-6738model SUNW,pci-x-qgeok3.1.3.4.配置Server服务器◆在虚拟机创建存放镜像文件的共享目录bash-3.2# mkdir –p /quan/iso◆进入光盘系统目录,安装Server启动程序bash-3.2# cd /cdrom/Sol_10_113_sparc/Solaris_10/Tools/bash-3.2# lsBoot add_install_client rm_install_clientInstallers dial setup_install_serverbash-3.2# ./setup_install_server /quan/iso/Verifying target directory...Calculating the required disk space for the Solaris_10 productCalculating space required for the installation boot imageCopying the CD image to disk...Copying Install Boot Image hierarchy...Copying /boot netboot hierarchy...Install Server setup completebash-3.2#cd /quan/isobash-3.2# du -sh * //查看文件及大小4K Copyright2K Offer_to_Provide_Source_Code.txt1.9G Solaris_10226M boot1K installer10K platformbash-3.2#◆共享安装文件存放的目录bash-3.2# share -F nfs -o ro,anon=0 -d "install server directory" /quan/iso //临时共享/quan/iso也可把上命令添加到/etc/dfs/dfstab中运行shareall永久共享bash-3.2# share //查看共享文件- /quan/iso ro,anon=0 " install server directory "bash-3.2#bash-3.2# showmount -e localhostlocalhost 的导出列表:/quan/iso (每一个)bash-3.2#◆启动tftp服务bash-3.2# vi /etc/inet/inetd.conf## Copyright 2004 Sun Microsystems, Inc. All rights reserved.# Use is subject to license terms.##ident "@(#)inetd.conf 1.56 04/10/21 SMI"## Legacy configuration file for inetd(1M). See inetd.conf(4).## This file is no longer directly used to configure inetd.# The Solaris services which were formerly configured using this file# are now configured in the Service Management Facility (see smf(5))# using inetadm(1M).## Any records remaining in this file after installation or upgrade,# or later created by installing additional software, must be converted# to smf(5) services and imported into the smf repository using# inetconv(1M), otherwise the service will not be available. Once# a service has been converted using inetconv, further changes made to# its entry here are not reflected in the service.### CacheFS daemon. Provided only as a basis for conversion by inetconv(1M).#100235/1 tli rpc/ticotsord wait root /usr/lib/fs/cachefs/cachefsd cachefsd# TFTPD - tftp server (primarily used for booting)tftp dgram udp6 wait root /usr/sbin/in.tftpd in.tftpd -s /tftpboot bash-3.2# //删除最后一行前面的#注释bash-3.2# svcadm enable svc:/network/tftp/udp6:defaultsvcadm: 模式 'svc:/network/tftp/udp6:default' 与所有实例都不匹配//开启tftp服务报错bash-3.2# inetconv -i /etc/inet/inetd.conf 1>/dev/null 2>&1//将 /etc/inet/inetd.conf 项转换为 SMF 服务清单bash-3.2# svcadm enable svc:/network/tftp/udp6:default//重新开启tftp服务bash-3.2# svcs -a|grep tftp //查看tftp服务状态online 11:08:51 svc:/network/tftp/udp6:defaultbash-3.2# netstat -a | grep tftp*.tftp Idle*.tftp Idle bash-3.2#bash-3.2#3.1.3.5.添加客户端配置信息◆修改/etc/hosts 文件添加Sun Blade 2500系统的IP地址和主机名bash-3.2# vi /etc/hosts## Internet host table#::1 localhost127.0.0.1 localhost10.233.23.159 Solaris10-test loghost10.233.23.144 quan-test02bash-3.2#注意:网络引导的Server和Client的IP地址必须在同一网段;◆修改/etc/ether,添加网口MAC地址和主机名bash-3.2# vi /etc/ethers00:14:4f:69:8e:00 quan-test02bash-3.2#3.1.3.6.生成客户端启动文件bash-3.2# cd /quan/isobash-3.2# lsCopyright Solaris_10 installerOffer_to_Provide_Source_Code.txt boot platformbash-3.2# cd ./Solaris_10/Tools/bash-3.2# lsBoot add_install_client rm_install_clientInstallers dial setup_install_serverbash-3.2# ./add_install_client -e 00:14:4f:69:8e:00 quan-test02 sun4usaving original /etc/dfs/dfstab in /etc/dfs/dfstab.origAdding "share -F nfs -o ro,anon=0 /quan/iso" to /etc/dfs/dfstabmaking /tftpbootenabling network/rarp serviceenabling network/rpc/bootparams serviceupdating /etc/bootparamscopying boot file to /tftpboot/inetboot.SUN4U.Solaris_10-1bash-3.2# //生成客户端启动文件bash-3.2#bash-3.2#bash-3.2# more /etc/bootparams //查看生成的配置文件信息quan-test01 root=Solaris10-test:/quan/iso/Solaris_10/Tools/Boot install=Solaris10-test:/quan/iso boottype=:in rootopts=:rsize=8192bash-3.2# pwd/quan/iso/Solaris_10/Toolsbash-3.2# ls /tftpboot/0AE9178F 0AE91791.SUN4U rm.10.233.23.1440AE9178F.SUN4U 0AE91792 rm.10.233.23.1450AE91790 0AE91792.SUN4U rm.10.233.23.1460AE91790.SUN4U inetboot.SUN4U.Solaris_10-1 tftpboot0AE91791 rm.10.233.23.143bash-3.2#bash-3.2#注意: IP和MAC对应的主机名必须唯一一致,否则可能安装失败;3.1.3.7.安装操作系统okok boot /pci@1e,600000/pci@4/network@0Sun Blade 2500, No KeyboardCopyright 1998-2003 Sun Microsystems, Inc. All rights reserved.OpenBoot 4.9.7, 4096 MB memory installed, Serial #60984762.Ethernet address 0:3:ba:a2:8d:ba, Host ID: 83a28dba.Rebooting with command: boot /pci@1e,600000/pci@4/network@0Boot device: /pci@1e,600000/pci@4/network@0 File and args:/pci@1e,600000/pci@4/network@0: 1000 Mbps full duplex link upTimeout waiting for ARP/RARP packetTimeout waiting for ARP/RARP packetTimeout waiting for ARP/RARP packetTimeout waiting for ARP/RARP packetTimeout waiting for ARP/RARP packet3a000 /pci@1e,600000/pci@4/network@0: 1000 Mbps full duplex link upRequesting Internet address for 0:14:4f:69:8e:0SunOS Release 5.10 Version Generic_147147-26 64-bitCopyright (c) 1983, 2013, Oracle and/or its affiliates. All rights reserved. Configuring devices.Using RPC Bootparams for network configuration information.Attempting to configure interface bge0...Skipped interface bge0Attempting to configure interface ce3...Skipped interface ce3Attempting to configure interface ce2...Skipped interface ce2Attempting to configure interface ce1...Skipped interface ce1Attempting to configure interface ce0...Configured interface ce0svc:/system/filesystem/local:default: WARNING: /usr/sbin/zfs mount -a failed: one or more file systems failed to mountSetting up Java. Please wait...Serial console, reverting to text installBeginning system identification...Searching for configuration file(s)...Search complete.Discovering additional network configuration...注意:上面黄色部分会出现网口闪断,属于正常状态;Select a Language0. English1. Brazilian Portuguese2. French3. German4. Italian5. Japanese6. Korean7. Simplified Chinese8. Spanish9. Swedish10. Traditional ChinesePlease make a choice (0 - 10), or press h or ? for help: 0What type of terminal are you using?1) ANSI Standard CRT2) DEC VT523) DEC VT1004) Heathkit 195) Lear Siegler ADM316) PC Console7) Sun Command Tool8) Sun Workstation9) Televideo 91010) Televideo 92511) Wyse Model 5012) X Terminal Emulator (xterms)13) CDE Terminal Emulator (dtterm)14) OtherType the number of your choice and press Return: 3- The Oracle Solaris Installation Program --------------------------------------The Solaris installation program is divided into a series of short sectionswhere you'll be prompted to provide information for the installation. Atthe end of each section, you'll be able to change the selections you'vemade before continuing.About navigation...- The mouse cannot be used- If your keyboard does not have function keys, or they do notrespond, press ESC; the legend at the bottom of the screenwill change to show the ESC keys to use for navigation.-------------------------------------------------------------------------------- F2_Continue F6_Help- Identify This System ---------------------------------------------------------On the next screens, you must identify this system as networked ornon-networked, and set the default time zone and date/time.If this system is networked, the software will try to find the informationit needs to identify your system; you will be prompted to supply anyinformation it cannot find.> To begin identifying this system, press F2.-------------------------------------------------------------------------------- F2_Continue F6_Help- Configure Multiple Network Interfaces ----------------------------------------Multiple network interfaces have been detected on this system. Specify allof the network interfaces you want to configure.Note: You must choose at least one interface to configure.Network interfaces------------------[X] bge0[ ] ce0[ ] ce1[ ] ce2[ ] ce3-------------------------------------------------------------------------------- F2_Continue F6_Help- Subnet for bge0 --------------------------------------------------------------On this screen you must specify whether this system is part of a subnet. If you specify incorrectly, the system will have problems communicating on thenetwork after you reboot.> To make a selection, use the arrow keys to highlight the option andpress Return to mark it [X].System part of a subnet-----------------------[X] Yes[ ] No-------------------------------------------------------------------------------- F2_Continue F6_Help- Netmask for bge0 -------------------------------------------------------------On this screen you must specify the netmask of your subnet. A defaultnetmask is shown; do not accept the default unless you are sure it iscorrect for your subnet. A netmask must contain four sets of numbersseparated by periods (for example 255.255.255.0).Netmask for bge0 255.255.255.128-------------------------------------------------------------------------------- F2_Continue F6_Help- IPv6 for bge0 ----------------------------------------------------------------Specify whether or not you want to enable IPv6, the next generation Internet Protocol, on this network interface. Enabling IPv6 will have no effect ifthis machine is not on a network that provides IPv6 service. IPv4 servicewill not be affected if IPv6 is enabled.> To make a selection, use the arrow keys to highlight the option andpress Return to mark it [X].Enable IPv6 for bge0--------------------[ ] Yes[X] No-------------------------------------------------------------------------------- F2_Continue F6_Help- IPv6 for bge0 ----------------------------------------------------------------Specify whether or not you want to enable IPv6, the next generation Internet Protocol, on this network interface. Enabling IPv6 will have no effect ifthis machine is not on a network that provides IPv6 service. IPv4 servicewill not be affected if IPv6 is enabled.> To make a selection, use the arrow keys to highlight the option andpress Return to mark it [X].Enable IPv6 for bge0--------------------[ ] Yes[X] NoPlease wait...-------------------------------------------------------------------------------- F2_Continue F6_Help- Set the Default Route for bge0 -----------------------------------------------To specify the default route, you can let the software try to detect oneupon reboot, you can specify the IP address of the router, or you can choose None. Choose None if you do not have a router on your subnet.> To make a selection, use the arrow keys to select your choice and pressReturn to mark it [X].Default Route for bge0--------------------------[ ] Detect one upon reboot[X] Specify one[ ] None-------------------------------------------------------------------------------- F2_Continue F6_Help- Default Route IP Address for bge0 --------------------------------------------Enter the IP address of the default route. This entry will be placed in the/etc/defaultrouter file and will be the default route after you reboot(example 129.146.89.225).Router IP Address for bge0 10.233.23.129-------------------------------------------------------------------------------- F2_Continue F6_Help- Confirm Information for bge0 -------------------------------------------------> Confirm the following information. If it is correct, press F2;to change any information, press F4.System part of a subnet: YesNetmask: 255.255.255.128Enable IPv6: NoDefault Route: Specify oneRouter IP Address: 10.233.23.129-------------------------------------------------------------------------------- F2_Continue F4_Change F6_Help- Configure Security Policy: --------------------------------------------------- Specify Yes if the system will use the Kerberos security mechanism.Specify No if this system will use standard UNIX security.Configure Kerberos Security---------------------------[ ] Yes[X] No-------------------------------------------------------------------------------- F2_Continue F6_Help- Confirm Information ----------------------------------------------------------> Confirm the following information. If it is correct, press F2;to change any information, press F4.Configure Kerberos Security: No-------------------------------------------------------------------------------- F2_Continue F4_Change F6_Help- Name Service -----------------------------------------------------------------On this screen you must provide name service information. Select the nameservice that will be used by this system, or None if your system will either not use a name service at all, or if it will use a name service not listedhere.> To make a selection, use the arrow keys to highlight the optionand press Return to mark it [X].Name service------------[ ] NIS+[ ] NIS[ ] DNS[ ] LDAP[X] None-------------------------------------------------------------------------------- F2_Continue F6_Help- Confirm Information ----------------------------------------------------------> Confirm the following information. If it is correct, press F2;to change any information, press F4.Name service: None-------------------------------------------------------------------------------- F2_Continue F4_Change F6_Help- NFSv4 Domain Name ------------------------------------------------------------NFS version 4 uses a domain name that is automatically derived from thesystem's naming services. The derived domain name is sufficient for mostconfigurations. In a few cases, mounts that cross domain boundaries mightcause files to appear to be owned by "nobody" due to the lack of a commondomain name.The current NFSv4 default domain is: ""NFSv4 Domain Configuration----------------------------------------------[X] Use the NFSv4 domain derived by the system[ ] Specify a different NFSv4 domain-------------------------------------------------------------------------------- F2_Continue F6_Help- Confirm Information for NFSv4 Domain -----------------------------------------> Confirm the following information. If it is correct, press F2;to change any information, press F4.NFSv4 Domain Name: << Value to be derived dynamically >>-------------------------------------------------------------------------------- F2_Continue F4_Change F6_Help- Time Zone --------------------------------------------------------------------On this screen you must specify your default time zone. You can specify atime zone in three ways: select one of the continents or oceans from thelist, select other - offset from GMT, or other - specify time zone file.> To make a selection, use the arrow keys to highlight the option andpress Return to mark it [X].Continents and Oceans----------------------------------- [ ] Africa| [ ] Americas| [ ] Antarctica| [ ] Arctic Ocean| [X] Asia| [ ] Atlantic Ocean| [ ] Australia| [ ] Europev [ ] Indian Ocean-------------------------------------------------------------------------------- F2_Continue F6_Help- Country or Region ------------------------------------------------------------> To make a selection, use the arrow keys to highlight the option andpress Return to mark it [X].Countries and Regions------------------------- [ ] Afghanistan| [ ] Armenia| [ ] Azerbaijan| [ ] Bahrain| [ ] Bangladesh| [ ] Bhutan| [ ] Brunei| [ ] Cambodia| [X] China| [ ] Cyprus| [ ] East Timor| [ ] Georgiav [ ] Hong Kong-------------------------------------------------------------------------------- F2_Continue F6_Help- Date and Time ----------------------------------------------------------------> Accept the default date and time or enternew values.Date and time: 2014-11-12 15:21Year (4 digits) : 2014Month (1-12) : 11Day (1-31) : 12Hour (0-23) : 15Minute (0-59) : 21-------------------------------------------------------------------------------- F2_Continue F6_Help- Confirm Information ----------------------------------------------------------> Confirm the following information. If it is correct, press F2;to change any information, press F4.Time zone: PRCDate and time: 2014-11-12 15:21:00-------------------------------------------------------------------------------- F2_Continue F4_Change F6_Help- Root Password ---------------------------------------------------------------- Please enter the root password for this system.The root password may contain alphanumeric and special characters. Forsecurity, the password will not be displayed on the screen as you type it.> If you do not want a root password, leave both entries blank.Root password: *******Root password: *******-------------------------------------------------------------------------------- F2_Continue F6_Help- Enabling remote services ----------------------------------------------------- Would you like to enable network services for use by remote clients?Selecting "No" provides a more secure configuration inwhich Secure Shell is the only network service provided toremote clients. Selecting "Yes" enables a larger set ofservices as in previous Solaris releases. If in doubt, it issafe to select "No" as any services can be individually enabledafter installation.Note: This choice only affects initial installs. It doesn't affect upgrades.Remote services enabled-----------------------[X] Yes[ ] No-------------------------------------------------------------------------------- F2_Continue F6_Help- Provide Oracle Configuration Manager Registration Information ----------------To improve products and services, Oracle Solaris communicates configurationdata to Oracle after rebooting.You can register your version of Oracle Solaris to capture this data foryour use, or the data is sent anonymously.For information about what configuration data is communicated and how tocontrol this facility, see the Release Notes or/goto/solarisautoreg> Use the arrow keys to select the option and press Return tomark it [X].-----------------------------------------------------------------[X] I would like to register using My Oracle Support information.-------------------------------------------------------------------------------- F2_Continue F6_Help- Provide Oracle Configuration Manager Registration Information ----------------To register, complete the following fields:- Confirm your existing My Oracle Support information.- If using a proxy server, provide the proxy settings.Provide your email address to be informed of security issues, install andinitiate Oracle Configuration Manager. Easier for you if you use your MyOracle Support Email Address/User Name.For information about what configuration data is communicated and how tocontrol this facility, see the Release Notes or/goto/solarisautoregProvide your My Oracle Support password to receive security updates via your My Oracle Support account.User Name/Email: My Oracle Support Password:Proxy Server Host Name:Proxy Server Port Number:HTTP Proxy User Name:-------------------------------------------------------------------------------- F2_Continue F6_HelpSystem identification is completed.System identification complete.Starting Solaris installation program...Executing JumpStart preinstall phase...Searching for SolStart directory...Checking rules.ok file...Using begin script: install_beginUsing finish script: patch_finishExecuting SolStart preinstall phase...Executing begin script "install_begin"...Begin script install_begin execution completed.- Solaris Interactive Installation ---------------------------------------------On the following screens, you can accept the defaults or you can customizehow Solaris software will be installed by:- Selecting the type of Solaris software to install- Selecting disks to hold software you've selected- Selecting unbundled products to be installed with Solaris- Specifying how file systems are laid out on the disksAfter completing these tasks, a summary of your selections (called aprofile) will be displayed.There are two ways to install your Solaris software:- "Standard" installs your system from a standard Solaris Distribution.Selecting "Standard" allows you to choose between initial installand upgrade, if your system is upgradable.- "Flash" installs your system from one or more Flash Archives.-------------------------------------------------------------------------------- F2_Standard F4_Flash F5_Exit F6_Help- iSCSI Installation ----------------------------------------------------------- Do you want to install Oracle Solaris 10 on an iSCSI target?NOTE: You must have created the iSCSI target before beginning the OSinstallation and the target system should be running Oracle Solaris 11 orSolaris 10 U5 or greater.If you choose to install the OS on a non-iSCSI target, you will be takendirectly to the Oracle Solaris 10 installation screens.[X] Install on non-iSCSI target[ ] Install on iSCSI target-------------------------------------------------------------------------------- F2_Continue F3_Go Back F5_Exit- Eject a CD/DVD Automatically? ------------------------------------------------During the installation of Solaris software, you may be using one or moreCDs/DVDs. You can choose to have the system eject each CD/DVD automaticallyafter it is installed or you can choose to manually eject each CD/DVD.[X] Automatically eject CD/DVD[ ] Manually eject CD/DVD-------------------------------------------------------------------------------- F2_Continue F3_Go Back F5_Exit- Reboot After Installation? ---------------------------------------------------After Solaris software is installed, the system must be rebooted. You canchoose to have the system automatically reboot, or you can choose tomanually reboot the system if you want to run scripts or do othercustomizations before the reboot. You can manually reboot a system by using the reboot(1M) command.[X] Auto Reboot[ ] Manual Reboot-------------------------------------------------------------------------------- F2_Continue F3_Go Back F5_Exit- Choose Media -----------------------------------------------------------------Please specify the media from which you will install the Solaris OperatingSystem.Media:[ ] CD/DVD[X] Network File System-------------------------------------------------------------------------------- F2_Continue F3_Go Back F5_Exit- Specify Network File System Path ---------------------------------------------Please specify the path to the network file system from which you willinstall the Solaris Operating System. Example:NFS Location: server:/path_to_Solaris_image============================================================================NFS Location: 10.233.23.159:/quan/iso-------------------------------------------------------------------------------- F2_Continue F3_Go Back- Solaris Interactive Installation ---------------------------------------------This system is upgradable, so there are two ways to install the Solarissoftware.The Upgrade option updates the Solaris software to the new release, savingas many modifications to the previous version of Solaris software aspossible. Back up the system before using the Upgrade option.The Initial option overwrites the system disks with the new version ofSolaris software. This option allows you to preserve any existing filesystems. Back up any modifications made to the previous version of Solarissoftware before starting the Initial option.After you select an option and complete the tasks that follow, a summary ofyour actions will be displayed.-------------------------------------------------------------------------------- F2_Upgrade F3_Go Back F4_Initial F5_Exit F6_Help由于硬盘中有原来的操作系统,选择初始化安装。
T5440上Solaris10的LDOM安装配置记录
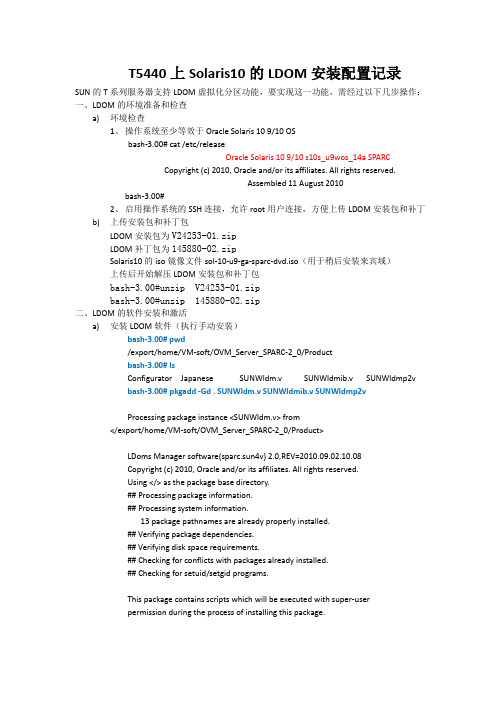
T5440上Solaris10的LDOM安装配置记录SUN的T系列服务器支持LDOM虚拟化分区功能,要实现这一功能,需经过以下几步操作:一、LDOM的环境准备和检查a)环境检查1、操作系统至少等效于Oracle Solaris 10 9/10 OSbash-3.00# cat /etc/releaseOracle Solaris 10 9/10 s10s_u9wos_14a SPARCCopyright (c) 2010, Oracle and/or its affiliates. All rights reserved.Assembled 11 August 2010bash-3.00#2、启用操作系统的SSH连接,允许root用户连接,方便上传LDOM安装包和补丁b)上传安装包和补丁包LDOM安装包为V24253-01.zipLDOM补丁包为145880-02.zipSolaris10的iso镜像文件sol-10-u9-ga-sparc-dvd.iso(用于稍后安装来宾域)上传后开始解压LDOM安装包和补丁包bash-3.00#unzip V24253-01.zipbash-3.00#unzip 145880-02.zip二、LDOM的软件安装和激活a)安装LDOM软件(执行手动安装)bash-3.00# pwd/export/home/VM-soft/OVM_Server_SPARC-2_0/Productbash-3.00# lsConfigurator Japanese SUNWldm.v SUNWldmib.v SUNWldmp2vbash-3.00# pkgadd -Gd . SUNWldm.v SUNWldmib.v SUNWldmp2vProcessing package instance <SUNWldm.v> from</export/home/VM-soft/OVM_Server_SPARC-2_0/Product>LDoms Manager software(sparc.sun4v) 2.0,REV=2010.09.02.10.08Copyright (c) 2010, Oracle and/or its affiliates. All rights reserved.Using </> as the package base directory.## Processing package information.## Processing system information.13 package pathnames are already properly installed.## Verifying package dependencies.## Verifying disk space requirements.## Checking for conflicts with packages already installed.## Checking for setuid/setgid programs.This package contains scripts which will be executed with super-userpermission during the process of installing this package.Do you want to continue with the installation of <SUNWldm> [y,n,?] y Installing LDoms Manager software as <SUNWldm>## Installing part 1 of 1./opt/SUNWldm/bin/ldm <symbolic link>/opt/SUNWldm/bin/ldmconfig <symbolic link>/opt/SUNWldm/bin/ldmd/opt/SUNWldm/bin/ldmd_start/opt/SUNWldm/bin/schemas/cim-common.xsd/opt/SUNWldm/bin/schemas/cim-rasd.xsd/opt/SUNWldm/bin/schemas/cim-vssd.xsd/opt/SUNWldm/bin/schemas/cli-list-constraint-v3.xsd/opt/SUNWldm/bin/schemas/combined-v3.xsd/opt/SUNWldm/bin/schemas/event-v3.xsd/opt/SUNWldm/bin/schemas/ldmd-binding.xsd/opt/SUNWldm/bin/schemas/ldmd-property.xsd/opt/SUNWldm/bin/schemas/ovf-core.xsd/opt/SUNWldm/bin/schemas/ovf-envelope.xsd/opt/SUNWldm/bin/schemas/ovf-section.xsd/opt/SUNWldm/bin/schemas/ovf-strings.xsd/opt/SUNWldm/bin/schemas/ovfenv-core.xsd/opt/SUNWldm/bin/schemas/ovfenv-section.xsd/opt/SUNWldm/ldom_database.xsd/opt/SUNWldm/lib/ds/dr_cpu-1.0_lib.so/opt/SUNWldm/lib/ds/dr_crypto-1.0_lib.so/opt/SUNWldm/lib/ds/dr_mem-1.0_lib.so/opt/SUNWldm/lib/ds/dr_vio-1.0_lib.so/opt/SUNWldm/lib/ds/ds_dio-1.0_lib.so/opt/SUNWldm/lib/ds/fma_cpu-1.0_lib.so/opt/SUNWldm/lib/ds/fma_cpu_svc-1.0_lib.so/opt/SUNWldm/lib/ds/fma_io_domain-1.0_lib.so/opt/SUNWldm/lib/ds/fma_mem-1.0_lib.so/opt/SUNWldm/lib/ds/fma_mem_svc-1.0_lib.so/opt/SUNWldm/lib/ds/fma_pri_svc-1.0_lib.so/opt/SUNWldm/lib/ds/keystore-1.0_lib.so/opt/SUNWldm/lib/ds/mdstore-1.0_lib.so/opt/SUNWldm/lib/ds/platsvc-1.0_lib.so/opt/SUNWldm/lib/ds/pri_svc-1.0_lib.so/opt/SUNWldm/lib/ds/varconfig-1.0_lib.so/opt/SUNWldm/lib/templates/guest-state.bin/opt/SUNWldm/lib/templates/ldc-state.bin/opt/SUNWldm/lib/templates/vcpu-state.bin/opt/SUNWldm/man/man1m/ldm.1m <symbolic link>/opt/SUNWldm/man/man1m/ldmconfig.1m <symbolic link>/opt/SUNWldm/man/man1m/ldmd.1m <symbolic link>/usr/sbin/ldm/usr/sbin/ldmconfig/usr/share/man/man1m/ldm.1m/usr/share/man/man1m/ldmconfig.1m/usr/share/man/man1m/ldmd.1m/usr/share/man/man1m/virtinfo.1m/usr/share/man/man3ext/v12n.3ext/usr/share/man/man3ext/v12n_capabilities.3ext/usr/share/man/man3ext/v12n_chassis_serialno.3ext/usr/share/man/man3ext/v12n_ctrl_domain.3ext/usr/share/man/man3ext/v12n_domain_name.3ext/usr/share/man/man3ext/v12n_domain_roles.3ext/usr/share/man/man3ext/v12n_domain_uuid.3ext/usr/share/man/man3lib/libv12n.3lib[ verifying class <none> ][ verifying class <manifest> ]Installation of <SUNWldm> was successful.Processing package instance <SUNWldmib.v> from</export/home/VM-soft/OVM_Server_SPARC-2_0/Product>Logical Domains MIB(sparc.sun4v) 1.0.1,REV=2008.04.30.17.07 Copyright 2007 Sun Microsystems, Inc. All rights reserved.Use is subject to license terms.Using </> as the package base directory.## Processing package information.## Processing system information.1 package pathname is already properly installed.## Verifying package dependencies.## Verifying disk space requirements.## Checking for conflicts with packages already installed.## Checking for setuid/setgid programs.Installing Logical Domains MIB as <SUNWldmib>## Installing part 1 of 1./opt/SUNWldmib/legal/Ldoms_MIB_1.0.1_Entitlement.txt/opt/SUNWldmib/legal/Ldoms_MIB_1.0.1_SLA_Entitlement.txt /opt/SUNWldmib/legal/Ldoms_MIB_1.0.1_TranslatedSLA.pdf /opt/SUNWldmib/lib/ldomMIB.so/opt/SUNWldmib/lib/mibs/SUN-LDOM-MIB.mib[ verifying class <none> ]Installation of <SUNWldmib> was successful.Processing package instance <SUNWldmp2v> from</export/home/VM-soft/OVM_Server_SPARC-2_0/Product>LDoms P2V tool(sparc) 2.0,REV=2010.09.02.10.08Copyright (c) 2010, Oracle and/or its affiliates. All rights reserved.Using </> as the package base directory.## Processing package information.## Processing system information.6 package pathnames are already properly installed.## Verifying package dependencies.## Verifying disk space requirements.## Checking for conflicts with packages already installed.## Checking for setuid/setgid programs.This package contains scripts which will be executed with super-userpermission during the process of installing this package.Do you want to continue with the installation of <SUNWldmp2v> [y,n,?] yInstalling LDoms P2V tool as <SUNWldmp2v>## Installing part 1 of 1./opt/SUNWldmp2v/bin/ldmp2v_prepare/opt/SUNWldmp2v/etc/ldmp2v.conf.sample/opt/SUNWldmp2v/lib/ldmp2v_convert/opt/SUNWldmp2v/man/man1m/ldmp2v.1m <symbolic link>/usr/sbin/ldmp2v/usr/share/man/man1m/ldmp2v.1m[ verifying class <none> ]Installation of <SUNWldmp2v> was successful.bash-3.00# pkginfo -l SUNWldm|grep VERSIONVERSION: 2.0,REV=2010.09.02.10.08bash-3.00#b)安装LDOM补丁bash-3.00# ls -lttotal 4459764-rw-r--r-- 1 root root 3564851 Apr 28 2011 V24253-01.zip-rw-r--r-- 1 root root 648822 Apr 28 2011 145880-02.zipdrwxr-xr-x 3 root root 512 Nov 17 2010 145880-02drwxr-xr-x 4 root root 512 Sep 17 2010 OVM_Server_SPARC-2_0-rw-rw-r-- 1 root root 2278031360 Aug 12 2010 sol-10-u9-ga-sparc-dvd.iso bash-3.00#bash-3.00# patchadd 145880-02Validating patches...Loading patches installed on the system...Done!Loading patches requested to install.Done!Checking patches that you specified for installation.Done!Approved patches will be installed in this order:145880-02Checking installed patches...Executing prepatch script...Installing patch packages...Patch 145880-02 has been successfully installed.See /var/sadm/patch/145880-02/log for detailsExecuting postpatch script...Patch packages installed:SUNWldmbash-3.00# ls /var/sadm/patch/145880-02/log/var/sadm/patch/145880-02/logbash-3.00# ls -l /var/sadm/patch/145880-02total 20-rw-r--r-- 1 root root 3294 Nov 18 2010 README.145880-02-rw-r--r-- 1 root root 450 May 23 17:38 log-rwxr-xr-x 1 root root 1833 Nov 12 2010 postbackout-rwxr-xr-x 1 root root 2433 Nov 12 2010 prebackoutbash-3.00# cat /var/sadm/patch/145880-02/logThis appears to be an attempt to install the same architecture andversion of a package which is already installed. This installationwill attempt to overwrite this package.Dryrun complete.No changes were made to the system.This appears to be an attempt to install the same architecture andversion of a package which is already installed. This installationwill attempt to overwrite this package.Installation of <SUNWldm> was successful.c)激活LDOM软件bash-3.00# svcadm enable ldmdbash-3.00# /opt/SUNWldm/bin/ldm listNAME STATE FLAGS CONS VCPU MEMORY UTIL UPTIMEprimary active -n-c-- SP 128 65248M 0.7% 27mbash-3.00# rebootbash-3.00# svcadm enable ldmd三、LDOM控制域域配置bash-3.00#ldm listbash-3.00# ldm add-vcc port-range=5000-5005 primary-vcc0 primarybash-3.00# ldm add-vsw net-dev=nxge0 primary-vsw0 primarybash-3.00#ldm add-vds primary-vds0 primarybash-3.00#ldm list -o crypto primarybash-3.00#ldm set-mau 1 primarybash-3.00#ldm add-vcpu 4 primarybash-3.00#ldm add-memory 8G primarybash-3.00# ldm add-config initialbash-3.00# ldm list-configfactory-defaultinitial [next poweron]bash-3.00# sync;sync;syncbash-3.00# shutdown -y -g0 -i6Shutdown started. Thu May 24 08:57:57 CST 2012Changing to init state 6 - please waitBroadcast Message from root (pts/2) on t5440 Thu May 24 08:57:57...THE SYSTEM t5440 IS BEING SHUT DOWN NOW ! ! !Log off now or risk your files being damagedbash-3.00# exitexit# exitbash-3.00# svcadm enable vntsdbash-3.00# svcs vntsdSTATE STIME FMRIonline May_29 svc:/ldoms/vntsd:defaultbash-3.00#ldm list-services primary四、LDOM来宾域配置1.添加来宾域bash-3.00#ldm add-domain ldg-gljybash-3.00# ldm listNAME STATE FLAGS CONS VCPU MEMORY UTIL UPTIMEprimary active -n-cv- SP 8 8416M 0.7% 7d 2h 2mldg-gljy inactive ------ 0.0% 02.分配cpubash-3.00#ldm add-vcpu 12 ldg-gljy3.分配memorybash-3.00#ldm add-memory 4G ldg-gljy4.分配网卡bash-3.00#ldm add-vsw net-dev=nxge1 primary-vsw1 primarybash-3.00#ldm add-vnet vnet1 primary-vsw1 ldg-gljy5.分配磁盘bash-3.00# format</dev/nullSearching for disks...doneAVAILABLE DISK SELECTIONS:0. c0t0d0 <SUN300G cyl 46873 alt 2 hd 20 sec 625> solaris/pci@400/pci@0/pci@1/scsi@0/sd@0,01. c0t1d0 <SUN300G cyl 46873 alt 2 hd 20 sec 625>/pci@400/pci@0/pci@1/scsi@0/sd@1,02. c0t2d0 <SUN300G cyl 46873 alt 2 hd 20 sec 625>/pci@400/pci@0/pci@1/scsi@0/sd@2,03. c0t3d0 <SUN300G cyl 46873 alt 2 hd 20 sec 625>/pci@400/pci@0/pci@1/scsi@0/sd@3,04. c1t600144F0C91E31EE00004FCD43DE0001d0 <SUN-SunStorage7310-1.0 cyl 9749alt 2 hd 254 sec 254>/scsi_vhci/ssd@g600144f0c91e31ee00004fcd43de0001Specify disk (enter its number):bash-3.00#bash-3.00#ldm add-vdsdev /dev/dsk/c0t2d0s2 vol1@primary-vds0bash-3.00#ldm add-vdisk vdisk1 vol1@primary-vds ldg-gljy6.分配来宾域控制台bash-3.00#ldm set-vconsole port=5001 ldg-gljy五、LDOM来宾域的安装1、给来宾域分配iso安装文件bash-3.00#lldm add-vdsdev /export/home/VM-soft/sol-10-u9-ga-sparc-dvd.iso iso_vol@primary-vds0bash-3.00#ldm add-vdisk isodisk iso_vol@primary-vds ldg-gljy2、启动来宾域到ok状态bash-3.00#ldm bind ldg-gljybash-3.00#ldm start-domain ldg-gljybash-3.00#telnet localhost 5001……ok)3、指定从iso文件启动ok)devaliasok)boot isodisk:f4、安装solaris10操作系统(略)。
- 1、下载文档前请自行甄别文档内容的完整性,平台不提供额外的编辑、内容补充、找答案等附加服务。
- 2、"仅部分预览"的文档,不可在线预览部分如存在完整性等问题,可反馈申请退款(可完整预览的文档不适用该条件!)。
- 3、如文档侵犯您的权益,请联系客服反馈,我们会尽快为您处理(人工客服工作时间:9:00-18:30)。
一、以下是在虚拟机下安装solaris10操作系统的步骤:
1.先在起始页中选择新建虚拟机,根据步骤添加solaris10的镜像
文件,分配内存和磁盘大小等(网络连接最好选桥接方式,配置网络的时候更简单)。
注意:Solaris10系统虚拟机分配内存时最小内存为768MB,所以,内存分配应>768MB,否则安装无法进行
2.进入最初的安装页面,选择1选项。
3.提示使用哪种键盘输入方式,选择(先用方向键标记到选择的选项,然后用回车键选择上,以下相同)美式英语方式(默认)。
4.提示操作系统安装的语言环境,选择6(简体中文),按回车键。
5.按F2键继续。
6. 按F2键继续。
7.提示安装的系统是否联网,选Yes(默认),按F2键继续。
8.提示是否使用DCHP,如果使用,则要重启系统,选择No(默认),按F2键继续。
9.提示给主机取个名字,按F2键继续。
10.提示给主机设置一个外接的IP地址(最号和本机系统中设的IP 地址在一个网段,以后的网络配置就会跟简单),按F2键继续。
11.提示是否需要设置子网掩码,选择Yes(默认),按F2键继续。
12.设置子网掩码,这里是默认值,按F2键继续。
13.提示是否在该网络接口上启用Ipv6,这里选择No(默认),按F2键继续。
14.提示路由设置,这里选择第一或第三都行,按F2键继续。
15.显示该阶段的设置情况,若无误,按F2,若要修改,按F4,这里按F2键继续。
16.配置Kerberos的安全性,选择No,按F2键继续。
17.按F2键继续。
18.提示选择命名服务,这里选None,按F2键继续。
19. 按F2键继续。
20.NFSv4的域名配置,选默认值,按F2继续。
21.按F2继续。
22.选择Asia,按F2继续。
23.选择China,按F2继续。
24.日期设置,按F2继续。
25. 按F2继续。
26.为超级用户设置密码,按F2继续。
27. 按F2继续。
28.提示系统是否要设置远程服务,选Yes,按F2继续。
29.提示安装是采用标准还是采用快捷方式,选标准,按F2.
30.提示安装光盘期间是自动退出还是手动退出,选择自动(默认),按F2继续。
31.提示重启系统时是自动还是手动,选择自动(默认),按F2继续。
32. 按F2继续。
33.提示是否接受协议,按F2继续。
34.提示选择地区使用语言,用方向键定位到Asia前面的>符号,按回车键,弹出子选项,选中如图的四个选项,按F2继续。
35.提示选择一个默认值,按F2继续。
36.提示添加其它系统产品软件的安装方式,这里没有,选择None,按F2继续。
37.提示选择文件系统类型,选UFS(默认,ZFS是最新的128位系统),按F2继续。
38.提示选择安装系统类型,这里选择第一个(完整分发加OEM支持),按F2继续。
39.这里要特别注意,默认是选中的,如果直接按F2继续,将无法安装。
解决办法是:
按空格键,出现未被选中状态,如下图,再按F2继续。
提示没有选择磁盘,按F2。
选择第一个(默认),按F2继续。
现在看到的如下图,所选择的磁盘安装大小为20426MB了,按F2继续。
40.按F2继续。
41.默认的两个挂载点就行、选多了分细了会要求更大的硬盘,实际系统会根据需要自动划分细些,按F2继续。
42.默认划分,按F2继续。
43.提示是否配置远程文件系统,F4远程安装,根据解说,没有必要安装,按F2继续。
44.显示该阶段的系统设置数据信息,F4修改,按F2开始安装。
45.进入安装界面
安装过程中可能出现以下乱码,不要着急,根据提示输入c(也可以不输入c,不过时间等得长些),安装回车键就行了。
安装过程中会出现如下情况,其中,pujialin是安装前配置的主机名,别担心,进入系统后改一下:/etc/hosts文件就可以了。
当系统重启到下面界面的时候,先在“选项”里选择回话那个选项,在选择到“java桌面系统”(选择过程中要一直安装鼠标左键),然后输入“root”及其之前设置的密码,按回车键进入系统界面。
要解决先前发现的问题,就要修改文件系统里的/etc/hosts文件,具体如下:
把:192.168.0.10 pujialin loghost
改成:192.168.0.10 pujialin loghost
或者改成其它的域名。
然后重启就不会出现先前的那个现象了。
至此,安装已结束。
接下来是配置网络。
二、网络配置
1.配置网关和域名解析器(ip地址和子网掩码在安装的时候已经配
置)
要能上网,除了IP地址和子网掩码还不行,还要设置网关(相当于路由器,以便识别在哪个网段上去寻找该IP地址)和域名解析
器(上网时我们一般输入的是地址,如:,这就需要域名解析器来解析出具体的IP地址)。
以下是配置的具体方法:
1)网关配置
网关配置在/etc/defaultrouter文件中,新装的系统没这个文件,就需要我们新建:vi /etc/defaultrouter
然后在里面添加:192.168.0.254(注意这里的网关IP要和主机系统上的网关相同)。
2)域名解析器的配置
域名解析器的配置要用到两个文件:/etc/resolv.conf和/etc/nsswitch.conf。
新装的系统也没有第一个文件,新建:vi /etc/resolv.conf 然后在里面添加:
domain
nameserver 202.98.96.68(这只是一个域名解析的主机ip地址,和主机系统的设置一样)
接下来在第二个文件里的hosts,ipnodes,networks三行的行尾添加dns就好了。
然后重启系统就能上网了。
2.Telnet(远程连接)的配置
Solaris 10和后续版本为了保护系统安全,缺省只提供ssh服务,而且还不允许root用户直接登录,这对于开发和调试系统的使用用
户来说很不方便。
在Solaris 10上开放telnet服务并允许root用户登录的方法如下:
1)打开telnet服务
# svcadm enable telnet
svcadm是Solaris下最新的网络服务管理系统,要了解它和svcs 的使用方法,请参见其帮助手册。
2)开放root登录权限
修改/etc/default/login文件,注释掉其中的:
CONSOLE=/dev/console
不用重启就能远程登陆了。
3.用root用户也能使用FTP的配置
为了系统的安全,solaris系统不允许用root用户进行FTP连接,如果要用root用户登陆,就需要修改一个文件:/etc/ftpd/ftpusers,用#号把root 注释掉就可以了。
4.修改ip地址的网络配置
要修改ip地址,就要修改如下文件:
/etc/hosts(如果是solaris9,还有修改/etc/inet/ipnodes,使其内容和/etc/hosts里面的一样)
/etc/netmask
/etc/defaultrouter。