IBM-AIX命令详解
IBM_AIX小机命令手册

?EXCLUDE files:如果选择yes,将使得文件/etc/exclude.rootvg文件中列出的文件和目录不被备份。
?Make BOOTABLE backup:是否生成可启动备份,一般取默认值——yes。
?EXPAND /tmp if needed:是否在需要时自动扩展/tmp文件系统。强烈建议选yes。
内存大小: lsattr –El mem0
? 磁盘 lspv
? 交换分区 lsps –a
? 软件 lslpp –l 文件包名字
? 用户 who
关机命令:
–shutdown
一分钟后关机
–shutdown +2
二分钟后关机
–shutdown –Fr
关机重启(-r)
–或者创建一个CD-ROM文件系统并进行加载
?smit cdrfs
?mount /cdrom
?卸载cdrom
– unmount /cdrom
二、备份与恢复
rootvg备份 — mksysb
●只备份rootvg
●只备份已挂接的文件系统
●以备份格式创建可启动磁带
●保存rootvg中的换页空间设备定义
●tar (tape archive)
◇适用范围广
◇非常适合在不同UNIX平台间传送文件
◇可恢复空目录(-d选项)
◇不支持AIX访问控制列表(ACL,属于扩展inode内容)
●cpio(copy input to output)
◇适用范围广
◇符号链接较多时可能不能正常工作
?ls 显示目录中的内容(文件名)
#ls –a 列出当前目录中的所有文件
AIX基本知识

AIX操作系统概述一、AIX的性能和特点:1、短小强干的内核和丰富的核外系统程序;AIX对系统的内核进行了精心设计,使之既简短又强干,可常驻内存。
把凡是能从内核中分离出来的部分都从中分离出来,被分离出来的部分均按核外系统程序对待。
2、良好的用户界面;AIX向用户提供的界面功能齐备,使用方便。
其中包括:命令是用户通过键盘和显示终端与系统进行交互会话的界面。
系统调用命令是供用户在编写应用程序时使用的界面。
X-WINDOWS是系统与用户之间的图形界面环境。
3、可装卸文件卷的文件系统AIX的整个文件系统由一个基本文件系统和若干个可装卸的子文件系统构成,它允许用户根据需要把自己的文件卷装入并与基本文件系统连接起来,不需要时可以拆卸下来。
AIX的这种特点既便于扩大文件存储空间,又有利于安全和保密。
4、文件、目录和各种I/O设备均作为文件统一处理为了方便用户使用,AIX将普通数据文件、目录文件和I/O设备均以文件论之,三者使用相同的保护机制,在用户面前它们具有相同的语法和语义。
5、性能良好的网络环境AIX为用户提供了良好的网络环境,主要包括:一组网络通信协议,例如TCP/IP。
一组网络通信工具,例如mail,talk等。
一组网络编程接口,例如TLI(Transport Layer Interface)和Socket等。
6、完善的安全机制AIX具有完善的多级安全/保密机制,其中用户级机制的基本内容包括:AIX将其用户分为普通用户和特权(超级)用户,它们各自享有不同的权限。
AIX为每一个用户都建立一个户头,称之为用户帐户。
系统通过用户帐户来组织和记录各用户在系统中的活动,并将其限制在一定的活动范围之内。
AIX要求每一个用户必须用合法的用户名、正确的口令进行注册,并将每一个用户都归划到某一个特定的用户组中。
AIX要求每一个用户必须按照自己拥有的权限对文件/目录进行访问,不符合权限规定的访问不被系统所接受。
7、AIX用C语言编写,非常便于移植。
IBM AIX命令手册:IBM MQ管理、安装和卸载说明书

Summary of AIX commands to administrate MQhttps:///support/pages/node/6407842Date last updated: 17-Jun-2021Angel Rivera –*************.comIBM MQ Support+++ Objective +++T o provide the most common AIX commands to administrate, install and uninstall MQ.The organization of the sections is based on what will be the commands to start the installation of MQ from scratch:- ensuring that you have a supported version of AIX: uname, oslevel- create the group “mqm” (mkgroup) and the user “mqm” (mkuser),- unpack the .Z or tar.gz file downloaded from IBM Passport Advantage or IBM Fix Central: gunzip, uncompress, zcat, tar- install/uninstall via installp- querying filesets via lslpp- create (mkusil), list (lsusil), remove (rmusil) a USIL, and- specifying USILs (-R ALL or -R /usr/mqm92) with installp and lslpp++ Update from 17-Jun-2021The AIX command “install -r” that is discussed in this chapter will REJECT all the fix packs installed in the server. If you have only 1 fix pack or if you want to delete at the same time all the fix packs, then the procedure in this chapter is fine.But if you have multiples fix packs and you want to uninstall ONL Y the LATEST one, then you need to use another procedure, which is documented in the article:https:///support/pages/node/6464857Uninstalling only the latest fix pack for MQ in AIX and leaving behind other previous fix packs+++ Related tutorials +++https:///support/pages/node/6405792Customization of an AIX server for using MQ+ Customization of Putty for using Function Key F3 with smitty+ Creating groups and userids+ Downloading, customizing and using the sample scripts+ Customization of bash login for root+ Customization of set-mq-xxx scripts in /usr/local/bin to reflect MQ installations+ Customize the bash login for user "mqm" or the normal user "fulanohttps:///support/pages/node/6407850Installing in AIX - MQ 9.0.0.1 LTS, applying Fix Pack 9.0.0.11, Uninstalling MQChapter 1: How to get the installation imagesChapter 2: Create userid "mqm" and group "mqmChapter 3: Installation of MQ 9.0.0.1 (Installation1 in /usr/mqm)Chapter 4: Setting the environment for MQChapter 5: Creating a test queue manager, quick verification testChapter 6: Installation of the Fix Pack 9.0.0.11Chapter 7: Uninstallation of the Fix Pack 9.0.0.11Chapter 8: Uninstallation of the base 9.0.0.1Chapter 9: Appendices showing full output from installp for the scenarioshttps:///support/pages/node/6415777Upgrading in AIX from MQ 9.0.0.1 to MQ 9.1.0.0 LTSChapter 1: How to get the installation imagesChapter 2: T ake a backup of the queue manager data and recovery logsChapter 3: Uninstalling MQ 9.0Chapter 4: Installing MQ 9.1.0.0 LTSChapter 5: Running setmqenv to use MQ 9.1 commandsChapter 6: Creating a queue manager under 9.1Chapter 7: Upgrading an existing queue manager to MQ 9.1https:///support/pages/node/6415921Installing in AIX - MQ 9.2 LTS to coexist with MQ 9.1 LTS, including applying Fix Packs 9.1.0.7 and 9.2.0.1 Chapter 1: How to get the installation imagesChapter 2: Creating USIL and installing MQ 9.2 side-by-side to MQ 9.1Chapter 3: Need to run setmqenv to use MQ 9.1 or MQ 9.2 commandsChapter 4: Creating a queue manager under MQ 9.2Chapter 5: Migrating an MQ 9.1 queue manager to MQ 9.2Chapter 6: Installing Fix Pack 9.1.0.7 in Installation1 (default location)Chapter 7: Installing Fix Pack 9.2.0.1 in Installation2 (USIL /usr/mqm92)Chapter 8: Uninstallation of MQ 9.2Chapter 9: Deleting the USIL /opt/mqm92https:///support/pages/node/6429607Life cycle for a USIL in AIX for non-default installations of MQ++ Displaying version of operating systemDisplaying the platform and hostname+ROOT+ aglet: /downloads# uname -aAIX aglet 2 7 00F944604C00Displaying the version (high lievel)# oslevel7.2.0.0Displaying the detailed version# oslevel -s7200-05-01-2038+++ Creating group ‘mqm’ and user ‘mqm’The following steps show how to create:- a group “mqm” (gid 202),- a user “mqm” (userid 205),- under /home/mqmLogin as user: rootCreate a group called “mqm” with groupid of 202:mkgroup -'A' id='202' mqmCreate a user also called “mqm” with userid of 205 and who belongs to group “mqm”: mkuser id='205' pgrp='mqm' home='/home/mqm' mqmYou can assign the password:passwd mqmYou can use the command “id” to find out the ids and the group membership:$ id mqmuid=205(mqm) gid=202(mqm) groups=1(staff)+++ How to unpack tar.Z and tar.gz filesWhen you download MQ files from IBM Passport Advantage or IBM Fix Central, there are 2 possible suffixes for the file names:tar.Ztar.gzThe tar options are:-x T o extract members from the archive into the file system.-v T o be verbose about the operation being performed.-f FileArchive T o use the specified file archive as the tar archive.The rest of this section provides more details on how to unpack the files.a) Suffix: tar.ZThe most common ways to unpack this type of files are:a.1) One (1) long compound command (it preserves the file tar.Z)zcat MQ_V9.0_F_AIX_EIMAGE.tar.Z | tar -xvf -The output of zcat is sent to the standard output file (i.e., stdout).This allows the user to decompress the compressed tar file (leaving the compressed file unchanged), and then to expand the tar file to the current directory.The "f -" tar command line option tells the tar command to read its input from the standard input file (i.e., stdin).a.2) T wo (2) simpler commands (the tar.Z is uncompressed, leaving a .tar file) Decompress the file tar.Z by issuing:uncompress MQ_V9.0_F_AIX_EIMAGE.tarThen unpack the file:tar -xvf MQ_V9.0_F_AIX_EIMAGE.tarb) Suffix: tar.gzb.1) One (1) long compound command (it preserves the file tar.gz)gunzip -c IBM_MQ_9.1_AIX.tar.gz | tar -xvf -A common convention is to use the "-c" command line option on the gunzip command so that instead of replacing the tar.gz, the output of the command is sent to the standard output file (i.e., stdout). This allows the user to decompress the compressed tar file (leaving the compressed file unchanged), and expand the tar file to the current directory. The "f -" tar command line option tells the tar command to read its input from the standard input file (i.e., stdin).b.2) T wo (2) simpler commands (the tar.gz is uncompressed, leaving a .tar file) Decompress the file tar.gz by issuing:gunzip IBM_MQ_9.1_AIX.tar.gzThen unpack the file:tar -xvf IBM_MQ_9.1_AIX.tar+++ Creating a USIL to install in a non-default location, such as /usr/mqm92+ Create a dedicated installation directory and designate it as a USILLogin as userid root to create the USIL- Create directory for the USIL.This directory will be designated to be a USIL in a step mentioned later on.# mkdir /usr/mqm92- List the subdirectories that will have the MQ code.Note that /usr/mqm is the default location for Installation1 (in this case,it already has MQ 9.1)# ls -dl /usr/mq*dr-xr-xr-x 20 mqm mqm 4096 Jan 27 07:34 /usr/mqmdrwxr-xr-x 2 root system 256 Jan 27 09:17 /usr/mqm92- So far, we do not have any USI Ls. Let’s verify by issuing the following command:# lsusil(empty)- Make the newly created directory a USIL.Note that the directory will be known as: INSTALL_ROOT_PATH# mkusil -R /usr/mqm92 -c 'MQ 9.2' -Xmkusil: Return Status = SUCCESSWhere:-R /usr/mqm92 => usil location-c comment-X Expands the space needed automatically.- List the USILs and note the new one:# lsusilINSTALL PATH = /usr/mqm92COMMENTS = MQ 9.2- Proceed to use the USIL with installp and lslpp.- If you uninstall MQ from the USIL and if you decide to not use the USIL anymore, then delete it.Please keep in mind that rmusil does not delete the directory structure for the USIL! # rmusil -R /usr/mqm92rmusil: Return Status = SUCCESS- List the USILs (it should show no USILs)# lsusil(empty)- Remove the directory structure that was associated with the USIL:# rm -fr /usr/mqm92+++ Using installp to install and uninstallAfter using “tar -xvf” to unpack the base code to install, you need to go to the newly created directory “MQServer”# cd MQServer++ Install the base code:T o install the base code in the default location /usr/mqm:# installp -acgXYd . all- T o install the base code in a non-default location such as /usr/mqm92# installp -R /usr/mqm92 -acgXYd . allWhere “-R usil” is the path of the User Specified Installation Location (USIL) specified when the product was installed.++ Install the fix pack code on top of an existing installation:T o install the fix pack code in the default location /usr/mqm:# installp -agXYd . all- T o install the fix pack code in a non-default location# installp -R /usr/mqm92 -agXYd . allWhere “-R usil” is the path of the User Specified Installation Location (USIL) specified when the product was installed.++ Reject ALL the Updates (uninstall all the Fix Packs)From the default location:# installp -r "mqm*"From a USIL:# installp -R /usr/mqm92 -r "mqm*"++ Update from 17-Jun-2021The AIX command “install -r” that is discussed in this chapter will REJECT all th e fix packs installed in the server. If you have only 1 fix pack or if you want to delete at the same time all the fix packs, then the procedure in this chapter is fine.But if you have multiples fix packs and you want to uninstall ONL Y the LATEST one, then you need to use another procedure, which is documented in the article:https:///support/pages/node/6464857Uninstalling only the latest fix pack for MQ in AIX and leaving behind other previous fix packs++ Uninstalling the base code:T o uninstall or modify IBM MQ by using installp, enter one of the following commands:- T o uninstall an installation in the default location /usr/mqm:installp -u mqm- T o uninstall an installation in a non-default location:installp -R /usr/mqm92 -u mqmWhere “-R usil” is the path of the User Specified Installation Location (USIL) specified when the product was installed.+++ Using lslpp to list the MQ filesetsa) This is the most comprehensive command to list all the installed MQ filesets ACROSS the different USILs and including the normal location of /usr/mqm.The following shows the output when MQ is not installed at all and there are no USILs. Note that ALL is in UPPERCASE!# lslpp -R ALL -la "mqm.*"+-----------------------------------------------------------------------------+INSTALL ROOT PATH = /+-----------------------------------------------------------------------------+lslpp: 0504-132 Fileset mqm.* not installed.If there are no USILs, then this is the command.In this case, no MQ filesets are installed.# lslpp -la "mqm.*"lslpp: 0504-132 Fileset mqm.* not installed.b) Listing the file sets from the default location /usr/mqm# lslpp -la "mqm*"Fileset Level State Description----------------------------------------------------------------------------Path: /usr/lib/objreposmqm.amqp.rte 9.0.0.1 COMMITTED IBM MQ AMQP Service9.0.0.11 APPLIED IBM MQ AMQP Servicemqm.ams.rte 9.0.0.1 COMMITTED IBM MQ Advanced MessageSecurity9.0.0.11 APPLIED IBM MQ Advanced MessageSecurityc) Listing the file sets for the USIL# lslpp -R /usr/mqm92 -la "mqm*"Fileset Level State Description----------------------------------------------------------------------------Path: /usr/mqm92/usr/lib/objreposmqm.amqp.rte 9.2.0.0 COMMITTED IBM MQ AMQP Servicemqm.ams.rte 9.2.0.0 COMMITTED IBM MQ Advanced - AdvancedMessage Securitymqm.base.runtime 9.2.0.0 COMMITTED IBM MQ Runtime for Client andServerServer+++ References+++ AIX 7.1 documentationhttps:///support/knowledgecenter/en/ssw_aix_71/m_commands/mkusil.htmlAIX 7.1 / Commands / m /mkusil Command.Creates or attaches a new user-specified installation location (USIL) instance.Syntaxmkusil -R RelocatePath -c Comments [-XFa]DescriptionThe mkusil command creates or attaches a new USIL instance.A user-specified installation location (USIL) is a tracked, relocated installation path that is created by the administrator. The location is tracked by the system and can be used as an alternate installation path for packages that use relocation of file sets or software. Multiple instances or versions of the same software package can be installed on a single system by delegating each installation to a separate USIL.An existing USIL instance can be attached or detached from any given system.Each USIL instance maintains its own set of Software Vital Product Data (SWVPD) in three installp parts:InstallRoot/etc/objreposInstallRoot/usr/lib/objreposInstallRoot/usr/share/lib/objrepos++ Information about the flags for the AIX command: installpThe flags for installp mentioned in the online manual for MQ indicate to apply, commit, expand file system, agree with license, using the .toc (table of contents) file and filesets in the current directory:installp -acgXYd . allhttps:///support/knowledgecenter/en/ssw_aix_72/i_commands/installp.htm lAIX 7.2 / Commands / i /installp CommandPurposeInstalls available software products in a compatible installation package.Flags:-R path Indicates a user-specified installation location.-a Applies one or more software products or updates. This is the default action. This flag can be used with the -c flag to apply and commit a software product update when installed.-c Commits all specified updates that are currently applied but not committed. When an update is committed all other software products it is dependent on must also be committed (unless they are already in the committed state). The specified software product is dependent on any software product that is a prerequisite or corequisite of the specified product. If the requisite software products are not in the committed state, the commit fails and error messages are displayed. The -g flag can be used to automatically commit requisite software product updates.-g When used to install or commit, this flag automatically installs or commits, respectively, any software products or updates that are requisites of the specified software product. When used to remove or reject software, this flag automatically removes or rejects dependents of the specified software.-X Attempts to expand any file systems where there is insufficient space to do the installation. This option expands file systems based on current available space and size estimates that are provided by the software product package. Note that it is possible to exhaust available disk space during an installation even if the -X flag is specified, especially if other files are being created or expanded in the same file systems during an installation. Also note that any remote file systems cannot be expanded.-Y Agrees to required software license agreements for software to be installed. This flag is only valid with the -a flag.-d Device Specifies where the installation media can be found.Notice that "d ." means: current directory-r Rejects all specified software updates that are currently applied but not committed. When a software update is rejected any other software product that is dependent on it (that is, those software products that have the specified software product as a requisite) must also be rejected. The -g flag can be used to reject automatically dependent software updates.-u Removes the specified software product and any of its installed updates from the system. The product can be in either the committed or broken state.https:///support/knowledgecenter/ssw_aix_72/l_commands/lslpp.htmlAIX 7.2 /lslpp Command-R { path | ALL } Indicates a user-specified installation location.-a Displays all the information about filesets specified when combined with other flags. This flag shows all updates when combined with the -l flag and all history when combined with the -h flag.-l (lowercase L) Displays the name, most recent level, state, and description of the specified fileset.++ MQ Documentationhttps:///support/knowledgecenter/SSFKSJ_9.2.0/com.ibm.mq.ins.doc/q008600_.htm IBM MQ 9.2.x / Installing and uninstalling IBM MQ / Installing and uninstalling IBM MQ on AIX /Installing IBM MQ server on AIX.You must install the second version of the product in a location that is not the default. To create the non-default installation location you must use the mkusil command, which is available only from the command line..Install the whole product in a non-default location using the -R flag:installp -R USIL_Directory -acgXYd . allhttps:///support/knowledgecenter/SSFKSJ_9.2.0/com.ibm.mq.mig.doc/q008 010_.htmlIBM MQ 9.2.x / IBM MQ / Maintaining and migrating / Applying maintenance to IBM MQ / Applying and removing maintenance on UNIX and Linux /Applying maintenance level updates on AIX (Installation of Fix Packs)*** Note: The components will be either COMMITTED or APPLIED depending on the options chosen when applying the fix pack.https:///support/knowledgecenter/SSFKSJ_9.2.0/com.ibm.mq.mig.doc/q008 020_.htmlIBM MQ 9.2.x / IBM MQ / Maintaining and migrating / Applying maintenance to IBM MQ / Applying and removing maintenance on AIX and Linux /Reverting to the previous maintenance level on AIXT o back out ALL maintenance updates, as the user root, issue the command:installp [ -R usil ] -r "mqm*"https:///support/knowledgecenter/SSFKSJ_9.2.0/com.ibm.mq.ins.doc/q0094 20_.htmlIBM MQ 9.2.x / IBM MQ / Installing and uninstalling / Installing and uninstalling IBM MQ on AIX /Uninstalling or modifying IBM MQ on AIXT o uninstall an installation in the default location /usr/mqm:installp -u mqm+++ end。
IBMAIX5L学习笔记

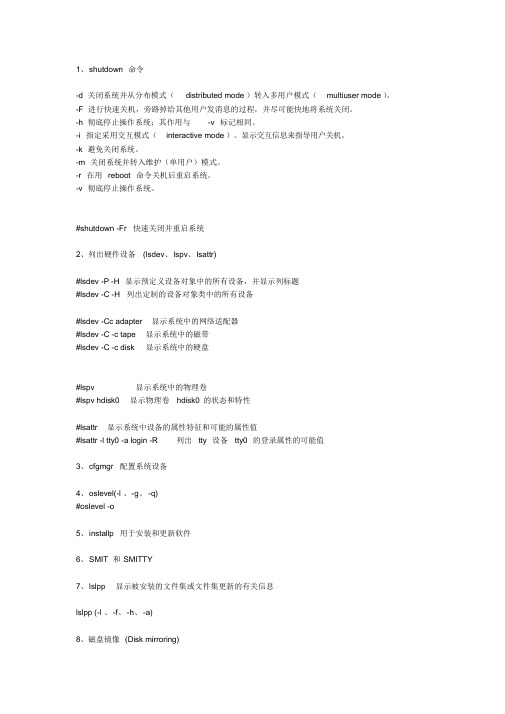
1、shutdown 命令-d 关闭系统并从分布模式(distributed mode )转入多用户模式(multiuser mode )。
-F 进行快速关机,旁路掉给其他用户发消息的过程,并尽可能快地将系统关闭。
-h 彻底停止操作系统;其作用与-v 标记相同。
-i 指定采用交互模式(interactive mode )。
显示交互信息来指导用户关机。
-k 避免关闭系统。
-m 关闭系统并转入维护(单用户)模式。
-r 在用reboot 命令关机后重启系统。
-v 彻底停止操作系统。
#shutdown -Fr 快速关闭并重启系统2、列出硬件设备(lsdev、lspv、lsattr)#lsdev -P -H 显示预定义设备对象中的所有设备,并显示列标题#lsdev -C -H 列出定制的设备对象类中的所有设备#lsdev -Cc adapter 显示系统中的网络适配器#lsdev -C -c tape 显示系统中的磁带#lsdev -C -c disk 显示系统中的硬盘#lspv 显示系统中的物理卷#lspv hdisk0 显示物理卷hdisk0 的状态和特性#lsattr 显示系统中设备的属性特征和可能的属性值#lsattr -l tty0 -a login -R 列出tty 设备tty0 的登录属性的可能值3、cfgmgr 配置系统设备4、oslevel(-l 、-g、-q)#oslevel -o5、installp 用于安装和更新软件6、SMIT 和SMITTY7、lslpp 显示被安装的文件集或文件集更新的有关信息lslpp (-l 、-f、-h、-a)8、磁盘镜像(Disk mirroring)#smitty mirrorvg#mklv 命令允许你为每个逻辑卷选择一个或两个附加拷贝#mklvcopy 命令为一个已经存在的逻辑卷增加镜像#mirrorvg 命令对一个给定卷组的所有逻辑卷作镜像,缺省时试图将逻辑卷镜像到一个卷组的所有磁盘例:对workvg 卷组作三重镜像#mirrorvg -c 3 workvg对rootvg 提供缺省镜像#mirrorvg rootvg --rootvg 卷组现在就有了两份数据拷贝例:为了从一个镜像的卷组中替换掉一个失效(hdisk7) 的磁盘驱动器,运行下面的命令:#unmirrorvg workvg hdisk7#reducevg workvg hdisk7#rmdev -l hdisk7 -d例:用一块新磁盘替换失效的磁盘,将其命名为hdisk7,执行下面的命令:#extendvg workvg hdisk7#mirrorvg workvg- 下面的命令将同步新创建的镜像:#mirrorvg -S -c 3 workvg-c 标记指定在mirrorvg 命令执行完成后每个逻辑卷必须具有的最小的拷贝个数。
IBM-AIX命令详解

IBM-AIX命令详解AIX常用命令AIX系统的设备有四种状态:Undefined(未定义):表示系统无法识别该设备,也就是系统找不到该设备。
Defined(定义):表示系统可以识别设备,但是系统不能使用它。
Available(可用):表示该设备在系统中可以使用,用户也可以使用。
Stopped(停用):表示设备不能被使用,但操作系统通过驱动程序可以识别它。
-------------------------------------------------------------------------------一、查看错误记录1、显示错误:errpt2、显示详细的错误信息:errpt -a 或errpt -a|more3、清空错误记录信息:errclear 0二、查看文件系统df -g 【以G为单位检查】或df -k 【以K为单位检查】三、查看系统中的设备及其特征lsdev -C显示的设备都已经安装在系统中。
lsdev -P显示系统预定义设备数据库中的所有设备,即系统能支持的设备。
【举例】1、查看硬盘: lsdev –Cc disk2、看磁带机: lsdev –Cc tape3、查看适配卡: lsdev –Cc adapter4、处理器个数:lsdev –C|grep proc【grep:强大的文本搜索工具,并把匹配的行打印出来(类似于find)】5、查看预定义设备对象类中的所有设备,并具有列头:lsdev -P -H6、要列出预定义设备对象类中的受支持的设备类,输入:lsdev -P -r class7、要列出其名称以字母‘hdi’开头的所有设备:lsdev -l hdi*8、要列出所有子pci0 总线,请输入:lsdev -p pci09、要列出其名称包含在文件/tmp/f 中的设备,输入:cat /tmp/f | lsdev -l -四、显示系统的配置信息、诊断信息和重要产品数据(VPD)信息lscfg -vp获取所有已配置硬件设备的详细信息【举例】1、查看硬盘信息: lscfg –vl hdiskx x表示数字2、查看网卡信息: lscfg –vl entx x表示数字3、查看磁带机: lscfg –vl rmtx x表示数字4、要在每一行显示带有设备描述的系统配置:lscfg -s5、要显示由逻辑名ent0 指定的特定设备的VPD:lscfg -v -l ent06、要显示不带有VPD 的逻辑名hdisk(或proc)所指定设备的名称、位置和描述:lscfg -l hdisk(或proc)\*7、要将开放固件设备树中相应节点的VPD 显示到ent0 设备中:lscfg -vp -l ent0五、查看硬件属性lsattr:用于读取指定设备的配置属性,部分属性可更改lsattr –El获取已配置设备的属性信息。
IBM-AIX系统常用命令

IBM-AIX系统常用命令原文引自:/luckyrobbie/archive/2006/03/27/37543.htmlAix的系统备份命令是mksysb, make system backup ,有点类似ghost.Aix5.3支持微分区技术,所谓微分区就是1台机器上装多个OS(操作系统),把这台机器上的cpu资源进行划分,然后分配给每一个os使用,最小粒度是0.1个cpu.有点类似vmware软件.让一个机器跑多个操作系统.这项技术早在ibm的大机上就已经实现了.只不过最近才在小机和pc机器上发布.TIVOLI是系统管理软件.关闭aix的命令:shutdown ->正常关机,关闭所有服务. halt -> 相当于直接关闭电源.重启aix:shutdown -Fr查看出错信息:errpt errpt -a | more -> 分页显示errpt -a > /tmp/err01 输出到文件.清除错误信息:errclear 0smit 用鼠标操作 smitty 用键盘来操作,一般用smitty为好.ping -f 全速ping ,利用所有的服务器资源来ping,如果是多个服务器ping一个ip,可以把机器ping死.几个关于磁盘的名词:lv: logical volume 逻辑卷pv: physical volume 物理卷vg: volume group 卷组pp: physical partition 物理分区lp: logical partition 逻辑分区pv对应的是物理硬盘或者是磁盘阵列上划分的lun,一个vg最多可以有1016个pp.pv的上面是vg,一个vg可以包含多个pv.vg的上面是lv,lv如果不作任何处理就是裸设备,也可以作成文件系统.lv被分为多个lp,默认情况下,lp与pp是一一对应的,也可以做成一对多的.这样就相当于用多个pp来作raid0备份.lsdev -C | grep disk 可以查看物理磁盘的硬件信息lspv 查看pv的信息 -p hdisk0 查看具体数据存放的位置:例如,数据在第m到n个pp上面.lsvg 查看vg的信息 -l vg的列表 -c 被使用的vg -l rootvg 查看rootvg的详情.lslv -m lv1 查看lv1 的lp与pp的映射.getlvcv -AT lv1 看到lv1的控制信息.fsck -y /dev/newlv 检查lv.smit vg 可以管理vgsmit lv 管理lvvarryonvg rootvg 激活rootvg卷组,varryoffvg newvg 使newvg卷组脱机.nbpi:number of bytes per inode 每个i节点拥有的字节数,这个参数越小,文件系统的可用的inode越多.如果inode用完,即使有剩余空间,系统也会报空间不够.此时要调小nbpi的值.一般是4k df -k 中iused 指的是i节点的使用情况.设置从cd启动,bootlist -m normal cd0启动时按ESC+1或者F1,可以进入启动菜单.选择启动方式.用smitty crfs 创建完文件系统以后还要mount./etc/filesystems 文件记录文件系统的信息.如想把某个lv映射到不同的文件系统路径上面,可以直接修改这个文件.用logform /dev/testloglv 将lv格式化成jfs的log的格式.file 文件名可以看某个文件的信息,包括文件类型,可执行文件,文本文件,等等.uname -a 可以看到os的信息.fsck 检查文件系统的信息,在umount的时候是准确的, 相当于windows的磁盘扫描.碎片整理 smitty jfslsfs /root 显示文件系统的属性各个组件的关系:lsps -a 查看page space的使用情况vgda:vg description area 每个vg的头部存放vg的描述信息, 如果包含2个pv,那么第一个pv会在头部和另一个位置存放2个vgda,第2个pv也会存放一个.如果包含3个pv,那么每个pv上都有1个vgda.vg的信息在odm中也会存储,但必须和vgda中的信息一致,否则无法varryonvg,有下面4个命令来管理odm中的vg信息.importvg:从vgda中读取信息到odm中exportvg:从odm中删除vg信息varyonvg:激活(online)vgvaryoffvg:卸载(offline)vg修改vg的factor,这样可以将vg的max pp 从默认的1016 增大1倍,到2032,但由于vgda的总大小不变,这些信息都是记录到里面的.所以vg的最大文件数要减小1倍,实际上是个等式:max pp * max file = 固定的一个值,factor增大,实际上是max pp * factor,max file / factor.具体做法:chvg -t 2 rootvg 修改factor为2.vgda 用cfgmgr,来刷新,来认出新assign的hdisk.cfgmgr -v 检查新设备,新硬件.-i /dev/cd0 从光盘自动安装新硬件驱动.当作双机时,2个服务器server1 和server2 来连接同一个盘阵,server1对磁盘分配一个pvid,当第一次切换到server2时,要用ckdev命令来读出server1配置的pvid.系统是通过pvid来识别pv的.ckdev -l hdisk1 -a pv = clear 清除pvidckdev -l hdisk1 -a pv = yes 新置pvidlsdev 查看物理设备lsdev -C 显示所有设备状态rmdev -l cd0 逻辑删除 cd0mkdev -l cd0 安装cd0rmdev -d -l cd0 删除cd0设备驱动查看cpu的信息lsattr -El proc0lsdev -C | grep proc查看内存的信息lsattr -El mem0查看光驱的信息lsattr -El cd0查看硬盘的信息lsattr -El hdisk0lscfg -vp | more 分页看全部硬件信息prtconf | more 列出硬件信息查看谁在使用cdrom fuser /cdrom -k 直接杀掉用户进程telnet的登陆信息存放在/etc/motd文件中.想查看最近有谁登陆,用last命令.查看登录失败的信息: /etc/security/failedlogin存放用户密码的文件:/etc/security/passwd用户登录需要运行的脚本:1 /etc/profile2 /etc/environment 在这个文件中设置中文环境,LANG=zh_CN3 用户profile ,分2种情况:如果是命令行登录,则运行/home/user/.profile如果是图形登录,则运行/home/user/.dtprofile 需要将次文件中,#DTSOURCEPROFILE=TRUE 的# 去掉,否则还是使用.profile.在/dev下面有2种设备,一种是block设备,一种是char(字符)设备.这取决于不同的应用.vmstat的某些行的解释:vmstat->faults->cs: user calls 用户调用的次数cpu->wa: >40 说明io繁忙kthr: kernel threadkthr->r 在运行队列中等待执行的进程b 正在等待io的进程memory->avm:active vitual memory 物理内存+使用的虚拟内存,以4k为单位.page->re:是pin 和 pout 的总和.sr:search的内存块数.fr:释放的内存块数.每次作page out时,系统要搜索物理内存以找到可以释放的块,sr 和fr分别代表搜索的和通过搜索找到的可以释放的块数.如果2者很接近,说明内存中有很多用于file cache,内存的数量是够用的.如果fr/sr的值很小,说明内存不够.tty:代表终端iostat:%tm_act 实际transaction的百分比tps 每秒发生的次数kbps 每秒的速率名词:thrasing: 应用程序频繁交换,导致paging过多./usr/samples/kernel/vmtune -f 120 -F 128-f 120 代表minfree mem < 120 时要进行page out-F 128 代表maxfree mem > 128 时要进行page in-p -P 也跟page out 有关,具体不清楚,还需明确.sar->avque:平均的请求数对文件系统作监视:filemonfilemon -o /tmp/a.txt -O all -v运行之后系统会一直监视文件系统的使用情况并记录日志,-T 64000 是使用的buffer cache,在大型系统上,这个值可以调大.运行一段时间后,要停掉filemon,使用trcstop 或者 kill -9 进程.从a.txt中可以看到使用最频繁的文件等信息,有些类似statspack 的报告.对于后缀是Z的文件用uncompress来解压缩. uncompress a.tar.Z用strings 命令来看2进制文件如何调大page space,直接设置对应lv的大小.如果对应lv的vg 空间不够的话,可以向vg中加硬盘.dd的用法:dd if=/dev/rnewfs of=/dev/rcopyfs bs=1024 count=10240bs: block size 块大小,1024字节count: block count 块的数量if是input file ,of 是output file将任务切换到后台执行: ctrl+z ,然后 bg+回车查看后台执行的程序:jobs把后台执行的程序切换到前台执行:fg %n n是后台的job 编号ip抓包工具:iptrace 和 tcpdumpiptrace -a a.out停止iptrace:kill -9tcpdump -i en1 -w a.out a.out 是输出文件把进程与cpu绑定:bindprocessor -U 进程号 cpuidbindprocessor -U 12345 0odm库:env | grep objODMDIR=/etc/objrepos 这是odm库的存储路径在disk0上生成引导区bosboot -a -d /dev/hdisk0用kdb 查看os 的 dumpethernet channel 把2个网卡绑定到1个ip,可以作网络负载均衡.crontab 设置定时任务crontab -l list the crontabcrontab -e edit the crontabcrontab的格式:分钟小时月中的天数月份星期命令minute:0 到 59hour:0 到 23day_of_month:1 到 31month:1 到 12weekday:星期日到星期六的 0 到 6 时要在每星期日上午 2 时运行 fwlogmgmt 命令,请将下列各行添加至 crontab 文件底部:0 2 * * 0 /usr/bin/fwlogmgmt -1发送邮件,aix和redhad linux 都默认安装了smtp邮件服务,可以直接给internet发邮件.mail -s "test mail" *************************<$ORACLE_BASE/admin/$ORACLE_SID/bdump/alert$ORACLE_SI D.logmail-s"testmail"*************************<<EOF******** MAIL CONTENT *******FJLADSFJLAKHFGALFJALDSKFJAFASLJFLASF*****************************EOF有了crontab和mail,就可以定时监控数据库,然后把报告发送邮件到管理员的信箱.kill -9 9 是kill命令传送的一个信号,一共15个信号可以发送./etc/ftpusers 限制登录ftp的用户,谁在这个文件里面,谁就登不进去.网络服务 /etc/inetd.conf 刷新 refresh src -dlslpp -l | grep http 查看安装的软件检查瓶颈:利用vmstat iostat 查看总体情况,ps aux 可以看到具体进程占用资源的情况.如果是io瓶颈,可以利用filemon -o /tmp/a.txt -O all; sleep 10;trcstop 来查看io资源的使用情况.辨别僵尸进程:ps -ef pid 那列是 defunc的为僵尸进程.。
AIX 软件日常的操作

AIX 软件日常的操作一、IBM AIX 5L 日常命令1、查看当前所在目录,使用如下命令:# pwd/oracle#2、检查文件系统的使用情况,使用如下命令:# df -kFilesystem 512-blocks Free %Used Iused %Iused Mounted on/dev/hd4 65536 44096 33% 1544 10% //dev/hd2 2031616 532008 74% 24425 10% /usr/dev/hd9var 327680 298616 9% 857 3% /var/dev/hd3 327680 309496 6% 60 1% /tmp/dev/hd1 327680 317152 4% 20 1% /home/proc - - - - - /proc/dev/hd10opt 327680 303424 8% 338 1% /opt/dev/orafslv 10485760 6732616 36% 40476 4% /oracle#3、更改目录,使用如下命令:# cd [目标目录]# cd /oracle4、查看错误日志,使用如下命令:# errpt |more# errpt |moreIDENTIFIER TIMESTAMP T C RESOURCE_NAME DESCRIPTION7FB2523A 1129143602 I O grpglsm Group Services GLSM daemon started AFA89905 1129143602 I O grpsvcs Group Services daemon started 97419D60 1129143602 I O topsvcs Topology Services daemon started6D19271E 1129143402 I O topsvcs Topology Services daemon stopped 28854E81 1129143402 I O grpsvcs Group Services daemon stoppedD82EF8B5 1129143402 I O grpglsm Group Services GLSM daemon stopped5、查看系统上已经定义的 VG 卷组,使用如下命令:# lsvgrootvgoravg6、查看系统上正在激活的 VG 卷组,使用如下命令# lsvg -orootvg7、查看 VG 卷组中的信息,使用如下命令:# lsvg rootvgVOLUME GROUP: rootvg VG IDENTIFIER: 0002394f00004c00000000f 1c95beb65VG STATE: active PP SIZE: 32 megabyte(s)VG PERMISSION: read/write TOTAL PPs: 1084 (34688 megabytes) MAX LVs: 256 FREE PPs: 944 (30208 megabytes) LVs: 9 USED PPs: 140 (4480 megabytes) OPEN LVs: 8 QUORUM: 1TOTAL PVs: 2 VG DESCRIPTORS: 3STALE PVs: 0 STALE PPs: 0ACTIVE PVs: 2 AUTO ON: yesMAX PPs per PV: 1016 MAX PVs: 32LTG size: 128 kilobyte(s) AUTO SYNC: noHOT SPARE: no#8、查看系统设备的属性,使用如下命令:# lsdev -Cc processor # 查看 CPU 的数量proc0 Available 00-00 Processorproc2 Available 00-02 Processor## lsdev -Cc disk # 查看磁盘的数量## lsdev -Cc memory # 查看内存板的数量mem0 Available 00-00 MemoryL2cache0 Available 00-00 L2 Cache### lsattr -El proc0 # 查看 CPU 的类型及主频等state enable Processor state Falsetype PowerPC4 Processor type Falsefrequency 190000000 Processor Speed False## lsattr -El proc2state enable Processor state Falsetype PowerPC4 Processor type Falsefrequency 190000000 Processor Speed False## lsdev -C|grep ent # 查看以太网卡的数量9、卷组 VG 的激活及卸载,使用如下命令:# varyonvg datavg # 激活 VG datavg# varyoffvg datavg # 卸载 VG datavg10、更改 root 用户的口令,使用如下命令:# passwdChanging password for "root"root's New password: # 在这里敲入新口令Enter the new password again: # 在这里确认新口令#11、通过 smitty 界面更改用户的口令,如下步骤:(1)、进入 smit 界面,使用如下命令# smitty(2)、选择“Security & Users”菜单项。
aix 常用命令

aix 常用命令AIX常用命令AIX(Advanced Interactive eXecutive)是IBM公司的一款UNIX操作系统,广泛应用于企业级服务器系统中。
本文将介绍AIX 常用命令,帮助读者更好地理解和使用该操作系统。
一、系统管理命令1. whoami:查询当前登录用户的用户名;2. hostname:查看主机名;3. uname -a:显示系统的各种信息,如内核版本、硬件平台等;4. uptime:查看系统的运行时间和负载情况;5. date:显示当前日期和时间;6. topas:实时监控系统性能,包括CPU利用率、内存使用情况等;7. lparstat -i:显示LPAR(Logical Partition)信息,包括分区的配置和资源利用情况;8. lsdev:列出设备列表;9. errpt:查看系统错误日志,用于排查故障;10. ps -ef:显示当前系统的进程列表;11. mksysb:创建系统备份;12. bootlist:设置系统启动顺序。
二、文件和目录管理命令1. ls:列出当前目录下的文件和子目录;2. pwd:显示当前工作目录的路径;3. cd:切换工作目录;4. mkdir:创建新的目录;5. rm:删除文件或目录;6. cp:复制文件或目录;7. mv:移动文件或目录;8. find:按照指定条件查找文件;9. du:查看目录或文件的磁盘使用情况;10. df:显示文件系统的使用情况;11. cat:查看文件内容;12. vi:编辑文本文件。
三、用户和权限管理命令1. useradd:创建新用户;2. userdel:删除用户;3. passwd:修改用户密码;4. chuser:修改用户属性;5. chown:修改文件或目录的所有者;6. chmod:修改文件或目录的权限;7. chgrp:修改文件或目录的所属组;8. groups:查看用户所属的组;9. su:切换用户身份;10. visudo:编辑sudoers文件,配置用户的sudo权限。
- 1、下载文档前请自行甄别文档内容的完整性,平台不提供额外的编辑、内容补充、找答案等附加服务。
- 2、"仅部分预览"的文档,不可在线预览部分如存在完整性等问题,可反馈申请退款(可完整预览的文档不适用该条件!)。
- 3、如文档侵犯您的权益,请联系客服反馈,我们会尽快为您处理(人工客服工作时间:9:00-18:30)。
AIX常用命令AIX系统的设备有四种状态:Undefined(未定义):表示系统无法识别该设备,也就是系统找不到该设备。
Defined(定义):表示系统可以识别设备,但是系统不能使用它。
Available(可用):表示该设备在系统中可以使用,用户也可以使用。
Stopped(停用):表示设备不能被使用,但操作系统通过驱动程序可以识别它。
-------------------------------------------------------------------------------一、查看错误记录1、显示错误:errpt2、显示详细的错误信息:errpt -a 或errpt -a|more3、清空错误记录信息:errclear 0二、查看文件系统df -g 【以G为单位检查】或df -k 【以K为单位检查】三、查看系统中的设备及其特征lsdev -C显示的设备都已经安装在系统中。
lsdev -P显示系统预定义设备数据库中的所有设备,即系统能支持的设备。
【举例】1、查看硬盘: lsdev –Cc disk2、看磁带机: lsdev –Cc tape3、查看适配卡: lsdev –Cc adapter4、处理器个数:lsdev –C|grep proc【grep:强大的文本搜索工具,并把匹配的行打印出来(类似于find)】5、查看预定义设备对象类中的所有设备,并具有列头:lsdev -P -H6、要列出预定义设备对象类中的受支持的设备类,输入:lsdev -P -r class7、要列出其名称以字母‘hdi’开头的所有设备:lsdev -l hdi*8、要列出所有子pci0 总线,请输入:lsdev -p pci09、要列出其名称包含在文件/tmp/f 中的设备,输入:cat /tmp/f | lsdev -l -四、显示系统的配置信息、诊断信息和重要产品数据(VPD)信息lscfg -vp获取所有已配置硬件设备的详细信息【举例】1、查看硬盘信息: lscfg –vl hdiskx x表示数字2、查看网卡信息: lscfg –vl entx x表示数字3、查看磁带机: lscfg –vl rmtx x表示数字4、要在每一行显示带有设备描述的系统配置:lscfg -s5、要显示由逻辑名ent0 指定的特定设备的VPD:lscfg -v -l ent06、要显示不带有VPD 的逻辑名hdisk(或proc)所指定设备的名称、位置和描述:lscfg -l hdisk(或proc)\*7、要将开放固件设备树中相应节点的VPD 显示到ent0 设备中:lscfg -vp -l ent0五、查看硬件属性lsattr:用于读取指定设备的配置属性,部分属性可更改lsattr –El获取已配置设备的属性信息。
【举例】查看硬盘属性: lsattr –El hdiskx x表示数字查看网卡属性: lsattr –El entx x表示数字查看磁带机属性: lsattr –El rmtx x表示数字查看内存大小:lsattr –El mem0六、lsvg 【卷组】列出卷组细节:lsvg vg_name列出卷组中的逻辑卷:lsvg -l vg_name列出卷组中的物理卷:lsvg -p vg_name按卷组列出所有的逻辑卷:lsvg -o|lsvg -i -l-------------------------------------------------------------------------------【逻辑卷】列出逻辑卷名称:lsvg -l vg_name列出逻辑卷细节:lslv lv_name列出逻辑卷相关的物理卷:lslv -l lv_name列出物理卷中物理分区的分配:lslv -p pv_name显示逻辑卷中LP与PP的对应: lslv -m lv_name七、lspv 【物理卷】列出物理卷名称:lspv列出物理卷细节:lspv hdiskN列出物理卷中的逻辑卷:lspv -l hdiskN列出物理卷中的物理分区分布:lspv -p hdiskN显示物理分区与逻辑分区的对应情况:lspv -M hdiskN增加物理卷:cfgmgr /mkdev删除物理卷:rmdev八、获取子系统状态lssrc -a获取active的子系统状态#lssrc -a |grep active启动子系统:#startsrc [option] {-s subsystem |-g group}例:#startsrc -s tftpd停止子系统:#stopsrc [option] {-s subsystem |-g group}例:#stopsrc -s tftpd刷新子系统:#refresh -s tftpd1、要获取本地机器上所有子系统的状态:lssrc -a2、要获取外部主机上的所有子系统的状态:lssrc -h zork -a本命令获取zork 机器上已知的所有子系统的状态。
3、获取srctest 子系统的状态:lssrc -s srctest本命令获取本地机器的srctest 子系统上的所有实例状态。
4、要使用PID 获取子系统状态:lssrc -p 1234本命令获取本地机器上PID 为1234 的子系统的状态。
5、要获取tcpip 子系统组的状态:lssrc -g tcpip本命令获取本地机器上tcpip 组中子系统的所有实例的状态。
6、要获取tester 子服务器的状态:lssrc -t tester -p 1234本命令获取tester 子服务器上属于srctest 子系统中PID 为1234 的子系统的状态。
7、要使用PID 获取子系统状态:lssrc -l -p 1234本命令获取PID 为1234 的子系统的长状态。
九、prtconf 命令如果不带任何标志运行prtconf命令,会显示系统型号、机器序列号、处理器类型、处理器数目、处理器时钟速度、cpu 类型、总内存大小、网络信息、文件系统信息、调页空间信息和设备信息。
1、要显示处理器时钟速度,请输入:prtconf -s2、要显示定制数据库中所有物理设备的VPD,请输入:prtconf -v3、要显示正在使用的内核类型,请输入:prtconf -k4、要显示内存,请输入:prtconf -m十、其他1、last 命令:来检查来自登陆的地方2、检查系统是否有巨大的Core文件生成:find / -name core –print对Core文件,一般直接删除就可以了。
3、CPU性能:使用vmstat,topas来检查【vmstat:用来获得有关进程、虚存、页面交换空间及CPU活动的信息,这些信息反映了系统的负载情况。
iostat:用于输出CPU和磁盘I/O相关的统计信息。
】4、内存使用情况:也是使用topas,vmstat来检查5、检查IO平衡使用情况:使用iostat来检查6、交换空间使用情况:使用lsps –a来检查7、列出系统注册/已登录的用户:who/finger8、重启时间查询:last reboot9、lsmcode命令,显示适配器、设备与系统的微码与固件级别10、lslpp 命令,列出安装的软件产品11、netstat命令,显示网络状态12、passwd命令,更改口令13、uptime命令,查看系统运行了多长时间14、ps命令,显示进程的当前状态;(1)-e:显示系统内当前运行的所有的后台进程;(2)-f:除ps所提供的外,还显示用户名、PPID(父进程ID)及启动时间;(3)-l:除ps所提供的外,还显示userID、PPID和进程优先级;15、sar命令:系统维护的工具,可掌握系统资源的使用情况,特别是CPU和内存;(1)-a:所有报告的总和;(2)-u:cpu利用率;(3)-v:进程、I节点、文件和锁表状态;(4)-d:硬盘使用状态;(5)-r:没有使用的内存页面和硬盘块;(6)-g:串口I/O情况;(7)-b:缓冲区使用情况;(8)-R:进程的活动情况;(9)-a:文件读写情况;16、mkdir/rm/mv/cd;用于创建目录/删除文件或目录/更改文件或目录名/进入某一目录17、ls命令,显示目录中的内容(文件名)【例】ls –a 列出当前目录中的所有文件;ls –l 显示文件的详细信息18、ps / kill显示后台进程的有关信息或杀死后台进程kill -9 25343219、find命令,在一个/多个目录中查找符合条件的文件find –name ‘t*’-print20、head/tail 显示文件头/尾声的内容tail +200 filename21、光驱cdrom【a】加载cdrom或者创建一个CD-ROM文件系统并进行加载命令:mount -rv cdrfs /dev/cd0 /cdrom•smit cdrfs•mount /cdrom【b】卸载cdrom命令:unmount /cdrom【备注】:【1】找到光盘的完整路径名:在命令行输入:ls -l /dev | grep cdrom)【2】在命令行执行: mount /dev/cdrom1 /mnt/。
这会把光盘挂载到/mnt 目录下。
然后我们就可以通过访问/mnt来访问光盘。
)cdrom1为光盘的名字【3】比如:我们要从光盘中拷贝出来一个rpm包。
首先在命令行输入:cd /mnt。
然后输入ll。
就列出了光盘里面的所有的内容。
)【4】进入到Packages目录,在命令行输入:cd Packages。
然后输入:ls -l | grep mysql。
找到我们要拷贝出来的rpm包。
)【5】在命令行输入: cp mysql-5.1.66-2.el6_3.x86_64.rpm /opt/soft。
把mysql-5.1.66-2.el6_3.x86_64.rpm这个包拷贝到/opt/soft目录下面。
在命令行输入:cd /opt/soft。
然后ll。
可以看到文件已经被拷贝过去了。
)【6】使用完毕以后,要记得卸载光盘。
在命令行输入:umount /mnt。
然后再进入/mnt目录就看不到光盘的内容了,说明已经成功卸载。
)22、topas命令:aix性能监控工具(动态)============================================= 一、smit/smitty部分快捷菜单方式:#smitty tape #smitty user #smitty tcpip #smitty inet #smitty nfs #smitty jfs #smitty lvm二、关于卷组(smitty vg)1、显示卷组状态:列出卷组细节:lsvg <vgname>列出卷组中的逻辑卷:lsvg -l <vgname>列出卷组中的物理卷:lsvg -p <vgname>2、增加卷组:smitty mkvg3、修改卷组属性:smitty chvg4、激活卷组:varyonvg vg_name5、解除卷组:varyoffvg vg_name6、向卷组中增加一个物理卷:extendvg vg_name hdiskn注:extendvg命令用于向已存在的卷组增加新的物理卷,这个物理卷设备的状态必须是可用的(Available)。
