多功能折叠椅说明书
Traxion Products 3-100 折叠式顶部坡度滑椅用户手册说明书

engineered products OWNER’S MANUALFoldable Topside Creeper Model 3-100Please read and understand all safety advisories and operating instruction in this manual to ensure safe and productive operation of your new Topside Creeper.If you have any questions please contact us at:phone: 479-474-3460email:***************************VIDEO INSTRUCTIONS ARE AVAILABLE ON OUR WEBSITE AT: Safety FirstWARNING: Failure to follow these safety requirements could result in personal injury.This product is a tool to reach what are normally hard to reach places, such as the topside of an engine compartment for mechanics.Always inspect the product for damage before each use. Do not use if damage is detected. Make sure all nuts and bolts are secure before each use.Always engage the caster locks before using the Topside Creeper.Always make sure the angle adjustment bar is secure in one of the three position slots before using.Always face the Topside Creeper when climbing up or down. Use both hands and keep your body centered between the rails.DO NOT USE THE PRODUCT if you tire easily or are subject to fainting spells or disorientation. DO NOT USE THE PRODUCT if you are taking medication that could impair judgement.DO NOT USE THE PRODUCT if you are under the influence of drugs or alcohol.DO NOT USE THE PRODUCT if you are physically challenged.DO NOT sit or stand on the chest pad.DO NOT overload the product. The maximum capacity is 400 lbs (180 kg) which includes body weight, tools and torque applied to tools.DO NOT use the Topside Creeper over a running engine.Parts List 12mm wrench 8mm socket 6mm wrench philips screwdriverTools NeededAssemble Base Attach CastersAssemble legs (M1 and M2) to Base (N) using bolts (F), Nuts (C) and Pins (I) as shown. Do not overtighten.The two legs must be angled outward with angle adjustment notches on the inside.N O TE With angle adjustment notches upward, secure two Locking Casters (A2) to closed end of the base (N) using Flange Nut (B). Secure two non-locking casters (A1) to the outward protruding legs using Flange Nuts (B) as shown.Attach Climbing SectionPosition step section (O) as shown. Secure step section to base using two Bolts (F) and two Locknuts (C).Inside step section must be secured before proceeding. Insert both spring loaded pins into corresponding hole in outside rail of Climbing Section (M). Slide inside step section frame until both spring loaded adjustment pins fully engaged through oblong adjust-ment holes of inside rails.IMPORTANTAttach Angle Adjust Keepers Place angle adjustment bar into one of thethree adjustment slots located on the base. Secure Angle Adjustment Keepers (N) to base using Bolts (G3) and Lock Nuts (E).Attach Base Cross Bar Using two Bolts (G1), two Nuts(D) and Washers (Q), attachSquare Tube Cross Bar Sup-port (J) to base as shown.Attach Padded Deck Frame Using Bolts (G2) and Nuts (D) securechest frame to climbing section as shown.Attach Tool Pouch Attach Padded DeckInsert Philips Head Screws (H) through Bracket (S), Pouch (R) and Padded Deck Frame as shown. Secure to frame using Lock Nuts (E).Using two Philips Head Screws (H) secure the padded deck to the frame. Insert screws through holes in the bottom of the frame and into the threaded inserts in the bottom of the pad.Attach Bumper PadsSlide the three Bumper Pads (U) onto the angle support bars and thecrossbar with the spring-loaded pins.Operating Instructions Using the adjustable angle lean-in featureThere are three different lean-in angles that allow the user to adjust positioning. This helps the user to maximize safety and productivity. To adjust angle lean-in:1. Lock casters (A2) by pressing the lock tab with your foot on each of the locking casters.2. Push back on the climbing section (O).3. Move angle adjustment to one of the three notches located on the base.Changing Working HeightThe working height of the Topsdie Creeper can be adjusted to fit the needs of each individual task from 44” (110cm) to 68” (172cm) in height. To change the working height:1. Lock casters (A2) by pressing the lock tab with your foot on each of the locking casters.2. Grasp a step within the sliding section with one hand while using the other hand to pull one of the spring loaded locking pins outward. Rotate the pin so it does not slide back into the locking slot.3. Repeat step 2 on the other side of the sliding section to remove the second spring loaded locking pin. IMPORTANT: one hand MUST have a firm hold of a step within the sliding section when the second spring loaded locking pin is removed from the locked position. This prevents the sliding section from free falling which could cause serious personal injury.4. Slide the inside step section up or down to desired height while maintaining a firm grip.5. While holding a step within the sliding section with one hand guide one of the spring loaded locking pins into its corresponding hole in the outside rail.Done. Now use your Topside Creeper safelyfor maximum productivity.Lock Casters by pressing downward on the locking tab with your foot.Remove two locking pins from the assembled base section.Push the Angle Adjustment Bar forward to the first setting of the notched Angle Adjustment Keeper.Grasp each of the two legs (M1 and M2) and raise to the climbing section.Replace pins back into their holes for safekeeping.Folding Up The Topside Creeper folds up for easy and compact storage.Thank you for purchasing the Topside Creeper from TraXion Engineered Products. If you need anything please call us at 800-364-7359 or email ***************************.There is more information, including assembly videos on our website at: O t h e r S t u f f F r o m T r a X i o n E n g i n e e r e d P r o d u c t s ...。
多功能折叠椅子安装方法

多功能折叠椅子安装方法引言多功能折叠椅子是一种方便易用的家具,它不仅可以作为椅子使用,还可以转换成梳妆台、书桌或者休闲椅等多种功能。
然而,对于新手来说,可能会觉得安装过程复杂或者不清楚如何正确组装。
本文将详细介绍多功能折叠椅子的安装方法,帮助您轻松完成组装并充分利用它的多种功能。
准备工作在开始组装多功能折叠椅子之前,确保您已经准备好所有需要的工具和材料。
通常情况下,您可能需要以下物品:- 多功能折叠椅子的零件包- 扳手或者螺丝刀- 组装说明书(如果有的话)步骤一:仔细阅读组装说明书在开始组装之前,不论您是否有经验,请务必仔细阅读多功能折叠椅子的组装说明书。
这是确保正确组装的重要步骤。
说明书中通常包含了组装步骤的详细说明、零件的名称以及安全注意事项。
如果你有任何疑问或者不了解某一步骤,建议您先咨询相关专业人士或者客服部门。
步骤二:准备工作空间在组装之前,请确保您有一个干燥、平整且宽敞的空间,这样可以让您更好地操作和放置椅子的零件。
您可以选择在床上或者地板上进行组装,只要确保您的操作空间足够,以避免零件遗失或者损坏的情况。
步骤三:按照步骤组装根据组装说明书,按照步骤逐一组装多功能折叠椅子。
通常情况下,您需要根据说明书的指示将主体骨架、座椅、靠背和腿部零件连接起来。
确保您使用正确的螺丝或者螺母,并用相关工具进行固定。
在组装过程中,请注意以下几点:1. 小心处理零件:多功能折叠椅子的零件较多,有些可能比较小巧。
在进行组装时,小心处理零件,防止零件遗失或者损坏。
2. 对零件进行检查:在组装之前,您可以对每个零件进行检查,确保它们没有瑕疵或者损坏。
如果发现任何问题,请联系相关部门或者品牌客服,并咨询如何处理。
3. 注意力度和力量:在组装过程中,要保持适当的力度和力量。
螺丝的拧紧程度要适中,既不能过松导致松动,也不能过紧使零件变形或者破裂。
4. 注意安全:组装多功能折叠椅子时,请注意保持安全。
在进行组装时,不要将手指或其他身体部位放在可能造成伤害的位置,例如夹子或者紧缩的零件之间。
快捷2(QUICKIE 2):一款可定制化的轻质折叠手动椅子说明书

STRONG AND LIGHTThe revolutionary engineering of the QUICKIE 2 offers one of the strongest and most durable frames on the market without sacrificing weight savings. We make the QUICKIE 2 out of the same material used to make rockets and airplanes, leveraging the strength of 7000 series aerospace aluminum for increased durability and reliability.The design of the QUICKIE 2 crossbrace is something you won’t find anywhere else. We take that 7000 series aerospace aluminum and extrude it into diamond-shaped tubing welded in a four-bar pattern. This optimized geometry creates a stronger, more rigid crossbrace at a lighter weight, ensuring long-lasting durability you can rely on.MULTIPLE WEIGHT CAPACITY OPTIONSFit every body safely and comfortably with the QUICKIE 2 Lite (265-lb user weight capacity) or QUICKIE 2 Heavy Duty (350-lb user weight capacity).LARGE ASSORTMENT OF SEAT WIDTHS AND DEPTHS Offering 11 seat depths, 8 frame depths, and 13 frame widths, the QUICKIE 2 is designed to fit you both today and tomorrow.UNIQUE CASTER HOUSING, FORK AND WHEEL SIZES Achieve a more nimble ride with added stability by leveraging the QUICKIE 2’s unique range of caster sizes and options to better navigate your environment. QUICKIE 2 LITE OPTIONThe QUICKIE 2’s minimalist counterpart, the QUICKIE 2 Lite, features an extremely lightweight, modular frame with a rounded rear for unique style and either fixed or swing-away front hangers.PATENTED Q-FIT TECHNOLOGYOur Q-Fit Technology guarantees a tight fit that can be maintainedfor the life of your chair.SUPERIOR CLINICAL SEATINGJAY cushions and backs come in a wide variety of sizes featuring varying levels of stability and pressure management. Prefer air, fluid, or cooling technology in your cushion or back? QUICKIE 2 has you covered with the industry’s largest in-house selection of seating options. From JAY Your Way to made to order, we believe that comfort is not optional, it’s a must.MOST COLOR OPTIONSWith more than 24 frame colors, 4 patterned frame wraps, and 7 anodized parts colors, you can design a chair that’s truly unique, just like you.Aztec Gold Black Black Cherry Black OpalBlue OpalCandy BlueCandy PurpleCandy RedElectric Blue Evergreen Glow Green AppleHot Sparkle Pink Mauve Pink Rootbeer Sparkle SilverSunrise Orange Yellow Titanium Color Paint Matte BlackMatte Black Cherry Matte Purple Matte Electric Blue Matte EvergreenDesert Camo Mossy Oak Camo Stars and Stripes ZebraIMPORTANT NOTE: The color options shown are for reference only. They are not intended as accurate representations. Refer to the QUICKIE Color Brochure or a QUICKIE Color Ring for representations of QUICKIE colors.Zebra Kolorfusion ™ pattern is available on any base color. Shown here on Candy Blue.。
折椅说明书
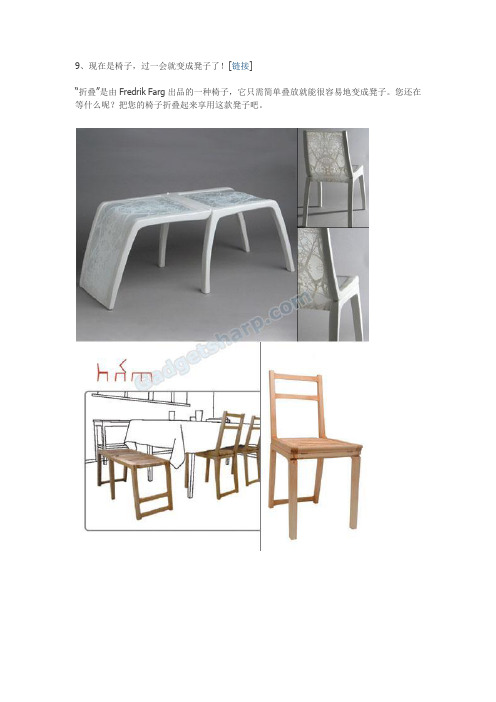
“折叠”是由FredrikFarg出品的一种椅子,它只需简单叠放就能很容易地变成凳子。您还在等什么呢?把您的椅子折叠起来享用这款凳子吧。
专利申请日
2005.05.23
名称
可折叠座椅
公开日
2011.4.27
类别
DIY椅子
地址
中国北京
发明(设计)人
朔卿肖哥gloryoo
专利代
谭老师
摘要
一种可折叠座椅,其包括一框架,该框架形成靠背以及前支架,并铰接到形成后支架的第二框架和形成座位的板上。其特征在于,所述座位通过连接件以销接头连接的方式连接到所述第二框架,所述连接件的每个相应的端部以销接头连接的方式连接到两个元件的相应一个上,所述两个元件分别固定安装到座位的下表面和所述第二框架的横向件的下表面,所述座位支靠在该横向件上。
卫生间折叠凳使用说明

卫生间折叠凳使用说明哎呀,卫生间,大家都知道,这个地方可不是单纯的“如厕”,它简直是个小天地,既能放松又能思考人生,哈哈!说到这里,有个小道具,简直让这个地方变得更加舒适——那就是折叠凳!大家可别小看了它,没准它就是你生活中的“救星”哦。
咱们聊聊这个折叠凳的来历。
它可不是从天上掉下来的,而是咱们现代生活的产物。
想象一下,有时候洗澡洗得正舒服,泡沫满天飞,突然就想坐下来休息一下,这时候一个折叠凳简直就是及时雨。
简简单单一坐,哎,感觉整个世界都放慢了脚步,真是太惬意了!它可不是个笨重的家伙,轻轻一折,便于收纳,真是随时随地想用就用,方便得不要不要的。
咱们聊聊它的使用方法。
说实话,用折叠凳还真没什么难度。
你只需要找到一个合适的地方,比如浴室的角落,或者更衣室,这些地方都可以。
用手轻轻一拉,啪的一声,凳子就打开了,稳稳当当的,坐上去简直不要太舒服。
对了,坐的时候可要小心别滑倒啊,尤其是洗澡后地面可能会湿漉漉的,给个小提醒,安全第一,没错没错!再说说它的承重能力。
很多朋友一听到“折叠”,脑袋里就开始打鼓:这东西能承受得了我的体重吗?嘿,别担心,市面上不少折叠凳都是经过严格测试的,承重能力杠杠的。
所以,坐上去的时候,尽情享受,完全不必担心。
不过,要是你的朋友有点重,那就要考虑下了,哈哈,毕竟还是要看具体情况嘛!此外,这个折叠凳还可以当作洗澡时的“护法”。
很多小伙伴在洗澡的时候总是想找个地方放洗发水、沐浴露,结果这些瓶瓶罐罐就变成了洗澡时最大的麻烦。
这个时候,把折叠凳摆过去,哎,既能坐又能放东西,一举两得,简直是智慧的结晶!而且洗完澡后,你还可以把它拿到外面,享受一下阳光,绝对是一种惬意。
说到清理,折叠凳也不麻烦。
它的材质大多容易清洗,用湿布一擦,立马焕然一新。
卫生间嘛,难免会有水渍或者沐浴露的残留,搞定这些小麻烦根本不费力。
只要保持干净,保证它的使用寿命,真是省心又省力。
折叠凳还可以用在其他地方。
比如,家里有个小聚会,你可以把它拿出来,让朋友们坐坐,增添几分亲密感。
折叠小板凳使用说明书
折叠小板凳使用说明书
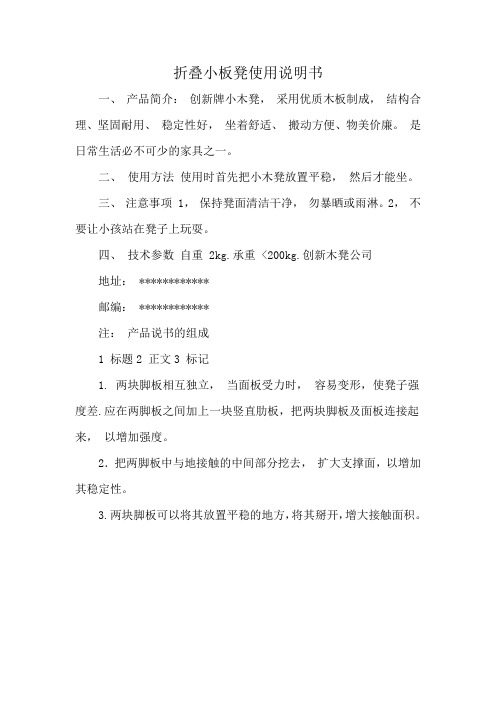
一、产品简介:创新牌小木凳,采用优质木板制成,结构合理、坚固耐用、稳定性好,坐着舒适、搬动方便、物美价廉。
是日常生活必不可少的家具之一。
二、使用方法使用时首先把小木凳放置平稳,然后才能坐。
三、注意事项 1,保持凳面清洁干净,勿暴晒或雨淋。
2,不要让小孩站在凳子上玩耍。
四、技术参数自重 2kg.承重 <200kg.创新木凳公司
地址: ************
邮编: ************
注:产品说书的组成
1 标题
2 正文
3 标记
1. 两块脚板相互独立,当面板受力时,容易变形,使凳子强度差.应在两脚板之间加上一块竖直肋板,把两块脚板及面板连接起来,以增加强度。
2.把两脚板中与地接触的中间部分挖去,扩大支撑面,以增加其稳定性。
3.两块脚板可以将其放置平稳的地方,将其掰开,增大接触面积。
多功能按摩椅的商品说明书
多功能按摩椅的商品说明书尊敬的顾客,感谢您选择购买我们公司的多功能按摩椅。
本说明书将为您详细介绍我们产品的特点、功能以及使用方法,以确保您能充分了解并正确使用该款按摩椅。
产品特点:1. 创新设计:我们的多功能按摩椅采用了现代化设计,外形美观大方,适用于家庭、办公室和其他场所。
2. 多种按摩模式:该按摩椅配备了多种按摩模式,包括按摩、揉捏、敲打、推拿等多种技术,以满足不同用户的需求。
3. 全身按摩:该款按摩椅能够对颈椎、肩部、背部、腰部、臀部、大腿和小腿等多个部位进行全方位的按摩,帮助舒缓疲劳和紧张感。
4. 多种按摩强度:可以根据个人需求调整按摩椅的力度和速度,以提供舒适和个性化的按摩体验。
5. 智能化控制:该款按摩椅配备了智能遥控器,操作简便,用户可以根据自己的喜好和需求进行个性化设置。
使用方法:1. 请务必在使用前仔细阅读本产品说明书,并按照说明进行正确操作。
2. 打开电源开关,按摩椅即可启动。
使用遥控器选择您偏爱的按摩模式和强度。
系统会为您提供舒适的按摩体验。
3. 在使用按摩椅时,请系好安全带以确保您的安全,并将袜鞋、项链等易掉落的物品脱下,以免造成意外事故。
4. 在按摩过程中,如遇到不适或疼痛感,请立即停止使用,并咨询专业人士的意见。
5. 使用完毕后,请关闭电源开关,并及时清洁按摩椅。
注意事项:1. 请勿长时间连续使用按摩椅,以免对身体造成不适。
2. 建议每次使用按摩椅的时间为15-20分钟,适当休息后再继续使用。
3. 儿童、孕妇、老年人和患有相关疾病(如心脏病、高血压等)的人士,请在专业人士的指导下使用按摩椅。
4. 按摩椅仅供个人使用,请勿与他人共用,以免传播疾病。
5. 请勿将任何尖锐或重物放置在按摩椅上,以免损坏产品。
尊敬的顾客,购买我们公司的多功能按摩椅,您将享受到舒适、放松和个性化的按摩体验。
我们坚信我们的产品将为您带来无与伦比的使用体验和品质生活。
如果您在使用过程中遇到任何问题或需求帮助,请立即联系我们的客服团队,我们将竭诚为您提供协助和解决方案。
多功能智能电动按摩椅的使用说明书
多功能智能电动按摩椅的使用说明书尊敬的用户:感谢您选择我们的多功能智能电动按摩椅!为了让您能够安全、舒适地享受按摩椅带来的放松体验,在使用前请您仔细阅读本使用说明书。
一、产品概述我们的多功能智能电动按摩椅是一款融合了先进技术与人体工程学设计的高端按摩设备。
它具有多种按摩模式、力度调节、部位选择等功能,旨在为您提供全方位的身心舒缓。
二、产品组件1、按摩椅主体包括座椅、靠背、扶手和腿部支撑等部分,采用高品质的材料制作,提供舒适的支撑和坐感。
2、按摩机芯内置的按摩机芯能够模拟多种按摩手法,如揉捏、捶打、推拿等。
3、控制面板位于按摩椅一侧,方便您操作和选择各种按摩功能。
4、气囊系统分布在肩部、手臂、腿部和脚部等部位,通过充气和放气来实现挤压按摩。
5、加热装置在腰部和背部等部位设有加热功能,促进血液循环,增强按摩效果。
三、安全注意事项1、在使用按摩椅前,请确保电源插头正确插入电源插座,且电源电压符合按摩椅的要求。
2、请勿在按摩椅上跳跃、站立或放置过重的物品,以免损坏按摩椅或造成人身伤害。
3、如果您身体有任何不适、疾病或正在接受医疗治疗,请在使用前咨询医生的意见。
4、儿童、孕妇、老人及身体虚弱者在使用时应有人陪同。
5、请勿在按摩椅运行时强行拆卸或修理按摩椅,以免发生危险。
四、使用方法1、开启电源将电源插头插入插座,然后按下按摩椅上的电源开关,按摩椅会进入待机状态。
2、选择按摩模式通过控制面板上的按键,您可以选择多种按摩模式,如全身按摩、颈部按摩、腰部按摩等。
3、调节力度根据个人的承受能力,您可以调节按摩的力度,通常有轻度、中度和重度可供选择。
4、选择部位如果您只想按摩特定的部位,可以通过控制面板上的部位选择按键进行操作。
5、启动按摩确认好按摩模式、力度和部位后,按下启动按键,按摩椅开始工作。
6、调节气囊压力部分按摩椅具有气囊按摩功能,您可以通过相应的按键调节气囊的压力大小。
7、使用加热功能如果需要使用加热功能,按下加热按键,按摩椅会在相应部位进行加热。
折叠式板凳使用说明
折叠式板凳使用说明《折叠式板凳使用说明》1. 嘿,小伙伴们!你们知道折叠式板凳不?这可是个超棒的小玩意儿呢。
就像魔法道具一样,不用的时候能变得小小的,一点都不占地方。
比如说,我家的小角落,以前放个大凳子可挤了,换了这个折叠式板凳,哇塞,空间一下子就宽敞多啦。
你看,这就像把大象变成小老鼠,多神奇呀。
我和弟弟在小角落里玩耍的时候再也不用担心撞到凳子啦,感觉整个小天地都变得更温馨了呢。
这折叠式板凳啊,就是小空间的救星。
2. 哟呵,你要是想打开这个折叠式板凳呀,简单得很呢。
就像打开一个神秘的小盒子一样。
你看,只要抓住两边轻轻一拉,“哗”的一下,它就展开了,就像花朵绽放似的。
有一次我和小伙伴们在院子里画画,我拿出折叠式板凳分给大家坐。
我一边拉着板凳一边喊:“看我的厉害,变!”小伙伴们都围过来看,眼睛瞪得大大的,可好奇了。
那一刻,我就像个小魔法师,感觉自己特别酷呢。
所以呀,这折叠式板凳打开可容易啦,连小朋友都能轻松搞定。
3. 折叠式板凳的坐感也很不错哦。
你可能会想,这么个能折叠的小凳子,会不会坐上去不舒服呀?嘿,那你可就错喽。
它就像一个小小的舒适港湾。
我爷爷在门口晒太阳的时候就爱坐这个折叠式板凳。
他坐在上面,眯着眼睛,嘴里还哼着小曲儿呢。
我问爷爷:“爷爷,这个凳子坐着舒服不?”爷爷笑着说:“乖孙儿啊,这个凳子软乎乎的,比我那老椅子还舒服呢。
”你看,连爷爷都觉得舒服,这折叠式板凳的舒适度那是没得说的。
4. 大家可别小瞧这折叠式板凳的承重能力呀。
它就像一个小小的大力士呢。
我有一次和爸爸打赌,我说这个小凳子肯定能承受我的重量。
爸爸还不信,笑着说:“你这小身板儿都快赶上小胖子了,这凳子能行?”我就一屁股坐上去,还在上面跳了两下,凳子稳稳当当的。
我得意地说:“看,爸爸,我就说它行吧。
”爸爸惊讶地看着,然后竖起大拇指。
这折叠式板凳啊,别看它小,承重力可是很强的呢。
5. 这折叠式板凳的材质也很特别哦。
摸起来滑溜溜的,就像摸到了小鱼的肚皮一样。
八爪椅子用法
八爪椅子用法1. 简介八爪椅子是一种特殊设计的多功能椅子,它具有八条可伸缩的腿,可以根据需要进行调整和固定。
这种独特的设计使得八爪椅子在使用上非常灵活和方便,能够适应各种不同的场景和需求。
2. 功能和特点2.1 可调节高度八爪椅子的腿部可以灵活伸缩,使得椅子的高度可以根据需要进行调节。
无论是在办公室工作、学习还是家庭使用,都可以根据个人身高和桌面高度进行合理调整,保证坐姿舒适。
2.2 可固定角度除了高度可调节外,八爪椅子还可以固定不同的角度。
通过简单地调整腿部长度,可以将椅子前倾、后仰或者保持平稳。
这种功能非常适合在不同场景下使用,如工作时需要保持坐姿端正,而休息时则可以稍微放松。
2.3 可折叠收纳八爪椅子还具有可折叠的特点,可以方便地收纳和携带。
当不需要使用时,只需将腿部收起来,就可以将椅子整理得非常紧凑,节省空间。
这对于有限的居住空间或者需要经常移动的人来说非常实用。
2.4 耐用稳固八爪椅子采用高质量的材料制作而成,具有良好的耐用性和稳固性。
无论是重量承载能力还是抗摔打能力都非常出色,可以长时间使用而不会出现损坏或者变形。
3. 使用场景3.1 办公室八爪椅子在办公室中是一种非常实用的座椅选择。
由于其可调节高度和可固定角度的特点,可以满足不同员工的个性化需求。
而且八爪椅子舒适稳固的座感也能够提高员工在工作中的舒适度和效率。
3.2 学习区域对于学生来说,一个舒适合适的座椅是学习效果好与否的重要因素之一。
八爪椅子通过其可调节高度和可固定角度的特点,可以帮助学生找到最适合自己的坐姿,减少长时间学习对身体的负担。
3.3 家庭使用八爪椅子也非常适合在家庭中使用。
不论是用于餐厅、客厅还是卧室,都可以根据需要进行高度和角度的调节,使得整个家庭成员都能够享受到舒适健康的坐姿。
3.4 户外活动由于八爪椅子具有可折叠收纳的特点,非常适合携带到户外进行野餐、露营等活动。
无论是在野外露营时需要一个舒适的座椅,还是在户外聚会时需要额外的座位,八爪椅子都能够满足需求。
- 1、下载文档前请自行甄别文档内容的完整性,平台不提供额外的编辑、内容补充、找答案等附加服务。
- 2、"仅部分预览"的文档,不可在线预览部分如存在完整性等问题,可反馈申请退款(可完整预览的文档不适用该条件!)。
- 3、如文档侵犯您的权益,请联系客服反馈,我们会尽快为您处理(人工客服工作时间:9:00-18:30)。
多功能折叠椅设计说明书
设计者:随帅民、杨宏伟、聂连强、梁兴宇、马文立
内容简介
1 研制背景及意义
随着人们生活需求的多样化,传统的椅子和只有单一功能的椅子,已不能满足人
们的需求,其中就有很难实现一个椅子有多个功能,解决生活中的多个问题,实
现一对多的效应。本作品的基本思路和创新点就是一对多效应,一把椅子有多个
功能,解决人们对节省空间等几个方面的需求,给使用者带来方便。
2
设计方案
2.1座椅外观图:为图1所示
图1
2.2底座
如图2所示,为座椅的底座,主要功能是调节椅子的高度,通过旋动螺杆上的螺
母,改变交叉架之间的水平距离来实现升降功能。
图2
2.3迷你折叠桌
如图3所示,桌子不用时,通过可动套筒挂在椅子的侧面(如图3(1))。使
用时,将桌子移至把手前端,并从外侧将桌子旋转270度至图3(2),并把
桌子折叠部分打开(如图3(3))。
(1) (2) (3)
图3
2.4可调节角度减震靠背装置
如图4所示,当两边紧固螺丝拧紧的的时候,靠背被固定,当需要调节靠背角度
时,可将靠背调成适宜角度,然后拧紧两边的螺丝,当两边的螺丝都拧松时,可
作为减震靠背,增加舒适度。
图4
2.5折叠功能
如图5所示,此椅子可实现部分折叠功能,椅子的底座可以降到一定位置,靠背
可向座板翻折,弹簧减震处的减震杆可拔出,形成折叠。小桌子可以转到扶手上
面节省空间。
图5
3
理论设计计算
椅子总体尺寸长约60cm,宽约45cm,高约120cm(正常情况下)。
理论升降范围约40cm。迷你折叠桌(展开状态)长约40cm,宽约30cm。
靠背宽约40cm,长约65cm,靠背板后约1cm。座板宽约40cm ,长约50 cm,
平均厚度2cm。
椅子主架结构采用外径2.5cm,内径2.3cm的钢管材料。