Android界面开发之常用系统控件界面大合集
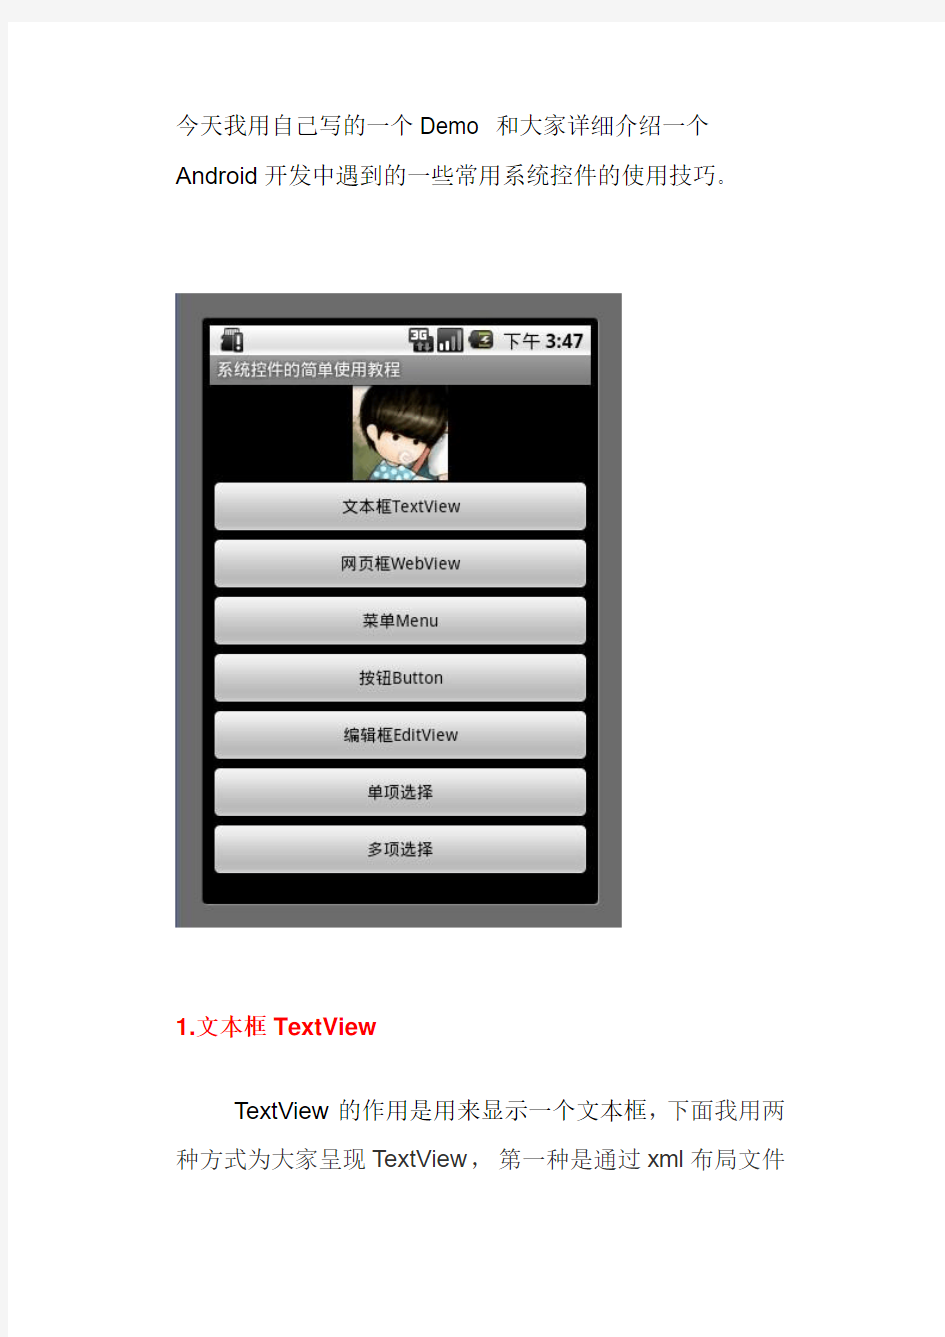

今天我用自己写的一个Demo 和大家详细介绍一个Android开发中遇到的一些常用系统控件的使用技巧。
1.文本框TextView
TextView的作用是用来显示一个文本框,下面我用两种方式为大家呈现TextView,第一种是通过xml布局文件
呈现,第二种是通过代码来呈现,由此可见Android 的界面开发真的是非常灵活。
view plaincopy to clipboardprint?
1. public class TextViewActivity extends Activity {
2. @Override
3. protected void onCreate(Bundle savedInstanceState) {
4. setContentView(https://www.360docs.net/doc/0717303485.html,yout.textview);
5.
6. LinearLayout ll = (LinearLayout) findViewById(R.id.textviewll);
7. TextView textView = new TextView(this);
8. //设置显示文字
9. textView.setText("从代码中添加一个TextView");
10. //设置显示颜色
11. textView.setTextColor(Color.WHITE);
12. //设置显示字体大小
13. textView.setTextSize(18);
14. //设置显示背景颜色
15. textView.setBackgroundColor(Color.BLUE);
16. //设置锚点位置
17. textView.setGravity(Gravity.CENTER_VERTICAL|Gravity.CE
NTER_HORIZONTAL);
18. //把这个view加入到布局当中
19. ll.addView(textView);
20.
21. super.onCreate(savedInstanceState);
22. }
23. }
1.
2. 3. android:id="@+id/textviewll" 4. android:orientation="vertical"android:layout_width="fill_parent " 5. android:layout_height="fill_parent"> 6. 7. android:layout_width="fill_parent" 8. android:layout_height="wrap_content" 9. android:textColor="#000000" 10. android:textSize="18dip" 11. android:background="#00FF00" 12. android:text="@string/textView" 13. android:gravity="center_vertical|center_horizontal" 14. /> 15.
view plaincopy to clipboardprint?
1. public class WebViewActivity extends Activity {
2. WebView webView = null;
3. static final String MIME_TYPE = "text/html";
4. static final String ENCODING = "utf-8";
5.
6.
7. @Override
8. protected void onCreate(Bundle savedInstanceState) {
9. setContentView(https://www.360docs.net/doc/0717303485.html,yout.webview);
10.
11. webView = (WebView) findViewById(R.id.webview);
12. webView.loadDataWithBaseURL(null,"欢迎访问雨松MOMO的博客
", MIME_TYPE, ENCODING, null);
13. super.onCreate(savedInstanceState);
14. }
15. }
1.
2. 3. android:id="@+id/textviewll" 4. android:orientation="vertical"android:layout_width="fill_parent " 5. android:layout_height="fill_parent"> 6. 7. android:layout_height="wrap_content" 8. android:textColor="#000000" 9. android:textSize="18dip" 10. android:background="#00FF00" 11. android:text="网页框WebView测试" 12. android:gravity="center_vertical|center_horizontal" 13. /> 14. 15. android:layout_height="wrap_content" 16. android:layout_width="fill_parent"/> 17.
view plaincopy to clipboardprint?
1. public class MenuActivity extends Activity {
2.
3. @Override
4. protected void onCreate(Bundle savedInstanceState) {
5. setContentView(https://www.360docs.net/doc/0717303485.html,yout.menuview);
6. super.onCreate(savedInstanceState);
7. }
8.
9. @Override
10. public boolean onCreateOptionsMenu(Menu menu) {
11. menu.add(0, 0, Menu.NONE, "菜单
1").setIcon(R.drawable.icon);
12. menu.add(0, 1, Menu.NONE, "菜单
2").setIcon(R.drawable.icon);
13. menu.add(0, 2, Menu.NONE, "菜单
3").setIcon(R.drawable.icon);
14. menu.add(0, 3, Menu.NONE, "菜单
4").setIcon(R.drawable.icon);
15. menu.add(0, 4, Menu.NONE, "菜单
5").setIcon(R.drawable.icon);
16. menu.add(0, 5, Menu.NONE, "菜单
6").setIcon(R.drawable.icon);
17. return super.onCreateOptionsMenu(menu);
18. }
19.
20. @Override
21. public boolean onOptionsItemSelected(MenuItem item) {
22. Dialog(item.getItemId());
23. return super.onOptionsItemSelected(item);
24. }
25.
26. private void Dialog(int message) {
27. new AlertDialog.Builder(this).setMessage(
28. "您单击第【" + message + "】项Menu菜单项.").show();
29. }
30. }
1.
2. 3. android:orientation="vertical"android:layout_width="fill_parent " 4. android:layout_height="fill_parent"> 5. 6. android:layout_height="wrap_content" 7. android:textColor="#000000" 8. android:textSize="18dip" 9. android:background="#00FF00" 10. android:text="Menu菜单测试" 11. android:gravity="center_vertical|center_horizontal" 12. /> 13.
view plaincopy to clipboardprint?
1. public class ButtonActivity extends Activity {
2.
3. Context mContext = null;
4. @Override
5. protected void onCreate(Bundle savedInstanceState) {
6. setContentView(https://www.360docs.net/doc/0717303485.html,yout.buttonview);
7. mContext = this;
8.
9. //普通按钮
10. Button button0 = (Button)findViewById(R.id.buttonview0);
12. //设置按钮文字颜色
13. button0.setTextColor(Color.BLUE);
14. //设置按钮文字大小
15. button0.setTextSize(30);
16.
17. //设置按钮监听点击事件
18. button0.setOnClickListener(new OnClickListener() {
19.
20. @Override
21. public void onClick(View arg0) {
22. Toast.makeText(ButtonActivity.this, "您点击了‘这是一个按
钮’", Toast.LENGTH_LONG).show();
23.
24. }
25. });
26.
27. //带图片的按钮
28. ImageButton button1 = (ImageButton)findViewById(R.id.butto
nview1);
29. //设置按钮监听点击事件
30. button1.setOnClickListener(new OnClickListener() {
31.
32. @Override
33. public void onClick(View arg0) {
34. Toast.makeText(ButtonActivity.this, "您点击了一个带图片的
按钮", Toast.LENGTH_LONG).show();
35.
36. }
37. });
38. super.onCreate(savedInstanceState);
39. }
1.
2. 3. android:orientation="vertical"android:layout_width="fill_parent " 4. android:layout_height="fill_parent"> 5. 6. android:layout_height="wrap_content" 7. android:textColor="#000000" 8. android:textSize="18dip" 9. android:background="#00FF00" 10. android:text="Button按钮测试" 11. android:gravity="center_vertical|center_horizontal" 12. /> 13. 14. android:id="@+id/buttonview0" 15. android:layout_width="fill_parent" 16. android:layout_height="wrap_content" 17. android:text="这是一个按钮" 18. /> 19. 20. android:id="@+id/buttonview1" 21. android:layout_width="fill_parent" 22. android:layout_height="wrap_content" 23. android:src="@drawable/icon" 24. /> 25.
view plaincopy to clipboardprint?
1. public class EditTextActivity extends Activity {
2.
3. Context mContext = null;
4. @Override
5. protected void onCreate(Bundle savedInstanceState) {
6. setContentView(https://www.360docs.net/doc/0717303485.html,yout.editview);
7. mContext = this;
8. //帐号
9. final EditText editText0 = (EditText)findViewById(R.id.editview
0);
10. //密码
11. final EditText editText1 = (EditText)findViewById(R.id.editview
1);
12.
13. //确认按钮
14. Button button = (Button)findViewById(R.id.editbutton0);
15.
16. button.setOnClickListener(new OnClickListener() {
17.
18. @Override
19. public void onClick(View arg0) {
20. String username = editText0.getText().toString();
21. String password = editText1.getText().toString();
22. Toast.makeText(EditTextActivity.this, "用户名:
"+username +"密码:
"+ password, Toast.LENGTH_LONG).show();
23. }
24. });
25. super.onCreate(savedInstanceState);
26. }
27. }
1.
2. 3. android:orientation="vertical"android:layout_width="fill_parent " 4. android:layout_height="fill_parent"> 5. 6. android:layout_height="wrap_content" 7. android:textColor="#000000" 8. android:textSize="18dip" 9. android:background="#00FF00" 10. android:text="EditText编辑框测试" 11. android:gravity="center_vertical|center_horizontal" 12. /> 13. 14. android:id="@+id/editview0" 15. android:layout_width="fill_parent" 16. android:layout_height="wrap_content" 17. android:hint="请输入帐号" 18. android:phoneNumber="true" 19. /> 20. 21. 22. android:id="@+id/editview1" 23. android:layout_width="fill_parent" 24. android:layout_height="wrap_content" 25. android:hint="请输入密码" 26. android:password="true" 27. /> 28. 29. android:id="@+id/editbutton0" 30. android:layout_width="fill_parent" 31. android:layout_height="wrap_content" 32. android:text="确定" 33. /> 34.
view plaincopy to clipboardprint?
1. public class RadioActivity extends Activity {
2.
3. Context mContext = null;
4. @Override
5. protected void onCreate(Bundle savedInstanceState) {
6. setContentView(https://www.360docs.net/doc/0717303485.html,yout.radioview);
7. mContext = this;
8. //单选组(只有在一个组中的按钮可以单选)
9. RadioGroup radioGroup = (RadioGroup)findViewById(R.id.rad
ion0);
Android人机界面(UI)设计规范(带目录)
Android 人机界面设计规范 1Android 设计的依据 1.1 框架结构及流程 是什么使得android 有着独特的用户体验? 后台处理支持多任务功能 正在进行和事件驱动的提示信息 通过Widgets 和live folders 来实现实时信息的预览 用户想用时,任一应用程序都可以挑选和选择 android 不是关于程序的,它是关于活动,把任务分层, 1.2 架构基础 硬件平台 android 设备代表的是硬件和软件的完美组合。硬件辅助导航操作,并给android 提供更多更好的功能。当菜单没有开启,要把屏幕最大化时,菜单按钮可以在屏幕上提供更多的内容。返回按钮允许使用返回堆(back stack)。 竖屏与横屏 一般来说,用户界面开发竖屏与横屏。在新横屏也仍存在于新的Android 手机中。99%的android 布局支持横屏。 焦点和菜单 在触摸模式里没有焦点,只有轨迹球。Android 平台里没有鼠标焦点。确定你从未显示焦点。主菜单应该包括全部功能;它们与活动联系一起形成整体。菜单上的图标按重要性排序。如果有多于5 个图标,使用点击more menu 菜单来查看那些不太重要的菜单项。上下文菜单(长按)集中在一个特定对象。 总是把那些与所选项最相关的行为放在长按菜单的顶部。 需要记住的几点: 设计时要考虑速度和简洁 尽量分层来分等级 屏幕上的活动尽量最小 使用下载进度条,下载数据时,而不是让用户等待去看一个加载完全的页面。 考虑活动流而不是线性行为 1.3 屏幕上的行为
android 设计了特定的行为方式。在你的应用程序里利用好这一点。应该坚持android 行为的标准,避免混淆用户。 1.4 表达 细节使得产品集中在细节。程序的美学会帮助你集中注意在那些应用体验核心的关键任务上。API DEMO 是开始你的工具包的好地方。 2 用户界面原则 这部分试图讲述创造一个好的用户界面的一些基本的交互设计原则。这些原则是基本的,不止能应用于android 的用户界面设计,也可以应用于其他。苹果建议开发者花费60%的开发时间来进行设计工作。下面的用户界面原则将为好的设计提供一个基础。 2.1 隐喻 隐喻是构建一个基于操作任务心智模型的模块;用它们来传递应用程序的概念和功能。基于真实世界的应用对象可以帮助用户很快的理解该应用程序。当你设计你的应用程序时,要注意andriod 中存在的隐喻,不要重新定义它们。同时,检查你的应用程序执行的任务,看是否有些自然隐喻你可以使用。 2.2 反映用户的心智模型 用户已经有了一个来描述你的程序正在进行的任务的心智模型。这个心智模型产生于真实世界经验、其它软件和一般电脑基本知识的结合。比如说,用户在真实世界里有写字、寄信的经验,也会产生特定的期待,像写一封新的信,选一个接受者,然后寄出信。一个忽略用户心智模型的电子邮件程序用起来会很困难和不舒服。这是因为程序强加给用户一个不熟悉的概念模型,而不是建立一个用户已有的知识经验模式。 在设计程序用户界面之前,试着去发现你的用户的心智模型,这样帮助用户去执行任务。心智模型中内在的隐喻,它代表了任务的概念组成。在写信这个例子中,隐喻包括信件、邮包和信封。在涉及到照片的任务的思考模式中,隐喻包括照片、照相机和专辑。我们要努力地发现用户的期望,包括任务组成、组织、窗口布局的工作流、菜单和工具栏组织、控制面板的使用。 要通过努力地何必把个下面的特征与用户心智模型相融合: 熟悉性 用户的心智模型主要是建立在经验的基础上 简单化 一项任务的心智模型通常是流线型,关注任务的基本组成部分。尽管对于一个给定的任务有很多可选的细节,但是基本的组成部分占大部分,并且不会占用用户的注意。 可利用性Availability
android studio 控件常用属性
android studio 控件常用属性 下面是RelativeLayout各个属性 1.android:layout_above="@id/xxx" --将控件置于给定ID控件之上 2.android:layout_below="@id/xxx" --将控件置于给定ID控件之下 3. android:layout_toLeftOf="@id/xxx" --将控件的右边缘和给定ID控件的左边缘对齐 4.android:layout_toRightOf="@id/xxx" --将控件的左边缘和给定ID控件的右边缘对齐 5. android:layout_alignLeft="@id/xxx" --将控件的左边缘和给定ID控件的左边缘对齐 6.android:layout_alignTop="@id/xxx" --将控件的上边缘和给定ID控件的上边缘对齐 7.android:layout_alignRight="@id/xxx" --将控件的右边缘和给定ID控件的右边缘对齐 8.android:layout_alignBottom="@id/xxx" --将控件的底边缘和给定ID控件的底边缘对齐 9.android:layout_alignParentLeft="true" --将控件的左边缘和父控件的左边缘对齐 10. android:layout_alignParentTop="true" --将控件的上边缘和父控件的上边缘对齐 11. android:layout_alignParentRight="true" --将控件的右边缘和父控件的右边缘对齐 12.android:layout_alignParentBottom="true" --将控件的底边缘和父控件的底边缘对齐 13.android:layout_centerInParent="true" --将控件置于父控件的中心位置 14.android:layout_centerHorizontal="true" --将控件置于水平方向的中心位置 15.android:layout_centerVertical="true" --将控件置于垂直方向的中心位置 android:layout_width 设置组件的宽度 android:layout_height 设置组件的高度 android:id 给组件定义一个id值,供后期使用 android:background 设置组件的背景颜色或背景图片 android:text 设置组件的显示文字 android:textColor 设置组件的显示文字的颜色 android:layout_below 组件在参考组件的下面 android:alignTop 同指定组件的顶平行
Android简单的登陆界面的设计开发
通信实训报告 -Android移动平台开发 学院:信息工程学院 班级: 学号: 姓名:
实训内容: 一.1.Andriod的简介 Android一词的本义指“机器人”,同时也是Google于2007年11月5日宣布的基于Linux平台的开源手机操作系统的名称,该平台由操作系统、中间件、用户界面和应用软件组成,号称是首个为移动终端打造的真正开放和完整的移动软件。目前,最新版本为Android 2.4 Gingerbread 和Android 3.0 Honeycomb。 Android是基于Linux开放性内核的操作系统,是Google公司在2007年11月5日公布的手机操作系统。 Android早期由原名为"Android"的公司开发,谷歌在2005年收购"Android.Inc"后,继续对Android系统开发运营,它采用了软件堆层(software stack,又名软件叠层)的架构,主要分为三部分。底层Linux内核只提供基本功能,其他的应用软件则由各公司自行开发,部分程序以Java编写。2011年初数据显示,仅正式上市两年的操作系统Android已经超越称霸十年的塞班系统,使之跃居全球最受欢迎的智能手机平台。现在,Android系统不但应用于智能手机,也在平板电脑市场急速扩张,在智能MP4方面也有较大发展。采用Android系统主要厂商包括台湾的HTC,(第一台谷歌的手机G1由HTC生产代工)美国摩托罗拉,SE等,中国大陆厂商如:魅族(M9),华为、中兴、联想、蓝魔等。 2.Android构架图 二.1软件下载 Android SDK,网址是https://www.360docs.net/doc/0717303485.html,. JDK的下载地址https://www.360docs.net/doc/0717303485.html,/javase/downloads/widget/jdk6.jsp。Eclipse的下载网址是https://www.360docs.net/doc/0717303485.html,/downloads/ 2.Android开发环境搭建
Android常用控件
《Android基础应用》 Android常用控件 ?本章任务 ?使用Android开发使用时间组件 ?使用Android开发使用进度条组件 ?使用Android开发创建底部选项卡 ?本章目标 ?了解Android的组件层次结构 ?掌握常用的日期时间类控件 ?掌握常用的几个容器组件 1.Android组件的层次结构 UI组件都是View的子类,View有很多子类,它们之间存在树状的继承关系View及其子类结构图
TextView及其子类结构图
ViewGroup及其子类结构图 其下的子类一般作为容器或布局来使用 FrameLayout及其子类结构图 其下的子类通常作为容器或布局来使用
2.时间控件 2.1日期时间选择器 DatePicker组件可用于输入日期,TimePicker组件可用来选择时间,只能输入小时和分,默认12小时制 DatePicker ●使用onDateChangedListener监听器来获取用户的日期选择 ●使用init对组件进行初始化 ●使用getYear,getMonth,getDayOfMonth方法获得用户选择的年,月,日 TimePicker ●使用onTimeChangedListener监听器获取用户的时间选择 ●使用setIs24HourView设置是否以24小时制显示 ●使用getCurrentHour获得当前的小时数 ●使用getCurrentMinute获得当前的分钟数 示例
示例的实现结果
2.2时钟组件 AnalogClock组件用来以表盘的方式显示当前时间,该表只有时针和分针,DigitClock组件以数字的方式显示当前时间可以显示时分秒,由于DigitClock继承TextView,可以使用TextView 的属性 示例
Android界面开发之常用系统控件界面大合集
今天我用自己写的一个Demo 和大家详细介绍一个Android开发中遇到的一些常用系统控件的使用技巧。 1.文本框TextView TextView的作用是用来显示一个文本框,下面我用两种方式为大家呈现TextView,第一种是通过xml布局文件
呈现,第二种是通过代码来呈现,由此可见Android 的界面开发真的是非常灵活。 view plaincopy to clipboardprint? 1. public class TextViewActivity extends Activity { 2. @Override 3. protected void onCreate(Bundle savedInstanceState) { 4. setContentView(https://www.360docs.net/doc/0717303485.html,yout.textview);
5. 6. LinearLayout ll = (LinearLayout) findViewById(R.id.textviewll); 7. TextView textView = new TextView(this); 8. //设置显示文字 9. textView.setText("从代码中添加一个TextView"); 10. //设置显示颜色 11. textView.setTextColor(Color.WHITE); 12. //设置显示字体大小 13. textView.setTextSize(18); 14. //设置显示背景颜色 15. textView.setBackgroundColor(Color.BLUE); 16. //设置锚点位置 17. textView.setGravity(Gravity.CENTER_VERTICAL|Gravity.CE NTER_HORIZONTAL); 18. //把这个view加入到布局当中 19. ll.addView(textView); 20. 21. super.onCreate(savedInstanceState); 22. } 23. } 1. 2. 第四章Android用户界面 P3 Android系统为我们提供了丰富的可视化用户界面组件,包括菜单、对话框、按钮、下列列表等。Android系统借用了Java里的UI设计思想,包括事件响应机制和布局管理,所以有过Java UI开发经验的学生,学些这一章会很轻松。 Android系统中所有UI类都是建立在View和ViewGroup这两个类的基础之上的。所有View 的子类称为Widget,所有ViewGroup的子类称为Layout。 P5 View和ViewGroup之间采用了组合设计模式(Composite)。 P6 ViewGroup作为布局容器类在最上层,布局容器里面又可以有View和ViewGroup。 P16 为了更好地管理Android应用的用户界面里的各组件,Android提供了布局管理器。通过使用布局管理器,Android应用的图形用户界面具有良好的平台无关性。通常来说,推荐使用布局管理器来管理组件的分布、大小,而不是直接设置组件的位置和大小。这样可以让组件在不同的手机屏幕上都能运行良好—不同手机屏幕的分辨率、尺寸并不完全相同。如果让程序手动控制每个组件的大小、位置、则将给编程带来巨大的困难。为了解决这个问题,Android 提供了布局管理器。布局管理器可以根据运行平台来调整组件的大小,程序员要做的,只是为组件选择合适的布局管理器。 与Swing不同的是,Android的布局管理器本身就是一个UI组件,所有布局管理器都是ViewGroup的子类。 P18 线性布局由LinearLayout来代表,线性布局有点像AWT编程里的FlowLayout,他们都会将容器里的组件一个挨着一个地排列起来。LinearLayout不仅可以控制组件横向排列,也可控制各组件纵向排列。 线性布局与AWT中的FlowLayout的最大区别在于:Android的线性布局不会换行:当组件一个挨着一个地排列到头后,剩下的组件将不会被现实出来;在AWT中FlowLayout则会另起一行排列多出来的组件。 视图组件的使用模式 常用组件 高级组件 提示框与警告对话框 就是Android应用程序的开发过程。一般过程是先通过XML布局文件或Java代码创建界面布局,设定组件显示样式,随后获取UI组件对象,并处理组件事件响应。 视图组件的定义 资源的访问 生成视图组件资源标识 视图组件的引用 视图组件的事件响应 组件的常用属性 1.1视图组件的定义 使用XML布局文件定义视图组件 使用Java代码定义视图组件(不推荐) 1.1视图组件的定义 使用XML布局文件定义视图组件 Android平台为大多数视图组件以及其子类提供了XML标记,可通过XML布局文件中的标记来定义视图组件。XML中的每个元素代表了一个组件,即元素名称对应相应的Java类。 1.1视图组件的定义 android常用控件大全 在Android中使用各种控件(View) DatePicker-日期选择控件 TimePicker-时间选择控件 ToggleButton-双状态按钮控件 EditText-可编辑文本控件 ProgressBar-进度条控件 SeekBar-可拖动的进度条控件 AutoCompleteTextView-支持自动完成功能的可编辑文本控件 MultiAutoCompleteTextView-支持自动完成功能的可编辑文本控件,允许输入多值(多值之间会自动地用指定的分隔符分开) ZoomControls-放大/缩小按钮控件 Include-整合控件 VideoView-视频播放控件 WebView-浏览器控件 RatingBar-评分控件 Tab-选项卡控件 Spinner-下拉框控件 Chronometer-计时器控件 ScrollView-滚动条控件 在Android中使用的Layout FrameLayout:里面只可以有一个控件,并且不能设计这个控件的位置,控件会放到左上角 LinearLayout:里面可以放多个控件,但是一行只能放一个控件 TableLayout:这个要和TableRow配合使用,很像html里面的table AbsoluteLayout:里面可以放多个控件,并且可以自己定义控件的x,y的位置 RelativeLayout:里面可以放多个控件,不过控件的位置都是相对位置 (Android界面布局好像还可以直接引用一些view,如ScrollView等) 常用控件: 1,EditText 主要函数:setText/getText设置/获取文本内容,setHint设置缺省显示内容; 2,RadioGroup,RadioButton RadioButton的isChecked()判断是否被选中 获取选中RadioButon的ID:设置 RadioGroup.setOnCheckedChangeListener方法 publiconCheckedChanged(RadioGroupgroup,intcheckedId)//checkedId 是选中RadioButton的ID 3,CheckBox isChecked()判断是否被选中 setOnCheckedChangeListener方法监视选中状态改变情况 4,Spinner a,显示数据 1),硬编码加载 通过setAdapter方法设置类型为 ArrayAdapter(Contextcontext,inttextViewResId,String[]objects) textViewResourceId:显示内容的ViewID默认设置为 https://www.360docs.net/doc/0717303485.html,yout.simple_spinner_item Android开发日志—常用控件篇(容器控件) android简介: Android是一种基于Linux的自由及开放源代码的操作系统,主要使用于移动设备,如智能手机和平板电脑,由Google公司和开放手机联盟领导及开发。尚未有统一中文名称,中国大陆地区较多人使用“安卓”或“安致”。Android操作系统最初由Andy Rubin开发,主要支持手机。 Android的系统架构和其操作系统一样,采用了分层的架构。 Android结构 从架构图看,Android分为四个层,从高层到低层分别是应用程序层、应用程序框架层、系统运行库层和Linux内核层。开发人员也可以完全访问核心应用程序所使用的API框架。该应用程序的架构设计简化了组件的重用;任何一个应用程序都可以发布它的功能块并且任何其它的应用程序都可以使用其所发布的功能块(不过得遵循框架的安全性)。同样,该应用程序重用机制也使用户可以方便的替换程序组件。 隐藏在每个应用后面的是一系列的服务和系统, 其中包括; 丰富而又可扩展的视图(Views),可以用来构建应用程序,它包括列表(Lists),网格(Grids),文本框(Text boxes),按钮(Buttons),甚至可嵌入的web 浏览器。 内容提供器(Content Providers)使得应用程序可以访问另一个应用程序的数据(如联系人数据库),或者共享它们自己的数据 资源管理器(Resource Manager)提供非代码资源的访问,如本地字符串,图形,和布局文件(Layout files )。 通知管理器(Notification Manager) 使得应用程序可以在状态栏中显示自定义的提示信息。 活动管理器( Activity Manager) 用来管理应用程序生命周期并提供常用的导航回退功能。 Android开发四大组件分别是:活动(Activity):用于表现功能。服务(Service):后台运行服务,不提供界面呈现。广播接收器(BroadcastReceiver):用于接收广播。内容提供商(Content Provider):支持在多个应用中存储和读取数据,相当于数据库。 活动(当前界面视图): Android简单登录界面 设计一个登陆界面: 允许用户输入用户名,密码; 用户点击“Login”之后,如果用户名为admin, 密码为123则显示“登陆成功”;如果用户名密码其中之一不正确,红色字体显示“登陆失败!” 首先我们来建立一个新的项目: 图标那一步就随便选吧,下一步: 这一步与上次有点不同,这次我们不要ADT 帮我们创建任何的Activity,我们只需要一个空的项目。 点击Finish后,我们会发现,项目文件视图下,与上次的不一样,src, res/layout 是空的,这次需要我们自己去添加了。 首先来明确一下我们现在的目标: 建立一个包含登录框的界面,并将它显示在我们的手机(模拟器)上。 建立一个界面的主要步骤是什么呢?主要有以下几步: ?在res/layout下创建布局文件; ?在src下创建Activity子类,并将布局文件与这个Activity联系起来。 ?在AndroidManifest.xml程序配置文件中,添加Activity的声明。 我们先来 1. 创建布局文件: 在Eclipse项目文件中选中layout 文件夹,在工具栏里点击下面图标 在弹出的窗口,填上这个xml布局文件的文件名,Root Element 根节点就选择Linearlayout 即可 点击下一步,这一步是选择更多配置属性的,暂且不用理会,直接点击Finish。 我们发现,在res/layout 下面多了一个login.xml文件,同时Android 的Layout 编辑器也把它打开了。 切换到“source”代码视图,今天我们不用“所见即所得”的傻瓜拖拽方式。 我们看到xml代码是这样的: Android用户界面程序设计示例 [例1]按钮和Toast弹出对话框 (1) [例2] TextView文本框(1) (4) [例3]TextView文本框(2) (5) [例4]编辑框EditText (6) [例5]单选RadioButton (12) [例6]Toast的用法简介 (14) [例7]多选checkbox (18) [例8]菜单Menu (20) [例9]Dialog对话框 (22) [例10]图片视图ImageView (25) [例11]图片按钮ImageButton (27) 界面布局 (31) [例12]垂直线性布局 (31) [例13]水平线性布局 (33) [例14]相对布局 (34) 绝对布局 (35) [例15]表单布局 (35) [例16]切换卡(TabWidget)40 [例1]按钮和Toast弹出对话框1、设计界面如图所示: 2、布局文件: Android UI开发专题(一) 之界面设计 发帖日期:2010-02-09 10:49:28 标签:ophone 近期很多网友对Android用户界面的设计表示很感兴趣,对于Android UI开发自绘控件和游戏制作而言掌握好绘图基础是必不可少的。本次专题分10节来讲述,有关OpenGL ES相关的可能将放到以后再透露。本次主要涉及以下四个包的相关内容: android.content.res 资源类 android.graphics 底层图形类 android.view 显示类 android.widget 控件类 一、android.content.res.Resources 对于Android平台的资源类android.content.res.Resources可能很多网友比较陌生,一起来看看SDK上是怎么介绍的吧,Contains classes for accessing application resources, such as raw asset files, colors, drawables, media or other other files in the package, plus important device configuration details (orientation, input types, etc.) that affect how the application may behave.平时用到的二进制源文件raw、颜色colors、图形drawables和多媒体文件media的相关资源均通过该类来管理。 int getColor(int id) 对应res/values/colors.xml Drawable getDrawable(int id) 对应res/drawable/ XmlResourceParser getLayout(int id) 对应res/layout/ String getString(int id) 和CharSequence getText(int id) 对应 res/values/strings.xml InputStream openRawResource(int id) 对应res/raw/ void parseBundleExtra (String tagName, AttributeSet attrs, Bundle outBundle) 对应res/xml/ String[] getStringArray(int id) res/values/arrays.xml float getDimension(int id) res/values/dimens.xml 二、android.graphics.Bitmap 作为位图操作类,Bitmap提供了很多实用的方法,常用的我们总结如下: boolean compress(https://www.360docs.net/doc/0717303485.html,pressFormat format, int quality, OutputStream stream) 压缩一个Bitmap对象根据相关的编码、画质保存到一个OutputStream中。其中第一个压缩格式目前有JPG和PNG void copyPixelsFromBuffer(Buffer src) 从一个Buffer缓冲区复制位图像素 实验二 android基本控件实验 【目的】 熟悉Android常用控件的基本操作,掌握它们的基本使用方法。了解控件之间的构成关系,熟悉适配器的使用原理。 【要求】 1、了解控件的继承关系; 2、掌握适配器的使用; 3、掌握信息提示的实现机制; 4、实现基本界面。 【原理】 1.控件类之间的关系 android.view.View类(视图类)呈现了最基本的UI构造块。View类是Android中的一个超类,几乎包含了所有的屏幕类型,主要负责绘制和事件处理。 Android中控件类的扩展结构如图所示。 View有众多的扩展者,它们大部分是在android.widget包中,这些继承者实际上就是Android 系统中的“控件”。View实际上就是各个控件的基类,创建交互式的图形用户界面的基础。View的直接继承者包括文本视图(TextView)、图像视图(ImageView)、进度条(ProgressBar)等。它们各自又有众多的继承者。每个控件除了继承父类功能之外,一般还具有自己的公有 方法、保护方法、XML属性等。 在Android中使用各种控件的一般情况是在布局文件中可以实现UI的外观,然后在Java文件中实现对各种控件的控制动作。控件类的名称也是它们在布局文件XML中使用的标签名称。 2.控件通用行为和属性 View是Android中所有控件类的基类,因此View中一些内容是所有控件类都具有的通用行为和属性。 提示:由于Java语言不支持多重继承,因此Android控件不可能以基本功能的“排列组合”的方式实现。在这种情况下,为了实现功能的复用,基类的功能往往做得较强,作为控件的祖先类,View所实现的功能也是最多的。 控件类经常在布局文件中使用,因此其可以使用XML属性(XMLAttributes),和Java代码经常具有对应关系。 View作为各种控件的基类,其XML属性所有控件通用,XML属性及其对应的方法如表1所示。 表1 View中的XML属性及其对应的方法 其中,android:id表示控件的标识,通常需要在布局文件中指定这个属性。View中与控件标识相关的几个方法如下所示: public int getId() // 获得控件的id(int类型) Android程序用户界面的设计与开发 摘要 安卓智能凭借其优越性和易操作性,越来越大众化。然而,为了脱离庸俗化和单一化,安卓程序用户界面的美观设计越来越显重要。可以说,谁设计出引人注目的安卓程序用户界面,设计出具有极强的用户个人主义色彩魅力的界面,谁就占领市场。 关键词:安卓,界面,设计 一 .现况 目前,智能手机已经成为人们生活的必备工具,随着手机4G时代的到来,智能手机将会与我们的生活结合的更加紧密,得到更广泛的应用,因此围绕智能手机的相关应用产品的研发也将得到了快速的发展。特别是安卓系统的开发。Android是一种基于Linux的自由及开放源代码的操作系统,主要使用于移动设备,如智能手机和平板电脑,由Google公司和开放手机联盟领导及开发。 因此,安卓手机相关应用产品界面设计的优劣,是目标用户是否使用该手机以及相关应用软件的重要环节,所以近来围绕安卓手机用户体验设计的研究越来越多,智能手机交互界面动效设计研究就是其中的一项。安卓手机界面设计的动效,是界面从一个静止界面转换成另外一个静止界面之间的动态的转场效果,通过这样的动态转场效果是可以增进使用者对于某款手机或者某个软件以及游戏与娱乐项目的兴趣,起到促进手机、手机应用软件和游戏娱乐项目的销售,赢得客户青睐和信任的 作用。原先,安卓手机的界面只有简单的链接,是因为“动效”对手机硬件的运算速度要求较高。然而,随着4G智能手机的普及,手机的硬件运算速度大幅提升,内、外存储器的容量加大,致使手机动效的实现成为可能。 现在,有关安卓程序用户界面的开发的设计师还在少数,特备是专业的前端UI设计大师更是寥寥无几。毕竟动效设计具有一定的艺术性和技术性的难度。而如若掌握一定的安卓网页美工的知识并将之投入工作中,在目前市场上是极具优越性的。 现在介绍下如何运用Bootstrap来快速设计出简约美观的安卓程序界面。 二.Bootstrap的应用 2.1.Bootstrap的介绍 Bootstrap是Twitter的设计师Mark Otto和Jacob Thornton合作开发,是目前很受欢迎的前端框架。它是基于HTML、CSS、JAVASCRIPT 的,简洁灵活,使得 Web 开发更加快捷。它是一个CSS/HTML框架。 下面是基于bootstrap的ace一组控件的封装框架的截图: 而安卓版本的bootstrap样式库的显示效果如下: 创建控件并添加监听器的过程: 1.xml中定义控件() 2.Activity中实例化控件((Button)findViewById()) 3.创建监听器(OnClickListener) 4.绑定监听器(setOnClickListener) UI基础-内/外边距 UI基础-常用控件-单选按钮 UI基础-常用控件-输入控件 maxLines:最大行数。 maxLength:最大字符数。 hint:空白文字提示,当输入文字时自动消失。 password:密码文本框。 numeric:控制输入的数字类型,一共有三种分别为integer(正整数)、signed(带符号整数,有正负)和decimal(浮点数)。 digits:录入指定字符。 UI基础-常用控件-图片控件 CENTER:图片大小为原始大小,如果图片大小大于ImageView控件,则截取图片中间部分,若小于,则直接将图片居中显示。 CENTER_CROP:将图片等比例缩放,让图像的短边与ImageView的边长度相同,即不能留有空白,缩放后截取中间部分进行显示。 CENTER_INSIDE:将图片大小大于ImageView的图片进行等比例缩小,直到整幅图能够居中显示在ImageView中,小于ImageView的图片不变,直接居中显示。 FIT_CENTER:ImageView的默认状态,大图等比例缩小,使整幅图能够居中显示在ImageView中,小图等比例放大,同样要整体居中显示在ImageView中。 FIT_START:缩放方式同FIT_CENTER,只是将图片显示在左方或上方,而不是居中。FIT_END:缩放方式同FIT_CENTER,只是将图片显示在左方或上方,而不是居中。 FIT_XY:将图片非等比例缩放到大小与ImageView相同。 Android概述: javaME:塞班系统,诺基亚手机。 Android是一个开源的免费的移动操作系统,它基于linux内核,目前支持Android操作系统的手机:HTC、samsung、华为、小米。。。。。山寨 Android目前最高的版本是4.4,比较通用的是4.0.3,在开发应用的时候,一般采用目前比较通用的手机的最低版本去开发,官方推荐2.2,但通常我们用2.3。 做Android开发主要有以下几个方向: Android驱动开发:面向C语言,对Android内核开发 Android应用开发: APP:公司内部的管理系统,电商 游戏:引擎 网游:一般是一个公司来运营,团队来开发 单机游戏:可以独立开发 Android开发环境的搭建 下载eclipse,以及开发Android用的ADT(Android Development Tool)插件,并且还有去Android 官网下载SDK(Standard Development Kit) 目前,Android的官网提供了一套配置好的Android开发工具组(eclipse+ADT+SDK) 官网:https://www.360docs.net/doc/0717303485.html,点击下方的get the SDK 在以前做Android开发的时候需要手动配置sdk和ADT,但是现在官方提供了开发工具组 修改sdk的路径:修改到对应的sdk的安装目录位置 创建一个虚拟机:点击此按钮 点击“New”创建一个虚拟机: 配置虚拟机的相应参数: 点击start启动虚拟机: 虚拟机启动画面: 创建第一个Android工程: 任务一Android 开发环境的搭建 第一部分知识回顾与思考 1. Android 的四层架构分别包括哪几层?分别起到什么作用? 答: Linux 内核层( Linux Kernel ):基于Linux 内核,内核为上层系统提供了系统服务。 系统库层( Libraries ):系统库基于C/C++ 语言实现,通过接口向应用程序框架层提供编程接口。 应用框架层( Application Framework ):为开发者提供了一系列的Java API,包括图形用户界面组件View 、 SQLite 数据库相关的API 、 Service 组件等。 应用程序层( Applications ):包含了Android 平台中各式各样的应用程序。 第二部分职业能力训练 一、单项选择题(下列答案中有一项是正确的,将正确答案填入括号内) 1. Android 四层架构中,应用框架层使用的是什么语法?(C) A . C B . C++C. Java D. Android 2. Android 四层架构中,系统库层使用的是什么语法?(B) A . V B B. C /C++C. Java D .Android 3.应用程序员编写的Android 应用程序,主要是调用(B)提供的接口进行实现。 A .应用程序层B.应用框架层C.应用视图层D.系统库层 二、填空题(请在括号内填空) 1.在 Android 智能终端中,有很多应用如拍照软件、联系人管理软件,它们都属于Android 的(应用程序)层。 2.为了让程序员更加方便的运行调试程序,Android 提供了(模拟器),可以方便的将程序运行其上, 而不要实际的移动终端。 3.为了支持Java 程序运行,我们需要安装(JDK )。 三、简答题 1.简述 Android 开发环境安装的步骤。 答:下载并安装JDK ,配置 JDK 的环境变量; 从 Anroid 官网上下载Android 开发组件(包含Eclipse 和 Android SDK 、 ADT ); 安装 Android 开发环境(包括配置Android SDK 的环境变量、打开 Eclipse 通过菜单设定Android SDK 路径)。 2.简述 Android 应用程序创建和运行的步骤。 淮海工学院计算机工程学院实验报告书 课程名:《手持设备软件开发》 题目:实验2:用户界面程序设计 班级:软件092 学号: 1 姓名: 评语: 成绩:指导教师: 批阅时间:年月日 一、实验目的与要求 掌握Android用户界面程序设计的一般方法; 掌握系统提供的各种View和ViewGroup的基本用法; 掌握使用XML Layout资源创建用户界面的方法; 熟悉ADT用户界面可视化编辑器及Hierarchy Viewer透视图的功能及用法; 理解Android用户界面程序设计中的单线程模型 掌握选项菜单及快捷菜单的创建及菜单子项选择事件的处理方法; 掌握用户界面组件事件处理的一般方法。 二、实验内容 1. 使用ADT创建一个Android Project,并在默认创建的布局资源main.xml中添加一个Button 组件,在程序中该按钮的单击事件处理方法中,执行100万次或更多次的循环,并在每次循环中向LogCat中输出当前循环变量的值和一个[0,1)之间的随机双精度数值。调节循环执行的次数直到产生“应用程序无响应”(ANR:Application Not Responding)错误,并思考产生该错误的原因。 2. 编写一个简单的贷款计算器,根据输入的贷款金额、期限和利率,显示每月应还款的金额。使用android.widget.Toast显示输入数据中的格式错误信息。(可参考文档中Dev Guide的帮助主题Toast Notifications中的内容) 三、实验步骤 1. 实验一(1)新建一个android 项目,打开res文件夹下面的layout文件夹中的main.xml文件,对界面进行编辑,如图1 第一类:属性值为true或false android:layout_centerHrizontal 水平居中 android:layout_centerVertical 垂直居中 android:layout_centerInparent 相对于父元素完全居中 android:layout_alignParentBottom 贴紧父元素的下边缘 android:layout_alignParentLeft 贴紧父元素的左边缘 android:layout_alignParentRight 贴紧父元素的右边缘 android:layout_alignParentTop 贴紧父元素的上边缘 android:layout_alignWithParentIfMissing 如果对应的兄弟元素找不到的话就以父元素做参照物 第二类:属性值必须为id的引用名“@id/id-name” android:layout_below 在某元素的下方 android:layout_above 在某元素的的上方 android:layout_toLeftOf 在某元素的左边 android:layout_toRightOf 在某元素的右边 android:layout_alignTop 本元素的上边缘和某元素的的上边缘对齐 android:layout_alignLeft 本元素的左边缘和某元素的的左边缘对齐 android:layout_alignBottom 本元素的下边缘和某元素的的下边缘对齐 android:layout_alignRight 本元素的右边缘和某元素的的右边缘对齐 第三类:属性值为具体的像素值,如30dip,40px android:layout_marginBottom 离某元素底边缘的距离 android:layout_marginLeft 离某元素左边缘的距离 android:layout_marginRight 离某元素右边缘的距离 android:layout_marginTop 离某元素上边缘的距离 EditText的android:hint 设置EditText为空时输入框内的提示信息。第四章Android用户界面
第4章 Android用户界面设计
android常用控件大全
Android开发日志—常用控件篇(android简介和容器控件)
Android登录界面(步骤详细)
Android用户界面程序设计示例
android UI界面设计
实验二 android基本控件实验
Android程序用户界面的设计与开发
Android基础-控件的使用
Android基础界面编程
Android应用开发基础习题
android用户界面程序设计
android 控件常用属性