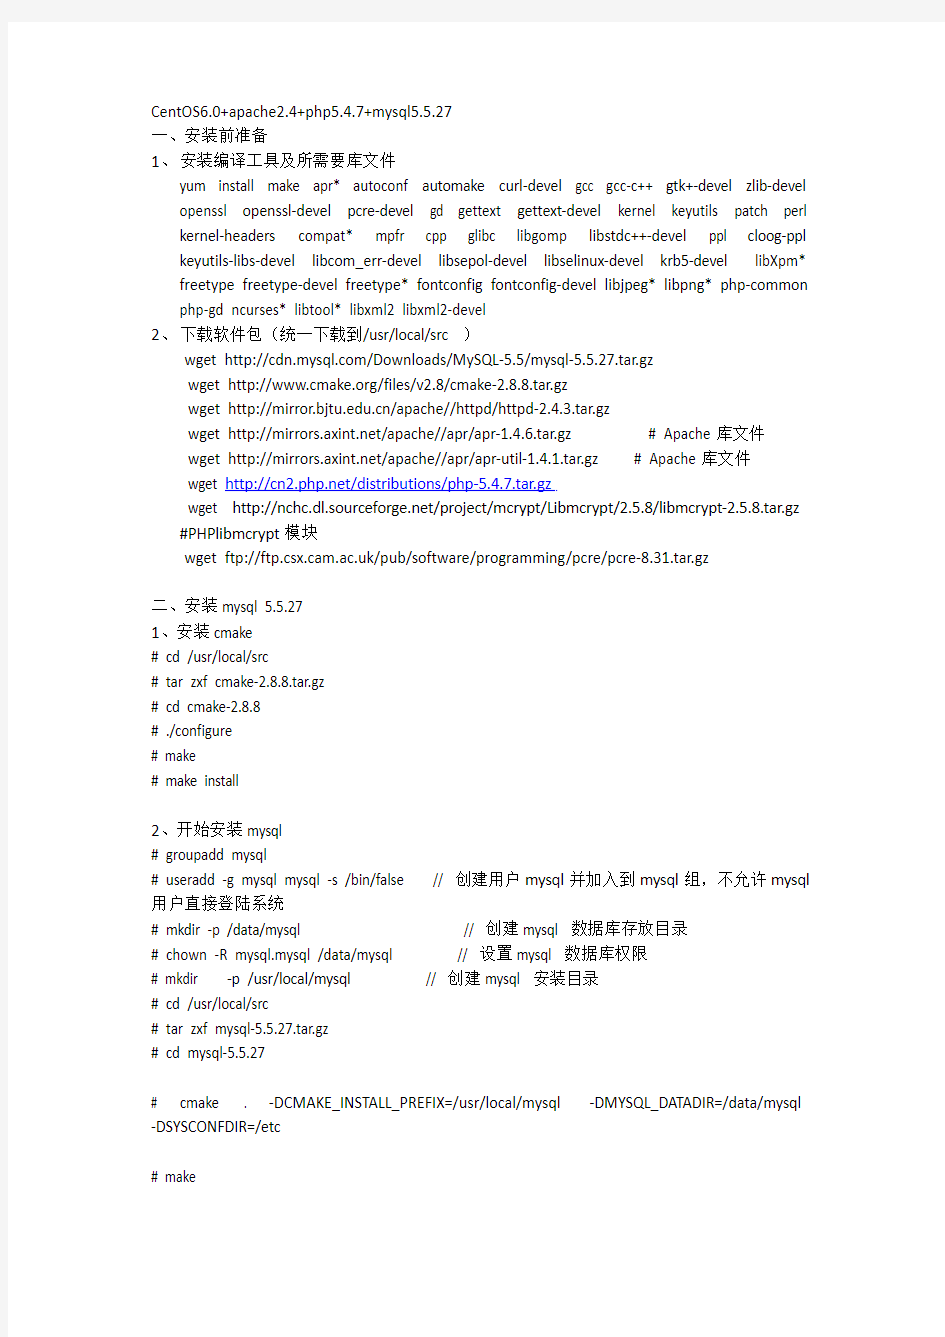
CentOS6.0+apache2.4+php5.4.7+mysql5.5.27


CentOS6.0+apache2.4+php5.4.7+mysql5.5.27
一、安装前准备
1、安装编译工具及所需要库文件
yum install make apr* autoconf automake curl-devel gcc gcc-c++ gtk+-devel zlib-devel openssl openssl-devel pcre-devel gd gettext gettext-devel kernel keyutils patch perl kernel-headers compat* mpfr cpp glibc libgomp libstdc++-devel ppl cloog-ppl keyutils-libs-devel libcom_err-devel libsepol-devel libselinux-devel krb5-devel libXpm* freetype freetype-devel freetype* fontconfig fontconfig-devel libjpeg* libpng* php-common php-gd ncurses* libtool* libxml2 libxml2-devel
2、下载软件包(统一下载到/usr/local/src )
wget https://www.360docs.net/doc/1216392572.html,/Downloads/MySQL-5.5/mysql-5.5.27.tar.gz
wget https://www.360docs.net/doc/1216392572.html,/files/v2.8/cmake-2.8.8.tar.gz
wget https://www.360docs.net/doc/1216392572.html,/apache//httpd/httpd-2.4.3.tar.gz
wget https://www.360docs.net/doc/1216392572.html,/apache//apr/apr-1.4.6.tar.gz # Apache库文件
wget https://www.360docs.net/doc/1216392572.html,/apache//apr/apr-util-1.4.1.tar.gz # Apache库文件
wget https://www.360docs.net/doc/1216392572.html,/distributions/php-5.4.7.tar.gz
wget https://www.360docs.net/doc/1216392572.html,/project/mcrypt/Libmcrypt/2.5.8/libmcrypt-2.5.8.tar.gz #PHPlibmcrypt模块
wget ftp://https://www.360docs.net/doc/1216392572.html,/pub/software/programming/pcre/pcre-8.31.tar.gz
二、安装mysql 5.5.27
1、安装cmake
# cd /usr/local/src
# tar zxf cmake-2.8.8.tar.gz
# cd cmake-2.8.8
# ./configure
# make
# make install
2、开始安装mysql
# groupadd mysql
# useradd -g mysql mysql -s /bin/false // 创建用户mysql并加入到mysql组,不允许mysql 用户直接登陆系统
# mkdir -p /data/mysql // 创建mysql 数据库存放目录
# chown -R mysql.mysql /data/mysql // 设置mysql 数据库权限
# mkdir -p /usr/local/mysql // 创建mysql 安装目录
# cd /usr/local/src
# tar zxf mysql-5.5.27.tar.gz
# cd mysql-5.5.27
# cmake . -DCMAKE_INSTALL_PREFIX=/usr/local/mysql -DMYSQL_DATADIR=/data/mysql -DSYSCONFDIR=/etc
# make
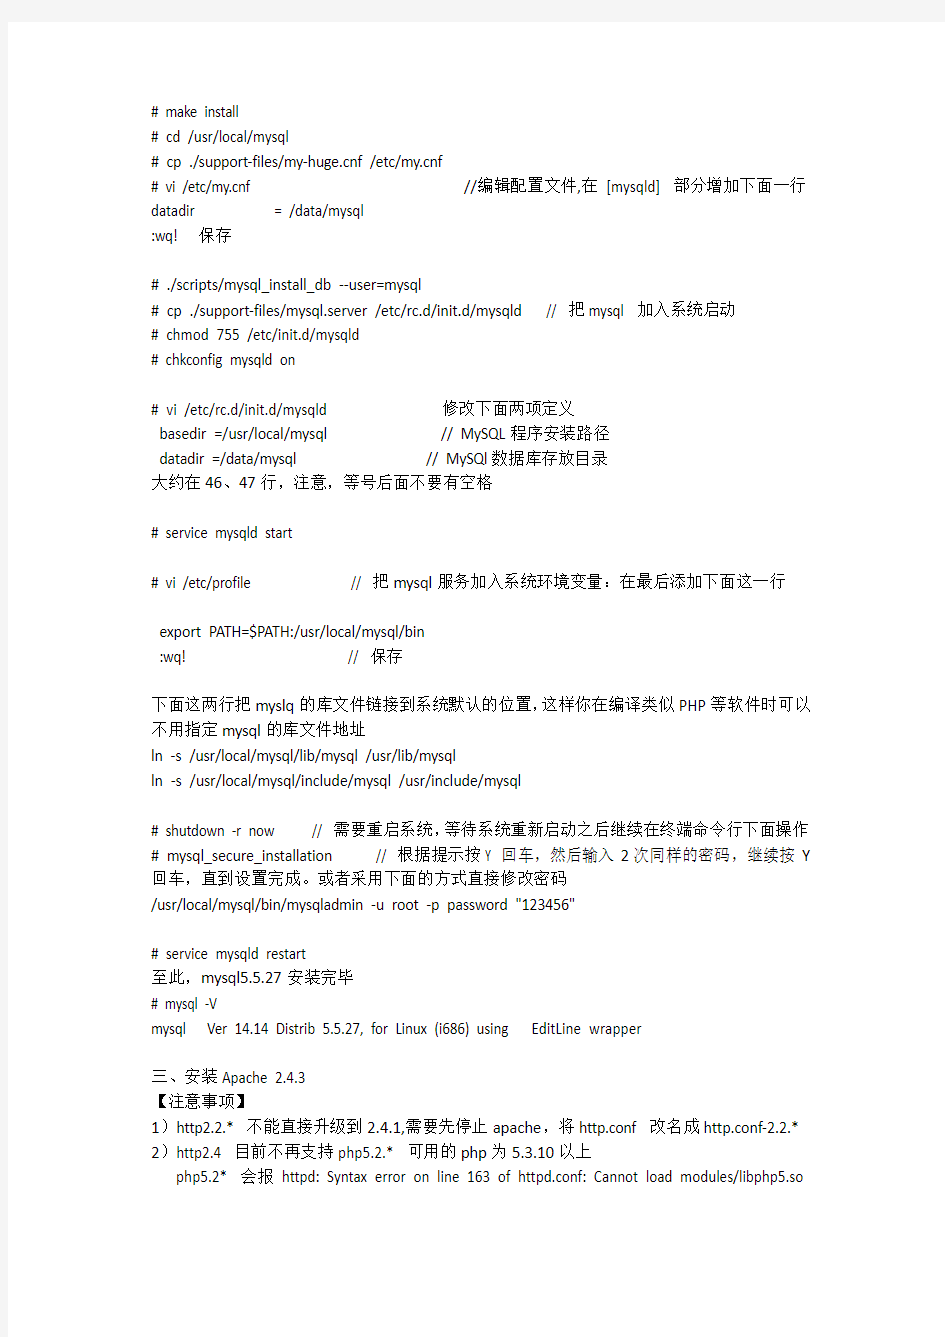
# make install
# cd /usr/local/mysql
# cp ./support-files/https://www.360docs.net/doc/1216392572.html,f /etc/https://www.360docs.net/doc/1216392572.html,f
# vi /etc/https://www.360docs.net/doc/1216392572.html,f //编辑配置文件,在[mysqld] 部分增加下面一行datadir = /data/mysql
:wq! 保存
# ./scripts/mysql_install_db --user=mysql
# cp ./support-files/mysql.server /etc/rc.d/init.d/mysqld // 把mysql 加入系统启动
# chmod 755 /etc/init.d/mysqld
# chkconfig mysqld on
# vi /etc/rc.d/init.d/mysqld 修改下面两项定义
basedir =/usr/local/mysql // MySQL程序安装路径
datadir =/data/mysql // MySQl数据库存放目录
大约在46、47行,注意,等号后面不要有空格
# service mysqld start
# vi /etc/profile // 把mysql服务加入系统环境变量:在最后添加下面这一行
export PATH=$PATH:/usr/local/mysql/bin
:wq! // 保存
下面这两行把myslq的库文件链接到系统默认的位置,这样你在编译类似PHP等软件时可以不用指定mysql的库文件地址
ln -s /usr/local/mysql/lib/mysql /usr/lib/mysql
ln -s /usr/local/mysql/include/mysql /usr/include/mysql
# shutdown -r now // 需要重启系统,等待系统重新启动之后继续在终端命令行下面操作# mysql_secure_installation // 根据提示按Y 回车,然后输入2次同样的密码,继续按Y 回车,直到设置完成。或者采用下面的方式直接修改密码
/usr/local/mysql/bin/mysqladmin -u root -p password "123456"
# service mysqld restart
至此,mysql5.5.27安装完毕
# mysql -V
mysql Ver 14.14 Distrib 5.5.27, for Linux (i686) using EditLine wrapper
三、安装Apache 2.4.3
【注意事项】
1)http2.2.* 不能直接升级到2.4.1,需要先停止apache,将http.conf 改名成http.conf-2.2.* 2)http2.4 目前不再支持php5.2.* 可用的php为5.3.10以上
php5.2* 会报httpd: Syntax error on line 163 of httpd.conf: Cannot load modules/libphp5.so
into server: modules/libphp5.so: undefined symbol: unixd_config
3)http2.4.1 不在需要NameVirtualHost以及不再支持ServerName * 这种写法
使用ServerName * 会报Invalid ServerName “*”use ServerAlias to set multiple server names.
1、安装libmcrypt
cd /usr/local/src
tar zxvf libmcrypt-2.5.8.tar.gz #解压
cd libmcrypt-2.5.8 #进入目录
./configure #配置
make #编译
make install #安装
2、安装apache
# cd /usr/local/src/
# tar zxf apr-1.4.6.tar.gz
# tar zxf apr-util-1.4.1.tar.gz
# tar zxf httpd-2.4.3.tar.gz
# mv /usr/local/src/apr-1.4.6 /usr/local/src/httpd-2.4.3/srclib/apr # 把apr-1.4.6 移动到解压出来的httpd-2.4.3中的srclib目录中,并重命名为apr
# mv /usr/local/src/apr-util-1.4.1 /usr/local/src/httpd-2.4.3/srclib/apr-util #把apr-util-1.4.1 移动到解压出来的httpd-2.4.3中的srclib目录中,并重命名为apr-util
# cd /usr/local/src/httpd-2.4.3
# ./configure --prefix=/usr/local/apache --enable-so --enable-deflate=shared --enable-ssl=shared --enable-expires=shared --enable-headers=shared --enable-rewrite=shared --enable-static-support --with-included-apr --with-mpm=prefork # make
# make install
# cp -f build/rpm/httpd.init /etc/init.d/httpd
# chmod +x /etc/init.d/httpd
# chkconfig --add httpd
# chkconfig httpd on
# cd /etc
# ln -s /usr/local/apache/ httpd
# cd /usr/sbin/
# ln -fs /usr/local/apache/bin/httpd
# ln -fs /usr/local/apache/bin/apachectl
# cd /var/log
# ln -s /usr/local/apache/logs httpd
# /usr/local/apache/bin/apachectl -k start
# httpd -v
Server version: Apache/2.4.3 (Unix)
Server built: Sep 14 2012 10:55:23
四、安装php
1、安装libmcrypt
# cd /usr/local/src
# tar zxvf libmcrypt-2.5.8.tar.gz #解压
# cd libmcrypt-2.5.8 #进入目录
# ./configure #配置
# make #编译
# make install #安装
2、安装php
# cd /usr/local/src/
# tar zxf php-5.4.7.tar.gz
# cd php-5.4.7
# ./configure --prefix=/usr/local/php --with-config-file-path=/usr/local/php/etc/ --with-libxml-dir=/usr/include/libxml2 --with-zlib --with-zlib-dir --with-bz2 --with-curl --enable-exif --with-gd --with-jpeg-dir=/usr/lib --with-png-dir=/usr/lib --enable-ftp --with-freetype-dir=/usr/lib/ --enable-gd-native-ttf --enable-mbstring --with-mysql=/usr/local/mysql --with-mysqli=/usr/local/mysql/bin/mysql_config --with-pdo-mysql=/usr/local/mysql --enable-shmop --enable-soap --enable-sockets --enable-wddx --enable-zip --with-xmlrpc --enable-fpm
# make
# make install
# cp php.ini-production /usr/local/php/etc/php.ini
# cp /usr/local/php/etc/php-fpm.conf.default /usr/local/php/etc/php-fpm.conf
# cp /usr/local/src/php-5.4.7/sapi/fpm/init.d.php-fpm /etc/rc.d/init.d/php-fpm // 拷贝php-fpm到启动目录
# chmod +x /etc/rc.d/init.d/php-fpm
# chkconfig php-fpm on
# vi /usr/local/php/etc/php.ini
①找到:disable_functions = 修改为:
disable_functions =
passthru,exec,system,chroot,scandir,chgrp,chown,shell_exec,proc_open,proc_
get_status,ini_alter,ini_alter,ini_restore,dl,openlog,syslog,readlink,symlink,pop
epassthru,stream_socket_server,escapeshellcmd,dll,popen,disk_free_space,c
heckdnsrr,checkdnsrr,getservbyname,getservbyport,disk_total_space,posix_ct
ermid,posix_get_last_error,posix_getcwd,
posix_getegid,posix_geteuid,posix_getgid,
posix_getgrgid,posix_getgrnam,posix_getgroups,posix_getlogin,posix_getpgid
,posix_getpgrp,posix_getpid, posix_getppid,posix_getpwnam,posix_getpwuid,
posix_getrlimit, posix_getsid,posix_getuid,posix_isatty,
posix_kill,posix_mkfifo,posix_setegid,posix_seteuid,posix_setgid,
posix_setpgid,posix_setsid,posix_setuid,posix_strerror,posix_times,posix_ttyn
ame,posix_uname #列出PHP可以禁用的函数,如果某些程序需要用到
这个函数,可以删除,取消禁用
②找到:;open_basedir =
修改为:open_basedir = .:/tmp/ #防止php木马跨站,相当重要!!
③找到:;date.timezone =
修改为:date.timezone = PRC #设置时区
④找到:expose_php = On
修改为:expose_php = OFF #禁止显示php版本的信息
⑤找到:short_open_tag = Off
修改为:short_open_tag = ON #支持php短标签
# /etc/init.d/php-fpm start
五、配置apache 支持php
1、vi /usr/local/apache/conf/httpd.conf
找到#ServerName https://www.360docs.net/doc/1216392572.html,:80
把“#”去掉,并且把https://www.360docs.net/doc/1216392572.html,:80改成你要发布的域名或者是计算机名称,如果做测试的话可以不用改。
找到:DirectoryIndex index.html
修改为:DirectoryIndex index.html index.php
找到:Options Indexes FollowSymLinks
修改为:Options FollowSymLinks #不显示目录结构
找到AllowOverride None
修改为:AllowOverride All #开启apache支持伪静态,有三处都做修改LoadModule rewrite_module modules/mod_rewrite.so #取消前面的注释,开启apache支持伪静态
2、vi /usr/local/apache/conf/httpd.conf #编辑apache配置文件
在LoadModule php5_module modules/libphp5.so这一行下面添加、
AddType application/x-httpd-php .php (注意:php .php这个点前面有一个空格)
3、groupadd www #添加www组
useradd -g www www -s /bin/false #创建httpd运行账户www并加入到www组,不允许www用户直接登录系统
vi /usr/local/apache/conf/httpd.conf
User daemon
Group daemon 这两行修改为
User www
Group www
chown www.www -R /usr/local/apache/htdocs
chmod -R 700 /usr/local/apache/htdocs
#pkill -9 http
#service apache start
