史陶比尔机器人基本操作
Instruction clipwelding st?ubli
1. Komponents of St?ubli (2)
2. Workmode (2)
2.1 Workmode ...manual“ .. (3)
2.2 Workmode ...external automatic“.. (3)
3. Menuoverview (3)
3.1 User-window (3)
3.2 Menu-window (3)
4. Drive robot by hand (3)
4.1 Drive by hand (4)
4.1.1 Breakswitch (4)
4.1.2 Jog-Mode (4)
4.2 Function-buttons (5)
4.3 bring the robot back to his normal way (6)
4.4 Change to automatic mode (6)
5. Teach a Point (7)
5. Export Program / Backup (7)
5.1 Export program (7)
5.2 Make a Backup (8)
6. Start a new program (8)
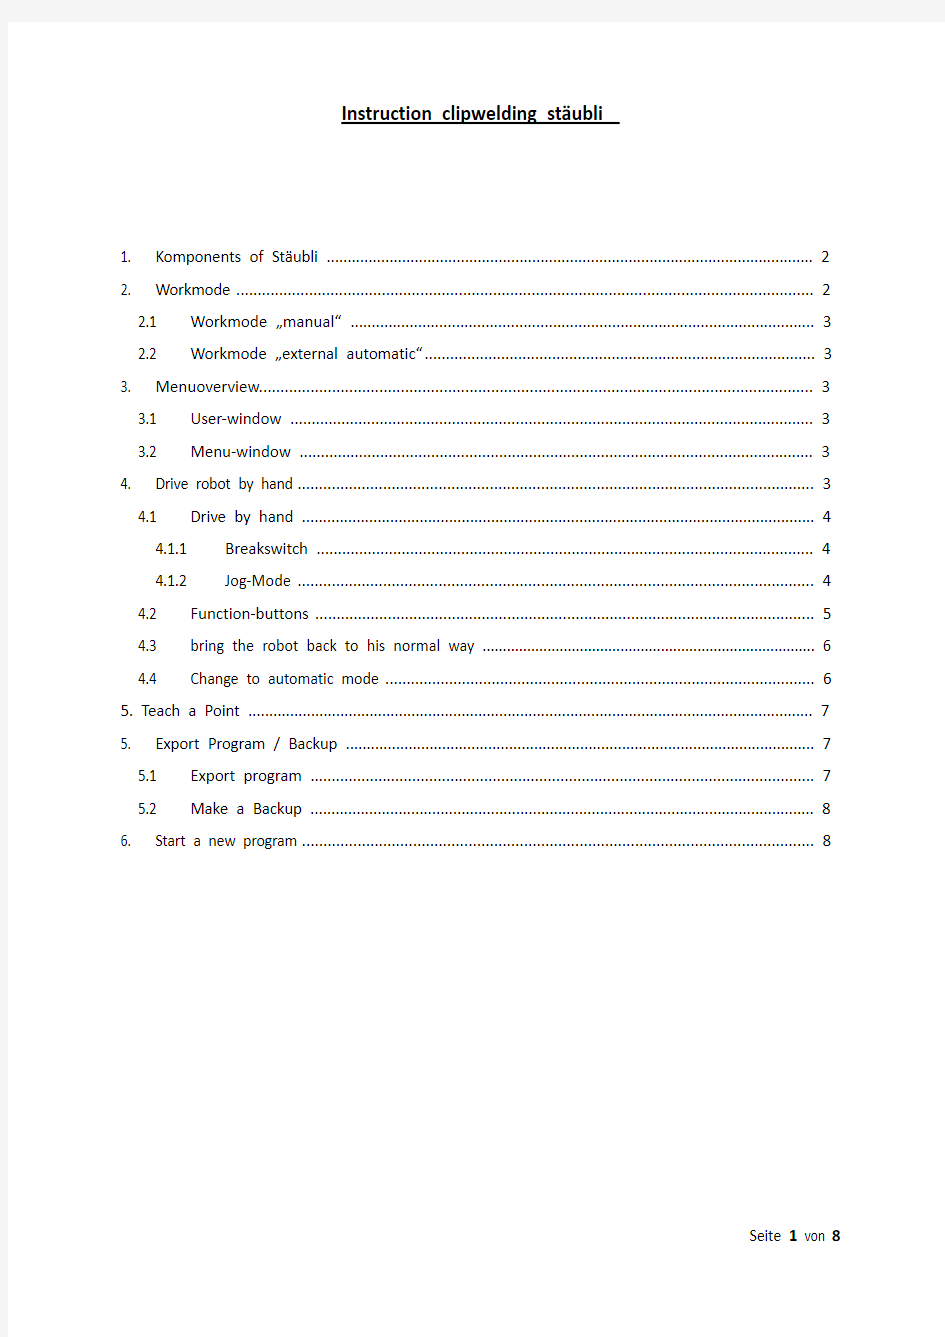
1.Komponents of St?ubli
-External Key (WMS-Box) for changing the workmode -Robot-Interface SP1
-TX40-Robotarm
-CS8C Controller
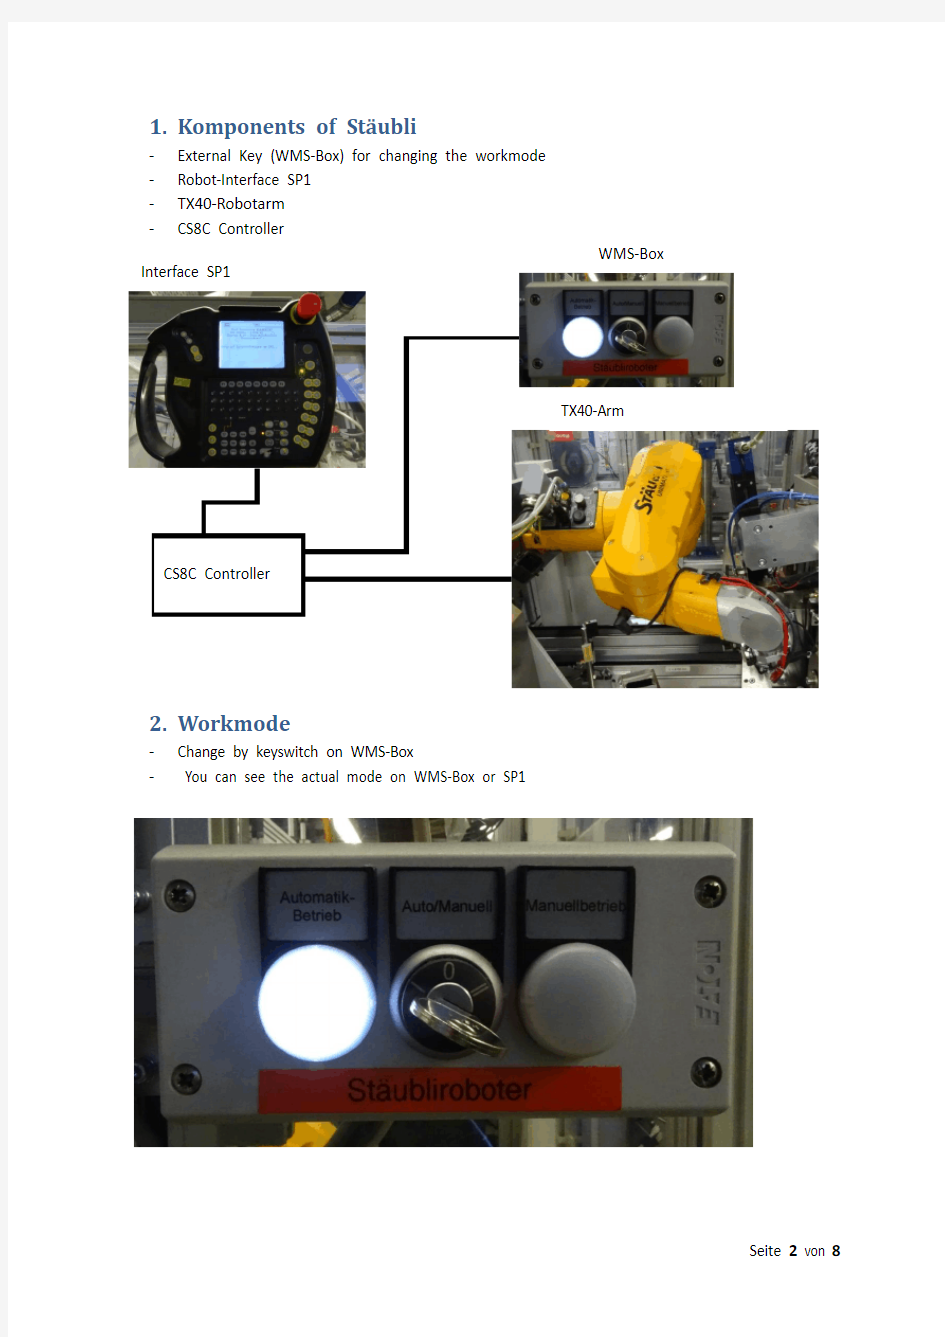
2.Workmode
-Change by keyswitch on WMS-Box
- You can see the actual mode on WMS-Box or SP1
Interface SP1
WMS-Box
TX40-Arm CS8C Controller
2.1Workmode …manual“
-Drive the robot by hand
-teach points
-Can be used by open Safetydoors
-Power must be switched on with SP1-Button
-To switch on the power, the safety-Button on the back
side of the SP1 Interface must be pushed first
2.2Workmode …external automatic“
-Control the robot by PLC
-Safetydoors must be closed and locked
-Power can only have switched on and off by PLC
3.Menuoverview
3.1User-window
-In automatic-mode you can see the actual step of the program
-the program shows you messages
-Press the user-button to open the window
3.2Menu-window
-Go up and down with cursor-key
-Open a menu with enter-button
-Tree structure can be open and closed with the left and right cursor-key -You can go back to the main menu with the escape-button
-Press the menu-button to open the window
4.Drive robot by hand
-Before you can drive the robot, you must change to manual-mode
-you should change the speed before driving:
o The actual speed is showed in the middle of the SP1 on the upper side
o Change the speed with the +/- Button
4.1 Drive by hand
You have more options to change the position of the robot.
4.1.1 Breakswitch
You find the switch at the socket of the robot. You choose the axis you want to open with the switch (1) and open the break with the breakbutton (2).
4.1.2 Jog-Mode
You can use four different Jog-Mode.
1
2
Joint : Drive every axis separate
Frame: drive relative to the XYZ-axis of the robot
socket
Tool: drive relative to the XYZ-axis of the tool
(gripper)
Point: drive to a point
Drive the robot with the buttons on the right side of SP1.
In Jog-Mode Joint every button drive one axis. On the
robot, you can see the number and the direction of the
turning axis.
In Jog-Mode Frame/Tool you work in a coordinate system
(X-Y-Z)
To change position, you must switch the power on by
hand.
ATTENTION: you can crash the
robot!!!
4.2Function-buttons
The buttons switch the gripper. (only in manual mode)
When power is switched on, you can open and close the
gripper with the button one.
Button two and three are not used.
4.3
bring the robot back to his normal way
4.4
Change to automatic mode
After manual mode, you must change back to automatic mode:
- Take SP1 back in the holder - Change to user-window - Speed back to 100%
- Breakswitch back on position …0“
-
Keyswitch on the WMS-Box back to automatic mode
- Change to manual mode - Change speed to 10% - Switch power on
- Use Jog-Mode Point point-overview open
-
Search the point who is next the the actual position (ATTENTION: DI10 Points have the Index 1 (for example jGrst_1), G45 Points have the Index 2
-
Select the right point with the cursor, then push the “M ove H old “-button to drive (the robot drives only while push the button. The blue lamp is on)
- When the point is reached, a @ or a ~ Symbol is in front of the point -
Point overview:
o pSchweissen_1: welding position DI10 o pSchweissen_2: welding position G45 o pHolen: separator
o jGrst_1: Home position DI10 o jGrst_2: Home position G45
o jGrundstellung: same as jGrst_1, it is used for no-clip-parts -
all other points cannot be taught, they are calculated by the program
G45与正常产品互换后需要在9工位手动画面执行一次“release peco refrence"用来寻找位移量原点,前提是机器人手抓必须拿着接底片在焊接位置。机器人断电复位后,第一次需要执行手抓位置时,必须按如下步骤才可以
1:选择point 2: 选择tool
-Hauptprogram
-flange(旋转轴 -tGrifer
)
5. Teach a Point
-Change to manual mode
-Change speed to 10%
-Switch power on
-Use Jog-Mode Point → point-overview open
-Select the right point with the cursor, then push the “M ove H old “-button to drive (the robot drives only while push the button. The blue lamp is on)
-When the point is reached, a @ or a ~ Symbol is in front of the point
-Point overview:
o pSchweissen_1: welding position DI10
o pSchweissen_2: welding position G45
o pHolen: separator
o jGrst_1: Home position DI10
o jGrst_2: Home position G45
o jGrundstellung: same as jGrst_1, it is used for no-clip-parts
-Now change to Jog-Mode Tool and Speed under 2%
-Change the Point to the right position (XYZ/RXRYRZ)
-If you want to save the new point, press button F1 “Here”
-Now the @ Symbol is in front of the point
-After testing with the new point, press F4 “Save” to overwrite the old point (If you want to go back to the old settings, restart the robot before save)
5.Export Program / Backup
You can do this while driving in automation mode.
5.1Export program
-Change to Menu
-
-Open Application Manager
-Select the right program with the cursor (normally
“Hauptprogramm”)
-Press the button F3 “Exp.”
-Change Location: Enter→cursor down to USB0→Enter
-Press F8 “OK” to start export
-You can see a buffering in the upper left corner (it can take
some minutes)
顺着爪子的方向是x轴,水平垂直爪子的方向是y轴
绕着x轴旋转就是RX 绕着y轴旋转就是RY
在MODE POINT模式下手动将爪子走到需要重新学的点的
原始位置,然后将速度降低到2%,将运行模式改为MODE
TOOL,然后通过X Y Z RX RY RZ按钮体调整新位置
5.2Make a Backup
-Change to Menu
-Put a USB-Stick (Size < 2 GB) in
one of the slots of CS8C
Controller
-Open Control panel
-Select Controller configuration
-Press F8 “Bkup”
-Change Destiantion to USB0
-Press F8 “OK”
-You can see a buffering in the
upper left corner (it can take
some minutes)
6.Start a new program
-Stop the station and drive to home position
-Change in manual mode
-Change to Menu
-Put a USB-Stick (Size < 2 GB) with the new program in one of the slots of CS8C Controller -Open Application Manager
-Press the “Stop” button on SP1
-Close the message with F8 “OK”→ now the orange lamp next to RUN Button switched off -Select the right program with the cursor (normally “Hauptprogramm”)
-Press F4 “Clo.” To close the program
-Press F6 “Open” → select USB0 → select the new program →Press F8 “OK” to open the program
-Press the button Run
-Select the new program and start it with button F8 “OK” → orange lamp switched on
-Now you can switch back to automation mode, start the station and remove the USB-Stick