本科实验报告
课程名称:移动应用软件开发技术
实验项目:Android系统环境搭建、Activity运用实
验、Android应用UI设计(一)、(二)实验地点:逸夫楼404
专业班级:软件班学号:
学生姓名:
指导教师:
2015年6月19 日
实验一Android系统环境搭建
一、实验目的和要求
1.掌握Android环境的搭建。
2.学会Java、eclipse、Android SDK以及ADT的安装与环境变量设置。
3.学会在线更新SDK。
4.掌握离线安装SDK的方法。
二、实验内容和原理
1.安装JDK ,SE6.0以上版本。
⑴访问以下网址:
https://www.360docs.net/doc/651192303.html,/technetwork/java/javase/downloads/index.html下载JDK。
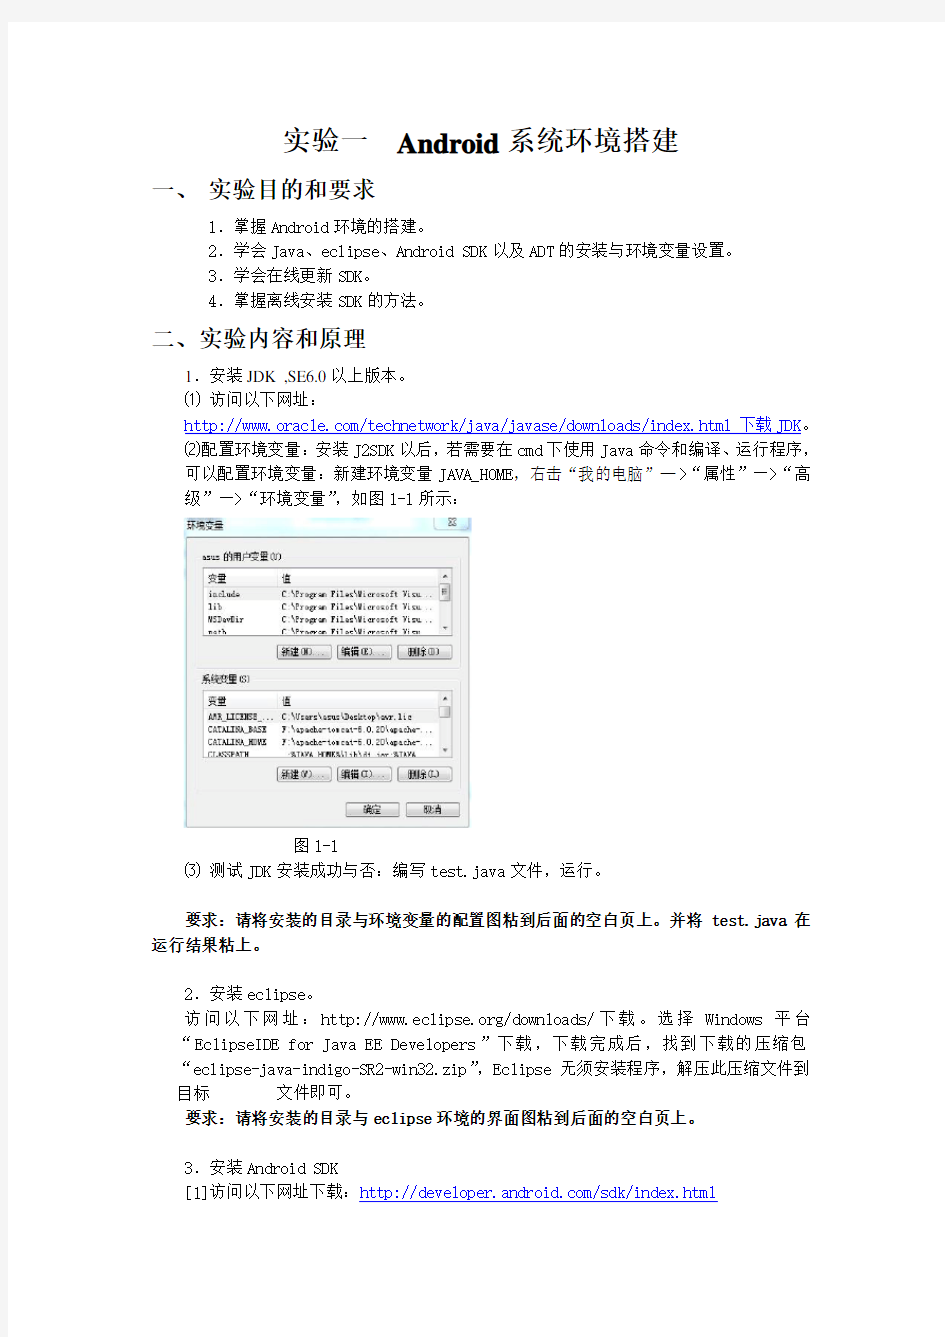
⑵配置环境变量:安装J2SDK以后,若需要在cmd下使用Java命令和编译、运行程序,
可以配置环境变量:新建环境变量JAVA_HOME,右击“我的电脑”—>“属性”—>“高级”—>“环境变量”,如图1-1所示:
图1-1
⑶测试JDK安装成功与否:编写test.java文件,运行。
要求:请将安装的目录与环境变量的配置图粘到后面的空白页上。并将test.java在运行结果粘上。
2.安装eclipse。
访问以下网址:https://www.360docs.net/doc/651192303.html,/downloads/下载。选择Windows平台“EclipseIDE for Java EE Developers”下载,下载完成后,找到下载的压缩包“eclipse-java-indigo-SR2-win32.zip”,Eclipse无须安装程序,解压此压缩文件到目标文件即可。
要求:请将安装的目录与eclipse环境的界面图粘到后面的空白页上。
3.安装Android SDK
[1]访问以下网址下载:https://www.360docs.net/doc/651192303.html,/sdk/index.html
[2]在线安装SDK:打开SDKManager,如图1-2、1-3所示。
图1-2 图1-3
[3]离线安装:首先下载SDK的安装包,“android-sdk_r16-windows.zip”(安装工具)解压到目录,如我的目录D:\TDDOWNLOAD\android-sdk_r16-windows\android-sdk-windows,然后新建以下几个文件夹:platforms,docs,samples,usb_driver,market_licensing。接着打开下载工具,下载以下内容:
https://www.360docs.net/doc/651192303.html,/android/repository/android-1.5_r04-windows.zip
https://www.360docs.net/doc/651192303.html,/android/repository/android-1.6_r03-windows.zip
https://www.360docs.net/doc/651192303.html,/android/repository/android-2.0.1_r01-windows.zip
https://www.360docs.net/doc/651192303.html,/android/repository/android-2.0_r01-windows.zip
https://www.360docs.net/doc/651192303.html,/android/repository/android-2.1_r02-windows.zip
https://www.360docs.net/doc/651192303.html,/android/repository/android-2.2_r01-windows.zip
https://www.360docs.net/doc/651192303.html,/android/repository/docs-2.2_r01-linux.zip
https://www.360docs.net/doc/651192303.html,/android/repository/google_apis-3-r03.zip
https://www.360docs.net/doc/651192303.html,/android/repository/google_apis-4_r02.zip
https://www.360docs.net/doc/651192303.html,/android/repository/google_apis-5_r01.zip
https://www.360docs.net/doc/651192303.html,/android/repository/google_apis-6_r01.zip
https://www.360docs.net/doc/651192303.html,/android/repository/google_apis-7_r01.zip
https://www.360docs.net/doc/651192303.html,/android/repository/google_apis-8_r01.zip
https://www.360docs.net/doc/651192303.html,/android/repository/jboss-5.1.0.GA.zip
https://www.360docs.net/doc/651192303.html,/android/repository/samples-2.1_r01-linux.zip
https://www.360docs.net/doc/651192303.html,/android/repository/samples-2.2_r01-linux.zip
https://www.360docs.net/doc/651192303.html,/android/repository/tools_r06-windows.zip
https://www.360docs.net/doc/651192303.html,/android/repository/usb_driver_r03-windows.zip
要求:请将安装的目录与SDK在界面图粘到后面的空白页上。
4.安装ADT
[1]首先启动Eclipse,选择Help->Install New Software,打开Eclipse的插件安装页面。
[2]单击Add按钮,弹出“Add Repository”对话框,在Name中输入:ADT,在Location 中输入:https://www.360docs.net/doc/651192303.html,/android/eclipse/,单击OK按钮后,Eclipse会自动搜索可安装的插件。
[3] 此时Eclipse会搜索指定URI的资源,如果搜索无误,会出现:Develop Tools的复选框,选中复选框,点击“Next”按钮。再点击finish 按钮
[4] 整个安装过程会持续几分钟,安装结束后会出现Eclipse重启提示界面,。建议选择
“Restart Now”按钮重新启动Eclipse,使ADT插件生效。
[5]在ADT插件安装完毕且重启Eclipse之后,进入配置Android开发环境的最后一步,
设置Android SDK的位置。首先选择Windows->Preference命令打开Eclipse的配制界面,然后在SDK Location 中输入Android SDK的保存路径,最后单击OK按钮使配置生效。
要求:请将安装ADT后的eclipse界面图粘到后面的空白页上。
三、主要仪器设备
hp笔记本
四、实验结果与分析
1.jdk安装:
安装目录:
环境变量配置:
2.eclipse安装:
3.SDK安装:
4.安装ADT后eclipse:
实验二Activity运用实验
一、实验目的和要求
1.熟悉Activity与Intent的使用。
2.掌握Activity启动另一个Activity的方法。
3.会使用Intent对象进行Activity间意图的传达。
二、实验内容和原理
1.编一Android应用程序TestActivity01,使用MainActivity,启动另一个OtherActivity。
MainActivity主界面上只有一个按钮。OtherActivity上只有一个TextView组件。
要求:请将工程中的MainActivity.java,OtherActivity.java以及对应的xml文件源码附上。同时将运行的界面图粘上。
2.编一Android应用程序TestActivity02,使用MainActivity,启动另一个OtherActivity。
MainActivity主界面上只有一个按钮。OtherActivity上只有一个TextView组件。要将MainActivity中的数据“中国”通过Intent对象传到OtherActivity上显示。
要求:请将工程中的MainActivity.java,OtherActivity.java以及对应的xml文件源码附上。同时将运行的界面图粘上。
三、主要仪器设备
hp笔记本
四、实验结果与分析
MainActivity.java:
package com.example.intent1;
import android.support.v7.app.ActionBarActivity;
import android.text.Editable;
import android.content.Intent;
import android.os.Bundle;
import android.view.Menu;
import android.view.MenuItem;
import android.view.View;
import android.view.View.OnClickListener;
import android.widget.Button;
import android.widget.EditText;
import android.widget.TextView;
public class MainActivity extends ActionBarActivity {
private Button but;
private TextView bibi;
@Override
protected void onCreate(Bundle savedInstanceState) { super.onCreate(savedInstanceState);
setContentView(https://www.360docs.net/doc/651192303.html,yout.activity_main);
but=(Button) findViewById(R.id.but);
bibi=(TextView) findViewById(R.id.bibi);
but.setOnClickListener(new OnClickListener() {
@Override
public void onClick(View v) {
// TODO Auto-generated method stub
Intent intent=new Intent();
String msg=(String) MainActivity.this.bibi.getText(); intent.putExtra("bibi", msg);
intent.setClass(MainActivity.this,OtherActivity.class);
}
});
}
}
OtherActivity.java代码:
package com.example.intent1;
import android.app.Activity;
import android.content.Intent;
import android.os.Bundle;
import android.view.View;
import android.view.View.OnClickListener;
import android.widget.Button;
import android.widget.TextView;
public class OtherActivity extends Activity{
private TextView jieguo;
private Button bu;
@Override
protected void onCreate(Bundle savedInstanceState) { // TODO Auto-generated method stub
super.onCreate(savedInstanceState);
setContentView(https://www.360docs.net/doc/651192303.html,yout.factivity);
jieguo=(TextView) findViewById(R.id.jieguo);
bu=(Button) findViewById(R.id.bu);
Intent intent=getIntent();
String msg=intent.getStringExtra("bibi");
OtherActivity.this.jieguo.setText(msg);
bu.setOnClickListener(new OnClickListener() {
@Override
public void onClick(View v) {
// TODO Auto-generated method stub
Intent intent=new Intent();
intent.setClass(OtherActivity.this,NextActivity.class);
startActivity(intent);
}
});
}
}
activity_main.xml;
android:layout_width="fill_parent"
android:layout_height="fill_parent"
android:orientation="vertical" >
android:id="@+id/but"
android:layout_width="wrap_content"
android:layout_height="wrap_content"
android:text="点我" />
android:id="@+id/bibi"
android:layout_width="match_parent"
android:layout_height="40dp"
android:hint="结果"
android:textColor="#ff0000"
android:textSize="30dp"
/>
android:id="@+id/babi"
android:layout_width="match_parent"
android:layout_height="40dp"
android:hint="请输入"
/>
android:id="@+id/but1"
android:layout_width="wrap_content"
android:layout_height="wrap_content"
android:text="点我哦" />
factivity.xml:
android:layout_height="match_parent"
android:orientation="vertical" >
android:layout_width="match_parent"
android:layout_height="wrap_content"
android:orientation="vertical" >
android:id="@+id/jieguo"
android:layout_width="match_parent"
android:layout_height="60dip"
android:hint="结果"/>
android:id="@+id/bu"
android:layout_width="wrap_content"
android:layout_height="wrap_content"
android:text="返回" />
实验结果:
实验三Android应用UI设计(一)
一、实验目的和要求
1.熟悉TextView、Button、ImageView、LinearLayout、TabelLayout、RelativeLayout、FrameLayout、AlertDialog对话框。
2.掌握以上UI设计元素的基本功能和用法。
3.掌握UI设计的基本方法。
二、实验内容和原理
(一)实现一个如图3.1所示的UI界面
1.布局分析:最外层是纵向的线性布局(LinearLayout,android:orientation="vertical"),包含了三个布局,横向的线性布局(四列)、表格布局(TableLayout,三行三列)、纵向的线性布局(四行)。
2.在res\layout文件夹下的MyLayout.xml中实现。
3.布局内的控件为TextView
要求:请将工程中的java源文件以及对应的xml文件源码附上。同时将运行的界面图粘上。
图3.1布局嵌套图3.2多输入对话框
(二)实现一个如图3.2所示的多输入框的对话框
1.要求使用LinearLayout布局、TextView、EditText控件各两个。
2.要求点击按钮后有对应的输出(用Toast控件、TextView控件以及Logcat窗口输出都可以)。
要求:请将工程中的java源文件以及对应的xml文件源码附上。同时将运行的界面图粘上。
三、主要仪器设备
hp笔记本电脑
四、实验结果与分析
(一)实现UI界面
实验代码:
activity_main.xml:
android:layout_width="fill_parent"
android:layout_height="fill_parent"
android:orientation="vertical" >
android:layout_width="match_parent"
android:layout_height="wrap_content"
android:orientation="horizontal"
android:layout_weight="4"
android:text="@string/color1"
android:textSize="7pt"
android:textColor="#000000"
android:background="#ff0000"
android:gravity="center_vertical|center_horizontal"
android:layout_width="wrap_content"
android:layout_height="fill_parent"
android:layout_weight="1"
/>
android:text="@string/color2"
android:textColor="#000000"
android:background="#00ff00"
android:gravity="center_vertical|center_horizontal"
android:layout_width="wrap_content"
android:layout_height="fill_parent"
android:layout_weight="1"
/>
android:text="@string/color3"
android:textSize="7pt"
android:textColor="#000000"
android:background="#0000ff"
android:gravity="center_vertical|center_horizontal"
android:layout_width="wrap_content"
android:layout_height="fill_parent"
android:layout_weight="1"
/>
android:text="@string/color4"
android:textSize="7pt"
android:textColor="#000000"
android:background="#ffff00"
android:gravity="center_vertical|center_horizontal"
android:layout_width="wrap_content"
android:layout_height="fill_parent"
android:layout_weight="1"
/>
android:layout_width="match_parent"
android:layout_height="wrap_content"
android:orientation="vertical"
android:layout_weight="1">
android:layout_width="fill_parent"
android:layout_height="fill_parent"
android:stretchColumns="1"> android:id="@+id/row1"
android:layout_width="wrap_content"
android:layout_height="wrap_content" >
android:text="@string/row1_column1"
android:gravity="center_horizontal"
/>
android:text="@string/row1_column2"
android:gravity="center_horizontal" android:padding="3dip"
/>
android:text="@string/row1_column3"
android:gravity="center_horizontal" android:padding="3dip"
/>
android:id="@+id/row2"
android:layout_width="wrap_content"
android:layout_height="wrap_content" >
android:text="@string/row2_column1"
android:gravity="center_horizontal"
android:padding="3dip"
/>
android:text="@string/row2_column2"
android:gravity="center_horizontal"
android:padding="3dip"
/>
android:text="@string/row2_column3"
android:gravity="center_horizontal"
android:padding="3dip"
/>
android:id="@+id/row3"
android:layout_width="wrap_content"
android:layout_height="wrap_content" >
android:text="@string/row3_column1"
android:gravity="center_horizontal"
android:padding="3dip"
/>
android:text="@string/row3_column2"
android:gravity="center_horizontal"
android:padding="3dip"
/>
android:text="@string/row3_column3"
android:gravity="center_horizontal"
android:padding="3dip"
/>
android:layout_width="match_parent"
android:layout_height="wrap_content"
android:orientation="vertical"
android:layout_weight="2">
android:text="@string/color1"
android:textSize="7pt"
android:textColor="#000000"
android:background="#ff0000"
android:gravity="center_vertical|center_horizontal" android:layout_width="fill_parent"
android:layout_height="fill_parent"
android:layout_weight="1"
/>
android:text="@string/color2"
android:textSize="7pt"
android:textColor="#000000"
android:background="#00ff00"
android:gravity="center_vertical|center_horizontal" android:layout_width="fill_parent"
android:layout_height="fill_parent"
android:layout_weight="1"
/>
android:text="@string/color3"
android:textSize="7pt"
android:textColor="#000000"
android:background="#0000ff"
android:gravity="center_vertical|center_horizontal" android:layout_width="fill_parent"
android:layout_height="fill_parent"
android:layout_weight="1"
/>
android:text="@string/color4"
android:textSize="7pt"
android:textColor="#000000"
android:background="#ffff00"
android:gravity="center_vertical|center_horizontal" android:layout_width="fill_parent"
android:layout_height="fill_parent"
android:layout_weight="1"
/>
实验结果:
(二)实现一个多输入框的对话框
实验代码:
activity_main.xml:
android:layout_width="match_parent"
android:layout_height="match_parent"
android:orientation="vertical"android:padding="20.0dip">
android:layout_width="match_parent"
android:layout_height="wrap_content"
android:orientation="horizontal">
android:text="@string/name"
android:layout_width="wrap_content"
android:layout_height="wrap_content"/>
android:layout_width="match_parent"
android:layout_height="wrap_content"
android:inputType="none"/>
android:layout_width="match_parent"
android:layout_height="wrap_content"
android:orientation="horizontal">
android:text="@string/pnumber"
android:layout_width="wrap_content"
android:layout_height="wrap_content"/>
android:layout_width="match_parent"
android:layout_height="wrap_content"
android:inputType="phone"/>
android:layout_width="match_parent"
android:layout_height="wrap_content"
android:orientation="horizontal">
android:text="@string/email"
android:layout_width="wrap_content"
android:layout_height="wrap_content"/>
android:layout_width="match_parent"
android:layout_height="wrap_content"
android:inputType="textEmailAddress"/>
android:layout_width="match_parent"
android:layout_height="wrap_content"
android:orientation="horizontal">
android:text="@string/confrim"
android:layout_width="wrap_content"
android:layout_height="wrap_content"
android:layout_weight="1.0"/>
android:text="@string/cancle"
android:layout_width="wrap_content"
android:layout_height="wrap_content"
android:layout_weight="1.0"/>
MainActivity.java代码
package com.example.lianxiren;
import android.support.v7.app.ActionBarActivity;
import android.os.Bundle;
import android.view.Menu;
import android.view.MenuItem;
import android.view.View;
import android.view.View.OnClickListener;
import android.widget.Button;
import android.widget.Toast;
public class MainActivity extends ActionBarActivity {
protected void onCreate(Bundle savedInstanceState) {
super.onCreate(savedInstanceState);
setContentView(https://www.360docs.net/doc/651192303.html,yout.activity_main);
Button btn_confrim =(Button)findViewById(R.id.btn_confirm);
btn_confrim.setOnClickListener(new OnClickListener() {
public void onClick(View v) {
Toast.makeText(MainActivity.this, "添加成功", Toast.LENGTH_LONG).show();
}
});
Button btn_cancle=(Button)findViewById(R.id.btn_cancle);
btn_cancle.setOnClickListener(new OnClickListener() {
public void onClick(View v) {
// TODO Auto-generated method stub
Toast.makeText(MainActivity.this, "添加失败", Toast.LENGTH_LONG).show();
}
});
}
}
实验结果:
太原理工大学计算机网络实验报告 本科实验报告 课程名称:计算机网络B 实验地点:行勉楼 专业班级:学号 学生姓名: 指导教师: 实验成绩: 2016年 6 月 14 日
实验3 VLAN基本配置 一、实验目的 掌握交换机上创建VLAN、分配静态VLAN成员的方法。 二、实验任务 1、配置两个VLAN:VLAN 2和VLAN 3并为其分配静态成员。 2、测试VLAN分配结果。 三、实验设备 Cisco交换机一台,工作站PC四台,直连网线四条,控制台电缆一条。 四、拓扑结构 五、实验结果 PC0到PC1 想通 PC0到PC2 不通,不在相同VLAN PC2到PC3 不通,网段不同。 Switch#sh run Building configuration... Current configuration : 1127 bytes ! version 12.1 no service timestamps log datetime msec no service timestamps debug datetime msec no service password-encryption ! hostname Switch ! ! spanning-tree mode pvst ! interface FastEthernet0/1
! interface FastEthernet0/2 switchport access vlan 2 ! interface FastEthernet0/3 switchport access vlan 2 ! interface FastEthernet0/4 switchport access vlan 2 ! interface FastEthernet0/5 switchport access vlan 3 ! interface FastEthernet0/6 switchport access vlan 3 ! interface FastEthernet0/7 switchport access vlan 3 ! 六、实验心得 输入容易出现错误。重复输入次数多。
太原理工大学软件工程《数据结构实验报告4-查找》 本科实验报告 课程名称:数据结构B 实验项目:查找 实验地点:行勉楼C214 专业班级:软件XXX班学号:2014XXXX 学生姓名:xxxxx 指导教师:牛之贤张润梁 2016年 1 月 1 日
void insertBST(BiTree *bt, BiTree s) { if (*bt == NULL) *bt = s; else if (s->data.key<(*bt)->data.key) insertBST(&((*bt)->lchild), s); else if (s->data.key>(*bt)->data.key) insertBST(&((*bt)->rchild), s); } main() { char ch; KeyType key; BiTree bt, s; int i = 0; printf("请输入元素:\n"); scanf("%d", &key); bt = NULL; while (key != -1) { s = (BiTree)malloc(sizeof(BiTNode)); (s->data).key = key; s->lchild = s->rchild = NULL; insertBST(&bt, s); scanf("%d", &key); } do { printf("输入你想要查找的元素:"); scanf("%d", &key); s = searchBST(bt, key); if (s != NULL) printf("成功! 这个等价元素是 %d.\n", s->data.key); else printf("没有找到!\n"); printf("是否继续查找?(y/n):"); scanf("%c", &ch); ch = getchar(); } while (ch == 'y' || ch == 'Y'); getchar(); } 4.2#include int b_search(int *p, int l, int r, int key); int main() { int a[10] = { 1,2,3,4,5,6,7,8,9,10 }; int i, p, k; for (i = 0; i < 10; i++) { printf("a[%d]=%d\n", i, a[i]); } for (i = 0; i<2; i++) {
android实验报告 创建一个名为“登录页面”的布局文件,该文件用于展示登录信息。程序界面如下图所示:; public class Activity01 extends Activity { EditText name; EditText pass ; protected void onCreate(Bundle savedInstanceState) { super.onCreate(savedInstanceState); public void click(View view){ Intent intent1=new Intent(this,Mylayout1MainActivity.class); startActivity(intent1);} public void click1(View view){ SharedPreferences sf1=getSharedPreferences("account",Context.MODE_PRIVATE); String name1=sf1.getString("name",""); String pass1=sf1.getString("pass",""); String name2=name.getText().toString(); String pass2=pass.getText().toString(); if(name1.equals(name2)&&pass1.equals(pass2)){ Intent intent2=new Intent(this, Textview1.class); intent2.putExtra("name", name1);
太原理工大学计算机网络实验报告 本科实验报告 课程名称:计算机网络B 实验地点:行勉楼 专业班级:学号 学生姓名: 指导教师: 实验成绩: 2016年 6 月14 日
实验3 VLAN基本配置 一、实验目的 掌握交换机上创建VLAN、分配静态VLAN成员的方法。 二、实验任务 1、配置两个VLAN:VLAN 2和VLAN 3并为其分配静态成员。 2、测试VLAN分配结果。 三、实验设备 Cisco交换机一台,工作站PC四台,直连网线四条,控制台电缆一条。 四、拓扑结构 五、实验结果 PC0到PC1 想通 PC0到PC2 不通,不在相同VLAN PC2到PC3 不通,网段不同。 Switch#sh run Building configuration... Current configuration : 1127 bytes ! version 12.1 no service timestamps log datetime msec no service timestamps debug datetime msec no service password-encryption ! hostname Switch ! ! spanning-tree mode pvst ! interface FastEthernet0/1
! interface FastEthernet0/2 switchport access vlan 2 ! interface FastEthernet0/3 switchport access vlan 2 ! interface FastEthernet0/4 switchport access vlan 2 ! interface FastEthernet0/5 switchport access vlan 3 ! interface FastEthernet0/6 switchport access vlan 3 ! interface FastEthernet0/7 switchport access vlan 3 ! 六、实验心得 输入容易出现错误。重复输入次数多。
Android实验报告_基于SQLite的通信录 第一次实验Android界面设计 一. 实验目的及实验环境 1. 实验目的 1)掌握SQLiteOpenHelper类结构 2)掌握基于SQLite数据库的应用开发过程 3)掌握Content Provider发布数据的方法 4)掌握Content Resolver获取数据的方法 2.实验环境 系统开发平Android Studio 3.0 系统开发平台:Android 7.1 运行平台:Windows10 x64 运行环境:https://www.360docs.net/doc/651192303.html, Framework SDK 2.0 二. 实验教材、组织方式、实验容 1.实验教材:Andorid开发与应用 2.组织方式:个人独立完成 2.实验容: 实现基于SQLite数据库的通信录应用,通过单击增加图标打开添加通信录界面,通过单击通信录中的各条信息可删除选中项。 三.方案设计 Android系统中集成了SQLite数据库,并且为数据库的操作提供了相关的类和方法,便于没有数据库开发经验的开发者编写程序。另外,Android平台中利用Content Provider机制来实现跨应用程序数据共享。一个应用程序可以通过Content Provider来发布自己的数据,其他的应用程序可以通过Content Resolver来获取共享数据。
四.运行结果
五.总结 通过这次实验掌握了SQLite OpenHelper类结构,掌握了基于SQLite数据库的应用开发过程以及Content Provider发布数据的方法和掌握Content Resolver 获取数据的方法。 六.附录:源代码 主布局文件activity_main.xml:
基于android开发实验报告总结 基于android开发实验 报告总结 组员: 指导老师: 2016.12.15
目录 实验一 Android开发环境的搭建 (3) 1 实验目的及要求 (3) 2 实验设备(环境)及要求 (3) 3 实验内容 (3) 4 实验步骤 (3) 5 实验核心代码(关键代码),及调试中的问题 (4) 6 实验的运行结果及分析 (9) 3 实验设备(环境)及要求 (10) 实验三 GUI创建套件Widget的使用 (18) 1 实验目的及要求 (18) 2 实验设备(环境)及要求 (18) 3 实验内容 (19) 4 实验步骤 (19) 5 实验核心代码(关键代码),及调试中的问题 (19) 6 实验的运行结果及分析 (28) 实验四 SQLite应用 (29) 1 实验目的及要求 (29) 2 实验设备(环境)及要求 (30) 3 实验内容 (30) 4 实验步骤 (30) 5 实验核心代码(关键代码),及调试中的问题 (30) 6 实验的运行结果及分析 (41)
实验一 Android开发环境的搭建 1 实验目的及要求 1.搭建Eclipse+Android开发平台 2.创建简单的Android应用程序 3.创建Activity并利用intent的实现Activity的跳转 2 实验设备(环境)及要求 1)PC计算机 2)JDK安装包 3)Eclipse安装包 4)Android SDK安装包 5)ADT插件 3 实验内容 1)搭建Eclipse+Android开发环境 2)创建一个简单的”hello world”工程 3)创建两个Activity,实现简单的Activity之间的参数传递 4 实验步骤 1)下载安装JDK 1.6,配置环境变量,如果所示。
太原理工大学web实验报告资料 本科实验报告 课程名称:Web开发实用技术基础 实验项目:HTML语言 网页程序设计Javascript Request与Response对象的应用 Application与Session对象的应用 实验地点:实验室211 专业班级:学号: 学生姓名: 指导教师: 2015年11月5日
学院名称学号实验成绩 学生姓名专业班级实验日期 课程名称Web开发实用技术基础实验题目HTML语言 一.实验目的和要求 1.掌握常用的HTML语言标记; 2.利用文本编辑器建立HTML文档,制作简单网页。 3.独立完成实验。 4.书写实验报告书。 二.实验内容 1.在文本编辑器“记事本”中输入如下的HTML代码程序,以文件名sy1.html保存,并在浏览器中运行。(请仔细阅读下列程序语句,理解每条语句的作用) 源程序清单如下:
Example welcome to you A simple HTML document Welcome to the world of HTML This is a simple HTML document.It is to give you an outline of how to write HTML file and how the markup tags work in the HTML file Following is three chapters Following is items of the chapter two item content 太原理工大学多媒体实验报告 本科实验报告 课程名称:多媒体技术与应用 实验项目:《多媒体技术与应用》课程实验实验地点:思贤楼1108 专业班级:学号:201200 学生姓名: 指导教师:廖丽娟 2015年12月6日
太原理工大学学生实验报告
4)Rm格式 Rm是RealMedia文件的简称。 Real Networks公司所制定的音频视频压缩规范称为RealMedia,是目前在Internet上相当流行的跨平台的客户/服务器结构多媒体应用标准,它采用音频/视频流和同步回放技术来实现在Intranet上全带宽地提供最优质的多媒体,同时也能够在Internet上以28.8Kbps的传输速率提供立体声和连续视频。 4.硬件准备 目前,多媒体计算机中的音频处理工作主要借助声卡,从对声音信息的采集、编辑加工,直到声音媒体文件的回放这一整个过程都离不开声卡。声卡在计算机系统中的主要作用是声音文件的处理、音调的控制、语音处理和提供MIDI接口功能等。 进行录制音频信号所需的硬件除了声卡,还有麦克风、音箱以及外界的音源信号设备(如CD唱机、录音机等),把麦克风、音箱、外界音源信号设备与声卡正确连接完成硬件准备工作。 【实验步骤】 1.准备一段语音文件,本次实验使用机器猫的一段无音乐文件,文件名为机器猫.wav使用声音编辑软件(如Cool Edit)导入该语音素材: 2.使用“另存为”命令分别以A/mu-Law Wave、Microsoft ADPCM、PM3格式进行保存。将各种格式的语音文件的声音参数(如采样频率、量化精度、压缩算法、压缩前后的数据量等)以表格的形式记录: 采样频率量化精度压缩前压缩后压缩率A/mu-Law 44.1K/hz 8位 1.56 MB 218K 13% Wave Microsoft 44.1K/hz 4位 1.56 MB 402K 25% ADPCM PM344.1K/hz 1.56 MB 799K 50% 3.使用声音编辑软件(如Cool Edit)对语音进行降低噪声处理的方法:首先,导入要处理的波形文件,在单轨编辑区内,点击波形水平放大按钮将波形水平放大,找出一段适合用来作噪声的采样波形,选中采样波形,单击鼠标右键,在弹出的菜单中
安卓空气质量app查询实验报告 课程设计报告 课程名称: 移动平台开发 设计题目:空气质量查询 院系:计算机科学与工程学院 专业:计算机科学与技术 班级:计科141 学号:Z09314123 姓名:吴佩 指导教师:孙霞 设计地点:N6-113 开课时间:2016 至2017 学年第1 学期
目录 1.引言 (1) 1.1.题目描述 (1) 1.2.设计意义 (1) 2.开发环境 (1) 2.1.硬件环境 (1) 2.2.软件环境 (1) 3.相关技术及知识点 (2) 3.1.Activity (2) 3.2.Service (2) 3.3.网络通信 (3) 4.需求分析 (3) 4.1.系统功能需求分析 (3) 4.2.系统流程图 (4) 4.3.系统界面需求分析 (4) 4.4.系统性能需求分析 (4) 5.设计与实现 (5) 5.1.界面布局 (5) 5.2.省市二级联动 (6) 5.3.获取空气质量数据 (9) 5.4.播放背景音乐 (16) 6.个人总结 (17)
1.引言 1.1.题目描述 本次实验是开发一款基于Android平台的空气质量查询应用,将网络系统的功能扩展到智能手机终端上,让手机能够通过移动网络访问Web网站并处理各种各样的业务,可以让智能手机用户能够随时随地查询互联网所提供的空气质量信息。 1.2.设计意义 可以让广大Android手机用户能够在第一时间获取最新的空气质量信息,以便提前预防,方便出行。同时,把气象灾害造成的损失降到最低,也可以提高公共服务质量,更好的发挥气象事业对经济社会发展的现实性作用,有巨大的实用价值。虽然该技术在Android平台已经比较成熟,但是通过该软件的开发仍然能帮助我更好的认识Android系统的工作原理。 2.开发环境 2.1.硬件环境 神州笔记本电脑 2.2.软件环境 Android的上层应用程序是用Java语言开发的,一般情况下是基于Dalvik虚拟机的,所以Google公司推荐使用主流的Java集成开发环境Eclipse。而用Java语言进行开发,需要用到SUN 公司提供的Java SDK(其中包括JRE:Java Runtime Environment)。此外,Android的应用程序开发和Java开发有较大区别的,需要使用Google提供的Android SDK。同时,要在Eclipse 上安装ADT,为Android开发提供开发工具的升级或者变更,是Eclipse下开发工具的升级或下载的工具。 简言之,需要以下软件,才能搭建Android开发环境,从而进行Android应用程序的开发。 (1) Java SDK (2) Eclipse (3) Android SDK (4) ADT
安卓实验报告报告 《Android网络程序设计》课程期末作品设计报告 学号:130705222 姓名:廖梓茗 班级:13信息 2 班 学院:电子信息学院 2016年6 月
1 主要界面截图 分组界面全部赛程界面 球队赛程界面
“我的”界面--未登录“我的”界面--已登录 登陆界面
修改密码界面
2 请结合本项目的开发,回答以下问题 2.1 如何在ViewPager中放入多个Fragment?如何为每个Fragment设置标签?介绍一下管理ViewPager的适配器。 给viewpager addOnPageChangerListener 同时绑定fragment数据源 2.2 适配器是什么?以本项目为例介绍一个列表适配器的实现? Adapter是控件与数据之间的桥梁,控制控件什么时候如何显示数据 项目中的listview的adapter全继承BaseAdapter,自由度高。 其中adapter 的getView方法主要控制listview的每个item显示什么视图view 2.3 如何访问网络接口?如何获得网络接口返回的数据?以本项目为例介绍一个网络接口的访问。 本项目访问网络,主要使用HttpClient,调用AsyncHttpClient的get或post发送 一个请求,在回调接口中处理返回数据。
例如获取分组数据接口,先获取AsyncHttpClient对象 AsyncHttpClient client = new AsyncHttpClent(); 再调用client对象的post或是get方法 Client.get(url,new TextHttpResponseHandler()); 在回调函数onSuccess中处理返回信息 2.4 如何解析json数据?以本项目为例介绍一个接口返回的json数据的解析过程。 json数据解析,主要使用Gson或是FastJson解析 FastJson: JSON.priseObjest()或是JSON.priseArray()直接将json映射成list或是object 3 请回答以下问题 3.1 当启动一个Activity并且新的Activity执行完后需要返回到启动它的Activity,应使用什么方法?其有哪些参数,分别表示什么? 在新Activity中如何将数据返回启动它的Activity? 原Activity如何用什么方法获取返回的数据?其有哪些参数,分别表示什么? startActivityForResult(intent, requestCode); setResult(intent); 通过onActivityResult()函数中的Intent参数中获取传回的数据 3.2 Activity和Fragment的生命周期状态各有哪些?状态之间如何变换?状态变换时会执行哪些方法?
2014太原理工大学C++实验报告 本科实验报告 课程名称:C++面向对象程序设计 实验项目:C++语言编程 实验地点:明向校区 专业班级:软件1431 学号:201400XXXX 学生姓名:白建兴 指导教师:崔晓红 2015年5月10日
1.运行例题程序: #include using namespace std; void fn1(int z=5); int x=1,y=2; int main() { cout<<"Begin. . ."<>p[i]; if(p[i]>0) plus++; else if(p[i]!=0) minus++; } cout<<"正数的个数:"<安卓计算器开发实验报告 嵌入式WebOS应用开发 实验报告 实验名称:使用An droid Developer SDK开发应用程序 专业:_________________________ 姓名:__________________________________ 班级:_______________________________ 学号:______________________________ 一、作品的运行环境及安卓SDK基础操作 SDK An droid Developer 是一款在windows系统上运行的针对 An droid应用开发的谷歌官方软件(需要JAVA环境支持)。 1、导入工程 2、建立虚拟机 在运行虚拟机是为保证机器的顺畅运行建议选择分辨率较低的虚拟机,但是其RAM最好设为512MB因为部分程序如果调用资源过大会导致虚拟机无法运行。 3、虚拟机界面 二、作品介绍 我的应用是一个计算器。能实现包括小数的加减乘除运算,结果过大会自动用科学记数法表示,另外还有退格跟清屏功能键。
加应用图标 1.首先在我的桌面上添加你应 用的图标以及文字,双击图标后 项中自行进行挑选; 也可以添加自己的图片, 只要将图片放到对应的 文件夹之下在刷新就可 以,但不建议放分辨率 过高图片可能会出现超 出界面的等错误。 要在xml 界面中添加排版: xml 代码首末的 格式较为自由可以直接在 界面中拖动图标位置以及修改大小,而其他layout 则更会自动排列, 各有优劣。 三、 编程以及运行调试 (一)、在MyDesktop 主界面中添 fin^_ok,prig 世IF it launchiWipng 32E img'O.png jdE im^il.png] 3E img?.pHg 血 imql.pngi 32E img4.png 血 im^S.pngi Tn? imgg.png JJL -mgT.pngj ..1. imy^.png ..1. uiHiprxg 就可以看见对应的代码, 可直接 在代码中进行修改图片文字的 大小颜色等等。 以下是对应图像图标的代码 图片可以在左侧的选 (二)、在 res/layout 目录下新建.xml 文件,由于计算器的按钮很多, TIF charfrc 起 ch^tfrorn_bg_ipTW5&d !S'.pflg ~l <+i?,kbnif^M 口 .股 ch?kbojco#f bsckgrourid^na SE chfkb rn (」]n.hewlcgin 口unci 岱n 评 弧 tlwr^na TTF de^ r o 1 .pnq
Android实验一实验报告 Android实验报告一 姓名:丁军峰 班级:信科12-3 学号:08123448
一、实验内容 编写一个Android应用程序,实现对自己物品的管理,功能包括添加、删除和查询等 二、实验目的 了解android开发流程,掌握SQLite数据库和ListView控件的使用三、需求分析 使用SQLite数据库,使用ListView控件显示物品 四、实验过程 1.创建程序,设计用户交互界面 Android程序开发实验报告 山西大学 物理电子工程学院 论文题目:基于Android系统的GPS 程序开发 学号:* 姓名:* * * 指导老师:* *
摘要 在日常生活中,我们经常需要知道自己的具体位置,尤其是在 旅游或陌生城市中。而手机作为目前最常见、最方便的电子信息载体,无疑是我们最好的选择。为了让智能手机用户能够随时随地查询GPS 所提供的服务,一种高效的办法就是将应用系统的功能拓展到手机终端上。本文选择的是最常见的Android系统的程序开发。对于软件从业人员来说,该平台具有无限的吸引力。 因此,本文首先介绍安卓系统在个人计算机上开发平台的搭建,并尝试在安卓系统上开发一款基于手机自带GPS组件的GPS应用。 关键字:Android,GPS,SDK,JDK,ADT,Eclipse 一引言 (一)开发背景 随着网络世界的深入生活,地球网络化已经是一条必然之路。而今后的网络也将逐渐的走向移动互联网的轨道。像手机,平板计算机,笔记本计算机等可以搭乘移动互联网的产品中使用人数最多的数码产品便是智能手机了。它已经在逐步的取代其他的电子产品的市场份额。据《2013-2017年中国智能手机行业市场需求预测与投资战略规划分析报告》估算,2012前三季度,全球智能手机用户总数已经突破了10亿大关。而2011前三季度的用户量只有约7亿户。可以看出,智能手机市场的潜力不可估量。
(二)Android 与GPS 简介 1.Android 是一种基于Linux 的自由及开放源代码的操作系统,主要使用于移动设 备,如智能手机和平板计算机,由Google 公 司和开放手机联盟领导及开发。 2011年第一季度,Android 在全球的市场份额首次超过塞班系统,跃居全球第一。 2012年11月数据显示,Android 占据全球智能手机操作系统市场76%的份额,中国市场占有率为90%。 Android 的系统架构和其操作系统一 样,采用了分层的架构。从架构图看, Android 分为四个层,从高层到低层分别是应用程序层、应用程序框架层、系统运 行库层和Linux 内核层。 Android 系统所具有的特点有:开放性、丰富的硬件、方便开发。 2.GPS 是英文Global Positioning System (全球定位系统) 的简称。GPS 起始于1958年美国军方的一个项目, 1964年投入使用。GPS 定位的基本原理是根据高速运动的卫星瞬间位置作为已知的起算数据,采用空间距离后方交会的方法,确定待测点的位置。GPS 由空间部分、地面控制系统、用户设备部分三部分组成。作为先进的测量手段和新的生产力,GPS 已经融入了国民经济建设、国防建设和社会发展的各个应用领域。GPS 技术与我们的日常生活日益相关。
太原理工大学数值计算方法实验报告 本科实验报告 课程名称:计算机数值方法 实验项目:方程求根、线性方程组的直接解法、线性方程组的迭代解法、代数插值和最小二乘拟合多项式 实验地点:行勉楼 专业班级:******** 学号:********* 学生:******** 指导教师:誌,冬华 2016年4 月8 日
y = x*x*x + 4 * x*x - 10; return y; } float Calculate(float a,float b) { c = (a + b) / 2; n++; if (GetY(c) == 0 || ((b - a) / 2) < 0.000005) { cout << c <<"为方程的解"<< endl; return 0; } if (GetY(a)*GetY(c) < 0) { return Calculate(a,c); } if (GetY(c)*GetY(b)< 0) { return Calculate(c,b); } } }; int main() { cout << "方程组为:f(x)=x^3+4x^2-10=0" << endl; float a, b; Text text; text.Getab(); a = text.a; b = text.b; text.Calculate(a, b); return 0; } 2.割线法: // 方程求根(割线法).cpp : 定义控制台应用程序的入口点。// #include "stdafx.h" #include"iostream"
心得体会 使用不同的方法,可以不同程度的求得方程的解,通过二分法计算的程序实现更加了解二分法的特点,二分法过程简单,程序容易实现,但该方法收敛比较慢一般用于求根的初始近似值,不同的方法速度不同。面对一个复杂的问题,要学会简化处理步骤,分步骤一点一点的循序处理,只有这样,才能高效的解决一个复杂问题。
太原理工大学单片机实验报告 实验一双字节加法 一实验目的 (1)熟悉并掌握MCS-51指令系统和程序设计方法。 (2)掌握双字节加法的程序算法。 二实验设备 计算机 操作系统:Windows 98/2000/XP 应用软件:WAVE 6000或其他。 三实验内容 编写一个双字节加法程序并调试,设9930H存在R1R0中,6083H存在R2R3中,计算R1R0+R3R2,最后结果保存在R5R4中。 四实验原理 两数低位相加后保留进位位,高位数相加时,将低位的进位加上。 五实验程序流程图 开始 30H→R0,A9H→R1 B3H→R2,50H→R3 低位数相加 (R0)+(R2)→A,Cy A→R4 高位数带进位相加 (R1)+(R3)+(Cy) →A,Cy;A→R5 结束
七实验源程序 ORG 0 LJMP MAIN ORG 30H MAIN: MOV 30H,#25H MOV 31H,#13H MOV 32H,#14H MOV 33H,#35H MOV A,30H ADDC A,32H DA A MOV 40H,A MOV A,31H ADD A,33H DA A MOV 41H,A SJMP $ 八实验结果与分析 (40H)中的结果为39;(41H)中的结果为48.与计算结果相同说明实验正确。九实验心得与总结 通过实验增强了我们分析问题和解决问题的能力,以实践证实理论,从实践中加深对理论知识的理解和掌握。
实验二数据排序程序 一实验目的 (1)熟悉并掌握MCS-51指令系统和程序设计方法。 (2)掌握排序程序算法。 (3)掌握用循环程序实现数据排序的方法。 二实验设备 计算机 操作系统:Windows 98/2000/XP 应用软件:WAVE 6000或其他。 三实验内容 编写一个通用排序子程序并调试,其功能为将RAM的40H~4FH单元16个字节无符号二进制整数按从小到大顺序排序,将排序后的数据存放在50H~5FH缓冲区中。 四实验原理 从40H单元的第一个数开始依次和相邻单元的另一个数比较,如果顺序正确,则不作任何操作;如果顺序错误,则将这两个数位置对换。这样,在完成第一遍n-1次比较后,最小的数到了最后,所以第二遍比较只需要比较n-2次,最多作n-1遍比较就可完成排序。在比较中设立一个标志位flag清零,在循环结束时,若flag=1说明排序未完成,进入外循环;若flag=0,说明排序完成,程序结束。 五实验程序流程图
安卓开发实验报告 安卓开发实验报告 目录 一、页面跳转 二、长按图标抖动以及显示删除 一、页面跳转 功能:通过点击button实现2个activity之间的跳转。 1.设置监听器监听点击button 2.使用intent传输数据
完整代码 1.ui_test.java publicclass UI_Test extends Activity { @Override protectedvoid onCreate(Bundle savedInstanceState) { super.onCreate(savedInstanceState); setContentView(https://www.360docs.net/doc/651192303.html,yout.incident_activity_1); Button bt = (Button)findViewById(R.id.login); bt.setOnClickListener(new OnClickListener()); } class OnClickListener implements View.OnClickListener{ publicvoid onClick(View v){ EditText name = (EditText)findViewById(https://www.360docs.net/doc/651192303.html,); EditText password = (EditText)findViewById(R.id.password); Bundle data=new Bundle(); data.putString("name", name.getText().toString()); data.putString("password", password.getText().toString()); Intent intent = new Intent(UI_Test.this,UI_Result.class); intent.putExtras(data); startActivity(intent); } } 2.ui_result.java publicclass UI_Result extends Activity { @Override protectedvoid onCreate(Bundle savedInstanceState) { super.onCreate(savedInstanceState); setContentView(https://www.360docs.net/doc/651192303.html,yout.incident_activity_2); TextView name = (TextView)findViewById(https://www.360docs.net/doc/651192303.html,Show); TextView password = (TextView)findViewById(R.id.passwordShow); Intent intent=getIntent(); Bundle result = intent.getExtras(); name.setText("您的用户名为: "+result.getString("name")); password.setText("您的密码为: "+result.getString("password"));
Android实验报告 Android实验报告 专业:计算机科学与技术 班级: 学号: 姓名:武易 2016年11月28日 实验一 Activity 生命周期 一、实验目的 Android 生命周期是从程序启动到程序终止的过程。通过本次实验深入理解Android 系统管理生命周期的必要性,并以Activity 为例说明Android 系统是如何管理程序组件的生命周期。 二、实验设备 1、硬件设备系统类型:Win7 版本32 位,处理器: Intel(R)Core(TM)i3-2350M CPU @2.30GHz 2.30GHz 安装内存(RAM):8.00GB 2、软件设备 Win7 操作系统、Eclipse、JDK、Android SDK、ADT 三、实验内容 1、实验要求 观察 Activity的生命周期。 2、详细设计 public class MainActivity extends ActionBarActivity {
private static String TAG="LIFECYCLE"; @Override public void onCreate(Bundle savedInstanceState){ super.onCreate(savedInstanceState); Log.i(TAG,"(1) onCreate()"); button.setOnClickListener(new View.OnClickListener(){ public void onClick(View view){ finish(); } }); } @Override public void onStart(){ super.onStart(); Log.i(TAG,"(2) onStart()"); } @Override public void onRestoreInstanceState(Bundle savedInstanceState){ super.onRestoreInstanceState(savedInstanceState); Log.i(TAG,"(3) onRestoreInstanceState()"); } @Override
android实验报告模板 移动应用开发实验报告 实验名称音乐播放器 班级 学号 姓名 指导教师 实验成绩 2016 年04月
一、实验目的 本项目是一款基于Android手机平台的音乐播放器,使Android手机拥有个性的多媒体播放器,使手机显得更生动灵活化,与人们更为接近,让手机主人随时随地处于音乐视频的旋律之中。使人们的生活更加多样化。也使设计者更加熟练Android的技术和其它在市场上的特点。 二、实验内容及要求 在其中写清楚这个实验具体要你做什么,怎么做,要达到什么样的效果等。 本设计实现的主要功能是播放Mp3,Wav多种格式的音乐文件,并且能够控制播放,暂停,停止,,下一首,上一首播放列等基本播放控制功能,界面简明,操作简单。三、实验方案设计 在其中写清楚你的程序的详细设计,用流程图配文字的形式描述。 如果其中涉及到算法,一定要把算法阐述清楚。 3.1.1假设安装了音乐播放器的用户是系统的主要设计对象,其拥有以下操作,启动软件、播放音乐、暂停播放、停止播放、退出软件,其用例图如下 图2.1 播放器基本用例图 3.1.2用例分析
①用例名称:启动软件参与者:用户目标:使得用户启动软件并加载手机和sd 卡上的音频文件到播放列表前置条件:无基本事件流:1.用户启动软件 2.播放器将播放列表中的当前的歌曲 ②用例名称:播放参与者:用户目标:使得用户可以播放在播放列表中选中的歌曲前置条件:播放器正在运行基本事件流:1.用户单击“播放”按钮 2.播放器将播放列表中的当前的歌曲 ③用例名称:暂停参与者:用户目标:使得用户可以暂停正在播放的歌曲前置条件:歌曲正在播放且未停止和暂停基本事件流:1.用户单击“暂停”按钮 2.播放器将暂停当前的歌曲 ④用例名称:停止参与者:用户目标:使得用户可以停止正在播放的歌曲前置条件:歌曲正在播放或暂停基本事件流:1.用户单击“停止”按钮 2.播放器将停止当前播放的歌曲 ⑤用例名称:推出参与者:用户目标:使得用户退出或者后台播放音乐前置条件:程序在运行 基本事件流:1.用户按返回键 2.播放器退出或者进入后台播放 四、实验测试 Step1.启动软件后,软件自动检索手机和sd卡的音频文件,并组织显示成列表. Step2.点击列表的歌曲名字。 Step3.播放音乐。 Step4.点击暂停,音乐暂停 Step5.点击播放转到step3 Step6.点击停止停止播放音乐 Step7.点击退出,若音乐处于播放状态,则音乐转向后台播放,界面退出。 Step8.点击退户,若音乐处于暂停或者停止状态,直接退出。