GQ_2_010_NPD_Gate_4_ Launch_03NO09,0
副本GBK码整理
汉字全拼五笔郑码UNICODE GBK笔画数部首一yi ggll A4E00D2BB1一丁ding sgh AI4E01B6A12一丂yu gnv AZVV4E0281402一七qi agn HD4E03C6DF2一丄shang hgd IAVV4E0481412一丅xia ghk AIVV4E0581422一丆myeon myen GAA4E0681432一万wan dnv AYM4E07CDF23一丈zhang dyi AOS4E08D5C93一三san dggg CD4E09C8FD3一上shang hhgg I/IDA4E0A C9CF3一下xia ghi AID4E0B CFC23一丌ji gjk AND4E0C D8A23一不bu gii GI4E0D B2BB4一与yu gngd AZA4E0E D3EB3一丏mian ghnn AIZY4E0F81444一丐gai ghnv AIZ4E10D8A44一丑chou nfd XED4E11B3F34一丒chou vygf YDSA4E1281454一专zhuan fnyi BDZS4E13D7A84一且qie egd LC4E14C7D25一丕pi gigf GIA4E15D8A75一世shi anv E/EAZ4E16CAC05一丗shi mgd EA4E1781465一丘qiu rgd PDA4E18C7F05丿一丙bing gmwi ALOD4E19B1FB5一业ye ogd KU4E1A D2B55业一丛cong wwgf ODOA4E1B B4D45一人东dong aii HDKO4E1C B6AB5一丝si xxgf ZZZA4E1D CBBF5一纟丞cheng bigf XKA4E1E D8A96一乙丟diu tfcu CZS4E1F81476一丠qiu uxgf TIRA4E2081486一両liang gmmk ALLL4E2181496一丢diu tfcu MBZS4E22B6AA6一丿丣you gjag ANHX4E23814A7一两liang gmww ALOO4E24C1BD7一严yan godr AKM4E25D1CF7一並bing uogd UAKU4E26814B8一八丧sang fueu EDUH4E27C9A58一丨shu hhll IAAA4E28D8AD1丨丩jiu nhk ZI4E29814C2丨个ge whj O/ODI4E2A B8F63丨人丫ya uhk UDI4E2B D1BE3丨八丬zhuang uygh TI4E2C E3DC3丨中zhong khk J/JIVV4E2D D6D04丨丮ji nfhk YDAB4E2E814D4丨丯jie ehk PDI4E2F814E4丨丰feng dhk CI4E30B7E14丨丱kuang njgh ZIAA4E31814F5丨串chuan kkhk JJI4E32B4AE7丨丳chan kkjk JJND4E3381508丨临lin jtyj KDMK4E34C1D99丨丵zhuo oguf KUUB4E35815110丨业丶dian yyll SAAA4E36D8BC1丶丷ha uyt UDAA4E3781522丶丸wan vyi QYA4E38CDE83丿丶丹dan myd QSVV4E39B5A44丶丿为wei ylyi U/UDYS4E3A CEAA4丶主zhu ygd SCVV4E3B D6F75丶丼jing fjyi BDNS4E3C81535丶丽li gmyy ALLD4E3D C0F67丶一举ju iwfh VDOB4E3E BED99丶丿pie ttll MAAA4E3F D8AF1丿乀fu nnll YDAA4E4081541丿乁yi gyi YDAA4E4181551丿乂yi qty OS4E4281562丿乃nai etn YMVV4E43C4CB2丿乄wu nyi ZSVV4E4481572丿久jiu qyi RSVV4E45BEC33丿乆jiu nwi ZOD4E4681583丿乇tuo tav MHD4E47D8B13丿么me tcu MZS4E48C3B43丿义yi yqi SOS4E49D2E53丶丿乊ho tue MUD4E4A81593丿之zhi pppp WA4E4B D6AE3丿丶乌wu qngd RZA4E4C CEDA4丿乍zha thfd MAID4E4D D5A75丿乎hu tuhk MUA4E4E BAF55丿乏fa tpi MWVV4E4F B7A64丿乐le qii RHKO4E50C0D65丿乑zhong tii GQAA4E51815A6丿乒ping rgtr PDAM4E52C6B96丿乓pang rgyu PDAS4E53C5D26丿乔qiao tdjj MGND4E54C7C76丿乕hu rfmh PDBL4E55815B7丿乖guai tfux METR4E56B9D48丿乗sheng tgai MFEA4E57815C9丿乘cheng tuxv MFTR4E58B3CB10丿乙yi nnll YDA4E59D2D21乙乚yin nnll ZAAA4E5A815D1乙乛ya nnll XAAA4E5B815E1乙乜nie nnv YZVV4E5C D8BF2乙九jiu vtn QY4E5D BEC52丿乙乞qi tnb MAYD4E5E C6F23乙也ye bnhn YI4E5F D2B23乙习xi nud YT4E60CFB03乙乡xiang xte ZZM4E61CFE73乙乢gai mnn LLZ4E62815F4乙乣jiu xnb ZZZ4E6381604乙乤hal ghnb AIYD4E6481614乙乥hol tunb MUYD4E6581624乙书shu nnhy XYIS4E66CAE94乛乧dul ufnb TDEY4E6781635乙乨shi cknn ZSJZ4E6881646乙乩ji hknn IDJZ4E69D8C06乙乪nang nld YDAK4E6A81656乙乫kal lknb YMJY4E6B81666乙乬keol annb HXYD4E6C81675乙乭tol dnb GYDA4E6D81686乙乮mol qtbn RHYY4E6E81696乙乯ol tuhn MUYD4E6F816A6乙买mai nudu XTGD4E70C2F26乙乱luan tdnn MIZ4E71C2D27乙乲cal uqwn TDRY4E72816B7乙乳ru ebnn PVYZ4E73C8E98乙乚乴xue rrnb DPYD4E74816C8乙乵yan unn SEZ4E75816D8乙乶phoi gehn FBYD4E76816E8乙乷sha iinb VKMY4E77816F8乙乸na bxgu YIZY4E7881708乙乹qian fjnn EDEZ4E7981719乙乺sol rnrn PDPY4E7A81729乙乻eol ywun SYTY4E7B81739乙乼cui iygn VSCY4E7C81749乙乽ceor ftjn BMYD4E7D81759乙乾qian fjtn EDMY4E7E C7AC11乙乿zhi exin PVZZ4E7F817611乙亀gui qjjn RKKZ4E80817711乙亁gan fjfn EDMY4E81817812十乙亂luan ecmn PVLZ4E82817913乙亃lin oqan UFMZ4E83817A13乙亄yi fpgn BWUZ4E84817B13乙亅jue hhl IAAA4E85817C1亅了le bnh Y4E86C1CB2乙亅亇ma qhk RIVV4E87817D3亅丿予yu cbj XSXI4E88D3E84亅乙争zheng qvhj RXB4E89D5F96刀亅亊zhi guvh DUXB4E8A817E7亅一事shi gkvh DJXB4E8B CAC28亅一二er fgg BD4E8C B6FE2二亍chu fhk AAI4E8D D8A13二于yu gfk ADVV4E8E D3DA3二亏kui fnv BDZ4E8F BFF73二亐yu fnv BDZ4E9081803二云yun fcuu BDZS4E91D4C64二互hu gxgd BDZM4E92BBA54二亓qi adw BDND4E93D8C14二五wu gghg BIX4E94CEE54二井jing fjk BDND4E95BEAE4二亖si fff BDBD4E9681814二亗sui mff LLBD4E9781825二亘gen gjgf BDK4E98D8A86二亙geng gqug BDRS4E9981836二亚ya gogd AKU4E9A D1C76二些xie hxff IIRB4E9B D0A98二亜ya gkjg BDJK4E9C81847二亝zhai cccf ZSZB4E9D81858二厶亞ya ghgg BZ4E9E81868二亟ji bkcg YJXA4E9F D8BD8二亠wen yyg SAA4EA0D9EF2亠亡wang ynv SH4EA1CDF63亠亢kang ymb SQD4EA2BFBA4亠亣da yji SND4EA381874亠交jiao uqu SOOS4EA4BDBB6亠亥hai yntw SZOD4EA5BAA56亠亦yi you SNO4EA6D2E06亠产chan ute SUM4EA7B2FA6亠亨heng ybj SJY4EA8BAE07亠亩mu ylf SKI4EA9C4B67亠亪ye yogy SNOY4EAA81887亠享xiang ybf SJYA4EAB CFED8亠京jing yiu SJKO4EAC BEA98亠亭ting ypsj SJWA4EAD CDA49亠亮liang ypmb SJWQ4EAE C1C19亠亯xiang ybf SJK4EAF81899亠亰jing yjiu SKKO4EB0818A9亠亱ye ywjg SNKA4EB1818B9亠亲qin usu SUF4EB2C7D79亠亳bo ypta SJMH4EB3D9F110亠亴you ypfv SJBQ4EB4818C12亠亵xie yrve SDQR4EB5D9F412亠亶zhan ylkg SJKA4EB6818D13亠亷lian udvo SUMX4EB7818E13亠亸duo ybuf SJKE4EB8818F16亠亹wei ywfg SNLL4EB9819022亠人ren wwww OD4EBA C8CB2人亻dan wth NAAA4EBB D8E92亻亼ji wgf ODA4EBC81913人亽ra wyu ODS4EBD81923人亾wu nwi ZOD4EBE81933人亿yi wnn NYDA4EBF D2DA3亻什shen wfh NED4EC0CAB24亻仁ren wfg NBD4EC1C8CA4亻仂le wln NYM4EC2D8EC4亻仃ding wsh NAI4EC3D8EA4亻仄ze dwi GGOD4EC4D8C64人仅jin wcy NXS4EC5BDF64亻仆pu why NID4EC6C6CD4亻仇chou wvn NQY4EC7B3F04亻仈ba wwy NOVV4EC881944亻仉zhang wmn NQD4EC9D8EB4亻今jin wynb ODSX4ECA BDF14人介jie wjj ODND4ECB BDE94人仌bing wwu ODOD4ECC81954人仍reng wen NYM4ECD C8D44亻从cong wwy ODOD4ECE B4D34人仏fo wcy NZS4ECF81964亻仐tao wfj ODED4ED081974人仑lun wxb ODRR4ED1C2D84人仒eo wuu ODTD4ED281984人仓cang wbb ODYY4ED3B2D64人仔zai wbg NYA4ED4D7D05亻仕shi wfg NBVV4ED5CACB5亻他ta wbn N/NYI4ED6CBFB5亻仗zhang wdyy NAOS4ED7D5CC5亻付fu wfy NDS4ED8B8B65亻仙xian wmh NLL4ED9CFC95亻仚xian wmj ODLL4EDA81995人仛zhe wtab NMHD4EDB819A5亻仜hong wag NBI4EDC819B5亻仝tong waf ODBI4EDD D9DA5人仞ren wvyy NYS4EDE D8F05亻仟qian wtfh NME4EDF C7AA5亻仠han wfh NAED4EE0819C5亻仡yi wtnn NMYD4EE1D8EE5亻仢bo wqyy NRS4EE2819D5亻代dai way NHS4EE3B4FA5亻令ling wycu ODW4EE4C1EE5人以yi nywy ZSOD4EE5D2D44人仦chao wiy NKO4EE6819E5亻仧zhang hwu IDAO4EE7819F5人仨sa wdg NCD4EE8D8ED5亻仩shang whg NIA4EE981A05亻仪yi wyqy NSOS4EEA D2C75亻仫mu wtcy NMZS4EEB D8EF5亻们men wun NTL4EEC C3C75亻仭ren wlyy NYS4EED81A15亻仮fan wlyy NPXS4EEE81A26亻仯miao witt NKM4EEF81A36亻仰yang wqbh NRY4EF0D1F66亻仱qian wwgn NOSX4EF181A46亻仲zhong wkhh NJI4EF2D6D96亻仳pi wxxn NRRR4EF3D8F26亻仴wo weg NQVV4EF481A56亻仵wu wtfh NMED4EF5D8F56亻件jian wrhh NMB4EF6BCFE6亻价jia wwjh NOND4EF7BCDB6亻仸yao wtdu NMGD4EF881A66亻仹feng wdhh NCI4EF981A76亻仺chuang wagd ODH4EFA81A85人任ren wtfg NMB4EFB C8CE6亻仼wang wgg NCVV4EFC81A96亻份fen wwvn NOYD4EFD B7DD6亻仾di wgxg NBZM4EFE81AA6亻仿fang wyn NSY4EFF B7C26亻伀zhong wwcy NOZS4F0081AB6亻企qi whf ODII4F01C6F36人伂pei wgmh NALI4F0281AC6亻伃yu wcbh NXXI4F0381AD6亻伄diao wxhh NYI4F0481AE6亻伅dun wgbn NHZI4F0581AF6亻伆wu wqrt NROD4F0681B06亻伇yi wmcy NQX4F0781B16亻伈xin wny NWZ4F0881B26亻伉kang wymn NSQD4F09D8F86亻伊yi wvtt NXMA4F0A D2C16亻伋ji weyy NYMS4F0B81B35亻伌ai wdbn NGYY4F0C81B46亻伍wu wgg NBX4F0D CEE96亻伎ji wfcy NEXS4F0E BCBF6亻伏fu wdy NGS4F0F B7FC6亻伐fa wat NHM4F10B7A56亻休xiu wsy NFVV4F11D0DD6亻伒yin wrh NPD4F1281B56亻伓pi wgiy NGI4F1381B66亻伔shen wpmn NWQD4F1481B76亻伕fu wfwy NBOD4F1581B86亻伖tang wdcy NGXS4F1681B96亻众zhong wwwu ODOO4F17D6DA6人优you wdnn NGR4F18D3C56亻伙huo woy NUO4F19BBEF6亻会hui wfcu ODBZ4F1A BBE16人伛yu waqy NHOS4F1B D8F16亻伜zu wcfh NQED4F1C81BA6亻伝yun wfcy NBZS4F1D81BB6亻伞san wuhj ODUA4F1E C9A16人伟wei wfnh NBY4F1F CEB06亻传chuan wfny NBZS4F20B4AB6亻伡ju wlh NHE4F2181BC6亻伢ya waht NHI4F22D8F36亻伣xian wmqn NLR4F2381BD6亻伤shang wtln NMYM4F24C9CB6亻伥chang wtay NCH4F25D8F66亻伦lun wwxn NORR4F26C2D76亻伧cang wwbn NOYY4F27D8F76亻伨xun wquf NRTD4F2881BE6亻伩xin wyy NSO4F2981BF6亻伪wei wyly NUYS4F2A CEB16亻伫zhu wpgg NWA4F2B D8F96亻伬ze wnyy NXS4F2C81C06亻伭xian wyxy NSZZ4F2D81C17亻伮nu wvcy NZXS4F2E81C27亻伯bo wrg NNK4F2F B2AE7亻估gu wdg NEJ4F30B9C07亻伱ni wwiy NOKO4F3181C37亻伲ni wnxn NXRR4F32D9A37亻伳xie wann NEZ4F3381C47亻伴ban wufh NUB4F34B0E97亻伵xu wlg NLK4F3581C57亻伶ling wwyc NOW4F36C1E67亻伷zhou wmg NKIA4F3781C67亻伸shen wjhh NKIC4F38C9EC7亻伹zu wegg NLC4F3981C77亻伺si wngk NYAJ4F3A CBC57亻伻beng wguh NAUA4F3B81C87亻似shi wnyw NZOD4F3C CBC66亻伽ga wlkg NYJ4F3D D9A47亻伾pi wgig NGA4F3E81C97亻伿yi wkwy NJO4F3F81CA7亻佀si whnn NYVV4F4081CB7亻佁yi wckg NZJ4F4181CC7亻佂zheng wghg NAII4F4281CD7亻佃dian wlg NKI4F43B5E87亻佄han wafg NEB4F4481CE7亻佅mai wfiy NBKO4F4581CF7亻但dan wjgg NKA4F46B5AB7亻佇zhu wpsh NWAI4F4781D07亻佈bu wdmh NGLI4F4881D17亻佉qu wfcy NBZS4F4981D27亻佊bi whcy NXI4F4A81D37亻佋zhao wvkg NYJ4F4B81D47亻佌ci whxn NIRR4F4C81D58亻位wei wug NSU4F4D CEBB7亻低di wqay NRS4F4E B5CD7亻住zhu wygg NSC4F4F D7A17亻佐zuo wdag NGBI4F50D7F47亻佑you wdkg NGJ4F51D3D37亻佒yang wmdy NLGD4F5281D67亻体ti wsgg NFA4F53CCE57亻佔zhan whkg NIJ4F5481D77亻何he wskg NAJ4F55BACE7亻佖bi wntt NWM4F5681D87亻佗tuo wpxn NWRR4F57D9A27亻佘she wfiu ODBK4F58D9DC7人余yu wtu ODMF4F59D3E07人佚yi wrwy NMOD4F5A D8FD7亻佛fo wxjh NYND4F5B B7F07亻作zuo wthf NMID4F5C D7F77亻佝gou wqkg NRJ4F5D D8FE7亻佞ning wfvg NBZM4F5E D8FA7亻佟tong wtuy NRTD4F5F D9A17亻你ni wqiy NRKO4F60C4E37亻佡xian wwmh NOLL4F6181D97亻佢qu wang NHX4F6281DA6亻佣yong weh NLD4F63D3B67亻佤wa wgnn NAYS4F64D8F46亻佥qian wgif ODBV4F65D9DD7人佦shi wdg NGVV4F6681DB7亻佧ka whhy NIAI4F67D8FB7亻佨bao wqnn NRY4F6881DC7亻佩pei wmgh NQAL4F69C5E58亻佪hui wlkd NJJ4F6A81DD8亻佫he wtkg NRJ4F6B81DE8亻佬lao wftx NBRR4F6C C0D08亻佭xiang wtah NRMB4F6D81DF8亻佮ge wwgk NOAJ4F6E81E08亻佯yang wudh NUC4F6F D1F08亻佰bai wdjg NANK4F70B0DB8亻佱fa wfhf ODBI4F7181E18亻佲ming wqkg NRJ4F7281E28亻佳jia wffg NBB4F73BCD18亻佴er wbg NCE4F74D9A68亻併bing wuah NUE4F7581E38亻佶ji wfkg NBJ4F76D9A58亻佷heng wvey NXO4F7781E48亻佸huo wtdg NMI4F7881E58亻佹gui wqdb NRGY4F7981E68亻佺quan wwgg NOC4F7A81E78亻佻tiao wiqn NVRD4F7B D9AC8亻佼jiao wuqy NSOO4F7C D9AE8亻佽ci wuqw NTRO4F7D81E88亻佾yi wweg NOQ4F7E D9AB8亻使shi wgkq NAJO4F7F CAB98亻侀xing wgaj NAEK4F8081E98亻侁shen wtfq NMRD4F8181EA8亻侂tuo wyta NTMH4F8281EB8亻侃kan wkqn NJND4F83D9A98亻侄zhi wgcf NHB4F84D6B68亻侅hai qynw NSZO4F8581EC8亻來lai swwi FOOD4F8681ED8亻侇yi wgxw NGYZ4F8781EE8亻侈chi wqqy NRRS4F88B3DE8亻侉kua wdfn NGBZ4F89D9A88亻侊guang wigq NKGR4F8A81EF8亻例li wgqj NARK4F8B C0FD8亻侌yin wync ODBZ4F8C81F08人侍shi wffy NBDS4F8D CACC8亻侎mi woy NUF4F8E81F18亻侏zhu wriy NMKO4F8F D9AA8亻侐xu wtlg NMLK4F9081F28亻侑you wdeg NGQ4F91D9A78亻侒an wpvg NWZM4F9281F38亻侓lu wvfh NXBD4F9381F48亻侔mou wcrh NZMB4F94D9B08亻侕er wdmj NGL4F9581F58亻侖lun wgma ODAL4F9681F68人侗dong wmgk NLD4F97B6B18亻侘cha wpta NWMH4F9881F78亻侙chi waaf NHBI4F9981F88亻侚xun wqjg NRK4F9A81F98亻供gong wawy NEO4F9B B9A98亻侜zhou wtey NPY4F9C81FA8亻依yi wyey NSRH4F9D D2C08亻侞ru wvkg NZJ4F9E81FB8亻侟jian wdhb NGIY4F9F81FC8亻侠xia wguw NBUO4FA0CFC08亻価si wny NFJ4FA181FD8亻侢dai wgmf NALB4FA281FE8亻侣lv wkkg NJJ4FA3C2C28亻侤ta wftn NBAZ4FA482408亻侥yao watq NHGR4FA5BDC48亻侦zhen whmy NILO4FA6D5EC8亻侧ce wmjh NLKD4FA7B2E08亻侨qiao wtdj NMGN4FA8C7C88亻侩kuai wwfc NOBZ4FA9BFEB8亻侪chai wyjh NSND4FAA D9AD8亻侫ning wynv NSZM4FAB82418亻侬nong wpey NWRH4FAC D9AF8亻侭jin wnyu NXST4FAD82428亻侮wu wtxu NMZY4FAE CEEA9亻侯hou wntd NXMA4FAF BAEE9亻侰jiong wvtk NXJ4FB082439亻侱ting wkgg NJC4FB182449亻侲zhen wdfe NGH4FB282459亻侳zuo wwwf NOOB4FB382469亻侴chou wgnj ODEK4FB482479人侵qin wvpc NXWX4FB5C7D69亻侶lv wktk NJNJ4FB682489亻侷ju wnnk NXYJ4FB782499亻侸shu wgku NAJU4FB8824A9亻侹ting wtfp NYMB4FB9824B8亻侺shen wmwn NLSX4FBA824C9亻侻tuo wukq NUJR4FBB824D9亻侼bo wfpb NEWY4FBC824E9亻侽nan wlln NKYM4FBD824F9亻侾xiao wftb NBYA4FBE82509亻便bian wgjq NAKO4FBF B1E39亻俀tui wevg NPZM4FC082519亻俁yu wknd NJZG4FC182529亻係xi wtxi NMZ4FC282539亻促cu wkhy NJI4FC3B4D99亻俄e wtrt NMHM4FC4B6ED9亻俅qiu wfiy NDVS4FC5D9B49亻俆xu wwty NOMF4FC682549亻俇guang wqtg NQC4FC782559亻俈ku wtfk NMJ4FC882569亻俉wu wgkg NBXJ4FC982579亻俊jun wcwt NZOR4FCA BFA19亻俋yi wkcn NJYI4FCB82589亻俌fu wgey NFB4FCC82599亻俍liang wyve NSXO4FCD825A9亻俎zu wweg ODOL4FCE D9DE9人俏qiao wieg NKQ4FCF C7CE9亻俐li wtjh NMKD4FD0C0FE9亻俑yong wceh NXLD4FD1D9B89亻俒hun wpfq NWBR4FD2825B9亻俓ying wgva NHBI4FD3825C9亻俔xian whqn NLR4FD4825D9亻俕san wpsy NWF4FD5825E9亻俖pei wgik NGJ4FD6825F9亻俗su wwwk NOOJ4FD7CBD79亻俘fu webg NPYA4FD8B7FD9亻俙xi wqdh NOGL4FD982609亻俚li wjfg NKB4FDA D9B59亻俛mian wqkq NRJR4FDB82619亻俜ping wmgn NKAZ4FDC D9B79亻保bao wksy NJF4FDD B1A39亻俞yu wgej ODQK4FDE D3E19人俟si wctd NZMA4FDF D9B99亻俠xia wdww NGOO4FE082629亻信xin wyg NSVV4FE1D0C59亻俢xiu qtet NRPD4FE282638亻俣yu wkgd NJAG4FE3D9B69亻俤di wuxt NUYZ4FE482649亻俥ju wlh NFK4FE582659亻俦chou wdtf NCDS4FE6D9B19亻俧zhi wfny NBWZ4FE782669亻俨yan wgod NAKM4FE8D9B29亻俩liang wgmw NAOO4FE9C1A99亻俪li wgmy NALL4FEA D9B39亻俫lai wgoy NBKV4FEB82679亻俬si wtcy NMZS4FEC82689亻俭jian wwgi NOBV4FED BCF39亻修xiu whte NIRP4FEE D0DE9亻俯fu wywf NTND4FEF B8A910亻俰huo wtkg NMJ4FF0826910亻俱ju whwy NLO4FF1BEE310亻俲xiao wuql NSOY4FF2826A10亻俳pai wdjd NKC4FF3D9BD10亻俴jian waat NHHM4FF4826B10亻俵biao wgey NCRH4FF5826C10亻俶ti whhc NIKX4FF6826D10亻俷fei wecn NQYI4FF7826E10亻俸feng wdwh NCBI4FF8D9BA10亻俹ya wgjg NBZ4FF9826F10亻俺an wdjn NGKZ4FFA B0B310亻俻bei wtlg NRKI4FFB827010亻俼yu wyce NSZQ4FFC827110亻俽xin wrqw NPRO4FFD827210亻俾bi wrtf NNED4FFE D9C210亻俿hu wham NIH4FFF827310亻倀zheng wdey NCH5000827410亻倁zhi wtdk NMJ5001827510亻倂bing wydf NMAE5002827610亻倃jiu wthk NRIJ5003827710亻倄yao wqde NOGQ5004827810亻倅zu wywf NSOE5005827910亻倆liang wgmy NAOO5006827A10亻倇wan wpqb NWRY5007827B10亻倈lie wgoy NFOO5008827C10亻倉chuang wgvk ODXJ5009827D10人倊zong wwcn NOZW500A827E10亻個ge wldg NJEJ500B828010亻倌guan wpnn NWY500C D9C410亻倍bei wukg NSJ500D B1B610亻倎tian wmaw NLEO500E828110亻倏shu whtd NIGS500F D9BF10亻倐shu whto NIRU5010828210亻們men wun NXD5011828310亻倒dao wgcj NHKD5012B5B910亻倓tan wooy NUUO5013828410亻倔jue wnbm NXZZ5014BEF310亻倕zhui wtg NMEB5015828510亻倖xing wfuf NBUB5016828610亻倗ping weeg NQQ5017828710亻倘tang wimk NKLD5018CCC810亻候hou whnd NIXM5019BAF210亻倚yi wdsk NGAJ501A D2D010亻倛qi wadw NEC501B828810亻倜ti wmfk NLBJ501C D9C310亻倝gan fjwy EDEO501D828910人倞liang wyiy NSJK501E828A10亻借jie wajg NEK501F BDE810亻倠sui wwyg NNI5020828B10亻倡chang wjjg NKK5021B3AB10亻倢qie wgvh NAXI5022828C10亻倣fang wyty NSMO5023828D10亻値zhi wfhg NZEL5024828E10亻倥kong wpwa NWBI5025D9C510亻倦juan wudb NUYY5026BEEB10亻倧zong wpfi NWBK5027828F10亻倨ju wndg NXEJ5028D9C610亻倩qian wgeg NCQ5029D9BB10亻倪ni wvqn NNRD502A C4DF10亻倫lun wwga NOAL502B829010亻倬zhuo whjh NIKE502C D9BE10亻倭wo wtvg NMZM502D D9C110亻倮luo wjsy NKF502E D9C010亻倯song wswc NFOZ502F829110亻倰ling wfqt NBOR5030829210亻倱hun wjxx NKRR5031829310亻倲dong wgji NFK5032829410亻倳zi wgkh NDJX5033829510亻倴ben wdfa NGEE5034829610亻倵wu wgah NAHI5035829710亻倶ju whgw NLAO5036829810亻倷nai wdfi NGBK5037829910亻倸cai wesy NPF5038829A10亻倹jian wwgi NOJO5039829B10亻债zhai wgmy NCLO503A D5AE10亻倻ye wbbh NCY503B829C10亻值zhi wfhg NELC503C D6B510亻倽sha wwfk NOMI503D829D10亻倾qing wxdm NRGO503E C7E310亻倿qie wuvg NSZM503F829E10亻偀ying wamd NELG5040829F10亻偁cheng wemf NPLB504182A011亻偂qian wuej NUQK504282A111亻偃yan wajv NHKZ5043D9C811亻偄ruan wdmd NGGD504482A211亻偅zhong wtgf NMKB504582A311亻偆chun wdwj NCO504682A411亻假jia wnhc NXXX5047BCD911亻偈ji wjqn NKRY5048D9CA11亻偉wei whnh NXJM504982A511亻偊yu wtky NMIL504A82A611亻偋bing wnua NXUE504B82A711亻偌ruo wadk NEGJ504C D9BC10亻偍ti wjgh NKAI504D82A811亻偎wei wlge NKH504E D9CB11亻偏pian wyna NWLD504F C6AB11亻偐yan wuet NSMP505082A911亻偑feng wmtj NQI505182AA11亻偒tang wjgr NKRO505282AB11亻偓wo wngf NXHB505382AC11亻偔e wkkn NJBZ505482AD11亻偕xie wxxr NRRN5055D9C911亻偖che wftj NBM505682AE10亻偗sheng with NKML505782AF11亻偘kan wkkk NJJJ505882B011亻偙di wuph NSWL505982B111亻做zuo wdty NEJM505A D7F611亻偛cha wtfv NMNB505B82B211亻停ting wyps NSWA505C CDA311亻偝bei wuxe NTRQ505D82B311亻偞zha wans NEZF505E82B411亻偟huang wrgg NNC505F82B511亻偠yao wsvg NFZM506082B611亻偡zhan wadn NEZ506182B711亻偢zou wtoy NMUO506282B811亻偣yan wujg NSK506382B911亻偤you wusg NUFD506482BA11亻健jian wvfp NYXB5065BDA110亻偦xu wnhe NXIQ506682BB11亻偧zha wdqq NGRR506782BC11亻偨ci whxs NIRF506882BD12亻偩fu wqmy NRLO506982BE11亻偪fu gklp NAJK506A82BF11亻偫zhi wtff NOBD506B82C011亻偬zong wqrn NRSW506C D9CC11亻偭mian wdmd NGJK506D82C111亻偮ji wkbg NJCE506E82C211亻偯yi wyey NSJR506F82C311亻偰xie wdhd NCYG507082C411亻偱xun wrfh NPEL507182C511亻偲si wlny NKWZ507282C611亻偳duan wmdj NLGL507382C711亻側zhai wmjh NLKD507482C811亻偵zhen whmy NILO507582C911亻偶ou wjmy NKLZ5076C5BC11亻偷tou wwgj NOQK5077CDB511亻偸tou wwgb NOQZ507882CA11亻偹bei whtl NIRK507982CB11亻偺zan wtwj NRIK507A82CC11亻偻lv wovg NUZM507B D9CD11亻偼qie whvh NIXI507C82CD11亻偽wei wyto NUYU507D82CE11亻偾fen wfam NEEL507E D9C711亻偿chang wipc NKBZ507F B3A511亻傀kui wrqc NNJ5080BFFE11亻傁sou wvhc NNXS508182CF11亻傂zhi wdhm NPIH508282D012亻傃su wgxi NCZ508382D112亻傄xia wduh NGUL508482D212亻傅fu wgef NFDS5085B8B512亻傆yuan wdri NGNK508682D312亻傇rong wabg NECE508782D411亻傈li wssy NFF5088C0FC12亻傉nu wdff NGDS508982D512亻傊yun wkmy NJLO508A82D612亻傋jiang wagf NELB508B82D712亻傌ma wcy NCU508C82D812亻傍bang wupy NSWS508D B0F812亻傎dian wfhw NELO508E82D912亻傏tang syvk NTXJ508F82DA12亻傐hao wymk NSJL509082DB12亻傑jie wqas NRMF509182DC12亻傒xi wexd NPZG509282DD12亻傓shan wynn NWYY509382DE12亻傔qian wuvo NUXK509482DF12亻傕que wpwg NWNI509582E012亻傖chen wwbn NOXJ509682E112亻傗chu wyxl NSZK509782E212亻傘san wwwf ODOE509882E312人備bei wade NEML509982E412亻傚xiao wuqt NSOM509A82E512亻傛yong wpwk NWOJ509B82E612亻傜yao werm NPEZ509C82E712亻傝tan wjng NKYY509D82E812亻傞suo wuda NUBI509E82E911亻傟yang wwcn NOYY509F82EA12亻傠fa wyfy NSDS50A082EB12亻傡bing wuug NSSU50A182EC12亻傢xiang wpey NWGQ50A282ED12亻傣dai wdwi NCKV50A3B4F612亻傤zai wfal NEHE50A482EE12亻傥tang wipq NKJR50A5D9CE12亻傦gu wmeg NLW50A682EF11亻傧bin wprw NWPO50A7D9CF12亻储chu wyfj NSBM50A8B4A212亻傩nuo wcwy NXNI50A9D9D012亻傪san wcce NZOP50AA82F013亻傫lei wlxi NKZ50AB82F113亻催cui wmwy NLNI50AC B4DF13亻傭yong wdvh NTXL50AD82F213亻傮zao wgmj NEKK50AE82F313亻傯zong wqrn NNRW50AF82F413亻傰peng wmee NLQQ50B082F513亻傱song wtwh NOOI50B182F613亻傲ao wgqt NCYM50B2B0C112亻傳zhuan wfny NFDS50B382F713亻傴yu wakk NHJJ50B482F813亻債zhai wgmy NCLO50B582F913亻傶zu wdht NHAK50B682FA13亻傷shang wtjr NMRO50B782FB13亻傸chuang wdqq NGOO50B882FC13亻傹jing wujq NSKR50B982FD13亻傺chi wwfi NRBK50BA D9D113亻傻sha wtlt NNOR50BB C9B513亻傼han wakw NEBO50BC82FE13亻傽zhang wujh NSKE50BD834013亻傾qing wxdm NRGO50BE834113亻傿yin whgo NAZU50BF834213亻僀di waqh NEWL50C0834313亻僁xie wton NPWZ50C1834413亻僂lou wlfv NKZM50C2834513亻僃bei waqe NERL50C3834612亻僄piao wsfi NFBK50C4834713亻僅jin wakg NEJC50C5834813亻僆lian wlph NWFK50C6834912亻僇lu wnwe NYOP50C7834A13亻僈man wjlc NKLX50C8834B13亻僉qian wgif ODOO50C9834C13人僊xian wsdn NFGY50CA834D14亻僋tan wwgm NOXL50CB834E13亻僌ying wlty NFMO50CC834F13亻働dong wtgl NMBY50CD835013亻僎zun rnnw NYEO50CE835114亻像xiang wqje NRJG50CF CFF113亻僐shan wudk NUUJ50D0835214亻僑qiao wtdk NMJL50D1835314亻僒jiong wpwk NWXJ50D2835414亻僓tui wkhm NJAL50D3835514亻僔zun wusf NUFD50D4835614亻僕pu wogy NKUC50D5835714亻僖xi wfkk NBUJ50D6D9D214亻僗lao wool NUWY50D7835814亻僘chang wimt NKLM50D8835914亻僙guang wamw NEKO50D9835A13亻僚liao wdui NGKK50DA C1C514亻僛qi wadw NERO50DB835B14亻僜teng teng NXJU50DC835C14亻僝zhuan wnbb NXYY50DD835D14亻僞wei weto NPYU50DE835E14亻僟ji wxxt NZHO50DF835F14亻僠bo wtol NPKI50E0836014亻僡hui wgjn NFWZ50E1836114亻僢chun weph NPRM50E2836214亻僣tie wfwj NBOK50E3836314亻僤shan wkkf NJKE50E4836414亻僥yao watq NBBG50E5836514亻僦jiu wyin NSKG50E6D9D614亻僧seng wulj NULK50E7C9AE14亻僨fen wfam NEEL50E8836614亻僩xian wueg NXQ50E9836714亻僪yu wcbk NXML50EA836814亻僫e wghn NBWZ50EB836914亻僬jiao wwyo NNUO50EC D9D514亻僭jian waqj NHRK50ED D9D414亻僮tong wujf NSKB50EE D9D714亻僯lin woqh NURM50EF836A14亻僰bo gmiw FLLO50F0836B14人僱gu wtny NWNI50F1836C14亻僲xian wsqh NFRM50F2836D14亻僳su wsoy NFUF50F3CBDB14亻僴xian wujg NXK50F4836E14亻僵jiang wglg NCKK50F5BDA915亻僶min wnng NWX50F6836F14亻僷ye waas NEZF50F7837014亻僸jin wssi NFFB50F8837115亻價qia wsmy NFLO50F9837215亻僺qiao wkks NJJF50FA837315亻僻pi wnku NXJS50FB C6A715亻僼feng wmau NKJU50FC837415亻僽zhou wton NMUW50FD837515亻僾ai wept NPWR50FE837615亻僿sai wpff NWOB50FF837715亻儀yi wugt NUMH5100837815亻儁jun wwym NNIY5101837914亻儂nong wmae NKKG5102837A15亻儃tan wylg NSKA5103837B15亻億yi wujn NSKW5104837C15亻儅dang wipl NKJK5105837D15亻儆jing waqt NEJM5106D9D314亻儇xuan wlge NLJR5107D9D815亻儈kuai wwfc NOLK5108837E15亻儉jian wwgi NOOO5109838015亻儊chu wssh NFXI510A838115亻儋dan wqdy NROS510B D9D915亻儌jiao wryt NNSM510C838215亻儍sha wtlt NOOR510D838315亻儎zai wfal NEFK510E838415亻儏can whqo NIXU510F838515亻儐bin wpgm NWKL5110838616亻儑an wjxo NKZU5111838716亻儒ru wfdj NFGL5112C8E516亻儓tai wfkf NBWH5113838816亻儔dao wdtf NBJD5114838916亻儕chai wyuh NSRN5115838A16亻儖lan wahl NHML5116838B16亻儗yi wxth NRXI5117838C16亻儘jin wvhl NXUL5118838D16亻儙qian wkhp NWAY5119838E15亻儚meng walq NEWR511A838F15亻儛wu wrlh NMRM511B839016亻儜ning wpns NWLA511C839116亻儝qiong woos NUWF511D839216亻儞ni wgiq NAOO511E839316亻償chang wipm NKJL511F839417亻儠lie wvln NZOZ5120839517亻儡lei wlll NKKK5121C0DC17亻儢lv whan NIKW5122839617亻儣kuang wyaw NTG5123839716亻儤bao wjai NKOK5124839817亻儥yu wflm NBLL5125839917亻儦biao wyno NTUO5126839A17亻儧zan wfwm NBOL5127839B17亻儨zhi wrrm NPPL5128839C17亻儩si wmjr NLRO5129839D17亻優you wdet NAWR512A839E17亻儫hao wype NSWG512B839F16亻儬qing wgeq NCQL512C83A017亻儭qin wusq NSFL512D83A118亻儮li wdth NGMI512E83A218亻儯teng teng NUCU512F83A318亻儰wei wayo NEYU513083A417亻儱long wued NSI513183A519亻儲chu wyfj NSBM513283A617亻儳chan wqky NRRS513383A719亻儴xiang wyke NSER513483A819亻儵tiao whto NIBU513583A918亻儶xie wmwk NLNL513683AA20亻儷li wgmx NALT513783AB21亻儸luo wlxy NLZN513883AC21亻儹zan wtfm NMRL513983AD21亻儺nuo waky NEON513A83AE21亻儻tang wipo NKBU513B83AF22亻儼yan wkkt NJCM513C83B021亻儽luo wlli NKKZ513D83B123亻儾nang wgke NAER513E83B224亻儿er qtn RD513F B6F92儿兀wu gqv GR5140D8A33儿允yun cqb ZSRD5141D4CA4儿厶兂zan aqv HRD514283B34儿元yuan fqb BDRD5143D4AA4儿二兄xiong kqb JRD5144D0D65儿口充chong ycqb SZRD5145B3E46儿亠兆zhao iqv VRD5146D5D76儿丿兇xiong qbqb OSZR514783B46兒凵先xian tfqb MBRD5148CFC86儿光guang iqb KOGR5149B9E26儿兊rui wcqb OZRD514A83B56儿克ke dqb EDJR514B BFCB7十儿兌rui ukqb OJRD514C83B67儿八免mian qkqb RJRD514D C3E27刀儿兎tu qkqy MJRS514E83B77儿兏chang dhqb GGIG514F83B87儿厂児ni hjqb IKRD515083B97儿兑dui ukqb UDJR5151B6D27儿丷兒ni vqb NBRD515283BA8兒兓jin aqaq HRHR515383BB8儿兔tu qkqy RJRS5154CDC38儿刀兕si mmgq IYAR5155D9EE7儿兖yan ucqb SOZR5156D9F08亠儿兗yan ukqb SOJR515783BC9亠儿兘shi fqck BDZJ515883BD9儿兙shike dqfk EDRE515983BE9兒党dang ipkq KOJR515A B5B310儿小兛qianke dqtf EDRM515B83BF10兒兜dou qrnq RHXR515C B6B511儿兝gongfen dqwv EDOY515D83C011兒兞haoke dqtn EDRM515E83C111兒兟shen tfqq MBMR515F83C212兒兠dou urxq TIRR516083C312儿兡baike dqdj EDAN516183C413兒兢jing dqdq EDJR5162BEA414儿兣gongli dqdf EDKB516383C516兒兤huang iqyw KOGT516483C617儿入ru tyi ODA5165C8EB2入兦wu ntyi ZODA516683C73入內rui mtyi LDOD516783C84入全quan wgf ODC5168C8AB6入兩liang gmhw ALOO516983C98一兪yu wgeb ODQZ516A83CA9入八ba wty OA516B B0CB2八公gong wcu OZS516C B9AB4八六liu uygy SOVV516D C1F94八兮xi wgnb OAZ516E D9E24八兯han ubf UDY516F83CB4丷兰lan uff UABD5170C0BC5丷共gong awu EAO5171B9B26八兲tian gwu COVV517283CC6八关guan udu UAGD5173B9D86丷兴xing iwu VDAO5174D0CB6八兵bing rgwu PDAO5175B1F87八其qi adwu EC5176C6E48八具ju hwu LCO5177BEDF8八典dian mawu LDEO5178B5E48八兹zi uxxu UAZZ5179D7C89丷兺ppun ppun OYJR517A83CD9八养yang udyj UCND517B D1F89丷兼jian uvou UAXK517C BCE610丷兽shou ulgk UDAJ517D CADE11丷兾ji ulaw UDEO517E83CE13丷兿yi urvc UABZ517F83CF13丷冀ji uxlw TIEO5180BCBD16八冁chan ujfe UDEH5181D9E618丷冂tong mhn LDAA5182D8E72冂冃mao mfd LDBD518383D04冂冄ran mfd LDBD518483D14冂内nei mwi LDOD5185C4DA4冂円yan lkmi LDIA518683D24冂冇mao dmb GDLD518783D34冂冈gang mqi LDOS5188B8D44冂冉ran mfd LDB5189C8BD5冂冊zha mmgd LDE518A83D45冂冋jiong mkd LDJ518B83D55冂册ce mmgd QQA518C B2E15丿再zai gmfd ALB518D D4D96冂冎gua mnmv LDLD518E83D65冂冏jiong mqkd LDOJ518F83D77冂冐mao jef KQVV519083D88冂冑zhou mef KIAQ519183D99冂冒mao jhf KLVV5192C3B09冂冓gou agmf EBLB519383DA10冂冔xu jkgf KJAD519483DB10冂冕mian jqkq KRJR5195C3E111冂冖ping pyn WW5196DAA22冖冗rong pmb WWQD5197C8DF4冖冘you pqv WWRD519883DC4冖写xie pgng WWZA5199D0B45冖冚kan pmj WWLL519A83DD5冖军jun plj WWHE519B BEFC6冖农nong pei WWRH519C C5A96冖丶冝yi pegf WWLC519D83DE7冖丶冞mi pou WWUF519E83DF8冖冟shi prxb WWNR519F83E09冖冠guan pfqf WWRD51A0B9DA9冖冡meng pgei WWAG51A183E110冖冢zhong peyu WWGS51A2DAA310冖冣ju pbci WWCX51A383E210冖冤yuan pqky WWRS51A4D4A910冖冥ming pjuu WWSO51A5DAA410冖冦kou pfqc WWIX51A683E310冖冧min pssu WWFF51A783E410冖冨fu pgkl WWJK51A883E511冖冩xie pvqo WWRU51A983E614冖冪mi pajh WWGL51AA83E715冖冫liang uyg TD51AB D9FB2冫冬dong tuu RSTD51AC B6AC5冫夂冭tai duu GDTD51AD83E85冫冮gang uag TDBI51AE83E95冫冯feng ucg TDX51AF B7EB5冫冰bing uiy TDKV51B0B1F96冫冱hu ugxg TDBZ51B1D9FC6冫冲chong ukhh TDJI51B2B3E56冫决jue unwy TDXG51B3BEF66冫冴hu uaht TDHI51B483EA6冫况kuang ukqn TDJR51B5BFF67冫冶ye uckg TDZJ51B6D2B17冫冷leng uwyc TDOW51B7C0E47冫冸pan uufh TDUB51B883EB7冫冹fu udcy TDXS51B983EC7冫冺min unan TDYH51BA83ED7冫冻dong uaiy TDHK51BB B6B37冫冼xian utfq TDMR51BC D9FE8冫冽lie ugqj TDRK51BD D9FD8冫冾qia uwgk TDAJ51BE83EE8冫冿jian uvfh TDXB51BF83EF8冫净jing uqvh TDRX51C0BEBB8冫凁sou ugki TDFJ51C183F09冫凂mei uqkq TDJR51C283F19冫凃tu uwty TDOM51C383F29冫凄qi ugvv TDXZ51C4C6E010冫凅gu uxdg TDEJ51C583F310冫准zhun uwyg TDNI51C6D7BC10冫凇song iswc TDOZ51C7DAA110冫凈jing uevh TDPX51C883F410冫凉liang uyiy TDJK51C9C1B910冫凊qing ugeg TDCQ51CA83F510冫凋diao umfk TDBJ51CB B5F210冫凌ling ufwt TDOR51CC C1E810冫凍dong ugji TDFK51CD83F610冫凎gan uqg TDP51CE83F710冫减jian udgt TDAJ51CF BCF511冫凐yin usfg TDFB51D083F811冫凑cou udwd TDAG51D1B4D511冫凒ai umgu TDJU51D283F912冫凓li ussy TDFF51D383FA12冫凔cang uwgk TDXJ51D483FB12冫凕ming upju TDSO51D583FC12冫凖zhun uwyf TDNE51D683FD12冫凗cui umwy TDLN51D783FE13冫凘si uadr TDEP51D8844014冫凙duo ulff TDBU51D9844115冫凚jin ussi TDFB51DA844215冫凛lin uyli TDJB51DB C1DD 15冫凜lin uylt TDJM51DC844315冫凝ning uxth TDXI51DD C4FD16冫凞xi utao TDYU51DE844416冫凟du uflm TDLL51DF844517冫几ji mtn QD51E0BCB82几凡fan myi QDA51E1B7B23几凢fan tmv MQD51E284463几凣fan hmv IQD51E384473几凤feng mci QDXS51E4B7EF4几凥ju nmv XMQD51E584485几処chu tmv RSQD51E684495几凧zheng mmhk QDLI51E7844A5几凨feng mfci QDBZ51E8844B6几凩mu msi QDF51E9844C6几凪zhi mhd QDII51EA844D6几凫fu qynm RZQD51EB D9EC6几凬feng mgjd QDAK51EC844E7几凭ping wtfm NMBQ51ED C6BE8几凮feng mdjd QDAN51EE844F8几凯kai mnmn LLYQ51EF BFAD8几凰huang mrgd QDNC51F0BBCB11几凱kai mgkm LLUQ51F1845012幾凲gan muvo QDUX51F2845112几凳deng wgkm XSUQ51F3B5CA14几凴ping ucmn TDCQ51F4845214几凵shan bnh ZI51F5DBC92凵凶xiong qbk OSZI51F6D0D74凵凷kuai fbk BZI51F784535凵凸tu hgmg IAYA51F8CDB95凵丨凹ao mmgd IYXA51F9B0BC5凵出chu bmk ZIZI51FA B3F65凵击ji fmk BIZI51FB BBF75凵凼dang ibk KVZI51FC DBCA6凵函han bibk XKZI51FD BAAF8凵凾han bkcb YJXZ51FE84549凵凿zao ogub KUUZ51FF D4E412凵刀dao vnt YD5200B5B62刀刁diao ngd YAVV5201B5F32刀刂ce jhh KD5202D8D62刂刃ren vyi YDS5203C8D03刀刄ren lyi YDS520484553刀刅chuang vwi YDO520584564刀分fen wvb OYD5206B7D64刀切qie avn HDYD5207C7D04刀刈yi qjh OSKD5208D8D74刂刉ji tmjh MAYK520984575刂刊kan fjh AEKD520A BFAF5刂刋qian tdjh MGKD520B84585刂刌cun fjh DSKD520C84595刂刍chu qvf RXB520D DBBB5刀刎wen qrjh RYOK520E D8D86刂刏ji rnjh MYKD520F845A6刂刐dan myjh QSKD5210845B6刂刑xing gajh AEKD5211D0CC6刂划hua ajh HMKD5212BBAE6刂刓wan fqjh BDRK5213845C6刂刔jue nwjh XGKD5214845D6刂刕li vvvb YDYY5215845E6刀刖yue ejh QKD5216EBBE6刂列lie gqjh ARKD5217C1D06刂刘liu yjh SOKD5218C1F56刂则ze mjh LOKD5219D4F26刂刚gang mqjh LDKD521A B8D56刂创chuang wbjh ODYK521B B4B46刂刜fu xjjh YZNK521C845F7刂初chu puvn WTYD521D B3F57刀刞qu egjh LCKD521E84607刂刟diao vkjh YDJK521F84617刂删shan mmgj QQAK5220C9BE7刂刡min najh YYBK522184627刂刢ling wycj ODWK522284637刂刣zhong ckjh ZSJK522384647刂判pan udjh UBKD5224C5D07刂別bie kljh JYKD522584657刂刦jie fcjh BZKD522684667刂刧jie fcvn BZYD522784677刀刨pao qnjh RYKD5228C5D97刂利li tjh MFKD5229C0FB7刂刪shan mmgj LDEK522A84687刂别bie kljh JYKD522B B1F07刂刬chan gjh HMKD522C84697刂刭jing cajh XSBK522D D8D97刂刮gua tdjh MIKD522E B9CE8刂刯geng gjgj BDKK522F846A8刂到dao gcfj HBKD5230B5BD8刂刱chuang fjvw BDYO5231846B8刀刲kui ffjh BBKD5232846C8刂刳ku dfnj GDZK5233D8DA8刂刴duo esjh YMFK5234846D8刂刵er bjh CEKD5235846E8刂制zhi rmhj MBLK5236D6C68刂刷shua nmhj XMLK5237CBA28刂券quan udvb UBYD5238C8AF8刀刹cha qsjh OSFK5239C9B28刂刺ci gmij FLKD523A B4CC8刂刻ke yntj SZOK523B BFCC8刂刼jie fcln BZYS523C846F8刀刽gui wfcj ODZK523D B9F48刂刾ci guwj BDUK523E84708刂刿gui mqjh LLRK523F D8DB8刂剀kai mnjh LLYK5240D8DC8刂剁duo msjh QDFK5241B6E78刂剂ji yjjh SONK5242BCC18刂剃ti uxhj UDYK5243CCEA9刂剄jing cajh HDBK524484719刂剅dou gkuj AJUK524584729刂剆luo yvcj SXKD524684738刂則ze mjh LOKD524784749刂剈yuan kejh JQKD524884759刂剉cuo wwfj ODBK524984769刂削xue iejh KOQK524A CFF79刂剋kei dqjk EDRK524B84779刂剌la gkij FJKD524C D8DD9刂前qian uejj UAQK524D C7B09刂剎sha qsjh OSSK524E84789刂剏chuang uavy UAYS524F84799刀剐gua kmwj JLOK5250B9D09刂剑jian wgij ODVK5251BDA39刂剒cuo ajjh EAKK5252847A10刂剓li tqtv MFMY5253847B10刀剔ti jqrj KROK5254CCDE10刂剕fei djdj KCKD5255847C10刂剖pou ukjh SUJK5256C6CA10刂剗chan ggjh HMHK5257847D10刂剘qi adwj ECKD5258847E10刂剙chuang uavw UAYO5259848010刀剚zi gkvj DJXK525A848110刂剛gang mumj LDKD525B848210刂剜wan pqbj WDYK525C D8E010刂剝pu vijh ZMKK525D848310刂剞ji dskj GDJK525E D8DE10刂剟duo cccj XSXK525F848410刂剠qing yijh SJKK5260848510刂剡yan oojh UOUK5261D8DF10刂剢zhuo eyjh GQSK5262848610刂剣jian wgkj ODOK5263848710刂剤ji yjfj SONK5264848810刂剥bao vijh XBKK5265B0FE10刂剦yan djnj GDZK5266848910刂剧ju ndjh XMJK5267BEE710刂剨huo dhdj CIGK5268848A11刂剩sheng tuxj MFRK5269CAA312刂剪jian uejv UAKY526A BCF411刀剫duo yacj TGXK526B848B11刂剬zhi mdmj LLGK526C848C11刂剭wu ngcj XMHK526D848D11刂剮gua kmwj LJKD526E848E10刂副fu gklj AJKK526F B8B111刂剰sheng tgaj MFEK5270848F11刂剱jian qgky ODYS5271849011刀割ge pdhj WDJK5272B8EE12刂剳zha awgj EOJK5273849111刂剴kai mgkj LLUK5274849212刂創qiang wgvj ODJK5275849312刂剶chuan xejh ZMGK5276849411刂剷chan ydtj SUMK5277849513刂剸zhuan gjhj FKDK5278849613刂剹lu nwej YTPK5279849713刂剺li fidv BDGY527A849813刀剻peng meej LLQK527B849913刂剼shan cccj ZSPK527C849A13刂剽piao sfij FJBK527D D8E213刂剾kou akkj HJJK527E849B13刂剿jiao vjsj ZDFK527F BDCB13刂劀gua cbtj XSLK5280849C14刂劁qiao wyoj NIUK5281D8E414刂劂jue dubj GGRK5282D8E314刂劃hua vflj XBAK5283849D14刂劄zha twgj MOJK5284849E14刂劅zhuo lqjj LKIK5285849F15刂劆lian qyuo TGXK528684A015刂劇ju haej IHGK528784A115刂劈pi nkuv XMSY5288C5FC15刀劉liu qyvj RHPK528984A215刂劊gui wfcj ODKK528A84A315刂劋jiao kksj JJFK528B84A415刂劌gui hdgj IIKK528C84A515刂劍jian wgkj ODOK528D84A615刂劎jian wgkv ODOY528E84A715刀劏tong ipkj KOKK528F84A815刂劐huo awyj ENXK5290D8E515刂劑ji yjjh SYNK529184A916刂劒jian wgky ODYS529284AA16刀劓yi thlj NLNK5293D8E616刂劔jian wgky ODYS529484AB16刀劕zhi rrmj PDLK529584AC17刂。
clgetplatformids returned unknown error code
您遇到的问题与OpenCL环境的配置有关。
clGetPlatformIDs()函数返回的错误代码-1001对应于状态宏CL_PLATFORM_NOT_FOUND_KHR,这通常意味着系统上没有找到可用的OpenCL平台。
以下是可能的解决方案:
安装OpenCL驱动和库:确保您的系统上安装了正确的OpenCL驱动和库。
这通常包括与您的GPU或CPU兼容的驱动和库。
检查环境变量:确保OpenCL相关的环境变量(如PATH或LD_LIBRARY_PATH)已正确设置,以便系统可以找到OpenCL库。
检查设备支持:使用clinfo工具检查系统上的OpenCL设备是否被正确识别。
确保您的硬件支持OpenCL,并且驱动程序已正确安装。
更新驱动程序和固件:确保您的GPU驱动程序和固件是最新的,有时候这可以解决兼容性问题。
检查文档和社区支持:查阅特定硬件或软件的官方文档,或在相关社区和论坛中搜索类似的问题。
可能有人遇到了相同的问题,并找到了解决方案。
联系技术支持:如果上述方法都不能解决问题,可能需要联系您的硬件供应商或OpenCL软件供应商的技术支持寻求帮助。
在处理此类问题时,请注意查阅相关的技术文档和社区论坛,以获得最准确和最新的解决方案。
CP750 Software Release Notes_1.2.8.3

CP750 Release NotesEmbedded FirmwareSetup Software(jump to )CP750 Embedded Firmware Version 1.2.8.3Changes since 1.2.8.2Fix for LCDCCP-400: the Aux output will be muted if any input other than Digital 1 is selectedKnown IssuesMeters on Front Panel Portal can get out of sync and/or out of place. Sometimes they freeze and at times they show old data or data in the wrong channels. This does not affect the audio output of the unit.Generated tone levels in alignment mode are 3dB higher than generated pink noise levelsThe aux output will not mute when PCM Mute is enabled for the current input and the current input format is PCMSwitching to the Non-sync input while configured for format 71 (Mono C), can sometimes result in distorted audio output. The CP750 must be restarted.CP750 Embedded Firmware Version 1.2.8.2Changes since 1.2.7.3HiN/ViN routing is now configurable via the Setup Application (version 1.3.2.0 or later) between the following two options: Route Digital 1 input pair 7/8 to Aux 7/8 output (the default option)Route Digital 2 input to Aux 7/8 output. In this mode, the Digital 2 input is not selectable. This option provides the same behavioras the 1.2.7.3 release.When routing Digital 2 to Aux 7/8, the Digital 2 GPI will activate Dolby 7.1 decode mode (since the Digital 2 input is not available in this mode)The aux output now mutes when the system is muted (e.g. using the front-panel mute button)Fix for LCDCCP-365: in rotating pink noise mode, Bsl and Bsr levels are 3dB too high when the system is configured for 7.1 operation.General stability improvementsKnown IssuesMeters on Front Panel Portal can get out of sync and/or out of place. Sometimes they freeze and at times they show old data or data in the wrong channels. This does not affect the audio output of the unit.Generated tone levels in alignment mode are 3dB higher than generated pink noise levelsThe aux output will not mute when PCM Mute is enabled for the current input and the current input format is PCMSwitching to the Non-sync input while configured for format 71 (Mono C), can sometimes result in distorted audio output. The CP750 must be restarted.CP750 Embedded Firmware Version 1.2.7.3Changes since 1.2.6.7CP750 HiN/ViN ModificationsAdd support for 10 channels (7.1 surround plus HI/VI-N)Digital 2 input is now connected directly to the Aux 7/8 outputThe user can no longer select channels 7/8 of the Digital 1 input to go over RCADelay block max is now 170msIt is still possible for the user to select DIG2 in the system setup software, but if they do, the system will mute the 8-channel analogoutput.Previously channels 7/8 from the Digital 1 input went to the RCA outputs as the HiN/ViN. That is no longer possible with the update.The user will connect the 8-channel audio from the server to the Digital 1 input and the HI/VI-N channels (11/12) to the Digital 2 input. The Digital 1 input drives the MAIN AUDIO Output, and the Digital 2 input drives the AUX OUT Output.After this modification, it is no longer possible to select DIG2 for the main output channels 1&2. If the user selects DIG2 in the system setup software, the hardware will mute the 8-channel analog output. The user can still select DIG3 or DIG4. DIG3 and DIG4 will come out of channel1&2 of the 8-channel analog outputCP750 Embedded Firmware Version 1.2.6.7Improvements since 1.2.6.5Fix issue that prevented remote access via the network port on units with the updated SDRAM part. This issue also affected units with the original part in rare instances.Add support for the Holtek HT1650 Front Panel Portal LCD controllerKnown IssuesMeters on Front Panel Portal can get out of sync and/or out of place. Sometimes they freeze and at times they show old data or data in the wrong channels. This does not affect the audio output of the unit.CP750 Embedded Firmware Version 1.2.6.5Improvements since 1.2.5.361559Add Dolby Surround 7.1 SupportChange rotating signal generator delay to 3s between channelsFix dialnorm status updateKnown IssuesMeters on Front Panel Portal can get out of sync and/or out of place. Sometimes they freeze and at times they show old data or data in the wrong channels. This does not affect the audio output of the unit.CP750 Embedded Firmware Version 1.2.5.361559Improvements since 1.2.4.170268Fix CP750 TECS connection loss issue from 1.2.4.170268.Change default brightness and contrast on the front panel LCD to 17.Change the default treble frequency bulk filter to 2KHz.Fix a very rare audio bug found when switching channels on a Dish TV set top box being used as an input source.Fix the noise on Aux 7/8 Output when global delay is set to another other than zero.Fix issue where Prologic Subwoofer cut applied during NonSync format 61 or 75 would remain applied after switching to a new input.This bug could result in a LFE signal at -9dB.Fix issue where Prologic Subwoofer cut as set in Alignment Mode would always be fixed at -9dB when doing a Prologic decode even witha correct cut applied in Alignment Mode.Known IssuesMeters on Front Panel Portal can get out of sync and/or out of place. Sometimes they freeze and at times they show old data or data in the wrong channels. This does not affect the audio output of the unit.CP750 Embedded Firmware Version 1.2.4.170268Improvements since 1.2.3.167693Surround EX meta data bug fixed: In previous version AC-3 stream with no extended meta data will be Surround EX decoded if previous AC-3 stream had extended meta data with Surround EX enabled.SNMP functionality improved.Support for out-of-phase clocks on 4xAES input.Known IssuesCP750 will loose TECS connection (cues from the Show Manager) after a long period (several days) of TECS activity. This shows up particularly when the D-Cinema equipment rack is rebooted nightly while the audio rack (containing the CP750) is left running. A reboot of the CP750 will resolve the symptom.Meters on Front Panel Portal can get out of sync and/or out of place. Sometimes they freeze and at times they show old data or data in the wrong channels. This does not affect the audio output of the unit.CP750 Embedded Firmware Version 1.2.3.167693Improvements since 1.2.2.164601Channel Swap bug fixed.Meter drop out bug fixed.Pro Logic II stream switch audio artifact fixed.Can now restart a failed upgrade without rebooting the CP750.The Mute Tally on the automation now reports correct mute state after boot.AC-3 3/0L streams now report as 3/0L instead of 3/0.Ethernet LEDs show correct status.CP750 Embedded Firmware Version 1.2.2.164601Known IssuesSwitching to a stream that will be Pro Logic II decoded can result in an audible audio artifact. on the screen channels. Improvements since 1.2.0.1619187/8 Aux Ouput now works.Noise Gating now available.USB reliability greatly enhanced.CP750 Embedded Firmware Version 1.2.0.161918Known IssuesSwitching to a PCM stream that will be Pro Logic II decoded results in an audible audio artifact on the screen channels.The Aux 7/8 RCA Output is not reliable and could produce audio artifacts.No power on indication until 20 seconds after power is applied.Input switching takes about 2 seconds. The front panel will always indicate the input that will be applied.Front Panel Portal does not indicate Firmware Update progress.Improvements since 1.1.0.155183SNMP v2 is now available.USB connection to CP750 Setup Software and Dolby Software Update is now available.Surround EX decode is now available.Pro Logic II decode is now available.System unmutes upon press of an input button.Mic input can be steered to Center or Left/Right Surround.Support Setup Software direct Ethernet connections from a laptop (or any computer) which is using an active WiFi connection at the same time.Rotating signal generation now available.EQ Assist now available.Support now available for traditional Nonsync formats: 60, 61, 70, 71, 73, 74, 75.Stream and decode information displayed on the Front Panel Portal is now complete.Output level trims default to +7.4dB which provides a 300mV pink noise signal on the Main Audio Outputs.The SPL ballistics are slower and the decimal value is now available.Expert mode and ASCII control selectable +3dB surround boost now available. This will not re-boost surrounds that have already been boosted by +3dB due to consumer content mix prediction.CP750 Embedded Firmware Version 1.1.0.155183Known IssuesNo power on indication until 9 seconds after power is applied.Dolby Digital decode results in slow meter updates.Meters on Front Panel Portal can get out of sync and/or out of place. Sometimes they freeze and at times they show old data or data in the wrong channels. This does not affect the audio output of the unit.Input switching takes about 1 second. This includes stream switching on the same input (Dolby Digital -> PCM or PCM -> Dolby Digital).Setting the real time clock (RTC) via ASCII Control is unreliable. Note that the clock has been set at the factory.Front Panel Portal does not indicate Firmware Update progress.Improvements since 1.1.0.154336Audio output is muted until all is stable to prevent noise on power-up.Unimplemented FeaturesSNMPUSB connectivityPro Logic IIEQ Assist7/8 Aux Output global delay and mute.CP750 Embedded Firmware Version 1.1.0.154336Known IssuesNo power on indication until 9 seconds after power is applied.Dolby Digital decode results in slow meter updates.Meters on Front Panel Portal can get out of sync and/or out of place. Sometimes they freeze and at times they show old data or data in the wrong channels. This does not affect the audio output of the unit.Input switching takes about 1 second. This includes stream switching on the same input (Dolby Digital -> PCM or PCM -> Dolby Digital).Setting the real time clock (RTC) via ASCII Control is unreliable. Note that the clock has been set at the factory.Front Panel Portal does not indicate Firmware Update progress.Unimplemented FeaturesSNMPUSB connectivityPro Logic IIEQ Assist7/8 Aux Output global delay and mute.Setup Software+Setup SoftwareSetup Software Version 1.3.2.1Improvements since 1.3.2.0The installer will warn users if it was not run as Administrator - not running as Administrator will prevent successful USB driver installation.Setup Software Version 1.3.2.0Improvements since 1.3.1.0Add HiN/ViN routing controls to the General Settings tab (see the 1.2.8.2 firmware release notes for more detail)Adding "--monitoronly" to the "CP750 Setup" shortcut will cause the application to display only the monitor panel. All other settings will be unavailable.Fix issue that caused the "Save" button on the Log tab to be disabled when connected via USBKnown IssuesChanging Windows Theme can cause GUI corruption. A restart of the Setup Software will correct the corruption.EQ Assist can inadvertently lower all EQ bands to zero. Flatten and re-running EQ Assist should resolve the issue.Setup Software Version 1.3.1.0Improvements since 1.2.4.3Add support for 64-bit Windows Vista and Windows 7Add support for loading settings files saved with ISO/IEC 8859-1 (Western European) character encodingKnown IssuesChanging Windows Theme can cause GUI corruption. A restart of the Setup Software will correct the corruption.EQ Assist can inadvertently lower all EQ bands to zero. Flatten and re-running EQ Assist should resolve the issue.Setup Software Version 1.2.4.3Improvements since 1.2.3.167304Add support for Dolby Surround 7.1The b-chain alignment X-Curve now falls at 6db/Octave above 10KHzAdd graphic EQ copy and pasteEnable line wrap in comment field of the profile tabPrevent the first mouse click (focus grab) from moving the EQ slidersAdd vertical scroll bar on the main window when all components cannot be displayed due to window sizeFix a bug in the Continue button on the LFE alignment screenKnown IssuesChanging Windows Theme can cause GUI corruption. A restart of the Setup Software will correct the corruption.EQ Assist can inadvertently lower all EQ bands to zero. Flatten and re-running EQ Assist should resolve the issue.Setup Software Version 1.2.3.167304Known IssuesChanging Windows Theme can cause GUI corruption. A restart of the Setup Software will correct the corruption.EQ Assist can inadvertently lower all EQ bands to zero. Flatten and re-running EQ Assist should resolve the issue. Improvements since 1.2.2.164864Windows XP 64 bit and Windows Vista 64 bit support now included in a separate installer.Improved saved file handling.Setup Software Version 1.2.2.164864Known IssuesChanging Windows Theme can cause GUI corruption. A restart of the Setup Software will correct the corruption.EQ Assist can inadvertently lower all EQ bands to zero. Flatten and re-running EQ Assist should resolve the issue. Improvements since 1.2.0.161916Firmware Update now available as a Tab on the Setup Software. Note that using Dolby Software Update as a standalone application with the CP750 is still supported.SPL target levels now displayed on Room Levels page.Many look and feel improvements especially on Windows Vista.Log file now stored under <user dir>\Application Data\Dolby Laboratories Inc\CP750 on Windows.Correct many issues with loading parameters from a saved file.Setup Software Version 1.2.0.161916Known IssuesThe Action->Update Software menu item closes the Setup Software and launches the included Dolby Software Update with no progress indication. When that menu item is selected the Setup Software window will close and some time later (15 - 30 seconds) the DolbySoftware Update application will appear. The same thing happens when Dolby Software Update is then closed while returning to Setup Software but with a shorter duration.USB auto-connect can fail on Windows Vista. The user can use the Action->Connect to Local Device as a work around if needed.Changing Windows Theme can cause GUI corruption. A restart of the Setup Software will correct the corruption.EQ Assist can inadvertently lower all EQ bands to zero. Flatten and re-running EQ Assist should resolve the issue. Improvements since 1.1.0.156092Overall connection to the CP750 has been greatly enhanced.Dolby Installer package now available as an executable.USB connection to CP750 Setup Software and Dolby Software Update is now available.Surround EX decode is now available.Pro Logic II decode is now available.Mic input can be steered to Center or Left/Right Surround.Support Setup Software direct Ethernet connections from a laptop (or any computer) which is using an active WiFi connection at the same time.Rotating signal generation now available.EQ Assist now available.Support now available for traditional Nonsync formats: 60, 61, 70, 71, 73, 74, 75.The SPL ballistics are slower and the decimal value is now available.System time can now be set from the Network/Time Tab.The actual IP settings in use are now displayed on the Network/Time Tab.The layout has been improved to work well with Windows Vista.Improvements to GUI ease of use.Active EQ Slider now highlighted in green.Warning message displayed before entering Alignment Mode which will disrupt audio.Redesign the Bsl/Bsr and 7/8 Aux output controls to make the usage more clear.Setup Software no longer closes down between connection events. This makes user commanded (via the Action Menu)connection and disconnection events much smoother and faster.Hide the LFE EQ controls which a bypassable dialog if the system has not yet collected Center channel average RTA data.Redesign the LFE EQ frame to be more clear.Add a dialog to the Action -> Update Software... workflow to warn the user about the delay between Setup Software and DolbySoftware Update.Setup Software Version 1.1.0.156092Known IssuesUn-commanded disconnect can occur and is not always displayed in the connection bar (Setup Software will continue to indicateconnected). Close and rerun the Setup Software when this occurs.Always when the host PC sent into standby.Always when the Setup Software is left running for 24 or more hours.The meter display will show the same meter issues as is described for the Firmware.Flatten EQ on the Room Tune tab only flattens the 27 Band Graphic EQ. It does not affect LFE or Bulk EQ.The decimal value (tenths) on the SPL readout is always zero.The Action->Update Software menu item closes the Setup Software and launches the included Dolby Software Update with no progress indication. When that menu item is selected the Setup Software window will close and some time later (15 - 30 seconds) the Dolby Software Update application will appear. The same thing happens when Dolby Software Update is then closed while returning to Setup Software but with a shorter duration.If the computer running the Setup Software has multiple IP addresses (Ethernet and wireless for example), all controls may appear disabled / "greyed out". If this occurs, disconnect from any wireless networks and reconnect to the CP750.Improvements since 1.1.0.154338Saving settings to a file on the host computer disk has been fixed.The control layout has been optimized for 1024x768 displays.The left and right arrow keys can be used to navigate between EQ band slider controls on the Channel Tune alignment tab. Unimplemented FeaturesDolby InstallerUnzip the file into a new folder and double click on CP750Setup.exe.USB connectivityPro Logic II configuration support.EQ AssistSetup Software Version 1.1.0.154338Known IssuesCannot save settings to a file on host computer disk.Un-commanded disconnect can occur and is not always displayed in the connection bar (Setup Software will continue to indicateconnected). Close and rerun the Setup Software when this occurs.Always when the host PC sent into standby.Always when the Setup Software is left running for 24 or more hours.Screen layout will turn sidewise (monitor panel shows to the right of the control panel) when reconnecting to a live CP750. Close and rerun Setup Software when this occurs.The meter display will show the same meter issues as is described for the Firmware.Flatten EQ on the Room Tune tab only flattens the 27 Band Graphic EQ. It does not affect LFE or Bulk EQ.The decimal value (tenths) on the SPL readout is always zero.The Action->Update Software menu item closes the Setup Software and launches the included Dolby Software Update with no progress indication. When that menu item is selected the Setup Software window will close and some time later (15 - 30 seconds) the Dolby Software Update application will appear. The same thing happens when Dolby Software Update is then closed while returning to Setup Software but with a shorter duration.Unimplemented FeaturesDolby InstallerUnzip the file into a new folder and double click on CP750Setup.exe.USB connectivityPro Logic II configuration support.EQ Assist。
SPECpower_ssj2008-User_Guide_2009-04-01

User Guide SPECpower_ssj2008 V1.10Table of Contents1 Introduction (4)1.1 Preface (4)1.2 General Concepts (4)1.3 The SPECpower_ssj2008 Benchmark Suite (4)1.4 The Hardware Components (5)2 Installation and Setup of SPECpower_ssj2008 (6)2.1 Hardware Setup (6)Power Analyzer (6)2.2 Software Installation (7)Java Runtime Environment (JRE) Set-up (7)2.3 Network Setup (9)System Under Test (SUT) (9)System Under Test (SUT) (9)2.4 Running the JVM Director Remotely (10)The JVM Director Run Script (10)Remote JVM Director: SUT (10)Remote JVM Director: Controller System (10)Controller System (10)2.5 Trial Run of SPECpower_ssj2008 (11)Controller System (11)Start the Trial Run (12)System Under Test (SUT) (12)3 Running SPECpower_ssj2008 (17)Running SPEC_power in a multi-node configuration (17)Inventory of Operating System Services (18)Results 184 Operational Validity (19)5 Metric (19)5.1 SPECpower_ssj2008 Metric (19)6 Results Reports (19)6.1 Overview (19)6.2 The CSV file (20)CSV File Naming Convention (20)CSV File Format (20)6.3 The RAW File (22)Raw File Format (22)6.4 The Reporter (23)Running the Reporter Manually (23)6.5 The HTML File(s) (24)HTML File Naming Convention (24)Overall HTML Results File Format (24)6.6 The SSJ Results Files (25)The RAW Files (25)The LOG File (26)The RESULTS File (26)The TXT File (26)7 Visual Activity Monitor (VAM) (26)Global Settings (29)Screen Size and Location (29)Title Panel and Text (29)Chart Panel Example (30)Freeze Button Example (30)Colors 308 Performance Tuning (32)9 Submitting Results (33)1Introduction1.1PrefaceSPECpower_ssj2008 is a benchmark product developed by the Standard PerformanceEvaluation Corporation (SPEC), a non-profit group of computer vendors, system integrators, universities, research organizations, publishers, and consultants. It isdesigned to provide a view of a server system's power consumption running Java server applications.This practical guide is intended for people that wish to setup and run the SPECpower_ssj2008 benchmark in order to accurately measure the power consumptionof their server in relation to the server’s performance.Updates and the latest version of this User Guide can be found here: /power_ssj2008/docs/SPECpower_ssj2008-User_Guide.pdf.In order to submit SPECpower_ssj2008 results, the licensee must adhere to the rules contained in the Run and Reporting Rules (/power_ssj2008/docs/SPECpower_ssj2008-Run_Reporting_Rules.html) which is included in the benchmark kit.Be sure to read, understand and follow all the safety rules that come with your Power Analyzer and compute equipment1.2General Concepts1.3The SPECpower_ssj2008 Benchmark SuiteSPECpower_ssj2008 consists of three main software components:•Server Side Java (SSJ) – Workloado The SSJ-Workload is a Java program designed to exercise the CPU(s), caches, memory, the scalability of shared memory processors, JVM (JavaVirtual Machine) implementations, JIT (Just In Time) compilers, garbagecollection, and other aspects of the operating system of the SUT.o For more information on SSJ ->/power_ssj2008/docs/SPECpower_ssj2008-Design_ssj.pdf•Power and Temperature Daemon (PTDaemon)o The Power and Temperature Daemon is to offload the work of controlling a power analyzer or temperature sensor during measurement intervals to asystem other than the SUT.o For more information on PTDaemon ->/power_ssj2008/docs/SPECpower_ssj2008-Design_ptd.pdf•Control and Collect System (CCS), including the Visual Activity Monitor (VAM) o CCS is a multi-threaded Java application that controls and enables thecoordinated collection of data from multiple data sources such as aworkload running on a separate SUT (System Under Test), a poweranalyzer, and a temperature sensor.o VAM is a software package designed to display activity from one, two, orthree SUT’s simultaneously, in conjunction with the SPECpower_ssj2008benchmark.o For more information on CCS and VAM ->/power_ssj2008/docs/SPECpower_ssj2008-Design_ccs.pdf1.4The Hardware ComponentsThe following components work together to collect server power consumption and performance data by exercising the SUT with a predefined workload.The most basic SPECpower_ssj2008 test bed implementation consists of these four hardware devices:•Server Under Test (SUT)The SUT is the system that will be driven by the SSJ workload. The SUT’s performance and power consumption characteristics will be captured and measured by the benchmark.•Power AnalyzerThe power analyzer is used to measure and record the power consumed by the SUT. •Temperature SensorThe temperature sensor is used to capture the temperature of the environment where the SUT is being benchmarked.•Controller SystemThe controller system is a separate system that runs the CCS and Power and Temperature Daemon (PTD) portions of the SPECpower_ssj2008 benchmark suite.Figure 1.2-1 illustrates the architecture of a simple SPECpower_ssj2008 benchmark implementation.Figure 1.2-12Installation and Setup of SPECpower_ssj2008This section will go over the installation and setup procedures for a basic SPECpower_ssj2008 implementation consisting of:•one server under test•one power analyzer and one temperature sensoro The PTD can connect to and collect data from either a power analyzer or a temperature sensor, but never more than one device at a time per PTDinstance.•one benchmark controller system2.1Hardware Setup2.1.1.1Power & Temperature Daemon (PTDaemon)In this simple SPECpower_ssj2008 implementation, it is assumed that the PTD instance for the power analyzer and the PTD instance for the temperature sensor are residing locally on the controller server as illustrated in figure 1.3.3. By default, the run scripts for PTD will run the PTD executable in "dummy mode". Dummy Mode is a mode of operation for PTD in which it will return false power and temperature readings during the benchmark run. Like the SSJ and CCS modules of the SPECpower_ssj2008 benchmark, the PTD module also uses run scripts. Therefore, two concurrent instances of PTD must be run; one for communication with the power analyzer, and one for communication with the temperature sensor. These run scripts are recommended for starting the PTD modules.There is a run script for initializing an instance of PTD for a power analyzer named runpower.bat for Windows or runpower.sh for Unix. There is a run script for a temperature sensor named runtemp.bat for Windows or runtemp.sh for Unix. It should be noted that PTD also supports General Purpose Interface Bus (GPIB) connectivity.Modifications of these scripts are done the same way they are done for the SSJ and CCS run scripts. The variables that the user may be interested in modifying are as follows: •The model of power analyzer or temperature sensor to be used in the test bed implementation.The device model, for the temperature sensor or for the power analyzer, is specified with an integer value.To find out which integer value corresponds to the device being used within the test bed, Use the command prompt to change to the directory of the PTD executable, and run the PTD executable for your operating system without arguments.This will cause PTD to display a list of supported power and temperature devices, along with their corresponding integer values, and find and make note of the values that apply to the devices being used within the test bedThis will cause PTD to display a list of supported power and temperature devices, along with their corresponding integer values. Find and make note of the values that apply to the devices being used within the test bed.Power AnalyzerBefore selecting a power analyzer for the SPECpower_ssj2008 test bed, please consult the Power Analyzer Minimum Requirements.Please consult the manufacturer’s documentation for instructions that are specific to the exact analyzer used.1.Once you have correctly associated the Device number with the correspondinginteger values that apply to those devices2.Connect the communication interface of the power analyzer to the appropriateport of the controller server with a manufacturer-approved cable.3.Open runpower.bat for Windows or runpower.sh for Unix with a text editor, andlocate the set DEVICE= for the runpower script respectfully. Enter the correct device number for the power analyzer being used.o set DEVICE=8 (for Windows & Unix)4.Now enter the DEVICE_PORT that the PTD uses to communicate with Controllersystem.o set DEVICE_PORT=COM1 (for Windows)o set DEVICE_PORT=/dev/tty2 (for Unix)5.To verify what port the power meter is using you may left-click my computer,click Manage. Click Device Manager and then click Ports this should give you a list of all the ports attached to your computer at that time. Verify the port the power analyzer is connected to.6.Set power analyzer communication settings as required by the Hardware SetupGuide (/power_ssj2008/docs/SPECpower_ssj2008-Hardware_Setup_Guide.pdf).7.Connect the SUT’s AC power cord to the power receptacle provided by the poweranalyzer.2.1.2Temperature SensorBefore selecting a temperature sensor for the SPECpower_ssj2008 test bed, please consult the Temperature Sensor Minimum Requirements.The temperature sensing device must be secured 50mm from the center of the inlet for airflow of the equipment being benchmarked, please refer to SPECpower_ssj2008 Run and Reporting Rules.Please consult the manufacturer’s documentation for instructions that are specific to the exact sensor used.1.Place the temperature sensor in accordance with the rules outlined in thissection.2.Connect the temperature sensor’s communication interface to the appropriateport on the controller server with a manufacturer-approved cable.3.Open runtemp.bat for Windows or runtemp.sh for Unix with a text editor, andlocate the set DEVICE= for the runtemp script respectfully. Enter the correctdevice number for the temperature sensor being used.o set DEVICE=1001 (for Windows & Unix)4.Also locate the set DEVICE_PORT= for the runtemp script respectfully. Enter thecorrect port number used to connect the temperature sensor.o set DEVICE_PORT=USB (for Windows)o set DEVICE_PORT=/dev/tty1 (for Unix)5.To verify what port the temperature sensor is using you may left-click mycomputer, click Manage. Next click Device Manager and then click Ports this should give you a list of all the ports attached to your computer at that time.Find the port that the temperature sensor is connected to.2.2Software InstallationJava Runtime Environment (JRE) Set-upBefore proceeding it is the responsibility of the user to select a suitable Java RuntimeEnvironment (JRE) (version 1.5 or later) is installed on the SUT. There are a variety of JREs available from a number of different vendors.Also note: The JRE is the only auxiliary software that must be installed within thebenchmark environment with the SPECpower_ssj2008 benchmark suite. No additional database or web server components are required.The installation program is written in Java, and will therefore require a Java interpreter in order to run. To invoke the setup program:1.Change to the root directory of the installation CD.2.Call the command:java –jar setup.jar [options]The options to pass into the setup program are as follows:To run in GUI mode (for Windows), simply type:java -jar setup.jarTo run in CONSOLE mode, type:java -jar setup.jar -i consoleTo run in CONSOLE + SILENT mode (where the installer option panels are bypassed and the benchmark will be installed in the default install dir, /SPECpower_ssj2008 on Unix or <SYSTEM_DRIVE_ROOT>:\SPECpower_ssj2008 on Windows):java -jar setup.jar -i silentTo run in CONSOLE + SILENT mode with an install dir of the user’s choosing, for example, /power_ssj2008:java -jar setup.jar -i silent -DUSER_INSTALL_DIR=/power_ssj2008The exact location within the OS directory structure into which the SPECpower_ssj2008 suite is to be installed is subject to the user's discretion. The user must either add the path to the Java executable to the PATH environment variable (consult the documentation of the OS for instructions), or invoke the Java interpreter with the fully qualified path and filename.For example:C:\Java\AcmeSuperJava-v0.15\bin\java.exe -jar setup.jaror/usr/java/AcmeSuperJava-v0.15/bin/java –jar setup.jar –i consoleas appropriate to the OS being used.To define the environmental variables: Right-click My Computer, select Properties, Select the Advanced tab, select Environmental Variables, select PATH, and click edit. At the end of the list, place the path to the java.exe of the bin directory that the Java software was installed. IE: C:\Java\AcmeSuperJava-v0.15\bin\java.exe. Also add .JAR to the pathext.An easy way to test for this is simply to type java -fullversion from a command prompt (and from within a directory that does NOT contain the Java executable). If the Java executable is indeed specified in the PATH environment variable, then the output of this command should specify the version of the JRE currently installed on the SUT. If it instead returns an error, then the path to the Java executable is not correctly specified in the PATH environment variable.2.3Network SetupSystem Under Test (SUT)For a valid SPECpower_ssj2008 benchmark implementation, there is a set of physicalenvironment criteria that must be satisfied. Please consult the Run and Reporting Rules in order to ensure that the environment in which the benchmark is taking place meetsthe minimum requirements.Ensure that power is properly routed to the SUT through the power analyzer only.Please note: the SUT cannot receive power from any source other than that whichis provided by the power analyzer. For example, the other power supply/suppliesmay not be connected to any power source other than that which is provided by the power analyzer. Refer to Quick Start guideConnect the network interface of the SUT so that it will establish a TCP/IP connection with the controller server.Configure the operating system’s TCP/IP implementation such that the SUT is on the same subnet as the controller. Also disable the firewall for both systems to allow them to communicate through TCP/IP. Try Ping to see if the IP of the SUT to see if they can converse through TCP/IP. Consult the operating system’s documentation for specific instructions regarding this procedure. In consideration of the data sources that CCS will be connecting to, ensure that the controller server’s TCP/IP interface(s) is configured so that reliable TCP/IP communication can be established with all data sources.System Under Test (SUT)The SPECpower_ssj2008 software uses the Java interpreter to run, so the user must ensure that the java interpreter can be found by the benchmark. There are two ways to accomplish this:Add the fully qualified path of the Java executable to the run script. (Note that the user may also elect this method for the purpose of overriding the Java executable path that is specified in the PATH environment variable.)1.Change to the SSJ directory and open runssj.bat (for Windows) or runssj.sh(for Unix) with a text editor.2.For runssj.bat, locate the line set JAVA=java and replace java with the fullyqualified path to the java executable. For example:set JAVA=c:\Java\AcmeSuperJava-v5.30\bin\java.exe3.For runssj.sh, locate the line JAVA=java, and replace java with the fullyqualified path to the java executable. For example:JAVA=/usr/java/AcmeSuperJava-v5.30/bin/java4.Save and close the file.The recommended (and simplest) method for starting the SSJ iteration is to use the sample run script that came with the SPECpower_ssj2008 distribution.1.Change to the directory in which the SSJ workload module was installed.2.Run the file, runssj.bat or runssj.sh, as appropriate to your operating system.Please note: it is the responsibility of the user to inspect the sample run script files for any commands, parameters, or variables that may need to be modified for the particular environment under which the workload is being run.For Windows, when the workload instance is ready, it will display the text SSJ instances ready for connection. This means that the SSJ workload is now waiting for the command from CCS to start.For Unix, the STDOUT is not output to the console by default. Nonetheless, running runssj.sh will start the SSJ iteration.2.4Running the JVM Director RemotelyAs mentioned, the JVM Director need not necessarily be run on the SUT. This section will very briefly go over the steps to configure the test bed for running the JVM Director on the controller system. This method is an alternative from the default method, and is of course entirely optional.The JVM Director Run ScriptLike most other components of SPECpower_ssj2008, a run script is provided with the kit with which to initiate the JVM Director. The default name of the script is rundirector.bat or rundirector.sh, and it is located under …/SPECpower_ssj2008/ssj. To start the director, simply call the rundirector script from the command line.In order for Director to successfully connect to the SUT, the SUT must know the IP of the Director:Remote JVM Director: SUT1.On the SUT, open the SSJ run script (runssj.bat or runssj.sh) for editing.2.Locate the LOCAL_DIRECTOR= property. It should equal FALSE,if the Director ison another system change FALSE to TRUE, and fill in the IP address of theDIRECTOR_HOST to the controller IP address used.3.Save and close the SSJ run script.4.Open the control properties file, SPECpower_ssj_EXPERT.props, for editing.5.Uncomment (remove ‘#’) the property input.director.hostname, and change itsvalue from localhost to the hostname or IP address of the system that will berunning the JVM Director (for this example, the controller system).6.Save and close SPECpower_ssj_EXPERT.props.7.Open the descriptive properties file, SPECpower_ssj_config.props, for editing.8.Change the property config.director.location to reflect the system on whichthe JVM Director will be running. In this example, Controller.9.Save and close SPECpower_ssj_config.props.Remote JVM Director: Controller System1.Open the CCS properties file, ccs.props, for editing.2.Change the property ccs.wkld.ssj_dir.IP to the hostname or IP address of thesystem that will be hosting the JVM Director. For this example, the controllersystem which is localhost or 127.0.0.1.3.Save and close ccs.props.Controller SystemPlease see SPECpower_ss2008j Run and Reporting Rules for a list of minimum systemrequirements for the controller server. Connect the network interface of the controller server so that it can establish a TCP/IP connection with the SUT, refer to section 2.4.System Under Test (SUT).Before proceeding it is the responsibility of the user to select a suitable Java RuntimeEnvironment (JRE) (version 1.5 or later) is installed on the Controller system. There are a variety of JREs available from a number of different vendors. It is the responsibility of the user to select a suitable JRE for the benchmark environment. (Please refer to section 2.2.1 Java Run-time Environment)2.5Trial Run of SPECpower_ssj2008After successful installation of the SPECpower_ssj2008 benchmark suite on the Controller System and the SUT, the user may be interested in starting a trial run of the benchmark. This will ensure that all of the fundamental components of the test bed are functioning properly. This section will go over the steps involved in doing so. Please note that the CCS and SSJ modules will, by default, wait for 300 seconds (5 minutes) for a connection with the JVM Director. If the JVM Director is for some reason not initiated sooner than 300 seconds after either the SSJ workload module or the CCS module is initiated, then the module will time-out and terminate with an error and will then need to be restarted.2.5.1.1DirectorAs was done for the SSJ modules on the SUT, the user must ensure that the Java executable is accessible for the Director module on the Controller System as well. The Java interpreter must be accessible via either the PATH environment variable of the OS, or by specifying the fully qualified path to the Java executable in the run script.1.Change to the SSJ directory within the benchmark suite and openrundirector.bat (for Windows) or rundirector.sh (for Unix) with a texteditor.2.For rundirector.bat, locate the line set JAVA=java, and replace java withthe fully qualified path to the Java executable. For example:set JAVA=c:\Java\AcmeSuperJava-v5.30\bin\java.exe3.For rundirector.sh, locate the line JAVA=java, and replace java with the fullyqualified path to the Java executable. For example:JAVA=/usr/java/AcmeSuperJava-v5.30/bin/java4.Save and close the file.2.5.1.2Control and Collect System (CCS)Controller SystemThe controller server runs the CCS module of the SPECpower_ssj2008 benchmark suite. CCS is a Java based application, therefore the user should ensure that a suitable Java Runtime Environment (version 1.5 or later) is properly installed on the controller server before proceeding.The user must ensure that the Java executable is accessible for the CCS module on the Controller System as well.1.Change to the CCS directory within the benchmark suite and open runCCS.bat(for Windows) or runCCS.sh (for Unix) with a text editor.2.For runCCS.bat, locate the line set JAVA=java, and replace java with the fullyqualified path to the Java executable. For example:set JAVA=c:\Java\AcmeSuperJava-v5.30\bin\java.exe3.For runCCS.sh, locate the line JAVA=java, and replace java with the fullyqualified path to the Java executable. For example:JAVA=/usr/java/AcmeSuperJava-v5.30/bin/java4.Save and close the file.Start the Trial RunNow the trial run is ready to be started:e the run script to start the PTD instance for the temperature sensor bychanging to the PTD directory and running runtemp.bat or runtemp.sh asappropriate to the OS. This will start the Temperature deamon instance.e the run script to start the PTD instance for the power analyzer by changingto the PTD directory and running runpower.bat or runpower.sh as appropriateto the OS. This will start the Power daemon instance.3.On the SUT, change to the SSJ directory, and run runssj.bat (for Windows) orrunssj.sh (for Unix). SPECpower_ssj2008 workload iteration will start up, andwait for a connection from the Director.4.On the controller server, change to the SSJ directory, and run rundirector.bat(for Windows) or rundirector.sh (for Unix).5.Next on the controller server, change to the CCS directory, and use the runscript runCCS.bat or runCCS.sh, as appropriate to the OS, to start the CCSiteration.This will start the SPECpower_ssj2008 trial run, and will take approximately 73 minutes to complete. The purpose of the trial run is to identify possible issues with the benchmark test bed implementation. If the procedures in this section were followed correctly, and problems are still encountered during the trial run, then issues are native to the test bed that must be resolved in order for SPECpower_ssj2008 to run properly.It should be understood that the number of possible complications that can be encountered with any test bed implementation can be quite numerous, ranging from OS installation issues, to network problems, to Java Runtime Environment issues. The entire spectrum of troubleshooting procedures for any server/networking environment, are immense therefore troubleshooting procedures for any particular test bed implementation fall outside the scope of this document.Software SetupHaving done a trial run of the benchmark, the user should now learn what the changeable parameters are, and where to find and change them in the run scripts and properties files.System Under Test (SUT)2.5.1.3Properties Files: OverviewThe SSJ module takes two properties files as input:A control properties file: The control properties file is used to modify the operation ofthe benchmark descriptive properties fileo The descriptive properties file is used to document the SUT, documentation is required for publishable results, and is reflected in the output files.he control properties files come in two different forms: basic and advanced. It is up to the user to decide which one to use for the benchmark run (this will be covered ingreater detail in the next section). The values of the descriptive properties file do not affect the workload. The default file name for the descriptive properties file is SPECpower_ssj_config_sut.props.Before modifying these files, it is good practice to first make a copy of the originals to enable easy recovery of the default benchmark configuration. The control properties file can be renamed to any name desired by the user providing that the user updates the set PROPFILE=, or the PROPFILE=, variable in the runssj.bat or runssj.sh file. The descriptive properties files can also be changed to any name desired by the user. Exactly how this is done is explained in the next section.2.5.1.4Properties Files: FormatThe properties files are in plain-text ASCII format, and can be easily edited with most popular text editors. Each line of a properties file is one of three types:• a blank• a commentAny text following a # character will be ignored by the benchmark• a property assignmentEach property assignment is of the form name=value, where "name" is theproperty identifier (the terms "name" and "property" are used interchangeably). Property names are specific to the benchmark and must not be changed. "value" is the actual value that is assigned to the property. A value can take the form of an integer, a string of text, or a boolean value depending on the property type. The SSJ workload engine takes these property values as input for the benchmark iteration.As mentioned previously, the control properties file comes in two forms:• a basic control properties file whose default name is SPECpower_ssj.props•an advanced control properties file whose default name is SPECpower_ssj_EXPERT.propsThe basic control properties file contains just a few basic parameters for the SSJ run. This properties file is more suitable for beginners, or simply for benchmark implementations that are relatively simple.The advanced properties file contains quite a large number of additional parameters that the user may elect to modify for the benchmark run.Please note that there are also a number of control properties whose values must not be changed in order for the SPECpower_ssj2008 result to be publishable. See the Run and Reporting Rules for more information.2.5.1.5Control Properties: SSJOne of these files must be selected for use with the benchmark run by setting the PROPFILE= variable in the SSJ run.For simplicity, only those parameters that are the most pertinent to the discussion of the basic concepts of the SSJ workload will be covered in this section.The properties are contained in basic SPECpower_ssj.props file contains only the following:。
DisplayPort 1.2_TIF_2011_DisplayPort_Updates

2
Tektronix Technology Innovation Forum 2011
Display Port 1.2 Update
DisplayPort 1.2 Overview
The DisplayPort PHY Compliance Test Specification establishes a test regimen to determine compliance of DisplayPort devices. It is segmented into Source, Receiver, Copper Cable, Hybrid devices, and Tethered devices.
px4开机加载文件

modules/PX4Firmware/Build/px4fmu-v2_APM.build/romfs_scratch/init.d/rc.APM此文件里边指出了启动顺序,在系统启动的时候会被调用,用来初始化整个系统,包括软硬件。
ArduCopter 作为nsh的一个内建命令被开机自动启动。
set deviceA /dev/ttyACM0if [ -f /fs/microsd/APM ]thenecho "APM file found - renaming"mv /fs/microsd/APM /fs/microsd/APM.oldfiif [ -f /fs/microsd/APM/nostart ]thenecho "APM/nostart found - skipping APM startup"sh /etc/init.d/rc.errorfiif [ -f /bin/reboot ]thenecho "binfs already mounted"elseecho "Mounting binfs"if mount -t binfs /dev/null /binthenecho "binfs mounted OK"elsesh /etc/init.d/rc.errorfifiset sketch NONEif rm /fs/microsd/APM/boot.logthenecho "removed old boot.log"fiset logfile /fs/microsd/APM/BOOT.LOG if [ ! -f /bin/ArduPilot ]thenecho "/bin/ardupilot not found"sh /etc/init.d/rc.errorfiif mkdir /fs/microsd/APM > /dev/null thenecho "Created APM directory"fiif [ -f /bin/px4io ]thenif [ -f /bin/lsm303d ]thenecho "Detected FMUv2 board"set BOARD FMUv2elseecho "Detected FMUv1 board"set BOARD FMUv1fielseecho "Detected FMUv4 board"set BOARD FMUv4fiif [ $BOARD == FMUv1 ]thenset deviceC /dev/ttyS2if [ -f /fs/microsd/APM/AUXPWM.en ]thenset deviceD /dev/nullelseset deviceD /dev/ttyS1fielseset deviceC /dev/ttyS1set deviceD /dev/ttyS2fiif uorb startthenecho "uorb started OK"elsesh /etc/init.d/rc.errorfiif [ -f /fs/microsd/APM/mkblctrl ]thenecho "Setting up mkblctrl driver"echo "Setting up mkblctrl driver" >> $logfilemkblctrl -d /dev/pwm_outputfiif [ -f /fs/microsd/APM/mkblctrl_+ ]thenecho "Setting up mkblctrl driver +"echo "Setting up mkblctrl driver +" >> $logfile mkblctrl -mkmode + -d /dev/pwm_outputfiif [ -f /fs/microsd/APM/mkblctrl_x ]thenecho "Setting up mkblctrl driver x"echo "Setting up mkblctrl driver x" >> $logfile mkblctrl -mkmode x -d /dev/pwm_outputfiif [ -f /bin/px4io ]thenecho "Trying PX4IO board"set HA VE_PX4IO falseif px4io start norcthenset HA VE_PX4IO trueelseecho Loading /etc/px4io/px4io.bintone_alarm MBABGPif px4io update /etc/px4io/px4io.binthenecho "upgraded PX4IO firmware OK"tone_alarm MSPAAelseecho "Failed to upgrade PX4IO firmware"tone_alarm MNGGGfisleep 1if px4io start norcthenset HA VE_PX4IO truetone_alarm 1fifielseset HA VE_PX4IO falseecho "No PX4IO support"fiif [ $HA VE_PX4IO == true ]thenecho "PX4IO board OK"if px4io checkcrc /etc/px4io/px4io.binthenecho "PX4IO CRC OK"elseecho "PX4IO CRC failure"echo "PX4IO CRC failure" >> $logfiletone_alarm MBABGPif px4io safety_onthenecho "PX4IO disarm OK"elseecho "PX4IO disarm failed"fisleep 1if px4io forceupdate 14662 /etc/px4io/px4io.binthensleep 1if px4io start norcthenecho "PX4IO restart OK"echo "PX4IO restart OK" >> $logfiletone_alarm MSPAAelseecho "PX4IO restart failed"echo "PX4IO restart failed" >> $logfiletone_alarm MNGGGsh /etc/init.d/rc.errorfielseecho "PX4IO update failed"echo "PX4IO update failed" >> $logfiletone_alarm MNGGGfifielseecho "No PX4IO board found"echo "No PX4IO board found" >> $logfileif [ $BOARD == FMUv2 ]thensh /etc/init.d/rc.errorfifiif [ $BOARD == FMUv1 -a $deviceD == /dev/ttyS1 ]thenecho "Setting FMU mode_serial"fmu mode_serialelseif fmu mode_pwm4thenecho "Set FMU mode_pwm4"fifiecho "Starting APM sensors"if ms5611 startthenecho "ms5611 started OK"elseecho "no ms5611 found"echo "No ms5611 found" >> $logfile sh /etc/init.d/rc.errorfiif adc startthenecho "adc started OK"elseecho "No adc" >> $logfilesh /etc/init.d/rc.errorfiif [ $BOARD == FMUv1 ]thenecho "Starting FMUv1 sensors"if hmc5883 -C -T -X startthenecho "Have external hmc5883"elseecho "No external hmc5883"fiif hmc5883 -C -T -I startthenecho "Have internal hmc5883"elseecho "No internal hmc5883"fiif mpu6000 startthenecho "mpu6000 started OK"elsesh /etc/init.d/rc.errorfiif l3gd20 startthenecho "l3gd20 started OK"elseecho "No l3gd20"echo "No l3gd20" >> $logfile fifiif [ $BOARD == FMUv2 ]thenecho "Starting FMUv2 sensors"if hmc5883 -C -T -X startthenecho "Have external hmc5883"elseecho "No external hmc5883"fiif hmc5883 -C -T -I -R 4 startthenecho "Have internal hmc5883"elseecho "No internal hmc5883"fiif mpu6000 -X -R 4 startthenecho "Found MPU6000 external"set HA VE_FMUV3 trueelseif mpu9250 -X -R 4 startthenecho "Found MPU9250 external"set HA VE_FMUV3 trueelseecho "No MPU6000 or MPU9250 external"set HA VE_FMUV3 falsefifiif [ $HA VE_FMUV3 == true ]thenif l3gd20 -X -R 4 startthenecho "l3gd20 external started OK"elseecho "No l3gd20"sh /etc/init.d/rc.errorfiif lsm303d -X -R 6 startthenecho "lsm303d external started OK"elseecho "No lsm303d"sh /etc/init.d/rc.errorfiif mpu6000 -R 14 startthenecho "Found MPU6000 internal"elseif mpu9250 -R 14 startthenecho "Found MPU9250 internal"elseecho "No MPU6000 or MPU9250"echo "No MPU6000 or MPU9250" >> $logfilesh /etc/init.d/rc.errorfifiif hmc5883 -C -T -S -R 8 startthenecho "Found SPI hmc5883"fielseif mpu6000 startthenecho "Found MPU6000"elseif mpu9250 startthenecho "Found MPU9250"elseecho "No MPU6000 or MPU9250"echo "No MPU9250" >> $logfilefifiif l3gd20 startthenecho "l3gd20 started OK"elsesh /etc/init.d/rc.errorfiif lsm303d startthenecho "lsm303d started OK"elsesh /etc/init.d/rc.errorfififiif [ $BOARD == FMUv4 ]thenecho "Starting FMUv4 sensors"if hmc5883 -C -T -X startthenecho "Have external hmc5883"elseecho "No external hmc5883"fiif hmc5883 -C -T -S -R 2 startthenecho "Have SPI hmc5883"elseecho "No SPI hmc5883"fiif mpu6000 -R 2 -T 20608 startthenecho "Found ICM-20608 internal"fiif mpu9250 -R 2 startthenecho "Found mpu9250 internal"fifiif ets_airspeed startthenecho "Found ETS airspeed sensor"fiif meas_airspeed startthenecho "Found MEAS airspeed sensor"elseif meas_airspeed start -b 2thenecho "Found MEAS airspeed sensor (bus2)"fifiif ll40ls -X startthenecho "Found external ll40ls sensor"fiif ll40ls -I startthenecho "Found internal ll40ls sensor"fiif trone startthenecho "Found trone sensor"fiif mb12xx startthenecho "Found mb12xx sensor"fiif [ -f /bin/px4flow ]thenif px4flow startthenecho "Found px4flow sensor"fifiif pwm_input startthenecho "started pwm_input driver"fiif mtd start /fs/mtdthenecho "started mtd driver OK"elseecho "failed to start mtd driver"echo "failed to start mtd driver" >> $logfilesh /etc/init.d/rc.errorfiif mtd readtest /fs/mtdthenecho "mtd readtest OK"elseecho "failed to read mtd"echo "failed to read mtd" >> $logfilesh /etc/init.d/rc.errorfiif [ -f /bin/oreoled ]thenif oreoled start autoupdatethenecho "oreoled started OK"fifiif batt_smbus -b 2 startthenecho "Found batt_smbus"fiif irlock startthenecho "irlock started"fiif [ $BOARD == FMUv2 -o $BOARD == FMUv4 ] thenif mtd rwtest /fs/mtdthenecho "mtd rwtest OK"elseecho "failed to test mtd"echo "failed to test mtd" >> $logfilesh /etc/init.d/rc.errorfifiecho Starting ArduPilot $deviceA $deviceC $deviceDif ArduPilot -d $deviceA -d2 $deviceC -d3 $deviceD startthenecho ArduPilot started OK elsesh /etc/init.d/rc.errorfiecho "rc.APM finished"。
大字数显示器 (Model LDD) 说明书

O WIDE SELECTION OF INPUT MODULES O 3.32 INCH (84.4 mm) HIGH DIGITS O 115/230 VAC SWITCH SELECTABLE O RUGGED STEEL CONSTRUCTION O AVAILABLE IN 4 OR 6-DIGIT VERSIONSO AVAILABLE WITH RED OR GREEN LED DISPLAY O SEALED FRONT PANEL CONSTRUCTION (NEMA 4/IP65)O VERSATILE MOUNTING OPTIONSOTEMPLATE PROVIDED FOR EASY INSTALLATIONDESCRIPTIONThe Large Digit Display, Model LDD, is a versatile display which can increase your productivity by offering your plant floor or production area a visual display of their current status, such as counting, rate indication, real time,or any engineering unit required. The LDD is available in either a 4-digit or a 6-digit display version with Red or Green LED displays, that accepts a selection of personality boards to meet your specific application needs (see Personality Module Bulletins for more information).There are four panel wiring knock-outs provided, two 7/8" (22.2 mm)knock-outs and two 1/2"(12.7 mm)knock-outs. Also provided is a removeable cover located on the rear panel which will expose one open ended cut-out for easy wire installation.The LDD has a sealed front panel which meets NEMA 4/IP65 requirements for wash-down and dusty environments when properly installed. The 3.32"(84.4 mm)digits are readable to 130 feet (40 M).SAFETY SUMMARYAll safety related regulations, local codes and instructions that appear in the manual or on equipment must be observed to ensure personal safety and to prevent damage to either the instrument or equipment connected to it. If equipment is used in a manner not specified by the manufacturer, the protection provided by the equipment may be impaired.SPECIFICATIONS1. DISPLAY:3.32" (84.4 mm)High, Red or Green LED display.2. POWER REQUIREMENTS:Switch selectable 115/230 V AC (±10%),50/60 Hz, 17 V A 4-digit, 21 V A 6-digit (including module).3. CONSTRUCTION:Steel construction textured with polyurethane paint for scratch and corrosion resistance protection. Front panel meets NEMA 4/IP65requirements for indoor use when properly installed. Installation Category II,Pollution Degree 2. (Panel gasket included with unit.)4. ENVIRONMENTAL CONDITIONS:Operating Temperature : SEE MODULE LITERATURE Storage Temperature : -40 to 70°COperating and Storage Humidity : 85% max. relative (non-condensing)over operating rangeAltitude : Up to 2000 metersMODELLDD - LARGE DIGIT DISPLAYSPECIFICATIONS (Cont’d) Array 5. CERTIFICATIONS AND COMPLIANCES:SAFETYIEC 61010-1, EN 61010-1: Safety requirements for electrical equipmentfor measurement, control, and laboratory use, Part 1.IP65 Enclosure rating (Face only), IEC529Type 4 Enclosure rating (Face only), UL50EMC EMISSIONS:Meets EN 50081-2: Industrial Environment.EMC IMMUNITY:Meets EN 50082-2: Industrial Environment.Refer to individual personality module specifications for aditional information.6. MOUNTING REQUIREMENTS:Max. panel thickness is 0.375" (9.5 mm).Min. panel thickness for NEMA4/IP65 sealing is 0.125" (3.2 mm).7. WEIGHT: 8 lbs (3.6 kg) (less module).Disconnect all power before installing or removing module. SET-UPTo place the personality module into the LDD, first remove the rear coverby unscrewing the two captive fasteners. Then, before installing the moduleinto the LDD, configure the module for the specific application by SETTINGALL APPLICABLE DIP SWITCHES AND JUMPERS AT THIS TIME (seeaccompanying module data sheet). Place the module on the plastic standoffs(see figure 1). Push on the four posts as shown in figure 2 until the carrier snapsinto place.Note: Power should NOT be applied until the terminal block is plugged into themodule AND the module is properly installed into the Large Digit Display. Select the proper voltage by setting the switch to either 115 or 230 volts. Connect the display and power cables on the module to the appropriate connectors on the power supply board (see figure 2).To program the Intelligent Meter, three normally open momentarypushbuttons are connected to “P”, “UP”, “DOWN”, and common of the LDD(not included with the Intelligent Meter). The Model PGM is a small plasticcase with three normally open momentary pushbuttons and 10 feet (3 M)ofshielded cable, and is well suited for programming the Intelligent Metermodule. Although, any normally open, momentary pushbutton switches can beused. (SEE APPROPRIATE MODULE LITERATURE FOR SET-UP ANDOTHER CONNECTIONS.)To remove module from the LDD, disconnect the display and power cables,then remove the carrier from the standoffs by disengaging the tabs andsimultaneously lifting the carrier. Repeat this until the module has cleared all 4standoffs.INSTALLATION ENVIRONMENTThe unit should be installed in a location that does not exceed the maximumoperating temperature and provides good air circulation. Placing the unit neardevices that generate excessive heat should be avoided.The LDD may be cleaned using alcohol compounds such as Isopropanol ormethanol. Also, liquid glass cleaners may be used if they do NOT containammonia.NOTE: MINIMAL EXPOSURE OF KETONE SOLVENTS TO THE LDD ISGOING TO CAUSE A WHITENING OF THE DISPLAY OVERLAY. Continuous exposure to direct sunlight may accelerate the aging process of the bezel.The LDD is intended to be mounted into an enclosed panel with a gasket toprovide a water-tight seal. A gasket and ten 10 to 32 kep nuts are provided foreasy installation. The recommended minimum panel thickness for NEMA4/IP65 applications is 0.125" (3.2 mm). Thinner panels may be used but maydistort and not provide a water-tight seal.For ease of installation, the cardboard template (supplied with the LDD)maybe used to mark the holes and cut-out locations on the panel. After the panelcut-out has been completed and deburred, insert the unit with the panel gasket,into the panel as depicted in the drawing (see figure 3). Install the ten kep nutsand tighten evenly for uniform gasket compression.By using additional hardware, the LDD can be surface-wall mounted,suspended, or bottom mounted. To surface-wall mount the unit, two sets ofMB6 brackets are required. To suspend or bottom mount the unit, one set ofMB6 brackets is required.1. TOTALIZER2. LINEARIZER 4-20 mA MODEL NO.DESCRIPTION+18 VDC 3. PEAK/VALLEYDUAL SERIAL ANALOG PART NUMBEREXCITATION 4. TARE ALARM OUTPUTOUTPUT5. E2-CON6. EFFICIENCYIntelligent Meter Modules NO NO NO NO NO PBD10000For Decade Voltage Inputs *YES NO NO NO NO PBD10100PBD1YES NO YES NO NO PBD10102(See IMD1 Bulletin for operating YES 1, 2, 3, 4, 5NO NO NO PBD13100Specifications.)YES 1, 2, 3, 4, 5YES YES YES PBD13107Intelligent Meter Modules NO NO NO NO NO PBD20000For Decade Current Input *YES NO NO NO NO PBD20100PBD2YES NO YES NO NO PBD20102(See IMD2 Bulletin for operating YES 1, 2, 3, 4, 5NO NO NO PBD23100Specifications.)YES 1, 2, 3, 4, 5YES YES YES PBD23107Intelligent Serial Slave Display Module *20 mA SRC 3, 5NO YES NO PBA04101PBA(See IMA Bulletin for operating 20 mA SRC 3, 5YES YES NO PBA04104Specifications.)20 mA SRC 3, 5YES YES YES PBA04107+12 VDC 1, 2, 3, 5, 6NO NO NO PBI04100Intelligent Digital Rate Meter *+12 VDC 1, 2, 3, 5, 6NO YES NO PBI04101PBI(See IMI Bulletin for operating +12 VDC 1, 2, 3, 5, 6YES NO NO PBI04102Specifications.)+12 VDC 1, 2, 3, 5, 6NO NO YES PBI04103+12 VDC 1, 2, 3, 5, 6YES YES YESPBI04107PGMProgramming BoxPGM00000* Note: All the above Intelligent Meter modules require a 6-digit Large Digit Display, Model LDD00600 or LDD0G600.ORDERING INFORMATION FOR APOLLO INTELLIGENT METER MODULESORDERING INFORMATIONFOR APOLLO PERSONALITY MODULESPERSONALITY MODULESThe following Apollo and IM capabilities are available as modules for the TROUBLESHOOTINGFor further technical assistance, contact technical support at the appropriate company numbers listed.LIMITED WARRANTYThe Company warrants the products it manufactures against defects in materials and workmanship for a period limited to two years from the date of shipment, provided the products have been stored, handled, installed, and used under proper conditions. The Company’s liability under this limited warranty shall extend only to the repair or replacement of a defective product, at The Company’s option. The Company disclaims all liability for any affirmation, promise or representation with respect to the products.The customer agrees to hold Red Lion Controls harmless from, defend, and indemnify RLC against damages, claims, and expenses arising out of subsequent sales of RLC products or products containing components manufactured by RLC and based upon personal injuries, deaths, property damage, lost profits, and other matters which Buyer, its employees, or sub-contractors are or may be to any extent liable, including without limitation penalties imposed by the Consumer Product Safety Act (P.L. 92-573) and liability imposed upon any person pursuant to the Magnuson-Moss Warranty Act (P.L. 93-637), as now in effect or as amended hereafter.No warranties expressed or implied are created with respect to The Company’s products except those expressly contained herein. The Customer acknowledges the disclaimers and limitations contained herein and relies on no other warranties or affirmations.。
NXP SCM-i.MX 6 Series Yocto Linux 用户指南说明书
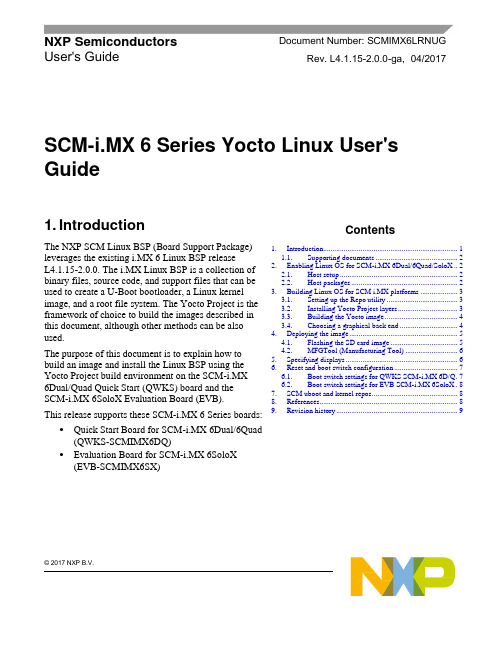
© 2017 NXP B.V.SCM-i.MX 6 Series Yocto Linux User'sGuide1. IntroductionThe NXP SCM Linux BSP (Board Support Package) leverages the existing i.MX 6 Linux BSP release L4.1.15-2.0.0. The i.MX Linux BSP is a collection of binary files, source code, and support files that can be used to create a U-Boot bootloader, a Linux kernel image, and a root file system. The Yocto Project is the framework of choice to build the images described in this document, although other methods can be also used.The purpose of this document is to explain how to build an image and install the Linux BSP using the Yocto Project build environment on the SCM-i.MX 6Dual/Quad Quick Start (QWKS) board and the SCM-i.MX 6SoloX Evaluation Board (EVB). This release supports these SCM-i.MX 6 Series boards:• Quick Start Board for SCM-i.MX 6Dual/6Quad (QWKS-SCMIMX6DQ)• Evaluation Board for SCM-i.MX 6SoloX (EVB-SCMIMX6SX)NXP Semiconductors Document Number: SCMIMX6LRNUGUser's GuideRev. L4.1.15-2.0.0-ga , 04/2017Contents1. Introduction........................................................................ 1 1.1. Supporting documents ............................................ 22. Enabling Linux OS for SCM-i.MX 6Dual/6Quad/SoloX .. 2 2.1. Host setup ............................................................... 2 2.2. Host packages ......................................................... 23.Building Linux OS for SCM i.MX platforms .................... 3 3.1. Setting up the Repo utility ...................................... 3 3.2. Installing Yocto Project layers ................................ 3 3.3. Building the Yocto image ....................................... 4 3.4. Choosing a graphical back end ............................... 4 4. Deploying the image .......................................................... 5 4.1. Flashing the SD card image .................................... 5 4.2. MFGTool (Manufacturing Tool) ............................ 6 5. Specifying displays ............................................................ 6 6. Reset and boot switch configuration .................................. 7 6.1. Boot switch settings for QWKS SCM-i.MX 6D/Q . 7 6.2. Boot switch settings for EVB SCM-i.MX 6SoloX . 8 7. SCM uboot and kernel repos .............................................. 8 8. References.......................................................................... 8 9.Revision history (9)Enabling Linux OS for SCM-i.MX 6Dual/6Quad/SoloX1.1. Supporting documentsThese documents provide additional information and can be found at the NXP webpage (L4.1.15-2.0.0_LINUX_DOCS):•i.MX Linux® Release Notes—Provides the release information.•i.MX Linux® User's Guide—Contains the information on installing the U-Boot and Linux OS and using the i.MX-specific features.•i.MX Yocto Project User's Guide—Contains the instructions for setting up and building the Linux OS in the Yocto Project.•i.MX Linux®Reference Manual—Contains the information about the Linux drivers for i.MX.•i.MX BSP Porting Guide—Contains the instructions to port the BSP to a new board.These quick start guides contain basic information about the board and its setup:•QWKS board for SCM-i.MX 6D/Q Quick Start Guide•Evaluation board for SCM-i.MX 6SoloX Quick Start Guide2. Enabling Linux OS for SCM-i.MX 6Dual/6Quad/SoloXThis section describes how to obtain the SCM-related build environment for Yocto. This assumes that you are familiar with the standard i.MX Yocto Linux OS BSP environment and build process. If you are not familiar with this process, see the NXP Yocto Project User’s Guide (available at L4.1.15-2.0.0_LINUX_DOCS).2.1. Host setupTo get the Yocto Project expected behavior on a Linux OS host machine, install the packages and utilities described below. The hard disk space required on the host machine is an important consideration. For example, when building on a machine running Ubuntu, the minimum hard disk space required is about 50 GB for the X11 backend. It is recommended that at least 120 GB is provided, which is enough to compile any backend.The minimum recommended Ubuntu version is 14.04, but the builds for dizzy work on 12.04 (or later). Earlier versions may cause the Yocto Project build setup to fail, because it requires python versions only available on Ubuntu 12.04 (or later). See the Yocto Project reference manual for more information.2.2. Host packagesThe Yocto Project build requires that the packages documented under the Yocto Project are installed for the build. Visit the Yocto Project Quick Start at /docs/current/yocto-project-qs/yocto-project-qs.html and check for the packages that must be installed on your build machine.The essential Yocto Project host packages are:$ sudo apt-get install gawk wget git-core diffstat unzip texinfo gcc-multilib build-essential chrpath socat libsdl1.2-devThe i.MX layers’ host packages for the Ubuntu 12.04 (or 14.04) host setup are:$ sudo apt-get install libsdl1.2-dev xterm sed cvs subversion coreutils texi2html docbook-utils python-pysqlite2 help2man make gcc g++ desktop-file-utils libgl1-mesa-dev libglu1-mesa-dev mercurial autoconf automake groff curl lzop asciidocThe i.MX layers’ host packages for the Ubuntu 12.04 host setup are:$ sudo apt-get install uboot-mkimageThe i.MX layers’ host packages for the Ubuntu 14.04 host s etup are:$ sudo apt-get install u-boot-toolsThe configuration tool uses the default version of grep that is on your build machine. If there is a different version of grep in your path, it may cause the builds to fail. One workaround is to rename the special versi on to something not containing “grep”.3. Building Linux OS for SCM i.MX platforms3.1. Setting up the Repo utilityRepo is a tool built on top of GIT, which makes it easier to manage projects that contain multiple repositories that do not have to be on the same server. Repo complements the layered nature of the Yocto Project very well, making it easier for customers to add their own layers to the BSP.To install the Repo utility, perform these steps:1.Create a bin folder in the home directory.$ mkdir ~/bin (this step may not be needed if the bin folder already exists)$ curl /git-repo-downloads/repo > ~/bin/repo$ chmod a+x ~/bin/repo2.Add this line to the .bashrc file to ensure that the ~/bin folder is in your PATH variable:$ export PATH=~/bin:$PATH3.2. Installing Yocto Project layersAll the SCM-related changes are collected in the new meta-nxp-imx-scm layer, which is obtained through the Repo sync pointing to the corresponding scm-imx branch.Make sure that GIT is set up properly with these commands:$ git config --global "Your Name"$ git config --global user.email "Your Email"$ git config --listThe NXP Yocto Project BSP Release directory contains the sources directory, which contains the recipes used to build, one (or more) build directories, and a set of scripts used to set up the environment. The recipes used to build the project come from both the community and NXP. The Yocto Project layers are downloaded to the sources directory. This sets up the recipes that are used to build the project. The following code snippets show how to set up the SCM L4.1.15-2.0.0_ga Yocto environment for the SCM-i.MX 6 QWKS board and the evaluation board. In this example, a directory called fsl-arm-yocto-bsp is created for the project. Any name can be used instead of this.Building Linux OS for SCM i.MX platforms3.2.1. SCM-i.MX 6D/Q quick start board$ mkdir fsl-arm-yocto-bsp$ cd fsl-arm-yocto-bsp$ repo init -u git:///imx/fsl-arm-yocto-bsp.git -b imx-4.1-krogoth -m scm-imx-4.1.15-2.0.0.xml$ repo sync3.2.2. SCM-i.MX 6SoloX evaluation board$ mkdir my-evb_6sxscm-yocto-bsp$ cd my-evb_6sxscm-yocto-bsp$ repo init -u git:///imx/fsl-arm-yocto-bsp.git -b imx-4.1-krogoth -m scm-imx-4.1.15-2.0.0.xml$ repo sync3.3. Building the Yocto imageNote that the quick start board for SCM-i.MX 6D/Q and the evaluation board for SCM-i.MX 6SoloX are commercially available with a 1 GB LPDDR2 PoP memory configuration.This release supports the imx6dqscm-1gb-qwks, imx6dqscm-1gb-qwks-rev3, and imx6sxscm-1gb-evb. Set the machine configuration in MACHINE= in the following section.3.3.1. Choosing a machineChoose the machine configuration that matches your reference board.•imx6dqscm-1gb-qwks (QWKS board for SCM-i.MX 6DQ with 1 GB LPDDR2 PoP)•imx6dqscm-1gb-qwks-rev3 (QWKS board Rev C for SCM-i.MX 6DQ with 1GB LPDDR2 PoP) •imx6sxscm-1gb-evb (EVB for SCM-i.MX 6SX with 1 GB LPDDR2 PoP)3.4. Choosing a graphical back endBefore the setup, choose a graphical back end. The default is X11.Choose one of these graphical back ends:•X11•Wayland: using the Weston compositor•XWayland•FrameBufferSpecify the machine configuration for each graphical back end.The following are examples of building the Yocto image for each back end using the QWKS board for SCM-i.MX 6D/Q and the evaluation board for SCM-i.MX 6SoloX. Do not forget to replace the machine configuration with what matches your reference board.3.4.1. X11 image on QWKS board Rev C for SCM-i.MX 6D/Q$ DISTRO=fsl-imx-x11 imx6dqscm-1gb-qwks-rev3 source fsl-setup-release.sh -b build-x11$ bitbake fsl-image-gui3.4.2. FrameBuffer image on evaluation board for SCM-i.MX 6SX$ DISTRO=fsl-imx-fb MACHINE=imx6sxscm-1gb-evb source fsl-setup-release.sh –b build-fb-evb_6sxscm$ bitbake fsl-image-qt53.4.3. XWayland image on QWKS board for SCM-i.MX 6D/Q$ DISTRO=fsl-imx-xwayland MACHINE=imx6dqscm-1gb-qwks source fsl-setup-release.sh –b build-xwayland$ bitbake fsl-image-gui3.4.4. Wayland image on QWKS board for SCM-i.MX 6D/Q$ DISTRO=fsl-imx-wayland MACHINE=imx6dqscm-1gb-qwks source fsl-setup-release.sh -b build-wayland$ bitbake fsl-image-qt5The fsl-setup-release script installs the meta-fsl-bsp-release layer and configures theDISTRO_FEATURES required to choose the graphical back end. The –b parameter specifies the build directory target. In this build directory, the conf directory that contains the local.conf file is created from the setup where the MACHINE and DISTRO_FEATURES are set. The meta-fslbsp-release layer is added into the bblayer.conf file in the conf directory under the build directory specified by the –e parameter.4. Deploying the imageAfter the build is complete, the created image resides in the <build directory>/tmp/deploy/images directory. The image is (for the most part) specific to the machine set in the environment setup. Each image build creates the U-Boot, kernel, and image type based on the IMAGE_FSTYPES defined in the machine configuration file. Most machine configurations provide the SD card image (.sdcard), ext4, and tar.bz2. The ext4 is the root file system only. The .sdcard image contains the U-Boot, kernel, and rootfs, completely set up for use on an SD card.4.1. Flashing the SD card imageThe SD card image provides the full system to boot with the U-Boot and kernel. To flash the SD card image, run this command:$ sudo dd if=<image name>.sdcard of=/dev/sd<partition> bs=1M && syncFor more information about flashing, see “P reparing an SD/MMC Card to Boot” in the i.MX Linux User's Guide (document IMXLUG).Specifying displays4.2. MFGTool (Manufacturing Tool)MFGTool is one of the ways to place the image on a device. To download the manufacturing tool for the SCM-i.MX 6D/Q and for details on how to use it, download the SCM-i.MX 6 Manufacturing Toolkit for Linux 4.1.15-2.0.0 under the "Downloads" tab from /qwks-scm-imx6dq. Similarly, download the manufacturing tool for the SCM-i.MX 6SoloX evaluation board under the "Downloads" tab from /evb-scm-imx6sx.5. Specifying displaysSpecify the display information on the Linux OS boot command line. It is not dependent on the source of the Linux OS image. If nothing is specified for the display, the settings in the device tree are used. Find the specific parameters in the i.MX 6 Release Notes L4.1.15-2.0.0 (available at L4.1.15-2.0.0_LINUX_DOCS). The examples are shown in the following subsections. Interrupt the auto-boot and enter the following commands.5.1.1. Display options for QWKS board for SCM-i.MX 6D/QHDMI displayU-Boot > setenv mmcargs 'setenv bootargs console=${console},${baudrate} ${smp}root=${mmcroot} video=mxcfb0:dev=hdmi,1920x1080M@60,if=RGB24'U-Boot > run bootcmd5.1.2. Display options for EVB for SCM-i.MX 6SXNote that the SCM-i.MX 6SX EVB supports HDMI with a HDMI accessory card (MCIMXHDMICARD) that plugs into the LCD connector on the EVB.Accessory boards:•The LVDS connector pairs with the NXP MCIMX-LVDS1 LCD display board.•The LCD expansion connector (parallel, 24-bit) pairs with the NXP MCIMXHDMICARD adapter board.LVDS displayU-Boot > setenv mmcargs 'setenv bootargs console=${console},${baudrate} ${smp}root=${mmcroot} ${dmfc} video=mxcfb0:dev=ldb,1024x768M@60,if=RGB666 ldb=sep0'U-Boot > run bootcmdHDMI display (dual display for the HDMI as primary and the LVDS as secondary)U-Boot > setenv mmcargs 'setenv bootargs console=${console},${baudrate} ${smp}root=${mmcroot} video=mxcfb0:dev=hdmi,1920x1080M@60,if=RGB24video=mxcfb1:dev=ldb,LDBXGA,if=RGB666'U-Boot > run bootcmdLCD displayu-boot > setenv mmcargs 'setenv bootargs ${bootargs}root=${mmcroot} rootwait rw video=mxcfb0:dev=lcd,if=RGB565'u-boot> run bootcmd6. Reset and boot switch configuration6.1. Boot switch settings for QWKS SCM-i.MX 6D/QThere are two push-button switches on the QWKS-SCMIMX6DQ board. SW1 (SW3 for QWKS board Rev B) is the system reset that resets the PMIC. SW2 is the i.MX 6Dual/6Quad on/off button that is needed for Android.There are three boot options. The board can boot either from the internal SPI-NOR flash inside the SCM-i.MX6Dual/6Quad or from either of the two SD card slots. The following table shows the switch settings for the boot options.Table 1.Boot configuration switch settingsBoot from top SD slot (SD3)Boot from bottom SD slot (SD2)Boot from internal SPI NORDefault1.References6.2. Boot switch settings for EVB SCM-i.MX 6SoloXThis table shows the jumper configuration to boot the evaluation board from the SD card slot SD3.7. SCM uboot and kernel repositoriesThe kernel and uboot patches for both SCM-i.MX 6 QWKS board and evaluation board are integrated in specific git repositories. Below are the git repos for SCM-i.MX 6 uboot and kernel:uBoot repo: /git/cgit.cgi/imx/uboot-imx.gitSCM Branch: scm-imx_v2016.03_4.1.15_2.0.0_gakernel repo: /git/cgit.cgi/imx/linux-imx.gitSCM branch: scm-imx_4.1.15_2.0.0_ga8. References1.For details about setting up the Host and Yocto Project, see the NXP Yocto Project User’s Guide(document IMXLXYOCTOUG).2.For information about downloading images using U-Boot, see “Downloading images usingU-Boot” in the i.MX Linux User's Guide (document IMXLUG).3.For information about setting up the SD/MMC card, see “P reparing an SD/MMC card to boot” inthe i.MX Linux User's Guide (document IMXLUG).9. Revision historyDocument Number: SCMIMX6LRNUGRev. L4.1.15-2.0.0-ga04/2017How to Reach Us: Home Page: Web Support: /supportInformation in this document is provided solely to enable system and softwareimplementers to use NXP products. There are no express or implied copyright licenses granted hereunder to design or fabricate any integrated circuits based on the information in this document. NXP reserves the right to make changes without further notice to any products herein.NXP makes no warranty, representation, or guarantee regarding the suitability of its products for any particular purpose, nor does NXP assume any liability arising out of the application or use of any product or circuit, and specifically disclaims any and all liability, including without limitation consequentia l or incidental damages. “Typical”parameters that may be provided in NXP data sheets and/or specifications can and do vary in different applications, and actual performance may vary over time. All operating parameters, including “typicals,” must be valida ted for each customer application by customer’s technical experts. NXP does not convey any license under its patent rights nor the rights of others. NXP sells products pursuant to standard terms and conditions of sale, which can be found at the following address: /SalesTermsandConditions .NXP, the NXP logo, NXP SECURE CONNECTIONS FOR A SMARTER WORLD, Freescale, and the Freescale logo are trademarks of NXP B.V. All other product or service names are the property of their respective owners.ARM, the ARM Powered logo, and Cortex are registered trademarks of ARM Limited (or its subsidiaries) in the EU and/or elsewhere. All rights reserved. © 2017 NXP B.V.。
- 1、下载文档前请自行甄别文档内容的完整性,平台不提供额外的编辑、内容补充、找答案等附加服务。
- 2、"仅部分预览"的文档,不可在线预览部分如存在完整性等问题,可反馈申请退款(可完整预览的文档不适用该条件!)。
- 3、如文档侵犯您的权益,请联系客服反馈,我们会尽快为您处理(人工客服工作时间:9:00-18:30)。
1.0 Purpose and ScopeThe purpose of Gate 4 in Kohler Company’s New Pr oduct Development Process is toassure that the manufacturing process is ready and capable for full production and thesystems to support production of the product are in place.2.0 Responsibility2.1 Senior Management of each Business unit or Functional Location is responsiblefor identifying the function or individual responsible for the deliverables.2.2 Senior Management of each Business unit or Functional Location is responsible todefine a cross-functional team (including, but not limited to marketing, designengineering, manufacturing, and quality) to review and approve the design to passthis gate. Approval is by consensus with each team member having “veto”authority with the intent to have a balanced approach towards quality, cost, anddelivery.3.0 Procedure3.1 Global Requirements Gate 4 Scope3.1.1 Pilot RunThe pilot run is the trial run of product using tooling and processes intendedfor final production. This run will be used to analyze the capability of themanufacturing process to produce quality product at the volume needed tomeet the projected customer demand. At this point the product design andmanufacturing processes are “frozen.” Any changes to design orproduction processes may require additional retest and/or reverification.3.1.2 Manufacturing Readiness ReviewThe Manufacturing Readiness Review is a review of all the systems neededto produce quality product meeting all key characteristic requirements at theprojected volume. This review verifies the entire system satisfies thecustomer requirements including but not limited to performance, packaging,and installation. During this review the outputs from the deliverables forGate 4 will be analyzed to assure that all systems are ready.3.1.3 Reliability/Quality TestingThe Reliability/Quality Testing is performed on samples produced from thePilot Run. The testing is performed per the Reliability/Quality Test Planapproved in Gate 2. The results of this testing are reviewed and signed offby a cross-functional team.3.1.4 Launch PlanAt Launch all systems are in place and ready for full production. A ramp upplan is in place that will meet the projected demand for the product. Gate 4has been signed off by the Approval Authority.3.2 Global Requirements Gate 4 Deliverables3.2.1 Marketing Business ReleaseThe Marketing and Sales team has reviewed and approved all of thesystems and tools need to effectively roll the product out to the customer.The customer base has been notified of the availability of the product.Examples of the tools and systems are:•Business System (SAP or appropriate system) loaded or configured for new product•Published pricing i.e. Price Lists•Promotional Literature•Order Entry Training3.2.2 Intellectual Property FinalizedTo avoid infringements, research was performed on patents andtrademarks. Applications for new patents or trademarks have beensubmitted.3.2.3 Operations CertificationThe manufacturing process is ready for production. A Pilot Run of theprocess has been performed and any corrective actions resulting from thePilot Run have been implemented. All elements of Operations Certification(GQ-4-001) are fully completed. All open issues have been identified,corrective action taken, and effectiveness of the corrective actions verified.Some key elements of Operations Certification which should be completedinclude, but are not limited to:•Prints are available to manufacturing and are finalized with keycharacteristics fully identified with the intent to immediately releasefollowing approval of this Gate.•High PFMEA RPNs have corrective actions completed and RPNs are revised to reflect verified corrective actions•Capability studies for all key characteristics have been completed with additional actions and/or controls taken to address any poorCpk/capability characteristics identified.•Control plan which provides sufficient controls for all keycharacteristics verified via capability studies and verification testing.Control plan addresses all manufacturing value streams, includingrework and repair loops.•SOP’s are updated for product/process and applicable training has been completed3.2.4 Supply Chain FinalizedSupplier selection for purchased parts is finalized. The suppliers have been audited and approved as appropriate. Sample parts have been submittedand the Production Part Approval Process (PPAP) is complete and fullyverified to consistently provide product, components, and/or raw materialswhich delivers all key characteristics. Production parts have been ordered and will be ready for the Pilot Run. The following items have been finalized with the suppliers:•Non-Disclosure Agreement•Piece Part Price•Supplier Agreement•Lead Times•Delivery commitment3.2.5 Inventory Build PlanThe ramp up schedule leading to full production is complete. The schedule includes the build up of inventory to meet projected demand.3.2.6 Reliability/Quality DataReliability testing is complete and the results have been analyzed. Anyfailures have been documented, corrective actions implemented, andeffectiveness of corrective actions verified by retesting. A cross functionalteam has reviewed and signed of the Reliability Test Report. The capability of manufacturing processes producing critical features of the product havebeen calculated from product produced from the pilot run.3.2.7 Service PlanThe Service Plan is intended to prepare the organization to support the customer if they have questions or issues with the new product. This includes but isnot limited to:•Troubleshooting guidelines•Aftermarket service parts and instructions•Installation instructions / service manuals•Customer service or call center phone scripts•Field /Distributor /Sales/ Customer training•Warranty Policy3.2.8 Financial ReviewActual expenditures and financial assumptions are compared to the ACT and a decision is made whether to proceed or halt development of the project.3.2.9 Open Issues and ActionsActions taken to address issues from previous Gates have been completedand effectiveness verified. All actions defined required to be completedduring this process step are intended to have been completed. However,any open and pending actions which impact customers are fullydocumented in a Corrective Action tracking system for follow up to ensuretimely completion.4.0 Related Procedures and ProcessesGQ-1-005 Quality RecordsGQ-2-002 Kohler NPD ProcessGQ-4-001 Operations Certification5.0 Forms and Documents•ACT•Supplier Survey•GQ-4-0001-F Operations Certification Checklist Form6.0 Quality RecordsBusiness unit and or Functional Location must define who, where, how, and retention length for records required for the approval of this gate in accordance with GQ-1-005. The records must include: • Supplier Audit Reports • PPAP documentation • Reliability Test Report • Process Capability Report• Operations Certification7.0 Definitions▪ ACT – Authorized corporate transaction▪ KQMS – Kohler Quality Management System ▪ PPAP –Production Part Approval Process。