dell xps8600装机小结
戴尔易安信 FS8600 CIFS 文件服务器整合指南说明书

Dell Compellent FS8600: CIFS File Server Consolidation GuideA Dell Compellent Technical TipTHIS TECHNICAL TIP IS FOR INFORMATIONAL PURPOSES ONLY, AND MAY CONTAIN TYPOGRAPHICAL ERRORS AND TECHNICAL INACCURACIES. THE CONTENT IS PROVIDED AS IS, WITHOUT EXPRESS OR IMPLIED WARRANTIES OF ANY KIND.© 2012 Dell Inc. All rights reserved. Reproduction of this material in any manner whatsoever without the express written permission of Dell Inc. is strictly forbidden. For more information, contact Dell. Trademarks used in this text: Dell TM, the DELL TM logo, and Compellent TM are trademarks of Dell Inc. Other trademarks and trade names may be used in this document to refer to either the entities claiming the marks and names or their products. Dell Inc. disclaims any proprietary interest in trademarks and trade names other than its own.June 2012 Rev. AContentsGeneral Syntax (5)Document Revision (5)Preface (5)Customer Support (5)Introduction (6)Core concerns (6)Active Directory (6)Active Directory Domains (6)Active Directory Domain Controllers (6)Active Directory Security Identifiers (7)Active Directory Domain Trusts (7)Hypothetical Example (7)Permissions (8)Access Control Lists & Access Control Entries (8)Inheritance (8)Migrating with permissions (9)Shares (9)Share names, DNS and networking (9)Shares and subshares (10)Antivirus (10)NAS Volumes (10)Snapshots (10)Replication (10)Initial file ingestion (11)Initial ingestion and Storage Center tiering (11)Optimizing performance (11)Ingestion from production (11)Ingestion from backups (11)Migration tools (12)Robocopy (12)Xcals (12)TablesTable 1. Conventions (5)Table 2. Revision History (5)FiguresFigure 1. Domains before and after migration (8)General SyntaxTable 1. ConventionsItem ConventionMonospace FontConsole or file trace. (Commands are shown with system prompt‘#’ in console traces.)Other user input (file names and paths, field names, keys) Monospace FontWebsite addresses Email addresses *************Document RevisionTable 2. Revision HistoryDate Revision DescriptionJune 12, 2012 A Initial draft.PrefaceThis document is intended to be a resource used in the planning for the consolidation of multiple CIFS file shares and CIFS servers on to a Dell Compellent FS8600 NAS platform.It is not intended to be a walkthrough of a migration, or a direct template for migration planning. It is similarly not intended to be the authoritative document for all FS8600 CIFS related subjects.Customer SupportFor support, email Dell Compellent at **********************. Dell Compellent responds to emails during normal business hours.IntroductionAs unstructured file data continues to grow at challenging rates, IT file server infrastructure supporting business and mission critical systems can easily become strained and fragmented. This can manifest in a variety of painful forms such as overall system availability, lost storage efficiencies, complicated or fickle backup architectures and rising management costs.The Dell Compellent FS8600 is uniquely suited to overcoming the challenges presented by explosive file data growth and file sprawl. With the combination of FluidFS’s Scale-Out Single Namespace and Storage Center’s Data Progression and Dynamic Capacity, IT teams can reduce management overhead, and leverage the platforms unique storage efficiencies and cost of ownership attributes while providing class leading availability and data protection.It should be noted that the FS8600 is a member of the Dell FluidFS NAS product family, and is in many ways conceptually very similar to the FluidFS products available on the Dell PowerVault and Dell EqualLogic product lines. While many of the concepts, particularly front end NAS concepts are similar or even identical, some subjects such as management of the platform and interaction with backend storage may be radically different, and the relevant resources for each FluidFS product should be leveraged for the appropriate product.Core concernsFile server migrations and consolidation efforts can be daunting challenges, with unforeseen roadblocks and complex management of interdependent systems. An understanding of the core concerns and concepts involved, along with proper planning can limit the scope of effort required to consolidate established file server and file share sprawl onto an FS8600.Active DirectoryAs Active Directory continues to have a dominant foot print in data center and office IT infrastructure, understanding the topology and specific details of any Active Directory systems that may be involved in file server migrations and consolidations is crucial. Outlining all the elements and concepts of Active Directory falls outside the scope of this document, however the following sections outline the subjects directly related to CIFS migrations and consolidation onto an FS8600.Active Directory DomainsDomains are one of the fundamental building blocks of Active Directory. Domains represent the primary mechanism for outlining or limiting the scope of pools of resources that should be logically managed together.Active Directory Domain ControllersDomain controllers (DC or DCs) are logical server hosts that have been specifically designated to be an authority and resource manager for a specific domain. More than one domain controller can be present within a domain, and through various replication technologies the configuration for the domain is kept consistent across all domain controllers in the domain, and in some cases, with resources outside the domain.When a FS8600 is said to “bind” or “join” to an Active Directory domain, it does so by communicating with the domain controllers in the environment and incorporating itself into the Domain topology. Aslong as the FS8600 continues to be a member of that domain, it will use the domain controllers in that domain as the point of visibility into the rest of the domain topology.It should be noted here that in order to join an FS8600 to a domain, an Active Directory user with sufficient privileges must be used to complete the operations required to bind the FS8600 to that domain. If requesting or provisioning a user with the needed privileges requires an administrative escalation, (e.g. filing a ticket with a corporate I.T. team) that should be noted and the time required to complete that escalation included in the planning timeline.Active Directory Security IdentifiersActive directory creates a unique security identifier (SID) for each user, group, machine or other object created within an active directory topology. When an attribute or parameter has to be set for any of these objects, the attribute references the SID, which is translated into a human readable name by the Active Directory services of the domain that owns the SID. Any time a SID must be interacted with, a DC for the associated domain must be visible to identify and own that SID.Active Directory Domain TrustsDomain trusts are the mechanisms through which a logically isolated domain establishes a logical relationship with another domain with the intent of sharing or negotiating access to resources across domains.For the purposes of this document, the primary concern of domain trusts are user management and visibility, and the available points of visibility for a host responsible for migrating file and permission data from the source file share to the FS8600.Hypothetical ExampleIn conjunction with other efforts to unify various development teams, it is decided that various shares and domains will be consolidated onto an FS8600, and a new domain created with the intent of consolidating established domains over time. For the first phase of a staggered migration, it is determined that the following shares will be migrated:\\nas01.corp.local\appsteam\\nas02.corp.local\appsusers\\files.apps.corp.local\appsrepo\\test3.devapps.corp.local\devappsrepo\\util.devops.corp.local\sourceThese shares will be migrated to the new FS8600 and new domain to create the following shares: \\fs8600.systems.corp.local\appsteam\\fs8600.systems.corp.local\appsusers\\fs8600.systems.corp.local\appsrepo\\fs8600.systems.corp.local\devappsrepo\\fs8600.systems.corp.local\sourcecorp devops apps devapps corp systems apps devappsitself or root folder for the share may override the inheritance polices of the first sub-folder, so this should be checked as well before a migration begins.Migrating with permissionsSimilar to requiring that tools used to move files be SID aware, the tools should also be permissions aware, in that they can walk and maintain the ACEs in a ACL (as they correspond to SIDs) and copy those properly with the file to the destination share.If the tools available, or the migration path available, do not allow for the proper migration of permissions, there are tools available to “re-apply” a permission tree to a file set after they have been copied.SharesFor some platforms, shares represent isolated containers that must remain largely static over their lifetime. For FluidFS and the FS8600, shares are views for CIFS clients into various assigned parts of the overall single namespace of the file system, as isolated by the NAS Volumes. This provides significant flexibility in creating a file set structure optimal for file system consolidation.Share names, DNS and networkingOne of the decisions that must be made early on in the planning phase is if DNS can be changed to reflect share movements across hosts, or if IP addresses can move with the share, or if neither of these is possible. The overall effort that may be required in reconfiguring clients to reflect new IPs, DNS or share names should be evaluated against the effort required to reconfigure all resources dependent on that name.In the case of being able to alter DNS, the overall Universal Naming Convention (UNC) used address the share by various clients may not have to be updated. For example in the case of hypothetical example used earlier, if DNS for \\files.apps.corp.local\appsrepo can be updated to point from the old IP of the host to the new IP pool of the FS8600, any client already configured to target that name will be able to follow migration without being reconfigured. In these sorts of migrations, it is generally considered best practice to reduce the Time To Live (TTL) property for the associated DNS A or CNAME records prior to the migration. An example:•After a share is disabled or marked read only on the original host and the file data migration completed, the DNS can be re-configured to point to the IP pool of the FS8600.If it is possible to move the IP of the original host to the FS8600, this offers another route for maintaining established client configurations. An example:•After a share is disabled or marked read only on the original host and the file data migration completed, the IP for the share/host can be removed from the source host/share andconfigured on the destination FS8600.If it is not possible to change DNS or move the related IP, then a new IP pool and new DNS entries must be assigned to the FS8600, and clients must be reconfigured to target the new DNS entries or IP addresses.It should be noted that the FS8600 is fully VLAN aware, which can be used to overcome some obstacles in many consolidation efforts, where using the earlier example test3.devapps.corp.local may expect untagged frames from VLAN238 and util.devops.corp.local may be dependent on VLAN686. In this case,both VLANs can be left tagged to the FS8600 Ethernet ports at the switch level, and the FluidFS platform is left responsible for understanding and managing the VLAN tagged frames.Please note to consult the Dell Compellent FS8600 Best Practices document for further information about DNS, IP addresses and VLANs with the FS8600 platform.Shares and subsharesBecause shares represent points of visibility into the file system as isolated by NAS Volumes, the creation of shares below shares (subshares) can provide much needed control granularity. These can be created at arbitrary points within the file system, as needed, for either migrations or ongoing use cases. It should be noted that subshares can introduce a level of management complexity with regards to permissions and particularly inheritance, and should be used only as needed as opposed to a default assumption.AntivirusEach share or subshare can be configured to enable Antivirus scanning, via the ICAP protocol to a pre-determined Antivirus host. For more information regarding Antivirus support, please consult the Dell FluidFS NAS Solutions Administrator’s Guide.NAS VolumesNAS Volumes represent the primary abstraction and isolation mechanism on top of the single namespace, single instance FluidFS file system. The FS8600 features Snapshots and Replication are NAS Volume Centric; therefore planning should include considerations towards a NAS Volume scheme. For more information about NAS Volumes, please consult the Dell FluidFS NAS Solutions Administrator’s Guide and Dell Compellent FS8600 Best Practices documents.SnapshotsFluidFS Snapshots are an elegant, efficient and high performance data protection technology built into the core FluidFS architecture. Because of their performance, reliability and ease of use, they can provide the primary data protection mechanism for any data set profile. One of the primary benefits of consolidation of file shares to a unified FluidFS platform is the collapsing of administrative overhead required to manage the backups of the distributed or unorganized file share hosts.The FS8600 also provides two methods for user recovery of files from snapshots. Snapshotted versions of files can be access through the “View Previous Versions” Windows tool. They can also be access through a hidden “.snapshots” folder that FluidFS places in every share. System Administrators, as well as users, can access these areas to recover file data preserved in an existing Snapshot. ReplicationMany data sets may be required to be backed up to an offsite location or otherwise be stored in more than one system or location. With the replication available through the FluidFS platform, this data can be replicated from an active FS8600 in one site, to another FS8600 either in same location or in a separate geographic location entirely. This can significantly simplify the backup systems involved in meeting data protection and data retention requirements.For environments that intend to use a replication in such a way as to “stand up” on the replication destination, all Active Directory resources available in the primary site must be available in the site with the replication target.Initial file ingestionInitial ingestion and Storage Center tieringAny planning for the initial seeding of the FS8600 should be aware of the size of the data set to be imported, and the total available capacity in the Storage Centers Tier 1 storage. In order to avoid any overall Storage Center performance degradation, imports should either be planned in such a way as to not overrun Tier 1 storage, or the Storage Center volumes assigned to the FS8600 should have their storage profiles altered to a lower tier. Initial replication between FS8600s should also be considered in the planning, as initial replication of large data sets can similarly threaten to overrun Tier 1 storage. Optimizing performanceFor data sets that can be broken up during initial ingestion so that data can be migrated from multiple hosts, there are both migration and life-cycle performance benefits from performing that migration from multiple hosts. For performance during the migration, the extra hosts can improve overall throughput of data from the source to the FS8600. Migrating data from multiple hosts also takes best advantage of the overall FluidFS architecture, ensuring that data is best placed evenly around the entire cluster in order to provide best performance for the data set going forward.Ingestion from productionOften the simplest method for migrating file data to a new platform is to simply move or copy it from its production platform. While this may be the simplest, it is also likely to impact the current platform and the production file data set.If the current platform has access to the new FS8600 and provides the functionality for mounting other shares on other hosts (e.g. Windows Storage Server platforms), it may be easiest to simply mount the intended destination FS8600 share directly on the current platform, and copy file data directly from the current platform to the FS8600. This minimizes the amount network “hops” required to seed the FS8600. It is important to remember that the FS8600 must be bound to Domain Controllers with the required visibility to translate the SIDs and other Active Directory file information associated with the data set.If it is not possible to mount the share from the current platform, a host with visibility to both the source platform and the destination FS8600 can be used to migrate the file data to the destinationFS8600. In this case, the host being used to perform the migration, as well as the FS8600 must have visibility to the Domain Controllers responsible for the domains involved.Ingestion from backupsIn environments where the performance impact or network exposure required are the limiting factors in migrating file data, a common strategy is to seed and populate from the backup system associated with the current platform. Because this introduces no performance impact to the current system, and requires no network exposure, it is often used for massive file sets or complicated migration strategies.A strategy that builds on this is to use a backup system as the mechanism responsible to initially seed the destination FS8600, and then use host level tools to keep that seeded data in sync or at least in close proximity to the state of the current platform.The inclusion of another system in the strategy can add complexity and introduce new challenges, such as performance contention for resources on the backup system. Another area of concern is that thepermissions scheme of the current platform may be proprietary, and items such as file permissions ACEs or other attributes may not be stored in a translate-able way. Because the backups are taken from the perspective of the current platform, this may mean that file data attributes could not be understood by the destination FS8600. A final example of this introduced complexity is that due to the ways many enterprise backup systems catalog or maintain data on medium such as tape drives or libraries, file attributes such as access and write time stamps may be inaccurate when the data is seeded to the new FS8600.The seeding of data to the FS8600 can be performed using share mounts of the FS8600 to the backup host. As the FS8600 only supports NDMP restores from data that was initially backed up via NDMP from an FS8600, NDMP backup systems must be able to export NMDP data through open files.Migration toolsThere are a number of tools and utilities available to assist in the various tasks required for file data migrations or consolidations. The list below is not a complete list of available tools, nor is it a list of tools supported by Dell Compellent. It is simply a list of tools widely used by IT organizations for file data migrations and are commonly understood.RobocopyRobocopy, and a number of similarly purposed tools, is specifically designed for moving large file sets of complex data to new destinations. It has earned a reputation for reliability and performance, with modern versions of robocopy including support for ACLs and ACEs, as well as features such as multithreading for improved performance on multi-CPU systems across large file sets. There are a number of ways to automate robocopy activity, either through built in tools such as robocopy’s “run hours” flag or through tools such as Microsoft Windows’s “Scheduled Tasks” automation tool. Using this automation, file sets can be kept in sync or in a close proximity state for a period of time running up to a migration window.XcaclsXcacls, and other similarly purposed tools, provide the functionality to harvest or save permissions data and schemes across large file sets, and re-apply them to a similar or copied file set. For environments where the tool used to migrate the file data itself is unable to migrate the file permissions, Xcacls can be used to re-apply the permissions after the file data migration. It can also re-apply permissions to data seeded from a backup system.。
Dell Compellent FS8600
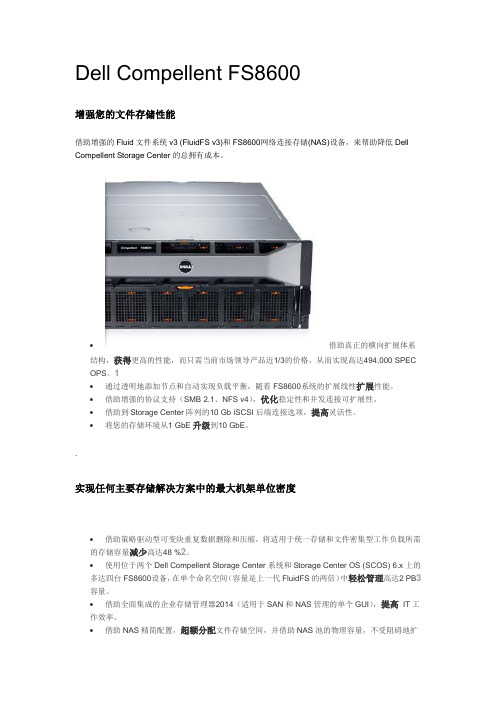
Dell Compellent FS8600增强您的文件存储性能借助增强的Fluid文件系统v3 (FluidFS v3)和FS8600网络连接存储(NAS)设备,来帮助降低Dell Compellent Storage Center的总拥有成本。
∙借助真正的横向扩展体系结构,获得更高的性能,而只需当前市场领导产品近1/3的价格,从而实现高达494,000 SPEC OPS。
1∙通过透明地添加节点和自动实现负载平衡,随着FS8600系统的扩展线性扩展性能。
∙借助增强的协议支持(SMB 2.1、NFS v4),优化稳定性和并发连接可扩展性。
∙借助到Storage Center阵列的10 Gb iSCSI后端连接选项,提高灵活性。
∙将您的存储环境从1 GbE升级到10 GbE。
.实现任何主要存储解决方案中的最大机架单位密度∙借助策略驱动型可变块重复数据删除和压缩,将适用于统一存储和文件密集型工作负载所需的存储容量减少高达48 %2。
∙使用位于两个Dell Compellent Storage Center系统和Storage Center OS (SCOS) 6.x上的多达四台FS8600设备,在单个命名空间(容量是上一代FluidFS的两倍)中轻松管理高达2 PB3容量。
∙借助全面集成的企业存储管理器2014(适用于SAN和NAS管理的单个GUI),提高IT工作效率。
∙借助NAS精简配置,超额分配文件存储空间,并借助NAS池的物理容量,不受阻碍地扩展卷。
∙借助精简卷克隆,启用代码和工作流测试,防止出现非生产数据集。
轻松扩展∙在现有的存储基础架构中,扩展文件存储性能和容量。
FS8600配备FluidFS v3,可提供灵活的横向扩展NAS解决方案,帮助减少恼人且昂贵的断代升级需求。
通过在单个命名空间内管理一个高达2 PB3的文件系统,简化数据增长。
∙通过复制和压缩30天或更长时间内未被访问的数据,自动减少存储文件数据所需的容量。
戴尔XPS超极本重装映像“操作指南”说明书

Dell XPS Ultrabook Reimage“How-To”GuideRevision1.0A01Dec.27th,2016Contents1Overview (3)2“How-To” (4)2.1Auto Installation Application (4)2.2Manual Installation Order (4)Appendix A How to create and use the Dell Windows recovery image (7)Appendix B Intel Rapid Storage Technology (9)Appendix C DELL Command Suite (11)Appendix D Dell Dock(WD15)&Dell Thunderbolt Dock(TB16)information and specifications (12)1OverviewThis document is a quick guidance for re-image OS on Dell XPS Ultrabook notebooks.Failure to install drivers and applications in this document may result in undesirable performance.These drivers are required to enable new technologies and features.Reinstalled images should be built from Windows clean installation then following steps in this guide.Dell does not recommend starting from an image built on previous generations of products or other computer systems.This“How-To”guide applies to following Systems,and support Windows OS list in below2“How-To”2.1Auto InstallationApplicationDell highly recommends Dell Command |Update application (DCU)to automate the installation of BIOS,firmware,driver and critical updates specific to your system.The application is availabletodownloadon Dell SupportWebsiteDriver&Downloadspage .Pick your system type from the list or enter the service tag of your system to get the right version for your computer.The DCU is supported on Precision,XPS and Latitude notebooks.The Dell Command |Update toolallows you to keep your system up to date without you having to know every driver or update needed.It will automatically interrogate your system and compare it to the available updates on /support for your specific system.Read here for more detail about How to use Dell Command |Update to update all drivers BIOS and firmware for yoursystem2.2Manual InstallationOrderAlternatively,Dell recommends installing the following BIOS,firmware and drivers step-by-step in the prescribed order to ensure optimal performance.Search for your system model name under Select a Product selection,or enter the service tag of your system to locate Drivers &Downloads page on the Dell Support Website.Change the Operating System to view all available updates for your system.NOTE :Older BIOS versions and drivers could result in your computer or not functioning optimally.NOTE :Dell highly recommends that you install BIOS,firmware,driver and critical updates via Microsoft Windows Update (in session 1)and Dell Command I Update application (in session 2.1).Manual installation is only recommends when you have internet connection problem.NOTE :Dell recommends restarting your system between each driver,firmware installation.onboard CommunicationAppendixAppendix AHow to create and use the Dell Windows recovery imageAfter you download the Windows recovery image file,follow these instructions to create a bootable USB drive or DVD,copy the recovery image onto your bootable media,and then use the media to reinstall Windows on your Dell device.Warning:These advanced steps are intended primarily for system administrators and those familiar with command line and/or comfortable following technical tutorials.Note:To print this document,expand the required section before you click the printer icon at the top of this document.How to create Windows10installation mediaCreate USB installation mediaStep1:Format your USB drive as a bootable driveMake sure that you use8GB or larger USB drive(32GB Maximum)and backup any important data on it.When the drive is formatted,all existing data will be deleted.1.Connect the USB drive to the PC where you'll be creating the installationmedia.2.Open the Command Prompt window by right-clicking the Start button and then select CommandPrompt(Admin)to run in administrator mode.3.At the command prompt,type diskpart and press Enter.4.Next,type list volume and press Enter.5.From the list,determine which volume number is the connected USB drive.The volume type shouldbe marked as Removable.6.Type select volume X,where X is the number obtained in the previous step.For example,selectvolume9.7.Type clean and press Enter.8.Type create partition primary and press Enter.9.Type format fs=fat32label='OS install'quick and press Enter.10.Type active and press Enter.11.To close the Command Prompt window,type exit and press Enter.Step2:Copy the recovery image to your bootable USB drive1.Go to the location where you saved the recovery image.2.Right-click the recovery image file(.iso)and on the options menu,select Mount.3.Windows will open the contents of the image in File Explorer.4.Copy the contents of the image to your bootable device.Create DVD installation media1.Insert the DVD into the disc drive of the PC where you’ll be copying the recovery image toDVD.Make sure that the disc drive has burning capabilities.2.Navigate to the folder where you saved the recovery image and double-click the isofile.3.Either the Windows ISO media creation tool or installed third-party disc burning software willopen.4.Follow the on-screen instruction to burn the ISO to the DVD.When the process completes,you willhave created bootable installation media.Using the USB or DVD installation media to reinstall Windows101.Connect the installation media you created to the Dell system where you want to installWindows.2.Restart the system and when the Dell logo screen appears,tap the F12key until you see Preparingone time boot menu in the top-right corner of the screen.3.On the boot menu,under UEFI boot,select your media type(USB or DVD)and enter your language.4.On the Choose an option screen,select Troubleshoot,and then select Recover from a drive.5.Follow the on-screen instructions to finish installing Windows.The installation process will takesome time and your computer will restart.Appendix BIntel®Rapid Storage TechnologyIntel®Rapid Storage Technology offers greater levels of performance,responsiveness,and expandability than ever before.Whether you are using one or multiple serial ATA(SATA)or PCIe drives,you can take advantage of enhanced performance and lower power consumption from the latest storage technologies. Additionally,you can rest easy knowing you have added protection against data loss in the event of a hard drive failure.∙Unleash the Performance of Your Solid-State DriveIntel®Rapid Storage Technology has added support for next generation PCIe storage devices with transfer speeds up to1GB/s that maximizes storage performance and improves response time for everyday usages like photo editing,video loading,and office productivity.Dynamic storage accelerator accelerates the performance of your SSD by dynamically adjusting system power management policies to deliver up to15 percent faster performance1during heavy multitasking compared to default power management.∙Fast Access to the Files and Applications You Use MostIntel®Smart Response Technology is a feature of Intel Rapid Storage Technology that recognizes and automatically stores your most frequently used applications and data into a high performance SSD while giving you full access to the large storage capacity of a hard disk drive(HDD).This enables a lower-cost, small-capacity SSD to be used in conjunction with a high-capacity HDD.Intel Smart Response Technology enables your system to perform faster than a system with just a HDD.Also supports solid-state hybrid drives(SSHDs).Intel Smart Response Technology boosts SSHD performance by informing the drive which data you use the most so it can store it into the built-in SSD,so your most frequently used data and applications are instantly accessible.∙Performance with Protection:RAID TechnologyMost of us don’t plan backup storage well in advance.Hard drive failure can be devastating,because it results in irretrievable content.Intel Rapid Storage Technology offers features that improve performance and data reliability for disk-intensive retrieval applications such as editing home video.For the fastest performance,Intel Rapid Storage Technology can combine from two to six drives in a configuration known as RAID0,so data can be accessed on each drive simultaneously,speeding up response time.For the best reliability,Intel Rapid Storage Technology RAID support includes the following levels of performance and reliability:RAID level0(Striping)RAID level1(Mirroring)RAID level5(Striping with parity)RAID level10(Striping and mirroring)Multiple drives in a PC can also provide added protection from disastrous hard drive failures by mirroring all data among two or more drives.This configuration is known as RAID1.RAID5and10provide additional reliability by mirroring all data among three and four drives respectively.Appendix CDell Client Command SuiteThe Dell Client Command Suite is the new name of our industry leading Client Systems Management tools. These tools make Dell commercial client systems the world's most manageable client devices.Click on a link below for more detailsDell Command|MonitorDell Command|ConfigureDell Command|DeployDell Command|Update CatalogDell Command|UpdateDell Command|Power ManagerAppendix DDell Dock(WD15)&Dell Thunderbolt Dock(TB16)information and specificationsThe Dell Thunderbolt Dock TB16is a device that links all your electronic devices to your laptop computer using Thunderbolt™3(Type-C)cable interface.When you connect the laptop to the docking station,you can gain accessto all your peripherals such as the mouse,keyboard,stereo speakers,external hard drive,and large-screen displays without having to plug each one into the laptop.Key Features:∙Supports up to three FHD displays or two4K displays@60Hz∙Supports faster data transfer of up to40Gbps,ideal for largefiles.∙Common docking experience across platforms with USB-C port(s)having data,video,and power capabilities.∙Single cable for power and data(up to130w on supported computers only).For more information about USB Type-C,refer to the knowledgebase article USB Type-C-Frequently Asked Questions.。
Dell FluidFS 版本 6.0 FS8600 设备固件更新指南说明书

Dell FluidFS Version 6.0 FS8600 Appliance Firmware Update GuideNotes, Cautions, and WarningsA NOTE indicates important information that helps you make better use of your product.A CAUTION indicates either potential damage to hardware or loss of data and tells you how to avoidA WARNING indicates a potential for property damage, personal injury, or death.© 2017 - 2021 Dell Inc. or its subsidiaries. All rights reserved. Dell, EMC, and other trademarks are trademarks of Dell Inc. or its subsidiaries. Other trademarks may be trademarks of their respective owners.About This Guide (4)Revision History (4)Chapter 1: Updating FluidFS Software on FS8600 Appliances (5)Supported Update Paths (5)Update Considerations (5)Performing Pre-Update Tasks (5)Pre-Update Checks (6)Updating From FluidFS Version 5.0 to 6.0 (6)Performing Post-Update Tasks (7)Chapter 2: Related Documentation (8)Documents Intended for Dell Customers (8)Documents Intended for Dell Installers and Certified Business Partners (8)Contents3The Dell FluidFS Version 6.0 FS8600 Appliance Firmware Update Guide provides information about updating the software on a Dell FS8600 FluidFS cluster. The document describes how to update the FluidFS software from version 5.0 to version 6.0 and also includes a list of related documentation.Revision HistoryDocument number: 680-112-002Table 1. Revision HistoryRevision Date DescriptionA July 2017Initial release of FluidFS version 6.0B June 2021Update for FluidFS version 6.0.5001354About This Guide1 Updating FluidFS Software on FS8600AppliancesThis section provides information that you need to update the FluidFS software on your FS8600 cluster.Topics:•Supported Update Paths•Update Considerations•Performing Pre-Update Tasks•Pre-Update Checks•Updating From FluidFS Version 5.0 to 6.0•Performing Post-Update TasksSupported Update PathsFor the supported update paths to FluidFS version 6.0, see the Dell Fluid File System Version 6 Support Matrix. This matrix is available from /support.Update ConsiderationsThe internal storage reservation for the cluster-wide data reduction dictionary was increased to 20 GB for the entire cluster. Performing Pre-Update TasksComplete the tasks in the following list before updating to the latest version of FluidFS version 6.0.●Change the FluidFS cluster name and NetBIOS name to match.Make sure the cluster name contains 15 or fewer characters and does not begin with a number.●Delete local user names that have a period as the last character. Recreate these accounts with different names.●Stop all NDMP backup sessions.If an NDMP backup session is in progress during the update, the temporary NDMP snapshot is left in place.●Open additional ports on your firewall to allow replication between replication partners.●Make sure SMB shares and NFS exports have only alphanumeric characters in the Comment field.●Make sure all the defined DNS servers are accessible using ping and dig (DNS lookup utility).●Make sure the Active Directory domain controller is accessible using ping, and that the FluidFS cluster system time is in syncwith the Active Directory time.●Make sure the NAS controllers are running, attached, and accessible using ping, SSH, and rsync.Although only one NAS controller is required to be running in each NAS appliance, Dell recommends that all NAS controllers be running.Updating FluidFS Software on FS8600 Appliances5Pre-Update ChecksThe following pre-update checks occur when updating to FluidFS v6 or later.Table 2. Pre-Update ChecksDescription v5 to v6v6 to later v6NotesCheck that DataReduction ArchiveMode is notenabled.XN/A Data Reduction Archive mode is deprecated in v6, the pre-update check will not allow updating to v6 if NAS volumes have Data Reduction Archive mode set. Instead, use 1-day filter for data reduction setting.Check that all attached controllers are up andrunning.XX-Check that File System is in optimal state.X X-Check that all LUNS are accessible from FluidFS.X X-Check that all configuration objects are valid.X X-Check that the mount table (mtab) is not lockedon all controllers.X X-Check that the File System is not in no-servicemode.X X Update is not allowed in No-Service Mode.Check that there are no more than 400 public Ips defined in all subnets.XN/A-SMB Message Encryption should be set for SMB 3.0 and above.XN/AThe maximum SMB version cannot be set toSMB 1 or SMB 2 if message encryption isrequired.Check the validity of an NFS Export ACE regarding the Subnet netmask:●Netmask is not set to a Broadcast●Netmask is not set to a Multicast●Netmask is not set to a LinkLocal●Netmask is not set to a LoopBack XN/A-Check that there is no NAS Volume access restriction to the Admin subnet.XN/A-Check that there are no invalid Administrators .X N/A-Updating From FluidFS Version 5.0 to 6.0Use the procedure in this section to update a Dell FS8600 FluidFS cluster from FluidFS version 5.0 to 6.0.Some FluidFS version 5.0 maintenance releases cannot be updated directly to FluidFS version 6.0. See the FluidFS v6 Support Matrix for a listing of the supported update paths.When a service pack is installed, the NAS controllers reboot during the installation process. Rebooting might cause interruptions in SMB, NFS, and FTP client connections. Therefore, Dell recommends installing service packs during a maintenance window.Prerequisites●Update to Dell Storage Manager 2016 R3 or later. Dell recommends using the latest Dell Storage Manager version. For moreinformation about updating Dell Storage Manager, see the Dell Storage Manager Release Notes.6Updating FluidFS Software on FS8600 Appliances●The Storage Center OS must be at version 6.5.10 or later. For more information about updating the Storage Center OS, seethe Storage Center Software Update Guide.●Perform the pre-update tasks as described in Performing Pre-Update Tasks on page 5.●Contact Dell Technical Support to obtain the latest FluidFS version 6.0 service pack. Do not modify the file name of theservice pack.Download and Install the Service Pack1.Download the service pack using one of the following methods:●Make sure that Dell Storage Manager and SCOS are both running supported versions, and then contact Dell TechnicalSupport to enable the upgrade rule in SupportAssist for your FS8600 cluster. After the rule is enabled, right-clickthe cluster name in Dell Storage Manager, then select Actions > Check for Upgrade to download the service pack automatically.●Request an FTP link from Dell Technical Support, manually download the service pack, and use FTP to upload the servicepack to the FS8600 cluster.When you upload a FluidFS ISO file to the FTP folder, it disappears from the FTP folder after a few minutes. The 2.The installation process for the service pack cannot be reversed. After the service pack isa.After the service pack is uploaded to the system, it is displayed in Dell Storage Manager as available, but not installed.b.Right-click the service pack and choose upgrade to install it.Performing Post-Update TasksAfter you update FluidFS, complete the tasks in the following list.●If you disabled secured management before the update, reenable this feature.●If you plan to enable data reduction, make sure that you allocate sufficient space for the NAS pool.●If antivirus scanning is enabled, configure the file-size threshold and whether to allow or deny access to files that are largerthan this threshold.●Restart Dell Storage Manager.Updating FluidFS Software on FS8600 Appliances72Related Documentation The following documents comprise the core Dell FluidFS for FS8600 Appliance documentation set. The documents are sorted by intended audience.Topics:•Documents Intended for Dell Customers•Documents Intended for Dell Installers and Certified Business PartnersDocuments Intended for Dell Customers●Dell FluidFS Version 6.0 FS8600 Appliance CLI Reference Guide – Provides information about the FS8600 appliancecommand-line interface.●Dell FluidFS Version 6.0 Release Notes – Provide information about FluidFS releases, including new features andenhancements, open issues, and resolved issues.●Dell FluidFS Version 6.0 Support Matrix – Provides information about supported software and hardware configurations aswell as usage requirements and recommendations for Dell FluidFS v6.x products.●Dell Storage Manager Installation Guide – Provides information about installing and configuring the Dell Storage ManagerData Collector and Dell Storage Manager Client.●Dell Storage Manager Administrator’s Guide – Provides information about using the Dell Storage Manager software tomanage Storage Center and FS8600 appliances.●Dell Storage Manager Release Notes – Provides information about Dell Storage Manager releases, including new featuresand enhancements, open issues, and resolved issues.Documents Intended for Dell Installers and Certified Business Partners●Dell FluidFS Version 6.0 FS8600 Appliance Pre-Deployment Requirements – Provides a checklist that assists in preparingto deploy an FS8600 appliance before a Dell installer or certified business partner arrives onsite to perform an FS8600 appliance installation.●Dell FluidFS Version 6.0 FS8600 Appliance Deployment Guide – Provides information about deploying an FS8600 appliance,including cabling the appliance to one or more Storage Centers and the network, and deploying the appliance using the Dell Storage Manager software.●Dell FS8600 Appliance Service Guide – Provides information about FS8600 appliance hardware, system componentreplacement, and system troubleshooting.●Dell NAS Appliance SFP+ Replacement Procedure – Provides information about replacing SFP+ transceivers on an inactivesystem.●Dell FluidFS FS8600 Appliance 1Gb to 10Gb Upgrade Procedure – Provides information about upgrading a Fibre ChannelFS8600 appliance from 1Gb Ethernet client connectivity to 10Gb Ethernet client connectivity.8Related Documentation。
戴尔 Latitude Z600 服务手册说明书

Dell™ Latitude™ Z600 服务手册注、小心和警告如果您购买的是 Dell™ n 系列计算机,则本说明文件中有关 Microsoft ® Windows ® 操作系统的任何参考信息均不适用。
本说明文件中的信息如有更改,恕不另行通知。
© 2009 Dell Inc. 版权所有,翻印必究。
未经 Dell Inc. 书面许可,严禁以任何形式复制本材料。
本文中使用的商标:Dell 、DELL 徽标、Latitude 、TravelLite 、Wi-Fi Catcher 和 ExpressCharge 是 Dell Inc.的商标;Intel 、Pentium 、Celeron 、Intel Atom 和 Core 是 Intel Corporation 的商标或注册商标;Bluetooth 是 Bluetooth SIG, Inc. 拥有的注册商标,许可 Dell 使用;TouchStrip 是 Zvetco Biometrics, LLC 的商标;Blu-ray Disc 是 Blu-ray Disc Association 的商标;Microsoft 、Windows 、Windows Server 、MS-DOS 、Aero 、Windows Vista 和 Windows Vista 开始按钮是 Microsoft Corporation 在美国和/或其它国家和地区的商标或注册商标。
Adobe 、Adobe 徽标和 Adobe Flash Player 是 Adobe Systems Incorporated 的商标。
本说明文件中述及的其他商标和商品名称是指拥有相应标记和名称的公司或其制造的产品。
Dell Inc. 对其它公司的商标和产品名称不拥有任何所有权。
2009 年 9 月 Rev. A00拆装计算机 添加和更换部件 规格 诊断程序 密码系统设置程序注:“注”指可帮助您更好使用计算机的重要信息。
戴尔XPS 8900说明书

尺寸和重量
系统信息
内存
端口和接口
通讯
介质卡读取器
额定功率
计算机环境
视频
音频
存储
视图
视频
控制器: 集成 独立
内存: 集成 独立
规格
Intel 高清显卡 530 • NVIDIA GT 730 • NVIDIA GTX 745 • NVIDIA GTX 750 Ti • NVIDIA GTX 960 • AMD Radeon R9 370
尺寸和重量
系统信息
内存
端口和接口
通讯
介质卡读取器
额定功率
计算机环境
视频
音频
存储
视图
介质卡读取器
类型 支持的插卡
规格
一个 19 合 1 插槽 • CF I/II 型卡 • CF MD 卡 • 安全数字 (SD) 卡 • 安全数字 mini SD 卡 • SDHC Class 2/4/6 • 多媒体卡 (MMC) • 多媒体卡+ (MMC+) • RS MMC 卡 • MultiMedia Card (MMC) Mobile
• 安全数字扩展容量 (SDXC) 卡 • Memory Stick (MS) 卡 • 记忆棒 Pro • 记忆棒 Duo • 记忆棒 Pro Duo • 记忆棒 Pro-HG Duo • Memory Stick XC • SM xD 卡
尺寸和重量
系统信息
内存
端口和接口
通讯
介质卡读取器
额定功率
计算机环境
注:如果您的计算机关闭或处 于休眠状态,则必须连接电源 适配器以使用 PowerShare 端口 为设备充电。您必须在 BIOS 设 置程序中启用此功能。
Dell Latitude ATG E6400 安装与快速参考指南说明书

Dell™ Latitude™ ATG E6400安装与快速参考指南本指南提供了计算机的功能概览、规格、快速设置、软件和故障排除信息。
有关操作系统、设备和技术的详细信息,请参阅 上的《Dell 技术指南》。
型号 PP27Lw w w.d e l l.c o m|s u p p o r t.d e l l.c o m注、注意和警告注:“注”表示可以帮助您更好地使用计算机的重要信息。
注意:“注意”表示可能会损坏硬件或导致数据丢失,并告诉您如何避免此类问题。
警告:警告表示潜在的财产损坏、人身伤害或死亡。
Macrovision 产品通告本产品采用了版权保护技术,它通过申请属于 Macrovision Corporation 和其它产权所有者的美国专利权以及其它知识产权来进行保护。
必须经Macrovision Corporation 授权才可以使用此版权保护技术,此技术仅适用于家庭和其它有限的观看用途,除非 Macrovision Corporation 另有授权。
禁止进行反向工程或反编译。
____________________本说明文件中的信息如有更改,恕不另行通知。
©2008 Dell Inc.。
版权所有,翻印必究。
未经 Dell Inc. 书面许可,严禁以任何形式进行复制。
本文中使用的商标:Dell、DellConnect、Latitude、Wi-Fi Catcher、ExpressCharge、Dell MediaDirect和 DELL 徽标是 Dell Inc. 的商标;Bluetooth是 Bluetooth SIG, Inc. 拥有的注册商标,并许可 Dell 使用;Intel和 Core 是 Intel Corporation 在美国和其他国家或地区的注册商标;Microsoft、Windows、Windows Vista和Windows Vista 开始按钮徽标是 Microsoft Corporation 在美国和/或其它国家或地区的商标或注册商标;TouchStrip 是 UPEK, Inc. 的商标。
Dell零售产品线介绍
XPS 1530关键卖点
引人瞩目的设计: 引人瞩目的设计:
键.
优良的材质:镁合金, 铝质拉丝 铬合金按键 更时尚的设计:三种颜色可选,管式转轴,触摸按
超凡性能: 超凡性能:
可选45nm全新Intel 9500CPU, 可选256 MB NVIDIA 8600GT 独立显卡 可选指纹识别器,更高性能显示屏LED 标配吸入式光驱,HDMI接口. 多媒体功能键,摄像头,遥控器给客户带来更全方位 多媒体体验.
戴尔(中国)培训专用
XPS 420 特征和卖点
外观设计
洗练的工业设计,黑色抛光面板,北极银色侧板,钢琴的神韵. 与主机色彩相匹配的多种外设. 方便易用的前置及后置端口,前置AVI/O多用托架.
XPS MiniView显示屏 显示屏
集成到前饰面的辅助液晶屏,便于访问和控制介质 兼容微软 Sideshow,支持标准Sideshow工具程序
机箱顶部设备存储区
机身顶部设有设备存储区,便于使用坞站,充电和连接线缆
Cool and Quite
由于英特尔的多核处理器经过专门设计,能效更高,消耗的能源 更少,产生的热量比其单核处理器更低,因此不仅可节省能源开支, 还可让风扇以较低速度运转,系统运行更安静. BTX机箱设计同样也有益于散热和降低噪音
定制可选黑色,白色或其它6种经过
高级缎面处理的颜色 与外壳匹配的桌面墙纸 个性十足的全新配件
始终连通
Wireless-N,支持HyperBand天线 WiFi Catcher 大容量电池,续航时间长
简约灵动
DellConnect 远程修复 (非工厂预装,
- 1、下载文档前请自行甄别文档内容的完整性,平台不提供额外的编辑、内容补充、找答案等附加服务。
- 2、"仅部分预览"的文档,不可在线预览部分如存在完整性等问题,可反馈申请退款(可完整预览的文档不适用该条件!)。
- 3、如文档侵犯您的权益,请联系客服反馈,我们会尽快为您处理(人工客服工作时间:9:00-18:30)。
Dell台式机重装Windows7系统总结
1 主机自带的系统为Win8,使用光盘或者U盘启动重装,按F12进入BOOT,选
择第二个选项,即带P1的那个选项,然后根据提示进行安装即可。
2 安装结束以后,有很多驱动无法安装,也无法上网。
对此使用驱动精灵离线版,
安装驱动精灵离线版就能上网,然后使用驱动精灵对驱动进行安装和更新。
3 该主机的目的是连接两个显示器,显卡工具上有两个接口,因此需要下载matrox
G450 MMS(此处可根据接口的型号不同而下载不同的版本),然后进行安装,设置之后就可以两个屏幕显示。
此处的matrox G450 MMS有两个版本,一个是32位的另一个是64位的,根据系统的不同选择不同的版本进行安装。
虚拟机安装以及和宿主机进行共享:
设置IP地址,主机IP地址设为两个,一个是上网地址,另一个是和虚拟机进行连接的地址,上网地址根据自动获取的IP进行设置。
另一个IP地址的设置应该和虚拟机处在同一个网段。
VM virtualBox中安装Win7时增强功能直接打开我的电脑,然后双击CD驱动器,安装即可。