智能型彩色液晶显示器613说明书
爱国者数码相机伴侣王p612_613说明书

七、硬盘设备的生产厂家一般以 1000 为进制计算容量,即 1k=1000 byte,1M=1000K,1G=1000M,操作系统是以 1024K 为 1M 计算,1024M=1G,格 式化后的报告容量会少于标称容量。不同操作系统下,系统文件也会占有少量 的空间
目录
第一章 公司简介 ................................................3 第二章 产品介绍 ................................................4 2-1 简介 ........................................................4 2-2 包装清单 ....................................................4 2-3 性能特点 ....................................................4 2-4 技术规格 ....................................................5 2-5 面板及按键功能 ..............................................6 第三章 产品使用方法 .............................................8 3-1 初次使用与设定 ...............................................8 3-2 USB 连接操作模式 .............................................9 3-3 硬盘格式化 ..................................................9 3-4 菜单介绍 ....................................................9 3-5 装置选择 ....................................................10 3-6 自动关机功能 ................................................10 3-7. 记忆卡数据备份 .............................................10 3-8. 文件管理 ...................................................12 3-9 复制及粘贴文件或文件夹 ......................................12 3-10 删除文件或文件夹 ...........................................14 3-11. 音乐播放模式 ..............................................15 3-12. FM 广播收听模式(此功能仅限 UH-P613 机型) ..................17 3-13. 录音操作模式 ..............................................17 第四章 电池使用与故障排除 .......................................19 4-1. 电池充电 ...................................................19 4-2. 硬盘与机器的维护 ...........................................19 4-3. 常见问题与疑难排解 .........................................19 第五章 数据安全解决方案 ........................................20 第六章 注意事项 ................................................20 第七章 华旗资讯产品标准保修服务承诺 ............................21 第八章 联系我们 .................................................23
液晶显示器说明书
液晶显示器使用说明书TFTLCGINSTRUCTION MANUAL简体中英文说明书目录一. 安全指南..............................‥2 二. 附件.................................‥ (3)三. 面板控制与端子接口...............‥4四. 液晶电视与各种信号的连接......‥5 五. OSD的基本调整.....................‥6 六. PC显示模式...........................‥7 七. VGA连接模式........................‥8 八. 遥控器说明 ...........................‥9九. 产品规格..............................‥10 十. 故障维修 (11)一.安全指南重要注意事项本机内有高压,非专业人员请勿打开机壳以免触电。
不正确的使用方法可能会导致触电或火灾事故。
为防止发生危险情况,请在安装,使用和清洁本机时遵守指示进行。
为确保你的安全及延长彩色液晶电视的使用寿命,请在使用前仔细阅读下述安全注意事项。
·在使用本机前,必须阅读并理解所有使用指示。
·必须严格遵守本机及其使用说明书上的警告指示。
·操作时必须遵照所有使用说明。
·请勿使用制造商没有推存的附设装置,不恰当地使用附设装置可能会发生意外情况。
·使用彩色液晶电视所配的电源适配器。
在把AC电源线连接到电源插座之前,请检查所适配器是否符合供应条件。
·请勿自行维修本机,由于本机内有高压装置会对人体或电视本身造成各种危害。
·若要将本机挂装上或吊装在天花板上,请按照制造商推存的方法进行安装。
·清洁本机前,拔下电源插头请使用略湿的抹布清洁,清洁时请勿使用液体清洁剂或喷雾清洁剂。
·长时间不使用本机时,请拔出交流电源插头。
BENQ MS612ST MX613ST数码投影机 说明书

随本投影机提供的附件适用于您所在的地区,可能与手册上图解中所述的不同。 * 仅部分特定地区提供保修卡。详情请咨询经销商。
投影机
电源线
VGA 线缆
快速使用指南
Capture
装有电池的遥控器
使用遥控器之前,请先拉出塑料片。
用户手册光盘
保修卡 *
Capture
选配附件
1. 备用灯泡组 2. 吊装套件
MS612ST/MX613ST 数码投影机 用户手册
欢迎使用
目录
重要安全说明 ................ 3
简介............................... 7
投影机特点 ........................................... 7 物品清单 ............................................... 8 投影机外观图 ....................................... 9 控制按钮和功能 ................................. 10
保修及版权信息 ............ 63
法规声明 ......................64
2 目录
重要安全说明
您的投影机经过设计和测试,符合最新信息技术设备的安全标准。然而,为确保安 全使用本投影机,按本手册中提及和产品上标记的说明进行操作是至关重要的。
安全说明
1. 请在使用投影机之前阅读本使用手 5. 册。妥善保存本使用手册以备今后 参考。
投影机吊装
我们希望您使用 BenQ 投影机时有 愉快的体验,因此我们需要提醒您 这些安全事项,以防生命财产受到 损害。
大连东福彩色液晶显示器模块使用说明书

EDM12232-06图形点阵式液晶显示模块使用说明大连东福彩色液晶显示器有限公司1. 使用范围----------------------------------------------------22. 质量保证----------------------------------------------------23. 性能特点----------------------------------------------------24. 外形图-------------------------------------------------------65. I/O接口特性-----------------------------------------------76. 质量等级---------------------------------------------------167. 可靠性---------------------------------------------------198. 生产注意事项---------------------------------------------199. 使用注意事项---------------------------------------------20第 2 页共 20页第 3 页 共 20页1、使用范围该检验标准适用于大连东福公司设计提供的标准液晶显示模块。
如果在使用中出现了异常问题或没有列明的项目,建议同最近的供应商或本公司联系。
2、质量保证 如在此手册列明的正常条件下使用、储存该产品,公司将提供12个月的质量保证。
3、性能特点3-1.性能:显示方式 : 半透、正显黄绿色 STN LCD 显示颜色 : 显示点: 深蓝色背景:黄绿色显示形式 : 122(w)×32 (h) 全点阵 输入数据 : 来自MPU 的8位并行数据接口 驱动路数 : 1/32 Duty视 角 :6 点3-2.机械性能:项 目 规 格 单位外形尺寸 84.0(W)×44.0(H) ×14.0 Max. Mm 显示点阵数 122(W) ×32 (H) Dots —视 域 60.0(W)×18.0(H) Mm 显示图形域 48.76(W)×15.32H) Mm 点间距 0.4(W)×0.45(H) Mm 点尺寸 0.36(W)×0.41(H) Mm 重量 Approx. 40 G3-3. 极限参数:项目 符 号 最小值 最大值 单位 注 释逻辑 Vdd-0.3 7.0 V 电源电压 LCD 驱动 Vdd – Vee VDD-13.5VDD-3.5V 输入电压 Vi -0.3 VDD+0.3V 操作温度 Top -10 50 ℃ 储存温度 Tstg -20 60 ℃ 湿度 — — 90 %RH 背光驱动动电压 VBL — 5.0 VLCD 模块使用手册第 4 页 共 20页3-4. 电气特性:3-4-1 电气参数项 目 符 号 条 件 最小值典型值 最大值 单 位 逻辑 Vdd 4.5 5.00 5.5电源电压LCD 驱动 Vdd–Vee — 5.0 —高电平 Vih Vdd=5V ±5% 2.0 — Vdd输入电压低电平 Vil 0 — 0.8V频 率 Fflm Vdd=5V — 75 — Hz逻辑 Idd — 0.44 —功 耗 LCD 驱动 Iee Vdd=5V Vdd–Vee=5.2VFflm=75Hz — 0.42 —mA Ta= -20℃φ=0°,θ=0°— — —Ta= 25℃φ=0°,θ=0°— 5.0 — LCD 驱动电压 (推荐电压) Vdd–Vee Ta= 60℃φ=0°,θ=0° — — —VNote: <1> 驱动路数=1/32 <2> 所有点在静态条 3-5. 光电特性项 目 符号温度 条件 最小值典型值最大值 单位 注释 -20℃ — — —25℃ — 5.0 — LCD 驱动电压 (推荐电压) V LCD 60℃ φ=0°,θ=0°— — — V 1,2,5-20℃ — 750 1100 上升时间 tr25℃ — 150 200 -20℃ — 1000 1500响应时间 衰退时间 td 25℃ φ=0°,θ=0° — 150 200Ms 1,3,5垂直 — +50/-45—视 角Δφ 25℃水平 — +55/-55—deg. 1,4,5对比度 K 25℃ φ=0°,θ=0°2 — 5 — 1,5,6注意:<1> φ和θ的定义<2> 在此电压范围内能获得对比度大于2(k≥2)第 5 页共 20页第 6 页 共 20页注意:<6> 对比度定义(K)正显负显非选择点的亮度(B2) 选择点的亮度(B1)4、外形图第 7 页 共 20页5、I/O 接口特性5-1. I/O 接口表:管脚号 符号功 能1 Vcc 电源电压2 Vss 接地3 Vee LCD 驱动电压4 RES 复位信号5 E1 使能信号6 E2 使能信号7 R/W 读写控制信号8 A0 显示数据.指令数据控制信号 9~16 DB0~DB7数据线 17 LED+ 背光电源 18 LED - 背光电源5-2.时序及时序图:项目 符号 条件最小值 最大值 单位 E 使能信号周期 Tc 1000 — E 高电屏保持时间 Twh 450 — E 低电屏保持时间 Twl450 — E 上升时间 Tr — 25 E 下降时间 Tf — 25R/W 建立时间 Tasu140 —R/W 保持时间 Tah10 — 数据上升时间 Tdsu 200 — 数据延时时间 Td — 320 写数据保持时间 Tdhw 20 — 读数据保持时间 TdhrVdd=5V ±5%Vss=0V Ta=25℃ 10 —ns时序图如下:(a) 写时序图第 8 页 共 20页(b)读时序图5-3. 电源连接图5-4. 电路图解(图解参见Fig.5-4)LCD 模块需逻辑电压(Vdd )和LCD 驱动电压(Vee )注释: 当信号线直接连到C-MOS电路且没有内部上拉或下拉电阻时,有必要隔离外部干扰来保护信号线。
显示器操作指南说明书
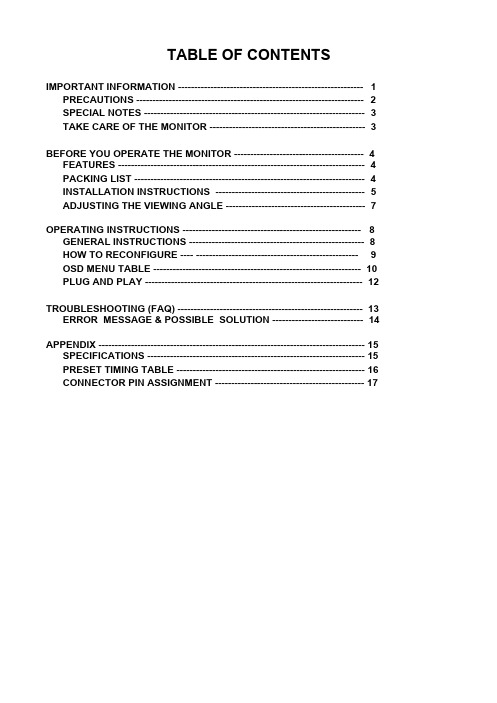
TABLE OF CONTENTSIMPORTANT INFORMATION --------------------------------------------------------- 1 PRECAUTIONS ---------------------------------------------------------------------- 2 SPECIAL NOTES -------------------------------------------------------------------- 3 TAKE CARE OF THE MONITOR ------------------------------------------------ 3BEFORE YOU OPERATE THE MONITOR ---------------------------------------- 4 FEATURES ---------------------------------------------------------------------------- 4 PACKING LIST ----------------------------------------------------------------------- 4 INSTALLATION INSTRUCTIONS ---------------------------------------------- 5 ADJUSTING THE VIEWING ANGLE ------------------------------------------- 7 OPERATING INSTRUCTIONS ------------------------------------------------------- 8 GENERAL INSTRUCTIONS ------------------------------------------------------ 8 HOW TO RECONFIGURE ---- -------------------------------------------------- 9 OSD MENU TABLE ---------------------------------------------------------------- 10 PLUG AND PLAY ------------------------------------------------------------------- 12TROUBLESHOOTING (FAQ) --------------------------------------------------------- 13 ERROR MESSAGE & POSSIBLE SOLUTION ---------------------------- 14 APPENDIX ---------------------------------------------------------------------------------- 15 SPECIFICATIONS ------------------------------------------------------------------- 15 PRESET TIMING TABLE ---------------------------------------------------------- 16 CONNECTOR PIN ASSIGNMENT ---------------------------------------------- 17IMPORTANT INFORMATIONBefore operating the monitor, please read this User Guide thoroughly. This User Guide should be retained for future reference.FCC Class B Radio Frequency Interference StatementWARNING: (FOR FCC CERTIFIED MODELS)NOTE: This equipment has been tested and found to comply with the limits for a Class B digital device, pursuant to Part 15 of the FCC Rules. These limits are designed to provide reasonable protection against harmful interference in a residential installation. This equipment generates, uses and can radiate radio frequency energy, and if not installed and used in accordance with the instructions, may cause harmful interference to radio communications. However, there is no guarantee that interference will not occur in a particular installation. If this equipment does cause harmful interference to radio or television reception, which can be determined by turning the equipment off and on, the user is encouraged to try to correct the interference by one or more of the following measures:1. Reorient or relocate the receiving antenna.2. Increase the separation between the equipment and receiver.3. Connect the equipment into an outlet on a circuit different from that to which the receiveris connected.4. Consult the dealer or an experienced radio/TV technician for help.NOTICE:1. The changes or modifications not expressly approved by the party responsible forcompliance could void the user's authority to operate the equipment.2. Shielded interface cables and AC power cord, if any, must be used in order to complywith the emission limits.3. The manufacturer is not responsible for any radio or TV interference caused byunauthorized modification to this equipment. It is the responsibilities of the user to correct such interference.As an E NERGY S TAR®Partner our company has determined that this product meets the E NERGY S TAR® guidelines for energy efficiency.WARNING:To prevent fire or shock hazard, do not expose the monitor to rain or moisture. Dangerous high voltages are present inside the monitor. Do not open the cabinet. Refer servicing to qualified personnel only.PRECAUTIONSl Do not use the monitor near water, e.g. near a bathtub, washbowl, kitchen sink, laundry tub, swimming pool or in a wet basement.l Do not place the monitor on an unstable cart, stand, or table. If the monitor falls, it can injure a person and cause serious damage to the appliance. Use only a cart or stand recommended by the manufacturer or sold with the monitor. If you mount the monitor on a wall or shelf, use a mounting kit approved by the manufacturer and follow the kit instructions.l Slots and openings in the back and bottom of the cabinet are provided for ventilation. To ensure reliable operation of the monitor and to protect it from overheating, be sure these openings are not blocked or covered. Do not place the monitor on a bed, sofa, rug, or similar surface. Do not place the monitor near or over a radiator or heat register. Do not place the monitor in a bookcase or cabinet unless proper ventilation is provided.l The monitor should be operated only from the type of power source indicated on the label.If you are not sure of the type of power supplied to your home, consult your dealer or local power company.l The monitor is equipped with a three-pronged grounded plug, a plug with a third (grounding) pin. This plug will fit only into a grounded power outlet as a safety feature. If your outlet does not accommodate the three-wire plug, have an electrician install the correct outlet, or use an adapter to ground the appliance safely. Do not defeat the safety purpose of the grounded plug.l Unplug the unit during a lightening storm or when it will not be used for long period of time.This will protect the monitor from damage due to power surges.l Do not overload power strips and extension cords. Overloading can result in fire or electric shock.l Never push any object into the slot on the monitor cabinet. It may short circuit parts causing a fire or electric shock. Never spill liquids on the monitor.l Do not attempt to service the monitor by yourself; opening or removing covers can expose you to dangerous voltages and other hazards. Please refer all servicing to qualified service personnel.l To ensure satisfactory operation, use the monitor only with UL listed computers which have appropriate configured receptacles marked between 100 - 240V AC, Min. 5A.l The wall socket shall be installed near the equipment and shall be easily accessible.SPECIAL NOTESThe following symptoms are normal with the monitor and do not indicate a problem.•Due to the nature of the fluorescent light, the screen may flicker during initial use. Turn off the Power Switch and then turn it on again to make sure the flicker disappears.•You may find slightly uneven brightness on the screen depending on the desktop pattern you use.•The LCD screen has effective pixels of 99.99% or more. It may include blemishes of0.01% or less such as a missing pixel or a pixel lit all the time.•Due to the nature of the LCD screen, an afterimage of the previous screen may remain after switching the image, when the same image is displayed for hours. In this case, the screen is recovered slowly by changing the image or turning off the Power Switch for hours.•When the screen becomes black or flashing, or cannot illuminate any more, contact your dealer or service center to replace parts. Don’t repair the screen by yourself!TAKE CARE OF THE MONITOR•Do not install the monitor in a location near heat sources such as radiators or air ducts, or in a place subject to direct sunlight, or excessive dust or mechanical vibration or shock. •Save the original shipping carton and packing materials, as they will come in handy if you ever have to ship your monitor.•For maximum protection, repackage your monitor as it is originally packed in the factory. •To maintain cleanness of your LCD display, wipe it periodically with clean and soft cloth.The screen may be damaged by any liquid splash.•To keep the monitor looking new, periodically clean it with a soft cloth. Stubborn stains may be removed with a cloth lightly dampened with mild detergent solution. Never use strong solvents such as thinner, benzene, or abrasive cleaners, since these will damage the cabinet. As a safety precaution, always unplug the monitor before cleaning it.BEFORE YOU OPERATE THE MONITOR FEATURES•43.2cm(17”) TFT Color LCD Monitor.•Recommended Resolutions: SXGA 1280 X 1024 @60Hz.•8ms (Tr+Tf) Quick Response Time.•SPLENDID™ Video Enhancement Technology.• 5 Video Preset Modes Switiched by Hotkey• 3 Skin-Tones Selection for Users’ Preference.•Microsoft Windows 95/98/2000/XP Compliance•VESA Display Data Channel (DDC)1/2B Compliance •VESA Wall Mount Compliance (100x100mm).•EPA ENERGY STAR® and Ergonomic Design.•Cabel Binder and Compact Case Design for Space Saving. •Both VGA and DVI-D Inputs. (for MM17T only)• 1.2Wx2 Stereo Speakers / Earphone Jack. (for MM17T only) PACKAGE LISTThe product package should include the following items:1. LCD Monitor2. Quick Start Guide3. User Guide (CD)4. Power Cord5. VGA Cable6. Audio Cable (for MM17T only)INSTALLATION INSTRUCTIONSASSEMBLING THE MONITOR BASEInstall RemoveFigure 1POWER CORD / POWER SOURCE1. Make sure that the power cord is the correct type required in your area.2. This LCD monitor has an internal universal power supply that allows operation in either100/120V AC or 220/240V AC voltage area (No user adjustment is required.)3. Connect the power cord into your LCD monitor’s power input socket, and then plug theother end into a 3-pin AC power outlet. The power cord may be connected to either a wall power outlet or the power outlet socket on your PC, depending on the type of power cord supplied with your LCD monitor.NOTESA certified power supply cord has to be used with this equipment. The relevant national installation and/or equipment regulations shall be considered. A certified power supply cord not lighter than ordinary polyvinyl chloride flexible cord according to IEC 60227 (designation H05VV-F 3G 0.75mm2 or H05VVH2-F2 3G 0.75mm2) shall be used. Alternative a flexible cord be of synthetic rubber according to IEC 60245 (designation H05RR-F 3G 0.75mm2) shall be used.MAKING THE CONNECTIONSConnecting the Signal Cable:Plug one end of the VGA Cableto the LCD monitor’s VGA port, the other end to the computer's VGA socket and tighten the two screws on the cable connector. Moreover, for MM17T, you can buy an extra 24-Pin DVI-D cable from your dealer for the digital signal connection if preferred.Connecting the Power Cord: Plug one end of the AC-power cord to the LCD monitor’s AC input socket, the other end to the power outlet.Connecting the Audio Cable (MM17T only):Plug the audio cable between the computer multi-media (or audio) card's audio output and monitor's audio jack.Caution:If the AC outlet is not grounded (with three holes), install the proper grounding adapter (not supplied).Figure 21. AC Input Socket2. Audio Jack (MM17T only)3. DVI-D Port (MM17T only)4. VGA (D-SUB) Port5. Earphone Jack (MM17T only)6. Cable BinderADJUSTING THE VIEWING ANGLE•For optimal viewing it is recommended to look at the full face of the monitor, then adjust the monitor’s angle to your own preference.•Hold the stand so you do not topple the monitor when you change the monitor’s angle. •You are able to adjust the monitor’s angle from -5° to 20°.Figure 3NOTES•Do not touch the LCD screen when you change the angle. It may cause damage or break the LCD screen.•Careful attention is required not to catch your fingers or hands when you change the angle.OPERATING INSTRUCTIONSGENERAL INSTRUCTIONSPress the power button to turn the LCD monitor on or off. The other control buttons are located on the front bezel (See Figure 4). By changing these settings, the picture can be adjusted to your personal preferences.•The power cord should be connected.•Connect the signal cable from the LCD monitor to your computer.•Press the power button to turn on the LCD monitor. The power indicator will light up.Figure 41. SPLENDID™ Button :•Hotkey for switching between 5 advanced video preset modes (Scenery Mode, Standard Mode, Theater Mode, Game Mode, Night Mode) with SPLENDID™Video Enhancement Technology.•Automatically adjust the image to its optimized position, clock, and phase by pressing the button for 2 seconds.•Exit the OSD menu or go back to the previous menu as the OSD menu is active.Button :2. -•Decrease the level of the function selected or move to the previous function as the OSD menu is activated.3. Power Button / Power LED Indicator:•Switch the LCD monitor on or off.•LED lights blue(MM17T)/green(MM17D): normal operation mode.•LED lights amber: power saving mode.•LED is off: power off mode.4. +•Activate Brightness adjustment menu.•Increase the level of the function selected or move to the next function as the OSD menu is activated.5. Menu Button :•Activate the OSD (On-Screen Display) main menu.•Enter/select the icon(function) highlighted as the OSD menu is activated.HOW TO RECONFIGURE1. Press the MENU-button to activate the OSD main menu (Figure 5).2. Pressto change the settings of the selected function.3.4. To exit and save, select the exit function. If you want to adjust any other function, repeatsteps 2-3.Figure 5OSD MENU TABLEThe table describes the function of each OSD iconMain Menu ItemMain Menu Icon Sub Menu Item SubMenuIconDescriptionSceneryModeAdvance for general Windows use (SPLENDID ™Off) Theater ModeAdvance for game use withSPLENDID ™ Video EnhancementScenarioAdvance for dark-display use withSPLENDID™ Video EnhancementColor RAdjust greengain RGBAdjust blue gainReddishSelect natural skin stone SkinToneSelect yellowishskin stone CoolNormal imagecolor. (7500°K) Color AdjustWarmAdjust brightness levelLuminanceAdjust contrast levelOSD SetupAdjust horizontal position of theOSDOSD V-PositionAdjust OSD timeout PhaseClockAdjust horizontal position of theimage Image PositionAdjust verticalposition of theimage Image SetupAutomatically adjust the horizontal /vertical positions, phase and clock of the image Input SelectShow the resolution,H/V frequency and input port of current input timing LanguageRecall default setting ExitPLUG AND PLAYPlug & Play DDC2B FeatureThis monitor is equipped with VESA DDC2B capabilities according to the VESA DDC STANDARD. It allows the monitor to inform the host system of its identity and, depending on the level of DDC used, communicate additional information about its display capabilities.The DDC2B is a bidirectional data channel based on the I²C protocol. The host can request EDID information over the DDC2B channel.THIS MONITOR WILL APPEAR TO BE NON-FUNCTIONAL IF THERE IS NO VIDEO INPUT SIGNAL. TO OPERATE PROPERLY, THERE MUST BE VIDEO INPUT SIGNAL. This monitor meets the Green monitor standards as set by the Video Electronics Standards Association (VESA) and/or the United States Environmental Protection Agency (EPA) and The Swedish Confederation Employees (NUTEK). This feature is designed to conserve electrical energy by reducing power consumption when there is no video-input signal present. When there is no video input signal this monitor, following a time-out period, will automatically switch to an OFF mode. This reduces the monitor's internal power supply consumption. After the video input signal is restored, full power is restored and the display is automatically redrawn. The appearance is similar to a "Screen Saver" feature except the display is completely off. The display is restored by pressing a key on the keyboard, or clicking the mouse.USING THE RIGHT POWER CORD :The accessory power cord for the Northern American region is the wallet plug with NEMA 5-15 style and is UL listed and CSA labeled. The voltage rating for the power cord shall be 125 volts AC.Supplied with units are intended for connection to power outlet of personal computer: Please use a cord set consisting of a minimum No. 18 AWG, type SJT or SVT three conductors flexible cord. One end terminates with a grounding type attachment plug, rated 10A, 250V, CEE-22 male configuration. The other end terminates with a molded-on type connector body, rated 10A, 250V, having standard CEE-22 female configuration.Please note that power supply cord needs to use VDE 0602, 0625, 0821 approval power cord in European counties.TROUBLESHOOTING (FAQ)Problem & Question Possible SolutionPower LED is not ON l Press the Power Button to check if themonitor is in the ON mode.l Check if the Power Cord is properlyconnected the monitor and the poweroutlet.The Power LED lights amber and there is no screen image l Check if the monitor and the computer are in the ON mode.l Make sure the Signal Cable is properly connected the monitor and the computer. l Inspect the Signal Cable and make sure none of the pins are bent.l Connect the computer and another available monitor to check if the computer is properly working.Screen image is too light or dark l Adjust the Contrast and Brightness settings via OSD.Screen image is not centered or sized properly l Press the SPLENDID™ Button for 2 seconds to automatically adjust theimage.l Adjust the H-Position or V-Position settings via OSDScreen image bounces or a wave pattern is present in the image l Make sure the Signal Cable is properly connected the monitor and the computer. l Move electrical devices that may cause electrical interference.Screen image has color defects(white does not look white) l Inspect the Signal Cable and make sure that none of the pins are bent.l Perform Reset via OSD.l Adjust the R/G/B color settings or select the Color Temperature via OSD.Screen image is blurry or fuzzy l Press the SPLENDID™ Button for 2 seconds to automatically adjust theimage.l Adjust the Phase and Clock settings via OSD.No sound or sound is low (MM17T only). l Ensure that the Audio Cable is properly connected the monitor and the computer l Adjust the volume settings of both your monitor and computer.l Ensure the computer sound card driver is properly installed and activated.ERROR MESSAGE & POSSIBLE SOLUTIONNO SIGNAL︰1. Check that the signal-cable is properly connected , If the connector is loose, tighten theconnector’s screws.2. Check the signal-cable’s connection pins for damage.OUT OF RANGE︰Your computer has been set to unsuitable display mode ,set the computer to display mode given in the following Preset Timing Table.APPENDIXSPECIFICATIONSModel MM17T MM17DVisible Diagonals 17.0" (43.2cm)Screen Size Horizontal : 337.92mm, Vertical : 270.34mm Max. Resolution SXGA 1280x1024@75HzPixel Pitch 0.264mmBrightness 300cd/㎡ (Typ.), 400cd/㎡ (Max.)Contrast Ratio 500:1 (Typ.), 600:1 (Max.)Viewing Angle (CR≧10) 150°(H)/ 130°(V)Display Colors 16.2MResponse Time 8msSignal Frequency Horizontal: 30~80 kHz, Vertical: 55 ~ 75HzMax. Pixel Clock 135MHzPlug & Play VESA DDC2B TMVideo Input DVI-D & D_Sub D_SubAudio Input/ Earphone 3.5mm Mini-jack --Speaker (Built-in) 1.2W x 2 Stereo --Tilt +20°~ -5°VESA Wall Mount 100x100mmPower Source 100~240VAC,47~63HzPower Consumption Power On: <40W, Standby: <2WPhys. Dimension 380(W) x 390(H) x 180mm(D)Net Weight 4 kg (approx.)Environmental Conditions Operating Temp: 5° to 35°C Storage Temp.: -20° to 60°C Operating Humidity: 10% to 85%Regulatory Approvals TCO99, Energy Star, UL/cUL, TUV-GS, CB, CE, FCC, CCC, BSMI, Gost-R, C-Tick, VCCI,ISO13406-2 ClassIIPRESET TIMING TABLESTANDARD RESOLUTION HORIZONTALFREQUENCYVERTICALFREQUENCYDos-mode 640 × 350 31.47kHz 70Hz Dos-mode 720 × 400 31.47kHz 70Hz640 × 480 31.47kHz 60Hz640 × 480 35.00kHz 66.6Hz640 × 480 37.50kHz 75Hz VGA640 × 480 37.86kHz 72Hz800 × 600 37.879kHz 60Hz800 × 600 46.875kHz 75Hz800 × 600 35.16kHz 56Hz800 × 600 48.01kHz 72Hz SVGA832 × 624 49.725kHz 75Hz1024 × 768 48.363kHz 60Hz1024 × 768 56.476kHz 70Hz XGA1024 × 768 60.02kHz 75Hz1280 × 1024 64.00kHz 60Hz SXGA1280 × 1024 80.00kHz 75HzCONNECTOR PIN ASSIGNMENT15 - Pin Color Display Signal CablePIN NO.DESCRIPTION PIN NO.DESCRIPTION 1. Red 9. +5V2. Green 10. Detect Cable3. Blue 11. RXD4. TXD 12. DDC-Serial Data5. Ground 13. H-Sync6. R-Ground 14. V-Sync7. G-Ground 15. DDC-Serial Clock 8.B-Ground24 - Pin Color Display Signal Cable(MM17T only)PIN NO. DESCRIPTIONPI N NO.DESCRIPTION 1. TMDS Data 2- 13. TMDS Data 3+ 2. TMDS Data 2+ 14. +5V Power 3. TMDS Data 2/4 Shield15. Ground(for+5V)4. TMDS Data 4- 16. Hot Plug Detect5. TMDS Data 4+ 17. TMDS Data 0-6. DDC Clock 18. TMDS Data 0+7. DDC Data 19. TMDS Data 0/5Shield8. N.C. 20. TMDS Data 5- 9. TMDS Data 1- 21. TMDS Data 5+ 10. TMDS Data 1+ 22. TMDS Clock Shield 11. TMDS Data 1/3 Shield23. TMDS Clock +12. TMDS Data 3- 24. TMDS Clock -。
彩色液晶显示器 说明书
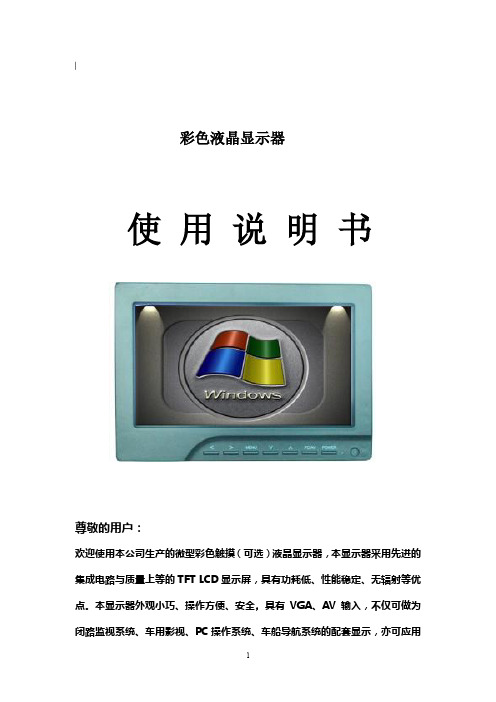
︳彩色液晶显示器使用说明书尊敬的用户:欢迎使用本公司生产的微型彩色触摸(可选)液晶显示器,本显示器采用先进的集成电路与质量上等的TFT LCD显示屏,具有功耗低、性能稳定、无辐射等优点。
本显示器外观小巧、操作方便、安全,具有VGA、AV输入,不仅可做为闭路监视系统、车用影视、PC操作系统、车船导航系统的配套显示,亦可应用配套于仪表仪器,工控自动化的显示系统。
为了可靠的、长期的正常使用,达到最佳视听效果,请认真阅读本使用说明书注意事项1. 请采用随机配置的电源适配器,如果因为需要,请注意提供合格的电源。
.2. 不要将机子放于日光下爆晒,也不要在过冷过热或潮湿的地方存放、使用.3. 使用时显示屏幕应避开强光照射,以保证图像效果及机子的长期使用.4. 机子内部虽有防震保护措施,但还应避免剧烈碰撞。
5.配有触摸功能的显示器,操作时应避免用力过度,以免损伤触摸屏表面。
6. 不要用化学试剂或溶剂擦洗机子.请用软布擦除机子上的尘污,以保证本机的亮丽.7. 机内无用户可调组件,非专业人员,请勿自行打开本机或自行尝试修理本产品!以免造成不必要的损坏.目录一.产品特征------------------- 3●.本机键说明------------------ 3●.遥控器说明------------------ 6●.配套电缆线------------------ 7●.电源与本机的连接---- 7二.操作说明------------------- 8●.菜单操作说明---------------- 9●.菜单说明-------------------- 91.PC状态下的菜单------------ 92.AV状态下的菜单------------ 11三.技术参数------------------- 13四.随机附件------------------- 14五.常见问题排除---------------- 14一.产品特征:●本机键说明图片1:1 2 3 4 5 6 7 8 9 10 11 12 13 1.:音量减,直接按此键控制音量的减小,菜单中用于设定值的调整2.:音量加,直接按此键控制音量的加大,菜单中用于设定值的调整3.:按此键弹出OSD菜单4.项目选择键或在VGA模式下进行自动相位调整5.:项目选择键或者直接地调整亮度6.PC/AV:进行VGA, AV输入信号的切换7.POWER:电源(POWER)开/关机键,用于机子工作或待机状态的选择8.指示灯9.红外线接收窗10. 3.5DIP耳机座:音频视频3端输入端口11.V GA输入端口12.H DMI输入端口(数字高清接口)13.DC12V输入电压端口●遥控器说明●图片2:1.:电源控制键,用于整机工作与待机的选择2.:静音键,按此键可关闭声音,再按则可恢复声音3.:菜单键,按此键弹出OSD菜单4.: 音量控制键,直接按此键为音量的减小;OSD菜单中用于设定值的调整5.: 音量控制键,直接按此键为音量的增加;OSD菜单中用于设定值的调整6.: OSD 菜单中用于调整项目的选择7.: OSD 菜单中用于调整项目的选择8.: 图像画面4:3/16:9切换9.:图像画面的上下反转切换10.:图像画面左右反转切换11.:AV1/AV2/ PC信号输入模式切换选择●配套电缆线图片3. (AV转接线)1 2 3 41.音频,视频3端输出端口(接本机A/V端口)2.黄色RCA插头:视频1(AV1)输入插头3.红色RCA插头:视频2(AV2)输入插头4.白色RCA插头:音频输入插头5.图片4. (VGA线)1 2 31.VGA,USB信号输出端口,连接到本机VGA输入端口2.VGA信号输入端口,连接到电脑的VGA输出端口B端口,连接到电脑主机的USB端口.(触摸用)●电源、信号线与本机的连接4. 当使用机子的时候.请使用本机配套的电源适配器,如果因为其他原因需要使用其他品种的电源,请注意提供的应该是供给功率不小于10W的DC12V±10%的合格电源。
彩色显示器用户手册说明书
用戶手冊彩色顯示器MultiSync UN462A MultiSync UN462VA MultiSync UN552S MultiSync UN552VS型號:UN462A、UN462VA、UN552S、UN552VS從顯示器背面的規格標籤中可以找到型號名稱和序列號。
目錄註冊資訊 (5)重要資訊 (6)安全預防措施、維護和推薦用法 (7)安全預防措施和維護事項 ............................................7推薦用法 (7)清潔液晶屏 (7)清潔機殼 (8)特色第1章安裝安裝概述 (11)安裝 (13)安裝位置 (15)方向 (15)通風要求 ...................................................................16連接安裝附件 (17)使用壁掛支架適配器 (17)安裝和拆卸可選桌面底座 (18)安裝選配板卡 (19)安裝可選感應器單元 (20)第2章部件名稱和功能控制面板 (22)端子面板 (23)無線遙控器(可選) (25)第3章連接路線圖解 (28)連接設備 (28)外部視頻連接 (29)連接至個人電腦 (29)使用HDMI連接媒體設備 (30)內部視頻源................................................................31媒體播放器. (32)顯示器的選配板卡 (33)連接USB設備 (34)第4章基本操作開機和關機模式 (36)選配遙控器的工作範圍 (37)使用電源管理 (37)顯示資訊OSD (38)在畫面模式之間切換 (38)設置寬高比 (39)使用點縮放................................................................40OSD(螢幕顯示)控制項 .. (41)使用媒體播放器 (43)文件顯示幕幕 (44)播放檔 (45)配置幻燈片設置 (46)啟用自動播放 (47)第5章高級操作創建開機時間表 (50)高級色彩調整 (51)使用SpectraView Engine (51)使用獨立校準 (54)使用其他畫面模式 (57)多畫面模式 (58)PIP(畫中畫)矩陣...................................................60設置安全和鎖定顯示器控制項.. (62)安全密碼 (62)鎖定按鈕控制 (63)媒體播放器設置 (66)網路和其他設置 (67)將檔複製到microSD存儲卡上 (68)使用緊急內容 (72)第6章多顯示器設置連接多台顯示器 (74)視頻輸出連接 (76)設置遙控ID功能 (77)第7章外部控制連接介面 (80)命令 (80)支援HDMI CEC命令 (82)通過RS-232C控制顯示器 (83)通過LAN控制顯示器 (84)多顯示器連接 ............................................................85使用HTTP流覽器指定網路設置 (86)顯示器web控制項的OSD菜單設置 (87)網路設置 (88)智慧無線資料 (92)播放驗證 (93)第8章故障排除螢幕圖像和視頻訊號問題 (95)硬體問題 (96)圖像殘留 (98)第9章規格說明UN462A (100)UN462VA ................................................................101UN552S (102)UN552VS (103)附錄 A 外部資源附錄 B OSD控制項列表輸入 (107)PICTURE (107)音頻 (112)SCHEDULE (112)多輸入 (114)OSD ........................................................................116多顯示器 .. (117)顯示器保護 (120)控制 (121)OPTION (125)系統 (125)計算模組 (126)附錄 C 製造商回收和節能資訊NEC舊產品廢棄處理 (128)節省能源 .................................................................128WEEE標記(European Directive 2012/19/EU和修正條款) (129)纜線資訊小心: 請使用本產品附帶的指定纜線以免無線電和電視接收受到干擾。
color liquid crystal monitor user manual说明书
� 本机的液晶面板使用敏感材料制造,不要用任何物品碰击液晶监视器。如果本机从高处 掉落或受到撞击,液晶面板有可能会破裂。此时请立即停止使用本机。
� 不要将本机置与阳光直射处或热源附近,如散热器、暖气设备、火炉和其他发热物体。 � 每次开关时间间隔不小于 2 秒。
� 10bit ADC采样处理输出 � 输入视频格式自动检测 � 帧速率变换 � 2D 视频解码,亮色分离,3D 视频动态降噪 � 3D 视频动态自适应隔逐行交换 � 自动3:2 和2:2 格式检测和恢复 � 4:3 和16:9 切换,可非线性缩放图像 � 彩色OSD,人性化操作菜单 � MSTAR 第三代ACE 图像引擎,可动态调整图像的颜色,对比度,肤色,清晰度等 � 可靠的EMC 和防静电处理措施 � BNC或VGA优先识别功能
正常工作模式,待机模式
118.5mm(L)×81.5mm(W)×16mm
该BNC板为高清液晶监控高端产品,也可以实现OSD和图像的180度完全倒屏功能,同时 解决了液晶监控所共存的躁点、图像干扰的行业难题;也适用于车载监控。最大可支持到 1680*1050分辨率的TFT-LCD屏,兼容SAMSUNG, CMO, AU, LGP,SHARP,BOE等市场主流厂商 的液晶面板,能够真实再现现实世界的图像色彩和声音。主IC采用MSTAR单一芯片MST9E19B 方案,系统成熟稳定。
彩色液晶监视器
Color TFT LCD monitor
用户手册 User’s Manual
至客户: 感谢阁下购买及使用本彩色液晶监视器,开箱时请检查箱内的附件是否
齐全。在连接部件及接通电源之前,请先详细阅读本使用说明书并请保留本使用 说明书以备后用。
6,几何菜单··························································
Philips 6100系列4K超清超薄智能LED电视说明书
Philips 6000 series4K Ultra Slim Smart LED TV with Pixel Plus UltraHD139 cm (55") 4K Ultra HD LED TV Quad CoreDVB-T/T255PUT61024K Ultra Slim Smart LED TVwith Pixel Plus Ultra HDEnjoy functional elegance and smart connectivity. The Philips 6100 Series boasts 4K Ultra HD picture quality for superb detail. Better still, its built-in Smart TV is easy to use - making it an excellent choice for effortless entertainment.The right features presented elegantly•Ultra Slim lines for a refined profilePassionate about Picture Quality•4K Ultra HD is unlike any resolution you’ve ever seen before•Discover Ultra HD Picture Quality with Pixel Plus Ultra HD•Micro Dimming optimizes the contrast on your TVConnect to a bigger world with this Smart TV•Smart TV: a whole new world to exploreHighlightsUltra Slim profileSleek. Cutting edge. Refined. Precise. The Philips Ultra Slim silhouette. That something so slim can inspire so much interest shouldn’t be surprising, given how much sophistication it will bring to your décor.4K Ultra HDUltra HD TV has four times the resolution of a conventional Full HD TV. With over 8 million pixels and our unique Ultra Resolution Upscaling technology, you'll experience the best possible picture quality. The higher the quality of your original content, the better images and resolution you will be able to experience. Enjoy improved sharpness,increased depth perception, superior contrast, smooth natural motion, and flawless details.Pixel Plus Ultra HDExperience 4K Ultra HD sharpness with the Philips Pixel Plus Ultra HD engine. It optimizes picture quality to deliver smooth, fluid images with incredible detail and depth – Enjoy sharper 4K images with brighter whites and blacker blacks every time.Smart TVDiscover a Smarter experience that lies beyond traditional TV. Rent and stream movies, videos or games from online videostores. Watch catch-up TV from your favorite channels and enjoy a growing selection of online apps with Smart TV.Micro DimmingThanks to our special software that analyzes the picture in 6400 different zones and adjusts it accordingly, you’ll enjoy incredible contrast and image quality for a truly lifelike visualexperience.Issue date 2018-07-16 Version: 6.2.212 NC: 8670 001 44867 EAN: 87 18863 01203 1© 2018 Koninklijke Philips N.V.All Rights reserved.Specifications are subject to change without notice. Trademarks are the property of Koninklijke Philips N.V. or their respective owners.SpecificationsPicture/Display•Display: 4K Ultra HD LED•Panel resolution: 3840x2160•Aspect ratio: 16:9•Brightness: 350 cd/m²•Picture enhancement: Pixel Plus Ultra HD, Micro DimmingSmart TV Features•User Interaction: MultiRoom Client, SimplyShare, Wi-Fi Miracast Certified*•Interactive TV:HbbTV•Program: Pause TV, USB Recording*•SmartTV apps*: Online Video Stores, Open Internet Browser, Social TV, TV on Demand, Youtube, Netflix TV•Ease of Installation: Auto detect Philips devices, Device connection wizard, Network installation wizard, Settings assistant wizard•Firmware upgradeable: Firmware auto upgrade wizard, Firmware upgradeable via USB, Online firmware upgrade•Screen Format Adjustments: Advance - Shift, Basic - Fill Screen, Fit to Screen, Zoom, Stretch •Philips TV Remote app*: Apps, Channels, Control, NowOnTV, TV Guide, Video On Demand Sound•Output power (RMS): 20W•Sound Enhancement: Incredible Surround, Clear Sound, Auto Volume Leveller, Smart Sound Connectivity•Number of HDMI connections: 4•Number of component in (YPbPr): 1•Number of AV connections: 1•Number of USBs: 3•Wireless connections: Wi-Fi 11n 2x2 integrated, Wi-Fi Direct•Other connections: Antenna IEC75, Digital audio out (optical), Audio L/R in, Audio in (DVI), Headphone out, Service connector, Ethernet-LAN RJ-45•HDMI features:Audio Return Channel •EasyLink (HDMI-CEC): Remote control pass-through, System audio control, System standby, Pixel Plus link (Philips)*, One touch play Multimedia Applications•Video Playback Formats: Containers: AVI, MKV,H264/MPEG-4 AVC, MPEG-1, MPEG-2, MPEG-4,WMV9/VC1, HEVC (H.265)•Subtitles Formats Support: .SMI, .SRT, .SUB, .TXT,.AAS•Music Playback Formats: AAC, MP3, WAV, WMA(v2 up to v9.2), WMA-PRO (v9 and v10)•Picture Playback Formats: JPEG, BMP, GIF, PNGSupported Display Resolution•Computer inputs on HDMI1/2: up to FHD1920x1080 @60Hz, up to 4K UHD3840x2160 @30Hz•Computer inputs on HDMI3/4: up to 4K UHD3840x2160 @60Hz•Video inputs on HDMI1/2: up to 4K UHD3840x2160 @30Hz, up to FHD1920x1080 @ 60Hz•Video inputs on HDMI3/4: up to 4K UHD3840x2160 @60HzTuner/Reception/Transmission•Digital TV: DVB-T/T2•MPEG Support: MPEG2, MPEG4•Video Playback: NTSC, PAL, SECAM•TV Program guide*: 8 day Electronic ProgramGuide•Signal strength indication•Teletext: 1000 page Hypertext•HEVC supportPower•Mains power: AC 110-240V +/-•Ambient temperature: 5 °C to 35 °C•Standby power consumption: <0.5W•Power Saving Features: Auto switch-off timer,Picture mute (for radio)Dimensions•Box dimensions(W x H x D):1343 x 828 x 168 mm•Set dimensions(W x H x D):1239.20 x 714.04 x 90.26 mm•Set dimensions with stand (W x H x D):1239.20 x 780.32 x 259.06 mm•Product weight: 15.3 kg•Product weight (+stand): 15.6 kg•Weight incl. Packaging: 21.5 kg•VESA wall mount compatible: 400 x 200 mmAccessories•Included accessories: Remote Control, Powercord, Quick start guide, Legal and safety brochure,Table top stand, 2 x AAA Batteries*EPG and actual visibility (up to 8 days) is country and operatordependent.*Energy consumption in kWh per year, based on the powerconsumption of the television operating 4 hours per day for 365days. The actual energy consumption will depend on how thetelevision is used.*The TV supports DVB reception for 'Free to air' broadcast. SpecificDVB operators may not be supported. An up to date list can befound in the FAQ section of the Philips support website. For someoperators Conditional Access and subscripction are required.Contact your operator for more information.*(Philips) only compatible with specific Philips player device.*Philips TV Remote app and related functionalities vary per TV model,operator, and country, as well as smart device model and OS. Formore details please visit: /TVRemoteapp.*Smart TV app offerings vary per TV model and country. For moredetails please visit: /smarttv.*USB recording for digital channels only, recordings may be limited bybroadcast copy protection (CI+). Country and channel restrictionsmay apply.*Compatibility depends on Wifi Miracast certification & Android 4.2or later. For more details please refer to your device documentation.。
iKAN D12 11.6英寸3G-SDI全高清显示器说明书
CONDITIONS OF WARRANTY SERVICE• Free service for one year from the day of purchase if the problem is caused by manufacturing errors. • The components and maintenance service fee will be charged if the warranty period has expired.Free Service will not be Provided in the Following Situations: (* Even if the product is still within the warranty period.) • Damage caused by abuse or misuse, dismantling, or changes to the product not made by the company. • Damage caused by natural disaster, abnormal voltage, and environmental factors etc.1.713.272.8822********************© 2014 ikan Corporation. All right reservedWhat’s included☐ 1 x D12 Monitor w/ Table Stand☐ 1 x AC Adapter 713-272-88221123452345User programmable function buttons. For quick access, the user may program the F1 and F4 buttons to enable frequently accessed monitor features.Power Switch Power ON / OFFInput Selection Buttons Select from SDI and HDMI InputsFunction ButtonsFunction key actions are selected in the Menu Exit ButtonUsed in the Menu to exit Menu Menu ButtonIn Menu,push button to select menu setting 713-272-882213G-SDI T erminalSDI Signal Output T erminalHDMI terminalIN : HDMI input terminalOUT : : Input signal through-out terminal USB terminalFor factory service use only DC 7-24V power terminal Standard DC Connection DC 7V-24V power terminal XLR DC Connection 3.5mm Phone Output TALL Y Input Connector RJ45 ConnectionPro Battery Plate Mount HolesThreaded for M3x.07 screws. Use to attach pro battery plate adapter.USB terminalFor factory service use only¼-20 Threaded insert (on bottom of table stand) Mounting Monitor234568791010The MANUAL function allows you to change the values of Red, Green, and Blue (RGB).This function recalls user de ned values settings .The user setting will remain in memory inde nitely and can be erased by using the reset option in the main menu.A graphical representation of the pixels exposed in your image. The left side of thegraph represents the blacks or shadows, the right side represents the highlights or bright areas and the middle section is mid-tones. How high the peaks reach represent the number of pixels in that particular tone. This tool helps you get proper exposure.A feature that allows you to see what parts of the image are over exposed. It does this by adding black stripes to the parts that are over exposed.The DSLR Scaling function will allow users to extend their DSLR camera’s HDMI video output any option of four – Normal, 3:2, 16:9 or Full Screen – convenience made simple.This function displays the blanking portion of the incoming signal.The LCD panel in this display has a native display of 1280 x 800 pixels. A signal of any other resolution is scaled to t this native resolution. There may be time when it is desired to view the incoming signal without scaling. Enabling Pixel to Pixel mode turns off the scaling and displays a 1280 x 800 pixel window of the original image. Each pixel of the panel displays one pixel of the original image. The user may use the arrow buttons (buttons 3-6) on the monitor face to move the window left, right, up and down to see the desired portion of the image.The D12 is equipped with Monochrome Peaking features which highlight the desired focus area in a bright, red outline. The operator adjusts the focus control until the red indicator outlines on the desired area are razor sharp, indicating optimal focus. For the best results, be sure the subject is properly exposed.The False Color feature utilizes a full spectrum of assigned color indicators, ensuring awless shot exposure. As the camera Iris is adjusted, the subject of the image will change color based on speci c brightness values indicating optimal exposure. See included chart for color assignments.As an additional tool associated with the D12’s False Color feature, ikan’s exclusive Adjustable Under Exposure and Over Exposed Waning feature gives the operator full control of the D12 False Color brightness values. By setting the preferred IRE exposure limits, the operator is warned when the image exposure is exceeding or falling under the preset IRE limit, providing customizable, full image exposure control.The D12 offers adjustable upper Clip Guide levels to accurately display overexposed images in any shooting condition. The operator simply assigns the upper IRE to their preference and any exposure over the set IRE limit will ash in a vivid purple, indicating only the over exposed area.This function displays a side by side comparison of the incoming video signal. Pushing the F1/2 button one time will enter the mode. Each time the F1/2 button is pushed it will freeze the current frame on the right hand side of the display while the left continues to display the live signal. Pressing the exit button will exit the window mode. Use Window 1 for 16:9 signals and Window 2 for 4:3 signals. Display a crosshair on the center of screen.Brightness 0-100Contrast 0-100Chroma 0-100Sharpness 0-100Tint 0-100Color T emp. 5600 K6500 K9300 K MANUAL OSD Language English Chinese OSD Duration5-60 secondLuma Under Warn Luma Over WarnFuction 1-4 Window 1Window 2 HV Delay GuidesPeakingFalse Color Clip Guide UnderscanDSLR Scaling Check Field PixelHistogram ZebraMenu SetupUser 1-5System ResetCONFIGURATION OF SETTING MENUSCrosshairFEATURES:1920 x 1080 Resolution IPS Panel3G-SDI & HDMI Inputs & OutputsFalse Color – Adjustable Luminance & Over Luminance WarningClip Guide – Adjustable ThresholdPeakingHistogramZebraUnderscanColor T emperature Presets (9300K, 6500K, 5600K)RGB AdjustGuidesCrosshairGuide Masks (Full / 16:9 / 15:9 /4:3 / 1.5:1 / 1.85:1 / 2:1 / 2.35:1/ User)Check Field (Blue, Red, Green, Mono)Side-by-Side Freeze FrameH/V DelayAspect Ratio (Full / 16:9 / 15:9 /4:3 / 1.5:1 / 1.85:1 / 2:1 / 2.35:1/ User)5 User De ned GroupsT ally System (On-Screen)DSLR ScalingSPECIFICATIONS:Screen Size 11.6"Aspect Ratio 16:9Resolution 1920 x 1080Viewing Angle H: 178 degree / V: 178 degreeDisplay T echnology IPSBrightness 350 cd/m2Contrast Ratio 700:1Response Time 25msPixel Pitch 0.1335×0.1335 (mm)Inputs 3G-SDI, HDMIOutputs 3G-SDI, HDMIBuilt-in Speaker 2Wx2Power Consumption 16WColor System PAL/NTSC/SECAM (Auto-Detected)Input Voltage DC 7V - 24VDimensions 9.2 x 11.7 x 0.9" (233.6 x 297 x 22.8mm)Weight 5lbs (2.2kg)Build Materials SteelShipping Dimensions 4 x 15.5 x 14.6" (101.6 x 393.7 x 370.8mm)Shipping Weight 7lbs (3.1kg)Operating T emperature 0°C ~ 50°C (32°F ~122°F)UPC Code 847983012343SUPPORT RESOLUTIONS3G-SDI 1920x1080p @ 50, 59.94, 60 HzHD-SDI 1280x720p @ 50, 59.94, 60 Hz1920x1080i @ 50, 59.94, 60 Hz******************,24,25,29.97,30Hz****************,24,25,29.94,30HzSD-SDI 720x480i @ 60Hz720x576i @ 50HzHDMI 720x480i&**************,60Hz720x576i & 720x576p @ 50 Hz1280x720p @ 50, 59.94, 60 Hz1920x1080i @ 50, 59.94, 60 Hz1920x1080psf @ 24, 25, 29.97, 30 Hz****************,24,25,29.94,30,50,59.94,60Hz713-272-8822。
- 1、下载文档前请自行甄别文档内容的完整性,平台不提供额外的编辑、内容补充、找答案等附加服务。
- 2、"仅部分预览"的文档,不可在线预览部分如存在完整性等问题,可反馈申请退款(可完整预览的文档不适用该条件!)。
- 3、如文档侵犯您的权益,请联系客服反馈,我们会尽快为您处理(人工客服工作时间:9:00-18:30)。
2、执行产品标准:豫Q/YLH2003-001。
3、检验标准:量认(豫)字(I0330)号。
4、本文件主要指标和接口说明由本公司研发部提供,由市场营销部组织编制并发行。
5、在没有我公司营销部门确认的情况下,不允许任何单位任何人使用任何手段,复制或摘录
本文件。
6、本公司无法承担因使用本产品出现的,对第三方产品所造成的知识产权侵权的连带责任,
○R 为河南友利华系统工程有限公司彩色液晶产品的注册商标
2005年8月郑州 Email:market@ Tel:0371-67391605 Fax:0371-67391622
第3页共40页
河南友利华系统工程有限公司
目
彩色液晶智能显示器使用说明书 V6.50
第二章 性能与接口............................................................. 6
第一节 性能指标 .......................................................... 6
第二节 通讯接口连线图.................................................... 8
2005年8月郑州 Email:market@ Tel:0371-67391605 Fax:0371-67391622
第2页共40页
河南友利华系统工程有限公司
彩色液晶智能显示器使用说明书 V6.50
彩色液晶智能显示器
使用说明书
版本:V6.50
欢迎您购买彩色液晶智能显示器
3、按照各命令功能排序 ................................................ 11
第二节 命令总汇 .......................................................... 21
第五章 外型尺寸.............................................................. 22
注意∶
为防止火灾或电击危险,勿将本机放置在淋雨或潮湿的地方。 使用本机推荐的开关电源。 避免安装不良。 不要在温度太低或太高的地方存贮或使用,严禁阳光长期直射或紫外线照射液晶屏幕! 因为本装置是精密装备,所以请不要自行打开,拆开或改装。 避免强烈振动和跌落地上。 用完或发生故障时,请关掉本机。 每次开关机后重新开机的时间应大于5秒钟。 请不要按压本机屏幕。 不可用汽油、酒精或其它化学药剂擦拭,用湿润软布抹净即可。 本机为液晶显示,如果屏幕破损,液晶遗漏在手上、身上或衣服上时,请用肥皂和清水洗净即可。 内有高压,请勿随意拆卸!如有故障请直接同本公司或代理商联系。
第三节 拔码开关设置………………………………………………………………………..8
第三章 安装与通讯.............................................................. 8
第一节 安装准备 ............................................................ 8
录
第一章 概
述.......................................................... 5
第一节 简介 .............................................................. 5
第二节 原理框图 .......................................................... 5
该系列显示器采用集成化CPU;内置一级汉字库(二级字库可选);采用标准指令集;通过RS232C接口或打印机并 行口接收控制命令和数据。可同时显示各种字体的彩色中西文、直方图、自由曲线等。 首次引入预置画面的概念:所有的显示内容都可分为固定部分与变化部分,对于固定部分,可以预先在微机上进行编制,然 后将其作为“预置画面”送入机内闪光(闪存)中,在需要显示时,使用简单的页面调用指令就可直接调出显示。预置画面不 但可以循环、交替、重叠显示,还可以与现场实时数据组合显示,预置画面的使用可以减少工作中通讯传输的负担以及重复 性的工作;另外,5.0版本还对用户开放了与BMP文件显示与操作相关的命令,提高了二次开发的效率与效果。
总工程师
制作人
发行人
销售部负责人
河南友利华系统工程有限公司
彩色液晶智能显示器使用说明书 V6.50
修订一览表
原版本 V5.0 V5.1 V5.0 V5.0 V5.0
修订内容 公司通讯地址、电话和传真的变更。增加YD-811说明 增加YD-711A外形尺寸图,删除YD-711
19页BMP直接显示增加内容 20页在指定位置显示指定大小的BMP增加内容 公司名称更改为河南友利华系统工程有限公司
第八节 YD-711A 外形尺寸 ................................................... 29
第九节 YD-811 外形尺寸 .................................................... 30
第十节 YD-911、YD-1011 外形尺寸 ........................................... 31
第一节 命令详解 ......................................................... 10
1 命令定义 ........................................................... 10
2 命令分类 ........................................................... 11
敬告: 1、日本液晶生产厂家明文告知:彩色液晶屏是采用高新技术通过精密设备制造出来的产品,允许有 0.01%(万分之一)的像素有缺陷或出现亮点。敬请予以理解。 2、本产品自购买之日起免费保修期为一年。但因使用不当等人为操作失误或不可抗拒力所造成 损 坏和故障不在此保修范围之内。 为改善性能,本机与说明书可能会进一步改进和补充,恕不另行通知。
第二节 串行通讯……………………………………………………………………………….8
第三节 并行通讯 ........................................................... 10
第四章 命令格式.............................................................. 10
现版本 V6.00 V6.50 V6.50 V6.50 V6.50
修改时间 2005-8-17 2006-06-13 2006-7-12 2006-7-12 2009-10-1
责任人
[注]此表所列版本只表示说明书的版本,不表示硬件或软件版本。 说明书的版本号为主机版本号和小数点最后一位的说明书修改次数版本。
众所周知,开发彩色液晶显示器的驱动电路有一定技术难度,而且用点阵操作来显示中文和图形也是一件非常烦琐的工 作。为使大家减轻这些负担,避免重复性劳动,专心于专业产品的开发,我们参照国际市场同类产品的标准,结合国内的实 际情况,以独自研制的优化逻辑电路取代进口昂贵的专用液晶驱动芯片,成功开发出彩色液晶智能系列显示器。它不但使用 非常方便,而且价格还不到国外同类产品的二分之一。
第三节 YD-413 ............................................................. 24
第四节 YD-511A ............................................................ 25
附录二、汉字内码查询方法 .................................................. 34
附录三、触摸屏 ............................................................ 35
附录四、51 汇编程序样例 ................................................... 36
第4页共40页
第一章
河南友利华系统工程有限公司
概
述
彩色液晶智能显示器使用说明书 V6.50
第一节 简介
彩色液晶显示器作为当代高新技术的结晶产品,它不仅具有超薄平面、色彩逼真的特点,而且还具有体积小、耗电省、 寿命长、无射线、抗震、防爆等CRT所无法比拟的优点。是工控仪表、机电设备等行业更新换代的理想显示器。
第五节 YD-611﹑YD-612S 外形尺寸 ........................................... 26
第六节 YD-613B 外形尺寸 ................................................... 27
第七节 YD-613 外形尺寸 .................................................... 28
发送人 接收人 接收单位
接收人 接收人 抄送
联系电话 联系电话
配送信息
传真
拷贝总数
E-mail E-mail
份数 份数 份数
部门
型号 部件名称 制造商 液晶屏制造商
规格描述
彩色液晶智能显示器 河南友利华系统工程有限公司
注册商标
友利华 总页数 共40页
收据
公司名称: