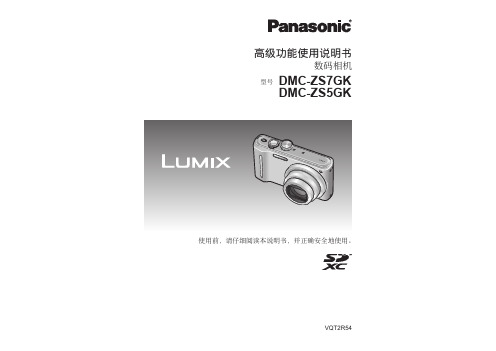
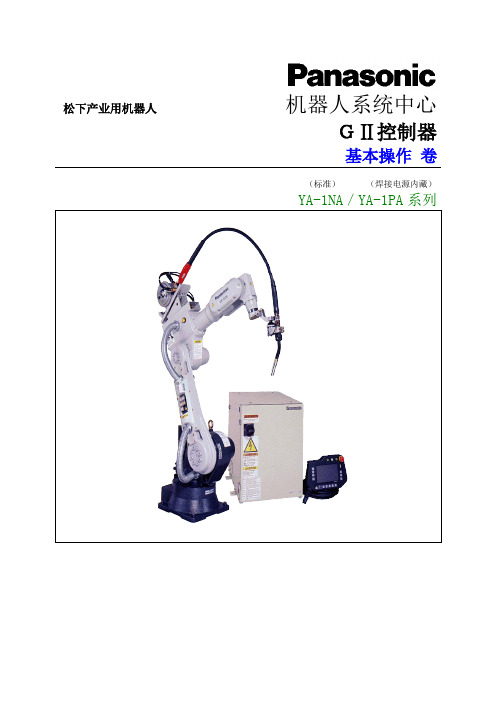
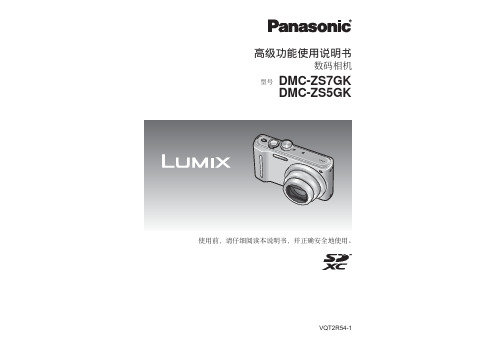
数码相机 松下 DMC-ZS10GK(高级功能)说明书
松下ZS7_ZS5 使用说明书

液晶显示器显示列表............ 138 拍摄时...................... 138 播放时...................... 139
信息显示...................... 140 问答 故障排除指南............ 142 使用警告和注意事项............ 149 录制图像/时间容量 ......... 152 录制图像/时间容量 ......... 154
基本操作
基本拍摄操作 ............... 26 拍摄静态图像................. 26 录制动态影像................. 26 握持相机..................... 27 模式转盘..................... 27
基本拍摄操作 ............... 28 拍摄静态图像................. 28 录制动态图像 (仅适用于 ) ... 28 握持相机..................... 29 模式转盘..................... 29
5 VQT2R54
使用前
先请阅读
■首先进行试验拍摄!
■某些照片可能不能播放
首先确认是否能成功地拍摄照片和录 • 在计算机上编辑的照片
制声音(动态影像/带有声频的图像)。 • 在另外的相机上拍摄或编辑的照片
■本公司对因拍摄失败或丢失拍摄内容 或因直接以及间接损坏造成的任何损
(在此相机上拍摄或编辑的照片也 可能不能在其他相机上播放)
使用[动态影像]菜单 ....... 96 [拍摄模式]/ [录制质量] ............... 96 [连续AF]/ [风声消除] ... 97
松下机器人操作手册

安全开关按下过轻 [力度适中]
伺服电源打开 <可以打开>
安全开关按下力量过大 伺服电源关闭
[力度过大]
<不能打开>
※1 ※2
※3
伺服打开
2 打开 机器人运转 图标 3.选择坐标系
※2 ※3
按下 右转换键 后,可以使用 键切换坐标
关闭
打开
关节
切换
直角
切换
工具
切换
圆柱
用户
(需要使用扩张机能设定)
+
右转换键
<在示教模式下使用用户功能键>
※24
+ 保存
使用这些键 进行换页
F1 F2 F3 F4 F5
开始跟踪 检气・送丝 示教内容切换 追加次序指令 切替 *速度变换 焊接/空走 插补方式变换 坐标系变换 切替
上面的设定仅仅是假设,用户可以根据需要随意改变设定内容。
* 在示教以外的其他操作方式时,功能键的使用会随着操作方式的不同而不同。 如果要了解进一步的详细信息,请参考用户功能键使用说明。
向前微动
微动键
TP正面
液晶显示屏
向后微动
+加
-减
确认/登录键 窗口切换键
(背面) 右转换键
取消键
安全开关
TP背面
右转换键
左转换键
模式选择开关
用户功能键
中文名称 非常停止开关
启动开关 暂停开关 伺服启动开关 Jog 微动键 登录键(确认键) 窗口切换键 取消键 用户功能键 模式选择开关 运动功能键 右转换键 左转换键 3 点安全开关
ファンクションキーⅠ
4.运转 推荐坐标(直角坐标/运动)(工具坐标/角度)
1)各轴运动时坐标系的选择
直角
焊枪的运动
松下 DMC-ZS10GK 数码相机 高级功能说明书

⾼级功能使⽤说明书数码相机型号DMC-ZS10GK使⽤前,请仔细阅读本说明书,并正确安全地使⽤。
VQT3H24⽬录使⽤之前使⽤之前 (6)标准附件 (8)各部件名称 (9)准备给电池充电 (10)可拍摄的图像数和操作时间指标 (11)插⼊和取出卡(另售)/电池 (12)图像保存⽬的地(卡和内置内存) (13)剩余电池和记忆容量 (14)拍摄指南(图像/拍摄时间) (15)如何操作相机 (16)触摸操作 (17)设置时钟 (18)要变更时间设定时 (19)基本操作操作顺序 (20)使⽤⾃定义设置拍摄图像[程序 AE]模式 (22)如何调整焦距 (23)触摸屏幕拍摄(触摸快门功能) (24)触摸屏幕调整聚焦和曝光(触摸AF/AE功能) (25)使⽤⾃动设置拍摄图像[智能⾃动]模式 (26)⾃动场景检测 (26)关于闪光灯 (27)关于喜庆⾊彩 (27)[消除动态模糊] (27)[智能⼿持夜景拍摄] (27)追踪AF (28)[智能⾃动]模式限制 (29)拍摄动态图像 (30)查看图像[标准回放] (32)观看动态图像 (33)放⼤并查看“播放变焦” (34)查看⼀列照⽚“多张播放” (34)通过拍摄⽇期查看图像“⽇历播放” (35)删除照⽚ (36)要删除多张照⽚(最多100张)/要删除全部图像 (37)设置菜单 (38)菜单类型 (40)使⽤快捷菜单 (41)使⽤[设置]菜单 (42)[时钟设置] (42)[世界时间] (42)[⾏程⽇期] (42)[操作⾳] (42)[⾳量] (43)[⾃定义设置存储] (43)[LCD模式] (43)[坐标线] (43)[直⽅图] (44)[拍摄区域] (44)[恢复变焦] (44)[经济] (45)[⾃动回放] (45)[号码重设] (46)[重设] (46)[USB 模式] (46)[输出] (47)[VIERA Link] (47)[3D播放] (47)[旋转显⽰] (48)[版本显⽰] (48)[格式化] (48)[校准] (49)[语⾔] (49)[演⽰模式] (49)⾼级(拍摄)⽤变焦拍摄图像 (50)通过触摸操作使⽤变焦 (50)变焦类型和使⽤ (51)⽤闪光灯拍摄照⽚ (52)近拍图像 (54)[微距变焦] (54)聚焦范围 (55)⽤⾃拍定时器拍摄图像 (56)⽤曝光补偿拍摄图像 (57)在⾃动改变曝光的同时拍摄([⾃动括弧式曝光]) (57)确定光圈和快门速度并拍摄 (58)[光圈优先]模式 (58)[快门优先]模式 (58)[⼿动曝光]模式 (59)注册⾃定义设置并拍摄[⾃定义]模式 (60)[⾃定义设置存储] (60)[⾃定义] (60)按场景拍摄图像[场景模式] (61)[我的场景模式] (62)[肖像] (62)[柔肤] (62)[变换] (62)[⾃拍肖像] (63)[风景] (63)[全景辅助] (63)[运动] (64)[夜间肖像] (64)[夜景] (64)[⼿持夜景拍摄] (64)[⾷物] (64)[派对] (65)[烛光] (65)[宝宝] (65)[宠物] (65)⽬录(续)[⽇落] (66)[⾼感光度] (66)[闪光灯连拍] (66)[星空] (66)[烟⽕] (66)[海滩] (67)[雪景] (67)[空中摄影] (67)[针孔效果] (67)[喷沙效果] (67)[⾼动态] (67)[相框模式] (67)[⽔中] (68)[⾼速摄影] (68)拍摄3D照⽚[3D照⽚模式] (69)连拍功能 (70)⽤个⼈识别功能拍摄[个⼈识别] (72)注册⼈脸图像 (74)编辑或删除有关注册个⼈的信息 (75)旅游时有⽤的功能 (76)[⾏程⽇期] (76)[世界时间] (77)输⼊⽂字.......................78使⽤[拍摄]菜单 (79)[⾼宽⽐] (79)[图像尺⼨] (79)[质量] (80)[感光度] (80)[⽩平衡] (81)[AF 模式] (83)[快速AF] (84)[个⼈识别] (85)[测光模式] (85)[智能曝光] (85)[最慢快门速度] (86)[智能分辨率] (86)[数码变焦] (86)[连拍] (87)[⾊彩模式] (87)[AF 辅助灯] (87)[数码红眼纠正] (88)[稳定器] (88)[⽇期印记] (89)[时钟设置] (89)使⽤[动态影像]菜单 (90)[拍摄模式] (90)[录制质量] (91)[增强模式] (92)[连续AF] (92)[风声消除] (92)在录制动态图像时记录照⽚ (93)⾼级(查看)编辑动态图像 (94)从动态图像抽取照⽚ (94)分割动态图像 (94)回放⽤连拍功能拍摄的照⽚ (95)不同的回放⽅法[回放模式] (96)[幻灯⽚放映] (96)[筛选播放] (98)[⽇历] (98)使⽤[回放]菜单 (99)[上传设置] (99)[编辑标题] (100)[⽂字印记] (101)[视频分割] (102)[调整⼤⼩] (103)[剪裁] (105)[收藏夹] (106)[打印设定] (107)[保护] (108)[个⼈识别编辑] (108)[复制] (109)连接其他设备在电视机屏幕上查看 (110)⽤HDMI插⼝在电视机上观看 (111)VIERA Link(HDMI)(HDAVI Control™) (112)观看3D照⽚ (113)保留拍摄的照⽚和动态图像 (115)通过插⼊SD卡到刻录机来复制 (115)通过AV电缆复制回放图像 (115)使⽤“PHOTOfunSTUDIO”复制到您的计算机 (116)保存3D照⽚ (116)与计算机⼀起使⽤ (117)复制照⽚和动态图像 (118)上载图像到图像共享⽹站 (120)打印 (121)打印多张照⽚ (122)带⽇期和⽂字打印 (122)在相机上进⾏打印设置 (123)其他LCD显⽰屏显⽰列表 (124)信息显⽰ (126)问答 故障排除指南 (128)使⽤警告和注意事项 (135)■务必进⾏试拍在进⾏重要的拍摄(例如婚礼等)之前,请务必试拍,以确认能够正常拍摄和录⾳。
松下 DMC-GM1K 數碼相機 鏡頭組 基本使用說明書说明书

基本使用說明書數位相機/鏡頭組型號DMC-GM1K使用本產品前請仔細閱讀這些說明,並保留本說明書供日後使用。
VQT5D60F1013WT02VQT5D60 (TCH)親愛的顧客,我們很高興能藉此機會感謝您購買Panasonic 數位相機。
請仔細閱讀本使用說明書,並將其妥善保管以備日後參考。
請注意,您的數位相機的實際控件、元件、功能表項等看起來可能與本使用說明書的圖例中所顯示的略有不同。
請嚴格遵守版權法。
•若非個人使用,複製先期錄製的錄影帶、光碟、其他出版物或播放材料都侵犯版權法。
即使是個人使用,也嚴禁複製某些特定的材料。
安全注意事項∫產品標識僅對於印度規格已由通訊及資訊技術部從帶2005年1月28日的G.S.R. 45 (E)的任何許可必要條件中免除。
歐盟以外國家的棄置資訊本符號只適用於歐盟國家。
如欲丟棄本產品,請聯絡當地政府單位或經銷商,洽詢正確的棄置方法。
警告:為了降低起火、電擊或產品損壞的危險,•請勿讓本機遭受雨淋、受潮、滴上或濺上水。
•請僅使用推薦的附件。
•請勿卸下蓋子。
•請勿自行維修本機。
請向有資格的維修人員請求維修。
電源插座應安裝在設備附近並應易於觸及。
產品位置數位相機底部電池充電器底部僅對於新加坡3(TCH) VQT5D60∫關於電池•請勿將電池加熱或接觸明火。
•請勿將電池長時間放置在門窗緊閉受陽光直射的汽車內。
∫關於電池充電器•連接了AC 電源線時,電池充電器處於待機狀態。
只要電源線和電源插座相連,原電路就會始終“帶電”。
小心•如果電池更換得不正確,會有發生爆炸的危險。
請僅用製造商建議使用的類型的電池進行更換。
•廢棄電池時,請與當地機構或經銷商聯繫,詢問正確的廢棄方法。
警告電池有發生火災、爆炸和灼傷的危險。
請勿拆卸、加熱至60x C 以上或焚燒。
注意!為了降低起火、電擊或產品損壞的危險,•請勿將本機安裝或置於書櫃、壁櫥或其他密閉的空間裡。
請確保本機通風良好。
4VQT5D60 (TCH)•請勿使用其他任何USB 連接電纜,只使用提供的USB 連接電纜或正品的Panasonic USB 連接電纜(DMW-USBC1:另購件)。
DMC-ZS5_ZS7GK高级功能使用说明书

嵫儛㞣晌/////////////////////// 27 嬮▅㢡㞣枡嵫ⵇ㞣!///////////// 27
嵫ⵇ喉│/////////////////////// 28 喉│丨⤸!///////////////////// 29 !ℬ䛕皳嵫儛皵喉│!//////////// 2: \㞣晌嵫儛^0 \㙺℉榠^0 \榠捼^0 \厗ⵇῶ嵫儛ⴅ≕^!/ 2: \MDE㯎ゼ^0 \㟫䫧⫔ⶼ^0 \⣽㦴偬^0 \䢡㝦⢫^!/////// 31 !\㑺㗱ⓧ⦌^! 0 \偼㻻^!//////////////////// 32 \厗⢋㛫^0 \㈏⪺▅䋓^0 \▤䦮捺嵫^!//////////////// 33 \捺嵫^0 \VTC!㯎ゼ^0 \孳樾慀⎧^0 \䛢孳沅㶁^!/ 34 \IENJ㯎ゼ^! 0 \WJFSB!Mjol^! 0 \䏵㣙㟫䫧^!//////////////// 35 \㧩ゼⓃ^0 \嶚宭^ \䃁䫧㯎ゼ^!//////////////// 36
!\姹䮸㞒㣌^!/////////////// 91 !\⣝䉦^!/////////////////// 92 !\ῃ䛹㞣枡^!!////////////// 93
ℬ䛕皳㑺㗱皵喉│/////////////// 95 !\⢫≼ⷧⶥ^0 !\⏣廕捼^! !/////////// 95 !\廕捼^0 !\沅㶁^0 !\㠧努JTP^!//////////////// 96 !\㋌⋶こ^!///////////////// 97 !\䠪〠娎^!///////////////// 98 !\ῗ嵳⏘^0 !\BG!㯎ゼ^!// 99 !\樱⋵BG^!///////////////// :1 !\㻸⋶㯎ゼ^0 !\㠧努㢊⋶^!/ :2 !\㢭㌏㆘枕懌こ^0 !\憋㑺^!/ :3 !\㠧努⎳慕䔴^0 !\㜝䦮▅䋓^0 !\憋傚BG^! 0 !\吟ㄖ㛵㥉^!/////////////// :4 !\⢫≼嶰㜡^0 !\䯠ⵇ⠕^!/// :5 !\榠^0 !\BG愲䈜^0 !\㜝䦮偏䣩偍㴐^0 !\㞣晌嵫儛^!/////////////// :6
松下 数码相机 DC-GF10 使用说明书

高级功能使用说明书数码相机型号 DC-GF10请于使用前仔细阅读操作使用说明书,并将说明书妥善保管,以备将来使用。
信息显示P308故障排除P311查找您需要的信息P2目录P4按功能的目录P9菜单列表P182查找您需要的信息在本“高级功能使用说明书”中,可以从以下页查找您需要的信息。
单击页码,可以跳到链接的页,快速查找信息。
从“目录”中检索单击此图标跳到“目录”。
P4从功能名称的列表中检索P9从按钮及转盘的列表中检索P14从画面及图标的列表中检索P301从“信息显示”中检索P308从“菜单列表”中检索单击此图标跳到“菜单列表”。
P182从“故障排除”中检索P311单击此图标跳到“查找您需要的信息”。
单击此图标返回到先前显示的页面。
有关使用本说明书的方法的详情,请参阅下一页。
P3Wi-Fi®功能P245目录查找您需要的信息 (2)使用本说明书的方法 (3)按功能的目录 (9)1. 使用之前相机的注意事项 (12)标准附件 (13)元件的名称及功能 (14)关于镜头 (17)2. 开始使用/基本操作安装肩带 (18)给电池充电 (19)• 插入电池 (20)• 充电 (21)• 大约工作时间和可拍摄的图像数量 (24)插入及取出记忆卡(可选件) (27)记忆卡信息 (28)• 格式化记忆卡(初始化) (29)• 大约可拍摄的图像数量和可拍摄的时间 (30)安装/取下镜头 (32)设置日期/时间(时钟设置) (36)• 重新调整时钟 (37)基本操作 (38)• 拍摄优质图像的技巧 (38)• 伸出/缩回镜头[当安装了可互换镜头(H-FS12032/H-FS35100)时] (39)• 调整监视器的角度 (40)• 快门按钮(拍摄图像) (41)• 动态影像按钮(录制动态影像) (41)• 模式转盘(选择拍摄模式) (42)• 控制转盘 (43)• 指针按钮/[MENU/SET]按钮 (43)• [DISP.]按钮(切换显示的信息) (44)• 触摸屏(触摸操作) (46)• 使用触摸功能拍摄 (47)设置菜单项 (50)立即调出常用的菜单(快速菜单) (52)• 自定义快速菜单设置 (53)将常用的功能分配到按钮(功能按钮) (54)输入文字 (57)3. 拍摄模式使用自动功能拍摄(智能自动模式) (58)• 手持夜景拍摄([智能手持夜景拍摄]) (61)• 将多张图像合成1张层次丰富的图像([智能HDR]) (62)• 使用自定义色彩失焦控制和亮度设置拍摄图像 (63)自拍([自拍]) (65)• 更改释放快门的方式 (74)用自动调整的光圈和快门速度拍摄(程序AE模式) (76)通过指定光圈/快门速度进行拍摄 (78)• 光圈优先AE模式 (79)• 快门优先AE模式 (79)• 手动曝光模式 (80)• 确认光圈效果和快门速度效果(预览模式) (82)• 轻松设置光圈/快门速度以获得适当的曝光(一键AE) (83)拍摄全景图像(全景拍摄模式) (84)配合拍摄场景拍摄(场景指南模式) (87)用最佳设置拍摄孩子或肖像 (90)• 孩子模式 (90)• 肖像模式 (91)用不同的影像效果拍摄(创意控制模式) (92)4. 焦点、亮度(曝光)和色调设置自动调整焦点 (98)• 聚焦模式(AFS/AFF/AFC) (100)• 自动聚焦模式 (102)• 设置AF区域的位置/改变AF区域的大小 (107)• 使触摸的位置的焦点和亮度最佳化 (109)手动调整焦点 (110)固定焦点和曝光(AF/AE锁) (113)补偿曝光 (114)设置感光度 (116)调整白平衡 (118)5. 4K照片和驱动设置拍摄4K照片 (122)从4K连拍文件中选择图像并保存 (126)• 4K照片功能的注意事项 (129)录制后控制对焦(后对焦/焦点合成) (132)• 使用[后对焦]拍摄 (132)• 选择所需的聚焦区域并保存图像 (135)• 合并多张图像以扩大聚焦范围(焦点合成) (136)选择驱动模式 (138)• 连拍模式 (139)• 自拍定时器 (141)在自动调整设置的同时进行拍摄(包围拍摄) (142)• 曝光包围 (143)以设置的间隔自动拍摄([定时拍摄]) (144)创建定格动态影像([定格动画]) (147)6. 稳定器、变焦和闪光灯影像稳定器 (150)使用变焦拍摄 (152)• 提高望远效果 (153)• 用触摸操作进行变焦(触摸式变焦) (157)使用闪光灯拍摄 (158)• 改变闪光灯模式 (160)• 设置为后帘同步 (162)• 闪光灯的发光量调整 (163)• 使闪光灯的发光量与曝光补偿同步 (163)7. 录制动态影像录制动态影像/4K动态影像 (164)• 设置格式、尺寸和拍摄帧率 (166)• 录制动态影像时设置焦点的方法([连续AF]) (168)在录制动态影像的同时拍摄静态影像 (169)拍摄视频快照 (171)8. 回放和编辑影像回放图像 (174)• 使用回放变焦 (177)• 显示多画面(多张回放) (177)• 按拍摄日期显示图像(日历回放) (178)回放组图像 (179)删除图像 (181)9. 使用菜单功能菜单列表 (182)• [拍摄]菜单 (182)• [动态影像]菜单 (202)• [自定义]菜单 (204)• [设置]菜单 (213)• [回放]菜单 (221)10. 使用Wi-Fi功能可以用Wi-Fi®功能做什么 (245)Wi-Fi功能 (246)用智能手机/平板电脑控制 (248)• 安装智能手机/平板电脑应用程序“Image App” (248)• 连接到智能手机/平板电脑 (249)• 通过智能手机/平板电脑拍摄影像(远程拍摄) (253)• 回放相机中的影像 (254)• 保存存储在相机中的影像 (254)• 将相机中的影像发送至SNS (255)• 从智能手机/平板电脑将位置信息添加至存储在相机中的影像 (255)• 用智能手机/平板电脑根据您的喜好合成以视频快照录制的动态影像 (257)在电视机上显示图像 (258)发送影像 (259)将影像发送至智能手机/平板电脑 (263)无线打印 (264)将影像发送至视听设备 (265)将影像发送至PC (266)使用WEB服务 (268)• 将影像发送至WEB服务时 (268)• 将影像发送至[云同步服务]时 (271)• 通过无线接入点连接(通过网络) (277)• 直接连接相机和其他设备(直接连接) (279)• 用与以前相同的设置快速连接([从历史记录中选择目标]/[从收藏夹中选择目标]) (280)[Wi-Fi设置]菜单 (282)11. 连接到其他设备在电视上观看4K动态影像/用PC或录像机保存4K动态影像 (284)• 观看4K的动态影像 (284)• 存储4K动态影像 (285)在电视屏幕上回放图像 (286)• 使用VIERA Link (HDMI) (288)将静态影像和动态影像保存到PC中 (289)• 下载软件 (290)• 将影像传输到PC (292)将静态影像和动态影像保存到录像机中 (294)打印图像 (295)欣赏3D图像 (298)12. 其他监视器显示 (301)信息显示 (308)故障排除 (311)使用时的注意事项 (320)按功能的目录拍摄拍摄模式................................P42自拍模式................................P65[预览].....................................P82全景拍摄模式.........................P84[4K照片]..............................P122[后对焦]...............................P132[定时拍摄]............................P144[定格动画]............................P147[多重曝光]............................P192[静音模式]............................P2043D拍摄................................P298聚焦(AF/MF)[聚焦模式]............................P100[AF 模式].............................P102调整AF区域位置.................P107手动聚焦..............................P110[AF/AE锁]...........................P113驱动器[驱动模式]............................P138[自拍定时器]........................P141画质和色调[感光度]...............................P116[白平衡]...............................P118[照片格调]............................P183[滤镜设置]............................P185[图像尺寸]............................P187[质量]...................................P188[智能动态范围].....................P190[智能分辨率]........................P190 [HDR]..................................P191[慢速快门降噪].....................P196[阴影补偿]............................P196[色彩空间]...........................P197曝光[触摸AE]..............................P48[一键AE]..............................P83[AF/AE锁]..........................P113曝光补偿..............................P114曝光包围..............................P143[测光模式]...........................P189闪光灯[闪光模式]...........................P160后帘同步..............................P162[闪光调整]...........................P163拍摄1.使用之前相机的注意事项请勿使其受到剧烈震动、撞击或压力。
panasonic 数码相机 DMC-S3GK DMC-S1GK 说明书

使用说明书数码相机型号亲爱的顾客:借此机会我们感谢您购买此款Panasonic数码相机。
请仔细阅读本使用说明书,并妥善保管以便日后参考。
请注意,数码相机上的实际控件、部件和菜单项目等可能会与使用说明书中的图示略有不同。
请严格遵守版权法。
• 除您自己私人使用外,对预先录制的磁带、光盘或其它出版或发行的材料进行录制会违反版权法。
即使是私人使用,对某些材料的录制也会受到限制。
安全注意事项警告:为防止火灾、触电或产品损坏的危险,• 请勿使本机遭受雨淋、受潮,并防止溅上水或溅入水,还请勿将诸如花瓶等盛有液体的物品置于本机上。
• 请仅使用所推荐的配件。
• 请勿拆卸机罩(或背板),因内部并无用户可维修的部件。
如需维修请委托有资格的维修人员进行。
电源插座应设置在电器附近并应易于触及。
■■产品识别标记产品位置数码相机底部电池充电器底部■■关于电池注意如果电池放置错误,会有发生爆炸的危险。
更换电池时,只能使用与此相同的电池或制造商建议使用的同等类型的电池。
根据制造商的说明处理废旧电池。
• 请勿加热或放在火焰附近。
• 请勿将电池长时间搁置在阳光直射、门窗关闭的汽车中。
警告火灾、爆炸和烧伤危险。
请勿分解、加热至60℃以上或烧弃。
■■电池充电器须知注意!• 请勿将本机安装或放置于书柜、内置橱柜或其它狭窄的空间。
请确保本机通风良好。
为避免过热导致的电击或火灾危险,请确保窗帘和其它任何东西不会阻碍空气流通。
• 请勿使报纸、桌布、窗帘和类似物品遮挡空气的流通。
• 请勿在本机上放置无保护的火源,例如点燃的蜡烛。
• 请按照环保要求处理电池。
• 当连接上AC电源线时,电池充电器将处于待机状态。
只要电源线与电源插座相连接,初级电路总是带电。
■■使用时• 请务必使用正宗的Panasonic音像电缆(DMW-AVC1:另售)。
• 切勿使用所附USB连接电缆以外的任何其他电缆。
请将相机尽可能远离电磁波设备(比如微波炉、电视机、视频游戏等)。
Panasonic DMC-ZS10 数码相机使用说明书

Basic Owner’s ManualDigital Cameraplease read the instructions completely.Dear Customer,Thank you for choosing Panasonic!You have purchased one of the most sophisticated and reliable products on the market today. Used properly, we’re sure it will bring you and your family years of enjoyment. Please take the time to fill in the information below.The serial number is on the tag located on the underside of your Camera. Be sure to retain this manual as your convenient Camera information source. Please note that the actual controls and components, menu items, etc. of your Digital Camera may look somewhat different from those shown in the illustrations in this Owner’s Manual.Carefully observe copyright laws.•Recording of pre-recorded tapes or discs or other published or broadcast material for purposes other than your own private use may infringe copyright laws. Even for the purpose of private use, recording of certain material may be restricted.Model No.Serial No.This Class B digital apparatus complies with Canadian ICES-003.WARNING:TO REDUCE THE RISK OF FIRE, ELECTRIC SHOCK OR PRODUCT DAMAGE,•DO NOT EXPOSE THIS APPARATUS TO RAIN, MOISTURE, DRIPPING OR SPLASHING AND THAT NO OBJECTS FILLED WITH LIQUIDS,SUCH AS VASES, SHALL BE PLACED ON THE APPARATUS.•USE ONLY THE RECOMMENDED ACCESSORIES.•DO NOT REMOVE THE COVER (OR BACK); THERE ARE NOUSER SERVICEABLE PARTS INSIDE. REFER SERVICING TOQUALIFIED SERVICE PERSONNEL.■Product identification markingProduct LocationDigital camera BottomBattery charger Bottom■About the battery packCAUTIONBattery pack (Lithium ion battery pack)•Use the specified unit to recharge the battery pack.•Do not use the battery pack with equipment other than the specified unit.•Do not get dirt, sand, liquids, or other foreign matter on the terminals.•Do not touch the plug terminals (+ and −) with metal objects.•Do not disassemble, remodel, heat or throw into fire.If any electrolyte should come into contact with your hands or clothes, wash it off thoroughly with water.If any electrolyte should come into contact with your eyes, never rub the eyes. Rinse eyes thoroughly with water, and then consult a doctor.CAUTIONDanger of explosion if battery is incorrectly replaced. Replace only with the same or equivalent type recommended by the manufacturer. Dispose of used batteries according to the manufacturer’s instructions.•Do not heat or expose to flame.•Do not leave the battery(ies) in an automobile exposed to direct sunlight for a long period of time with doors and windows closed.Warning Array Risk of fire, explosion and burns. Do not disassemble, heat above 60 °C (140 °F) or incinerate.■About the battery chargerCAUTION!DO NOT INSTALL OR PLACE THIS UNIT IN A BOOKCASE, BUILT-IN CABINET OR IN ANOTHER CONFINED SPACE. ENSURE THE UNIT IS WELL VENTILATED. TO PREVENT RISK OF ELECTRIC SHOCK OR FIRE HAZARD DUE TO OVERHEATING, ENSURE THAT CURTAINS AND ANY OTHER MATERIALS DO NOT OBSTRUCT THE VENTILATION VENTS.Battery chargerThis battery charger operates on AC between 110 V and 240 V.But•In the U.S.A. and Canada, the battery charger must be connected toa 120 V AC power supply only.•When connecting to an AC supply outside of the U.S.A. or Canada, use a plug adaptor to suit the AC outlet configuration.■Cautions for Use•Do not use any other AV cables except the supplied one.•Do not use any other USB connection cables except the supplied one.•Always use a genuine Panasonic HDMI mini cable (RP-CDHM15/RP-CDHM30: optional).Keep this unit as far away as possible from electromagnetic equipment (such as microwave ovens, TVs, video games etc.).•If you use this unit on top of or near a TV, the pictures and/or sound on this unit may be disrupted by electromagnetic wave radiation.•Do not use this unit near cell phones because doing so may result in noise adversely affecting the pictures and/or sound.•Recorded data may be damaged, or pictures may be distorted, by strong magnetic fields created by speakers or large motors.•Electromagnetic wave radiation generated by microprocessors may adversely affect this unit, disturbing the pictures and/or sound.•If this unit is adversely affected by electromagnetic equipment and stops functioning properly, turn this unit off and remove the battery or disconnect AC adaptor (DMW-AC5PP; optional). Then reinsert the battery or reconnect AC adaptor and turn this unit on.Do not use this unit near radio transmitters or high-voltage lines.•If you record near radio transmitters or high-voltage lines, the recorded picturesand/or sound may be adversely affected.Information for Your Safety (2)Before useStandard accessories (7)Names of parts (8)Cursor button (9)Touch operations (10)PreparationsCharging the battery (12)Inserting and removing the card (optional)/the battery (14)Picture save destination(cards and built-in memory) (15)Setting the clock (16)About GPS (17)Setting the menu (18)BasicsSelecting the Recording Mode (19)Taking pictures with automatic settings[Intelligent Auto] Mode (20)AF Tracking (21)Taking motion pictures (22)Viewing your pictures [Normal Play] (23)Deleting pictures (23)OthersReading the Owner’s Manual (PDF format) (24)Specifications (26)Optional accessories (29)This product is licensed under the AVC patent portfolio license for the personal and noncommercial use of a consumer to (i) encode video in compliance with the AVC Standard (“AVC Video”) and/or (ii) decode AVC Video that was encoded by a consumer engaged in a personal and non-commercial activity and/or was obtained from a video provider licensed to provide AVC Video. No license is granted or shall be implied for any other use. Additional information may be obtained from MPEG LA, LLC.See .Check that all the accessories are supplied before using the camera. Partnumbers are as of January 2011.Battery packDMW-BCG10PP•Charge the batterybefore use.battery pack or battery in thetext.Battery chargerDE-A65Bbattery charger or charger inthe text.Stylus PenVGQ0C14Hand strapVFC4297K1HY08YY0017AV cableK1HY08YY0018CD-ROMVFF0765•Software:Use it to install thesoftware on your PC.•Owner’s Manual•Cards are optional. You can record or play back pictures on the built-in memory when you are not using a card.•If any accessories are lost, customers should contact 1 800 99-LUMIX (1-800-995-8649) for further information about obtaining replacement parts.•Please dispose of all packaging appropriately.•Keep small parts in a safe place out of the reach of children.●We recommend you use a battery with sufficient battery power or the AC adaptor when recording motion pictures.●If the power supply is cut off due to a power cut or the AC adaptor being disconnected, the motion picture being recorded using the AC adaptor will not be recorded.●Always use a genuine Panasonic AC adaptor (DMW-AC5PP: optional).●When using an AC adaptor, ensure that the Panasonic DC coupler (DMW-DCC5; optional) and AC adaptor (DMW-AC5PP; optional) are used.This camera’s touch panel senses pressure that is applied to the screen.●If the type of sheet to protect LCD screens that are available on the market is to be used, observe the precautions that are contained with the sheet. (Some types of protective sheets may impair the screen’s visual recognition and ease of operation.)●If the camera is used with a protective sheet available on the market attached to its screen or if the screen is not very responsive, touch the screen with a little more pressure.●If your hand is pressed against the touch panel when holding the camera, the touch panel will not work properly.●Do not press on the LCD monitor with hard pointed tips, such as ball point pens.●Do not press the touch panel with your fingernails.●Clean the LCD monitor with a soft dry cloth if there are fingerprints or other kinds of dirt on it.■Stylus penThe stylus pen (supplied) comes in handy when doing the kinds of jobs that require close or careful operation and your fingertips are too large to perform the operations easily.•Do not use a pen other than the pen supplied.•Keep the stylus pen out of the reach of infants and small children.•Do not place the stylus pen on the LCD monitor when storing. LCD monitor may break when the stylus pen is pressed strongly against the LCD monitor.■About batteries that you can use with this unitThe battery that can be used with this unit is DMW-BCG10PP.It has been found that counterfeit battery packs which look very similar to the genuine products are made available to purchase in some markets. Some of these battery packs are not adequately protected with internal protection to meet the requirements of appropriate safety standards. There is a possibility that these battery packs may lead to fire or explosion. Please be advised that we are not liable for any accident or failure occurring as a result of use of a counterfeit battery pack. To ensure that safe products are used we recommend that a genuine Panasonic battery pack is used.•Use the dedicated charger and battery.•The camera has a function for distinguishing batteries which can be used safely. The dedicated battery (DMW-BCG10PP) supports this function. The only batteries suitable for use with this unit are genuine Panasonic products and batteries manufactured by other companies and certified by Panasonic. (Batteries which do not support this function cannot be used.) Panasonic cannot in any way guarantee the quality, performance or safety of batteries which have been manufactured by other companies and are not genuine Panasonic products.•The battery is not charged when the camera is shipped. Charge the battery and set the clock before use.•Charge the battery with the charger indoors (10 °C - 30 °C (50 °F - 86 °F)).Recording conditions by CIPA standard•CIPA is an abbreviation of [Camera & Imaging Products Association].•[Program AE] Mode.•[GPS Setting] is set to [OFF]•Temperature: 23 °C (73.4 °F)/Humidity: 50 %RH when LCD monitor is on.•Using a Panasonic SD Memory Card (32 MB).•Using the supplied battery.•Starting recording 30 seconds after the camera is turned on. (When theOptical Image Stabilizer function is set to [ON].)•Recording once every 30 seconds with full flash every second recording.•Rotating the zoom lever from Tele to Wide or vice versa in every recording.•Turning the camera off every 10 recordings and leaving it until thetemperature of the battery decreases.The number of recordable pictures or available operating time may varyaccording to surrounding environment and usage conditions. Figures maybe reduced if flash, zoom, or other functions are used frequently, or incolder climates.Ensure [LUMIX] faces outwards.●Always use genuine Panasonic batteries (DMW-BCG10PP).●If you use other batteries, we cannot guarantee the quality of this product.●Insert the card fully, otherwise it may be damaged.(This Site is English only.)●Keep the Memory Card out of reach of children to prevent swallowing.To cancel → Press [ /].To return to the previous screen, press [ /].•To manually set date and time →select [No].Select [Clock Set] from [Rec] or [Setup] menu, perform and .Optimum settings are made automatically from information such as “face,” “movement,” “brightness,” and “distance” just by pointing the camera at the subject, meaning that clear pictures can be taken withoutPress halfway (press lightly and focus)Press fully (press the button all the way to record)•If jitter becomes noticeable, use both hands, keep your arms close to your body, and stand with your feet at shoulder width. • •function. In other cases, it is displayed at the point on the subject which is in focus. •Focus: M ax. W: 3 cm (0.10 feet)/Max. T: 1 m (3.28 feet) and above (7 × to 11 × is 2 m (6.57 feet) to ∞)■Automatic Scene DetectionCamera identifies the scene when pointed at the subject, and makes optimum settings automatically. The type of scene detected is indicated If the camera automatically identifies the scene and determines that people appear as subjects in the picture (, , ), FaceDetection is activated, and the focus and exposure are adjusted for the recognized faces.AF TrackingThis function enables the camera to continue to focus on the subject and adjust the exposure of the subject even when the subject is moving.Perform these operations with the touch shutter function released.Touch the subject•When switching to lock on to another subject → Touch the other subject.•This records motion pictures with audio. Zoom can also be used during Slide the [REC/PLAY] switch to Elapsed recording time Remaining recording time (approx.)●Immediately release the motion picture button after pressing it all the way.●When there is no space left to store the motion picture, recording automatically ends.●An AVCHD motion picture can be recorded continuously for up to 29 minutes 59 seconds when [GFS] or [FSH] is set.Also, a maximum of approx. 2 GB of continuous motion picture can be recorded in Motion JPEG format. (Even if there is more than 2 GB of available space on the card, the available recording time will be calculated up to a maximum of 2 GB.)●If [Rec Quality] is set to [GFS] or [FSH], and if the surrounding temperature is high, or motion picture is recorded continuously, is displayed, and the recording may be stopped halfway through.To play back a motion picture, select an image with ◄ or ►, and then press ▲ to start playback.●You can print pictures by connecting a camera to your computer or printer, or by giving an SD card to a shop assistant at a photo shop.More detailed instructions on the operation of this camera are contained in “Owner’s Manual for advanced features (PDF format)” in the supplied CD-ROM. Install it on your PC to read it.To return to the install menu.See next page.Double click the “Owner’s Manual” shortcut icon on the desktop■When the Owner’s Manual (PDF format) will not openYou will need Adobe Acrobat Reader 5.0 or later or Adobe Reader 7.0 or later to browse or print the Owner’s Manual (PDF format).Vista SP2 / Windows 7•You can download and install a version of Adobe Reader that you can use with your OS from the following Web Site./reader/otherversions■To uninstall the Owner’s Manual (PDF format)Delete the PDF file from the “Program Files\Panasonic\Lumix\” folder. •When the contents in the Program Files folder cannot be displayed, click the “Show the contents of this folder” to display them.Battery chargerEquipment mobility: Movable Battery Pack (lithium-ion)Product name: Battery Pack Product no.: DMW-BCG10PP●Performance identical to supplied battery pack.●Recommended for taking on holiday, etc.Product name: AC adaptor *Product no.: DMW-AC5PPPurchase the AC adaptor and DC coupler as a set. They cannot be used individually with this camera.Product name: Marine Case Product no.: DMW-MCTZ20Product name: DC coupler *Product no.: DMW-DCC5Product name: HDMI mini cableProduct no.: RP-CDHM15/RP-CDHM30Product name: SDXC Memory CardProduct no.: 48 GB: RP-SDW48GU1K Class 1064 GB: RP-SDW64GU1K Class 10Product name: SDHC Memory CardProduct no.: 4 GB: RP-SDW04GU1K Class 104 GB: RP-SDN04GU1A Class 4 8 GB: RP-SDW08GU1K Class 10 8 GB: RP-SDN08GU1A Class 416 GB: RP-SDW16GU1KClass 10 16 GB: RP-SDN16GU1A Class 432 GB: RP-SDW32GU1KClass 10Product name: SD Memory CardProduct no.: 2 GB: RP-SDN02GU1A Class 4* T he AC Adaptor (optional) can only be used with the designatedPanasonic DC Coupler (optional). The AC adaptor (optional) cannot be used by itself.●Product numbers are correct as of January 2011. These may be subject to change.●Accessories and/or model numbers may vary between countries. Consult your local dealer.•HDMI, the HDMI Logo, and High-DefinitionMultimedia Interface are trademarks or registeredtrademarks of HDMI Licensing LLC in the UnitedStates and other countries.•HDAVI Control™ is a trademark of PanasonicCorporation.•VIERA Link™ is a trademark of PanasonicCorporation.•EZ Sync™ is a trademark of Panasonic Corporation.•The “AVCHD” and the “AVCHD” logo are trademarksof Panasonic Corporation and Sony Corporation.•Manufactured under license from DolbyLaboratories.Dolby and the double-D symbol are trademarks ofDolby Laboratories.•SDXC Logo is a trademark of SD-3C, LLC.•QuickTime and the QuickTime logo are trademarksor registered trademarks of Apple Inc., used underlicense therefrom.•This product uses “DynaFont” from DynaComwareCorporation. DynaFont is a registered trademark ofDynaComware Taiwan Inc.•Other names, company names, and product namesprinted in these instructions are trademarks orregistered trademarks of the companies concerned.Panasonic Canada Inc.5770 Ambler Drive,Mississauga, OntarioL4W 2T3(905) 624-5010www.panasonic.ca© Panasonic Corporation 2011Printed in Japan。
