E-Securer_系统安装手册
最新efutureoner2011v3-系统操作手册汇总

e F u t u r e O N E R2011V3 -系统管理操作手册eFuture ONE R2011 V3 系统管理操作手册文件控制版本记录审阅记录目录1系统公共界面及按钮说明 (6)1.1快捷菜单(对列表窗口) (6)1.2快捷菜单(对报表窗口) (6)1.3图形分析 (7)1.4ABC分析 (11)1.5楼层图分析 (13)1.6排序 (14)1.7公共功能按钮说明 (15)1.8批量打印功能 (15)1.9报表查询功能 (17)2系统管理 (19)2.1系统配置 (19)2.1.1Z1111企业资料设置 (19)2.1.2Z1112系统业务参数设置 (20)2.1.3Z1113系统编码规则 (23)2.1.4Z1114节假日定义 (23)2.1.5Z1118单据模版定义 (24)2.1.6Z1131打印纸张定义 (26)2.1.7Z1132 EXCEL导入配置 (26)2.1.8Z1137报表模型配置 (27)2.1.9Z1138 数据源定义 (29)2.2系统编码 (30)2.2.1Z2101经营公司定义 (30)2.2.2Z2102门店定义 (30)2.2.3Z2103门店群组定义 (31)2.2.4Z2104服务群组定义 (32)2.2.5Z2110数据分布定义 (33)2.3用户管理 (34)2.3.1Z1210 业务中心数据管理操作范围管理 (34)2.3.2Z1211 业务中心功能模块管理 (36)2.3.3Z1212 业务中心用户角色定义 (37)2.3.4Z1213 业务中心用户定义 (40)2.3.5Z1216 操作日志查询 (42)2.3.6Z1218 菜单模板定义 (43)2.3.7Z1219 门店用户角色定义 (44)2.3.8Z1220 门店数据范围管理 (46)2.3.9Z1221 门店用户定义 (48)2.3.10Z1222 门店功能模块管理 (50)2.4系统监控 (51)2.4.1Z1311工作站管理 (51)2.4.2Z1312工作站监控 (52)2.4.3Z1313打印操作日志查询 (53)2.4.4Z1314功能使用日志查询 (54)2.4.5Z1316报表使用日志查询 (55)2.5日常维护 (55)2.5.1Z1414 系统BUG管理 (55)2.5.2Z1415 系统连接管理 (57)2.5.3Z1413 接受数据 (59)2.5.4Z1416 门店日结配置 (59)2.5.5Z1417 数据库表空间管理 (60)2.5.6Z1418 数据库分区表管理 (61)2.6日常维护 (62)2.6.1Z1414 审批流定义 (62)2.6.2Z1415 审批流监控 (63)3门店系统维护 (64)3.1门店组业务参数设置 (64)3.2门店组数据分布定义 (64)3.3系统连接管理 (65)3.4门店日结配置 (66)3.5发送数据至总部 (66)3.6接收数据 (67)3.7数据库表空间管理 (68)1系统公共界面及按钮说明1.1 快捷菜单(对列表窗口)快捷菜单,指的是能够迅速被激活,用来执行某些常用功能的菜单。
瑞星企业终端安全管理系统安装使用介绍

15/81
客户端安装环境
• 软件环境
1)Microsoft Windows家族、主要的Unix操作系统(Linux、FreeBSD、Solaris)。 客户端: • Windows XP Professional/Home Edition • Windows Vista • Windows 7 • Windows 8.1 • Windows 10 • FreeBSD • UNIX(SUN Solaris系列、IBM AIX系列) • Linux(RedHat Linux、红旗Linux等基于Intel x86芯片的系统) 2)Internet Explorer 6.0以上 、Chrome (推荐)、 firefox
12/35
安装管理中心(四)
第二步:设置管理中心IP地址,以及管理地址信息,保持默认即可, 点击【下一步】;
13/81
安装管理中心(五)
第二步:填写单位名称以及设置管理员密码,端口保持默认即可, 漏洞补丁路径建议设置到非系统盘,建议高于30G以上,点击【下一 步】;
14/35
安装管理中心(六)
• 可方便的连接Internet:瑞星企业终端安全管理系统具有自动升级的功 能,为保证此功能的顺利实现,管理中心所在服务器应能接入互联网。
• 按照企业需求选择安装Microsoft SQL server 数据库和.Net Framework 3.5,以及IIS 6.0 or later。
• 也可根据企业实际需要进行手动从瑞星官网下载更新文件,来实现更 新系统组件以及病毒库。 注意:为了保障防病毒系统顺利工作,建议将管理中心安装在独立的 服务器上面。
7/35
安装前注意事项(二)
亿赛通电子安全管理系统V系统安装手册V

文档类型:文档编号:亿赛通电子文档安全管理系统安装手册北京亿赛通科技发展有限责任公司2016年1月目录第一章引言1.1 目的本文档主要用于指导亿赛通工程师、客户进行电子文档安全管理系统安全部署。
本手册的使用对象:公司技术支持部、销售部、市场部、测试部和使用该系统产品的客户。
1.2 范围本文档适用于电子文档安全管理系统。
1.3 名词定义1.4 参考资料编写本手册时参考的文档如下:《亿赛通电子文档安全管理系统_CDG需求规格说明书》《亿赛通电子文档安全管理系统_CDG概要设计规格说明书》《亿赛通电子文档安全管理系统_CDG详细设计规格说明书》《亿赛通电子文档安全管理系统_CDG技术白皮书》第二章运行环境2.1 硬件环境2.2 服务端的支持情况2.3 客户端的支持情况备注:win8 、win 10是否支持322.4 安装程序说明第三章 服务器安装3.1 服务器安装流程服务器管理平台结束开始3.2 服务器平台安装 3.2.1 数据库安装本部分内容省略,如不知道如何安装数据库可单独获取相应文档。
3.2.2 服务器安装过程步骤1: 插入安装光盘,打开光盘中“电子文档安全管理系统-服务器端”目录,双击根目录下的Setup ,启动安装向导,进入“安 装界面”,如下图所示:步骤2: 点击【下一步】按钮,选择【我接受许可证协议中的条款】,如下图所示:步骤3: 点击【下一步】按钮至输入用户信息界面,用户信息包括用户名和公司名称,根据需求选择用户安装类型,推荐选择【使用本计算机的任何人(所有用户)】,如下图所示:步骤4: 点击【下一步】按钮至安装功能界面,默认情况CDG Server功能为勾选状态,若去除该选项安装后服务将无法启动,如下图所示:步骤5: 点击【下一步】按钮,进入安装提示界面,点击图中【安装】进入程序安装过如下图所示:步骤6: 点击【安装】按钮,程序开始安装CDGServer直至完成,如下图所示:3.2.3 运行检查检查CDG Server1.在服务器端,用户鼠标右键点击【我的电脑】,选择【管理】,或者在【运行】栏中输入:命令,打开服务平台,如下图所示:2.进入选择【服务】管理平台,查看CobraDG服务是否为自动启动,如下图所示:配置SQL数据库CDG系统运行需要数据库系统的支持,本系统使用的数据库系统为Microsoft SQL Server (2000/SP3、2005、2008、2008 64bit正式版均可)。
瑞通EES酒店管理系统安装说明

1、先安装SQL2008数据库,压缩文件下有图文安装说明
2、插入加密狗,安装加密狗驱动程序
3、打开SQL2008,新建二个数据库,第一个名称(正式版)为“xjllhms2000”,第二个名称(练习版):test”如下图:
4、在SQL2008管理中心,在树目录下,选择对应导入相应的数据库即可,如下图
5、将瑞通EES正式版解压到C盘以外的其他盘符
6、打开解压的瑞通EES正式版文件夹,将以下快捷方式发送到桌面上
A、酒店管理系统登录程序:盘符:\瑞通EES正式版\EES标准版\HMSstandard,
发送到
桌面上
B、夜审程序:盘符:\瑞通EES正式版\EES标准版\HMSstandard\NightAudit,发送到桌面上,注意夜审程序必须24小时打开,禁止关闭,夜审时间为北京时间06点整
7、CRS服务器端安装:
A、打开解压缩的文件夹,找到盘符:\瑞通EES正式版\EES标准版\HMSstandard\CRS4.0,双击安装“crs服务程序”,完成即可
B、设置手机APP客户端:找到盘符:\瑞通EES正式版\EES标准版\HMSstandard\CRS4.0\CRS服务端,将
发送到桌面上,注意CRS程序必须24小时打开,否则手机无法与酒店系统实现数据共享
8、进入酒店管理系统的初始:工号001 密码1
Welcome !!! 欢迎您的下载,资料仅供参考!。
亿赛通电子文档安全管理系统V5.0--系统安装手册V11
文档类型:文档编号:亿赛通电子文档安全管理系统V5.0安装手册北京亿赛通科技发展有限责任公司2016年1月目录第一章引言 (3)1.1目的 (3)1.2范围 (3)1.3名词定义 (3)1.4参考资料 (3)第二章运行环境 (4)2.1硬件环境 (4)2.2服务端的支持情况 (4)2.3客户端的支持情况 (4)2.4安装程序说明 (4)第三章服务器安装 (6)3.1服务器安装流程 (6)3.2CDG-Server安装 (6)3.2.1数据库安装 (6)3.2.2服务器安装过程 (6)3.2.3运行检查 (9)3.2.4数据库配置 (13)3.2.5获取授权与导入 (14)3.2.6FileZilla FTP Server服务器部署 (16)3.3MediaSec-Server安装..................................................................... 错误!未定义书签。
第四章客户端安装.. (25)4.1CDG-Client安装 ............................................................................. 错误!未定义书签。
4.2MediaSec-Client安装...................................................................... 错误!未定义书签。
第五章服务器卸载.. (28)5.1CDG-Server器卸载 ........................................................................ 错误!未定义书签。
5.2MediaSec-Server卸载..................................................................... 错误!未定义书签。
SecureCRT设置教程
转帖】SecureCR T设置教程Sec ureCRT是最常用到的终端仿真程序,很多人都喜欢用进行一些配置和实验,在这里我只针对一些朋友常问到我的关于Cisco的Gns3与Secur eCRT的配置进行讲解。
我以Secure_CRT_6.2.3版为例进行介绍。
一、安装安装相对来说比较简单,运行Sec ure_CRT_6.2.3,只要“下一步”即可,我们不去更改以默认安装就可以了。
二、注册对于Se cure_CRT_6.2.3现在册上有很多注册机,只要去下载一个就可以了。
我这里用到的破解是器是cr ack.exe,把解压下来的crack.exe复制到安装文件夹下,并点击运行。
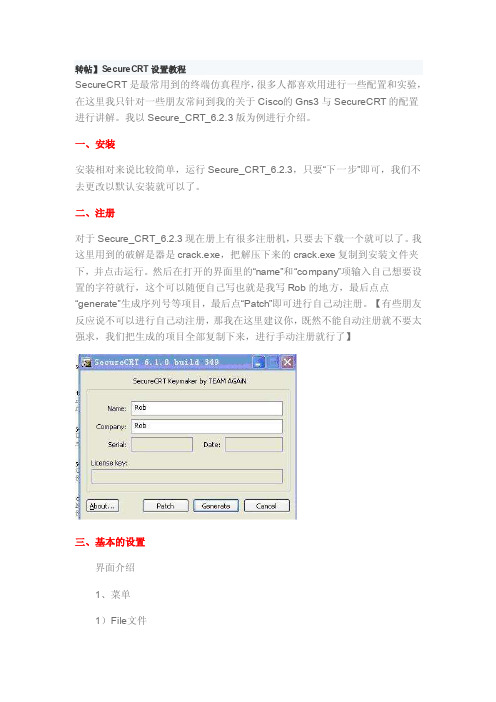
然后在打开的界面里的“name”和“com pany”项输入自己想要设置的字符就行,这个可以随便自己写也就是我写Rob的地方,最后点点“gene rate”生成序列号等项目,最后点“Pa tch”即可进行自己动注册。
【有些朋友反应说不可以进行自己动注册,那我在这里建议你,既然不能自动注册就不要太强求,我们把生成的项目全部复制下来,进行手动注册就行了】三、基本的设置界面介绍1、菜单1)File文件Connect... 连接,打开一个连接或者编辑已有的连接,创建新连接。
Q uick Conne ct... 快速连接,快速连接对话框,快速连接主机的最便捷方式。
Connect in Tab...在Tab中打开一个新的会话窗口。
Cl one Sessio n 克隆当前会话窗口。
ConnectSFTP Tab 打开SFTP窗口,对于SSH连接,此选项可用。
在此会话窗口中可使用SFTP命令传输文件。
Reconn ect 重新连接D isconnect中断当前会话窗口的连接Log Sess ion 把当前窗口的会话记录到log文件中。
ESET Smart Security Premium 说明书

Click here to download the most recent version of this documentInstallationESET Smart Security Premium contains components that may conflict with other antivirus products or security software installed on your computer. ESET strongly recommends that you remove any such programs to prevent potential problems. You do not need to disable or remove the Windows firewall in M icrosoft Windows Vista or later, as this is automatically handled by the ESET Smart Security Premium installer. You can install ESET Smart Security Premium from an installation CD/DVD or by downloading the installer from unching the installationTo launch the installer wizard, do one of the following:1.If you are installing from a CD/DVD, insertthe CD/DVD into the CD/DVD-ROM drive. If the autorun menu does not appear automatically, double-click your CD/DVD drive to open it manually.The installer will automatically check online for the latest product version. If a newer version is available, you will be prompted to download it before beginning the installation process.Next, the End-U ser License Agreement will be displayed. Please read the agreement and click I Accept to acknowledge your acceptance of the End-U ser License Agreement. After you accept, installation will continue.2.If you are installing from a downloadedfile, double-click the file to launch Live installer. Live installer itself is a small file;additional files required to install ESET Smart Security Premium will be downloaded automatically.Product activationThe Product Activation window appears.·If you purchased a retail boxed version of ESET Smart Security Premium, activate your product using a License Key. You can find the License Key on the license card or you have received it via email if you purchasedyour license online. For a successful activation, the License Key must be entered as supplied. To renew your existing license, enter your renewal activation key.·If you would like to evaluate ESET Smart Security Premium before activating, select Free trial. Specify an email address. Your test license will be sent to this address and ESET Smart Security Premium will be activated for a limited period of time. Alternatively, you can select Skip activation to continue installation without activation. You will be prompted for a License Key later.·After selecting U se License M anager you will be asked for your credentials in a new window.·If you do not have a license and would like to buy one, click Purchase License. This will redirect you to the website of your local ESET distributor.Join ESET LiveGrid®Help us capture malware by joining our collaboration network. Your participation allows us to gather more sample threats, which helps us to offer increasingly stronger and more efficient proactive protection to all ESET users. We recommend that you enable this feature, and we thank you for your support.Detection of potentially unwanted applicationsSince some potentially unwanted applications are used legitimately and might not necessarily pose a security risk, the user‘s consent is required to enable detection. Completing the installationStart the final installation by clicking Install. Installation progress will be indicated by a progress bar. After installation is complete, ESET Smart Security Premium will start automatically. A computer restart is not normally required, ESET Smart Security Premium will begin protecting your computer from malware threats immediately.Trusted zone setupIf a network connection is detected once installation is complete, a notification will appear allowing you to configure a trusted zone. The New network connection detected notification displays the local subnet defined in your computer’s system setup. These options only affect the visibility of your computer in the local network, not the internet. There are two access modes available:·Public network – select this option if you do not want to share your folders or printers and want your computer to be invisible to other users on the same network. This setting is recommended for users with a wireless connection.·Home or office network – select this option if you want to share files and folders on your computer and want your computer to be visible to other users in the same network. This setting is recommended for trusted local home or office networks.To protect your computer in case of a loss or theft click Enable Anti-Theft to activate ESET Anti-Theft features for the computer you just registered.For more instructions about ESET Anti-Theft computer association and to learn how it works see How to add a new device.Starting ESET Smart Security PremiumESET Smart Security Premium starts protecting your computer immediately after installation. You do not have to open the program to start it. You can open ESET Smart Security Premium at any time to check your protection status or to perform various scanning and maintenancetasks.To open ESET Smart Security Premium, double-click the ESET Smart Security Premium icon located in your Windows notification area (system tray).User interfaceThe Home section informs you about the current protection level of your computer.A Computer scan is an important part of each antivirus solution. It is used to perform a scan of the files and folders on your computer’s disk(s).The Update section contains important information about program updates. It is crucial that the program be updated regularly to provide the maximum level of protection against the latest threats.The Tools section allows you to access advanced features such as Password Manager, Secure Data, Connected Home Monitor, Banking & Payment protection, Anti-Theft and More tools including features such as log files, quarantine, scheduler etc.The Setup options allow you to adjust the protection levels of your computer.The Help and support section provides comprehensive help and support for ESET Smart Security Premium. You can also contact ESET technical support directly from here.UpdateESET Smart Security Premium comes with a predefined task to ensure regular updates (see the Scheduler section in the product manual). If once installation is completed you have not yet performed an update, we recommend starting the update manually as follows:From the ESET Smart Security Premium main program window, click Update from the main menu on the left and then click Update now. The update module will connect to the Internet, contact an available ESET updateserver and download digitally signed update files. These updates contain the most recent malware signatures and new definitions for advanced heuristics as well as other program modules. As soon as a newer update has been installed, ESET Smart Security Premium displays a notification in the system tray area and in the main program window. Computer scanAfter a successful installation and update, we recommend that you perform a complete computer scan for threats. To do this, click Computer scan from the main menu on the left and then select Scan your computer from the ESET Smart Security Premium primary window.NOTE: After installing ESET Smart Security Premium, a computer scan will start automatically after first successful update inorder to check for malicious code. Scanning of all local hard drives will start. The status window will display scan progress as well as the current statistics about scanned and infected files found. If a threat isdetected, ESET Smart Security Premium quarantines the file and displays an alert in the system tray area. You should be able to continue working as normal while the scan takes place.Protection statusESET Smart Security Premium’s current protection status is indicated in the followingways:The system tray iconThe Home section displays a detailed report of your protection status. In the event that any protection module is disabled, the Home window will show the name of the disabled module, along with a link allowing you to re-enable it.The individual protection statuses are indicated by the following icons:GreenAntivirus protection is working properly and your computer is protected against malicious software as well as network attacks. This status indicates that all protection modules are enabled and the detection engine is up-to-date.OrangeThis icon is displayed if your operating system does not have all necessary operating system updates installed.The orange icon is displayed if– Real-time file system protection is enabled,but the maximum level of protection is not ensured.– Email client protection or Web access protection is disabled or malfunctioning.Red– Real-time file system protection is disabled or malfunctioning. Since the proper function of this module is vital to your system’s security, we recommend re-enabling the inactive module immediately.– The detection engine is out of date. If the detection engine is not updated automatically, try to update it manually, or check to see if the computer is connected to Internet.Resolving issuesESET technical support specialists are ready to assist you in resolving any issues you may have. Before contacting technical support, we strongly recommend that you read the related topic in the product documentation (https://) or search for a solution on the ESET website. For solutions to specific issues or questions about features and products, visit our Knowledgebase at: https://To contact ESET technical support, use the web form available at:/support/contactSubmitting a technical support queryIn the event of a problem, contact ESET Customer Care using the query submission form integrated into ESET Smart Security Premium. Click Submit support request in the Help and support section.Copyright© 2019 by ESET, spol. s r.o.ESET Sm art Security Prem ium was developed by ESET, spol. s r.o.For m ore inform ation visit . All rights reserved. No part of this docum entation m ay be reproduced, stored in a retrieval system or transm itted in any form or by any m eans, electronic, m echanical, photocopying, recording, scanning, or otherwise without perm ission in writing from the author. ESET, spol. s r.o. reserves the right to change any of the described application software without prior notice. ESET, logo of ESET, NOD32, Sm art Security, ThreatSense, L iveGrid® and/or other m entioned products of ESET, spol. s r. o. are registered tradem arks of ESET, spol. s r. o. Other com panies m entioned here or products, m ay be registered tradem arks of its proprietors.Produced according to quality standards of ISO 9001:2000.R EV. 10/17/2019。
第6章 (1)身份认证

6.2 身份认证系统与数字签名
2.动态口令认证(ACE)系统 动态口令认证系统也称为一次性口令(One Time Password,OTP)认证系统,在登录过程中 加入不确定因素,使每次登录过程中传送的密码信息 都不相同,从而可以增强认证系统的安全性。动态口 令认证系统的组成包括:
图6-1 认证系统网络结构图
6.1 身份认证技术
【案例5-1】AAA认证系统现阶段应用最广。认证
案例6-2
(Authentication)是验证用户身份与可使用网络服 务的过程;授权(Authorization)是依据认证结果 开放网络服务给用户的过程;审计(Accounting)是 记录用户对各种网络服务的操作及用量,审查并计费 的过程。
6.2 身份认证系统与数字签名
3. 双因素安全令牌及认证系统
双因子安全令牌及认证系统,如图6-5所示。 (1)E-Securer的组成 ①安全身份认证服务器。 ②双因子安全令牌(Secure Key)。 (2)E-Securer的安全性 (3)双因子身份认证系统的技术特点与优势
图6-5 E-Securer安全认证系统
6.1 身份认证技术
表6-1 数字证书的类型与作用 证书名称 证书类型
个人证书 个人证书
主要功能描述
个人网上交易、网上支付、 电子邮件等相关网络作业
单位身份证 用于企事业单位网上交易、 书 网上支付等 单位证书 Email证书 用于企事业单位内安全电子 邮件通信 用于企事业单位内某个部门 的身份认证 用于服务器、安全站点认证 用于个人软件开发者对其软 件的签名
- 1、下载文档前请自行甄别文档内容的完整性,平台不提供额外的编辑、内容补充、找答案等附加服务。
- 2、"仅部分预览"的文档,不可在线预览部分如存在完整性等问题,可反馈申请退款(可完整预览的文档不适用该条件!)。
- 3、如文档侵犯您的权益,请联系客服反馈,我们会尽快为您处理(人工客服工作时间:9:00-18:30)。
联创E-Securer安全身份认证系统
V3.5
安装手册
联创科技(南京)有限公司
目录
一、安装所需介质 (3)
二、系统环境要求 (3)
2.1、系统安装人员要求 (3)
2.2、系统硬件平台要求 (3)
三、单机版安装实施步骤 (4)
1、安装RedHat Linux操作系统,并配置好网卡、启动必要的系统服务等; (4)
2、使用root身份用户login进入系统,mount上E-Securer安装光盘 (5)
3、安装j2sdk开发包 .................................................................... 错误!未定义书签。
4、安装E-Securer软件包 (5)
5、修改/etc/profile文件,在文件最后添加(拷贝粘贴即可) ...... 错误!未定义书签。
6、系统自启动配置,修改/etc/rc.d/rc.local文件,最后加入(拷贝粘贴即可)错误!未
定义书签。
7、重新启动系统,认证服务即可运行 (5)
8、跟标准时钟进行ntp时间同步(建议) (5)
9、对Linux系统实施安全加固(建议) (5)
10、远程登录进入WEB管理,对系统进行维护管理 (5)
11、修改web默认登录模式(根据用户需要操作) (5)
四、单机版系统卸载 (6)
五、多机版安装实施步骤 (6)
5.1、数据库同步配置前提条件.................................................... 错误!未定义书签。
5.2、同步配置步骤........................................................................ 错误!未定义书签。
5.3、监控数据库同步状态............................................................ 错误!未定义书签。
一、安装所需介质
Linux系统安装盘(SCSI硬盘、网卡等设备驱动程序);
E-Securer安全身份认证系统安装盘;
E-Securer安全身份认证系统令牌卡、License许可文件。
二、系统环境要求
2.1、系统安装人员要求
本手册针对企业系统安全管理员,要求拥有UNIX工作知识,能够使用文本编辑器更改配置文件,使用基本命令如cd,mkdir,ps等。
无论谁安装E-Securer认证软件,必须熟悉服务器平台,操作系统版本和系统外围设备的配置情况。
如果你的团队内部没有人有良好的下列工作知识,应该安排外来的技术援助: 例如文件访问权限、文件所属权、组成员资格等概念
例如PID、UID、GID等术语
例如su、mount、netstat等命令
在你的UNIX平台下如何挂载上光驱
例如/etc/hosts,/etc/passwd,/etc/services等系统文件
例如在工作站之间传递文件,远程访问工作站,使用vi或emacs编辑等程序
2.2、系统硬件平台要求
操作系统平台:RedHat AS 4.5;
服务器CPU:至少P4 1G,推荐P4 2G以上或多个CPU;
服务器内存:至少1G,推荐2G以上;
服务器光驱:必须有一个光盘驱动器来读取系统软件发布介质。
磁盘空间:程序占100MB,数据库空间取决于用户数、设备数及日志
推荐配置20G以上硬盘。
三、单机版安装实施步骤
1、安装RedHat Linux操作系统,并配置好网卡、启动必要的系统服务等;
注一:若单独划分opt分区,请为该分区空间至少留50G以上
注二:系统安装到选择所需软件包组时(如下图所示),请一定选上“开发”栏目中的【开发工具】和【原有的软件开发】两项。
2、使用root身份用户login进入系统,mount上E-Securer安装光盘
#mount /dev/cdrom /mnt
3、安装E-Securer软件包
#rpm -ivh /mnt/release/ E-Securer-3.5-1.i386_hassrc_release.rpm
4、重新启动系统,认证服务即可运行
5、跟标准时钟进行ntp时间同步(建议)
# vi /etc/crontab
加入下面一行:
w
6、对Linux系统实施安全加固(建议)
✧防火墙启动,需要打开必要的端口:8080、22、1812、1813、49、80、2638等
✧telnet(若启动)加入认证系统、ssh服务启动、ftp关闭
✧禁止ping:sysctl -w net.ipv4.icmp_echo_ignore_all=1
✧升级系统ssh版本(Linux AS4以后该步骤省略)
tar xvzf /mnt/release/openssh-3.9p1.tar.gz
cd openssh-3.9p1
./configure --prefix=/usr --with-pam --with-md5-passwords --sysconfdir=/etc/ssh
make
make install
正常情况已经升级完了,service sshd restart重启服务
ssh -V 显示新的版本:OpenSSH_3.9p1, OpenSSL 0.9.7a Feb 19 2003
7、远程登录进入WEB管理,对系统进行维护管理
页面地址:http://sever_ip
初始管理员用户名admin,密码12!@qw,管理员请及时修改密码。
若购买了E-Securer系统License文件,请到【系统管理】->【导入License信息】管理项中浏览查找到该文件导入即可。
11、修改web默认登录模式(根据用户需要操作)
web管理端默认登录用户身份使用数据库存储的静态口令验证,可修改成远程统一认
证,编辑/usr/local/resin/webapps/esecurer/login.jsp文件,查找action="login.do"替换成action="rad_login.do"即可。
四、单机版系统卸载
若需卸载掉当前的E-Securer系统,root登录后运行如下命令即可:
#rpm -e E-Securer-***
五、多机版安装实施步骤
每台机器首先分别执行单机版安装步骤,分别安装好自己的系统,然后进行数据库同步.
数据库同步参看文档《数据库同步步骤.doc》。