eco-pen450_EN
边缘计算机 EC900 系列 用户手册说明书
边缘计算机EC900 系列用户手册(适用于 Debian10)Version1.3,2023 年 5月本手册中描述的软件是根据许可协议提供的,只能按照该协议的条款使用。
版权声明© 2023 映翰通网络保留所有权利。
商标InHand 标志是映翰通网络的注册商标。
本手册中的所有其他商标或注册商标属于其各自的制造商。
免责声明本公司保留对此手册更改的权利,产品后续相关变更时,恕不另行通知。
对于任何因安装、使用不当而导致的直接、间接、有意或无意的损坏及隐患概不负责。
目录1 导言 (1)2 硬件安装说明 (1)2.1介绍 (1)2.2 EC900面板 (2)2.3 EC900外部连接器 (3)2.3.1 以太网 (3)2.3.2 串口 (3)2.3.3 CAN (4)2.3.4 开关量输入接口(Digital Input) (5)2.3.5 开关量输出接口(Digital Output) (5)2.3.6 USB (6)2.3.7 LED (6)2.3.8 用户可编程按键 (9)2.3.9 直流输入 (9)2.3.10 SIM卡插槽 (10)2.3.11 MicroSD卡槽 (10)2.3.12 恢复出厂按键 (11)2.3.13 开关机按键 (11)2.3.14 天线接口 (12)2.3.15 拨码开关 (13)2.3.15 mSATA硬盘接口 (13)3 入门 (14)3.1连接到EC900 (15)通过SSH Console进行连接 (16)3.2用户账户管理 (18)切换到root用户 (18)创建和删除用户账户 (19)禁用默认的用户账户 (19)3.3网络设置 (20)配置以太网口 (20)设置一个静态IP地址 (20)设置一个动态IP地址 (20)3.4系统管理 (21)查询固件版本 (21)查看可用磁盘空间 (21)调整时间 (22)设置时区 (23)使用localtime文件 (24)关闭设备 (25)启动设备 (25)4 外设接口的高级配置 (25)4.1串口 (26)更改串口设置 (26)查看串口信息: (29)设置COM1串口的波特率: (29)设置COM2串口的波特率 (30)4.2 USB接口 (30)USB自动挂载 (30)micro SD卡自动挂载 (30)4.3 CAN总线接口 (33)配置连接CAN接口 (34)4.4 IO调试 (34)5 无线网络连接配置 (35)5.1 配置蜂窝网络 (35)使用nvram (35)5.2 GPS (39)5.3 配置Wi-Fi连接 (40)Wi-Fi的其他功能 (42)6 安全 (44)sudo机制 (45)防火墙 (45)7 系统恢复出厂设置及更新 (45)恢复出厂设置 (46)系统升级 (46)1 导言本用户手册适用于基于Arm架构的边缘计算机EC900,并涵盖整套适用于所有支持型号的说明。
第三方路由器固件支持的路由列表
DD WRT目录DD WRT (1)Supported Devices (3)[edit]3com (3)[edit]Abocom (3)[edit]Accton (4)[edit]Aceex (4)[edit]Actiontec (4)[edit]ADI Engineering (4)[edit]Airlink 101 (5)[edit]Airlive / Ovislink (5)[edit]Alfa Networks (6)[edit]Allnet (6)[edit]Anaptyx Wireless Dynamics (7)[edit]Arada Systems (8)[edit]Askey (8)[edit]Asus (8)[edit]Belkin (11)[edit]Bountiful (13)[edit]Browan (13)[edit]Buffalo (13)[edit]Cisco (16)[edit]Conceptronic (22)[edit]Compex (23)[edit]Conrad Elektronic (27)[edit]Corega (27)[edit]Dell (28)[edit]Devolo (28)[edit]Digitus (29)[edit]D-Link (29)[edit]Doodle Labs (31)[edit]Dynex (31)[edit]Edimax (31)[edit]Encore (32)[edit]EnGenius (32)[edit]Exel Networks (32)[edit]Fluidmesh (32)[edit]FON (33)[edit]Fry's Electronics (33)[edit]Gateway (34)[edit]Gateworks (34)[edit]Intellinet (Reichelt) (36)[edit]Iomega (36)[edit]JJPlus (36)[edit]Lanready (37)[edit]Linksys (38)[edit]Logilink (38)[edit]MagicBox (38)[edit]Meraki (38)[edit]Microsoft (39)[edit]Mikrotik Routerboard (39)[edit]Mitsubishi (39)[edit]Motorola (40)[edit]MSI (40)[edit]MTN Electronics (40)[edit]NewMedia (40)[edit]NetComm (41)[edit]NETCORE (41)[edit]PC-Engines (46)[edit]Planex aka PCi (46)[edit]Ravo (46)[edit]RayTalk (46)[edit]Repotec (47)[edit]RFNet Technologies (47)[edit]Rosewill (47)[edit]Senao / EnGenius (48)[edit]Siemens (50)[edit]Sitecom (51)[edit]Snapgear (52)[edit]SOEKRIS Engineering (52)[edit]SparkLAN (53)[edit]Straight Core (53)[edit]Technaxx (53)[edit]Techniclan (54)[edit]Tonze (54)[edit]Toshiba (54)[edit]Tranzeo (54)[edit]TP-Link (55)[edit]TRENDnet (57)[edit]T&W (58)[edit]Ubiquiti (59)[edit]US Robotics (62)[edit]Valemount (63)[edit]Verizon (64)[edit]Viewsonic (65)[edit]VSCOM (65)[edit]Watchguard (65)[edit]WiliGear (66)[edit]WinStars (66)[edit]Wistron (66)[edit]ZCOM (67)OPEN WRT (67)支援的裝置- 路由器類型 (67)評估板/無品牌主機板 (67)3Com (67)Abicom International (67)Actiontec (67)Accton (68)Alcatel-Sbell (68)ALFA Network (68)Allnet (68)ARC Flex (68)Arcadyan (68)Astoria (68)Asus (69)Atmel (70)Avm (70)Aztech (70)Belkin (70)Buffalo (70)CEEDTec (71)Catch Tec (71)Compex (71)Comtrend (71)D-Link (72)Dragino (73)Edimax (73)Engenius (73)Fon (73)Linksys (75)Meraki (76)Netgear (76)PC Engines (77)Planex (78)Qemu (78)Qi hardware (78)Redwave (78)Sagem (78)Scientific Atlanta (78)Sercom (78)Skyline (79)SimpleTech (79)Siemens (79)Sitecom (79)SMC (79)Sparklan (79)Telsey (79)Tenda (79)Texas Instruments (80)Thomson (80)TP-Link (80)Trendnet (82)T-Com / Telekom (82)Ubiquiti (82)Unbranded (83)Upvel (83)Zcomax (83)ZyXEL (84)支援硬體- 開發板, 電話 (84)At91 SoC (84)Freescale (中譯:飛思卡爾) (84)開發中 (84)Tomato DualWAN (84)Tomato (86)Supported Devices[edit]Abocom[edit]Accton[edit]Aceex[edit]Askey[edit]Conrad Elektronic[edit]Corega[edit]Doodle Labs[edit]Dynex[edit]Encore[edit]Fry's Electronics[edit]Gateway[edit]Intellinet (Reichelt)[edit]Microsoft[edit]Mitsubishi[edit]Motorola[edit]MSI[edit]MTN Electronics[edit]NewMedia[edit]Nokia[edit]OpenMesh[edit]Ravo[edit]Rosewill。
Preeflow微量泵eco-PEN450微量泵

e co-PEN450 微量泵流体,低粘度介质 非流体,中高黏度介质产品说明: Viscotec 生产的革新型容积式精密计量输送产品,preeflow eco-PEN450适用于中低黏度介质的输送。
功能原理: preeflow ® eco-PEN 采用螺旋结构设计,耐压密封,转子和定子是自密封设计,易以替换。
通过转子在定子型腔的定向旋转,实现输送功能。
输送过程不对介质产生剪切作用,因此不对介质性状产生任何影响。
同时可通过电机反转,轻松实现介质回吸功能,确保介质和材料的清洁度,完全解决介质的滴漏,拉丝问题。
应用: 高精密容积式定量输送!简单控制电机转速即可获得您需要的精密流量输出,广泛适用于各种高精密定量输送场合。
适用介质: n 脂 n 油 n 油漆 n 密封剂 n 粘合剂 n 硅树脂 n 碾磨介质 技术特性: n 真正的容积式输送 n 回吸功能 n 适用于各种粘性介质 n 易于清洗 n 流量不受压力变化影响 n 精确计量n 无需加装任何阀门n 输送压力范围 16-20 bar左视图 主视图技术特性:(1)最大工作压力和自密封力和黏度成正比,可以通过生产商提供的数据计算出。
(2) 输送流量与微量泵转速成正比。
(3) 容积流量不受黏度变化影响。
尺寸 (HxWxD):长度 228 mm, 28 x 28 mm, ø 33 mm 重量approx. 300 g 接口1/8“圆柱型英制管螺纹 DIN/ISO 228 出料口O 型圈自锁,已获专利 最小压力0 bar,流体 工作压力0 - 6 bar 压力供应 最大压力16 -20 bar 自密封大约 2 bar (参考介质,20°C 时大概10mPas) 泵壳材质HD-POM /不锈钢 定子材质high-molecular PE, VisChem 密封圈O-Ring Viton (medium) NBR (dust) 电机:18 to 24 V DC,增量式编码器 工作条件+10°C to +40°C (Ta.), 气压 1 bar 介质温度+10°C to +40°C 储存条件干燥 / 无尘 -10°C to +40°C 每转流量0,05 ml/rev. 计量精度(2):± 1% 气压:0 —7 bar (0 —100 Psi) 重复精度> 99% 最小流量0,004 ml 流量范围0,5 to 6,0 ml/min。
KEMET 全系列钽电容规格书[1]
![KEMET 全系列钽电容规格书[1]](https://img.taocdn.com/s3/m/3861ede80975f46527d3e1fc.png)
2.7
#100.0
*U
T491U107(1)004A(2)
4.0
†100.0
*T
T491T107M004A(2)
4.0
150.0
V
T491V157(1)004AS
6.0
#220.0
*V
T491V227(1)004A(2)
8.8
†330.0
*V
T491V337(1)004A(2)
13.2
6.0
15.0
Max
ESR Ω @ +25°C 100 kHz
Max
2.5 Volt Rating at +85ºC (1.7 Volt Rating at +125ºC)Fra bibliotek100.0
T
T491T107(1)2R5A(2)
2.5
24.0
3.9
4 Volt Rating at +85ºC (2.7 Volt Rating at +125ºC)
Capacitance: 1.0μF to 330μF Tolerance: ±10%, ±20% Voltage: 2.5 - 50 VDC Halogen Free Epoxy 100% Surge Current test on U, V case sizes RoHS Compliant - Lead Free Terminations (See for transition information)
6.0
15.0
8.0
10.0
6.0
5.0
10.0
15.0
6.0
5.0
10.0
10.0
贴片F系列三极管参数

Base I I N C N N X K N N D N N N N N B N N N N N N N N X N N N N N N N N N N N B P X P ZB X ZB
Package SCD80 URD SOT323 SOT23 SC59 SC59 SOT23 SOT23 SOT23 SOT23 SOT23 SOT23 SOT23 SOT23 SOT23 SOT323 SC59 SC59 SOT23 SC59 SC59 SC59 SC59 SOT23 SC59 SC59 SOT23 SC59 SC59 SC59 SC59 SC59 SOT23 SOT89 SOT89 SOT23 SOT23
Leaded Equivalent/Data uhf varicap 2.5-22pf npn RF fT 8GHz 35V RF pin sw diode npn dtr R1 2k2 40V 100mA npn dtr R1 4k7 40V 100mA fT 12GHz npn RF 4V 12mA 35V RF pin sw diode BF495 RF npn fT 150MHz hfe30-60 dual series HP3820 pin sw diode BF184 BF494 BF184 BF494 BF184 BF494 RF npn fT150MHz hfe60-120 BF495 dual cc HP3820 pin sw diode BF184 BF494 pnp dtr 1k + 1k 50V 500mA pnp dtr 2k2 + 2k2 50V 500mA pnp dtr 4k7+ 4k7 50V 500mA pnp dtr 4k7+ 4k7 50V 500mA pnp dtr 10k + 10k 50V 500mA fT 12GHz npn 6V 20mA npn dtr 1k + 1k 50V 500mA npn dtr 2k2 + 2k2 50V 500mA npn dtr 4k7 + 4k7 50V 500mA npn dtr 4k7 + 4k7 50V 500mA npn dtr 10k + 10k 50V 500mA pnp dtr 2k2 + 10k 50V 100mA pnp dtr 2k2 + 10k 50V 100mA npn dtr 2k2 + 10k 50V 100mA pnp dtr R1 2k2 40V 100mA pnp dtr R1 4k7 40V 100mA pnp dtr R110k 40V 100mA 0.5-3GHz cc pin dual anode npn RF 1.5GHz 300mA BFQ69 npn RF Ft 5.5GHz 100mA microproc -ve reset gen 2.700V BFW92 microproc -ve reset gen 2.800V
Dell PN7522W 酷睿笔记本笔用户指南说明书

Dell Premier Rechargeable Active Pen PN7522WUser’s GuideNotes, cautions, and warningsA NOTE indicates important information that helps you make better use of your product.A CAUTION indicates either potential damage to hardware or loss of data and tells you how to avoidA WARNING indicates a potential for property damage, personal injury, or death.© 2021-2022 Dell Inc. or its subsidiaries. All rights reserved. Dell, EMC, and other trademarks are trademarks of Dell Inc. or its subsidiaries. Other trademarks may be trademarks of their respective owners.Chapter 1: What’s in the box (4)Chapter 2: Features (6)Chapter 3: Setting up your PN7522W (8)Connecting and charging your pen (8)Manual Bluetooth pairing (8)Chapter 4: Dell Peripheral Manager (10)Chapter 5: Holding your PN7522W (11)Chapter 6: Specifications (12)Chapter 7: Replacing the pen nib (13)Chapter 8: Tile (14)Chapter 9: Troubleshooting (15)Chapter 10: Statutory information (16)Chapter 11: Regulatory statement (17)Chapter 12: Getting help and contacting Dell (18)Contents3What’s in the box1.Dell Premier Rechargeable Active PenB-C to USB-C cable3.Nib remover4.Pen nib (2)5.DocumentsFor warranty purpose, note down the PPID number located behind the box or retain the box.14What’s in the boxThe PPID number can also be noted down from a secondary location on the pen barrel.What’s in the box5Features Table 1. Features and functionality of your PN7522WFeature Functionality1Tip Move the tip over a touchscreen to move the pointer. Enables you towrite, draw, and select objects.2Bottom barrel button Press and hold the bottom barrel button and move the tip over the areayou want to erase. To change the functionality of this button, see DellPeripheral Manager.3Top barrel button Press the top barrel button to open the context menu or perform aright-click. To change the functionality of this button, see Dell PeripheralManager.4USB Type-C charging port Ensure that your laptop is connected to Internet beforeConnect the USB-C cable to the USB-C port on your pen and your laptopto charge your PN7522W and to establish Bluetooth pairing with yourlaptop, if not yet paired. After your pen is paired with your laptop throughBluetooth, Dell Peripheral Manager is downloaded automatically.5LED indicator Blue●Blinking - Bluetooth pairing enabled●Solid (for three seconds) - Bluetooth succesfully pairedWhite●Blinking - Updating pen firmware●Solid - Pen is chargingAmberBlinking - Pen battery is lowGreenBlinking - Tile is locating the pen6Top button Before pairing your PN7522W with your laptop, press and hold for threeseconds to enable pairing mode.After pairing your PN7522W with your laptop:●Single press — Launch pen menu●Double press — Take a screenshot●Long press (1.5s) — Launch Sticky Notes●Press and hold or press twice in succession to wake your BluetoothThis feature is available only on computers that support2 6FeaturesTable 1. Features and functionality of your PN7522W (continued)Feature FunctionalityThese functions are available only in Windows 10 andThese functions can be changed by re-programmingDell Peripheral Manager.When using Microsoft Powerpoint in Presentation mode:●Press and hold to go to the next slideThese functions in Microsoft Powerpoint are available onlyDell Peripheral Manager.Features7Setting up your PN7522WConnecting and charging your penConnect the pen to your laptop to activate it automatically. The pen will only start working after this activation.Follow these steps to connect and charge your pen:1.To charge your PN7522W, connect one end of the Type-C cable to the charging port and the other end to your laptop ortablet.2.When you connect your PN7522W to your laptop or tablet a pop-up window appears asking you to pair your pen with thelaptop through Bluetooth.3.Connect to confirm the Bluetooth pairing.Do not remove the USB-C cable until the pen is fully charged.Manual Bluetooth pairingAbout this taskPerform the following steps if you are unable to pair your pen automatically through the USB-C cable connection.38Setting up your PN7522WYou can use your PN7522W only with selected Dell laptops. For the list of supported devices, see .If your PN7522W is already listed under Bluetooth devices, remove it from the list before performing the followingSteps1.Press and hold the top button for three seconds to enable pairing mode.The Bluetooth-pairing light starts blinking blue to confirm the pairing mode is enabled.2.In Windows Search, type Bluetooth.3.From the list that appears, tap or click Bluetooth & other devices.4.Ensure that the Bluetooth is enabled.5.From the list of devices under Bluetooth & other devices, tap or click Dell PN7522W→Pair.If your PN7522W is not listed, ensure that the pairing mode is enabled on the pen.6.Confirm the pairing process on both pen and your device.The Bluetooth-pairing light turns solid blue for few seconds to indicate the pairing is complete and then turns off. After successful pairing, your device and pen connect automatically when Bluetooth is enabled and are within the Bluetooth range.Setting up your PN7522W94Dell Peripheral Manager Use Dell Peripheral Manager (DPeM) to customize the pen buttons, change pressure sensitivity, and so on. The latest version of DPeM is automatically installed on your laptop or tablet when you set up your pen. The installation may take approximately 20 minutes to complete. If DPeM is not installed automatically, perform the following steps:1.See the Knowledge Base article Windows Update: FAQ for information about installing the latest version of.Drivers and Downloads FAQs.2.a.Browse to the Dell Peripheral Manager download page.b.Tap or click Download.c.Once the DPeM installer is downloaded, tap or click the installer to start the installation, and then follow the on-screeninstructions.10Dell Peripheral ManagerHolding your PN7522W Hold your PN7522W as you hold a pencil or pen. Adjust the grip so that you can use the barrel buttoneasily. Ensure that you do not accidentally press the barrel buttons while drawing or positioning the pen.Holding your PN7522W11Specifications Table 2. Specifications of your PN7522W12SpecificationsReplacing the pen nib When the pen nib on your PN7522W is worn out or damaged, replace the pen nib using the nib kit as shown in the following image.Replacing the pen nib13Tile You can install Tile on Android or Apple iOS devices. It enables you to locate your PN7522W on the Tile application. For more information, see the Tile application help information on your device.To enable Tile pairing mode on your pen to sync the Tile app to your pen through Bluetooth, press and hold the top and bottom barrel buttons of your pen.14TileTroubleshootingYou can only use your PN7522W with selected Dell laptops. For a list of supported laptops, see . Table 3. Dell Active Pen troubleshootingProblems Possible causes Possible solutionsPen buttons do not work, pen does not write or draw on your ptop does not support the pen.Pen works only with supported Delllaptops.Battery is fully drained.Charge the pen using the USB-C cableincluded in the box.Charge the pen using the USB-C cableincluded in the box.Connect the pen to your laptop using theUSB-C cable included in the box.Pen does not auto-pair with laptop when connected with USB Type-C cable during the first time setup.Swift Pair function is not enabled inWindows.On your laptop, go to WindowsSettings click or tap on Devices, thenBluetooth & other devices, and thenselect notifications to connect usingSwift Pair.USB-C cable is not working.Replace the USB-C cable.Unable to pair the pen with your laptop.Bluetooth driver outdated.Install the latest Bluetooth driver foryour laptop.Bluetooth pairing light does not turn on.Battery is fully drained.Charge the pen with the USB-C cableincluded in the box.Default functions for pen buttons do not work as expected.The default function is changed oroverwritten.Launch DPeM to check the functionassignment of the buttons.Tile app cannot find my pen.The pen may be outside of Tile'sBluetooth range.Ensure to use this feature within Tile's Bluetooth range of 10 meters in an unblocked area.If you have lost your pen in a location farther than 10 meters, follow the Tile app's instructions to view its most recent location.Pen skin peels off.Alcohol based liquid may damage the penskin.Avoid using alcohol based cleaner or sanitiser on the pen directly.Unsuitable stock and operating temperature and humidity may damage the pen body.See Specifications to find more information on the stocking and operating specifications of the pen.Troubleshooting15Statutory information WarrantyLimited warranty and return policiesDell-branded products carry a three year limited hardware warranty. If purchased together with a Dell system, it will follow the system warranty.For U.S. customers:This purchase and your use of this product are subject to Dell’s end user agreement, which you can find at / terms. This document contains a binding arbitration clause.For European, Middle Eastern and African customers:Dell-branded products that are sold and used are subject to applicable national consumer legal rights, the terms of any retailer sale agreement that you have entered into (which will apply between you and the retailer) and Dell’s end user contract terms. Dell may also provide an additional hardware warranty—full details of the Dell end user contract and warranty terms can be found by going to , selecting your country from the list at the bottom of the “home” page and then clicking the “terms and conditions” link for the end user terms or the “support” link for the warranty terms.For non-U.S. customers:Dell-branded products that are sold and used are subject to applicable national consumer legal rights, the terms of any retailer sale agreement that you have entered into (which will apply between you and the retailer) and Dell’s warranty terms. Dell may also provide an additional hardware warranty—full details of Dell’s warranty terms can be found by going to , selecting your country from the list at the bottom of the “home” page and then clicking the “terms and conditions” link or the “support” link for the warranty terms.16Statutory informationRegulatory statement FCC notices (U.S. only) and other regulatory informationFor FCC notices and other regulatory information, see the regulatory compliance website located at / regulatory_compliance.This device complies with Part 15 of the FCC Rules. Operation is subject to the following two conditions:1.This device may not cause harmful interference.2.This device must accept any interference received including interference that may cause undesired operation.Changes or modifications on this unit that are not expressly approved by the party responsible for This equipment has been tested and found to comply with the limits for a class B digital device, pursuant to part 15 of theFCC Rules. These limits are designed to provide reasonable protection against harmful interference in a residential installation. This equipment generates, uses and can radiate radio frequency energy and if not installed and used in accordance with the instructions, may cause harmful interference to radio communications. However, there is no guarantee that interference will not occur in a particular installation. If this equipment does cause harmful interference to radio or television reception, which can be determined by turning the equipment off and on, the user is encouraged to try to correct the interference by one or more of the following measures:●Reorient or relocate the receiving antenna.●Increase the separation between the equipment and receiver.●Connect the equipment into an outlet on a circuit different from that to which the receiver is connected.●Consult the dealer or an experienced radio/TV technician for help.Shielded cables must be used with this unit to ensure compliance with the Class B FCC Limits.Regulatory statement17Getting help and contacting DellContacting Dell/contactdell .Availability varies by country and product, and some services may not be available in your country.If you do not have an active internet connection, you can find contact information on your purchase invoice, packing Self-help resourcesYou can get information and help on Dell products and services using these online self-help resources:Table 4. Getting help and contacting DellInformation about Dell products and services /supportOnline help for operating system/support/windows Troubleshooting information, user manuals, setup instructions,product specifications, technical help blogs, drivers, software updates, and so on./support18Getting help and contacting Dell。
EnOcean

EnOceanEnOcean⽆线⾃获能技术由德国易能森公司(EnOcean GmbH)开创,致⼒于绿⾊节能建筑、智能家居、⼯业⾃动化、⽂物古迹⽆破坏性电⽓改造等项⽬的低功耗⽆线⽆源解决⽅案。
2012年3⽉,EnOcean⽆线通信标准被采纳为国际标准“ISO/IEC 14543-3-10”。
EnOcean⾃获能⽆线电技术⾃获能技术是EnOcean技术在与其它低功耗⽆线电标准竞争中最⼤的优势。
所有的EnOcean⽆线电模块都不需要再安装电池。
设想⼀下,在⼀栋采⽤EnOcean⽆线⾃获能技术解决⽅案的建筑中,不仅可以像基于别的低功耗⽆线电协议标准的电器设备那样省去⼤量的布线成本,同时还可以省去⼤量的锂电池成本以及更换锂电池的⼈⼯成本。
EnOcean⾃获能技术的能量来源于机械能、光能/太阳能、温差能、⼈体能量等周围环境的能量。
同时,EnOcean⽆线电技术为了能够达到⽆需外接电池的要求,每⼀个协议设计、每⼀块半导体⼯艺、每⼀条程序的编写都经过悉⼼的钻研,从⽽使得微⼩的能量能够满⾜我们全部的⽆线电功能实现。
EnOcean⽆线电标准采⽤315MHz、868MHz、902MHz(在中国⼤陆主要是868MHz)的民⽤开放频段,⽆需另⾏申请,同时避开了拥挤的2.4GHz可能造成的⼲扰。
EnOcean⽆线电信号的传输速率是125kB/s,传输占空⽐仅为1ms。
另外,为了避免⽆线信号在传输过程中发⽣冲突或⼲扰,EnOcean传感器会在第⼀个⼦报⽂传出后的40ms内随机重新发送两个相同的⼦报⽂,这就⼤⼤降低了数据由于⼲扰丢失的⼏率,这也是别的⽆线电协议所不可⽐拟的优势。
为了尽可能降低功耗,并降低⽤户开发难度,EnOcean标准并未采⽤在实际应⽤中很少使⽤的⽆线⾃组⽹技术。
⽽是采⽤是最简单易⾏的星形拓扑结构。
在实际应⽤中可以⽤⼀个中⼼节点接收到很多个⽆线传感器和开关发送的信号并进⾏集中处理。
同时,每⼀个EnOcean模块都带有唯⼀的32位ID,以便于各个不同⼚商⽣产的EnOcean设备统⼀读取和管理应⽤。
博斯市场自动化门禁系统用户指南说明书
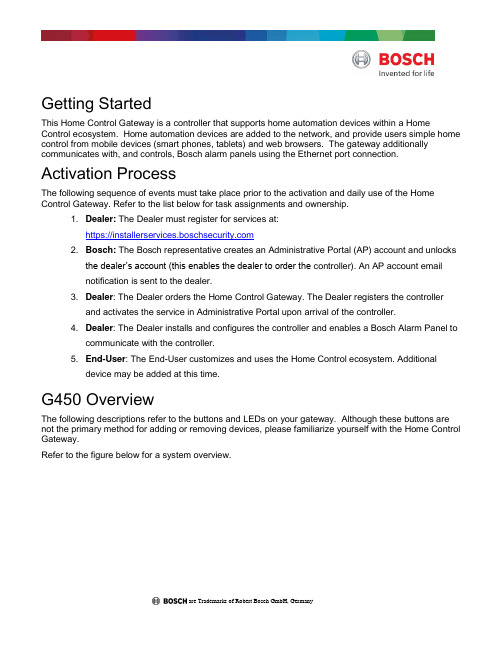
Getting StartedThis Home Control Gateway is a controller that supports home automation devices within a Home Control ecosystem. Home automation devices are added to the network, and provide users simple home control from mobile devices (smart phones, tablets) and web browsers. The gateway additionally communicates with, and controls, Bosch alarm panels using the Ethernet port connection. Activation ProcessThe following sequence of events must take place prior to the activation and daily use of the Home Control Gateway. Refer to the list below for task assignments and ownership.1. Dealer: The Dealer must register for services at:https://2. Bosch: The Bosch representative creates an Administrative Portal (AP) account and unlocksthe dealer’s account (this enables the dealer to order the controller). An AP account emailnotification is sent to the dealer.3. Dealer: The Dealer orders the Home Control Gateway. The Dealer registers the controllerand activates the service in Administrative Portal upon arrival of the controller.4. Dealer: The Dealer installs and configures the controller and enables a Bosch Alarm Panel tocommunicate with the controller.5. End-User: The End-User customizes and uses the Home Control ecosystem. Additionaldevice may be added at this time.G450 OverviewThe following descriptions refer to the buttons and LEDs on your gateway. Although these buttons are not the primary method for adding or removing devices, please familiarize yourself with the Home Control Gateway.Refer to the figure below for a system overview.are Trademarks of Robert Bosch GmbH, GermanyG450 overviewLog in to Your AccountThis section describes basic information on logging into your account. Logging in: 1. Go to . The login page opens.2.From your welcome email, insert your credentials (Username and Password) and click Login.3. Select the gateway you want to log into and click the Connect button. This is a convenient way tocontrol different gateways from a single account (one in your home, another in your summercottage). A status window briefly appears stating that the connection is in progress.4. The dashboard appears. The dashboard is your control center for the Home Control Gateway. Theappearance of your dashboard may vary slightly from the one below, depending on the devices you install.Refer to the next section for details about including new devices.Include (Add) DevicesThe Home Control Gateway wirelessly communicates with other controllable Home Control devices through an initial process called "pairing". For many devices, the Gateway supports a guided installation through a device installation wizard. This process walks you through all necessary steps to pair (include) your device.Pairing devices in close proximity1. Locate the device you want to pair.2. Place the device within 30 feet of the Home Control Gateway.3. Go to “Devices” and click “Add Device” to start the wizard.4. Click on the appropriate device category (plus symbol).5. Select the device type and model number that you want to install and click the symbol next to it.Follow the instructions on the screen.Your Bosch Security Dealer has already installed your Bosch Security System. You will not find thisPairing Installed Devices with a Battery Powered Home Control Gateway Sometimes controllable devices in your home are not easily moved within pairing distance of the Gateway. For example, a light switch that is already installed on a wall in another room, or a door lock. For these situations, the Gateway includes a battery pack (G100 only) that allows you to disconnect the Gateway from the power cable and bring it to the installed device. This step is optional, but if you do have pre-installed or otherwise non-movable controllable devices that you want to pair with the Gateway, please perform the following:1. Disconnect the Gateway’s network cable and power cable (the one that goes into the wall outlet)and press and hold the battery button (G100 only) for 5 seconds. Doing so causes theGateway to power up in battery mode.G100 only: blue LED will flash during the startup process. The blue LED illuminates continuously and2. Locate the device you want to pair.3. Press the button to set the Gateway to enter inclusion mode. Refer to the “pairing” or“inclusion” section of your device’s documentation for more information related to completing the pairing and/or inclusion process. The orange LED flashes rapidly for 3 seconds to indicate a new device was paired successfully.4. Press and hold the button for 5 seconds until all LEDs go off to save your changes. TheGateway exits the inclusion mode and turns off the battery mode.NoticeG100 only: If you want to exclude a device, follow the above mentioned steps, but press the button instead of the button. To exit, hold the button for 5 seconds until LEDs go off. This will save all changes.User Interface Features (for web and mobile apps)The Home Control Gateway provides a variety of interactive features accessed through a web browser, or through the use of a mobile device and supporting app. Refer to the list below:∙Card Carousel. This feature allows you to quickly view the current state of the system. The left card shows the connection state of all devices, and the right card shows if any of the security devices require your attention.∙House Modes (My Modes, Preset Modes). House modes are easy to use; pre-defined settings that allow you change your home automation configuration without the need to create scenes. This allows you to quickly toggle between the four presets (modes). These presets are optimized for theirimmediate use. You may adjust presets by using the button. This opens the configuration menu. ∙Weather widget (Web UI). The weather widget shows the temperature and current conditions for the city you choose. It also shows the local time of the device’s location.∙Event notification bar. The notification bar shows the latest events that occurred on the unit. Access the notification bar by pressing the pull-down button . Select events from the drop-down list.∙Turn All On/Off. This option allows you to quickly turn on, or off, all of your light switches:The numeric badge icon shows how many lights are on.∙Lock/Unlock All door locks. This option allows you to quickly lock, or unlock, all of your doors:The numeric badge icon shows how many doors are currently unlocked.Mobile Devices and the Remote Security Plus appIn addition to using the web browser for configuration and control, you can also perform the same tasks by using the Remote Security Control Plus app from your mobile device (e.g. smart phone, tablet). Both Android and iOS devices are supported by the app.To control with a mobile device, download and install the Remote Security Plus application from Apple’s App Store (), or from Google Play ().Perform the following:1. Launch the application and log in using the same credentials used when accessing the webbrowser dashboard. Depending on the operating system of your smart phone, you might see one of the following screens.2. Your dashboard window appears with the following preset modes (My Modes) as well as Shortcutsand your Favorite devices.3. Open the menu by clicking on Menu, or by sliding over your screen from left to right, depending onyour device.4. Select Devices to view and control your devices.5. Select Scenes to create or modify scenes using your mobile app. Follow the instructions on thescreen.Plan your GoalsThe Home Control Gateway and its components let you monitor, control, and automate many devices around your home. You and your smartphone (or PC or tablet) communicate with these devices. Such devices include cameras, door locks, lighting controls, and other supported devices. These devices can work independently, or in groups that work together, like a thermostat that turns itself down when it sees bright sunlight from a daylight sensor, and back up again when it gets dark.Proper planning and coordination are essential when utilizing the capabilities of the gateway in conjunction with your Bosch Security System. Understanding your current environment gives you a clearer picture as to how you want to automate your living space, and how you might improve it through the use of home control functionality.Monitoring and Security ApplicationsOne popular application is monitoring and operating electronic door locks. When your child gets home from school and unlocks the door, the Home Control Gateway can send you a text message or an email. You can view a still image, live or recorded video, from your computer or smartphone to be certain that your kids are home safe and didn't bring unwelcome guests. You can view live video from inside your home to check in on the babysitter while you are out, and so on.In the security and monitoring examples above, you use a powered door lock, a video camera and perhaps a motion detector. Most of these devices talk to the gateway through Z-Wave, ZigBee or Wi-Fi, interoperable standards in wireless control. How many of these devices will you need to connect? It all depends on what you want to accomplish.Energy Management ApplicationsWith the Home Control Gateway you can remotely, and automatically, create a household that runs at maximum energy efficiency with reduced energy bills. You can create "scenes" that adjust lights and climate to pre-determined settings that you control with one touch or that react automatically to changing conditions. You can remotely turn appliances off or on for example, turn off the lawn sprinkler when it starts raining or turn up the thermostat to warm the house when you’re on your way home.For many energy management applications, there are a wide range of plug-in and wall-mounted lighting switches that make any light remotely controllable. The Home Control Gateway is compatible with Z-Wave, ZigBee, and Wi-Fi thermostats. There are many plug-in modules that control indoor and outdoor appliances. And to make any device "smart", simply plug in a SmartSwitch, which not only allows you to control whatever you plug into it, but also to monitor that device's energy consumption over time. Wellness Assistance ApplicationsThe Gateway helps you protect your independent elderly loved ones by keeping you connected with them and helping to monitor and assist them. The Gateway can notify you if there is no motion in your loved one’s home, so you can check in and get help. The Gateway can also turn on lights when motion is detected, so there's no more fumbling for the bathroom light or dangerous stairwell lights in the middle of the night.Vital assistance like this provides security for both caretaker and the cared for, and is accomplished by adding compatible motion sensors and enabled lights. You can add home controlled window shades and daylight sensors, so it is no longer a strain for your loved ones to let light into the room. Convenience ApplicationsWith the Home Control Gateway and a mobile device, you can simplify your morning or evening routine. Simply touch one button to shut down, lock up and arm your house; no more running around to turn off every light, set the alarm and thermostat, and check that the doors are locked.These tasks are simple with the Home Control Gateway and the many different Z-Wave, ZigBee and Wi-Fi products and adapters on the market. You simply add one to each device, or application, that you want to remotely monitor or control.Before you move forward on how to “Automate your home”, where you'll learn how to control the gateway, take a few moments to ask yourself what kinds of monitoring and control tasks you'd like to accomplish, and what kinds of devices would help you accomplish them.Possibilities are endless within the home control spectrum when using the Home Control Gateway!Bosch Security Systems, Inc. • 130 Perinton Parkway • Fairport, NY 14450 • | 2017.06 | v3。