
Video Surveillance A Distributed Approach to protect Privacy Update 20070912
Video Surveillance:A Distributed Approach to protect Privacy⋆Update:2007/09/12Martin Schaffer and Peter SchartnerUniversity of Klagenfurt,AustriaComputer Science·System Security{m.schaffer,p.schartner}@syssec.atAbstract.The topmost concern of users who are kept under surveil-lance by a CCTV-System is the loss of their privacy.To gain a highacceptance by the monitored users,we have to assure,that the recordedvideo-material is only available to a subset of authorized users under ex-actly previously defined circumstances.In this paper we propose a CCTVvideo surveillance system providing privacy in a distributed way usingthreshold multi-party computation.Due to theflexibility of the accessstructure,we can handle the problem of loosing private-key-shares thatare necessary for reconstructing video-material as well as adding newusers to the system.If a pre-defined threshold is reached,a shared up-date of the master secret and the according re-encryption of previouslystored ciphertext without revealing the plaintext is provided.1IntroductionThe major concern of users monitored by a CCTV video surveillance system is the loss of their privacy.It is obvious,that encrypting the recorded material raises the acceptance by the monitored users.But what about unauthorized decryption?In this paper we propose several mechanisms concerning the setup, the recording and the retrieval of videos,and the key management during all these phases.Some of the mechanisms involve multi-party computation(MPC, cf.[18,6,8]),so that we can enforce dual control.A trusted third party(TTP) may also be used to enforce dual control.But if this TTP is compromised,a single unauthorized person may be able to decrypt the whole video-material. The main requirements for our system include:–Privacy-protection of the monitored users.–Shared generation and update of keys and key components.–Tree-based access structure to provide a mechanism for substitution.–Dual control(4-eyes principle)within the video retrieval process.–Minimal access of authorized people to monitored information.Several papers about video surveillance exist,most of which focus on the ability to detect and identify moving targets.Only a few discuss the privacy protection of recorded material.The authors in[9]for example describe a coop-erative,multi-sensor video surveillance system that provides continuous coverage over battlefield areas.In[10]the emphasis lies on face recognition–a solution to protect privacy by de-identifying facial images is given.A similar approach can be found in[2]concentrating on videos in general.The most general solution to cover privacy with respect to monitoring targets seems to be presented in [16].However the system in[16]uses a privacy preserving video console provid-ing access control lists.Once the console has been compromised videos may be decrypted without any restrictions.In our paper we focus on video surveillance where real-time reactions are not necessary like in private organisations where staffhas to be monitored.In case of criminal behaviour recorded video material can be decrypted if sufficiently enough instances agree–this e.g.is not provided in[10].Our approach can certainly be combined with the general solution proposed in[16]but also used for other applications such as key escrow as proposed in[15].Video CamerasFig.1.System ArchitectureFigure1shows the system architecture of the proposed system including all components and interactions within the setup phase,recording phase,retrieval phase and key putations within dotted boxes represent MPCs whereas undotted boxes are performed by a single belled arrows show which instance(s)deliver(s)or receive(s)which value(s).The proposed system employs the following hardware-components and users: Video Cameras.According to the monitored processes,video cameras record either single pictures or videos.Since we want to guarantee privacy of the2monitored users,we have to encrypt the video material.After encrypting the video,it is sent to the video server S V,whereas the key used for this encryption is(encrypted and)sent to the key server S K.Video Server S V.Here the received encrypted video material is stored in a suitable database so that it can be easily retrieved,if required.Key Server S K.Keys that are used for encrypting videos are chosen interval-wise(so we provide minimal access to videos).Therefore,we call them interval-keys(ikeys)and store them encrypted at S K.Users.In this paper,the term user always means an instance retrieving videos, not a person monitored by the system.Within strict regulations(e.g.dual control),these users are authorized to decrypt the stored videos.Due to the fact that enterprises are often hierarchically structured,we have to provide easy deputy-mechanisms.If a user is not available,he may be simply replaced by a qualified set of users of the next lower level in the hierarchy. Smartcards.In order to enforce the cooperation of several users in the decryp-tion process,the corresponding private key d is shared among a group of users.Hence,each user holds a share of the private key,which is stored ina pin-protected smartcard.Note that the private key d is never available inthe system or present during intermediate results of the decryption process.The proposed system consists of the following procedures:Setup Phase.To initialize the system,the users perform a MPC which pro-vides each user with a random share of private key d in a fair way.Addition-ally,the users generate shares of the corresponding public key.These shares are sent to the video cameras which reconstruct the public key e. Recording Phase.Due to performance reasons,the recorded video-material is encrypted by use of a hybrid cryptosystem.Hence,each video camera has to hold the public key e.The ikey is then encrypted by use of an asymmetric scheme(employing the public key e)and isfinally sent to S K,whereas the symmetrically encrypted video is sent to S V.Retrieval Phase.Within the retrieval phase,the authorized users perform a MPC which provides them with the ikey of the specific interval,without direct usage of the private key d(which corresponds to the public key e). Key Management.In order to take part in the system,a new user has to re-trieve a share of the private key d.To achieve this,the users already enrolled in the system perform a MPC whichfinally provides the new user with his share.Since the decryption process involves threshold cryptography,some smartcards(and the shares stored there)may be lost,without any danger for the privacy of the stored video material.Additionally,we employ a mech-anism which regularly updates the remaining shares(without changing the shared private key)and hence makes the shares on the lost(or stolen)smart-cards useless.Finally,we propose a mechanism to perform a shared update of d and the corresponding public key e.It is obvious that in this case,all en-crypted ikeys have to be re-encrypted,whereas the encrypted video material remains unchanged since the ikeys have not been compromised.3In the remainder of the paper we will give a more formal description of the processes briefly discussed by now.Note that within the proposed mechanisms we will only care about passive adversaries(see[6,8])from inside the system and we will assume that there exist pair-wise protected links between the individual parties participating in the surveillance process.2PreliminariesThroughout this work let G q be a group of prime order q,where the Discrete Logarithm Problem and closely related problems are believed to be hard.More-over,let g be a generator of G q.For computations in Z Z q we omit to write MOD q, since this will be clear from the context.The direct successors of the root of the tree-based access structure are calledfirst-level-users and united in the set U. To reduce complexity,we will only consider one video camera called V C.2.1Shamir’s Secret SharingTo share a secret s∈Z Z q among n users resulting in the shares s1,...,s n(denoted by s→(s1,...,s n))we use the following t-degree polynomial according to[17]:s i=g(i),g(x)=s+tj=1r j x j,r j∈R Z Z∗q(1)In order to reconstruct the secret s(denoted by(s1,...,s n)→s)we need at least t+1shares,because there are t+1unknown values in a t-degree polynomial.For efficiency reasons we use the interpolation formula of Lagrange(see e.g.[12]):s=g(0),g(x)=ni=1s iλs x,i,λs x,i=n j=1j=i(x−j)(i−j)−1(2)Several computations of the upcoming sections use the following transformation:z=y s(2)=y n i=1s iλs0,i=n i=1y s iλs0,i(3) 2.2Symmetric CryptosystemRecording videos causes a lot of data.Hence,we apply a symmetric algorithm (e.g.AES,see[1])to encrypt the video-material.We simply define the encryption function E S(m,k)=c and decryption function D S(c,k)=m.42.3ElGamal CryptosystemWe suppose that the reader is familiar with the basic ElGamal cryptosystem[4]. Assuming the key generation has already taken place resulting in the public key e∈G q and the private key d∈Z Z q,the encryption E and decryption D are: E(m,e)=(gα,meα)=(c1,c2),e=g d,α∈R Z Z q(4)D((c1,c2),d)=c2 c d1 −1=m(5) 3ElGamal Threshold Decryption and Re-encryptionA public key cryptosystem can be shared in several ways.The plaintext,the public key,the ciphertext as well as the private key can be used in a distributed way.For a video surveillance system sharing the encryption process does not make sense.However,sharing the decryption process enables us to realize dual-control.To increase the security it is very useful to share the ciphertext as well. For lack of space we decided not to describe this variation.Instead we focus on how to share the decryption process emphasizing on selected aspects of the corresponding management of key-shares.Due to its simplicity we use ElGamal threshold decryptionfirstly proposed in[3].The basic ElGamal decryption can be divided into two parts so that its computation only uses shares of private key d.Therefore d has to be shared using a t-degree polynomial:d→(d1,...,d n). The ElGamal decryption function can be modified replacing d with its Lagrange-representation over the shares:D((c1,c2),d)=c2 c d1 −1(3)=c2 n i=1cλd0,i1i −1(5)=m,c1i=c d i1(6) Now we can divide this computation into the following two sub-functions: Decryption Step1.This step has to be done by at least t+1shareowners.D1(c1,d i)=c d i1(6)=c1iDecryption Step2.To compute m at least t+1outputs of D1are required.D2((c11,...,c1n),c2)=c2 n i=1cλd0,i1i −1(6)=mIf the private key d has been compromised we have to provide an update of d and a re-encryption of the corresponding ciphertext without revealing plaintext. In[19]an approach based on distributed blinding is given.There,a ciphertext is first blinded by a randomly chosen and encrypted value.After having decrypted the blinded ciphertext in a particular way the resulting blinded plaintext is en-crypted with the new public key andfinally unblinded.The advantage of this approach is that the instances that blind the ciphertext do not know anything5about the private key.This is useful for transferring a ciphertext from one in-stance to another one(with different keys).In our case we need a mechanism that provides an update of the private key and the corresponding ciphertext. In our scenario the solution in[19]would require a distributed blinding,a dis-tributed decryption and a distributed unblinding.As a consequence we propose a different variation based on the distanceδbetween the old private key d and the new private key d′.The advantage of our re-encryption is that we only modify the old ciphertext and do not perform decryptions and encryptions respectively. Theorem1.Assume(c1,c2)is a ciphertext performed over m and e.Then a ciphertext based on e′=egδand decryptable by d′=d+δcan be computed by doing the following random transformation of(c1,c2)without intermediately revealing the corresponding plaintext m:RE((c1,c2),δ,e′)=(c1gβ,c2cδ1e′β)=(c′1,c′2),β∈R Z Z q(7)d′=d+δ,e′=egδ(8) Proof.Let(c′1,c′2)be a transformed ciphertext according to(7).Then the basic ElGamal decryption with new private key d′results in m because:D((c′1,c′2),d′)(5)=c′2(c′d′1)−1(7)=c2cδ1e′β((c1gβ)d′)−1(8)=c2cδ1(egδ)β((c1gβ)d+δ)−1(4)=meαgαδ(g d gδ)β((gαgβ)d+δ)−1(4)=mgα(d+δ)gβ(d+δ)(g(α+β)(d+δ))−1=m⊓⊔The re-encryption process in(7)can also be divided into two sub-functions so that it can be performed in a distributed way(assume:δandβare shared): Re-encryption Step1.Thefirst step is done locally by every user P i.RE1(c1,δi,e′,βi)=(gβi,cδi1,e′βi)=(˜c1i,c1i,e′i)Re-encryption Step2.The second step uses all outputs of RE1and(c1,c2).RE2(c1,(˜c11,...,˜c1n),(c11,...,c1n),(e′1,...,e′n),c2)=(c′1,c′2)c′1=c1ni=1˜cλβ0,i1i,c′2=c2 n i=1cλδ0,i1i n i=1e′iλβ0,iIf there is no need to mask the correspondence between old and new ciphertext, the modifications of the original randomnessαby use ofβcan be removed.64Video Surveillance4.1Setup PhaseDuring the initialization of the system,a key-pair(e,d)for the ElGamal cryp-tosystem has to be generated in a shared way.To achieve this,all users co-operatively generate shares of the private key d without reconstructing it.Then they computed and send e to the video camera.The distributed key generation proposed in[11]is very useful to generate a private key without reconstructing it.A more secure version is proposed in[5].However,we need a fair tree-structured generation of the private key.Based on this fact we modify the original protocol in order to be able to build such a tree.A detailed description of a tree-shared generation of secret values can be found in[14]–we refer to it for lack of space.4.2Recording PhaseWithin this phase V C uses local hybrid encryption.First of all V C generates an interval-key k at random and encrypts the interval-video using symmetric encryption described in section2.2:E S(video,k)=c.For encryption of k the camera uses asymmetric encryption described in section2.3with public key e: E(k,e)=(c1,c2).Within each interval the camera sends the encrypted video to S V and its corresponding encrypted ikey to S K.Both server store the ciphertext in a particular database.4.3Retrieval PhaseThe retrieval of a particular video can be done in two steps:Decryption of ikey.S K has to send(c1,c2)to every user in U who agrees to reconstruct the video.Then each user P i performs D1(c1,d i)=c1i and broadcasts the result within U.Finally every user P i decrypts ikey k by computing D2((c11,...,c1n),c2)=k.Decryption of Video.S V has to send the encrypted video c(corresponding to k)to every user P i who decrypts it by performing D S(c,k)=video.5Managing Private-Key-SharesGenerally,an access structure has to be veryflexible within an organization.The more users exist the sooner it might occur that a user leaves or joins the system.5.1Registration of a New UserWhen registering a new user P n+1we have to distinguish users of thefirst level who do not have a predecessor and users of lower levels who have predecessors.7New First-Level-User.Every existingfirst-level-user P i shares his share d i→(d i1,...,d in+1)among U′=U∪{P n+1}.Then every user P j in U′inter-polates the received shares(d1j,...,d nj)→d j.Due to the fact,that every share changes,an update of successor-shares has to be performed.Others.Every user P i of a lower level always has a predecessor P who is re-sponsible for registering his new successor P n+1.If P does not know the shares of his existing successors they have to send him their shares.Owningat least t+1shares of his successor enables P to generate a share d n+1= n i=1d iλd n+1,i for P n+1without causing a recursive update of successor-shares.After importing d n+1to P n+1’s smartcard P removes d1,...,d n fromhis smartcard.Generation of new shares can be done in several ways.An important fact is tokeep side effects minimal which we cannot guarantee with the solution describedabove when registering afirst-level-user.For more efficient but also some more complex variations we refer to our technical report[13].5.2Loss of SmartcardsIf a user collects at least t+1previously lost smartcards he might be able to compromise the private key d.Regularly updates of shares without changing d make the collector’s shares unusable.Such updates can be very time-consuming because all users of the access structure have to participate in the update process at the same time(except if centralized updates are used).If a user looses his smartcard his share can be reconstructed using the computations in section5.1. We always have to consider the worst case which is that another user of the access structurefinds the smartcard.Then the threshold is decreased which we want to avoid.Due to this fact we propose to run an update-protocolfirst and then generate a new share for the user who lost his smartcard.5.3Proactive BehaviourCollecting lost smartcards can be used to decrease the threshold.So we have to update the private-key-shares without changing the private key(as proposed in [7]).This should be done in case of loosing a smartcard but can also be performed proactively ing short intervals can be very time-consuming if up-dates are done in a distributed way because users have to be online at the same time.In this case the update could be initiated by a central trusted authority.A big advantage of this variation is that updates could be run in batch-mode.What happens if threshold t is vulnerable within one interval?In this case we propose to update the private key in a shared way in sufficient time which forces a re-encryption of ciphertext that corresponds to the compromised private key (see section6).Until the re-encryption process has beenfinished S K has to be protected against availability-compromising attacks.To handle this problem we propose to share the ciphertext-pairs(c1,c2)among several server.This would lead to several modifications of the basic system which we do not describe here.85.4De-registration of UsersIf a user leaves the organisation his smartcard(holding the share)should be securely destroyed.If a new user takes over his tasks the protocol described in section5.1has to be run.6Update of Private Key and corresponding Ciphertext First of all(e,d)has to be updated by all cameras and all shareowners of d. Before destroying the update-values a re-encryption of every ciphertext(c1,c2) generated using e has to be done.Shared Generation of Update-Values.All the users in U run the tree-based key generation mentioned in section4.1to get sharesδ1,...,δn of a private-key-updateδand sharesβ1,...,βn of randomness-updateβ.Update of Private-Key-Shares.Every user P i computes d′i=d i+δi which is a share of private key d′=d+δ.Shared Update of Public Key.All users perform the updated public key e′=e n i=1gδiλδ0,i in a distributed way and send e′to V C.Re-encryption of Encrypted ikeys.S K has to send the old ciphertext-part c1to every user P i participating in the re-encryption processes.Then each P i has to perform RE1(c1,δi,e′,βi)=(˜c1i,c1i,e′i).Finally,each output of RE1 has to be sent to S K which then replaces the old ciphertext(c1,c2)by the output of RE2(c1,(˜c11,...,˜c1n),(c11,...,c1n),(e′1,...,e′n),c2)=(c′1,c′2).7Security AnalysisWe now briefly analyse the power of each instance of the system to retrieve any secret information.However,we do not consider the tree-structure–the analysis can be interpreted recursively.As long as video cameras are not able to solve the Discrete Logarithm Prob-lem and do not compromise at least t+1first-level-users,they are not able to get any information about the private key d,update-valuesδandβor any shares of the users.To decrypt video-material S V needs the corresponding ikey.But to get access to it he has to compromise at least t+1first-level-users and S K.Afirst-level-user needs at least t other shares to reconstruct d or update-valuesδandβ. Moreover,he has to compromise S K and S V to be able to decrypt videos.Up to t smartcards offirst-level-users can be stolen and compromised without reveal-ing any information about d.Regularly updates of shares increase the security of the private key.Moreover,the smartcards are secured by a Personal Identifi-cation Number.To preserve resistance against active malicious behaviour(e.g. sending wrong intermediate results),extensions according to secure multi-party computation with active adversaries are required(see[6,8]).98Conclusion&Future ResearchConsidering the requirements stated in section1,it can be seen that all of them have been fulfilled.Privacy-protection of the monitored users is provided by encryption of video-material and interval-keys.4-eyes principle(dual control)is provided by a tree-based access structure.Minimal access of authorized people to monitored in-formation is guaranteed by scaling monitored intervals to a minimum so that many ikeys are generated.Keys and key components are generated tree-based in a fair distributed way according to[14].Update of keys and key components is realized by tree-based generation of update-values and threshold re-encryption. Tree-based secret sharing provides the possibility to simulate any user by his successors.The discussed distributed version of ElGamal is well known since[3]and only one-out-of many.Discussing how public key cryptosystems can be distributed can lead to many more applications than access structures to monitored informa-tion.When sharing functions the management of key-shares appears to be much more difficult than the“normal”key management.Some future research could emphasize on managing keys in distributed public-key cryptosystems keeping the number of local shares minimal not limiting to the ElGamal cryptosystem. References1.Advanced Encryption Standard(AES).FIPS-Pub197,NIST,2001.2.M.Boyle,C.Edwards,S.Greenberg.The Effects on Filtered Video on Aware-ness and Privacy.CSCW’00:Proceed.of the2000ACM conference on Computer supported cooperative work,Philadephia,PA,USA,2000,pages1–10.3.Y.Desmedt,Y.Frankel.Threshold Cryptosystems.Adv.in Crypt.:Proceed.ofCRYPTO’89,Springer-Verlag,pp.307–315,1990.4.T.ElGamal.A Public-Key Cryptosystem and a Signature Scheme Based on Dis-crete Logarithms.Adv.in Crypt.:CRYPTO’84,Springer-Verlag,pp.10–18,1985.5.R.Gennaro et al.Secure Distributed Key Generation for Discrete-Log BasedCryptosystems.Proceed.of EUROCRYPT’99,Springer LNCS1592,pp.295-310.6.O.Goldreich et al.How to play any mental game–a completeness theorem forprotocols with honest majority.Proc.19th ACM STOC,p.218–229,1987.7. A.Herzberg et al.Proactive secret sharing or:how to cope with perpetual leakage.In Adv.in Crypt.:CRYPTO’95,vol.963of LNCS,Springer-Verlag,pp.339–352.8.M.Hirt.Multi-Party Computation:Efficient Protocols,General Adversaries,andVoting.Ph.D.thesis,ETH Zurich,2001Reprint as vol.3of ETH Series in Infor-mation Security and Cryptography,Hartung-Gorre Verlag,Konstanz,2001.9.R.T.Collins et al.A System for Video Surveillance and Monitoring.Proceedingsof the American Nuclear Society(ANS)Eighth International Topical Meeting on Robotics and Remote Systems,1999.10. E.Newton,L.Sweeney,B.Malin.Preserving Privacy by De-identifying FacialImages.IEEE Transactions on Knowledge and Data Engineering,vol.17,no.2, pp.232–243,February2005.1011.T.Pedersen.A threshold cryptosystem without a trusted party.Adv.in Crypt.:EUROCRYPT’91,vol.547of LNCS,Springer-Verlag,pp.522–526,1991.12.J.Pieprzyka,T.Hardjono,J.Seberry.Fundamentals of Computer Security.Springer-Verlag,2003.13.M.Schaffer.Managing Key-Shares in Distributed Public-Key Cryptosystems.Technical Report TR-syssec-05-04,University of Klagenfurt,Austria,August 2005.14.M.Schaffer.Tree-shared Generation of a Secret Value.Technical Report TR-syssec-05-01,University of Klagenfurt,Austria,June2005.15.M.Schaffer,P.Schartner.Hierarchical Key Escrow with Passive Adversaries.Technical Report TR-syssec-05-02,University of Klagenfurt,Austria,June2005.16. A.Senior et al.Blinkering Surveillance:Enabling Video Privacy through Com-puter Vision.IBM Research Report RC22886(W0308-109),August28,2003.17. A.Shamir.How to share a m.of the ACM,vol.11,pp.612–613,1979.18. A.C.Yao.Protocols for secure computation.In Proceed.of the23rd IEEE Sym-posium on Foundations of Computer Security,1982.19.L.Zhou et al.Distributed Blinding for ElGamal Re-encryption.Proceed.25thIEEE Int.Conf.on Distributed Computing Systems.Ohio,June2005,p.815–824.11。
安全防范视频监控高清晰度摄像机测量方法
[9] JEITA TTR-4605 揉像机测景方法(网络圾像机) [IO] CEA-639 Consumer camcorder or video,camera low light performance(消费型便捞式援
像机或视频摄像机低照度性能)
子静态图像分辨力浏试方法) [7] ISO/IEC 13818-1 Information 1echnology-Generic coding of moving picLurcs and associ一
ated audio information:Systems—Part 1(信息技术 运动图像及其伴音信息的通用编码 第1部分:
[4] ISO/IEC 14496-2 倌息技术 视听对象编码 第2部分:视频
[5] ISO/IEC 14496-10 倌息技术 音频-可视对象的编码 第10部分:高级视频编码 [6] TSO 12233 Photography-Electronic still-picture cameras一Resolution measurements(电
龙牛网 下载
龙牛网 下载
龙牛网 下载
龙牛网 下载
龙牛网 下载
龙牛网 下载
龙牛网 下载
GA/T 1128一2013
。a
Z
参考
献
文
UN8,_
L
[l] GB 28281 安全防范视猴监控联网系统信息传输 、 交换 、控制技术要求
VI
[2) GB/T 15865 一 1995 摄像机(PAL/SECAM/NTSC)润最方法 第1部分:非广播单传感器
9
摄像机
[3] ISO 15739 浏试图
Bosch NDC-265-P 720p IP Dome Camera 说明书
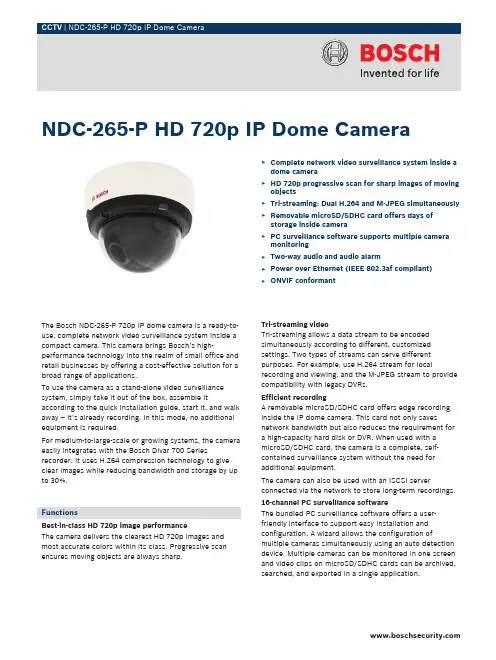
The Bosch NDC-265-P 720p IP dome camera is a ready-to-use, complete network video surveillance system inside a compact camera. This camera brings Bosch’s high-performance technology into the realm of small office and retail businesses by offering a cost-effective solution for a broad range of applications.To use the camera as a stand-alone video surveillance system, simply take it out of the box, assemble it according to the quick installation guide, start it, and walk away – it’s already recording. In this mode, no additional equipment is required.For medium-to-large-scale or growing systems, the camera easily integrates with the Bosch Divar 700 Series recorder. It uses H.264 compression technology to give clear images while reducing bandwidth and storage by up to 30%.FunctionsBest-in-class HD 720p image performanceThe camera delivers the clearest HD 720p images and most accurate colors within its class. Progressive scan ensures moving objects are always sharp.Tri-streaming videoTri-streaming allows a data stream to be encoded simultaneously according to different, customized settings. Two types of streams can serve different purposes. For example, use H.264 stream for local recording and viewing, and the M-JPEG stream to provide compatibility with legacy DVRs.Efficient recordingA removable microSD/SDHC card offers edge recording inside the IP dome camera. This card not only saves network bandwidth but also reduces the requirement for a high-capacity hard disk or DVR. When used with a microSD/SDHC card, the camera is a complete, self-contained surveillance system without the need for additional equipment.The camera can also be used with an iSCSI server connected via the network to store long-term recordings. 16-channel PC surveillance softwareThe bundled PC surveillance software offers a user-friendly interface to support easy installation and configuration. A wizard allows the configuration of multiple cameras simultaneously using an auto detection device. Multiple cameras can be monitored in one screen and video clips on microSD/SDHC cards can be archived, searched, and exported in a single application.NDC-265-P HD 720p IP Dome Camera▶Complete network video surveillance system inside adome camera▶HD 720p progressive scan for sharp images of movingobjects▶Tri-streaming: Dual H.264 and M-JPEG simultaneously▶Removable microSD/SDHC card offers days ofstorage inside camera▶PC surveillance software supports multiple cameramonitoring▶Two-way audio and audio alarm▶Power over Ethernet (IEEE 802.3af compliant)▶ONVIF conformant2ONVIF 1.0 conformantThe latest Open Network Video Interface Forum (ONVIF) standard ensures compatibility with other surveillance products. This will contribute to a reduction in future upgrade or migration costs.Two-way audio and audio alarmTwo-way audio allows remote users to listen in on an area and communicate messages to visitors or intruders via an external loudspeaker (not included). Audio detection can be used to generate an alarm, if needed.Tamper and motion detectionA wide range of configuration options is available for alarms signaling camera tampering. A built-in algorithm for detecting movement in the video can also be used for alarm signaling.Power-over-EthernetPower for the camera can be supplied via a Power-over-Ethernet (IEEE 802.3af) compliant network cable connection. With this configuration, only a single cable connection is required to view, power, and control the camera.Certifications and ApprovalsSafety EU: EN 60950-1: 2006,Reference IEC 60950-1:2005US: UL 60950-1:1st edition dated October 31, 2007Canada: CAN/CSA-C22.2 NO. 60950-1-03EMC EN 50130-4:1995 + A1:1998 + A2:2003FCC Part15 Subpart B, Class BEMC directive 2004/108/ECEN 55022 class BEN 61000-3-2 :2006EN 61000-3-3 : 1995+A1 :2001+A2 :2005EN 55024AS/NZS CISPR 22 (equal to CISPR 22)ICES-003 Class BEN 50121-4:2006Product Certifica-tionsCE, FCC, UL, cUL, C-tick, CB, VCCIPower supply CE, UL, cUL, PSE, CCC Installation/Configuration NotesConnections1I/O2Power 12 VDC3Ethernet RJ454Audio Line-out5Audio Line-inDimensionsmm (in)Parts IncludedQuantity Component1NDC-265-P 720p IP Dome camera1Quick Installation Guide1Installation paper sticker1Torx screwdriver for Dome cover1CD ROM1Camera fixing screw kit1MicroSDHC card (warranty provided by card manufacturer) 1Universal power supply with US, EU and UK plug3Technical SpecificationsPowerInput voltage+12 VDC orPower-over-EthernetPower consumption 4.2 W (max)VideoSensor type¼-inch CMOSSensor pixels1280 x 800Sensitivity 1.0 lxVideo resolution720p, 4CIF/D1, VGA, CIF, QVGA Video compression H.264 MP (Main Profile); H.264 BP+(Baseline Profile Plus); M-JPEGMax. frame rate30 fps (M-JPEG frame rate can vary de-pending on system loading)LensLens type Varifocal 2.7 to 9 mm, DC Iris F1.2 tocloseLens mount Board mountedConnectionAnalog video out 2.5 mm jack for installation onlyAlarm input Short or DC 5V activationRelay out Input rating Maximum 1 A 24 VAC/VDC AudioAudio input Built-in microphoneLine in jack connectorAudio output Line out jack connectorAudio communication Two-way, full duplexAudio compression G.711, L16 (live and recording)Local StorageMemory card slot Supports up to 32 GB microSD/SDHCcard(An SD card of Class 4 or higher is recom-mended for HD recording) Recording Continuous recording, ring recording.alarm/events/schedule recording Software ControlUnit configuration Via web browser or PC surveillance soft-wareNetworkProtocols HTTP, HTTPs, SSL, TCP, UDP, ICMP,RTSP, RTP, Telnet, IGMPv2/v3, SMTP,SNTP, FTP, DHCP client, ARP, DNS,DDNS, NTP, SNMP, UPnP, 802.1X, iSCSI Ethernet10/100 Base-T, auto-sensing, half/full du-plex, RJ45PoE IEEE 802.3af compliant MechanicalDimensions Diameter: 135 mm (5.32 in)Height: 102 mm (4 in)Weight568 g (1.25 lb) approx. EnvironmentalOperating temperatureCamera-10 ºC to +50 ºC (14 ºF to +122 ºF)Operating temperatureUniversal Power Supply Unit0 ºC to +40 ºC (+32 ºF to +104 ºF) Storage temperature-20 ºC to +70 ºC (-4 ºF to +158 ºF) Humidity10% to 80% relative humidity (non con-densing)Ordering InformationNDC-265-P 720p IP Dome CameraHD 720p IP Dome Camera System includingvarifocal lens and power supplyNDC-265-P4Americas:Bosch Security Systems, Inc. 130 Perinton Parkway Fairport, New York, 14450, USA Phone: +1 800 289 0096 Fax: +1 585 223 9180***********************.com Europe, Middle East, Africa:Bosch Security Systems B.V.P.O. Box 800025600 JB Eindhoven, The NetherlandsPhone: + 31 40 2577 284Fax: +31 40 2577 330******************************Asia-Pacific:Robert Bosch (SEA) Pte Ltd, Security Systems11 Bishan Street 21Singapore 573943Phone: +65 6258 5511Fax: +65 6571 2698*****************************Represented by© Bosch Security Systems Inc. 11 | Data subject to change without notice T7233796747 | Cur: en-US, V2, 5 Jan 2011。
群晖surveillance内存占用

群晖surveillance内存占用【实用版】目录1.群晖 surveillance 简介2.内存占用的影响因素3.解决内存占用过高的方法4.结论正文1.群晖 surveillance 简介群晖 Surveillance 是一款适用于家庭和办公室的网络视频监控软件,用户可以通过智能手机或平板电脑随时随地查看监控画面。
该软件支持多种设备和操作系统,包括 Windows、macOS、iOS 和 Android 等。
通过群晖 Surveillance,用户可以轻松地设置监控摄像头、查看实时视频、回放录像等功能。
2.内存占用的影响因素在使用群晖 Surveillance 时,内存占用是一个需要注意的问题。
内存占用的大小受以下几个因素影响:(1)监控摄像头数量:摄像头数量越多,实时视频流的处理和存储所需的内存资源就越多。
(2)视频质量:高质量的视频流需要更多的内存来存储和处理。
用户可以根据自己的需求调整视频质量以降低内存占用。
(3)存储方式:群晖 Surveillance 支持本地存储和网络存储两种方式。
本地存储需要更多的内存来存储视频文件,而网络存储可以减轻内存负担。
(4)其他因素:如操作系统、硬件配置等也可能对内存占用产生影响。
3.解决内存占用过高的方法为了避免内存占用过高导致系统崩溃或性能下降,用户可以采取以下措施:(1)优化摄像头数量:减少不必要的摄像头,以便降低内存占用。
(2)调整视频质量:降低视频质量以减少内存占用。
用户可以根据自己的需求在设置中调整视频质量。
(3)选择合适的存储方式:如果内存资源有限,建议采用网络存储方式以减轻内存负担。
(4)升级硬件配置:提高内存容量和处理器性能,以应对更高的内存需求。
4.结论群晖 Surveillance 作为一款网络视频监控软件,在提供便捷的监控功能的同时,也需要用户关注内存占用问题。
视频监控系统选购指南说明书

W H I T E PA P E RVideo Surveillance in Focus:Selecting the right system to meet your organization’s needsPlanning with the Future In MindThe first question organizations should ask is: How will this organization use a video surveillance system and what might it use the sys-tem for in the future?The questionsounds obvious, but surprisingly, manyorganizations do not consider the second half of this question before making a purchase decision. The second part of the question is the most critical, be-cause an organization’s use of its video surveillance system can change significantly over time.For instance, when video surveillance systems firstbecame popular, many municipalities simply installedVideo surveillance systems are helping municipalities, businesses and public safety organizations across the globe protect their citizens, protect their property and put criminals behind bars. But given the wide variety of technology choices for video surveillance, selecting the right system can seem like a daunting task. Fortunately, it doesn’t have to be. Organizations that wish to install, add to or upgrade a video surveillance system can ask justthree powerful questions to guide them in selecting the optimal video system.cameras as a deterrent to crime. But today, even if an organization installs a video system for a specific purpose – such as simply to monitor activity in a high crime area – that same organization might find itself using that video for much more.It might be used in a courtroom to help prosecute a crime. Or the video could be sent to first responders when they are on the way to a crime scene so they are better prepared to handle the situation when they arrive.Today, many private and public safety organizations are also sharing video from their systems with other organizations in emergency situations. This means that video from many disparate systems needs to be piped to and accessed by many different command centers, such as the police department’s command center, the fire department’s command center or the Department of Transportation’s (DOT’s) command center.QUESTION 1:How will this organization use a video surveillance system and what might it use the system for in the future?The Easiest Way to Share VideoGetting the different organizations’ video and command systems – which often use very differ-ent technology – to talk to one another can be a challenge. Fortunately, this challenge can be solved using software called physical security information management (PSIM). This software neutralizes the incompatibilities between different video systems and allows them to easily communicate with each other.Using PSIM software, an organization can easily access and manage the video from disparatesurveillance system – even if they have no idea what camera, compression or transmission technology that system uses. Using PSIM software, organiza-tions can even easily track movement across many different types of cameras and video systems owned by many organizations.For instance, PSIM software can facilitate the tracking of suspects as they move from a private parking lot onto the street. Or the police dispatch center can quickly tap into and view video from the Department of Transportation’s cameras no matter what technology the DOT system uses.Hassle-free Video System ManagementIn addition, if an organization finds that the video surveillance system it installed several years ago does not meet its current needs and decides to upgrade just part of its system, PSIM software can help the organization easily manage both the old and the new system. For instance, this software can be used to neutralize the differences between an “old” analog and a “new” IP-based video system. This allows organizations to operate and manage the two different video networks as one integrated system using one user interface. This reduces training costs as well as video storage and retrieval headaches.Quality, Frame Rate, Cost and Bandwidth:Finding the Right BalanceThe second question that organizations need to ask is: What level of video quality is needed – and how does this affect band-width needs? First, an organization must determine how much detail it needs in its video recordings.For instance, security guards at an organization might use a video surveillance system to simply track the movements of someone who has entered a restricted area. There might not be any need to recognize the identity of that individual. But in a courtroom, jurors must be capable of recognizing a face or reading a license plate from a video.Picture quality is determined by resolution, and the primary measurement for resolution is pixels per foot (PPF). As a rule of thumb, the minimum pixel measurement needed to recognize a face is 40 by 40 or 1600 pixels. To read a license plate, a minimum of 80 by 80 or 6400 pixels is required.Another feature to consider is frame rate. Generally, video being viewed live should support frame rates of 24 to 30 frames per second (fps) – which are the lowest speeds that the eye perceives as actual motion – to avoid eye strain. Depending on how the video is supported, however, some security opera-tions may find 10 to 15 fps acceptable today for basic video capture.In contrast, for video that is being reviewed after it is recorded, a higher resolution is often more important than a high frame rate. The higher resolution allows individuals to be recognized and license plates to be read more easily.It is critical to realize that video systems that sup-port better resolution and faster frame rates require higher bandwidth capabilities and thus cost more. Fortunately, using compression techniques, one can maintain a higher image quality while reducing band-width needs – and cost. But here again, organiza-tions must be willing to make choices.For instance, using a compression technique that is too aggressive results in anomalies that can damage the video’s credibility in court. Once again, an orga-nization must first determine how it wants to use its video system both now and in the future to make the right choices in this area.QUESTION 2:What level of video quality is needed – and how does this affect bandwidth needs?The Importance of ScalabilityThe third question to consider is: How much storage doI need for my video system? Unfortunately, video storage is oftenjust an afterthought with many organiza-tions, and this can lead to problems in the future.In fact, even when an organization starts with a small video system, it is critical to select a system that can easily scale because the storage require-ments for video surveillance systems are extremely large – and expand very quickly.For example, just one megapixel camera (1280 x 1024 pixels) will generate 80 kilobits of data per frame at 30 frames per second. In total, it will generate 207 gigabytes of data each 24-hour day. Even if motion analytics is used to record only when motion is detected, the camera will generate 20.7 gigabytes of data per day (assuming motion 10 percent of the time).Even if the camera records only when motion is detected, one year’s worth of video for just two cameras would generate 15 terabytes of data. And a law enforcement organization using that data as evidence in a trial might be required to store that data for at least five years.The Cost of Storing VideoOnce an organization’s storage needs reach 10 terabytes of data or higher, storing video usingtraditional systems – where data is backed up via tapes or hard drives – can become very costly. Why? As the amount of stored data grows, moreback-up copies of that data are needed. This not only leads to exponential increases in costs, it also leads to security concerns because the data is now located in many different facilities.Even when multiple back-up copies of data are made, the traditional data backup system is not that reliable, given that between one and five percent of hard drives fail every year and between 10 and 20 percent of tapes fail.Fortunately, there is an alternative way to store data using a technique called Information Dispersal. This technique stores slices of information on a network of servers – and then reassembles it when it isneeded. In addition, a file can be reassembled even if all the slices are not available, so if one server fails, the data can still be retrieved intact.The cost of a dispersed system is significantly less as well. With a large-scale storage system, where a company might need three back-up copies of the data using a traditional storage model, a dispersed storage system can cost one-fifth to one-half as much as a traditional storage system. Plus thedispersed back-up system will consume one-eighth the power and require much lower bandwidth.The bottom line is that once an organization under-stands how it wants to use its video surveillance system – and what it might use that system for in the future – it can more easily choose the right video system. By asking just three key questions, an organization will be well on its way to selecting a video surveillance system that meets its unique needs – both today and in the future.Investigate FurtherAs with any technology solution, wireless video surveillance networks are evolving and improving rapidly. That’s why it’s important to partner with a provider that knows wireless technology inside and out. For nearly 80 years, Motorola has been recognized as the leading provider of wireless communications, networks, devices and services. To learn more about how Motorola can help government and public safety agencies develop and deploy intelligent wireless video solutions that will provide immediate benefits and position your organization to take fast advantage of future innovation, please visit us at /videosurveillance.Motorola, Inc. 1301 E. Algonquin Road, Schaumburg, Illinois 60196 U.S.A. /videosurveillanceMOTOROLA and the stylized M Logo are registered in the U.S. Patent and Trademark Office. All other products or service names are the property of their registered owners.© Motorola, Inc. 2009QUESTION 3:How much storage do I need for my video system?。
HR-NR5000-2U系列NVR 说明书

The HR-NR5000-2U series NVRs are designed for the dynamic needs ofthe emergent digital video surveillance market. With high image resolution,seamlessly integrated mass storage, and alarm recording, The NVRdeliver flexible and powerful performance to security professionals fordistributed enterprise architectures and centralized managementapplications.The NVR are a complete network based video recording solution whichsupports various video compression formats of IP cameras (H.264,MPEG-4, and MJPEG), and image resolutions, from CIF/ D1, VGA, tomultiple megapixels. Integrating with megapixel IP cameras, MatriVideo™provides a breakthrough platform to view high resolution video from yoursurveillance system. Simply plug into the network infrastructure and theNVR can display the video image from any IP camera source through theEthernet. The IP cameras can be installed without cumbersome cabling,meaning that setting up a new IP-based security system has never beeneasier or more cost effective.Based on the embedded Linux OS, The NVR_On_Chip technology,combined with dual power supplies and RAID-5 and RAID-6 enhancement,provides customers a stable and secure system. The embedded Linux OSincreases overall system availability by reducing system downtime causedby power supply and hard drive failure. It has the capability to keep acomplete six month audit trail database of user activities. MatriVideo™NVRs allow different recording settings - continuous, motion detected,event triggered, and scheduled recording. This increases the data storageutilization giving more space to store video and saving money. The NVR provide the most intelligent and comprehensive video search tools. Users can retrieve the desired video images with a few simple clicks. Its graphical display illustrates the recorded video history, yet with quick indicators for alarm instances (video loss, motion detection, real-time video analytics, sensor or digital inputs, even POS and Access Control System events), and manual recording instances (special events triggered by security personnel onsite).a high performance enterprise-class network based solution for distributed architecturedata protection (optional)ID-1304NR52UFunctionOperating systemImage controlDual watchdogVideo inputAudio inputSupported resolutionSupported formatMax frame rate**Recording modesPre/post alarm recordingInternal storageInternal RAID5 and RAID6External storageSearching methodMonitoring environmentSpeaker outAudio line inSerial portKeyboardEthernetUSBVGA outputI/O controlsOptional remote I/O ModuleHardware accessoriesVideo servers and IP-camerasACSElectric power sourceDual power suppliesPower outputOperating temperatureHumidityDimension (mm)Weight (kg)ModelNetwork video recorder Embedded Linux Contrast / Brightness / Saturation / Hue Yes 16 / 32 / 48 / 64 channels 16 / 32 / 48 / 64 channels All resolutions supported MJPEG / MPEG4 / H.26430 fps (NTSC) / 25 fps (PAL)Continuous / Scheduled / Motion detected / Intelligent video detected / Event triggered / Manual / API 1 ~ 60 seconds Up to 8 swappable HDDs Optional Archive Server / IP SAN / SAS Date / Time / Camera / Alarm list Command Center(Lite/Dual), nCCTV 112 x RS-232PS/2 and USB 2 x RJ-45, 10/100/1000Mbps 6 x USB2.015 pin female D-SUB Max. 128 Inputs / 64 Outputs using Remote I/O Modules (optional)ID-IO2000-1600 (16 DI), ID-IO2000-0008 (8 DO), ID-IO2000-0808 (8 DI / 8DO) C232-485i (RS232 / 485 converter)1 x Power cable 3S, ACTi, Appro, Arecont Vision, Arlotto, AXIS, Basler, Brickcom, CNB Technology, Hikvision, Hi-Sharp, Hitron, Hunt, Instek Digital,ITX, IQinVision, MatriCam, Messoa, Mobotix , Pixord, Pelco, Probe, Samsung, Secubest, SANYO, SONY , Vivotek Cardax, CEM, Tyco AC 100 ~ 240V Optional 400W 0 ~ 40°C Max. 90%, non-condensing 575(L) x 485(W) x 95(H) mm (w/o box)14.1 Kg (w/o box)HR-NR5416-2U / HR-NR5432-2U / HR-NR5448-2U / HR-NR5464-2U SpecificationsFront ViewRear View Power socket Exhaust fan a) The actual video display performance may vary according to type of camera(s) and lighting condition.b) Product specifications and availability are subject to change without notice.COM VGA Speaker out / audio in USB DVI PS/2Ethernet。
ves评估

ves评估VES(Video Evaluation Standard)是一种对视频质量进行客观评估的指标体系,主要用于评估视频编码和传输质量。
VES评估包括以下几个方面:分辨率、比特率、帧率、压缩编码器效能、视频详细度、运动估计、码率失真表现、变化场景、失真度、编码格式、音视频同步等。
首先,分辨率是用来衡量视频清晰度的一个重要指标。
通常使用像素数量来表示,分辨率越高,视频的细节越丰富,清晰度越高。
在VES评估中,会对视频的分辨率进行检测,以确认视频是否达到了预期的清晰度要求。
其次,比特率是指视频编码过程中每秒传输的数据量。
比特率越高,视频质量越好,但也会造成传输压力增大。
VES评估中会对比特率进行检测,以确认视频是否符合预期的传输质量。
帧率是指视频中每秒显示的图像帧数。
帧率越高,视频显示的动作就越流畅。
在VES评估中,帧率也是一个重要的参考指标,用于评估视频的流畅度和动作表现力。
压缩编码器效能是指编码器在压缩视频时的效率和准确性。
VES评估中,会对不同的编码器进行测试,以确定其在视频压缩方面的表现。
视频详细度是指视频的细节表现能力。
VES评估中,会对视频的细节进行评估,以确定视频的清晰度和细节表现能力。
运动估计是指对视频中的运动进行检测和估计。
VES评估中,会对视频中的运动进行评估,以确定运动估计的准确性和准确性对视频质量的影响。
码率失真表现是指在特定比特率下,视频质量的损失程度。
VES评估中,会对不同比特率情况下的视频质量进行评估,以确定视频的码率失真表现。
变化场景是指视频中场景的变化情况。
VES评估中,会对视频中的场景变化进行检测,以确定视频的场景变化情况对视频质量的影响。
失真度是指视频质量的失真程度。
VES评估中,会对视频的失真度进行评估,以确定视频的失真程度和失真对观看体验的影响。
编码格式是指视频编码时使用的格式。
VES评估中,会对不同的编码格式进行测试,以确定不同格式对视频质量的影响。
VIDEO SURVEILLANCE
专利名称:VIDEO SURVEILLANCE发明人:ROBAATO SHII ORIBAA JIYUNIAA 申请号:JP30044488申请日:19881128公开号:JPH02166986A公开日:19900627专利内容由知识产权出版社提供摘要:PURPOSE: To provide an inexpensive and flexible system by multiplexedly transmitting modulated signals from plural video cameras, applying signals to plural video screens and tuners in parallel by a signal splitter and controlling the tuners by a computer. CONSTITUTION: Respective video modulators 2 modulate signals outputted from cameras 1 and plural combiners 3 connected in series apply the signals from all the modulators 2 to the signal splitter 4 through a video signal transmission line 5. The splitter 4 supplies the received signals to plural video display devices 6, each of which transmits the supplied signal to a channel selected by a tuner 7 and a display screen 8 displays a picture included within the visiual field of the camera 1. The computer controls the tuners 7 and executes sequence control so as to display pictures observed by a series of cameras 1 on the screen 8. Consequently the flexible system reducing wiring cost can be obtained.申请人:ROBAATO SHII ORIBAA JIYUNIAA更多信息请下载全文后查看。
达华Ultra 4K HDCVI摄像头系列文档
System OverviewExperience the superior clarity of Dahua's Ultra 4K HDCVI cameras for vast coverage and superior image details. As the world's first 4K over coax cameras, the Dahua Ultra 4K HDCVI series leverages existing coax infrastructures to deliver forensic-level images seamlessly and more cost effectively. The outstanding performance, easy installation and rugged design make the camera an ideal choice for mid- to large-size businesses and for applications in large, open spaces (city centers, parks, campuses) where highly reliable surveillance and construction flexibility are valued.FunctionsMicro Four Thirds SystemThis Dahua camera takes advantage of the The Micro Four Thirds System, an interchangeable-lens photography system that offers superior picture quality from a smaller lens. This system offers nine times the surface area and pixel size of the standard 1/3-in. sensor commonly used in video surveillance applications. The larger surface area and pixel size increases the light gathering capability of the sensor to deliver color images in ultra-low light conditions in the 8MP camera class when other cameras have switched to monochrome.4K Resolution4K resolution is a revolutionary breakthrough in image processing technology. 4K delivers four times the resolution of standard HDTV 1080p devices and offers superior picture quality and image details. 4K resolution improves the clarity of a magnified scene to view or record crisp forensic video from large areas.Starlight+ TechnologyFor challenging low-light applications, Dahua’s Starlight Ultra-low Light Technology offers best-in-class light sensitivity, capturing color details in low light down to 0.001 lux. The camera uses a large pixel sensor, smart imaging algorithms and a set of optical features to balance light throughout the scene, resulting in clear images in dark environments.Ultra Series | A83AA9M43 Lens InterfaceThe lens is a key component of any security camera and one that directly effects the quality of the image. The Dahua 4K HDCVI box camera features the M43 lens interface, typically found on most SLR cameras. This camera is compatible with all types of M43 lenses, including fixed and vari-focal lenses.Four Signals over One Coaxial CableHDCVI technology simultaneously transmits video, power, data, and audio over a single coaxial cable. Dual-way data transmission allows the HDCVI camera to communicate with an HCVR to send control signals or to trigger alarms. HDCVI along with PoC technology delivers power 1 to devices at the edge, simplifying installation.Long Distance TransmissionHDCVI technology guarantees real-time transmission over long distances without loss of video quality. HDCVI cameras provide the same resolution as most IP network camera systems using existing RG-59, RG-6, or CAT 6 UTP cabling.SimplicityHDCVI technology seamlessly integrates traditional analog surveillance systems with upgraded, high-quality HD video, making it the best choice to protect security investments. The plug and play approach enables full HD video surveillance without the hassles of configuring a network. Multiple OutputsThe camera supports HDCVI and CVBS signal outputs simultaneously with one HDMI connector and one BNC connector. These output signals allow the camera to integrate with various devices, including analog matrix systems and monitors.1. Requires PoC Transceivers for each channel and an external power supply for each transceiver.•Micro Four Thirds 8 MP Progressive-scan CMOS Sensor •M43 Lens Interface•3840 x 2160 at 30 fps (HDMI) and 3840 x 2160 at 15 fps (BNC) •Simultaneous HDMI and HDCVI/CVBS Video Output •Starlight+ Technology for Ultra-low Light Sensitivity•Ultra Wide Dynamic Range (140 dB) and 2D and 3D Noise Reduction •Built-in Microphone •Software Upgrade via USB •Five-year Warranty**Warranty applies to products sold through an authorized Dahua Dealer.2. 4K at 15 fps resolution achievable with the following Dahua HDCVI DVRs: C52A1N/C52A2N/C52A3N(Channel 1) and X58A3S (Channels 1 and 9).3. Transmission distance results verified by real-scene testing in Dahua's test laboratory. Actual transmissiondistances may vary due to external influences, cable quality, and wiring structures.Rev 001.010© 2018 Dahua. All rights reserved. Design and specifications are subject to change without notice.PFB110WWall/Ceiling MountBracketPFB121WWall Mount Bracket PFM800-EPassive HDCVI Balun PFM810POC Transceiver DH-PFM320D-015Power Adapter DH-PFM321D-US Power AdapterDH-PFL085-J12M 12 MP Fixed LensDH-PFL2070-J12M 12 MP Vari-focalLens。
Cisco Meraki MV摄像头系列介绍说明书
INTRODUCING MVWith an unobtrusive industrial design suitable for any setting—and available in indoor (MV21) and outdoor (MV71) models—the MV family simplifies and streamlines the unnecessarily complex world of secu-rity cameras. By eliminating servers and video recorders, MV frees administrators to spend less time on deployment and maintenance, and more time on meeting business needs.High-endurance solid state on-camera storage eliminates the concern of excessive upload bandwidth use and provides robust failoverprotection. As long as the camera has power it will continue to record, even without network connectivity. Historical video can be quicklyOVERVIEWCisco Meraki’s MV family of security cameras are exceptionally simple to deploy and configure. Their integration into the Meraki dashboard, ease of deployment, and use of cloud-augmented edge storage, eliminate the cost and complexity required by traditional security camera solutions.Like all Meraki products, MV cameras provide zero-touch deployment. Using just serial numbers, an administrator can add devices to the Meraki dashboard and begin configuration before the hardware even arrives on site. In the Meraki dashboard, users can easily streamvideo and create video walls for monitoring key areas across multiple locations without ever configuring an IP or installing a plugin.searched and viewed using motion-based indexing, and advanced export tools allow evidence to be shared with security staff or law enforcement easily.Because the cameras are connected to Meraki’s cloud infrastructure, security updates and new software are pushed to customers auto-matically. This system provides administrators with the peace of mind that the infrastructure is not only secure, but that it will continue to meet future needs.Simply put, the MV brings Meraki magic to the security camera world.Product Highlights• Meraki dashboard simplifies operation• Cloud-augmented edge storage eliminates infrastructure • Suitable for deployments of all sizes: 1 camera or 1000+• Intelligent motion indexing with search engine• Built-in video analytics tools• Secure encrypted control architecture• No special software or browser plugins required • Granular user access controlsMV21 & MV71Cloud Managed Security CamerasDatasheet | MV SeriesCUTTING EDGE ARCHITECTUREMeraki's expertise in distributed computing has come to the security camera world. With cloud-augmented edge storage, MV cameras provide ground breaking ease of deployment, configuration, and operation. Completely eliminating the Network Video Recorder (NVR) not only reduces equipment CAPEX, but the simplified architecture also decreases OPEX costs. Each MV camera comes with integrated, ultra reliable, industrial-grade storage. This cutting edge technology allows the system to efficiently scale to any size because the storage expands with the addition of each camera. Plus, administrators can rest easyknowing that even if the network connection cuts out, the cameras will continue to record footage.SCENE BEING RECORDEDON-DEVICE STORAGELOCAL VIDEO ACCESS MERAKIREMOTE VIDEOACCESSOPTIMIZED RETENTIONMV takes a unique approach to handling motion data by analyzing video on the camera itself, but indexing motion in the cloud. This hybrid motion-based retention strategy plus scheduled recording give users the ability to define the video retention method that works best for every deployment.The motion-based retention tool allows users to pick the video bit rate and frame rate to find the perfect balance betweenstorage length and image quality. All cameras retain continuous footage as a safety net for the last 72 hours before intelligently trimming stored video that contains no motion, adding one more layer of security.Determine when cameras are recording, and when they’re not, with scheduled recording. Create schedule templates for groups of cameras and store only what’s needed, nothing more. Turn off recording altogether and only view live footage for selective privacy.Best of all, the dashboard provides a real-time retention estimate for each camera, removing the guesswork.10:00:3010:00:2010:00:25EASY TO ACCESS, EASY TO CONTROLThere is often a need to allow different users access but with tailored controls appropriate for their particular roles. For example, a receptionist needing to see who is at the front door probably does not need full camera configuration privileges.The Meraki dashboard has a set of granular controls for defining what a user can or cannot do. Prevent security staff from changing network settings, limit views to only selected cameras, or restrict the export of video: you decide what is possible.With the Meraki cloud authentication architecture, these controls scale for any organization and support Security Assertion Markup Language (SAML) integration.CONFIGURE VIEW-ONLYISOLATE EVENTS, INTELLIGENTLYMeraki MV cameras use intelligent motion search to quickly find important segments of video amongst hours of recordings. Optimized to eliminate noise and false positives, this allows users to retrospectively zero-in on relevant events with minimal effort.MV's motion indexing offers an intuitive search interface. Select the elements of the scene that are of interest and dashboard will retrieve all of the activity that occurred in that area. Laptop go missing? Drag the mouse over where it was last seen and quickly find out when it happened and who was responsible.8:009:00ANALYTICS, BUILT RIGHT INMV's built-in analytics take the average deployment far beyond just security. Make the most of an MVcamera by utilizing it as a sensor to optimize business performance, enhance public safety, or streamline operational objectives.Use motion heat maps to analyze customer behavior patterns or identify where students are congregating during class breaks. Hourly or daily levels ofgranularity allow users to quickly tailor the tool to specific use cases.All of MV's video analytics tools are built right into the dashboard for quick access. Plus, the standard MV license covers all of these tools, with no additionallicensing or costs required.SIMPLY CLOUD-MANAGEDMeraki's innovative GUI-based dashboardmanagement tool has revolutionized networks aroundthe world, and brings the same benefits to networkedvideo surveillance. Zero-touch configuration, remotetroubleshooting, and the ability to manage distributedsites through a single pane of glass eliminate manyof the headaches security administrators have dealtwith for decades. Best of all, dashboard functionalityis built into every Meraki product, meaning additionalvideo management software (VMS) is now a thing ofthe past.Additionally, features like the powerful drag-and-drop video wall help to streamline remote devicemanagement and monitoring — whether cameras aredeployed at one site, or across the globe.SECURE AND ALWAYS UP-TO-DATECentralized cloud management offers one of the mostsecure platforms available for camera operation. Allaccess to the camera is encrypted with a public keyinfrastructure (PKI) that includes individual cameracertificates. Integrated two-factor authenticationprovides strong access controls. Local video is alsoencrypted by default and adds a final layer of securitythat can't be turned off.All software updates are managed automaticallyfor the delivery of new features and to enable rapidsecurity updates. Scheduled maintenance windowsensure the MV family continues to address users'needs with the delivery of new features as part of theall-inclusive licensed service.Camera SpecificationsCamera1/3.2” 5MP (2560x1920) progressive CMOS image sensor128GB high endurance solid state storageFull disk encryption3 - 10mm vari-focal lens with variable aperture f/1.3 - f/2.5Variable field of view:28° - 82° (Horizontal)21° - 61° (Vertical)37° - 107° (Diagonal)Automatic iris control with P-iris for optimal image quality1/5 sec. to 1/32,000 sec. shutter speed*******************************(color)*************(B&W)S/N Ratio exceeding 62dB - Dynamic Range 69dBHardware based light meter for smart scene detectionBuilt-in IR illuminators, effective up to 30 meters (98 feet)Integrated heating elements for low temperature outdoor operation (MV71 only)Video720p HD video recording (1280x720) with H.264 encodingCloud augmented edge storage (video at the edge, metadata in the cloud)Up to 20 days of video storage per camera*Direct live streaming with no client software (native browser playback)**Stream video anywhere with autotmatic cloud proxyNetworking1x 10/100 Base-T Ethernet (RJ45)Compatible with Meraki wireless mesh backhaul (separate WLAN AP required) DSCP traffic markingFeaturesCloud managed with complete integration into the Meraki dashboardPlug and play deployment with self-configurationRemote adjustment of focus, zoom, and apertureDynamic day-to-night transition with IR illuminationNoise optimized motion indexing engine with historical searchShared video wall with individual layouts supporting multiple camerasSelective export capability with cloud proxyHighly granular view, review, and export user permissions with SAML integration Motion heat maps for relative hourly or day-by-day motion overviewMotion alertsPowerPower consumption (MV21) 10.94W maximum via 802.3af PoE Power consumption (MV71) 21.95W maximum via 802.3at PoE+EnvironmentStarting temperature (MV21): -10°C - 40°C (14°F - 104°F)Starting temperature (MV71): -40°C - 40°C (-40°F - 104°F)Working temperature (MV21): -20°C - 40°C (-4°F - 104°F)Working temperature (MV71): -50°C - 40°C (-58°F - 104°F)In the boxQuick start & installation guideMV camera hardwareWall mounting kit, drop ceiling T-rail mounting hardwarePhysical characterisitcsDimensions (MV21) 166mm x 116.5mm (diameter x height)Dimensions (MV71) 173.3mm x 115mm (diameter x height)Weather-proof IP66-rated housing (MV71 only)Vandal-proof IK10-rated housing (MV71 only)Lens adjustment range:65° Tilt350° Rotation350° PanWeight (MV21) 1.028kg (including mounting plate)Weight (MV71) 1.482kg (including mounting plate)Female RJ45 Ethernet connectorSupports Ethernet cable diameters between 5-8mm in diameterStatus LEDReset buttonWarrantyWarranty (MV21) 3 year hardware warranty with advanced replacementWarranty (MV71) 3 year hardware warranty with advanced replacementOrdering InformationMV21-HW: Meraki MV21 Cloud Managed Indoor CameraMV71-HW: Meraki MV71 Cloud Managed Outdoor CameraLIC-MV-XYR: Meraki MV Enterprise License (X = 1, 3, 5, 7, 10 years)MA-INJ-4-XX: Meraki 802.3at Power over Ethernet injector (XX = US, EU, UK, or AU) Note: Each Meraki camera requires a license to operate* Storage duration dependent on encoding settings.** Browser support for H.264 decoding required.Mounting Accessories Specifications Meraki Wall Mount ArmWall mount for attaching camera perpendicular to mounting surfaceIncludes pendant capSupported Models: MV21, MV71Dimensions (Wall Arm) 140mm x 244mm x 225.4mmDimensions (Pendant Cap) 179.9mm x 49.9mm (Diameter x Height)Combined Weight 1.64kgMeraki Pole MountPole mount for poles with diameter between 40mm - 145mm (1.57in - 5.71in)Can be combined with MA-MNT-MV-1: Meraki Wall Mount ArmSupported Models: MV71Dimensions 156.7mm x 240mm x 68.9mmWeight 1.106kgMeraki L-Shape Wall Mount BracketCompact wall mount for attaching camera perpendicular to mounting surfaceSupported Models: MV21, MV71Dimensions 206mm x 182mm x 110mmWeight 0.917kgOrdering InformationMA-MNT-MV-1: Meraki Wall Mount Arm for MV21 and MV71MA-MNT-MV-2: Meraki Pole Mount for MV71MA-MNT-MV-3: Meraki L-Shape Wall Mount Bracket for MV21 and MV71。
Native Instruments MASCHINE MIKRO MK3用户手册说明书
The information in this document is subject to change without notice and does not represent a commitment on the part of Native Instruments GmbH. The software described by this docu-ment is subject to a License Agreement and may not be copied to other media. No part of this publication may be copied, reproduced or otherwise transmitted or recorded, for any purpose, without prior written permission by Native Instruments GmbH, hereinafter referred to as Native Instruments.“Native Instruments”, “NI” and associated logos are (registered) trademarks of Native Instru-ments GmbH.ASIO, VST, HALion and Cubase are registered trademarks of Steinberg Media Technologies GmbH.All other product and company names are trademarks™ or registered® trademarks of their re-spective holders. Use of them does not imply any affiliation with or endorsement by them.Document authored by: David Gover and Nico Sidi.Software version: 2.8 (02/2019)Hardware version: MASCHINE MIKRO MK3Special thanks to the Beta Test Team, who were invaluable not just in tracking down bugs, but in making this a better product.NATIVE INSTRUMENTS GmbH Schlesische Str. 29-30D-10997 Berlin Germanywww.native-instruments.de NATIVE INSTRUMENTS North America, Inc. 6725 Sunset Boulevard5th FloorLos Angeles, CA 90028USANATIVE INSTRUMENTS K.K.YO Building 3FJingumae 6-7-15, Shibuya-ku, Tokyo 150-0001Japanwww.native-instruments.co.jp NATIVE INSTRUMENTS UK Limited 18 Phipp StreetLondon EC2A 4NUUKNATIVE INSTRUMENTS FRANCE SARL 113 Rue Saint-Maur75011 ParisFrance SHENZHEN NATIVE INSTRUMENTS COMPANY Limited 5F, Shenzhen Zimao Center111 Taizi Road, Nanshan District, Shenzhen, GuangdongChina© NATIVE INSTRUMENTS GmbH, 2019. All rights reserved.Table of Contents1Welcome to MASCHINE (23)1.1MASCHINE Documentation (24)1.2Document Conventions (25)1.3New Features in MASCHINE 2.8 (26)1.4New Features in MASCHINE 2.7.10 (28)1.5New Features in MASCHINE 2.7.8 (29)1.6New Features in MASCHINE 2.7.7 (29)1.7New Features in MASCHINE 2.7.4 (31)1.8New Features in MASCHINE 2.7.3 (33)2Quick Reference (35)2.1MASCHINE Project Overview (35)2.1.1Sound Content (35)2.1.2Arrangement (37)2.2MASCHINE Hardware Overview (40)2.2.1MASCHINE MIKRO Hardware Overview (40)2.2.1.1Browser Section (41)2.2.1.2Edit Section (42)2.2.1.3Performance Section (43)2.2.1.4Transport Section (45)2.2.1.5Pad Section (46)2.2.1.6Rear Panel (50)2.3MASCHINE Software Overview (51)2.3.1Header (52)2.3.2Browser (54)2.3.3Arranger (56)2.3.4Control Area (59)2.3.5Pattern Editor (60)3Basic Concepts (62)3.1Important Names and Concepts (62)3.2Adjusting the MASCHINE User Interface (65)3.2.1Adjusting the Size of the Interface (65)3.2.2Switching between Ideas View and Song View (66)3.2.3Showing/Hiding the Browser (67)3.2.4Showing/Hiding the Control Lane (67)3.3Common Operations (68)3.3.1Adjusting Volume, Swing, and Tempo (68)3.3.2Undo/Redo (71)3.3.3Focusing on a Group or a Sound (73)3.3.4Switching Between the Master, Group, and Sound Level (77)3.3.5Navigating Channel Properties, Plug-ins, and Parameter Pages in the Control Area.773.3.6Navigating the Software Using the Controller (82)3.3.7Using Two or More Hardware Controllers (82)3.3.8Loading a Recent Project from the Controller (84)3.4Native Kontrol Standard (85)3.5Stand-Alone and Plug-in Mode (86)3.5.1Differences between Stand-Alone and Plug-in Mode (86)3.5.2Switching Instances (88)3.6Preferences (88)3.6.1Preferences – General Page (89)3.6.2Preferences – Audio Page (93)3.6.3Preferences – MIDI Page (95)3.6.4Preferences – Default Page (97)3.6.5Preferences – Library Page (101)3.6.6Preferences – Plug-ins Page (109)3.6.7Preferences – Hardware Page (114)3.6.8Preferences – Colors Page (114)3.7Integrating MASCHINE into a MIDI Setup (117)3.7.1Connecting External MIDI Equipment (117)3.7.2Sync to External MIDI Clock (117)3.7.3Send MIDI Clock (118)3.7.4Using MIDI Mode (119)3.8Syncing MASCHINE using Ableton Link (120)3.8.1Connecting to a Network (121)3.8.2Joining and Leaving a Link Session (121)4Browser (123)4.1Browser Basics (123)4.1.1The MASCHINE Library (123)4.1.2Browsing the Library vs. Browsing Your Hard Disks (124)4.2Searching and Loading Files from the Library (125)4.2.1Overview of the Library Pane (125)4.2.2Selecting or Loading a Product and Selecting a Bank from the Browser (128)4.2.3Selecting a Product Category, a Product, a Bank, and a Sub-Bank (133)4.2.3.1Selecting a Product Category, a Product, a Bank, and a Sub-Bank on theController (137)4.2.4Selecting a File Type (137)4.2.5Choosing Between Factory and User Content (138)4.2.6Selecting Type and Character Tags (138)4.2.7Performing a Text Search (142)4.2.8Loading a File from the Result List (143)4.3Additional Browsing Tools (148)4.3.1Loading the Selected Files Automatically (148)4.3.2Auditioning Instrument Presets (149)4.3.3Auditioning Samples (150)4.3.4Loading Groups with Patterns (150)4.3.5Loading Groups with Routing (151)4.3.6Displaying File Information (151)4.4Using Favorites in the Browser (152)4.5Editing the Files’ Tags and Properties (155)4.5.1Attribute Editor Basics (155)4.5.2The Bank Page (157)4.5.3The Types and Characters Pages (157)4.5.4The Properties Page (160)4.6Loading and Importing Files from Your File System (161)4.6.1Overview of the FILES Pane (161)4.6.2Using Favorites (163)4.6.3Using the Location Bar (164)4.6.4Navigating to Recent Locations (165)4.6.5Using the Result List (166)4.6.6Importing Files to the MASCHINE Library (169)4.7Locating Missing Samples (171)4.8Using Quick Browse (173)5Managing Sounds, Groups, and Your Project (175)5.1Overview of the Sounds, Groups, and Master (175)5.1.1The Sound, Group, and Master Channels (176)5.1.2Similarities and Differences in Handling Sounds and Groups (177)5.1.3Selecting Multiple Sounds or Groups (178)5.2Managing Sounds (181)5.2.1Loading Sounds (183)5.2.2Pre-listening to Sounds (184)5.2.3Renaming Sound Slots (185)5.2.4Changing the Sound’s Color (186)5.2.5Saving Sounds (187)5.2.6Copying and Pasting Sounds (189)5.2.7Moving Sounds (192)5.2.8Resetting Sound Slots (193)5.3Managing Groups (194)5.3.1Creating Groups (196)5.3.2Loading Groups (197)5.3.3Renaming Groups (198)5.3.4Changing the Group’s Color (199)5.3.5Saving Groups (200)5.3.6Copying and Pasting Groups (202)5.3.7Reordering Groups (206)5.3.8Deleting Groups (207)5.4Exporting MASCHINE Objects and Audio (208)5.4.1Saving a Group with its Samples (208)5.4.2Saving a Project with its Samples (210)5.4.3Exporting Audio (212)5.5Importing Third-Party File Formats (218)5.5.1Loading REX Files into Sound Slots (218)5.5.2Importing MPC Programs to Groups (219)6Playing on the Controller (223)6.1Adjusting the Pads (223)6.1.1The Pad View in the Software (223)6.1.2Choosing a Pad Input Mode (225)6.1.3Adjusting the Base Key (226)6.2Adjusting the Key, Choke, and Link Parameters for Multiple Sounds (227)6.3Playing Tools (229)6.3.1Mute and Solo (229)6.3.2Choke All Notes (233)6.3.3Groove (233)6.3.4Level, Tempo, Tune, and Groove Shortcuts on Your Controller (235)6.3.5Tap Tempo (235)6.4Performance Features (236)6.4.1Overview of the Perform Features (236)6.4.2Selecting a Scale and Creating Chords (239)6.4.3Scale and Chord Parameters (240)6.4.4Creating Arpeggios and Repeated Notes (253)6.4.5Swing on Note Repeat / Arp Output (257)6.5Using Lock Snapshots (257)6.5.1Creating a Lock Snapshot (257)7Working with Plug-ins (259)7.1Plug-in Overview (259)7.1.1Plug-in Basics (259)7.1.2First Plug-in Slot of Sounds: Choosing the Sound’s Role (263)7.1.3Loading, Removing, and Replacing a Plug-in (264)7.1.4Adjusting the Plug-in Parameters (270)7.1.5Bypassing Plug-in Slots (270)7.1.6Using Side-Chain (272)7.1.7Moving Plug-ins (272)7.1.8Alternative: the Plug-in Strip (273)7.1.9Saving and Recalling Plug-in Presets (273)7.1.9.1Saving Plug-in Presets (274)7.1.9.2Recalling Plug-in Presets (275)7.1.9.3Removing a Default Plug-in Preset (276)7.2The Sampler Plug-in (277)7.2.1Page 1: Voice Settings / Engine (279)7.2.2Page 2: Pitch / Envelope (281)7.2.3Page 3: FX / Filter (283)7.2.4Page 4: Modulation (285)7.2.5Page 5: LFO (286)7.2.6Page 6: Velocity / Modwheel (288)7.3Using Native Instruments and External Plug-ins (289)7.3.1Opening/Closing Plug-in Windows (289)7.3.2Using the VST/AU Plug-in Parameters (292)7.3.3Setting Up Your Own Parameter Pages (293)7.3.4Using VST/AU Plug-in Presets (298)7.3.5Multiple-Output Plug-ins and Multitimbral Plug-ins (300)8Using the Audio Plug-in (302)8.1Loading a Loop into the Audio Plug-in (306)8.2Editing Audio in the Audio Plug-in (307)8.3Using Loop Mode (308)8.4Using Gate Mode (310)9Using the Drumsynths (312)9.1Drumsynths – General Handling (313)9.1.1Engines: Many Different Drums per Drumsynth (313)9.1.2Common Parameter Organization (313)9.1.3Shared Parameters (316)9.1.4Various Velocity Responses (316)9.1.5Pitch Range, Tuning, and MIDI Notes (316)9.2The Kicks (317)9.2.1Kick – Sub (319)9.2.2Kick – Tronic (321)9.2.3Kick – Dusty (324)9.2.4Kick – Grit (325)9.2.5Kick – Rasper (328)9.2.6Kick – Snappy (329)9.2.7Kick – Bold (331)9.2.8Kick – Maple (333)9.2.9Kick – Push (334)9.3The Snares (336)9.3.1Snare – Volt (338)9.3.2Snare – Bit (340)9.3.3Snare – Pow (342)9.3.4Snare – Sharp (343)9.3.5Snare – Airy (345)9.3.6Snare – Vintage (347)9.3.7Snare – Chrome (349)9.3.8Snare – Iron (351)9.3.9Snare – Clap (353)9.3.10Snare – Breaker (355)9.4The Hi-hats (357)9.4.1Hi-hat – Silver (358)9.4.2Hi-hat – Circuit (360)9.4.3Hi-hat – Memory (362)9.4.4Hi-hat – Hybrid (364)9.4.5Creating a Pattern with Closed and Open Hi-hats (366)9.5The Toms (367)9.5.1Tom – Tronic (369)9.5.2Tom – Fractal (371)9.5.3Tom – Floor (375)9.5.4Tom – High (377)9.6The Percussions (378)9.6.1Percussion – Fractal (380)9.6.2Percussion – Kettle (383)9.6.3Percussion – Shaker (385)9.7The Cymbals (389)9.7.1Cymbal – Crash (391)9.7.2Cymbal – Ride (393)10Using the Bass Synth (396)10.1Bass Synth – General Handling (397)10.1.1Parameter Organization (397)10.1.2Bass Synth Parameters (399)11Working with Patterns (401)11.1Pattern Basics (401)11.1.1Pattern Editor Overview (402)11.1.2Navigating the Event Area (404)11.1.3Following the Playback Position in the Pattern (406)11.1.4Jumping to Another Playback Position in the Pattern (407)11.1.5Group View and Keyboard View (408)11.1.6Adjusting the Arrange Grid and the Pattern Length (410)11.1.7Adjusting the Step Grid and the Nudge Grid (413)11.2Recording Patterns in Real Time (416)11.2.1Recording Your Patterns Live (417)11.2.2Using the Metronome (419)11.2.3Recording with Count-in (420)11.3Recording Patterns with the Step Sequencer (422)11.3.1Step Mode Basics (422)11.3.2Editing Events in Step Mode (424)11.4Editing Events (425)11.4.1Editing Events with the Mouse: an Overview (425)11.4.2Creating Events/Notes (428)11.4.3Selecting Events/Notes (429)11.4.4Editing Selected Events/Notes (431)11.4.5Deleting Events/Notes (434)11.4.6Cut, Copy, and Paste Events/Notes (436)11.4.7Quantizing Events/Notes (439)11.4.8Quantization While Playing (441)11.4.9Doubling a Pattern (442)11.4.10Adding Variation to Patterns (442)11.5Recording and Editing Modulation (443)11.5.1Which Parameters Are Modulatable? (444)11.5.2Recording Modulation (446)11.5.3Creating and Editing Modulation in the Control Lane (447)11.6Creating MIDI Tracks from Scratch in MASCHINE (452)11.7Managing Patterns (454)11.7.1The Pattern Manager and Pattern Mode (455)11.7.2Selecting Patterns and Pattern Banks (456)11.7.3Creating Patterns (459)11.7.4Deleting Patterns (460)11.7.5Creating and Deleting Pattern Banks (461)11.7.6Naming Patterns (463)11.7.7Changing the Pattern’s Color (465)11.7.8Duplicating, Copying, and Pasting Patterns (466)11.7.9Moving Patterns (469)11.8Importing/Exporting Audio and MIDI to/from Patterns (470)11.8.1Exporting Audio from Patterns (470)11.8.2Exporting MIDI from Patterns (472)11.8.3Importing MIDI to Patterns (474)12Audio Routing, Remote Control, and Macro Controls (483)12.1Audio Routing in MASCHINE (484)12.1.1Sending External Audio to Sounds (485)12.1.2Configuring the Main Output of Sounds and Groups (489)12.1.3Setting Up Auxiliary Outputs for Sounds and Groups (494)12.1.4Configuring the Master and Cue Outputs of MASCHINE (497)12.1.5Mono Audio Inputs (502)12.1.5.1Configuring External Inputs for Sounds in Mix View (503)12.2Using MIDI Control and Host Automation (506)12.2.1Triggering Sounds via MIDI Notes (507)12.2.2Triggering Scenes via MIDI (513)12.2.3Controlling Parameters via MIDI and Host Automation (514)12.2.4Selecting VST/AU Plug-in Presets via MIDI Program Change (522)12.2.5Sending MIDI from Sounds (523)12.3Creating Custom Sets of Parameters with the Macro Controls (527)12.3.1Macro Control Overview (527)12.3.2Assigning Macro Controls Using the Software (528)13Controlling Your Mix (535)13.1Mix View Basics (535)13.1.1Switching between Arrange View and Mix View (535)13.1.2Mix View Elements (536)13.2The Mixer (537)13.2.1Displaying Groups vs. Displaying Sounds (539)13.2.2Adjusting the Mixer Layout (541)13.2.3Selecting Channel Strips (542)13.2.4Managing Your Channels in the Mixer (543)13.2.5Adjusting Settings in the Channel Strips (545)13.2.6Using the Cue Bus (549)13.3The Plug-in Chain (551)13.4The Plug-in Strip (552)13.4.1The Plug-in Header (554)13.4.2Panels for Drumsynths and Internal Effects (556)13.4.3Panel for the Sampler (557)13.4.4Custom Panels for Native Instruments Plug-ins (560)13.4.5Undocking a Plug-in Panel (Native Instruments and External Plug-ins Only) (564)14Using Effects (567)14.1Applying Effects to a Sound, a Group or the Master (567)14.1.1Adding an Effect (567)14.1.2Other Operations on Effects (574)14.1.3Using the Side-Chain Input (575)14.2Applying Effects to External Audio (578)14.2.1Step 1: Configure MASCHINE Audio Inputs (578)14.2.2Step 2: Set up a Sound to Receive the External Input (579)14.2.3Step 3: Load an Effect to Process an Input (579)14.3Creating a Send Effect (580)14.3.1Step 1: Set Up a Sound or Group as Send Effect (581)14.3.2Step 2: Route Audio to the Send Effect (583)14.3.3 A Few Notes on Send Effects (583)14.4Creating Multi-Effects (584)15Effect Reference (587)15.1Dynamics (588)15.1.1Compressor (588)15.1.2Gate (591)15.1.3Transient Master (594)15.1.4Limiter (596)15.1.5Maximizer (600)15.2Filtering Effects (603)15.2.1EQ (603)15.2.2Filter (605)15.2.3Cabinet (609)15.3Modulation Effects (611)15.3.1Chorus (611)15.3.2Flanger (612)15.3.3FM (613)15.3.4Freq Shifter (615)15.3.5Phaser (616)15.4Spatial and Reverb Effects (617)15.4.1Ice (617)15.4.2Metaverb (619)15.4.3Reflex (620)15.4.4Reverb (Legacy) (621)15.4.5Reverb (623)15.4.5.1Reverb Room (623)15.4.5.2Reverb Hall (626)15.4.5.3Plate Reverb (629)15.5Delays (630)15.5.1Beat Delay (630)15.5.2Grain Delay (632)15.5.3Grain Stretch (634)15.5.4Resochord (636)15.6Distortion Effects (638)15.6.1Distortion (638)15.6.2Lofi (640)15.6.3Saturator (641)15.7Perform FX (645)15.7.1Filter (646)15.7.2Flanger (648)15.7.3Burst Echo (650)15.7.4Reso Echo (653)15.7.5Ring (656)15.7.6Stutter (658)15.7.7Tremolo (661)15.7.8Scratcher (664)16Working with the Arranger (667)16.1Arranger Basics (667)16.1.1Navigating Song View (670)16.1.2Following the Playback Position in Your Project (672)16.1.3Performing with Scenes and Sections using the Pads (673)16.2Using Ideas View (677)16.2.1Scene Overview (677)16.2.2Creating Scenes (679)16.2.3Assigning and Removing Patterns (679)16.2.4Selecting Scenes (682)16.2.5Deleting Scenes (684)16.2.6Creating and Deleting Scene Banks (685)16.2.7Clearing Scenes (685)16.2.8Duplicating Scenes (685)16.2.9Reordering Scenes (687)16.2.10Making Scenes Unique (688)16.2.11Appending Scenes to Arrangement (689)16.2.12Naming Scenes (689)16.2.13Changing the Color of a Scene (690)16.3Using Song View (692)16.3.1Section Management Overview (692)16.3.2Creating Sections (694)16.3.3Assigning a Scene to a Section (695)16.3.4Selecting Sections and Section Banks (696)16.3.5Reorganizing Sections (700)16.3.6Adjusting the Length of a Section (702)16.3.6.1Adjusting the Length of a Section Using the Software (703)16.3.6.2Adjusting the Length of a Section Using the Controller (705)16.3.7Clearing a Pattern in Song View (705)16.3.8Duplicating Sections (705)16.3.8.1Making Sections Unique (707)16.3.9Removing Sections (707)16.3.10Renaming Scenes (708)16.3.11Clearing Sections (710)16.3.12Creating and Deleting Section Banks (710)16.3.13Working with Patterns in Song view (710)16.3.13.1Creating a Pattern in Song View (711)16.3.13.2Selecting a Pattern in Song View (711)16.3.13.3Clearing a Pattern in Song View (711)16.3.13.4Renaming a Pattern in Song View (711)16.3.13.5Coloring a Pattern in Song View (712)16.3.13.6Removing a Pattern in Song View (712)16.3.13.7Duplicating a Pattern in Song View (712)16.3.14Enabling Auto Length (713)16.3.15Looping (714)16.3.15.1Setting the Loop Range in the Software (714)16.3.15.2Activating or Deactivating a Loop Using the Controller (715)16.4Playing with Sections (715)16.4.1Jumping to another Playback Position in Your Project (716)16.5Triggering Sections or Scenes via MIDI (717)16.6The Arrange Grid (719)16.7Quick Grid (720)17Sampling and Sample Mapping (722)17.1Opening the Sample Editor (722)17.2Recording Audio (724)17.2.1Opening the Record Page (724)17.2.2Selecting the Source and the Recording Mode (725)17.2.3Arming, Starting, and Stopping the Recording (729)17.2.5Checking Your Recordings (731)17.2.6Location and Name of Your Recorded Samples (734)17.3Editing a Sample (735)17.3.1Using the Edit Page (735)17.3.2Audio Editing Functions (739)17.4Slicing a Sample (743)17.4.1Opening the Slice Page (743)17.4.2Adjusting the Slicing Settings (744)17.4.3Manually Adjusting Your Slices (746)17.4.4Applying the Slicing (750)17.5Mapping Samples to Zones (754)17.5.1Opening the Zone Page (754)17.5.2Zone Page Overview (755)17.5.3Selecting and Managing Zones in the Zone List (756)17.5.4Selecting and Editing Zones in the Map View (761)17.5.5Editing Zones in the Sample View (765)17.5.6Adjusting the Zone Settings (767)17.5.7Adding Samples to the Sample Map (770)18Appendix: Tips for Playing Live (772)18.1Preparations (772)18.1.1Focus on the Hardware (772)18.1.2Customize the Pads of the Hardware (772)18.1.3Check Your CPU Power Before Playing (772)18.1.4Name and Color Your Groups, Patterns, Sounds and Scenes (773)18.1.5Consider Using a Limiter on Your Master (773)18.1.6Hook Up Your Other Gear and Sync It with MIDI Clock (773)18.1.7Improvise (773)18.2Basic Techniques (773)18.2.1Use Mute and Solo (773)18.2.2Create Variations of Your Drum Patterns in the Step Sequencer (774)18.2.3Use Note Repeat (774)18.2.4Set Up Your Own Multi-effect Groups and Automate Them (774)18.3Special Tricks (774)18.3.1Changing Pattern Length for Variation (774)18.3.2Using Loops to Cycle Through Samples (775)18.3.3Load Long Audio Files and Play with the Start Point (775)19Troubleshooting (776)19.1Knowledge Base (776)19.2Technical Support (776)19.3Registration Support (777)19.4User Forum (777)20Glossary (778)Index (786)1Welcome to MASCHINEThank you for buying MASCHINE!MASCHINE is a groove production studio that implements the familiar working style of classi-cal groove boxes along with the advantages of a computer based system. MASCHINE is ideal for making music live, as well as in the studio. It’s the hands-on aspect of a dedicated instru-ment, the MASCHINE hardware controller, united with the advanced editing features of the MASCHINE software.Creating beats is often not very intuitive with a computer, but using the MASCHINE hardware controller to do it makes it easy and fun. You can tap in freely with the pads or use Note Re-peat to jam along. Alternatively, build your beats using the step sequencer just as in classic drum machines.Patterns can be intuitively combined and rearranged on the fly to form larger ideas. You can try out several different versions of a song without ever having to stop the music.Since you can integrate it into any sequencer that supports VST, AU, or AAX plug-ins, you can reap the benefits in almost any software setup, or use it as a stand-alone application. You can sample your own material, slice loops and rearrange them easily.However, MASCHINE is a lot more than an ordinary groovebox or sampler: it comes with an inspiring 7-gigabyte library, and a sophisticated, yet easy to use tag-based Browser to give you instant access to the sounds you are looking for.What’s more, MASCHINE provides lots of options for manipulating your sounds via internal ef-fects and other sound-shaping possibilities. You can also control external MIDI hardware and 3rd-party software with the MASCHINE hardware controller, while customizing the functions of the pads, knobs and buttons according to your needs utilizing the included Controller Editor application. We hope you enjoy this fantastic instrument as much as we do. Now let’s get go-ing!—The MASCHINE team at Native Instruments.MASCHINE Documentation1.1MASCHINE DocumentationNative Instruments provide many information sources regarding MASCHINE. The main docu-ments should be read in the following sequence:1.MASCHINE MIKRO Quick Start Guide: This animated online guide provides a practical ap-proach to help you learn the basic of MASCHINE MIKRO. The guide is available from theNative Instruments website: https:///maschine-mikro-quick-start/2.MASCHINE Manual (this document): The MASCHINE Manual provides you with a compre-hensive description of all MASCHINE software and hardware features.Additional documentation sources provide you with details on more specific topics:►Online Support Videos: You can find a number of support videos on The Official Native In-struments Support Channel under the following URL: https:///NIsupport-EN. We recommend that you follow along with these instructions while the respective ap-plication is running on your computer.Other Online Resources:If you are experiencing problems related to your Native Instruments product that the supplied documentation does not cover, there are several ways of getting help:▪Knowledge Base▪User Forum▪Technical Support▪Registration SupportYou will find more information on these subjects in the chapter Troubleshooting.Document Conventions1.2Document ConventionsThis section introduces you to the signage and text highlighting used in this manual. This man-ual uses particular formatting to point out special facts and to warn you of potential issues.The icons introducing these notes let you see what kind of information is to be expected:This document uses particular formatting to point out special facts and to warn you of poten-tial issues. The icons introducing the following notes let you see what kind of information canbe expected:Furthermore, the following formatting is used:▪Text appearing in (drop-down) menus (such as Open…, Save as… etc.) in the software andpaths to locations on your hard disk or other storage devices is printed in italics.▪Text appearing elsewhere (labels of buttons, controls, text next to checkboxes etc.) in thesoftware is printed in blue. Whenever you see this formatting applied, you will find thesame text appearing somewhere on the screen.▪Text appearing on the displays of the controller is printed in light grey. Whenever you seethis formatting applied, you will find the same text on a controller display.▪Text appearing on labels of the hardware controller is printed in orange. Whenever you seethis formatting applied, you will find the same text on the controller.▪Important names and concepts are printed in bold.▪References to keys on your computer’s keyboard you’ll find put in square brackets (e.g.,“Press [Shift] + [Enter]”).►Single instructions are introduced by this play button type arrow.→Results of actions are introduced by this smaller arrow.Naming ConventionThroughout the documentation we will refer to MASCHINE controller (or just controller) as the hardware controller and MASCHINE software as the software installed on your computer.The term “effect” will sometimes be abbreviated as “FX” when referring to elements in the MA-SCHINE software and hardware. These terms have the same meaning.Button Combinations and Shortcuts on Your ControllerMost instructions will use the “+” sign to indicate buttons (or buttons and pads) that must be pressed simultaneously, starting with the button indicated first. E.g., an instruction such as:“Press SHIFT + PLAY”means:1.Press and hold SHIFT.2.While holding SHIFT, press PLAY and release it.3.Release SHIFT.1.3New Features in MASCHINE2.8The following new features have been added to MASCHINE: Integration▪Browse on , create your own collections of loops and one-shots and send them directly to the MASCHINE browser.Improvements to the Browser▪Samples are now cataloged in separate Loops and One-shots tabs in the Browser.▪Previews of loops selected in the Browser will be played in sync with the current project.When a loop is selected with Prehear turned on, it will begin playing immediately in-sync with the project if transport is running. If a loop preview starts part-way through the loop, the loop will play once more for its full length to ensure you get to hear the entire loop once in context with your project.▪Filters and product selections will be remembered when switching between content types and Factory/User Libraries in the Browser.▪Browser content synchronization between multiple running instances. When running multi-ple instances of MASCHINE, either as Standalone and/or as a plug-in, updates to the Li-brary will be synced across the instances. For example, if you delete a sample from your User Library in one instance, the sample will no longer be present in the other instances.Similarly, if you save a preset in one instance, that preset will then be available in the oth-er instances, too.▪Edits made to samples in the Factory Libraries will be saved to the Standard User Directo-ry.For more information on these new features, refer to the following chapter ↑4, Browser. Improvements to the MASCHINE MIKRO MK3 Controller▪You can now set sample Start and End points using the controller. For more information refer to ↑17.3.1, Using the Edit Page.Improved Support for A-Series Keyboards▪When Browsing with A-Series keyboards, you can now jump quickly to the results list by holding SHIFT and pushing right on the 4D Encoder.▪When Browsing with A-Series keyboards, you can fast scroll through the Browser results list by holding SHIFT and twisting the 4D Encoder.▪Mute and Solo Sounds and Groups from A-Series keyboards. Sounds are muted in TRACK mode while Groups are muted in IDEAS.。