A20_Cubietruck_HW_V10_130606
Beckhoff TwinCAT PLC - Free Tag Names (Ethernet) P

Beckhoff TwinCAT PLC - Free Tag Names (Ethernet)Supported Series:CX8000,CX90x0,CX1010,CP62xx,CX5010,CP62xx,CX1020,CX2020,CPxxxx,C6920,CX2 030,CPxxxx,CP6930,CX2040,C65xx,C69xx.Website: /HMI Settings:Support Device Type:Note1: Support WString in EasyBuilderPro V6.08.02 and later versionsNote2: EasyBuilder Pro V6.03.02 or later supports 64 bits data type, but please note thatthe address limit range is 48 bits in maximum.Note3: When importing, there are two modes of one/two char per word to choose from. When importing one char per word, choose Unicode data format for ASCII objects, and choose UTF-8 (Default) data format for two char per word.TwinCAT 2 PLC Settings:To connect Beckhoff devices, HMI’s information must be registered to PLC first. The following steps describe how to register HMI’s information into Beckhoff devices.Step1.Open TwinCat System Manager. Select [Actions] menu, and then select [Choose Target System]. Select the device you are connecting.Open TwinCat System Control. Go to [AMS Router] tab, click [Add] to add HMI information. Please add the HMI information as below.Name: A user-defined nameAMS Net ID: HMI’s IP address + “.1.1”Address: HMI’s IP addressStep3.If added successfully, you will see a new item in Remote Computers. Click [Apply] to apply the configuration.Open TwinCat System Manager again. Select [Actions] menu, and then select [Activate Configuration] to apply the new settings.TwinCAT 3 PLC Settings:To connect Beckhoff devices, HMI’s information must be registered to PLC first. The following steps describe how to register HMI’s information into Beckhoff devices.Step1.Double click [SYSTEM], and then select [Choose Target System]. Select the device you are connecting.Expend the SYSTEM layer, select [Routes]. Click [Add] to add HMI information as below.Name: A user-defined nameAMS Net ID: must be HMI’s IP address + “.1.1”Transport Type: TCP_IPAddress: HMI’s IP addressStep3.If added successfully, you will see a new item in Remote Computers. Click [Apply] to apply the configuration.Step4.Select [TwinCAT] menu, and then select [Activate Configuration] to apply the new settings.How to Import Tags:EasyBuilder supports two ways to import tags.Get Tag Info[Get Tag Info] could retrieve the tags directly from Beckhoff devices. Select the network adapter to access the Beckhoff devices.Import TagsThere are three formats for importing tags: Linear, Hierarchical, EBproTagThe files generated after compilation in TwinCAT2 and TwinCAT3 programming software can be directly imported to EasyBuilder. Supported file types:TwinCAT2: .tpy and .EXP.TwinCAT3: .TcDUT, .TcGVL, .TcPOU and .TPY.TPY files can be imported as linear or hierarchicalTwinCAT2 does not support the conversion of global_tag from Linear to Hierarchical.Import and select hierarchical way, support filter tag function.Select PLC Software Version. Select the file type and then click [Import]. The invalid address types will be displayed in Error Status field.The “Import successfully” message will be shown upon completion.Note⏹Tag name can not include “.”.⏹GVL files with Tc2GvlVarNames attribute are not supported.⏹Except for .EXP file of TwinCAT2, after the TwinCAT project is compiled, other filetypes are generated and placed in the same folder as the project. To generate .EXP files, please select [Project] » [Export], and then select the tag location to be exported.⏹Only use linear type import to support array of array addresses.Wiring Diagram:Ethernet cable:。
X20系统用户手册说明书

HNC21M说明书

第一章简介广东省数控加工仿真训练与智能化考试系统,是由广东省职业技能鉴定指导中心、广州超软科技有限公司、华南理工大学工业培训中心联合制作。
该系统包括原CVM系列数控车床虚拟制造系统所有仿真操作功能,还包括理论知识考试及其成绩处理、报名表导入和加密试题库导入等功能(加密试题均由省职业技能中心统一提供),是一个无纸化、智能化的考试系统。
该系统可以通过局域网或互联网进行远程考试,首先老师在教师机上启动教师程序,导入学生的报名表和考核试题,再由学生在学生机上启学生程序,输入自己的准考证号码进行理论知识和仿真操作考试。
可以实时记录学生的考试错误信息,考核完毕后,教师可在教师程序上根据导入的报名表顺序对学生成绩进行统计,生成理论知识和仿真操作考核的成绩表,可使考核更加公正合理,更加高效安全。
第二章安装与启动指南一.安装1-1系统需求:操作系统:WINDOWS 98 II或以上处理器:Pentium500或以上内存:64M或以上硬盘:50M以上空间显卡:64M独立显卡1-2安装方法:将广州超软数控铣床虚拟制造系统软件安装光盘放在光驱中,会自动了出现(如图2-1-1播放功能,请运行光盘根目录下CVM-HNC21M.exe文件)图2-1-1按【下一步】进入(如图2-1-2)的界面,选择目的地位置。
图2-1-2按【下一步】进入(如图2-1-3)的界面,准备安装。
图2- 1-3点击此按钮可以选择安装到其它文件夹。
正在安装(如图2-1-4)的界面图2-1-4教师机(插有加密琐的主机)选择安装加密锁驱动程序,学生机则不用安装(如图2-1-5)图2-1-5安装完成后,选择按【完成】键结束安装。
1-3注意事项:请以管理员权限进行安装,如果您的硬盘有防读写功能,请先解除此功能,否则无法安装。
二. 启动2-1 启动要求在启动软件锁服务程序前确保电脑主机是否插上软件锁,如果没有请在电脑主机(即:教师机)插好软件锁,再启动电脑主机。
VEX产品介绍

产品介绍套装系列 (4)VEX机器人基本套装 (4)控制器套装M ICROCONTROLLER K IT (4)升级W I F I无线遥控套装N ET U PGRADE K IT (5)马达套装M OTOR K IT (5)双线加强马达套装H IGH S TRENGTH M OTOR K IT (6)伺服器套装 S ERVO K IT (6)遥控接收套装T RANSMITTER &R ECEIVER K IT (7)晶振套装A C RYSTAL U PGRADE K IT A (7)晶振套装B C RYSTAL U PGRADE K IT B (8)碰撞开关套装B UMPER S WITCH K IT (8)行程开关套装L IMIT S WITCH K IT (9)巡线传感器套装L INE T RACKER K IT (9)光敏传感器套装L IGHT S ENSOR K IT (10)超声波传感器套装U LTRASONIC R ANGE F INDER K IT (10)编码器套装O PTICAL S HAFT ENCODER K IT (11)双向编码器套装B IDIRECTIONAL O PTICAL S HAFT ENCODER K IT (11)探照灯套装F LASHLIGHT K IT (12)角度传感器套装P OTENTIOMETER K IT (12)信号分频器套装S IGNAL S PLITTER K IT (13)单向气泵套装VEX P NEUMATIC P ARTS K IT 1 (13)双向气泵套装VEX P NEUMATIC P ARTS K IT 2 (14)9.6V两电一充电池套装P OWER P ACK K IT (14)美国原装电池套装VEX P OWER P ACK (15)9.6V一电一充电池套装9.6V P OWER K IT (15)7.2V电池套装7.2V P OWER K IT (16)电源扩展器套装P OWER E XPANDER K IT (16)程序套装P ROGRAMMING P ARTS K IT (17)结构件套装H ARDWARE K IT (17)高级五金件套装A DVANCED M ETAL P ACK (18)铝金属件套装A LUMINUM M ETAL K IT (18)加长铝金属件套装L ONG A LUMINUM M ETAL K IT (19)齿条架套装R ACK B RACKET P ACK (19)蜗轮架套装W ORM B RACKET P ACK (20)差速架套装B EVEL B RACKET P ACK (20)滑动架套装L INEAR S LIDE P ACK (21)齿轮套装G EARS K IT (21)加强齿轮套装H EAVY G EARS K IT (22)高级齿轮套装A DVANCED G EAR P ACK (22)马达齿轮套装M OTOR G EARS K IT (23)金属小齿轮套装M ETAL G EARS K IT (23)车轮套装W HEEL K IT (24)万向轮套装O MNI-DIRECTIONAL W HEEL K IT (24)大万向轮套装L ARGE O MNI-DIRECTIONAL W HEEL K IT (25)腿轮套装W HEEL L EGS K IT (25)自组螺丝套装B EARING R IVETS P ACK (26)链轮套装S PROCKET AND C HAIN K IT (26)加强链轮套装H IGH S TRENGTH S PROCKET AND C HAIN K IT (27)履带套装T ANK T READ K IT (27)加强履带套装T ANK T READ U PGRADE K IT (28)电池扎带套装B ATTERY H OLD-DOWN K IT (28)扎带套装H OLD-DOWN K IT (29)防护眼镜S AFEGUARD G LASSES (29)工具包T OOLS K IT (30)竞赛系列 (31)高地战斗比赛场地 (31)高地战斗竞赛机器人范例......I型. (32)高地战斗竞赛机器人范例......II型.. (32)高地战斗竞赛机器人范例......III型.. (33)大获全胜比赛场地----中间隔墙 (33)大获全胜比赛场地----围板 (34)大获全胜比赛场地----场地纸 (34)大获全胜比赛场地----比赛用球 (35)大获全胜全套比赛场地 (35)大获全胜美国原装进口全套场地 (36)大获全胜场地控制器 (36)大获全胜竞赛机器人范例----Ⅰ型 (37)大获全胜竞赛机器人范例----Ⅱ型 (38)大获全胜竞赛机器人范例----Ⅲ型 (38)大获全胜竞赛机器人范例----Ⅳ型 (39)VEX LCD显示模块VEX LCD D ISPLAY (40)橡皮筋套装R UBBER B AND (40)网布A NTI-SLIP M AT (41)英文版程序套装E ASY C (41)套装系列VEX 机器人基本套装产品编号:产品 说明 含主控制器套装1套、遥控接收套装1套、马达套装3套、伺服器套装1套、碰撞开关套装1套、行程开关套装1套、车轮套装1套、齿轮套1套、五金件套装1套、工具套装1套、扎带1包 特性1. 高端质量、丰富齐全的零部件,为无限创意提供可能。
cubietruck学习之源码编译及显示器输出配置

cubietruck学习之源码编译及显示器输出配置作者: 海子时间: 2014.12.3Email: jyhhappyjyh@概述本文主要讲解cubietruck源码编译和如何在 android中支持HDMI和VGA自动侦测输出。
背景笔者接触cubieboard时间不长,却接二连三的遇到问题,一路走来甚是坎坷。
网络上有很多早已接触CT的前辈,有些问题他们早已碰到并经验总结下来,我们不加以利用岂不是对不起他们!现在将其中对新手甚是有用的部分结合自己的学习过程,加以组织列举在这里,从而造福更多的后来人。
环境搭建和编译过程首先,下载Cubietruck源码,有需要的可以跟“风火轮团队”去要,一般在购买cubietruck 的时候店家会给的。
有了源码,下面我们需要一个64bit的linux环境来编译源码,搭建环境的具体步骤可以参考:1)安装JDKwget /software/tools/android/jdk1.6.0_45.tar.gz2)修改环境变量sudo vim ~/.bashrcJAVA_HOME=/work/tools/jdk1.6.0_45export JRE_HOME=/work/tools/jdk1.6.0_45/jreexport PATH=$JAVA_HOME/bin:$JRE_HOME/bin: $JAVA_HOME/lib:$JRE_HOME/lib:$PATH $source ~/.bashrc3)安装必要的工具sudo apt-get install git gnupg flex bison gperf build-essential \zip curl libc6-dev libncurses5-dev:i386 x11proto-core-dev \libx11-dev:i386 libreadline6-dev:i386 mingw32 tofrodos \python-markdown libxml2-utils xsltproc zlib1g-dev:i386 libgl1-mesa-glx:i386 libgl1-mesa-dev4)源码修改在编译之前需要修改一下源码中内核模块部分的ump中的kbuild,否则在编译内核模块的时候,会爆出错误。
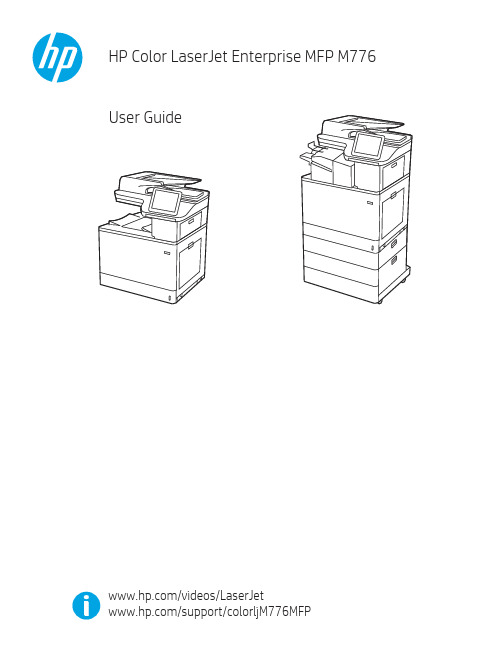
HP Color LaserJet Enterprise MFP M776用户指南说明书
Legal informationCopyright and License© Copyright 2019 HP Development Company, L.P.Reproduction, adaptation, or translation without prior written permission is prohibited, except as allowedunder the copyright laws.The information contained herein is subject to change without notice.The only warranties for HP products and services are set forth in the express warranty statementsaccompanying such products and services. Nothing herein should be construed as constituting anadditional warranty. HP shall not be liable for technical or editorial errors or omissions contained herein.Edition 1, 10/2019Trademark CreditsAdobe®, Adobe Photoshop®, Acrobat®, and PostScript® are trademarks of Adobe Systems Incorporated.Apple and the Apple logo are trademarks of Apple Inc., registered in the U.S. and other countries.macOS is a trademark of Apple Inc., registered in the U.S. and other countries.AirPrint is a trademark of Apple Inc., registered in the U.S. and other countries.Google™ is a trademark of Google Inc.Microsoft®, Windows®, Windows® XP, and Windows Vista® are U.S. registered trademarks of MicrosoftCorporation.UNIX® is a registered trademark of The Open Group.iiiT able of contents1 Printer overview (1)Warning icons (1)Potential shock hazard (2)Printer views (2)Printer front view (2)Printer back view (4)Interface ports (4)Control-panel view (5)How to use the touchscreen control panel (7)Printer specifications (8)T echnical specifications (8)Supported operating systems (11)Mobile printing solutions (12)Printer dimensions (13)Power consumption, electrical specifications, and acoustic emissions (15)Operating-environment range (15)Printer hardware setup and software installation (16)2 Paper trays (17)Introduction (17)Load paper to Tray 1 (multipurpose tray) (17)Load Tray 1 (multipurpose tray) (18)Tray 1 paper orientation (19)Use alternative letterhead mode (24)Enable Alternative Letterhead Mode by using the printer control-panel menus (24)Load paper to Tray 2 (24)Load Tray 2 (24)Tray 2 paper orientation (26)Use alternative letterhead mode (29)Enable Alternative Letterhead Mode by using the printer control-panel menus (29)Load paper to the 550-sheet paper tray (30)Load paper to the 550-sheet paper tray (30)550-sheet paper tray paper orientation (32)Use alternative letterhead mode (35)Enable Alternative Letterhead Mode by using the printer control-panel menus (35)ivLoad paper to the 2 x 550-sheet paper trays (36)Load paper to the 2 x 550-sheet paper trays (36)2 x 550-sheet paper tray paper orientation (38)Use alternative letterhead mode (41)Enable Alternative Letterhead Mode by using the printer control-panel menus (41)Load paper to the 2,700-sheet high-capacity input paper trays (41)Load paper to the 2,700-sheet high-capacity input paper trays (41)2,700-sheet HCI paper tray paper orientation (43)Use alternative letterhead mode (45)Enable Alternative Letterhead Mode by using the printer control-panel menus (45)Load and print envelopes (46)Print envelopes (46)Envelope orientation (46)Load and print labels (47)Manually feed labels (47)Label orientation (48)3 Supplies, accessories, and parts (49)Order supplies, accessories, and parts (49)Ordering (49)Supplies and accessories (50)Maintenance/long-life consumables (51)Customer self-repair parts (51)Dynamic security (52)Configure the HP toner-cartridge-protection supply settings (53)Introduction (53)Enable or disable the Cartridge Policy feature (53)Use the printer control panel to enable the Cartridge Policy feature (54)Use the printer control panel to disable the Cartridge Policy feature (54)Use the HP Embedded Web Server (EWS) to enable the Cartridge Policy feature (54)Use the HP Embedded Web Server (EWS) to disable the Cartridge Policy feature (55)Troubleshoot Cartridge Policy control panel error messages (55)Enable or disable the Cartridge Protection feature (55)Use the printer control panel to enable the Cartridge Protection feature (56)Use the printer control panel to disable the Cartridge Protection feature (56)Use the HP Embedded Web Server (EWS) to enable the Cartridge Protection feature (56)Use the HP Embedded Web Server (EWS) to disable the Cartridge Protection feature (57)Troubleshoot Cartridge Protection control panel error messages (57)Replace the toner cartridges (58)T oner-cartridge information (58)Remove and replace the cartridges (59)Replace the imaging drums (62)Imaging drum information (62)Remove and replace the imaging drums (63)Replace the toner-collection unit (66)T oner-collection unit information (66)vRemove and replace the toner-collection unit (67)Replace the staple cartridge (M776zs model only) (70)Staple cartridge information (70)Remove and replace the staple cartridge (71)4 Print (73)Print tasks (Windows) (73)How to print (Windows) (73)Automatically print on both sides (Windows) (74)Manually print on both sides (Windows) (74)Print multiple pages per sheet (Windows) (75)Select the paper type (Windows) (75)Additional print tasks (76)Print tasks (macOS) (77)How to print (macOS) (77)Automatically print on both sides (macOS) (77)Manually print on both sides (macOS) (77)Print multiple pages per sheet (macOS) (78)Select the paper type (macOS) (78)Additional print tasks (79)Store print jobs on the printer to print later or print privately (79)Introduction (79)Create a stored job (Windows) (79)Create a stored job (macOS) (80)Print a stored job (81)Delete a stored job (81)Delete a job that is stored on the printer (81)Change the job storage limit (82)Information sent to printer for Job Accounting purposes (82)Mobile printing (82)Introduction (82)Wi-Fi, Wi-Fi Direct Print, NFC, and BLE printing (82)Enable wireless printing (83)Change the Wi-Fi Direct name (83)HP ePrint via email (83)AirPrint (84)Android embedded printing (85)Print from a USB flash drive (85)Enable the USB port for printing (85)Method one: Enable the USB port from the printer control panel (85)Method two: Enable the USB port from the HP Embedded Web Server (network-connectedprinters only) (85)Print USB documents (86)Print using high-speed USB 2.0 port (wired) (86)Method one: Enable the high-speed USB 2.0 port from the printer control panel menus (86)Method two: Enable the high-speed USB 2.0 port from the HP Embedded Web Server (network-connected printers only) (87)vi5 Copy (88)Make a copy (88)Copy on both sides (duplex) (90)Additional copy tasks (92)6 Scan (93)Set up Scan to Email (93)Introduction (93)Before you begin (93)Step one: Access the HP Embedded Web Server (EWS) (94)Step two: Configure the Network Identification settings (95)Step three: Configure the Send to Email feature (96)Method one: Basic configuration using the Email Setup Wizard (96)Method two: Advanced configuration using the Email Setup (100)Step four: Configure the Quick Sets (optional) (104)Step five: Set up Send to Email to use Office 365 Outlook (optional) (105)Introduction (105)Configure the outgoing email server (SMTP) to send an email from an Office 365 Outlookaccount (105)Set up Scan to Network Folder (108)Introduction (108)Before you begin (108)Step one: Access the HP Embedded Web Server (EWS) (108)Step two: Set up Scan to Network Folder (109)Method one: Use the Scan to Network Folder Wizard (109)Method two: Use Scan to Network Folder Setup (110)Step one: Begin the configuration (110)Step two: Configure the Scan to Network Folder settings (111)Step three: Complete the configuration (118)Set up Scan to SharePoint (118)Introduction (118)Before you begin (118)Step one: Access the HP Embedded Web Server (EWS) (118)Step two: Enable Scan to SharePoint and create a Scan to SharePoint Quick Set (119)Scan a file directly to a SharePoint site (121)Quick Set scan settings and options for Scan to SharePoint (122)Set up Scan to USB Drive (123)Introduction (124)Step one: Access the HP Embedded Web Server (EWS) (124)Step two: Enable Scan to USB Drive (124)Step three: Configure the Quick Sets (optional) (125)Default scan settings for Scan to USB Drive setup (126)Default file settings for Save to USB setup (126)Scan to email (127)Introduction (127)Scan to email (127)Scan to job storage (129)viiIntroduction (129)Scan to job storage on the printer (130)Print from job storage on the printer (132)Scan to network folder (132)Introduction (132)Scan to network folder (132)Scan to SharePoint (134)Introduction (134)Scan to SharePoint (134)Scan to USB drive (136)Introduction (136)Scan to USB drive (136)Use HP JetAdvantage business solutions (138)Additional scan tasks (138)7 Fax (140)Set up fax (140)Introduction (140)Set up fax by using the printer control panel (140)Change fax configurations (141)Fax dialing settings (141)General fax send settings (142)Fax receive settings (143)Send a fax (144)Additional fax tasks (146)8 Manage the printer (147)Advanced configuration with the HP Embedded Web Server (EWS) (147)Introduction (147)How to access the HP Embedded Web Server (EWS) (148)HP Embedded Web Server features (149)Information tab (149)General tab (149)Copy/Print tab (150)Scan/Digital Send tab (151)Fax tab (152)Supplies tab (153)Troubleshooting tab (153)Security tab (153)HP Web Services tab (154)Networking tab (154)Other Links list (156)Configure IP network settings (157)Printer sharing disclaimer (157)View or change network settings (157)Rename the printer on a network (157)viiiManually configure IPv4 TCP/IP parameters from the control panel (158)Manually configure IPv6 TCP/IP parameters from the control panel (158)Link speed and duplex settings (159)Printer security features (160)Introduction (160)Security statements (160)Assign an administrator password (160)Use the HP Embedded Web Server (EWS) to set the password (160)Provide user access credentials at the printer control panel (161)IP Security (161)Encryption support: HP High Performance Secure Hard Disks (161)Lock the formatter (161)Energy-conservation settings (161)Set the sleep timer and configure the printer to use 1 watt or less of power (161)Set the sleep schedule (162)Set the idle settings (162)HP Web Jetadmin (163)Software and firmware updates (163)9 Solve problems (164)Customer support (164)Control panel help system (165)Reset factory settings (165)Introduction (165)Method one: Reset factory settings from the printer control panel (165)Method two: Reset factory settings from the HP Embedded Web Server (network-connectedprinters only) (166)A “Cartridge is low” or “Cartridge is very low” message displays on the printer control panel (166)Change the “Very Low” settings (166)Change the “Very Low” settings at the control panel (166)For printers with fax capability (167)Order supplies (167)Printer does not pick up paper or misfeeds (167)Introduction (167)The printer does not pick up paper (167)The printer picks up multiple sheets of paper (171)The document feeder jams, skews, or picks up multiple sheets of paper (174)Clear paper jams (174)Introduction (174)Paper jam locations (174)Auto-navigation for clearing paper jams (175)Experiencing frequent or recurring paper jams? (175)Clear paper jams in the document feeder - 31.13.yz (176)Clear paper jams in Tray 1 (13.A1) (177)Clear paper jams in Tray 2 (13.A2) (182)Clear paper jams in the fuser (13.B9, 13.B2, 13.FF) (188)ixClear paper jams in the duplex area (13.D3) (194)Clear paper jams in the 550-sheet trays (13.A3, 13.A4) (199)Clear paper jams in the 2 x 550 paper trays (13.A4, 13.A5) (206)Clear paper jams in the 2,700-sheet high-capacity input paper trays (13.A3, 13.A4, 13.A5, 13.A7) (213)Resolving color print quality problems (220)Introduction (220)Troubleshoot print quality (221)Update the printer firmware (221)Print from a different software program (221)Check the paper-type setting for the print job (221)Check the paper type setting on the printer (221)Check the paper type setting (Windows) (221)Check the paper type setting (macOS) (222)Check toner-cartridge status (222)Step one: Print the Supplies Status Page (222)Step two: Check supplies status (222)Print a cleaning page (222)Visually inspect the toner cartridge or cartridges (223)Check paper and the printing environment (223)Step one: Use paper that meets HP specifications (223)Step two: Check the environment (223)Step three: Set the individual tray alignment (224)Try a different print driver (224)Troubleshoot color quality (225)Calibrate the printer to align the colors (225)Troubleshoot image defects (225)Improve copy image quality (233)Check the scanner glass for dirt and smudges (233)Calibrate the scanner (234)Check the paper settings (235)Check the paper selection options (235)Check the image-adjustment settings (235)Optimize copy quality for text or pictures (236)Edge-to-edge copying (236)Improve scan image quality (236)Check the scanner glass for dirt and smudges (237)Check the resolution settings (238)Check the color settings (238)Check the image-adjustment settings (239)Optimize scan quality for text or pictures (239)Check the output-quality settings (240)Improve fax image quality (240)Check the scanner glass for dirt and smudges (240)Check the send-fax resolution settings (242)Check the image-adjustment settings (242)Optimize fax quality for text or pictures (242)Check the error-correction setting (243)xSend to a different fax machine (243)Check the sender's fax machine (243)Solve wired network problems (244)Introduction (244)Poor physical connection (244)The computer is unable to communicate with the printer (244)The printer is using incorrect link and duplex settings for the network (245)New software programs might be causing compatibility problems (245)The computer or workstation might be set up incorrectly (245)The printer is disabled, or other network settings are incorrect (245)Solve wireless network problems (245)Introduction (245)Wireless connectivity checklist (245)The printer does not print after the wireless configuration completes (246)The printer does not print, and the computer has a third-party firewall installed (246)The wireless connection does not work after moving the wireless router or printer (247)Cannot connect more computers to the wireless printer (247)The wireless printer loses communication when connected to a VPN (247)The network does not appear in the wireless networks list (247)The wireless network is not functioning (247)Reduce interference on a wireless network (248)Solve fax problems (248)Checklist for solving fax problems (248)What type of phone line are you using? (249)Are you using a surge-protection device? (249)Are you using a phone company voice-messaging service or an answering machine? (249)Does your phone line have a call-waiting feature? (249)Check fax accessory status (249)General fax problems (250)The fax failed to send (250)No fax address book button displays (250)Not able to locate the Fax settings in HP Web Jetadmin (250)The header is appended to the top of the page when the overlay option is enabled (251)A mix of names and numbers is in the recipients box (251)A one-page fax prints as two pages (251)A document stops in the document feeder in the middle of faxing (251)The volume for sounds coming from the fax accessory is too high or too low (251)Index (252)xiPrinter overview1Review the location of features on the printer, the physical and technical specifications of the printer,and where to locate setup information.For video assistance, see /videos/LaserJet.The following information is correct at the time of publication. For current information, see /support/colorljM776MFP.For more information:HP's all-inclusive help for the printer includes the following information:●Install and configure●Learn and use●Solve problems●Download software and firmware updates●Join support forums●Find warranty and regulatory informationWarning iconsUse caution if you see a warning icon on your HP printer, as indicated in the icon definitions.●Caution: Electric shock●Caution: Hot surface●Caution: Keep body parts away from moving partsPrinter overview1●Caution: Sharp edge in close proximity●WarningPotential shock hazardReview this important safety information.●Read and understand these safety statements to avoid an electrical shock hazard.●Always follow basic safety precautions when using this product to reduce risk of injury from fire orelectric shock.●Read and understand all instructions in the user guide.●Observe all warnings and instructions marked on the product.●Use only a grounded electrical outlet when connecting the product to a power source. If you do notknow whether the outlet is grounded, check with a qualified electrician.●Do not touch the contacts on any of the sockets on the product. Replace damaged cordsimmediately.●Unplug this product from wall outlets before cleaning.●Do not install or use this product near water or when you are wet.●Install the product securely on a stable surface.●Install the product in a protected location where no one can step on or trip over the power cord.Printer viewsIdentify certain parts of the printer and the control panel.Printer front viewLocate features on the front of the printer.2Chapter 1 Printer overviewPrinter front view3Printer back viewLocate features on the back of the printer.Interface portsLocate the interface ports on the printer formatter. 4Chapter 1 Printer overviewControl-panel viewThe control panel provides access to the printer features and indicates the current status of the printer.NOTE:Tilt the control panel for easier viewing.The Home screen provides access to the printer features and indicates the current status of the printer.screens.NOTE:The features that appear on the Home screen can vary, depending on the printerconfiguration.Control-panel view5Figure 1-1Control-panel view?i 12:42 PM6Chapter 1 Printer overviewHow to use the touchscreen control panelPerform the following actions to use the printer touchscreen control panel.T ouchT ouch an item on the screen to select that item or open that menu. Also, when scrolling T ouch the Settings icon to open the Settings app.How to use the touchscreen control panel 7SwipeT ouch the screen and then move your finger horizontally to scroll the screen sideways.Swipe until the Settings app displays.Printer specificationsDetermine the specifications for your printer model.IMPORTANT:The following specifications are correct at the time of publication, but they are subject to change. For current information, see /support/colorljM776MFP .T echnical specificationsReview the printer technical specifications.Product numbers for each model ●M776dn - #T3U55A ●Flow M776z - #3WT91A ●Flow M776zs - #T3U56APaper handling specificationsPaper handling features Tray 1 (100-sheet capacity)Included Included Included Tray 2 (550-sheet capacity)IncludedIncludedIncluded8Chapter 1 Printer overview550-sheet paper trayOptional Included Not included NOTE:The M776dn models accept one optional550-sheet tray.Optional Included Included2 x 550-sheet paper tray and standNOTE:The M776dn models accept one optional550-sheet tray that may be installed on top of thestand.Optional Not included Not included2,700-sheet high-capacity input (HCI) paper trayand standNOTE:The M776dn models accept one optional550-sheet tray that may be installed on top of theoptional printer stand.Printer standOptional Not included Not included NOTE:The M776dn models accept one optional550-sheet tray that may be installed on top of theoptional printer stand.Inner finisher accessory Not included Not included Included Automatic duplex printing Included IncludedIncludedIncluded Included Included10/100/1000 Ethernet LAN connection with IPv4and IPv6Hi-Speed USB 2.0Included Included IncludedIncluded Included IncludedEasy-access USB port for printing from a USBflash drive or upgrading the firmwareIncluded Included Included Hardware Integration Pocket for connectingaccessory and third-party devicesHP Internal USB Ports Optional Optional OptionalOptional Optional OptionalHP Jetdirect 2900nw Print Server accessory forWi-Fi connectivity and an additional Ethernet portOptional IncludedIncludedHP Jetdirect 3100w accessory for Wi-Fi, BLE, NFC,and proximity badge readingPrints 45 pages per minute (ppm) on Letter-sizepaper and 46 ppm on A4-size paperEasy-access USB printing for printing from a USBIncluded Included Includedflash driveT echnical specifications9Included Included Included Store jobs in the printer memory to print later orprint privatelyScans 100 pages per minute (ppm) on A4 andIncluded Included Included letter-size paper one-sidedIncluded Included Included 200-page document feeder with dual-headscanning for single-pass duplex copying andscanningNot included Included Included HP EveryPage T echnologies including ultrasonicmulti-feed detectionNot included Included Included Embedded optical character recognition (OCR)provides the ability to convert printed pages intotext that can be edited or searched using acomputerIncluded Included Included SMART Label feature provides paper-edgedetection for automatic page croppingIncluded Included Included Automatic page orientation for pages that haveat least 100 characters of textIncluded Automatic tone adjustment sets contrast,Included Includedbrightness, and background removal for eachpageIncluded Included Includedfolders on a networkIncludedSend documents to SharePoint®Included IncludedIncluded Included Included NOTE:Memory reported on the configurationpage will change from 2.5 GB to 3 GB with theoptional 1 GB SODIMM installed.Mass storage: 500 GB hard disk drive Included Included IncludedSecurity: HP Trusted Platform Module (TPM)Included Included IncludedT ouchscreen control panel Included Included IncludedRetractable keyboard Not included Included Included 10Chapter 1 Printer overviewFax Optional Included IncludedSupported operating systemsUse the following information to ensure printer compatibility with your computer operating system.Linux: For information and print drivers for Linux, go to /go/linuxprinting.UNIX: For information and print drivers for UNIX®, go to /go/unixmodelscripts.The following information applies to the printer-specific Windows HP PCL 6 print drivers, HP print driversfor macOS, and to the software installer.Windows: Download HP Easy Start from /LaserJet to install the HP print driver. Or, go tothe printer-support website for this printer: /support/colorljM776MFP to download the printdriver or the software installer to install the HP print driver.macOS: Mac computers are supported with this printer. Download HP Easy Start either from /LaserJet or from the Printer Support page, and then use HP Easy Start to install the HP print driver.1.Go to /LaserJet.2.Follow the steps provided to download the printer software.Windows 7, 32-bit and 64-bit The “HP PCL 6” printer-specific print driver is installed for this operating system aspart of the software installation.Windows 8.1, 32-bit and 64-bit The “HP PCL-6” V4 printer-specific print driver is installed for this operating systemas part of the software installation.Windows 10, 32-bit and 64-bit The “HP PCL-6” V4 printer-specific print driver is installed for this operating systemas part of the software installation.Windows Server 2008 R2, SP 1, 64-bit The PCL 6 printer-specific print driver is available for download from the printer-support website. Download the driver, and then use the Microsoft Add Printer tool toinstall it.Windows Server 2012, 64-bit The PCL 6 printer-specific print driver is available for download from the printer-support website. Download the driver, and then use the Microsoft Add Printer tool toinstall it.Windows Server 2012 R2, 64-bit The PCL 6 printer-specific print driver is available for download from the printer-support website. Download the driver, and then use the Microsoft Add Printer tool toinstall it.Windows Server 2016, 64-bit The PCL 6 printer-specific print driver is available for download from the printer-support website. Download the driver, and then use the Microsoft Add Printer tool toinstall it.Windows Server 2019, 64-bit The PCL 6 printer-specific print driver is available for download from the printer-support website. Download the driver, and then use the Microsoft Add Printer tool toinstall it.Supported operating systems11macOS 10.13 High Sierra, macOS 10.14 MojaveDownload HP Easy Start from /LaserJet , and then use it to install the print driver.NOTE:Supported operating systems can change.NOTE:For a current list of supported operating systems and HP’s all-inclusive help for the printer, go to /support/colorljM776MFP .NOTE:For details on client and server operating systems and for HP UPD driver support for this printer, go to /go/upd . Under Additional information , click Specifications .●Internet connection●Dedicated USB 1.1 or 2.0 connection or a network connection● 2 GB of available hard-disk space ●1 GB RAM (32-bit) or2 GB RAM (64-bit)●Internet connection●Dedicated USB 1.1 or 2.0 connection or a network connection●1.5 GB of available hard-disk spaceNOTE:The Windows software installer installs the HP Smart Device Agent Base service. The file size is less than 100 kb. Its only function is to check for printers connected via USB hourly. No data is collected. If a USB printer is found, it then tries to locate a JetAdvantage Management Connector (JAMc) instance on the network. If a JAMc is found, the HP Smart Device Agent Base is securelyupgraded to a full Smart Device Agent from JAMc, which will then allow printed pages to be accounted for in a Managed Print Services (MPS) account. The driver-only web packs downloaded from for the printer and installed through the Add Printer wizard do not install this service.T o uninstall the service, open the Control Panel , select Programs or Programs and Features , and then select Add/Remove Programs or Uninstall a Programto remove the service. The file name isHPSmartDeviceAgentBase.Mobile printing solutionsHP offers multiple mobile printing solutions to enable easy printing to an HP printer from a laptop, tablet, smartphone, or other mobile device.T o see the full list and to determine the best choice, go to /go/MobilePrinting .NOTE:Update the printer firmware to ensure all mobile printing capabilities are supported.●Wi-Fi Direct (wireless models only, with HP Jetdirect 3100w BLE/NFC/Wireless accessory installed)●HP ePrint via email (Requires HP Web Services to be enabled and the printer to be registered with HP Connected)●HP Smart app ●Google Cloud Print12Chapter 1 Printer overview。
TH2515 仪器说明书

Ver 2.1目录Ver 2.0 (2)第1章仪器简介与开箱安装 (8)1.1仪器简介 (8)1.2开箱检查 (8)1.3电源连接 (8)1.4保险丝 (8)1.5环境 (8)1.6使用测试夹具 (9)1.7预热 (9)1.8仪器的其它特性 (9)第2章前面板说明及入门操作 (10)2.1前面板说明 (10)2.2后面板说明 (11)2.3显示区域的定义 (12)2.4按键及其相应的显示页面 (13)2.4.1测量主菜单按键【DISP】 (13)2.4.2系统设置主菜单按键【SETUP】 (13)2.5基本操作 (13)2.6开机 (14)第3章基本操作 (15)3.1<测量显示>页面 (15)3.1.1测试功能 (15)3.1.2测试量程 (16)3.1.3测试速度 (17)3.1.4文件管理 (17)3.1.5其他工具 (17)3.2<比较显示>页面 (18)3.2.1文件管理 (19)3.2.2工具 (19)3.2.3比较 (19)3.2.4比较模式和上下限、百分比误差设置 (19)3.3<档显示>页面 (19)3.4<统计显示>页面 (21)3.4.1边界模式和其相应值的设定 (21)3.4.2统计状态 (21)3.4.3统计分析参数说明 (21)3.4.4工具 (22)3.4.5文件 (22)3.5<测量设置>页面 (22)3.6<TC/Δt设置>页面 (24)3.6.1温度校正(Temperature Correction 简称TC) (25)3.6.2温度转换(temperature conversion 简称t ) (25)3.6.3温度传感器的类型 (26)3.6.4参数设定 (27)3.6.5文件 (27)3.7<档设置>页面 (27)3.7.1文件 (29)3.7.2工具 (29)第4章系统设置和文件管理 (30)4.1系统设置 (30)4.1.1触摸音 (30)4.1.2语言 (30)4.1.3口令 (31)4.1.4总线模式 (31)4.1.5波特率 (32)4.1.6总线地址 (32)4.1.7EOC信号 (32)4.1.8Err.OUT信号 (33)4.1.9电源频率 (34)4.1.10时间和日期设定 (34)4.2<文件管理>功能页面 (34)4.2.1存储/调用功能简介 (34)4.2.2U盘上的文件夹/文件结构 (35)4.2.3DHCP (39)4.2.4IP地址 (40)4.2.5子网掩码 (40)4.2.6网关 (40)4.2.7首选DNS、备用DNS (40)第5章性能指标 (41)5.1测量功能 (41)5.1.1测量参数及符号 (41)5.1.2测量组合 (41)5.1.3等效方式 (41)5.1.4量程 (41)5.1.5触发 (41)5.1.6测试端方式 (41)5.1.7测量中的各种时间的开销 (41)5.1.8平均 (42)5.1.9显示的位数 (42)5.2测试信号 (42)5.2.1量程电流 (42)5.2.2开路输出电压 (42)5.2.3测量显示最大范围 (42)5.3测量准确度 (43)5.3.2温度测量的准确度(Pt500) (44)5.3.3温度测量的准确度(模拟输入) (45)5.3.4温度修正系数K (45)第6章远程控制 (46)6.1RS232C接口说明 (46)6.2GPIB接口说明(选购件) (47)6.2.1GPIB接口功能 (49)6.2.2GPIB 地址 (49)6.2.3GPIB总线功能 (49)6.2.4可编程仪器命令标准(SCPI) (50)6.3LAN远程控制系统 (50)6.3.1通过浏览器访问TH2515 (52)6.3.2通过上位机软件访问TH2515 (52)6.4USBTMC远程控制系统 (53)6.4.1系统配置 (53)6.4.2安装驱动 (53)6.5USBVCOM虚拟串口 (54)6.5.1系统配置 (54)6.5.2安装驱动 (54)第7章RS232命令参考 (55)7.1SCPI系统命令 (55)7.1.1DISPlay子系统命令集 (55)7.1.2FUNCtion 子系统命令集 (56)7.1.3APERture子系统命令集 (61)7.1.4TRIGer子系统命令集 (61)7.1.5FETCh?子系统命令集 (63)7.1.6TEMPerature子系统命令集 (64)7.1.7COMParator子系统命令集 (66)7.1.8BIN子系统命令集 (69)7.1.9STA Tistics子系统命令集 (73)7.1.10IO子系统命令集 (76)7.1.11MEMory子系统命令集 (77)7.1.12SYSTem 子系统命令集 (78)7.1.13SCPI公用命令 (81)7.2MODBUS系统命令 (83)7.2.1MODBUS协议说明 (84)7.2.2公用指令操作说明 (85)7.2.3DISP指令操作说明 (86)7.2.4FUNC指令操作说明 (86)7.2.5APER指令操作说明 (87)7.2.6TRIG指令操作说明 (87)7.2.7FETC指令操作说明 (88)7.2.8TEMP指令操作说明 (88)7.2.10BIN指令操作说明 (90)7.2.11STA T指令操作说明 (93)7.2.12IO指令操作说明 (94)7.2.13SYST指令操作说明 (94)第8章Handler接口使用说明及程序升级方法 (99)第9章包装及保修 (103)9.1标志 (103)9.2包装 (103)9.3运输 (103)9.4贮存 (103)9.5保修 (103)本说明书所描述的可能并非仪器所有内容,同惠公司有权对本产品的性能、功能、内部结构、外观、附件、包装物等进行改进和提高而不作另行说明!由此引起的说明书与仪器不一致的困惑,可通过封面的地址与我公司进行联系。
Iveco 430HP 8X4 Mining Truck 说明书

CONTACT US(0411) 47217010896-8446-6680@mandiri.tractorsperkasa @mandiri.tractorsperkasaAddress:Jl. Perintis Kemerdekaan km. 16, Komplek Ruko InsigniaNo.20 Kel. Pai, Kec. Biringkanaya, Kota Makassar Sulawesi Selatan**********************************Sales Engineer : ________________WhatsApp/Telp : ________________S A I C H O N G Y A NBrochure Page : 016 X 4 T I P P E R R H DModel CQ3254HTG384(414)Driving type6X4BOX SPECIFICATION Lifting system and type Front lifting Length (mm)5800(6200)Width (mm)2300(2500)Height (mm)1800WEIGHTS GVW (kg)55000DIMENSIONS (mm)Cab type Wheelbase A 4125Tandem AI 1350Overall length B 8940Front overhang C 1435Rear overhang D 2030Cab widthE 2500without mirriors Cab height (unladen)K 3510Min. Ground clearance P320ENGINE Type 类型Model 型号Cylinder in line 直列缸数6Capacity 排放Turbocharger 涡轮增压Max power (HP/KW) 最大马力Max. Torque(Nm/r/min)扭矩Emission regulation Fuel system Air filter type CHASSIS TypeDimension (mm)Section thickness (mm)8+8TYRE & WHEELS StandardTire Quantity(units)11one spare tire included GEARBOX Type ManualCLUTCH TypeDiameter (mm)430(17")BRAKES Type Parking Emergency Auxiliary brake ELECTRICS Tension 24vBatteries2 x 12v, 165Ah Circuits protected by fuseSystem SUSPENSIONS Frontsemi-elliptic lea Shock absorbers 2 on front Rear semi-elliptic lea Anti roll bar rear axle STEERING Type power assistedAXLES Front axle 9tons(9.5tons)Rear axle 16tons Differential lock inter axleAvailable ratios optionalFUEL TANK Capacity & type CAB INTERIOR Driver seat mechanical Entertainmentmp3+radio Cab maintanence titled manualAir conditioner350 liters, lockable fuel cap, aluminium magnesium alloymanual with pollen filterCombined with parking brake Exhaust valve brake Multiplex - CAN line data bus SAIC IVECO HONGYAN Extra loaded Casting axle with hub reduction 4.63、5.262、5.73、5.9212.00R20FAST® 12JSD160T 12 forward speed and 2reverse speed with full synchronizersingle plate, diaphragm spiral spring, pull type 2 independent pneumatic circuits, drum/drum Mechanical with spring cylinder, rear EURO IIIMechanical pumpRear cab snorkel / Oil -Horizontal Double chassis, ladder construction 940-865 (W) 317 (H)WP10.340E329.726L Inter-cooling340HP/247KW@2200rpm 1350N.m/1200-1600rpm CORE EQUIPMENT SPECIFICATION Day cabEGR Mechanical pumpS A I C H O N G Y A N8 X 4 T I P P E RBrochure Page : 02ModelDriving type 8X4Lifting system and typeLength (mm)7200(7500)Width (mm)2500Height (mm)1800GVW (kg)90000Cab type day-time no sleeperWheelbase A 1800+3600TandemAI 1350Overall length B 10020Front tread C 2006Rear tread D 1850Cab widthE 2750Cab height (unladen)K 3510Min. Ground clearance P300Type Common Rail System 高压共轨ModelSFH® Cursor 13 F3BEE681B*Z IVECO Cylinder in line 6 4 valve Capacity1288mlTurbochargerInter-cooling 中冷Max power (HP/KW)430HP/316KW@1900rpm Max. Torque(Nm/r/min)2100N.m@1000-1500rpm Emission regulation China Natinoal Standard III (EURO III)Air filter type Rear cab snorkel / dry -Horizontal TypeDouble chassis, ladder construction Dimension (mm)940-865 (W) 317 (H)Section thickness (mm)8+8Standard1.200R24 Mining Tyre Tire Quantity(units)13one spare tire includedType FAST® 12JSD220TA 12 forward speed and 2 reverse speed with full synchronizers Options FAST ReataderTypesingle plate, diaphragm spiral spring, pull type Diameter (mm)430(17")Type 2 independent pneumatic circuits, drum/drum Parking Mechanical with spring cylinder, rear Emergency Combined with parking brake Auxiliary brake Engine cylinder brake Exhaust valve brakeTension 24vBatteries2 x 12v, 165Ah Circuits protected by fuseSystemMultiplex - CAN line data bus Frontsemi-elliptic leaf 8 pieces Shock absorbers 2 on frontRearsemi-elliptic leaf 12 piecesAnti roll bar rear axle Type power assistedFront axle 9.5tons Rear axle16tonsMAN-TECH hub reduction Differential lock inter axle Available ratios Capacity & type 350 liters Aluminium alloy fuel tank with lockable fuel cap Driver seat mechanical Entertainmentmp3+radio Cab maintanence titled manualAir conditionermanual, with pollen filterCAB INTERIOR STEERING AXLES5.92FUEL TANK GEARBOX CLUTCH BRAKES ELECTRICS SUSPENSIONS front lifting DIMENSIONS (mm)ENGINECHASSISTYRE & WHEELS WEIGHTSCORE EQUIPMENT SPECIFICATIONCQ3314HTG366BOX SPECIFICATIONPT MANDIRI TRACTORS PERKASA BEST SERVICE FOR YOUR BUSINESS。