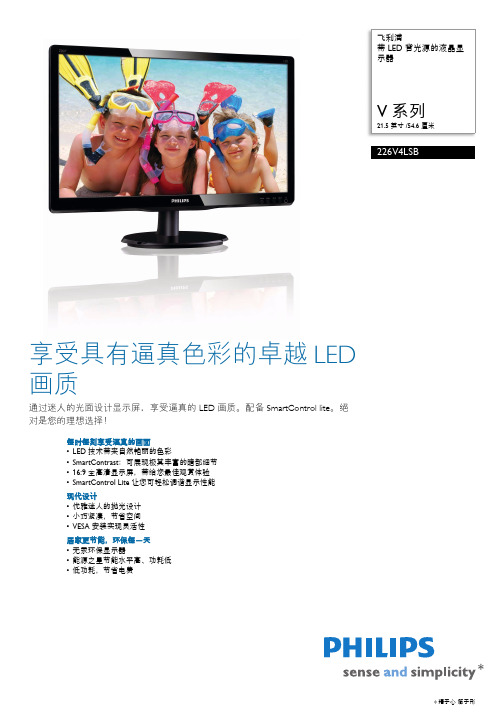
21.5寸五金外壳高清显示器中文说明书
飞利浦21.5寸显示器说明书
• OSD 语言 : 英语 , 法语 , 德语 , 意大利语 , 葡萄 牙语 , 俄语 , 简体中文 , 西班牙语 , 土耳其语
机壳
• 颜色 : 黑色 • 表面 : 光面 (前边框) / 质地 (后盖)
•
SmartContrast 是飞利浦推出的一项技术,当观 看暗色调的视频或玩暗色调的游戏时,它会分析 所显示的内容,自动调节色彩并控制背光亮度, 从而实现对比度的动态增强,展现优异的数字画 面。选择 “ 节能 ” 模式时,经过微调的对比度和 背光可使日常办公应用程序呈现恰如其分的显示 效果,将功耗保持在较低水平。
率。它支持来自所有信号源的 1080p 信号,包括 最新的蓝光技术和先进的高清游戏控制台,为未
来做好了充分的准备。全面升级的信号处理功能
可支持更高的信号质量和分辨率。它可生成具有
出色的亮度和超凡的色彩的靓丽无闪烁的逐行扫
描图像。
不含汞
具有 LED 背光照明的飞利浦显示器不含汞物质, 汞是毒性最强的自然物质之一,可严重危害人体
SmartControl Lite
SmartControl Lite 是基于 GUI 显示器控制软件的 下一代 3D 代表。它允许用户通过鼠标精细调谐 大多数显示器参数,包括颜色、亮度、屏幕校 准、多媒体、 ID 管理等等。
SmartContrast
连接
• 信号输入 : VGA (模拟) , DVI-D (数字, HDCP)
能源之星 5.0
能源之星是美国环保局赞助的一项节能计划,该
计划同时也为许多其它国家所采纳。能源之星认
证确保您购买的产品符合最新的节能标准,并且
Alienware AW2521HF AW2521HFL 显示器使用指南说明书
Alienware AW2521HF/AW2521HFL 顯示器使用指南機型:AW2521HF/AW2521HFL規格型號:AW2521HFb注意、小心與警告訊息注意:「注意」意指重要資訊的注意事項,可幫助您更妥善使用電腦。
小心:顯示「小心」,表示未遵循指示可能導致硬體損壞或資料遺失。
警告:「警告」標誌意指可能會造成財產損害、人體傷害或導致死亡。
© 2020 Dell Inc. 或其子公司。
版權所有。
Dell、EMC 及其它商標為 Dell Inc. 或其子公司的商標。
其它商標可能為個別所有者的商標。
2020 - 12Rev. A03目次關於您的顯示器 . . . . . . . . . . . . . . . . . . . . . . . . . . . . . . . . .6包裝內容 . . . . . . . . . . . . . . . . . . . . . . . . . . . . . . . . . . . . . . . . . . . .6產品功能特色 . . . . . . . . . . . . . . . . . . . . . . . . . . . . . . . . . . . . . . . .8認識各部位與控制裝置 . . . . . . . . . . . . . . . . . . . . . . . . . . . . . . . .9前視圖. . . . . . . . . . . . . . . . . . . . . . . . . . . . . . . . . . . . . . . . . . . . . . . . . . . . . .9背視圖. . . . . . . . . . . . . . . . . . . . . . . . . . . . . . . . . . . . . . . . . . . . . . . . . . . . .10後視圖和底視圖 . . . . . . . . . . . . . . . . . . . . . . . . . . . . . . . . . . . . . . . . . . . . .11顯示器規格 . . . . . . . . . . . . . . . . . . . . . . . . . . . . . . . . . . . . . . . . . 12解析度規格 . . . . . . . . . . . . . . . . . . . . . . . . . . . . . . . . . . . . . . . . .14支援視訊模式 . . . . . . . . . . . . . . . . . . . . . . . . . . . . . . . . . . . . . . . . . . . . . . .14預設顯示模式 . . . . . . . . . . . . . . . . . . . . . . . . . . . . . . . . . . . . . . . . . . . . . . .14電氣規格. . . . . . . . . . . . . . . . . . . . . . . . . . . . . . . . . . . . . . . . . . . . . . . . . . .15實體特性. . . . . . . . . . . . . . . . . . . . . . . . . . . . . . . . . . . . . . . . . . . . . . . . . . .16環境特性. . . . . . . . . . . . . . . . . . . . . . . . . . . . . . . . . . . . . . . . . . . . . . . . . . .17針腳定義. . . . . . . . . . . . . . . . . . . . . . . . . . . . . . . . . . . . . . . . . . . . . . . . . . .18隨插即用相容性 . . . . . . . . . . . . . . . . . . . . . . . . . . . . . . . . . . . . .19通用序列匯流排 (USB) 介面 . . . . . . . . . . . . . . . . . . . . . . . . . . .20 USB 上載連接器. . . . . . . . . . . . . . . . . . . . . . . . . . . . . . . . . . . . . . . . . . . . 20 USB 下載連接器. . . . . . . . . . . . . . . . . . . . . . . . . . . . . . . . . . . . . . . . . . . . .21 USB 連接埠 . . . . . . . . . . . . . . . . . . . . . . . . . . . . . . . . . . . . . . . . . . . . . . . .21液晶顯示器品質與像素政策. . . . . . . . . . . . . . . . . . . . . . . . . . . . 21維護指南 . . . . . . . . . . . . . . . . . . . . . . . . . . . . . . . . . . . . . . . . . . .22清潔您的顯示器 . . . . . . . . . . . . . . . . . . . . . . . . . . . . . . . . . . . . . . . . . . . . 22設定顯示器. . . . . . . . . . . . . . . . . . . . . . . . . . . . . . . . . . . .23安裝支架 . . . . . . . . . . . . . . . . . . . . . . . . . . . . . . . . . . . . . . . . . . .23連接電腦 . . . . . . . . . . . . . . . . . . . . . . . . . . . . . . . . . . . . . . . . . . .27移除顯示器支架 . . . . . . . . . . . . . . . . . . . . . . . . . . . . . . . . . . . . .28|3VESA 壁掛式組件(選配). . . . . . . . . . . . . . . . . . . . . . . . . . . 30操作顯示器. . . . . . . . . . . . . . . . . . . . . . . . . . . . . . . . . . . . 31開啟顯示器電源. . . . . . . . . . . . . . . . . . . . . . . . . . . . . . . . . . . . . .31使用搖桿控制. . . . . . . . . . . . . . . . . . . . . . . . . . . . . . . . . . . . . . . .31使用後面板控制按鈕. . . . . . . . . . . . . . . . . . . . . . . . . . . . . . . . . .32使用畫面顯示項目 (OSD) 功能表 . . . . . . . . . . . . . . . . . . . . . . .33存取功能表系統. . . . . . . . . . . . . . . . . . . . . . . . . . . . . . . . . . . . . . . . . . . . .33 OSD 警告訊息. . . . . . . . . . . . . . . . . . . . . . . . . . . . . . . . . . . . . . . . . . . . . .44鎖定後面板控制按鈕. . . . . . . . . . . . . . . . . . . . . . . . . . . . . . . . . 47設定最大解析度. . . . . . . . . . . . . . . . . . . . . . . . . . . . . . . . . . . . . 48使用傾斜、旋轉和垂直展開功能 . . . . . . . . . . . . . . . . . . . . . . . 49傾斜和旋轉展開. . . . . . . . . . . . . . . . . . . . . . . . . . . . . . . . . . . . . . . . . . . . .49垂直展開. . . . . . . . . . . . . . . . . . . . . . . . . . . . . . . . . . . . . . . . . . . . . . . . . . .49旋轉顯示器. . . . . . . . . . . . . . . . . . . . . . . . . . . . . . . . . . . . . . . . . . . . . . . . .50順時針旋轉. . . . . . . . . . . . . . . . . . . . . . . . . . . . . . . . . . . . . . . . . . . . . . . . .50逆時針旋轉. . . . . . . . . . . . . . . . . . . . . . . . . . . . . . . . . . . . . . . . . . . . . . . . .51調整您系統的旋轉顯示設定. . . . . . . . . . . . . . . . . . . . . . . . . . . .51使用 AlienFX 應用程式. . . . . . . . . . . . . . . . . . . . . . . . . .52先決條件 . . . . . . . . . . . . . . . . . . . . . . . . . . . . . . . . . . . . . . . . . . 52透過 Windows Update 安裝 AWCC . . . . . . . . . . . . . . . . . . . 52從 Dell Support 網站安裝 AWCC . . . . . . . . . . . . . . . . . . . . . 52瀏覽 AlienFX 視窗 . . . . . . . . . . . . . . . . . . . . . . . . . . . . . . . . . . 53建立主題 . . . . . . . . . . . . . . . . . . . . . . . . . . . . . . . . . . . . . . . . . . 54設定燈光效果. . . . . . . . . . . . . . . . . . . . . . . . . . . . . . . . . . . . . . . 55疑難排解. . . . . . . . . . . . . . . . . . . . . . . . . . . . . . . . . . . . . .58自我測試 . . . . . . . . . . . . . . . . . . . . . . . . . . . . . . . . . . . . . . . . . . 58內建診斷工具. . . . . . . . . . . . . . . . . . . . . . . . . . . . . . . . . . . . . . . 59常見問題 . . . . . . . . . . . . . . . . . . . . . . . . . . . . . . . . . . . . . . . . . . 60產品特定問題. . . . . . . . . . . . . . . . . . . . . . . . . . . . . . . . . . . . . . . 62通用序列匯流排 (USB) 特定問題 . . . . . . . . . . . . . . . . . . . . . . 624|附錄. . . . . . . . . . . . . . . . . . . . . . . . . . . . . . . . . . . . . . . . . .64 FCC 聲明(僅針對美國)與其它法規資訊. . . . . . . . . . . . . . .64 RoHS 聲明(僅針對台灣)/ Taiwan RoHS. . . . . . . . . . . . . .64與 Dell 聯絡 . . . . . . . . . . . . . . . . . . . . . . . . . . . . . . . . . . . . . . . .65|56|關於您的顯示器關於您的顯示器包裝內容您的顯示器包裝中包含以下元件。
EIS-2205-中英文说明书-B00-2413-026011

特种计算机Industrial Computer产品说明书User ManualEIS-2205研祥工业服务器EVOC Industrial ServerVersion: B00法律资讯警告提示为了您的人身安全以及避免财产损失,必须注意本手册中的提示。
人身安全的提示用一个警告三角表示,仅与财产损失有关的提示不带警告三角。
警告提示根据危险等级由高到低如下表示。
危险表示如果不采取相应的小心措施,将会导致死亡或者严重的人身伤害。
警告表示如果不采取相应的小心措施,可能导致死亡或者严重的人身伤害。
小心带有警告三角,表示如果不采取相应的小心措施,可能导致轻微的人身伤害。
注意表示如果不注意相应的提示,可能会出现不希望的结果或状态。
合格的专业人员本文件所属的产品/系统只允许由符合各项工作要求的合格人员进行操作。
其操作必须遵照各自附带的文件说明,特别是其中的安全及警告提示。
由于具备相关培训及经验,合格人员可以察觉本产品/系统的风险,并避免可能的危险。
EVOC产品请注意下列说明:警告EVOC产品只允许用于目录和相关技术文件中规定的使用情况。
如果要使用其他公司的产品和组件,必须得到EVOC推荐和允许。
正确的运输、储存、组装、装配、安装、调试、操作和维护是产品安全、正常运行的前提。
必须保证允许的环境条件。
必须注意相关文件中的提示。
A类设备声明注意此为A级产品,在生活环境中,该产品可能会造成无线电干扰,在这种情况下,可能需要用户对其干扰采取切实可行的防护措施。
免责声明本公司保留对此手册更改的权利,产品后续相关变更时,恕不另行通知。
对于任何因安装、使用不当而导致的直接、间接、有意或无意的损坏及隐患概不负责。
订购产品前,请向经销商详细了解产品性能是否符合您的需求。
EVOC是研祥智能科技股份有限公司的注册商标。
本手册所涉及到的其他商标,其所有权为相应的产品厂家所拥有。
研祥智能科技股份有限公司©2014,版权所有,违者必究。
15寸开放式显示器简体说明书

15〞TFT INDUSTRY MONITOR使用说明书天津市隆君电子科技有限公司 Ver:1.0天津市隆君电子科技有限公司技术部致用户: 感谢阁下购买及使用本彩色液晶工业用显示器,开箱时请检查箱内的附件是 否齐全。
在连接部件及接通电源之前,请先详细阅读本使用说明书 请保留本使用说明书以备后用目录一、安全指南······································································3 二、 附件··············································································3 三、安装结构······································································4 四、显示器的连接································································5 五、驱动程序的安装·····························································5 六、显示模式······································································5 七、连接器·········································································6 八、产品规格······································································6 九、故障维修······································································72天津市隆君电子科技有限公司技术部一、 安全指南重要注意事项! 高压危险! 本机内有高压。
21.5英寸全高清直播多视图监控器说明书
重要安全说明该设备已经通过安全性法规的要求和相关的测试,并已通过国际认证。
就如所有电子设备一样,应当谨慎小心地使用该设备。
请阅读并遵守安全说明,以保护自己免受潜在的伤害并最大程度地降低损坏设备的风险。
请勿将显示器的屏幕朝向地面放置,以免刮伤LCD表面。
请避免设备遭受重击。
请勿使用化学溶液清洁本产品。
只需用软布擦拭即可清洁表面。
请勿将显示器放置在不平坦的表面上。
请勿将显示器与尖锐的金属物品一起存放。
请按照说明和故障排除的内容调整调整显示器设置。
调整或维修机器内部必须由合格的技术人员进行。
请保留用户指南,以备参考。
如果长期不使用或雷雨天气时,请拔下电源并取出电池。
旧电子设备的安全处置请不要将旧的电子设备视为普通生活垃圾,也不要焚化旧的电子设备。
同时,请始终遵循当地的相关法规,并将其移交给恰当的收集站以安全回收。
确保可以有效地处理和回收旧物,以防止我们的环境和家庭受到负面影响。
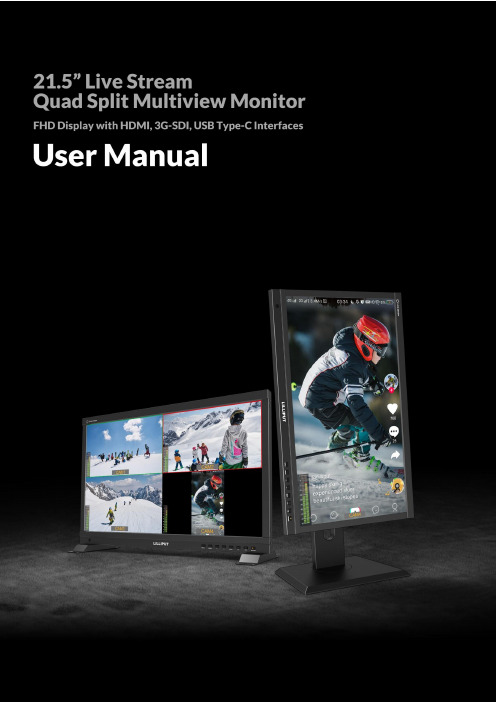
IntroductionThe 21.5 inch Full HD live streaming multiview monitor can be switched live up to 4 1080P high quality video signal inputs, which make it easy to create professional multi camera events for live streaming. At a time when live stream in mobile phone is popular, monitor innovatively built in phone mode so as to directly display a vertical video in multi camera. All-in-one capability greatly reduces the cost of productions.Features21.5 inch 1920x1080 physical resolution500cd/m² brightness, 1500:1 contrastSupports multiple video signal input:3G-SDI*2、HDMI*2、USB TYPE-CSupports PGM (SDI/HDMI) outputSupports HDMI and SDI signal cross conversion (Output 1080p60/50/30/25/24 through PGM)Automatic backlight adjustmentSupports vertical display: Camera Mode and Phone ModeSupports multiview display: Full screen/Vertical/Dual-1/Dual-2/Triple/QuadSupports level meter for multiviewSupports UMD editingPVW and PGM video signals can be switched at a shortcutColor temperature (6500K, 7500K, 9300K, User)Camera assist functions, for example, peaking, false color, exposure, histogram, etc.Supports VESA 100mm and 75mm optional bracket with swivel and load-bearing actionApplications: Mobile phone live, multi camera live, broadcast, TV, film and video switchingContents1. Product Description (3)1.1 Front Panel and Buttons (3)1.2 Rear Enclosure and Interfaces (4)1.3 Supported Installations (5)2. Menu Settings (6)2.1 User-definable Function Buttons (6)2.2 MENU and ▷/ ◁Buttons (6)2.3 Menu Operation (7)2.3.1 Information (7)2.3.2 Multiview (8)2.3.3 UMD (10)2.3.4 Picture (11)2.3.5 Marker (12)2.3.6 Function (13)2.3.7 Audio (17)2.3.8 System (18)3. Specifications (19)4. Accessories (20)5. Trouble Shooting (21)1. Product Description1.1 Front Panel and Buttons1) A window for brightness sensing2) INPUT : Signal switching sequence: SDI 1, SDI 2, HDMI 1, HDMI 2, USB Type-C.Note! INPUT is available only in Full Screen or Vertical mode3) MENU : Bring up the menu or confirm the options4) ◁ : Select option in the menu. Decrease the option value5) ▷ : Select option in the menu. Increase the option value6) EXIT : To return or exit the menu function7, 8) User-definable function button, default as● F1: [Multiview Mode]● F2: [PGM Cut]9) Power: Power on/off (green light for on, red light for off)1.2 Rear Enclosure and Interfaces1) 3G-SDI output interface (PGM output)2) 3G-SDI 2 loop output interface3) 3G-SDI 2 input interface4) 3G-SDI 1 loop output interface5) 3G-SDI 1 input interface6) HDMI output interface (PGM output)7) HDMI 2 input interface8) HDMI 1 input interface9) 3.5mm Ear Jack10) USB TYPE-C input interface11) Upgrade port12) Power input: DC 12-24V1.3 Supported Installations●VESA mount bracketMounting through standard VESA 75mm/100mm holes on the back of monitor:(The bracket is an optional part and supports multi-angle rotation and height adjustment)●Base stand bracketMounting through the screw holes left in the bottom of monitor:2. Menu Settings2.1 User-definable Function ButtonsPress either F1, F2 for 3-5 seconds to bring up the function setting. Press [▷] or [◁] to select the desired option; Press [MENU] to confirm the option and set it as a shortcut function.Press [EXIT] to close the function setting.User settable function buttons to suit individual needs: Center Marker, Aspect Marker, Safety Marker, overscan, Aspect Ratio, Check Field, Freeze, Peaking, False Color, Exposure, Histogram, Multiview Mode, Vertical Display, PGM Cut, UMD, Audio Source, Mute, Level Meter.Note! F1 default: [Multiview Mode], F2 default: [PGM Cut], [PGM Cut] is only available in shortcut function2.2 MENU and ▷/ ◁ButtonsTurn on the power, press [MENU] to display the OSD; Press [▷] or [◁] to select between Information, Multiview, UMD, Picture, Marker, Function, Audio and System; Press [MENU] again after selection to enterthe sub-menu.●The [▷] or [◁] buttons allow to switch or adjust the options and values in the menu, press [MENU] toconfirm or [EXIT] to exit.●When the OSD is not displayed, press the [▷] or [◁] button to adjust the volume. Press [MENU] again toswitch between Volume, Brightness, Contrast, Saturation, Tint, Sharpness and Exit in that order. Select the desired option and adjust the value of the option switched to by using [▷] or [◁].2.3 Menu Operation2.3.1 Information(Showing the resolution and fresh rate of each video signal)●3G-SDI supported signal formats: 1080p60/59.94/50/30/29.97/25/24/23.98; 1080i60/59.94/50; 720p60/59.94/50; Backwards compatible with other formats.●HDMI supported signal formats: 1080p60/59.94/50/30/29.97/25/24/23.98; 1080i60/59.94/50; 720p60/59.94/50; Backwards compatible with other formats.●USB Type-C supported signal formats: 1080p60/59.94/50/30/29.97/25/24/23.98; 1080i60/59.94/50;720p 60/59.94/50; Backwards compatible with other formats.2.3.2 MultiviewTo set the multiview mode, preset values for the input signal and switch between different signals.●PGM source: default value is SDI1/SDI2/HDMI1/HDMI2/TYPE-C, select the source for PGM output.●PVW source: default value is SDI1/SDI2/HDMI1/HDMI2/TYPE-C, select PVW preview signal source,through the [PGM Cut] function can realize the PGM source and PVW source signal switch each other. Note! The PGM source is marked with a red frame and PVW source is marked with a green frame●PGM Frame: default is 60p/50p/30p/25p/24p, select the source frame rate for PGM output●Multiview Mode:Full Screen (Horizontal screen) Vertical (Vertical screen)Dual-1 Dual-2Triple Quad●Vertical Display: default is Camera/Phone. In phone mode, the vertical phone signal from USB Type-Coutput can be displayed in full screen.●MV1 source selectable from SDI1/SDI2/HDMI1/HDMI2/TYPE-C, default is SDI1.●MV2 source selectable from SDI1/SDI2/HDMI1/HDMI2/TYPE-C, default is SDI2.●MV3 source selectable from SDI1/SDI2/HDMI1/HDMI2/TYPE-C, default is HDMI1.●MV4 source selectable from SDI1/SDI2/HDMI1/HDMI2/TYPE-C, default is HDMI2.(Multiview signal source sequencing)2.3.3 UMDSelect to turn UMD on or off. When turn on, each source will display the selected UMD information, the UMD font color can be changed from white/red/green/blue/yellow/cyan/magenta, default is green.(Current demo UMD color is yellow, characters are typed as CAM1~4)Character Editing Method.:Select [SDI1], press [MENU] to switch the character object; Press [▷] or [◁] to change the current character; Long press [MENU] to add a new character after the current character object, maximum support 16 characters; Long press [EXIT] to delete the current character.2.3.4 Picture●Brightness selectable from 0 to 100●Contrast selectable from 0 to 100●Saturation selectable from 0 to 100●Tint selectable from 0 to 100●Sharpness selectable from 0 to 100●Color TemperatureAdjustable color temperature level: 6500K, 7500K, 9300K, User.Note! User can only adjust the gain or offset values for red, green and blue in "User" mode- Red, Green and Blue GainAdjustment range 0-255, default value is 128.- Red, Green and Blue OffsetAdjustment range 0-511, default value is 255.2.3.5 Marker●Center MarkerSelect On, it will appear "+" marker on center of screen.●Aspect MarkerThe Aspect Marker provides various aspect ratios.Selectable from: 16:9/1.85:1/2.35:1/4:3/3:2/1.3X/2.0X/2.0X MAG●Safety MakrerUsed to select and control the size and availability of the safety area. Available type are: 95%/93%/90%/88%/85%/80%. Default is Off.●Marker ColorThe colors for Center Marker, Aspect Marker and Safety Marker are available in red, green, blue, white and black. Default is white.●Aspect Mat.Aspect Mat darkens the area of the outside of Marker. The degrees of darkness are between [0] to [7].●ThicknessThickness of marker line is selectable from 1 to 7, default value is 2.Note! The Marker function is not available in Multiview Mode2.3.6 Function●AspectSelect display ratio: Full/1.85:1/2.35:1/4:3/3:2/1.3X/2.0X/2.0X MAG. Default is Full.Note! The Aspect is not available in Multiview Mode●OverscanSome edge of image may be clipped after turning on overscan. Default is Off.Note! The Overscan is not available in Multiview Mode●Check FieldUsed to calibrate or analyse the accuracy of the screen color when Check Field is switched on. Selectable: Off/Red/Green/Blue/Mono. Default is Off.●FreezeTurn on to capture and display a frame of the current signal at any time. Default is Off.●PeakingUsed to assist in tracking the focus of subject. Default is Off.●Peaking ColorAvailable colors: red/green/blue/white/black. Default is red.●Peaking LevelUse this setting to adjust the level of focus sensitivity from [0]-[100]. If there are plenty of details of image with high contrast, it will display lots of focus assist lines that may cause visual interference. So, decrease the value of peaking level to reduce the focus lines to see clearly. Conversely, if the image has less details with low contrast, it should be increase the value of peaking level to see the focus lines clearly.●False ColorThis monitor has a false color filter to aid in the setting of camera exposure. As the camera Iris is adjusted, elements of the image will change color based on the luminance or brightness values. This enables proper exposure to be achieved without the use of costly, complicated external equipment. Selectable from: Off/Spectrum/ARRI/RED/Default. Default is Off.●False Color TableTurn on or off False Color reference tables.●ExposureThe exposure feature helps the user achieve optimum exposure by displaying diagonal lines over areas of the image that exceed the setting exposure level.●Exposure LevelThe Exposure Level can be set from 50 to 100IRE. Default is 100IRE.HistogramThe horizontal axis of histogram represents the luminance, from left to right indicating low to high luminance. The vertical axis of histogram indicates the number of pixels, from bottom to top indicating the number of pixels from less to more. The higher the histogram bumps in a certain luminance range, the more pixels there are in that luminance range. For example, if the histogram's bumps are mainly on the left side, this means that the overall brightness of the image is low; if it is on the right side, the overall brightness is high; if it is in the middle, the brightness is comfortable.(Actual distribution is white, black for demonstration reference)2.3.7 Audio●VolumeAdjusts the volume of built-in speaker and headphone, selectable range: 0-100. Default is 50.●MuteDisable any sound output when turn it off.●Level MeterTo achieve optimum audio quality, ensure the audio levels do not reach 0.This is the maximum level, meaning that any audio that exceeds this level willbe clipped, resulting in distortion. Ideally peak audio levels should fall in theupper end of the green zone. If the peaks enter into the yellow or red zones,the audio is in danger of clipping.●Audio SourceSelectable range: SDI1/SDI2/HDMI1/HDMI2/TYPE-C, Full Screen or Verticalmode default to current audio source, Multiview mode defaults to SDI12.3.8 System●LanguageAvailable in both Chinese and English.●Back Light ModeOptional: Custom/AutoLightAutoLight mode allows the backlight value to be adjusted automatically according to the ambient brightness. Manual adjustment of the backlight value in Custom mode●Back LightAdjusts the level of the back light from 0-100. Default is 100.●OSD TimerSelect the displaying time of the OSD. It has 10s, 20s, 30s preset to choose.●OSD TransparencySelect the transparency of the OSD from Off, 25% to 50%.●ResetIf there is any problem unknown, press to confirm after selected. The monitor will return to default settings.3. Specifications DISPLAYVIDEO INPUTVIDEO OUTPUTAUDIO IN/OUTPOWERENVIRONMENTOTHERS4. AccessoriesStandard Accessories1) DC 15V Power Adapter 1 pair2) Base Stand 1 pair3) USB Type-C Cable 1 pc4) Electronic User Manual 1 pc Optional Accessories1) V-mount or Anton Bauer Battery Plate 1 pc2) D-tap Cable 1 pc3) Swivel Bracket 1 pc4) Suitcase (Sunshade, frame brackets are included) 1 pc5. Trouble Shooting1. Only black-and-white display:Check whether the color saturation and check field are properly setup or not.2. Power on but no pictures:Check whether the cables of HDMI, and 3G-SDI are correctly connected or not. Please use the standard power adapter coming with the product package. Improper power input may cause damage.3. Wrong or abnormal colors:Check whether the cables are correctly and properly connected or not. Broken or loose pins of the cables may cause a bad connection.4. When on the picture shows size error:Press [MENU] →[Function] →[Overscan] to zoom in picture automatically.5. Other problems:Please try to press Menu button and choose [MENU] →[System] →[Reset] →[ON].6. Image Ghosting:If the same image or text continues to be displayed on the screen for an extended period of time, part of that image or text may burn into the screen and leave a ghost image, which is not a quality issue but a characteristic of some screens. It is simply a matter of turning the monitor off for a half hour to recover. Therefore no warranty/return/replacement will be made in this case.7. Some options can not be select in the Menu:Some options are only available in certain modes, for example the Center Marker function can only be used in full screen.8. Not working properly:If there is a problem that cannot be solved, please contact the relevant sales for after-sales service and leave the serial number to make it easier to locate the components so that the problem can be dealt with more quickly. The serial number is located on the back of monitor under the barcode.Note: Due to constant effort to improve products and product features, specifications may change without priority notice.。
眼镜智能显示器用户手册
眼镜智能显示器用户手册欢迎使用眼镜智能显示器!本手册将为您提供详细的使用说明和操作指南,以确保您能够充分了解并正确使用我们的产品。
在开始使用之前,请确保您已经阅读并理解本手册的所有内容,以避免任何使用问题或安全隐患。
一、产品概述眼镜智能显示器是一款集成了显示功能的眼镜设备,通过激光投影技术将信息直接投射到用户眼睛的视网膜上,提供全新的信息浏览方式。
它可以显示各种内容,包括文字、图像、音频和视频等。
二、主要功能1. 显示功能:眼镜智能显示器可以在您的视野中显示各种信息。
您可以通过眼镜上的控制按钮或语音指令来浏览、选择和操作所需的内容。
2. 语音交互:您可以使用眼镜智能显示器进行语音输入和语音控制,实现更便捷的操作和控制体验。
3. 连接功能:眼镜智能显示器支持无线连接,可以与您的智能手机或其他设备进行互联,实现信息的传输和共享。
4. 多功能应用:眼镜智能显示器提供了多种应用程序,包括导航、健康监测、社交媒体和娱乐等,可以满足不同用户的需求。
三、使用流程1. 初始设置:首次使用眼镜智能显示器时,您需要进行一些基本设置,如语言选择、网络连接和个人账户绑定等。
请按照屏幕上的提示进行操作,并确保您的设备连接正常。
2. 开关机:长按电源按钮开机,再次长按电源按钮关机。
请注意,长按时间不要过长或过短,以免误操作。
3. 导航操作:通过眼镜上的控制按钮或语音指令进入主菜单,并找到所需的应用程序。
您可以使用控制按钮来选择和操作内容,也可以使用语音指令来进行控制。
4. 连接设备:使用无线连接将眼镜智能显示器与您的智能手机或其他设备进行配对。
按照设备说明书中的步骤进行连接,并确保连接成功。
5. 个性化设置:眼镜智能显示器提供了一些个性化选项,如亮度调节、字号设置和音量控制等。
您可以根据自己的需求进行相应设置。
6. 使用注意事项:请在使用眼镜智能显示器时注意保护眼睛,避免过度使用或长时间注视屏幕。
另外,使用过程中要注意避免碰撞、摔落或接触水等可能导致故障或损坏的情况。
惠普EliteDisplay E220t 21.5英寸触摸显示器说明书
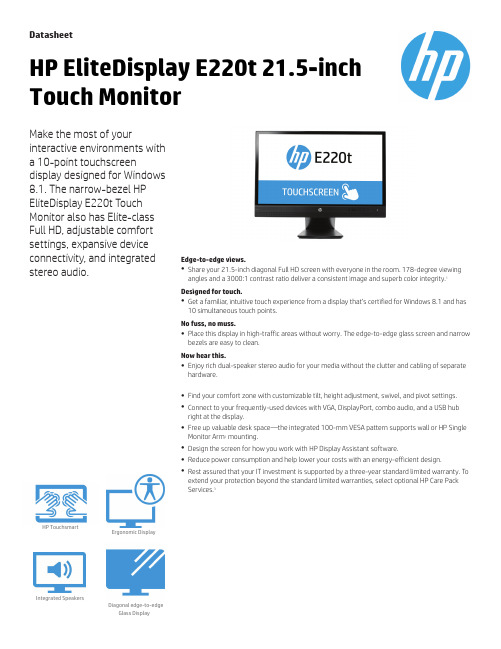
DatasheetHP EliteDisplay E220t 21.5-inch Touch MonitorMake the most of yourinteractive environments witha 10-point touchscreen display designed for Windows8.1.The narrow-bezelHPEliteDisplay E220t Touch Monitor also has Elite-classFull HD,adjustablecomfort settings,expansive deviceconnectivity,and integratedstereo audio.Edge-to-edge views.●Share your 21.5-inch diagonal Full HD screen with everyone in the room.178-degree viewing angles and a 3000:1contrast ratio deliver a consistent image and superb color integrity.1Designed for touch.●Get a familiar ,intuitive touch experience from a display that’s certified for Windows 8.1and has 10simultaneous touch points.No fuss,no muss.●Place this display in high-traffic areas without worry.The edge-to-edge glass screen and narrow bezels are easy to clean.Now hear this.●Enjoy rich dual-speaker stereo audio for your media without the clutter and cabling of separate hardware.●Find your comfort zone with customizable tilt,height adjustment,swivel,and pivot settings.●Connect to your frequently-used devices with VGA,DisplayPort,combo audio,and a USB hub right at the display.●Free up valuable desk space—the integrated 100-mm VESA pattern supports wall or HP Single Monitor Arm 2mounting.●Design the screen for how you work with HP Display Assistant software.●Reduce power consumption and help lower your costs with an energy-efficient design.●Rest assured that your IT investment is supported by a three-year standard limited warranty.Toextend your protection beyond the standard limited warranties,select optional HP Care Pack Services.3Ergonomic DisplayHP TouchsmartIntegrated SpeakersDiagonal edge-to-edgeGlass DisplayDatasheet|HP EliteDisplay E220t21.5-inch Touch MonitorHP EliteDisplay E220t21.5-inch Touch Monitor Specifications TableProduct Number L4Q76AADisplay Size(diagonal)21.5"Display Type VA w/LED backlight and projective capacitive touchPanel Active Area18.74x10.54in;476.064x267.786mmViewing Angle178°horizontal;178°verticalBrightness250cd/m²1Contrast Ratio3000:1static;5000000:1dynamic1Response Time8ms gray to gray1Aspect Ratio16:9Native Resolution1920x1080@60HzResolutions Supported1920x1080;1680x1050;1600x900;1440x900;1280x1024;1280x800;1280x720;1024x768;800x600;640x480Display Features Anti-glare;Language selection;LED Backlights;On-screen controls;Pivot rotation;Plug and Play;User programmable;Touch enabled;User controls User Controls Menu;Minus("-");Plus("+");OK;PowerInput Signal1DisplayPort1.2;1VGA;(HDCP support on all inputs)Ports and Connectors2USB3.0(one downstream and one upstream);1audio input/outputInput Power Input voltage:100to240VACPower Consumption35W(maximum),28W(typical),0.5W(standby)Dimensions with Stand(W x D x H)19.9x9.57x18.29in50.51x24.29x46.41cmDimensions withoutStand(W x D x H)19.9x2.22x13.25inch50.51x5.64x33.62cmwithout standWeight13.45lb6.1kgwith standErgonomic Features Tilt:-5to+30°;Swivel360°;Pivot rotation:90°Multimedia Two1W per channel built-in speakersEnvironmental Arsenic-free display glass;Mercury-free display backlights;Low halogen2What's in the box Monitor;AC power cord;VGA cable;DisplayPort cable;Audio cable;CD(includes User Guide,warranty,drivers);Service phone list card;Hard copy warranty booklet(country specific)See important legal disclaimers on the last page2Accessories and services (not included)3HP Single MonitorArm The HP Single Monitor Arm is the perfect desk accessory for your work life.Sleek and streamlined,the HP Single Monitor Arm is designed to complement the way you work.Product number:BT861AAHP LCD SpeakerBarThe LCD Speaker Bar seamlessly attached to the bezel of the HP Business Monitor and provides full multimedia capabilities.Product number:NQ576AA HP Hardware Support Exchange Service offers a reliable and fast exchange service for eligible HP products. Specifically targeted at products that can easily be shipped and on which customers may easily restore data from backup files, HP Hardware Support Exchange Service is a cost-efficient but still convenient alternative to onsite support. HP Hardware Support Exchange Service provides a replacement product or part to be delivered free of freight charges to your location within a specified period of time. Replacement products or parts are new or equivalent to new in performance. Product number : U0J10EHP 4 year Next business dayExchange Standard MonitorService HP Adjustable Dual DisplayStand The HP Adjustable Dual Display Stand allows you to use two displays to maximize your productivity and optimize efficiency.Either or both displays can be rotated to landscape or portrait orientation,and the stand is depth-,height-,tilt-,and angle-adjustable so you can view both screens at eye-level as well as slightly facing each other ,letting you track multiple applications and information sources at the same time.Integrated base rollers let you rotate the stand so you can more easily share your work.Product number:AW664AAHP Quick ReleaseBracket HP Quick Release is an easy to use,100mm VESA-compliant,LCD monitor mounting solution that allows you to quickly and securely attach a flat panel monitor to a variety of stands,brackets,arms or wall mounts.HP Quick Release can also be used for mounting any combination of devices that are compatible with the 100mm VESA Flat Display Mounting Interface Standard.The failsafe "Sure-Lock"mechanism snaps the monitor (or mounted device)securely in place,and can be further secured with a theft-deterrent security screw.Product number:EM870AAHP Business PC Security Lock v2KitHelp prevent chassis tampering and secure your PC and display in workspaces and public areas with the HP Business PC Security Lock v2Kit.Product number:N3R93AA HP UHD USB GraphicsAdapterBoost your productivity by extending or mirroring your desktop to a UHD display with the HP UHD USB Graphics Adapter.Product number:N2U81AAMessaging Footnotes1All performance specifications represent the typical specifications provided by HP's component manufacturers;actual performance may vary either higher or lower.2Options sold separately.3HP Care Pack Services are sold separately.Service levels and response times for HP Care Pack Services may vary depending on your geographic location.Service starts from date of hardware purchase.Restrictions and limitations apply.See /go/cpc for details.Technical Specifications Footnotes1All specifications represent the typical specifications provided by HP's component manufacturers,actual performance may vary either higher or lower.2External power supplies,power cords,cables and peripherals are not Low Halogen.Service parts obtained after purchase may not be Low Halogen.Learn more at Sign up for updates /go/getupdated The product could differ from the images shown.©2015Hewlett-Packard Development Company,L.P.The information contained herein is subject to change without notice.Specific features may vary from model to model.The only warranties for HP products and services are set forth in the express warranty statements accompanying such products and services.Nothing herein should be construed as constituting an additional warranty.HP shall not be liable for technical or editorial errors or omissions contained herein.ENERGY STAR®and the ENERGY STAR®mark are registered trademarks of the U.S.Environmental Protection Agency.4AA6-1476ENUC , September 2015。
L2251p宽屏显示器使用手册

第 3 章 參考資訊 ..............................................................................................................3-1
顯示器規格 ........................................................................................................................................ 3-1 故障排除 ...........................................................................................................................................3-2
L2251p 寬屏平面顯示器 使用手冊
產品編號
2572-HD6
初版(2009 年 6 月)
© 版權所有Lenovo 2009。
保留所有權利。
LENOVO 產品、資料、電腦軟體與服務之研發經費皆本公司自行支出,並根據 48 C.F.R. 2.101 所定義之有限及受限制之 使用、重製及公開權利,以商用物品售予政府部門。 有限與受限制權利注意事項:若產品、資料、電腦軟體或服務乃是依據「美國聯邦政府總務管理局」(GSA)之合約所提 供,則其使用、重製或公開皆必須受合約編號 GS-35F-05925 中載明之條款所限制。
調整類型....................................................................................................................................... 1-2 使用者控制項................................................................................................................................ 1-3 電腦鎖插槽 ......................................................................................................1-4 安裝顯示器....................................................................................................................................... 1-4 連接並開啟顯示器電源................................................................................................................ 1-4 產品註冊 ..........................................................................................................................................1-8
- 1、下载文档前请自行甄别文档内容的完整性,平台不提供额外的编辑、内容补充、找答案等附加服务。
- 2、"仅部分预览"的文档,不可在线预览部分如存在完整性等问题,可反馈申请退款(可完整预览的文档不适用该条件!)。
- 3、如文档侵犯您的权益,请联系客服反馈,我们会尽快为您处理(人工客服工作时间:9:00-18:30)。
高 清 彩 色 液 晶 监 视 器21.5″高分辨率监视器尊敬的用户:欢迎使用本公司生产的摄影,广播传媒等配套的彩色液晶监视器,本监视器采用专用的数字信号处理电路与专业的TFT LCD 液晶屏,具有高亮度、功耗低、性能稳定、无辐射等优点,兼容性强,可调色温控制。
高级特性包括屏幕标记,摄影模式,,画面放大,图像翻换,单色显示设置等。
是一款理想的非线性编辑配套监视器、本监视器不但具备有高清晰度多媒体接口HDMI ,分量COMPONENT(YpbPr),复合Video,音频Audio多种信号输入,还可根据客户的需要,配置具有HD-SDI 输入,输出信号端口,以满足不同的用户需求。
产品特点:◆ 5DⅡ摄影模式◆ 框形标记:关,96%,93%,90%,85%,80%◆ 屏幕中心标记(十字标记)显示设置◆ 扫描模式(标准、过扫描、欠扫描)(1080I和1080P 50/60HZ无作用)◆ 单色显示:彩色、黑白,红,绿,蓝,关◆ 镜像图像(图像翻转)功能(在1080I和1080P 50/60HZ无作用)◆ 行场消隐开关◆ 画中画功能◆ 画面比例(全景、满屏、点对点、缩放1、4:3、16:9、14:9)选择◆ 扫描模式: 标准,欠扫描,过扫描◆ 显示像素与屏幕像素点对点显示◆ 面板按键(F1~F4)功能的自定义设置◆ LED 背光源,图像显示更明亮,画面不闪烁◆ 前面板立体声监听耳机输出◆ 多制式信号输出端口,应用更灵活为了可靠的、长期的正常使用,达到最佳视听效果,请认真阅读本使用说明书注意事项1. 请采用随机配置的电源适配器,如果因为需要,请注意提供合格的电源。
.2. 不要将机子放于日光下爆晒,也不要在过冷过热或潮湿的地方存放、使用.3. 使用时显示屏幕应避开强光照射,以保证图像效果及机子的长期使用.4. 机子内部虽有防震保护措施,但还应避免剧烈碰撞。
5. 不要用化学试剂或溶剂擦洗机子.请用软布擦除机子上的尘污,以保证本机的亮丽.6. 机内无用户可调组件,非专业人员,请勿自行打开本机或自行尝试修理本产品!以免造成不必要的损坏.目 录一.产品说明 --------------------------- 31.前面板功能示意图 -------------------------- 32.后面板功能示意图 -------------------------- 43. 电池扣板 ---------------------------------- 54. 电源输入方式 ------------------------------ 55.TALLY的使用与连接 ------------------------- 6二. 按键操作说明 ------------------------ 7三、功能菜单操作介绍 ------------------- 8四.支持信号格式 ------------------------ 13五.随机附件 ---------------------------- 13六.产品技术参数 ------------------------ 14七.故障探寻与排除 ---------------------- 15一.产品说明1.前面板功能示意1.电源开关:表示电源接通,○断开电源2.: 耳机插口3.SDI: 数字分量串行信号输入选择键4.HDMI:HDMI高清信号输入选择键5. VIDEO:复合视频信号输入选择键6. YPbPr: YPbPr色差信号输入选择键7.:摄影(相机)模式8. MENU: 菜单键,弹出或者关闭菜单9.:音量减 ,菜单中为向左调整键,功能确定或减少菜单中模拟量的值10.:向下调整键,菜单中项目选择键,当无菜单显示时,直接按动此键,可使活动画面静止在当前画面。
11.:音量加 ,菜单中为向右调整键,功能确定或增加菜单中模拟量的值12.:向上调整键,菜单中项目选择键13~16. F1~F4:自定义键,可将(框形标记、单色显示、点对点、扫描模式、中心标记、分割、放大)选择一项作为本键的定义功能17. TALLY(提示灯)2.后面板功能示意图1.电池扣板,可根据客户的具体要求,配套不同的规格(见电池扣 板说明)2. TALLY(提示灯)信号输入3. 四芯卡侬头(XLR)直流电源输入接口4. HDMI OUT: HDMI(高清多媒体接口)信号输出5. HDMI IN: HDMI(高清多媒体接口)信号输入6.Y IN: YpbPr色差分量视频的Y信号输入7.Y 0UT: YPbPr色差分量视频的Y信号输出8.Pb IN: YPbPr色差分量视频的Pb信号输入9. Pb OUT: YPbPr色差分量视频的Pb信号输出10.Pr IN: YPbPr色差分量视频的Pr信号输入11.Pr OUT: YPbPr色差分量视频的Pr信号输出12.VIDEO IN: 复合视频信号输入13.VIDEO OUT: 复合视频信号输出14.AUDIO L IN: 音频信号输入15. AUDIO R IN: 音频信号输出16.3G-SDI IN: 数字分量串行接口信号输入(选配)17. 3G-SDI OUT: 数字分量串行接口信号输出(选配)3. 电池扣板松下安东扣板 索尼V型扣板 可根据客户对使用电池的不同型号要求,装配相应的电池扣板,客户无要求时,出厂默认装配V型电池扣板。
备注:当选用的电池型号的不同,电池的容量不同,显示器的有效工作时间将有所差别,电池容量高的,供给显示器工作时间相应较长。
4.电源输入方式:本机的工作电源可通过四芯卡侬头(XLR)接口或者机器附带的电池扣板加装电池进行供电,当四芯卡侬头(XLR)接口及电池扣板均带有电源时,机器自动选择由四芯卡侬头(XLR)接口进行供电。
4.1四芯卡侬头(XLR)接口进行供电。
可选择与摄像机电源共用或者市电经电源适配器输入。
本机的工作电压范围为10~24V的直流电压。
当客户自行选配电源适配器时,应注意选用输出电压为直流10~24V,输出功率>30W的电源适配器。
卡农头(XLR)的电源输入端口极性如下图,请注意电源的输入极性,否者可能引起机器的损坏!4.2 另一个电源选择是使用电池。
本产品后壳上安装有电池扣板,本产品的电池扣板有2种不同的型号配置,客户可根据自己的需要选用相应的电池扣板,以适用不同类型的电池。
(如果客户没有要求,出厂的默认安装V型电池扣板) 当选用的电池型号的不同,电池的容量不同,显示器的有效工作时间将有所差别,电池容量高的,供给显示器工作时间相应较长。
本机没有设计电池充电电路,如需充电请将电池拆卸下来到充电器进行建议:长期不使用本产品,最好取下电池另外存放。
5.TALLY的使用与连接TALLY套件●具有TALLY的使用与连接使用随机TALLY套件按照图示将来自切换台的TALLY信号线进行连接连接方法:5.1有源接法:将GND与G用导线短路接地接入0-5V电压当电压是0.3-2.7V时,绿色TALLY灯常亮当电压是2.8-5.5V时,红色TALLY灯闪烁5.2 无源接法:将GND,R+,G全部短接红色TALLY灯闪烁● 请注意连接方式二. 按键操作说明SDI →数字分量串行信号输入选择HDMI → 高清晰度多媒体数字信号输入选择VIDEO →复合视频信号输入选择Ypbpr → 色差分量接口视频信号输入选择→ 摄影模式。
采用5D2或者550D等类似机器进行摄影时,按下像,这时从屏幕的取景监看图像到录制时没有时间差,图像不变形,不黑屏,不延时,完美不失真MENU →菜单键→音量加,在菜单操作中为向左调整键,项目确定或增加菜单中→音量减,在菜单操作中为向右调整键,项目确定或减小菜单→进入菜单操作时为菜单选项及子菜单中的向上选择→图像静止快捷键或菜单操作向下选择键。
无菜单显示时,直接按项及子菜单中的向下选择F1 → 自定义键,可根据用户的喜爱,操作习惯,选择括弧内(框形标记、单色显示、点对点、扫描模式、中心标记、分割、放大)其中一个设置为本键的定义功能,设置时请进入菜单的系统设置中进行。
F2 →自定义键,见F1说明F3 → 自定义键,见F1说明F4 →自定义键,见F1说明三、功能菜单操作介绍在工作状态下按下机子的“”键,即进入相应的OSD菜单操作,按本机上的“”或“”键来选择所需查看或调整的选项:(显示效果)(声音)(系统设置)(扫描位置调整),在选择相应的选项后,按动本机上的“”或“”键进行确认,退出OSD菜单,则再按一次“”●显示效果设置(本设置有2页菜单)按“”键,出现以下的OSD菜单,“”或“”键来选择,按动“”或“”键确认,以“”或“”键选择调整项目,然后再用“”或“”键进行各调整量的调整或选择。
退出按“”键。
◆菜单1页画面对比度:图像画面最亮处与最暗处比例的调整亮 度:调整图像画面的明亮度色 度:对色彩饱和度的调整色 调:在复合视频模式下对NTSC制信号的颜色调整,其它模式无效清晰度:调整图像的层次感色温:使用该调整项可对色温进行预先设置(用户,6500K.7300K,9300K)◆菜单2页画面图像模式:对图像的明亮、标准、柔和、用户(对比度,亮度,色度的自行设置)的效果设置画面比例:图像的全景、满屏、点对点、缩放1、缩放2、缩放3、缩放4、4:3、16:9、14:9等画面比例模式的选择 行场消隐显示:行场消隐选择开关扫描模式: 特殊图像适应处理(标准,过扫描,欠扫描)●声音设置按“”键,出现以下的OSD菜单,“”或“”键来选择,按动“”或“”键确认,以“”或“” 键选择调整项目,然后再用“”或“”键进行各调整量的调整或选择。
退出按“”键。
音 量:调整声音的大小平 衡:调整耳机左右声道声音的平衡●系统设置(本设置有3页菜单)按“”键,出现以下的OSD菜单,“”或“”键来选择,按动“”或“”键确认,以“”或“”键选择调整项目,然后再用“”或“”键进行各调整量的调整或选择。
退出按“”键。
◆ 菜单1页画面框形标记: 画面取景框标记选择(关,96%,93%,90%,85%,80%)中心标记: 屏幕中心标记(十字标记)显示设置该模式在1080I和1080P 50/60HZ无作用水平位置:对图像的显示位置进行左右移动调整垂直位置:对图像的显示位置进行上下移动调整水平幅度:对图像显示幅度进行左右拉伸调整垂直幅度:对图像显示幅度进行上下拉伸调整◆ 菜单2页画面单色显示: 彩色黑白/单色切换,可对图像进行彩色、黑白、单色(红、绿、蓝) 之间的切换5D2摄影模式:摄影模式即用佳能5D II或类似相机进行拍摄时,从监视器观察到的是录像的即时图像,图像不变形、不黑屏,不延时,完美不失真。
画中画:在屏幕上同时显示两个输入视频信号的画面,可调整画面位置、大小、画面互换、双画面、画外画等模式 语 言: 简体中文,英文选项S D I:高清SDI输入功能选择开关(带SDI输入端口机型,其他机型选择关闭)菜单效果:菜单显示呈现的效果◆ 菜单3页画面菜单透明度: 对菜单显示透视效果进行选择菜单显示时间:菜单弹出后,不进行操作自动消失的时间控制复 位:对系统的参数及设置恢复出厂设置状态Ver 2.3:菜单软件版本号●自定义键及扫描的设置按“”键,出现以下的OSD菜单,“”或“”键来选择,按动“”或“”键确认,以“”或“”键选择调整项目,然后再用“”或“”键进行各调整量的调整或选择。