思科设备交换机vlantrunk配置
实验二VLAN以及Trunk实验(思科)
实验二VLAN以及Trunk配置(第2 次课 1 学时)一、【实验目的】1.了解交换机的工作原理,掌握交换机的基本配置命令。
1、掌握VLAN基本配置。
2、掌握静态接口VLAN划分。
二、【实验器材】1.思科3400交换机2台、PC机每组个2台。
2.连接console电缆线两条、标准网线若干。
三、【实验重点和难点】1.熟练使用交换机的常用配置命令。
2. 验证VLAN实现两个PC之间的连通性。
四、【实现功能】通过VLAN实现两个PC之间的连通性。
五、【思考题】不同VLAN间的PC是否可以相互访问,相同VLAN间的PC是否可以相互访问。
实验内容一、基本VLAN实验实验拓扑:实验需求:在交换机switch上面创建两个VLAN,vlan2和vlan3,vlan 名称分别为HR、ENG ,将主机PC1、PC2分别划入两个VLAN中步骤一:创建VLAN2与VLAN3Switch#config terminalSwitch(config)#vlan 2Switch(config-vlan)name HRSwitch(config-vlan) exitSwitch(config)#vlan 3Switch(config-vlan) name ENG步骤二:将与两台PC连接的两个接口分别划入相同的VLAN2中Switch(config)#int f0/1Switch(config-if) switch access vlan 2Switch(config-if)port nni//将接口划入指定VLAN中Switch(config-if)int f0/2Switch(config-if) switch access vlan 2Switch(config-if)port nni//将接口划入指定VLAN中Switch(config-if)exit验证结果:使用show vlan 2查看试验结果,在PC1以及PC2上使用ping 命令查看连通性。
交换机配置VLANTrunk
交换机配置VLANTrunk交换机配置VLAN Trunk有的思科交换机用户不知道怎么配置,且因为思科有一款模拟器软件,本文就以思科交换机的设置作为示例。
这次店铺来介绍一下思科交换机怎么设置虚拟串口配置VLAN Trunk的步骤。
交换机串口(Trunk)的作用:在以太网上通过交换机的.串口实现中继可以使用如下两种封装类型:—IEEE 802.1Q—ISL(Inter Switch Link, Cisco私有)配置步骤:交换机怎么设置-第一步:在交换机上添加VLAN交换机怎么设置-第二步:将接口添加到相应的VLAN中Switch1#config terminalSwitch1(config)#interface fastEthernet 0/1Switch1(config-if-range)#switchport access vlan 2Switch1(config)#interface fastEthernet 0/2Switch1(config-if-range)#switchport access vlan 3交换机怎么设置-第三步:配置交换机之间互联的端口为串口(Trunk)Switch1(config)#interface f0/15Switch1(config-if-range)#switchport mode trunk相关其他命令去除VLAN:Switch(config-if)#switchport trunk allowed vlan removevlan-list添加VLAN:Switch(config-if)#switchport trunk allowed vlan add vlan-list 查看端口状态:Switch#show interface f0/15switchport检查中继端口允许VLAN的列表:Switch#show interface interface-id switchport 查看VLAN信息:Switch#show vlan brief查看配置:Switch#show running-config【交换机配置VLAN Trunk】。
思科交换机配置TRUNK的主要步骤

思科交换机配置TRUNK的主要步骤思科交换机配置TRUNK的主要步骤到底什么是TRUNK呢?使用TRUNK功能到底能给我们带来哪些应用方面的优势?还有在具体的交换机产品中怎样来进行交换机配置TRUNK,下面我们来了解一下这些方面的知识。
在二层交换机的性能参数中,常常提到一个重要的指标:TRUNK,许多的二层交换机产品在介绍其性能时,都会提到能够支持TRUNK功能,从而可以为互连的交换机之间提供更好的传输性能。
那到底什么是TRUNK呢?使用TRUNK功能到底能给我们带来哪些应用方面的优势?还有在具体的交换机产品中怎样来进行交换机配置TRUNK。
下面我们来了解一下这些方面的知识。
一、什么是TRUNK?TRUNK是端口汇聚的意思,就是通过配置软件的设置,将2个或多个物理端口组合在一起成为一条逻辑的路径从而增加在交换机和网络节点之间的带宽,将属于这几个端口的带宽合并,给端口提供一个几倍于独立端口的独享的高带宽。
Trunk是一种封装技术,它是一条点到点的链路,链路的两端可以都是交换机,也可以是交换机和路由器,还可以是主机和交换机或路由器。
基于端口汇聚(Trunk)功能,允许交换机与交换机、交换机与路由器、主机与交换机或路由器之间通过两个或多个端口并行连接同时传输以提供更高带宽、更大吞吐量,大幅度提供整个网络能力。
一般情况下,在没有使用TRUNK时,大家都知道,百兆以太网的双绞线的这种传输介质特性决定在两个互连的普通10/100交换机的带宽仅为100M,如果是采用的全双工模式的话,则传输的最大带宽可以达到最大200M,这样就形成了网络主干和服务器瓶颈。
要达到更高的数据传输率,则需要更换传输媒介,使用千兆光纤或升级成为千兆以太网,这样虽能在带宽上能够达到千兆,但成本却非常昂贵(可能连交换机也需要一块换掉),更本不适合低成本的中小企业和学校使用。
如果使用TRUNK技术,把四个端口通过捆绑在一起来达到800M带宽,这样可较好的解决了成本和性能的`矛盾。
思科Cisco交换机配置——单交换机划分VLAN配置实验操作详解
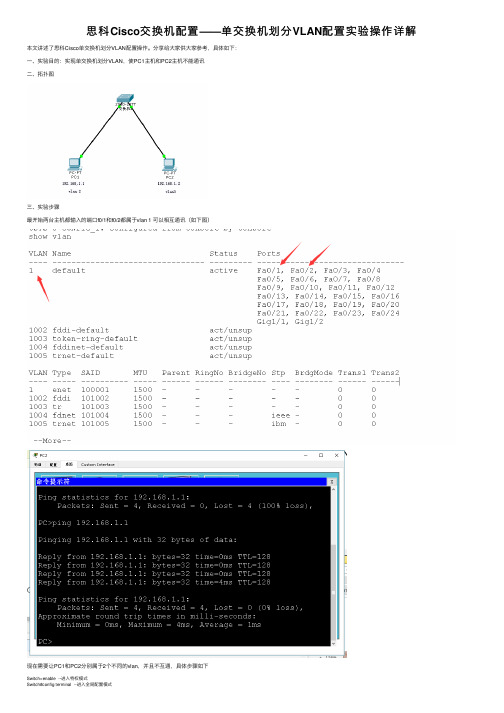
思科Cisco交换机配置——单交换机划分VLAN配置实验操作详解本⽂讲述了思科Cisco单交换机划分VLAN配置操作。
分享给⼤家供⼤家参考,具体如下:⼀、实验⽬的:实现单交换机划分VLAN,使PC1主机和PC2主机不能通讯⼆、拓扑图三、实验步骤最开始两台主机都输⼊的端⼝f0/1和f0/2都属于vlan 1 可以相互通讯(如下图)现在需要让PC1和PC2分别属于2个不同的vlan,并且不互通,具体步骤如下Switch>enable --进⼊特权模式Switch#config terminal --进⼊全局配置模式Enter configuration commands, one per line. End with CNTL/Z.Switch(config)#hostname S1 --修改交换机主机名为S1S1(config)#vtp domain test --创建⼀个vtp域Changing VTP domain name from NULL to testS1(config)#vtp mode server --设置当前vtp⾝份为serverDevice mode already VTP SERVER.S1(config)#vlan 2 --创建并进⼊vlan 2端⼝S1(config-vlan)#name V2 --命名vlan 2名字为V2S1(config-vlan)#vlan 3 --创建并进⼊vlan3端⼝S1(config-vlan)#name V3 --命名为V3S1(config-vlan)#interface f0/1 --进⼊f0/1端⼝S1(config-if)#switchport mode access --将端⼝模式改为access模式S1(config-if)#switchport access vlan 2 --将端⼝划分到vlan 2S1(config-if)#interface f0/2 --进⼊到f0/2端⼝S1(config-if)#switchport mode access --将端⼝模式改为access模式S1(config-if)#switchport access vlan 3 --将端⼝划分到 vlan 3S1(config-if)#end --发回特权模式S1#copy running-config startup-config --保存配置Destination filename [startup-config]?%SYS-5-CONFIG_I: Configured from console by consoleBuilding configuration...[OK] --成功保存四、验证PC1和PC2是否不互通,f0/1和f0/2是否分别划分到vlan 2和vlan 3⾥(1)验证vlan(2)验证是否相互不能ping通PC1:PC2。
思科交换机VLAN配置
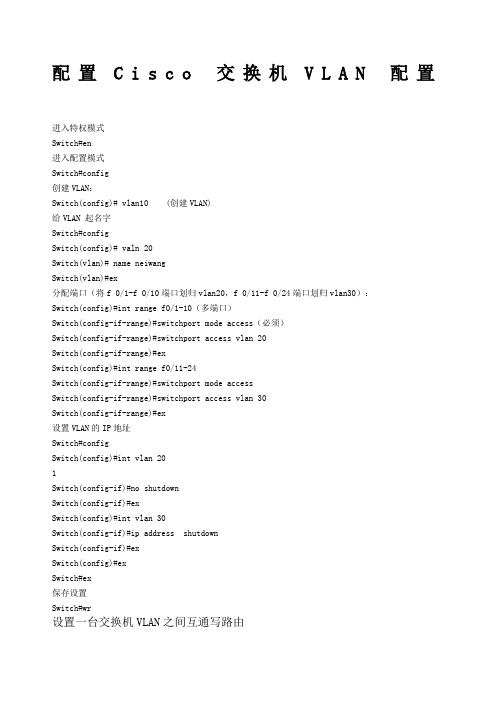
配置C i s c o交换机V L A N配置进入特权模式Switch#en进入配置模式Switch#config创建VLAN:Switch(config)# vlan10 (创建VLAN)给VLAN 起名字Switch#configSwitch(config)# valn 20Switch(vlan)# name neiwangSwitch(vlan)#ex分配端口(将f 0/1-f 0/10端口划归vlan20,f 0/11-f 0/24端口划归vlan30):Switch(config)#int range f0/1-10(多端口)Switch(config-if-range)#switchport mode access(必须)Switch(config-if-range)#switchport access vlan 20Switch(config-if-range)#exSwitch(config)#int range f0/11-24Switch(config-if-range)#switchport mode accessSwitch(config-if-range)#switchport access vlan 30Switch(config-if-range)#ex设置VLAN的IP地址Switch#configSwitch(config)#int vlan 201Switch(config-if)#no shutdownSwitch(config-if)#exSwitch(config)#int vlan 30Switch(config-if)#ip address shutdownSwitch(config-if)#exSwitch(config)#exSwitch#ex保存设置Switch#wr设置一台交换机VLAN之间互通写路由Switch(config)#ip routingSwitch>enSwitch#configSwitch(config)#vlan 20Switch(config-vlan)#exSwitch(config)#vlan 30Switch(config-vlan)#exitSwitch(config)#int f 0/1Switch(config-if)#switchport mode access?Switch(config-if)#switchport access vlan 20Switch(config-if)#exSwitch(config)#int f 0/2Switch(config-if)#switchport mode access?Switch(config-if)#switchport access vlan 30Switch(config-if)#exSwitch(config)#int vlan 201Switch(config-if)#no shutdownSwitch(config-if)#exSwitch(config)#int vlan 30Switch(config-if)#ip address shutdownSwitch(config-if)#exSwitch(config)#ip routingSwitch(config)#exSwitch#exSwitch#wr(保存)0删除端口vlanSwitch(config)#int f 0/2Switch(config)#no switchport access vlan 20两台交换机VLAN互通的TRUNK?switchA(config)#int fa0/24switchA(config-if)#switchport mode trunk?switchA(config-if)#switchport trunk encapsulation dot1q。
思科三层交换机实现不同VLAN间互相访问配置

思科三层交换机实现不同VLAN间互相访问配置案例解决:思科二层交换机不具备三层交换能力,无法在两个VLAN之间提供路由,为了解决这一问题,就必须增加思科路由器或思科三层交换机之类的路由设备。
我们这里选择增加一台思科三层交换机来实现(可以实现VLAN间路由,同时可提供更多的接口来接入主机)。
思科三层交换机VLAN间路由配置步骤:1、配置干道(TRUNK)在接口模式下声明该接口为trunk模式的命令格式:Switch(config-if)#switchport mode turnk指定接口封装类型的命令格式:Switch(config-if)#switchport trunk encapsulation {dot1q|ISL}注:dot1q封装类型为802.1q,一般在交换机默认封装dot1q类型2、配置VLAN在私有模式下进入vlan database声明VLAN的命令格式:Switch#vlan databaseSwitch(vlan)#vlan vlan_number进入相应接口,将该接口划分到指定VLAN内的格式:Switch(config-if)#switch port mode accessSwitch(config-if)#switchport access vlan vlan_number3、配置VLAN间路由思科三层交换机的路由模块和交换模块直接通过思科交换机的背板总线连接,因此只需要在三层交换机的路由模块上定义与VLAN数量相当的逻辑接口,并和VLAN 对应,然后为这些接口分配IP地址即可。
首先要在在思科三层交换机上打开路由功能,命令格式如下:Switch(config)#ip routing为VLAN分配地址的命令格式如下:Switch(config)#interface vlan vlan_numberSwitch(config)#ip add ip_adress netmask思科三层交换机VLAN间路由配置实例:设备:思科二层交换机(cisco 2960)A、B,思科三层交换机一台(cisco 3560),主机四台:主机1、主机2、主机3、主机4。
思科设备交换机vlan trunk配置

本次讲解vlan trunk配置方法:本例配置模型图命令行:以下为switchA配置:Switch>Switch>enableSwitch#vlan database% Warning: It is recommended to configure VLAN from config mode, as VLAN database mode is being deprecated. Please consult user documentation for configuring VTP/VLAN in config mode.Switch(vlan)#vlan 2 name TztAVLAN 2 added:Name: TztASwitch(vlan)#vlan 3 name TztBVLAN 3 added:Name: TztBSwitch(vlan)#exitAPPLY completed.Exiting....Switch#wrBuilding configuration...[OK]Switch#config tEnter configuration commands, one per line. End with CNTL/Z.Switch(config)#int f0/1Switch(config-if)#sw mo acSwitch(config-if)#sw acc vlan 2Switch(config-if)#int f0/2Switch(config-if)#sw mo acSwitch(config-if)#sw acc vlan 3Switch(config-if)#exitSwitch(config)#exitSwitch#%SYS-5-CONFIG_I: Configured from console by consoleSwitch#show vlanVLAN Name Status Ports---- -------------------------------- --------- -------------------------------1 default active Fa0/3, Fa0/4, Fa0/5, Fa0/6Fa0/7, Fa0/8, Fa0/9, Fa0/10Fa0/11, Fa0/12, Fa0/13, Fa0/14Fa0/15, Fa0/16, Fa0/17, Fa0/18Fa0/19, Fa0/20, Fa0/21, Fa0/22Fa0/23, Fa0/24, Gig1/1, Gig1/22 TztA active Fa0/13 TztB active Fa0/21002 fddi-default act/unsup1003 token-ring-default act/unsup1004 fddinet-default act/unsup1005 trnet-default act/unsupVLAN Type SAID MTU Parent RingNo BridgeNo Stp BrdgMode Trans1 Trans2 ---- ----- ---------- ----- ------ ------ -------- ---- -------- ------ ------1 enet 100001 1500 - - - - - 0 02 enet 100002 1500 - - - - - 0 03 enet 100003 1500 - - - - - 0 0 1002 fddi 101002 1500 - - - - - 0 0 1003 tr 101003 1500 - - - - - 0 0 1004 fdnet 101004 1500 - - - ieee - 0 0 1005 trnet 101005 1500 - - - ibm - 0 0Remote SPAN VLANs------------------------------------------------------------------------------Primary Secondary Type Ports------- --------- ----------------- ------------------------------------------Switch#wrBuilding configuration...[OK]Switch#conf tEnter configuration commands, one per line. End with CNTL/Z.Switch(config)#int g1/1 //进入端口g1/1配置vlan trunk模式Switch(config-if)#sw trunk encaSwitch(config-if)#sw trunk allowed vlan all //配置允许所有vlan通过switchA Switch(config-if)#exitSwitch(config)#exitSwitch#Switch#wr //保存已有配置Building configuration...[OK]Switch#以下为switchB配置:Switch>enableSwitch#vlan database% Warning: It is recommended to configure VLAN from config mode,as VLAN database mode is being deprecated. Please consult user documentation for configuring VTP/VLAN in config mode.Switch(vlan)#vlan 2 name TztAVLAN 2 added:Name: TztASwitch(vlan)#vlan 3 name TztBVLAN 3 added:Name: TztBSwitch(vlan)#exitAPPLY completed.Exiting....Switch#config tEnter configuration commands, one per line. End with CNTL/Z.Switch(config)#int f0/1Switch(config-if)#sw mo accSwitch(config-if)#sw acc vlan 2Switch(config-if)#int f0/2Switch(config-if)#sw mo accSwitch(config-if)#sw acc vlan 3Switch(config-if)#exitSwitch(config)#show vlan^% Invalid input detected at '^' marker.Switch(config)#exitSwitch#%SYS-5-CONFIG_I: Configured from console by consoleSwitch#show vlan //显示所有vlan配置信息VLAN Name Status Ports---- -------------------------------- --------- -------------------------------1 default active Fa0/3, Fa0/4, Fa0/5, Fa0/6Fa0/7, Fa0/8, Fa0/9, Fa0/10Fa0/11, Fa0/12, Fa0/13, Fa0/14Fa0/15, Fa0/16, Fa0/17, Fa0/18Fa0/19, Fa0/20, Fa0/21, Fa0/22Fa0/23, Fa0/24, Gig1/1, Gig1/22 TztA active Fa0/13 TztB active Fa0/21002 fddi-default act/unsup1003 token-ring-default act/unsup1004 fddinet-default act/unsup1005 trnet-default act/unsupVLAN Type SAID MTU Parent RingNo BridgeNo Stp BrdgMode Trans1 Trans2 ---- ----- ---------- ----- ------ ------ -------- ---- -------- ------ ------1 enet 100001 1500 - - - - - 0 02 enet 100002 1500 - - - - - 0 03 enet 100003 1500 - - - - - 0 0 1002 fddi 101002 1500 - - - - - 0 0 1003 tr 101003 1500 - - - - - 0 0 1004 fdnet 101004 1500 - - - ieee - 0 0 1005 trnet 101005 1500 - - - ibm - 0 0Remote SPAN VLANs------------------------------------------------------------------------------Primary Secondary Type Ports------- --------- ----------------- ------------------------------------------Switch#conf tEnter configuration commands, one per line. End with CNTL/Z.Switch(config)#int g1/1Switch(config-if)#switchport mode trunkSwitch(config-if)#%LINEPROTO-5-UPDOWN: Line protocol on Interface GigabitEthernet1/1, changed state to down %LINEPROTO-5-UPDOWN: Line protocol on Interface GigabitEthernet1/1, changed state to upSwitch(config-if)#switchport trunk allowed vlan allSwitch(config-if)#exitSwitch(config)#Switch(config)#exitSwitch#%SYS-5-CONFIG_I: Configured from console by consolewrBuilding configuration...[OK]Switch#注:模型图中客户端电脑IP已自行设定!讲解结束!。
Cisco(思科)交换机VLAN设置-电脑资料
Cisco(思科)交换机VLAN设置-电脑资料Cisco(思科)交换机VLAN设置交换机VLAN创建,删除,端口属性的设置,配置trunk端口,将某端口加入vlan中,配置VTP:switch#vlan database ;进入VLAN设置switch(vlan)#vlan 2 ;建VLAN 2switch(vlan)#vlan 3 name vlan3 ;建VLAN 3并命名为vlan3 switch(vlan)#no vlan 2 ;删vlan 2switch(config)#int f0/1 ;进入端口1switch(config)#speed ? 查看speed命令的子命令switch(config)#speed 100 设置该端口速率为100mb/s (10/auto)switch(config)#duplex ? 查看duplex的子命令switch(config)#duplex full 设置该端口为全双工(auto/half)switch(config)#description TO_PC1 这是该端口描述为TO_PC1 switchport mode accessswitch(config-if)#switchport access vlan 2 ;当前端口加入vlan 2交换机设置IP地址,默认网关,域名,域名服务器,配置和查看MAC地址表:switch(config)#interface vlan 1 ;进入vlan 1switch(config-if)#ip address 192.168.1.1 255.255.255.0 ;设置IP地址switch(config)#ip default-gateway 192.168.1.6 ;设置默认网关Switch#copy startup-config running-configreboot:是从新启动机器(你所有做数据都存在,不会丢失)reset:是设备恢复出厂值(就是你进行这个操作以后,你所有的配置数据全部被清除)reload:是配置完数据之后从新启动,配置的数据就会保存在设备里面这种说法是错误的,都只是重启设备,你在输入reload reboot reset 这三个命令后都会提示你保存不?按y就保存并且重启,你可能会问为什么命令不同,结果一样,是因为版权法的问题,你比如cisco是sho 3COM是DISP效果一样.。
- 1、下载文档前请自行甄别文档内容的完整性,平台不提供额外的编辑、内容补充、找答案等附加服务。
- 2、"仅部分预览"的文档,不可在线预览部分如存在完整性等问题,可反馈申请退款(可完整预览的文档不适用该条件!)。
- 3、如文档侵犯您的权益,请联系客服反馈,我们会尽快为您处理(人工客服工作时间:9:00-18:30)。
Fa0/7, Fa0/8, Fa0/9, Fa0/10
Fa0/11, Fa0/12, Fa0/13, Fa0/14
Fa0/15, Fa0/16, Fa0/17, Fa0/18
Fa0/19, Fa0/20, Fa0/21, Fa0/22
1005 trnet-default act/unsup
VLAN Type SAID MTU Parent RingNo BridgeNo Stp BrdgMode Trans1 Trans2
---- ----- ---------- ----- ------ ------ -------- ---- -------- ------ ------
Switch(config)#int f0/1
Switch(config-if)#sw mo acc
Switch(config-if)#sw acc vlan 2
1004 fdnet 101004 1500 - - - ieee - 0 0
1005 trnet 101005 1500 - - - ibm - 0 0
Remote SPAN VLANs
------------------------------------------------------------------------------
documentation for configuring VTP/VLAN in config mode.
Switch(vlan)#vlan 2 name TztA
VLAN 2 added:
Name: TztA
Switch(vlan)#vlan 3 name TztB
VLAN 3 added:
Name: TztB
本次讲解vlan trunk配置方法:
本例配置模型图
命令行:
以下为switchA配置:
Switch>
Switch>enable
Switch#vlan database
% Warning: It is recommended to configure VLAN from config mode,
as VLAN database mode is being deprecated. Please consult user
as VLAN database mode is being deprecated. Please consult user
documentation for configuring VTP/VLAN in config mode.
Switch(vlan)#vlan 2 name TztA
VLAN 2 added:
Primary Secondary Type Ports
------- --------- ----------------- ------------------------------------------
Switch#wr
Building configuration...
[OK]
Switch#conf t
Switch(vlan)#exit
APPLY completed.
Exiting....
Switch#wr
Building configuration...
[OK]
Switch#config t
Enter configuration commands, one per line. End with CNTL/Z.
Enter configuration commands, one per line. End with CNTL/Z.
Switch(config)#int g1/1.
[OK]
Switch#
以下为switchB配置:
Switch>enable
Switch#vlan database
% Warning: It is recommended to configure VLAN from config mode,
Switch(config)#int f0/1
Switch(config-if)#sw mo ac
Switch(config-if)#sw acc vlan 2
Switch(config-if)#int f0/2
Switch(config-if)#sw mo ac
Switch(config-if)#sw acc vlan 3
Switch(config-if)#exit
Switch(config)#exit
Switch#
%SYS-5-CONFIG_I: Configured from console by console
Switch#show vlan
VLAN Name Status Ports
---- -------------------------------- --------- -------------------------------
Name: TztA
Switch(vlan)#vlan 3 name TztB
VLAN 3 added:
Name: TztB
Switch(vlan)#exit
APPLY completed.
Exiting....SwitchFra bibliotekconfig t
Enter configuration commands, one per line. End with CNTL/Z.
1 enet 100001 1500 - - - - - 0 0
2 enet 100002 1500 - - - - - 0 0
3 enet 100003 1500 - - - - - 0 0
1002 fddi 101002 1500 - - - - - 0 0
1003 tr 101003 1500 - - - - - 0 0
Fa0/23, Fa0/24, Gig1/1, Gig1/2
2 TztA active Fa0/1
3 TztB active Fa0/2
1002 fddi-default act/unsup
1003 token-ring-default act/unsup
1004 fddinet-default act/unsup