svn配置linux
Linux下SVN部署安全及权限配置,实现web同步更新

[examPro:/]
@g_vip=rw
@g_fronter=r
@g_doc=r
[examPro:/protected/modules]
@g_vip=rw
@g_fronter=
*=
[examPro:/protected]
@g_doc=
对于以上代码的配置的详细说明,可以参考本文的参考文章[1]SVN权限配置,里面介绍的比较详细,这里就不多说,有疑问的请留言或mail;
Linux下SVN部署/安全及权限配置,实现web同步更新:
本文包含以下内容:
SVN服务器安装
SVN权限管理
SVN使用SASL加密
SVN上传时同步其它目录
需求
在WEB线上版本管理的基础上,能够在代码上传之后,立刻通过WEB访问,查看修改效果;同时,保证数据的安全性;
#export LANG=zh_CN.UTF-8
export LANG=en_US.UTF-8
2.设置SVN更新时需要同步更新的目录
svn update /alidata/www/examplePro --username yoursname --password yourpwd
以上这行表明,当svn服务器版本有更新时,则同步更新到/alidata/www/examPro目录下的对应文件;yoursname 和yourpwd是你在sasl中设置的用户名和密码;(这里还是涉及到了明文存放,对此,你可以分配一个用户对svn版本库只有全局的读权限)
现在,SVN就实现了版本管理的功能,同时,同步更新的目录有利于测试人员集成测试;
开发人员需要保证的是,任何时候签入到svn库中的版本是可运行的代码。
linux下搭建SVN手册

linux下搭建SVN服务器完全手册ubuntu14.0 + ssh + yum一,安装必须的软件包.yum install subversion (SVN服务器)mysql-server (用于codestriker)httpd mod_dav_svn mod_perl (用于支持WEB方式管理SVN服务器)sendmail (用于配置用户提交代码后发邮件提醒)wget gcc-c++ make unzip perl* (必备软件包)ntsysv vim-enhanced (可选)二,基本的SVN服务器配置1,新建一个目录用于存储SVN所有文件# mkdir /home/svn2,新建一个版本仓库# svnadmin create /home/svn/project3,初始化版本仓库中的目录# mkdir project project/serverproject/client project/test (建立临时目录)# svn import project/file:///home/svn/project -m "初始化SVN目录"# rm -rf project (删除临时建立的目录)4,添加用户要添加SVN用户非常简单,只需在/home/svn/project/conf/passwd文件添加一个形如“username=password"的条目就可以了.为了测试,我添加了如下内容:[users]# harry = harryssecret# sally = sallyssecretpm = pm_pwserver_group = server_pwclient_group = client_pwtest_group = test_pw5,修改用户访问策略/home/svn/project/conf/authz记录用户的访问策略,以下是参考:[groups]project_p = pmproject_s =server_groupproject_c =client_groupproject_t = test_group[project:/]@project_p = rw* =[project:/server]@project_p = rw@project_s = rw* =[project:/client]@project_p = rw@project_c = rw* =[project:/doc]@project_p = rw@project_s = rw@project_c = rw@project_t = rw* =以上信息表示,只有pm有根目录的读写权,server_group能访问server目录,client_group能访问client目录,所有人都可以访问doc目录.6,修改svnserve.conf文件,让用户和策略配置升效.svnserve.conf内容如下:[general]anon-access = noneauth-access = writepassword-db =/home/svn/project/conf/passwdauthz-db =/home/svn/project/conf/authz7,启动服务器# svnserve -d -r /home/svn8,测试服务器# svn co svn://192.168.60.10/projectAuthentication realm:<svn://192.168.60.10:3690> 92731041-2dae-4c23-97fd-9e1ed7f0d18dPassword for 'root':Authentication realm:<svn://192.168.60.10:3690> 92731041-2dae-4c23-97fd-9e1ed7f0d18dUsername: server_groupPassword for 'server_group':svn: Authorization failed ( server_group 没用根目录的访问权 )# svn co svn://192.168.60.10/projectAuthentication realm:<svn://192.168.60.10:3690> 92731041-2dae-4c23-97fd-9e1ed7f0d18dPassword for 'root':Authentication realm:<svn://192.168.60.10:3690> 92731041-2dae-4c23-97fd-9e1ed7f0d18dUsername: pmPassword for 'pm':A project/testA project/serverA project/clientChecked out revision 1. ( 测试提取成功 )# cd project/server# vim main.c# svn add main.c# svn commit main.c -m "测试一下我的C 程序,看什么看,不行啊??"Adding main.cTransmitting file data .Committed revision 2. ( 测试提交成功 )三,配置SVN服务器的HTTP支持1,转换SVN服务器的密码由于SVN服务器的密码是明文的,HTTP服务器不与支持,所以需要转换成HTTP支持的格式。
Linux下SVN命令使用大全

Linux下SVN命令使用大全版本号V0.1 修订内容详细修订日期文件性质备注正在继续添加和完善...1、将文件checkout到本地目录svn checkout path(path是服务器上的目录)例如:svn checkout svn://192.168.1.1/pro/domain简写:svn co2、往版本库中添加新的文件、目录或符号链svn add PATH...例如:svn add test.php(添加test.php)svn add *.php(添加当前目录下所有的php文件)●文件、目录或符号链到你的工作拷贝并且预定添加到版本库。
它们会在下次提交上传并添加到版本库,如果你在提交之前改变了主意,你可以使用svn revert取消预定。
●是否访问版本库否●选项--targets FILENAME--non-recursive (-N)--quiet (-q)--config-dir DIR--no-ignore--auto-props--no-auto-props--force●例子添加一个文件到工作拷贝:$ svn add foo.cA foo.c当添加一个目录,svn add缺省的行为方式是递归的:$ svn add testdirA testdirA testdir/aA testdir/bA testdir/cA testdir/d你可以只添加一个目录而不包括其内容:$ svn add --non-recursive otherdirA otherdir通常情况下,命令svn add *会忽略所有已经在版本控制之下的目录,有时候,你会希望添加所有工作拷贝的未版本化文件,包括那些隐藏在深处的文件,可以使用svn add的--force递归到版本化的目录下:$ svn add * --forceA foo.cA somedir/bar.cA otherdir/docs/baz.doc…3、将改动的文件提交到版本库svn commit -m ―LogMessage― [-N] [--no-unlock] PATH(如果选择了保持锁,就使用–no-unlock 开关)例如:svn commit -m ―add test file for my test― test.php简写:svn ci4、加锁/解锁svn lock -m ―LockMessage― [--force] PATH例如:svn lock -m ―lock test file― test.phpsvn unlock PATH5、更新到某个版本svn update -r m path例如:svn update如果后面没有目录,默认将当前目录以及子目录下的所有文件都更新到最新版本。
linux ubuntu下svn命令使用指南
Linux ubuntu下svn的命令使用指南Svn简介:Svn的全名是Subversion,它使用服务端—客户端的结构,当然服务端与客户端可以都运行在同一台服务器上。
在服务端是存放着所有受控制数据的Subversion仓库,另一端是Subversion 的客户端程序,管理着受控数据的一部分在本地的映射(称为工作副本)。
在这两端之间,是通过各种仓库存取层(Repository Access,简称RA)的多条通道进行访问的。
这些通道中,可以通过不同的网络协议,例如HTTP、SSH等,或本地文件的方式来对仓库进行操作。
Subversion是一种开放源码的全新版本控制系统,支持可在本地访问或通过网络访问的数据库和文件系统存储库。
不但提供了常见的比较、修补、标记、提交、回复和分支功能性,Subversion 还增加了追踪移动和删除的能力。
此外,它支持非ASCII文本和二进制数据,所有这一切都使Subversion不仅对传统的编程任务非常有用,同时也适于Web 开发、图书创作和其他在传统方式下未采纳版本控制功能的领域.Subversion的官方网站是:/大部分的发行版都已经提供Subversion套件,ubuntu下安装subversion客户端:sudo apt-get install subversion使用SubversionSubversion一般使用两种后台服务模式:一种是其自己实现的svnserve,可以通过svn协议访问,另一种是借助mod_dav_svn模块,由Apache http服务器来实现,然后通过HTTP或HTTPS协议来访问。
1、通过svn协议访问svn协议客户端若要通过svn协议访问仓库,必须在存放仓库的机器上运行svnserve服务程序。
启动该程序后,会监听在3690端口,以响应客户端的访问工作。
2、通过HTTP协议访问版本库通过HTTP协议访问版本库是Subversion的亮点之一,这种方式具备许多svnserve服务器所没有的特性,使用上更加灵活。
Linux下多项目SVN配置方法

1. 安装SVN服务器软件2. 在home下创建svn根目录mkdir /home/svnroot3. 在/home/svnroot下创建Project1 , Project 2, Project3 三个项目文件夹,这三个文件夹要存放不同项目的SVN版本库。
4. 同样在/home/svnroot中创建CodeAuth 文件夹,该文件夹将保存passwd 和authz文件,在第6步中实现。
5. 创建项目cd /home/svnrootsvnadmin create Project1svnadmin create Project2svnadmin create Project3分别创建了三个项目的版本库,版本库目录conf中存在passwd 、authz、和svnserve.conf 文件passwd - 用于存放本svn库的用户名和密码authz - 存放本svn库的访问授权信息svnserve.conf 文件为存放本svn库的全局访问控制信息6. 将passwd 、authz文件拷贝到/home/svnroot/CodeAuth中,将三个项目下conf目录中的passwd 和authz文件删除7. 修改三个项目中conf目录下的svnserve.conf 文件,最快的办法是修改一个项目下的svnserve.conf 文件,使用它覆盖其他两个项目下的svnserve.conf 文件。
svnserve.conf 修改为[general]anon-access = none auth-access = writepassword-db = /CodeAuth/passwdauthz-db = /CodeAuth/authz 8. 修改/home/svnroot/CodeAuth下的passwd文件为[users] admin=admin0019. 修改/home/svnroot/CodeAuth下的Authz文件为[groups] admin_group=admin[Project1:/]@admin_group=rw*=[Project2:/]@admin_group=rw*=[Project3:/]@admin_group=rw*=10. 启动SVN服务svnserve -d -r /home/svnrootOK,服务器端配置完毕!。
linux搭建svn服务器的方法步骤
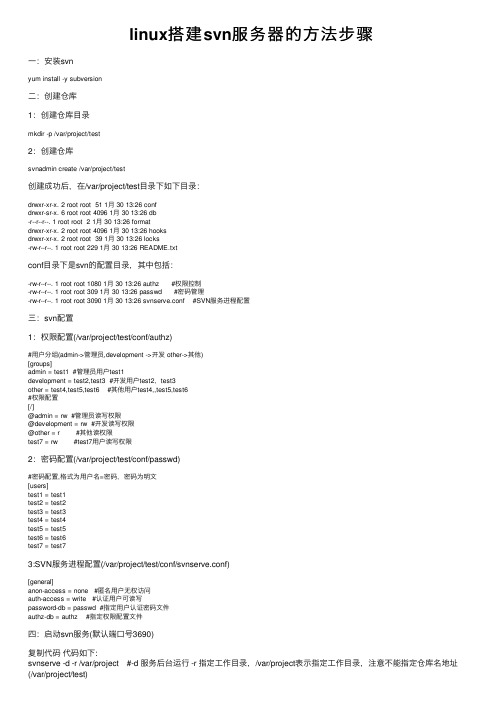
linux搭建svn服务器的⽅法步骤⼀:安装svnyum install -y subversion⼆:创建仓库1:创建仓库⽬录mkdir -p /var/project/test2:创建仓库svnadmin create /var/project/test创建成功后,在/var/project/test⽬录下如下⽬录:drwxr-xr-x. 2 root root 51 1⽉ 30 13:26 confdrwxr-sr-x. 6 root root 4096 1⽉ 30 13:26 db-r--r--r--. 1 root root 2 1⽉ 30 13:26 formatdrwxr-xr-x. 2 root root 4096 1⽉ 30 13:26 hooksdrwxr-xr-x. 2 root root 39 1⽉ 30 13:26 locks-rw-r--r--. 1 root root 229 1⽉ 30 13:26 README.txtconf⽬录下是svn的配置⽬录,其中包括:-rw-r--r--. 1 root root 1080 1⽉ 30 13:26 authz #权限控制-rw-r--r--. 1 root root 309 1⽉ 30 13:26 passwd #密码管理-rw-r--r--. 1 root root 3090 1⽉ 30 13:26 svnserve.conf #SVN服务进程配置三:svn配置1:权限配置(/var/project/test/conf/authz)#⽤户分组(admin->管理员,development ->开发 other->其他)[groups]admin = test1 #管理员⽤户test1development = test2,test3 #开发⽤户test2,test3other = test4,test5,test6 #其他⽤户test4,,test5,test6#权限配置[/]@admin = rw #管理员读写权限@development = rw #开发读写权限@other = r #其他读权限test7 = rw #test7⽤户读写权限2:密码配置(/var/project/test/conf/passwd)#密码配置,格式为⽤户名=密码,密码为明⽂[users]test1 = test1test2 = test2test3 = test3test4 = test4test5 = test5test6 = test6test7 = test73:SVN服务进程配置(/var/project/test/conf/svnserve.conf)[general]anon-access = none #匿名⽤户⽆权访问auth-access = write #认证⽤户可读写password-db = passwd #指定⽤户认证密码⽂件authz-db = authz #指定权限配置⽂件四:启动svn服务(默认端⼝号3690)复制代码代码如下:svnserve -d -r /var/project #-d 服务后台运⾏ -r 指定⼯作⽬录,/var/project表⽰指定⼯作⽬录,注意不能指定仓库名地址(/var/project/test)指定端⼝启动svnsvnserve -d -r /var/project --listen-port 3691五:关闭防⽕墙,或开启指定端⼝号1:关闭防⽕墙systemctl stop firewalld2:开启指定防⽕墙#开启3690端⼝firewall-cmd --zone=public --add-port=3690/tcp --permanent#刷新配置firewall-cmd --reload六:客户端连接并上传⽂件windows上连接svn1:新建⼀个⽬录,右击选择svn 检出2:在版本库上填写linux的svn地址 svn://ip:3690/仓库名 (这⾥的仓库名不是/var/project/test⽽是/test)2:填写⽤户名密码这时候我们可以看到此⽬录下⽣成了⼀个.svn⽂件,说明我们已经连接上了linux上的svn服务器3:上传⽂件现在我们新建⼀个test.txt⽂件,在⾥⾯随便填⼀些信息(1)右击选择add然后选择test.txt⽂件,点击确定,这时候我们会看到test.txt⽂件上会多了⼀个加号(2):上传右击选择提交填写备注选择要上传的⽂件后点击确定这时候我们可以看到test.txt⽂件上的加号会变成绿⾊的对号,表⽰上传成功但是这时候我们发现我们在/var/project/test⽬录下根本就没有找到我们上传的⽂件,这是为什么呢?难道我们没有上传成功,这是由于把⽂件上传到SVN版本库后,上传的⽂件不再以⽂件原来的格式存储,⽽是被svn以它⾃定义的格式压缩成版本库数据,存放在版本库中,svn服务器版本库有两种格式,⼀种为FSFS,⼀种为BDB这时候我们就需要在linux中实现检出4:检出svn checkout svn://192.168.11.201/test /data/test #svn://192.168.11.201/test表⽰需要检出的仓库地址 /data/test表⽰需要检出到哪个⽬录下这是我们可以在/data/test⽬录下看到我们之前在客户端上传的⽂件,但是现在问题⼜来了,我们在客户端上传⽂件之后,不可能每次都在服务器进⾏检出操作吧,那么如何进⾏⾃动检出呢?5:⾃动检出配置在/var/project/test/hooks⽬录下新建⼀个post-commit⽂件,post-commit⽂件添加内容为:#!/bin/shREPOS="$1" #仓库REV="$2" #版本号export.UTF-8 #编码SVN=/usr/bin/svn #svn地址WEB=/data/test #要更新的项⽬⽬录$SVN update $WEB --username test1 --password test1 #--username test1表⽰设置⽤户名 --password test1表⽰设置密码将post-commit设置为可执⾏chmod +x /var/project/test/hooks/post-commit到此⾃动检出配置完成,不过注意,第⼀次的时候需要⼿动检出,之后就不需要了,到此linux搭建svn服务器完成以上就是本⽂的全部内容,希望对⼤家的学习有所帮助,也希望⼤家多多⽀持。
svn linux下常用命令

在Linux下使用Subversion(SVN)进行版本控制,你可以使用以下常用命令:1. `svn checkout`:从服务器上检出(checkout)一个目录,作为你本地的副本。
语法为`svn checkout path`,其中`path`是服务器的目录路径。
例如:`svn checkout svn://192.168.1.1/pro/domain`。
2. `svn update`:将本地的目录更新到最新的版本。
如果在提交的时候提示过期的话,是因为冲突,需要先`update`,修改文件,然后清除`svn resolved`,最后再提交`commit`。
例如:`svn update test.php`。
3. `svn add`:将新的文件添加到版本库。
语法为`svn add filename`,其中`filename`是要添加的文件名。
例如:`svn add test.cpp`。
4. `svn commit`:将修改的内容提交到版本库。
语法为`svn commit -m "注释"`,其中`-m "注释"`是提交的注释信息。
例如:`svn commit -m "注释" test.cpp`。
5. `svn lock`:给文件加锁,防止其他用户修改。
语法为`svn lock -m "注释" path`,其中`path`是要锁定的文件路径,`-m "注释"`是锁定的注释信息。
例如:`svn lock -m "注释" test.cpp`。
6. `svn unlock`:解锁文件,允许其他用户修改。
语法为`svn unlock path`,其中`path`是要解锁的文件路径。
例如:`svn unlock test.cpp`。
7. `svn status`:查看文件或者目录状态。
可以查看正常状态(例如`svn status path`)和详细状态(例如`svn status -v path`)这些是Linux 下使用Subversion 的常用命令,可以根据实际情况选择适合的命令来操作。
linux下搭建svn服务器
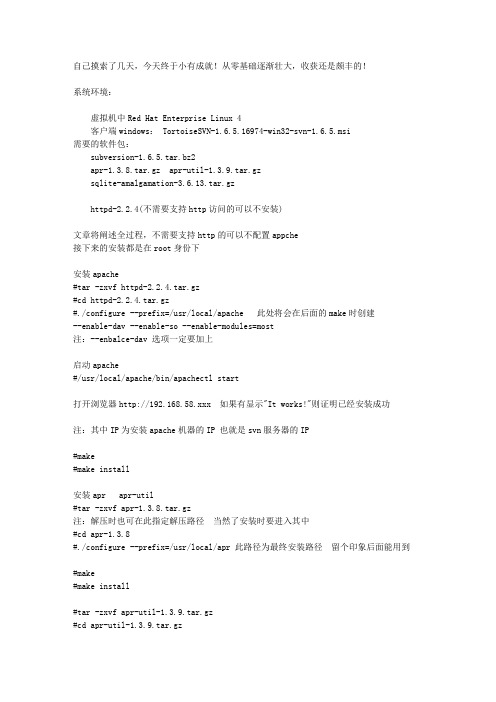
自己摸索了几天,今天终于小有成就!从零基础逐渐壮大,收获还是颇丰的!系统环境:虚拟机中Red Hat Enterprise Linux 4客户端windows: TortoiseSVN-1.6.5.16974-win32-svn-1.6.5.msi需要的软件包:subversion-1.6.5.tar.bz2apr-1.3.8.tar.gz apr-util-1.3.9.tar.gzsqlite-amalgamation-3.6.13.tar.gzhttpd-2.2.4(不需要支持http访问的可以不安装)文章将阐述全过程,不需要支持http的可以不配置appche接下来的安装都是在root身份下安装apache#tar -zxvf httpd-2.2.4.tar.gz#cd httpd-2.2.4.tar.gz#./configure --prefix=/usr/local/apache 此处将会在后面的make时创建--enable-dav --enable-so --enable-modules=most注:--enbalce-dav 选项一定要加上启动apache#/usr/local/apache/bin/apachectl start打开浏览器http://192.168.58.xxx 如果有显示"It works!"则证明已经安装成功注:其中IP为安装apache机器的IP 也就是svn服务器的IP#make#make install安装apr apr-util#tar -zxvf apr-1.3.8.tar.gz注:解压时也可在此指定解压路径当然了安装时要进入其中#cd apr-1.3.8#./configure --prefix=/usr/local/apr 此路径为最终安装路径留个印象后面能用到#make#make install#tar -zxvf apr-util-1.3.9.tar.gz#cd apr-util-1.3.9.tar.gz#./configure=/usr/local/apr-util --with-apr=/usr/local/apr 提供apr支持 =后面为apr安装路径#make#make install安装 sqlite#tar -zxvf sqlite-amalgamation-3.6.13.tar.gz#cd sqlite-3.6.13#./configure --prefix=/usr/local/sqlite#make#make install安装svn#tar -zxvf subversion-1.6.5.tar.bz2#cd subversion-1.6.5#./configure --prefix=/usr/local/svn--with-paxs=/usr/local/apache/bin/apxs--with-apr=/usr/local/apr--with-apr-util=/usr/local/apr-util--with-sqlite=/usr/local/sqlite--with-zlib=/usr/local/zlib 此处地址不定看看你zlib的安装路径在哪把它写在这没有的话自己装一个路径写这--with-ssl--enable-maintainer-mode#make#make install注:--with-zlib=/...后面不写路径会报错svn服务器安装结束安装svn客户端windows 下安装TortoiseSVN-1.6.5.16974-win32-svn-1.6.5.msi 常用软件安装方法SVN配置建立版本库#mkdir -p /opt/svn#/usr/bin svnadmin create /opt/svn/repository#ls -l /opt/svn/repository有内容显示说明版本库建立成功#vi /opt/svn/repository/conf/svnserve.conf修改如下内容:并把每行的#去掉[general]anon-access = noneauth-access = writepassword-db = /opt/svn/repository/conf/passwd 此为系统自动生成文件,但要修改过之后才能生效authz-db = /opt/svn/authz.conf 此文件还没有创建但系统已经为此自动生成了一个文件,路径同上我用我自己创建的realm = repository创建svn用户此用户也就是客户端的登陆用户#htpasswd -c /opt/svn/htpasswd admin之后体统会提示输入密码、校验密码注:第一次创建svn用户时要加 -c 意思是:如果htpasswd存在将覆盖写入往后再创建svn用户时也是执行此命令不过不用加 -cadmin 为用户名标识登陆用户例:新增加用户user#htpasswd /opt/svn/htpasswd user用户配置文件#vi /opt/svn/repository/conf/passwd在最下面添加两行代码格式为:用户名 = 密码admin = admin 前不要加# 、留空格user = user权限配置文件#vi /opt/svn/authz.conf写入如下代码[groups]admin = admin,user[/]@admin = rw 代表admin的所有组员有读写权限注:admin组里面有admin和user组员其中有一个以上的组员时要用逗号隔开这一部分自己可以找资料看看设计内容很多,我只建了一个版本库,还有多个版本库的设置,版本库下的具体目录权限设置启动svn服务#svnserver -d --listen-port 9999 -r /opt/svn/repository注:启动时也是有名堂的可以找资料看看-d 后台运行9999是要监听的端口-r 后面的是版本库路径#ps -ef | grep svnserve 查看svn有没有启动成功成功显示root 5088 1 0 Jul05 ? 00:00:00 svnserve -d --listen-port 9999 -r /opt/svn/repository客户端登陆右键单击某个文件夹点击check out输入URL:svn://192.168.58.XXX:9999/opt/svn/repository其中IP为启动svn服务的机器的IP不用支持http的下面范围内可以不用理会/***********************************/配置apache#vi /usr/local/apache/conf/httpd.conf做如下修改:listen 80 如果是以root用户启动apache此处不用修改其他用户启动的要修改大于1024的否则报错# Example:# LoadModule foo_module modules/mod_foo.soLoadModule dav_module modules/mod_dav.soLoadModule dav_svn_module modules/mod_dav_svn.soLoadModule authz_svn_module modules/mod_authz_svn.so注:此段代码我的没有我自己添加的因为后面启动apache时报:Invalid command 'DAV', perhaps mis-spelled or defined by a module not included in the server configuration 别光添加代码还要确保此文件上级目录下的 modules 里面有相应的模块没有的话另外下载其他的 httpd-xxx-xxx 解压安装把其中的相应模块拷贝过来User svnGroup svnServerName 192.168.58.xxx IP设置svn服务器的IP把DocumentRoot "/usr/local/apache/htdocs"改为DocumentRoot "/opt/svn/repository"把<Directory "/usr/local/apache/htdocs">改为<Directory "/opt/svn/repository">另外在最下面添加:<Location /opt/svn>DAV svn 如果没有Loadmodules xxx_dav xxx.so 此处会报错SVNParentPath /opt/svn svn设置AuthType Basic 连接类型设置AuthName "Subversion Authorization" 连接框提示AuthzSVNAccessFile /opt/svn/authz.conf 权限配置文件此文件中有 [group] AuthUserFile /opt/svn/htpasswd 此文件中存的是用 htpasswd 创建的Require valid-user 采用何种认证</Location>重启apache 验证配置/usr/local/apache/bin/apachectl restart 如果没有启动用start打开浏览器访问http://192.168.58.xxx/opt/svn/repository --》弹出登陆框如果不弹出登陆框则配置失败/***********************************/最后:我安装过程中错误千奇百怪的,一点一点上网搜资料,慢慢的就完善了!也预祝你们顺利!。
- 1、下载文档前请自行甄别文档内容的完整性,平台不提供额外的编辑、内容补充、找答案等附加服务。
- 2、"仅部分预览"的文档,不可在线预览部分如存在完整性等问题,可反馈申请退款(可完整预览的文档不适用该条件!)。
- 3、如文档侵犯您的权益,请联系客服反馈,我们会尽快为您处理(人工客服工作时间:9:00-18:30)。
S V N D E P L O Y M E N T O N L I N U XPrepared by: Arain Date: 17/08/2009TABLE OF CONTENTS1Introduction (2)2Apache Installation (2)3Subversion Installation (4)4SVN and LDAP combination (6)5Daily activities on server side (10)5.1Subversion Repository Creation (10)5.2Subversion Authorization file (10)5.3Subversion Backup (11)5.3.1All Backup (11)5.3.2Icremental Backup (11)5.3.3SVN Backup Strategy in SVNCLUB (12)6Troubleshooting (12)1 INTRODUCTIONThe purpose of the document is introduce how to do SVN deployment on Linux. It mainly includes following contents: how to install apache & Subversion, how to combine SVN and openldap, how to create a SVN repository, how to configure the authorization file, how to backup & restore SVN repository, and etc.2 APACHE INSTALL ATIONDownload apache installation source file from apache official website: /dist/httpd/. Here I download : httpd-2.0.59tar.gz.Copy the apache installation source file to the linux which you want to install apache on and release the compress file.[root@svnclub03 svnclub]# tar -xzvf httpd-2.0.59tar.gz[root@svnclub03 svnclub]# cd httpd-2.0.59Enable the ldap moduleswhile installing apache.[root@svnclub03 httpd-2.0.59]# ./configure --prefix=/usr/local/apache2 --enable-dav --enable-so --with-ldap --enable-ldap --enable-auth-ldap…creating config_vars.mkconfigure: creating ./config.statuscreating modules/aaa/Makefilecreating modules/arch/win32/Makefilecreating modules/cache/Makefilecreating modules/echo/Makefilecreating modules/experimental/Makefilecreating modules/filters/Makefilecreating modules/loggers/Makefilecreating modules/metadata/Makefilecreating modules/proxy/Makefilecreating modules/ssl/Makefilecreating modules/test/Makefilecreating os/unix/Makefilecreating server/mpm/Makefilecreating server/mpm/prefork/Makefilecreating modules/http/Makefilecreating modules/dav/main/Makefilecreating modules/generators/Makefilecreating modules/dav/fs/Makefilecreating modules/mappers/Makefilecreating Makefilecreating modules/Makefilecreating srclib/Makefilecreating os/beos/Makefilecreating os/os2/Makefilecreating os/Makefilecreating os/unix/Makefilecreating server/Makefilecreating support/Makefilecreating srclib/pcre/Makefilecreating test/Makefileconfig.status: creating docs/conf/httpd-std.confconfig.status: creating docs/conf/ssl-std.confconfig.status: creating include/ap_config_layout.hconfig.status: creating support/apxsconfig.status: creating support/apachectlconfig.status: creating support/dbmmanageconfig.status: creating support/envvars-stdconfig.status: creating support/log_server_statusconfig.status: creating support/logresolve.plconfig.status: creating support/phf_abuse_log.cgiconfig.status: creating support/split-logfileconfig.status: creating build/rules.mkconfig.status: creating build/pkg/pkginfoconfig.status: creating include/ap_config_auto.hconfig.status: executing default commands[root@svnclub03 httpd-2.0.59]# make…/svnclub/httpd-2.0.59/srclib/apr/libtool --silent --mode=compile gcc -g -O2 -pthread -DLINUX=2 -D_REENTRANT -D_GNU_SOURCE -DAP_HAVE_DESIGNATED_INITIALIZER -I/svnclub/httpd-2.0.59/srclib/apr/include -I/svnclub/httpd-2.0.59/srclib/apr-util/include -I. -I/svnclub/httpd-2.0.59/os/unix -I/svnclub/httpd-2.0.59/server/mpm/prefork -I/svnclub/httpd-2.0.59/modules/http -I/svnclub/httpd-2.0.59/modules/filters -I/svnclub/httpd-2.0.59/modules/proxy -I/svnclub/httpd-2.0.59/include -I/svnclub/httpd-2.0.59/modules/generators -I/svnclub/httpd-2.0.59/modules/dav/main -prefer-non-pic -static -c modules.c && touch modules.lo/svnclub/httpd-2.0.59/srclib/apr/libtool --silent --mode=link gcc -g -O2 -pthread -DLINUX=2 -D_REENTRANT -D_GNU_SOURCE -DAP_HAVE_DESIGNATED_INITIALIZER -I/svnclub/httpd-2.0.59/srclib/apr/include -I/svnclub/httpd-2.0.59/srclib/apr-util/include -I. -I/svnclub/httpd-2.0.59/os/unix -I/svnclub/httpd-2.0.59/server/mpm/prefork -I/svnclub/httpd-2.0.59/modules/http -I/svnclub/httpd-2.0.59/modules/filters -I/svnclub/httpd-2.0.59/modules/proxy -I/svnclub/httpd-2.0.59/include -I/svnclub/httpd-2.0.59/modules/generators -I/svnclub/httpd-2.0.59/modules/dav/main -export-dynamic -o httpd modules.lo modules/aaa/mod_ modules/aaa/mod_ modules/experimental/mod_ modules/experimental/mod_auth_ modules/filters/mod_ modules/loggers/mod_log_ modules/metadata/mod_ modules/metadata/mod_ modules/http/mod_ modules/http/mod_ modules/dav/main/mod_ modules/generators/mod_ modules/generators/mod_ modules/generators/mod_ modules/generators/mod_ modules/dav/fs/mod_dav_ modules/mappers/mod_ modules/mappers/mod_ modules/mappers/mod_ modules/mappers/mod_ modules/mappers/mod_ modules/mappers/mod_ modules/mappers/mod_ server/mpm/prefork/ server/ os/unix/ /svnclub/httpd-2.0.59/srclib/pcre/ /svnclub/httpd-2.0.59/srclib/apr-util/ -lldap -llber -lexpat /svnclub/httpd-2.0.59/srclib/apr/ -lrt -lm -lcrypt -lnsl -lpthread -ldlmodules/experimental/.libs/mod_ldap.a(util_ldap.o)(.text+0x1ef4): In function `util_ldap_post_config':/svnclub/httpd-2.0.59/modules/experimental/util_ldap.c:1476: warning: the use of `tmpnam' is dangerous, better use `mkstemp'make[1]: Leaving directory `/svnclub/httpd-2.0.59'[root@svnclub03 httpd-2.0.59]# make install…Making install in generatorsmake[2]: Entering directory `/svnclub/httpd-2.0.59/modules/generators'make[3]: Entering directory `/svnclub/httpd-2.0.59/modules/generators'make[3]: Leaving directory `/svnclub/httpd-2.0.59/modules/generators'make[2]: Leaving directory `/svnclub/httpd-2.0.59/modules/generators'Making install in dav/fsmake[2]: Entering directory `/svnclub/httpd-2.0.59/modules/dav/fs'make[3]: Entering directory `/svnclub/httpd-2.0.59/modules/dav/fs'make[3]: Leaving directory `/svnclub/httpd-2.0.59/modules/dav/fs'make[2]: Leaving directory `/svnclub/httpd-2.0.59/modules/dav/fs'Making install in mappersmake[2]: Entering directory `/svnclub/httpd-2.0.59/modules/mappers'make[3]: Entering directory `/svnclub/httpd-2.0.59/modules/mappers'make[3]: Leaving directory `/svnclub/httpd-2.0.59/modules/mappers'make[2]: Leaving directory `/svnclub/httpd-2.0.59/modules/mappers'make[2]: Entering directory `/svnclub/httpd-2.0.59/modules'make[2]: Leaving directory `/svnclub/httpd-2.0.59/modules'make[1]: Leaving directory `/svnclub/httpd-2.0.59/modules'Making install in supportmake[1]: Entering directory `/svnclub/httpd-2.0.59/support'make[2]: Entering directory `/svnclub/httpd-2.0.59/support'make[2]: Leaving directory `/svnclub/httpd-2.0.59/support'make[1]: Leaving directory `/svnclub/httpd-2.0.59/support'make[1]: Entering directory `/svnclub/httpd-2.0.59'Installing configuration filesmkdir /usr/local/apache2/confInstalling HTML documentsmkdir /usr/local/apache2/htdocsInstalling error documentsmkdir /usr/local/apache2/errorInstalling iconsmkdir /usr/local/apache2/iconsmkdir /usr/local/apache2/logsInstalling CGIsmkdir /usr/local/apache2/cgi-binInstalling header filesInstalling man pages and online manualmkdir /usr/local/apache2/manmkdir /usr/local/apache2/man/man1mkdir /usr/local/apache2/man/man8mkdir /usr/local/apache2/manualInstalling build system filesmake[1]: Leaving directory `/svnclub/httpd-2.0.59'3 SUBVERSION I NSTAL L ATIONDownload Subversion installation source file from apache official website:/servlets/ProjectDocumentList?folderID=260&expandFolder=260&folderID=260. Here I download : subversion-1.4.4.tar.gz.[root@svnclub03 svnclub]# tar -xzvf subversion-1.4.4.tar.gz[root@svnclub03 svnclub]# cd subversion-1.4.4.tar.gzEnable the ldap module while installing apache.[root@svnclub03 subversion-1.4.4]# /configure --with-apxs=/usr/local/apache2/bin/apxs --prefix=/usr/local/subversion --with-apr=/usr/local/apache2…checking for perl... /usr/bin/perlchecking for ruby... /usr/bin/rubychecking for rb_hash_foreach()... noconfigure: WARNING: The detected Ruby is too old for Subversion to useconfigure: WARNING: A Ruby which has rb_hash_foreach is required to use theconfigure: WARNING: Subversion Ruby bindingsconfigure: WARNING: Upgrade to the official 1.8.2 release, or laterchecking for swig... /usr/bin/swigchecking swig version... 1.3.21configure: WARNING: Detected SWIG version 1.3.21configure: WARNING: Subversion requires 1.3.24 or later, and is known to workconfigure: WARNING: with versions up to 1.3.29configure: Configuring python swig bindingchecking for Python includes... -I/usr/include/python2.3checking for compiling Python extensions... gcc -pthread -fno-strict-aliasing -DNDEBUG -O2 -g -pipe -m32 -march=i386 -mtune=pentium4 -D_GNU_SOURCE -fPIC -fPICchecking for linking Python extensions... gcc -pthread -sharedchecking for linking Python libraries...checking for apr_int64_t Python/C API format string... Lchecking perl version (5008005)configure: creating ./config.statusconfig.status: creating Makefileconfig.status: creating tools/backup/hot-backup.pyconfig.status: creating contrib/client-side/svn_load_dirs.plconfig.status: creating contrib/client-side/svncopy.plconfig.status: creating contrib/client-side/testsvncopy.plconfig.status: creating tools/hook-scripts/commit-access-control.plconfig.status: creating tools/hook-scripts/commit-email.plconfig.status: creating subversion/bindings/swig/perl/native/Makefile.PLconfig.status: creating packages/solaris/pkginfoconfig.status: creating subversion/svn_private_config.hconfig.status: executing mkdir-init commands/usr/bin/install -c -d subversion/bindings/java/javahl/classes/usr/bin/install -c -d subversion/bindings/java/javahl/includeconfigure: WARNING: we have configured without BDB filesystem supportYou don't seem to have Berkeley DB version 4.0.14 or newerinstalled and linked to APR-UTIL. We have created Makefiles whichwill build without the Berkeley DB back-end; your repositories willuse FSFS as the default back-end. You can find the latest version ofBerkeley DB here:/download/index.shtml[root@svnclub03 subversion-1.4.4]# make…cd subversion/mod_dav_svn && /bin/sh /svnclub/subversion-1.4.4/libtool --tag=CC --silent --mode=link gcc -g -O2 -g -O2 -pthread -rpath /usr/local/apache2/modules -avoid-version -module -o mod_dav_ activity.lo deadprops.lo file_revs.lo liveprops.lo lock.lo log.lo merge.lo mod_dav_svn.lo replay.lo repos.lo update.lo util.lo version.lo ../../subversion/libsvn_repos/libsvn_ ../../subversion/libsvn_fs/libsvn_ ../../subversion/libsvn_delta/libsvn_ ../../subversion/libsvn_subr/libsvn_ -lzlibtool: link: warning: `/usr/lib/gcc/i386-redhat-linux/3.4.6/../../..//' seems to be movedlibtool: link: warning: `/usr/lib/gcc/i386-redhat-linux/3.4.6/../../..//' seems to be movedlibtool: link: warning: `/usr/lib/gcc/i386-redhat-linux/3.4.6/../../..//' seems to be movedlibtool: link: warning: `/usr/lib/gcc/i386-redhat-linux/3.4.6/../../..//' seems to be movedcd subversion/mod_authz_svn && /bin/sh /svnclub/subversion-1.4.4/libtool --tag=CC --silent --mode=link gcc -g -O2 -g -O2 -pthread -rpath /usr/local/apache2/modules -avoid-version -module -o mod_authz_ mod_authz_svn.lo ../../subversion/libsvn_subr/libsvn_ ../../subversion/libsvn_repos/libsvn_ -lzlibtool: link: warning: `/usr/lib/gcc/i386-redhat-linux/3.4.6/../../..//' seems to be movedlibtool: link: warning: `/usr/lib/gcc/i386-redhat-linux/3.4.6/../../..//' seems to be moved/usr/bin/msgfmt -c -o subversion/po/de.mo subversion/po/de.po/usr/bin/msgfmt -c -o subversion/po/es.mo subversion/po/es.po/usr/bin/msgfmt -c -o subversion/po/fr.mo subversion/po/fr.po/usr/bin/msgfmt -c -o subversion/po/it.mo subversion/po/it.po/usr/bin/msgfmt -c -o subversion/po/ja.mo subversion/po/ja.po/usr/bin/msgfmt -c -o subversion/po/ko.mo subversion/po/ko.po/usr/bin/msgfmt -c -o subversion/po/nb.mo subversion/po/nb.po/usr/bin/msgfmt -c -o subversion/po/pl.mo subversion/po/pl.po/usr/bin/msgfmt -c -o subversion/po/pt_BR.mo subversion/po/pt_BR.po/usr/bin/msgfmt -c -o subversion/po/sv.mo subversion/po/sv.po/usr/bin/msgfmt -c -o subversion/po/zh_CN.mo subversion/po/zh_CN.po/usr/bin/msgfmt -c -o subversion/po/zh_TW.mo subversion/po/zh_TW.po[root@svnclub03 subversion-1.4.4]# make install…chmod 755 /usr/local/apache2/modules/mod_authz_svn.so[activating module `authz_svn' in /usr/local/apache2/conf/httpd.conf]/usr/bin/install -c -d /usr/local/subversion/share/locale/usr/bin/install -c -d /usr/local/subversion/share/locale/de/LC_MESSAGEScd subversion/po ; /usr/bin/install -c -m 644 de.mo /usr/local/subversion/share/locale/de/LC_MESSAGES/subversion.mo/usr/bin/install -c -d /usr/local/subversion/share/locale/es/LC_MESSAGEScd subversion/po ; /usr/bin/install -c -m 644 es.mo /usr/local/subversion/share/locale/es/LC_MESSAGES/subversion.mo/usr/bin/install -c -d /usr/local/subversion/share/locale/fr/LC_MESSAGEScd subversion/po ; /usr/bin/install -c -m 644 fr.mo /usr/local/subversion/share/locale/fr/LC_MESSAGES/subversion.mo/usr/bin/install -c -d /usr/local/subversion/share/locale/it/LC_MESSAGEScd subversion/po ; /usr/bin/install -c -m 644 it.mo /usr/local/subversion/share/locale/it/LC_MESSAGES/subversion.mo/usr/bin/install -c -d /usr/local/subversion/share/locale/ja/LC_MESSAGEScd subversion/po ; /usr/bin/install -c -m 644 ja.mo /usr/local/subversion/share/locale/ja/LC_MESSAGES/subversion.mo/usr/bin/install -c -d /usr/local/subversion/share/locale/ko/LC_MESSAGEScd subversion/po ; /usr/bin/install -c -m 644 ko.mo /usr/local/subversion/share/locale/ko/LC_MESSAGES/subversion.mo/usr/bin/install -c -d /usr/local/subversion/share/locale/nb/LC_MESSAGEScd subversion/po ; /usr/bin/install -c -m 644 nb.mo /usr/local/subversion/share/locale/nb/LC_MESSAGES/subversion.mo/usr/bin/install -c -d /usr/local/subversion/share/locale/pl/LC_MESSAGEScd subversion/po ; /usr/bin/install -c -m 644 pl.mo /usr/local/subversion/share/locale/pl/LC_MESSAGES/subversion.mo/usr/bin/install -c -d /usr/local/subversion/share/locale/pt_BR/LC_MESSAGEScd subversion/po ; /usr/bin/install -c -m 644 pt_BR.mo /usr/local/subversion/share/locale/pt_BR/LC_MESSAGES/subversion.mo/usr/bin/install -c -d /usr/local/subversion/share/locale/sv/LC_MESSAGEScd subversion/po ; /usr/bin/install -c -m 644 sv.mo /usr/local/subversion/share/locale/sv/LC_MESSAGES/subversion.mo/usr/bin/install -c -d /usr/local/subversion/share/locale/zh_CN/LC_MESSAGEScd subversion/po ; /usr/bin/install -c -m 644 zh_CN.mo /usr/local/subversion/share/locale/zh_CN/LC_MESSAGES/subversion.mo/usr/bin/install -c -d /usr/local/subversion/share/locale/zh_TW/LC_MESSAGEScd subversion/po ; /usr/bin/install -c -m 644 zh_TW.mo /usr/local/subversion/share/locale/zh_TW/LC_MESSAGES/subversion.mosubversion/svnversion/svnversion . /repos/svn/trunk > /usr/local/subversion/include/subversion-1/svn-revision.txt4 SVN AND LDAP COMBINAT IONFirstly, please create an account such as svnroot to manage svn activities. You should also configure the account in apache configuration file: httpd.conf. If you don’t know the exact position to configure the account in httpd.conf, please refer the example at the end of this section.Secondly, please make sure there are two SVN modules and two LDAP modules under apache installation directory. Hear check if there are: mod_authz_svn.so, mod_dav_svn.so, mod_auth_ldap.so,mod_ldap.so under: /usr/local/apache2/modules. If no, please copy them from: Y:\svn\modules directly. If yes, also need check if the four modules have been loaded in apache configuration file: httpd.conf. LoadModule ldap_module modules/mod_ldap.soLoadModule auth_ldap_module modules/mod_auth_ldap.soLoadModule dav_svn_module modules/mod_dav_svn.soLoadModule authz_svn_module modules/mod_authz_svn.soThirdly, need superadd following information at the end of the apache configuration file.<Location /svn/>Dav svnSVNParentPath /svn/AuthType BasicAuthName "SVNCLUB SVN"SVNListParentPath onAuthLDAPEnabled onAuthLDAPBindDN "CN=manager,DC=ufreight,DC=com"AuthLDAPBindPassword not24getAuthLDAPURL "ldap://192.168.11.220:389/OU=people,DC=svnclub,DC=com?uid?sub?( (o=svnclub*)" AuthLDAPAuthoritative offAuthzSVNAccessFile /svn/accessfileRequire valid-user</Location>Note:1. “SVNParentPath /svn/” is the parent path directory where can create many repositories.2. “SVNListParentPath” is a option that can display all repositories under parent path.3. “AuthLDAPBindDN”:An optional DN used to bind to the server when searching for entries. If notprovided, mod_auth_ldap will use an anonymous bind.4. “AuthLDAPBindPassword” A bind password to use in conjunction with the bind DN. Note that thebind password is probably sersitive data, and should be properly protected. Should only use the AUthLDAPBindDN and AuthLDAPBindPassword if you absolutely need them to search the directory.5. “AuthLDAPURL” is the ldap server URL. What I want to say is that using “o=svnclub” can only let theldap user whose “o” option begin with “svnclub” can access SVN.6. “AuthLDAPAuthoritative” Set to off if this module should let other authentication modules attempt toauthentivate the user, should authentication with this module fail. Control is only passed on to lower modules if there is no DN or rule that matches the supplied user name.7. “AuthzSVNAccessFile /svn/accessfile” means where is the authorization file.Fourthly, restart httpd service.[root@svnclub03 ~]# /usr/local/apache2/bin/apachectl -k restart[root@svnclub03 ~]# lsof -i:8888COMMAND PID USER FD TYPE DEVICE SIZE NODE NAMEhttpd 11106 svnroot 3u IPv6 613774 TCP *:8888 (LISTEN)httpd 30565 svnroot 3u IPv6 613774 TCP *:8888 (LISTEN)httpd 30566 svnroot 3u IPv6 613774 TCP *:8888 (LISTEN)httpd 30567 svnroot 3u IPv6 613774 TCP *:8888 (LISTEN)httpd 30568 svnroot 3u IPv6 613774 TCP *:8888 (LISTEN)httpd 30569 svnroot 3u IPv6 613774 TCP *:8888 (LISTEN)Here I paste some contents of apache configuration file, please note the bold section.Httpd.conf:# Based upon the NCSA server configuration files originally by Rob McCool.## This is the main Apache server configuration file. It contains the# configuration directives that give the server its instructions.# See <URL:/docs/2.0/> for detailed information about# the directives.## Do NOT simply read the instructions in here without understanding# what they do. They're here only as hints or reminders. If you are unsure# consult the online docs. You have been warned.## The configuration directives are grouped into three basic sections:# 1. Directives that control the operation of the Apache server process as a# whole (the 'global environment').# 2. Directives that define the parameters of the 'main' or 'default' server,# which responds to requests that aren't handled by a virtual host.# These directives also provide default values for the settings# of all virtual hosts.# 3. Settings for virtual hosts, which allow Web requests to be sent to# different IP addresses or hostnames and have them handled by the# same Apache server process.## Configuration and logfile names: If the filenames you specify for many# of the server's control files begin with "/" (or "drive:/" for Win32), the# server will use that explicit path. If the filenames do *not* begin# with "/", the value of ServerRoot is prepended -- so "logs/foo.log"# with ServerRoot set to "/usr/local/apache2" will be interpreted by the# server as "/usr/local/apache2/logs/foo.log".#…## Listen: Allows you to bind Apache to specific IP addresses and/or# ports, instead of the default. See also the <VirtualHost># directive.## Change this to Listen on specific IP addresses as shown below to# prevent Apache from glomming onto all bound IP addresses (0.0.0.0)##Listen 12.34.56.78:80Listen 8888## Dynamic Shared Object (DSO) Support## To be able to use the functionality of a module which was built as a DSO you # have to place corresponding `LoadModule' lines at this location so the# directives contained in it are actually available _before_ they are used.# Statically compiled modules (those listed by `httpd -l') do not need# to be loaded here.## Example:# LoadModule foo_module modules/mod_foo.so##LoadModule dav_module modules/mod_dav.so#LoadModule dav_fs_module modules/mod_dav_fs.soLoadModule speling_module modules/mod_speling.soLoadModule rewrite_module modules/mod_rewrite.soLoadModule auth_ldap_module modules/mod_auth_ldap.so LoadModule ldap_module modules/mod_ldap.soLoadModule dav_svn_module modules/mod_dav_svn.soLoadModule authz_svn_module modules/mod_authz_svn.so## ExtendedStatus controls whether Apache will generate "full" status# information (ExtendedStatus On) or just basic information (ExtendedStatus # Off) when the "server-status" handler is called. The default is Off.##ExtendedStatus On### Section 2: 'Main' server configuration## The directives in this section set up the values used by the 'main'# server, which responds to any requests that aren't handled by a# <VirtualHost> definition. These values also provide defaults for# any <VirtualHost> containers you may define later in the file.## All of these directives may appear inside <VirtualHost> containers,# in which case these default settings will be overridden for the# virtual host being defined.#<IfModule !mpm_winnt.c><IfModule !mpm_netware.c>## If you wish httpd to run as a different user or group, you must run# httpd as root initially and it will switch.## User/Group: The name (or #number) of the user/group to run httpd as.# . On SCO (ODT 3) use "User nouser" and "Group nogroup".# . On HPUX you may not be able to use shared memory as nobody, and the# suggested workaround is to create a user www and use that user.# NOTE that some kernels refuse to setgid(Group) or semctl(IPC_SET)# when the value of (unsigned)Group is above 60000;# don't use Group #-1 on these systems!#User svnrootGroup #-1</IfModule></IfModule>## ServerAdmin: Your address, where problems with the server should be# e-mailed. This address appears on some server-generated pages, such# as error documents. e.g. admin@#ServerAdmin arain@## ServerName gives the name and port that the server uses to identify itself. # This can often be determined automatically, but we recommend you specify # it explicitly to prevent problems during startup.## If this is not set to valid DNS name for your host, server-generated# redirections will not work. See also the UseCanonicalName directive.## If your host doesn't have a registered DNS name, enter its IP address here. # You will have to access it by its address anyway, and this will make# redirections work in a sensible way.#ServerName :8888…AddIconByType (TXT,/icons/text.gif) text/*### Section 3: Virtual Hosts## VirtualHost: If you want to maintain multiple domains/hostnames on your# machine you can setup VirtualHost containers for them. Most configurations # use only name-based virtual hosts so the server doesn't need to worry about # IP addresses. This is indicated by the asterisks in the directives below.## Please see the documentation at# <URL:/docs/2.0/vhosts/># for further details before you try to setup virtual hosts.## You may use the command line option '-S' to verify your virtual host# configuration.## Use name-based virtual hosting.##NameVirtualHost *:80## VirtualHost example:# Almost any Apache directive may go into a VirtualHost container.# The first VirtualHost section is used for requests without a known# server name.##<VirtualHost *:80># ServerAdmin webmaster@# DocumentRoot /www/docs/# ServerName # ErrorLog logs/-error_log# CustomLog logs/-access_log common#</VirtualHost><Location /svn>Dav svnSVNParentPath /svn/AuthType BasicAuthName "SVNCLUB SVN"AuthLDAPEnabled onAuthLDAPBindDN "CN=manager,DC=ufreight,DC=com"AuthLDAPBindPassword not24getAuthLDAPURL"ldap://192.168.11.220:389/OU=people,DC=svnclub,DC=com?uid?sub?( (o=svnclub*)" AuthLDAPAuthoritative offAuthzSVNAccessFile /svn/accessfileRequire valid-user</Location>5 D AILY ACT IVITIES ON SERVER SIDEThis section mainly include how to create a subversion repository, how to configure authorization file and how to do daily backup.5.1 SUBVERSION REPOSITORY CREATIONSubversion repository creation is an incredibly simple task; The svnadmin utility that comes with Subversion provides a subcommand for doing just that.[root@svnclub03 svn]# /usr/local/subversion/bin/svnadmin create SVNREGISTERAfter running this simple command, you have a subversion repository on current folder.[root@svnclub03 svn]# lsSVNREGISTERAt this time ,remember to change the user and group of the repository folder with the account that you configured in apache configuration file. Also ckeck if the folder”s authorities is 755.[root@svnclub03 svn]# chown -R svnroot:svnroot SVNREGISTER[root@svnclub03 svn]# chmod –R 755 SVNREGISTER5.2 SUBVERSION AUTHORIZATION FILEIn SVNCLUB we create a file named accessfile as the subversion authorization file. The file can control every directory access of each repositories.In SVNCLUB, we always create many groups for different project. Take SVNREGISTER/ADMIN as a exaple:[groups]SVNREGISTER=klhuiSVNREGISTER_PM=klhuiSVNREGISTER_Audit=kilyzengSVNREGISTER_Integrator=klhuiSVNREGISTER_Tester=scarlettxu,yukiyao,vivianjiang,dickywang,wendyzhou,lynnlu,zitawu [SVNREGISTER:/SVNREGISTER_ADMIN/trunk/share_docs]*=rw[SVNREGISTER:/SVNREGISTER_ADMIN/trunk/docs]@SVNREGISTER_PM=rw[SVNREGISTER:/SVNREGISTER_ADMIN/trunk/docs/audit_report]@SVNREGISTER_Audit=rw[SVNREGISTER:/SVNREGISTER_ADMIN/trunk/docs/plan_meeting]@SVNREGISTER=rw[SVNREGISTER:/SVNREGISTER_ADMIN/trunk/docs/tech_doc]@SVNREGISTER=rw[SVNREGISTER:/SVNREGISTER_ADMIN/trunk/main_body/docs]@SVNREGISTER_PM=rw@SVNREGISTER=rw[SVNREGISTER:/SVNREGISTER_ADMIN/trunk/main_body/docs/tracking/pro_tracking]@SVNREGISTER_Audit=rw[SVNREGISTER:/SVNREGISTER_ADMIN/trunk/main_body/src_codes]@SVNREGISTER_PM=rw@SVNREGISTER_Integrator=rw[SVNREGISTER:/SVNREGISTER_ADMIN/trunk/main_body/test/unit_test]@SVNREGISTER=rw@SVNREGISTER_PM=rw[SVNREGISTER:/SVNREGISTER_ADMIN/trunk/main_body/test/test_team]@SVNREGISTER_Tester=rw5.3 SUBVERSION BACKUPIt is vitally important to maintain regular backups, because if the server fails, you may be able to access a recent version of you files, but without the repository all your history is lost forever!5.3.1 ALL BACKUPThe simplest(but no recommended) way is just to copy the repository folder onto the backup medium. However, you have to be absolutely sure that no process is accessing the data. In this context, access means any access at all. If you repository is accessed at all during the copy, the backup will be worthless. The recommended method is to run/usr/local/subversion/bin/svnadmin hotcopy path/to/repository path/to/hotcopyfoderto create a copy of your repository in a safe manner. Then backup the copy.Restore: To restore an all backup is very easy, you just need copy the backup folder back to the SVN parent path directory, and then you can access the repository.5.3.2 ICREMENTAL BACKUPIncremental backup is a backup method that just backup specified revision(s), you can run/usr/local/subversion/bin/svnadmin dump path/to/repository --revision R1:R2 --incremental > path/to/dumpfile_R1_R2to backup the revisions from R1 to R2.Restore: To restore an incremental backup you should find the all backup copy which the revision is R0 (R1-1), then run/usr/local/subversion/bin/svnadmin load path/to/repository < path/to/dumpfile_R1_R2to restore the revisions from R1 to R2.Here is an example to do incremental backup and restore specified versions.[root@svnclub03 revs]# svnadmin dump /Arain/repository/OFSA --revision 8:12 --incremental > /Arain/dumpfile8-12* Dumped revision 8.* Dumped revision 9.* Dumped revision 10.* Dumped revision 11.* Dumped revision 12.[root@svnclub03 revs]# svnadmin load /Arain/repository/OFSA < /Arain/dumpfile8-12<<< Started new transaction, based on original revision 8* adding path : trunk/main_body/src_codes ... done.------- Committed revision 8 >>>。