TS140S_user
Securope Tempo 用户手册说明书

User Manual Securope Tempo DOC104-UK -11.09.201.CertificationThe Securope lifelines are designed and tested according to the European standard:E N795-C:2012The system conforms to the American National regulation,OSHA 1910If the system is designed and installed by a competent person (according to OSHA), it may conform to the ANSI standard,ANSI/ASSE Z359.6: 2009Here below the available certifications which can be downloaded anytime from our web portal: Securope 2012Standard BEN795-C:2012 - CEN/TS16415:2013CertificatesNumber N°0082 1084 160 04 14 0116 : EXT 02 06 15 Certification Date2015Notified bodyCode0082Address Apave Sudeurope, Centre d’essais et certification EPI, 17, Boulevard Paul Langevin, 38600Fontaine, France2. Preliminary checksIt is mandatory to check the following before using the system:U S E R✓ The user of the lifeline must be in good physical condition, and not prone to vertigo or dizziness.✓ The user must have received adequate training for the following:- Personal protection equipment and have read the user instructions of theelements associated to the system, the harness and the connectors/carabiners. - Use of the fall protection equipment, - Use of the rescue equipment in the event of fall.✓ The total mass of each user, including tools and equipment, must not exceed 140 kg.✓ A minimum of 2 persons are required to work together on the lifeline, so that each can assist the other in the event of an incident.P P E ✓ A suitable harness with two anchoring points or D rings, one at the back and one at the chest, in conformity with the EN 361 or ANSI / ASSEZ359.1.✓ The dorsal anchorage point is the recommended point to anchor the harness, the sternal anchorage point can be used for rescue operations,✓ An energy absorber lanyard in conformity with EN 354/355 or ANSI/ASSEZ359.13. It cannot be longer than 2m (6.5ft),✓ Two karabiners twist lock type in zinc plated steel, according to EN 362ANSI/ASSEZ359.12 and having the following characteristics, length 105 mm, width 58 mm, wire diameter 10 mm, opening 20 mm, breaking strength 23 kNS Y S T E M ✓ Check if the annual inspection was carried out within less than 1 year.✓ Check if the Pre-use inspection sheet is completed and the system is Safe to use. ✓ There is no obstacle under the walkway that could reduce the fall clearance ; ✓ If there are tilting end stops, they must be tested and must work properly ; ✓ There are no deformed components.✓ A rescue plan must be in place to evacuate the person who fell within 15 minutes. The rescue material must be easily accessible and be located in the vicinity from the lifeline.✓ The system must be immediately put out of service if the user notices one or more anomalies and the failing components have to be replaced by a certified installer (Also competent person if under OSHA regulations)Any other combination of components can affect the correct functioning of the system and is consequently forbidden.Before using the system, the user must locate the ID-plate installed in the immediate vicinity of the access point and follow the instructions on the board. The plate has a QR code that facilitates access to the Fallprotec web portal where all the data regarding the installation is registered. User manual and inspection log.1.Manufacturer’s information2.QR code to get directaccess to the informationrelated to the installation.3.Equipment type and appliedstandards.4.Installer details5.Installation locationinformations.6.It is mandatory to use a fallarrest harness with anenergy absorbing systemaccording to EN355.7.Seal tag serial number.8.Maximal number of usersand their max. weight.9.Installation Date10.It is mandatory to read theuser manual first.11.Fall clearance and Systemlength12.Inspection sticker (Safe touse)A seal Tag with a unique serialnumber is placed on the warningplate.612345789101112e of the system Maximal number of users persystem(For other cases please contactFallprotec)2The connection and disconnection to the system mustalways be carried out in an area without any risk of a fall.1Introduce the mobile anchorage device on the Lifeline incase it is not a captive one.2The user moves smoothly all along the lifeline withoutrunning.3The carabiner of the lanyard must be fixed directly to themobile anchorage device. **5To exit from the system (if the device is not openable),the user must take it out at the end of the line withthrough a tilting end stop. (If the glider is openable andreachable, it should be stored in a dry place)** If the system has no intermediate anchors, user canconnect directly to the lifeline with a carabiner. It must havethe following characteristics: twist lock type in zinc platedsteel, according to EN 362 / ANSI/ASSEZ359.12 , length 105mm, width 58 mm, section of 10 mm, opening 20 mm,breaking strength 23 kN3.1. GlidersThe user can walk as far from the line as his/her lanyard and the system itself allow it.The glider by gravity takes the correct position to pass over the intermediate anchors without needing any additional manual action.LDV001 LDV111 LDV001 LDV07530°- 90°3.1.1. Openable gliders1.Open the handle2.Let the handle close automatically3. Conect the carabinerHandleInserting/removing the glider on the line3.2.Energy absorber LDV032/LDV003The energy absorption is carried out during the penetration of the half sphere into the black polymer cylinder. The LDV032 includes a spring which compensates the tension on the line in case of dilatations and acts as a tensionActivatedNot activated4.Coiling the cable for storage The cable must be coiled as per the picture below:5.In case of fallMaximum deformation Calculated with the Fallprotec Securope calculation software. See technical file of the system supplied by the installer.6.Fall ClearanceThe installation must be done so that in case of a fall no equipment touches a sharp edge or something that can damage it.The minimum clearance must be superior of the height of fall so that a falling user doesn’t hit an obstacle during the fall.The height of fall is the sum of the terms given below:-D Deflection : the deflection of the rigid anchor line-L blocking : Locking distance of self retractable lanyard-H Safety : safety distance (1m)-Fall clearance Required : minimal height calculated and required in case of a fall-Fall clearance Available : actual height available between the path and the first obstacle -L Path : distance from the Life line to the edge-L Lanyard : lenght of the lanyard (< 2m)-L Absorber : deployment of the energy absorption system (< 0,8m)-H User : user’s heightF a l l c l e a r a n c e A v a i l a b l eFall clearance Required = D Deflection + L Lanyard + L Absorber - L Path + H User + H SafetyFall clearance Required < Fall clearance AvailableF a l l c l e a r a n c e A v a i l a b l eFall clearance Required = D Deflection + L Lanyard + L Absorber + H User + H Safety - H LineFall clearance Required < Fall clearance AvailableFallcl earance A va i l ab l eFall clearance Required = D Deflection + L blocking + H SafetyFall clearance Required < Fall clearance Available7.Prohibited useIt is forbidden to use the system out of the limits specified in this manual or in any othersituation different for the ones the system has been foreseen.Exceed the maximal number of users between on the system.It is forbidden to use the system with any other element, for which the system wascommissioned for.It is forbidden to use the system under the walkway.It is forbidden to use the system for lifting materials.In case of storm or any other exceptional climate conditions potentially dangerous.Temperature below -50°C.It is forbidden to use the system as earth phase for welding.8.WarningsMarking of the equipment must be always visible.Any modification of the system or equipment cannot be made without prior writtenauthorization of FALLPROTEC.9.MaintenanceThe durability of the system is function of the maintenance and the frequency (and intensity) of use. It will also depend of the host structure and its capacity to keep its physical properties during the time. If the anchorage device is used in a dusty environment, mobile anchor devices need to be cleaned with soapy water. The lifeline is cleaned with soapy water or solvent if the environment is not flammable. It must be thereafter dried.The system must be stored in a dry place.If the system is maintained, inspected, and used properly, the foreseen lifespan is 10 years.10.InspectionBefore use, each system must be checked by a competent person following the Pre-use checking list. If everything is correct, the warning plate will have the sticker “safe to use”.Each system must be inspected annually or after a fall.The inspection must be carried out by a certified/authorized installer (Also competent person if under OSHA regulations).The inspection must be registered on the Fallprotec portal The safety of the user is linked to the maintenance of the efficacy of the system and the resistance of the equipment.11. MarkingThe equipment is marked as follows:❶ Manufacturer :❷ Component name :❸ Standard : EN795-C❹ It is mandatory to read the user manual before use ❺ Manufacturing batch (Quarter/Year)Code ComponentLDV002LDV032LDV001LDV060LDV111❶ ❸❹❺ ❺ ❶ ❶❸ ❹ ❺❶❸ ❹❺ ❶❸❹❺。
300 Series User Manual

25-0163 Rev 03Table of Contents300S ERIES,M ODEL &P ART N UMBERS (2)S YMBOL I NFORMATION (3)P RODUCT L ABELING (3)G ENERAL S PECIFICATION (4)P OWER M ONITORING &C ONTROL,W I-F I C ONNECTION (5)S AFETY R ECOMMENDATIONS AND W ARNINGS (6)P ROPER O PERATION,C ARE &M AINTENANCE (7)B ASIC M OBILE C ART I NTEGRATION &O PERATION (8)U NPACKING &A SSEMBLY: (8)C HANGING THE H EIGHT P OSITION: (8)I NSTALLING YOUR COMPUTER OR LAPTOP: (8)I NSTALLING S TAND AND LCD M ONITOR: (9)I NSTALLING S CANNER M OUNTS: (10)I NSTALLING K EYBOARD AND M OUSE ONTO THE C ART: (10)O PTIONAL JACO P ATENTED T RAC™W HEEL S TEERING: (10)K EYBOARD L IGHT: (11)O PTIONAL L OCKING D RAWER O PERATION: (11)P OWER B LADE B ATTERY P ACK &C ART C ONTROLLER (12)P OWER B LADE C HARGER (14)A GENCY C ERTIFICATION (14)T ROUBLESHOOTING (15)H AVE A QUESTION? W E’RE HERE TO HELP.C ALL US AT 1‐800‐649‐2278 OR VISIT /SUPPORTJACO I NC. 140 C ONSTITUTION B LVD, F RANKLIN MA, USA1General SpecificationMobile CartWork Surface Height:30" to 46"Keyboard Height:25.5" to 41.5"Work Surface:310 Laptop Cart ‐ 20" x 18" (Laptop opening 16.5" x 2.75") 320 PC Cart ‐ 20" x 16"Internal Laptopor PC Storage: 310 Laptop Cart ‐ 16" x 12" x 2.25" 320 PC Cart ‐ 16" x 12" x 2.6"Casters:4" Single Wheel, Front LockingWheel Base:16" x 13" x 16"Cart Weight: (without options) 310 Laptop Cart ‐ 86 lbs (includes 2 Power Blade Battery Packs & base counterweight)320 PC Cart ‐ 91 lbs (including 2 Power Blade Battery Packs & base counter weight)Additional weight may be added based on Cart configuration & optionsPower Blade Battery:Included in top levels 310‐L408 & 320‐L408 Can be ordered as line item 51‐3829Physical ‐ 7" x 3.5" x 6" and 5 lbs.Power Blade Charger:Must order as line item 51‐4218Wall Mount Physical ‐ 17.25" x 8.0” x 4.0" and 6 lbs.Free Standing Physical ‐ 17.25" x 8.7” x 6.8" and 7 lbs.4If your JACO Mobile Cart has a Drawer System option, limit weight per drawer to 2 lbs max, close drawers when moving and do not transport at more than a 5-degree slope.Inspect the inside bays of the Cart Controller and Power Blade Charger as needed or weekly, remove the Power Blade Battery Packs to inspect the connections. Remove material that may have accidently droppedbut if required, make sure the Power Blade ChargerInstalling your computer or laptop:To install your PC or Laptop, unlock both key‐locks at the rear of the top assembly as shown in the photoTouch Pad Access, Front of Mobile CartThe Power Blade Battery Pack ports on the Mobile Cart are labeled as Battery 1 and Battery 2. Each port has two LED indicators that show approximately how much battery charge is remaining. The LED indicators are located at the front and rear of the Cart. This simple LED readout reports approximate Front LED Charge Capacity Indicators Rear LED Charge Capacity IndicatorsPower InverterOptional for Electronic LockingPower Blade ChargerThe Power Blade Charger can be placed on a tabletop or installed on the wall for convenient point ofuse access. With either installation, the Power Blade Charger MUST be positioned vertically, with thePower Blade Battery Packs entering from the top and will not function if positioned in any otherdirection. For complete details and instructions, please reference the Power Blade Charger UsersGuide that is shipped with each unit. This manual is also available on request.Agency Certification51‐4218, Power Blade ChargerSafety ‐ IEC 60601, 3rd Edition (60601‐1:2005 A1:2012)IEC 60601‐1EN/ISO 14971EMI / EMC (60601‐1:2005 A1:2012)IEC 60601‐1‐2Means of isolation provided by on‐board power supply.51‐3829, Power Blade Battery Pack AssemblyIATA ‐ UNDOT 38.3 International Air Transport AssociationIEC 62133 ‐ Safety Requirement for Cells Containing Alkaline ElectrolytesUL 2054 ‐ UL Certification for Primary and Secondary BatteriesH AVE A QUESTION? W E’RE HERE TO HELP.C ALL US AT 1‐800‐649‐2278 OR VISIT /SUPPORTJACO I NC. 140 C ONSTITUTION B LVD, F RANKLIN MA, USAThe Mobile Cart front battery status LEDs are not working however the Remove and reinstall the same Power Blade Battery Packs that are currently in the Cart, if the LED's still do。
74AC14 六角施密特触发器
© 2005 Fairchild Semiconductor Corporation DS009917November 1988Revised February 200574AC14 • 74ACT14 Hex Inverter with Schmitt Trigger Input74AC14 • 74ACT14Hex Inverter with Schmitt Trigger InputGeneral DescriptionThe 74AC14 and 74ACT14 contain six inverter gates each with a Schmitt trigger input. They are capable of transform-ing slowly changing input signals into sharply defined, jitter-free output signals. In addition, they have a greater noise margin than conventional inverters.The 74AC14 and 74ACT14 have hysteresis between the positive-going and negative-going input thresholds (typi-cally 1.0V) which is determined internally by transistor ratios and is essentially insensitive to temperature and sup-ply voltage variations.Featuress I CC reduced by 50%s Outputs source/sink 24 mAs 74ACT14 has TTL-compatible inputsOrdering Code:Device also available in Tape and Reel. Specify by appending suffix letter “X” to the ordering code.Pb-Free package per JEDEC J-STD-020B.Note 1: “_NL” indicates Pb-Free package (per JEDEC J-STD-020B). Device available in Tape and Reel only.FACT ¥ is a trademark of Fairchild Semiconductor Corporation.Order Number Package Package DescriptionNumber 74AC14SC M14A 14-Lead Small Outline Integrated Circuit (SOIC), JEDEC MS-012, 0.150" Narrow 74AC14SCX_NL (Note 1)M14A Pb-Free 14-Lead Small Outline Integrated Circuit (SOIC), JEDEC MS-012, 0.150" Narrow 74AC14SJ M14D Pb-Free 14-Lead Small Outline Package (SOP), EIAJ TYPE II, 5.3mm Wide74AC14MTC MTC1414-Lead Thin Shrink Small Outline Package (TSSOP), JEDEC MO-153, 4.4mm Wide 74AC14MTCX_NL (Note 1)MTC14Pb-Free 14-Lead Thin Shrink Small Outline Package (TSSOP), JEDEC MO-153, 4.4mm Wide74AC14PC N14A 14-Lead Plastic Dual-In-Line Package (PDIP), JEDEC MS-001, 0.300" Wide 74ACT14SC M14A 14-Lead Small Outline Integrated Circuit (SOIC), JEDEC MS-012, 0.150" Narrow 74ACT14MTC MTC1414-Lead Thin Shrink Small Outline Package (TSSOP), JEDEC MO-153, 4.4mm Wide 74ACT14MTCX_NL (Note 1)MTC14Pb-Free 14-Lead Thin Shrink Small Outline Package (TSSOP), JEDEC MO-153, 4.4mm Wide74ACT14PCN14A14-Lead Plastic Dual-In-Line Package (PDIP), JEDEC MS-001, 0.300" Wide 274A C 14 • 74A C T 14Logic SymbolIEEE/IECPin DescriptionsConnection DiagramFunction TablePin Names Description I n Inputs O nOutputsInput Output A O L H HL74AC14 • 74ACT14Absolute Maximum Ratings (Note 2)Recommended Operating ConditionsNote 2: Absolute maximum ratings are those values beyond which damage to the device may occur. The databook specifications should be met, with-out exception, to ensure that the system design is reliable over its power supply, temperature, and output/input loading variables. Fairchild does not recommend operation of FACT ¥ circuits outside databook specifications.DC Electrical Characteristics for ACNote 3: All outputs loaded; thresholds on input associated with output under test.Note 4: Maximum test duration 2.0 ms, one output loaded at a time.Note 5: I IN and I CC @ 3.0V are guaranteed to be less than or equal to the respective limit @ 5.5V V CC .Supply Voltage (V CC ) 0.5V to 7.0VDC Input Diode Current (I IK )V I 0.5V 20 mA V I V CC 0.5V 20 mADC Input Voltage (V I )0.5V to V CC 0.5VDC Output Diode Current (I OK )V O 0.5V 20 mA V O V CC 0.5V 20 mADC Output Voltage (V O ) 0.5V to V CC 0.5VDC Output Source or Sink Current (I O )r 50 mA DC V CC or Ground Current per Output Pin (I CC or I GND )r 50 mAStorage Temperature (T STG ) 65q C to 150q CJunction Temperature (T J )PDIP140q CSupply Voltage (V CC )AC 2.0V to 6.0V ACT4.5V to5.5V Input Voltage (V I )0V to V CC Output Voltage (V O )0V toV CCOperating Temperature (T A )40q C to 85q CSymbol ParameterV CC T A 25q C T A 40q C to 85q C UnitsConditions(V)Typ Guaranteed LimitsV OHMinimum HIGH Level 3.0 2.99 2.9 2.9V I OUT 50 P AOutput Voltage4.5 4.49 4.4 4.45.5 5.495.4 5.43.0 2.56 2.46V I OH 124.5 3.86 3.76I OH 24 mA5.54.86 4.76I OH 24 mA (Note 3)V OLMaximum LOW Level 3.00.0020.10.1VI OUT 50 P AOutput Voltage4.50.0010.10.15.50.0010.10.13.00.360.44VI OL 124.50.360.44I OL 24 mA5.50.360.44I OL 24 mA (Note 3)I IN (Note 5)Maximum Input Leakage Current 5.5r 0.1r 1.0P A V I V CC , GND V tMaximum Positive 3.0 2.2 2.2T A Worst CaseThreshold4.5 3.2 3.2V5.5 3.9 3.9V tMinimum Negative 3.00.50.5T A Worst CaseThreshold4.50.90.9V5.5 1.1 1.1V H(MAX)Maximum Hysteresis3.0 1.2 1.2T A Worst Case4.5 1.4 1.4V5.51.6 1.6V H(MIN)Minimum Hysteresis3.00.30.3T A Worst Case4.50.40.4V5.50.50.5I OLD Minimum Dynamic 5.575mA V OLD 1.65V Max I OHD Output Current (Note 4) 5.5 75mA V OHD 3.85V Min I CC Maximum Quiescent 5.52.020.0P AV IN V CC (Note 5)Supply Currentor GND 474A C 14 • 74A C T 14AC Electrical Characteristics for ACNote 6: Voltage Range 3.3 is 3.3V r 0.3VVoltage Range 5.0 is 5.0V r 0.5VDC Electrical Characteristics for ACTNote 7: All outputs loaded; thresholds on input associated with output under test.Note 8: Maximum test duration 2.0 ms, one output loaded at a time.Symbol ParameterV CCT A 25q C T A 40q C to 85q CUnits(V)C L 50 pFC L 50 pF (Note 6)Min Typ Max Min Max t PLH Propagation Delay 3.3 1.59.513.5 1.515.0ns 5.0 1.57.010.0 1.511.0t PHLPropagation Delay3.3 1.57.511.5 1.513.0ns 5.01.56.08.51.59.5Symbol ParameterV CC T A 25q C T A 40q C to 85q C Units Conditions(V)Typ Guaranteed LimitsV IH Minimum HIGH Level 4.5 1.5 2.0 2.0V V OUT 0.1V Input Voltage5.5 1.5 2.0 2.0or V CC 0.1V V IL Maximum LOW Level 4.5 1.50.80.8V V OUT 0.1V Output Voltage 5.5 1.50.80.8or V CC 0.1V V OHMinimum HIGH Level 4.5 4.49434 4.4VI OUT 50P A Output Voltage5.5 5.495.4 5.4VV IN V IL or V IH4.5 3.86 3.76I OH 24 mA5.54.864.76I OH 24 mA (Note 7)V OLMaximum LOW Level 4.50.0010.10.1VI OUT 50 P A Output Voltage5.50.0010.10.1V V IN V IL or V IH4.50.360.44I OL 24 mA5.50.360.44I OL 24 mA (Note 7)I IN Maximum Input Leakage Current 5.5r 0.1r 1.0P A V I V CC , GND V H(MAX)Maximum Hysteresis 4.5 1.4 1.4V T A Worst Case 5.5 1.6 1.6V H(MIN)Minimum Hysteresis 4.50.40.4V T A Worst Case 5.50.50.5V t Maximum Positive 4.5 2.0 2.0V T A Worst Case Threshold 5.5 2.0 2.0V t Minimum Negative 4.50.80.8V T A Worst Case Threshold5.50.80.8I CCT Maximum I CC /Input 5.50.61.5mA V I V CC2.1V I OLD Minimum Dynamic 5.575mA V OLD 1.65V Max I OHD Output Current (Note 8) 5.5 75mA V OHD 3.85V Min I CCMaximum Quiescent 5.52.020.0P AV IN V CC Supply Currentor GND74AC14 • 74ACT14AC Electrical Characteristics for ACTNote 9: Voltage Range 5.0 is 5.0V r 0.5VCapacitanceSymbol Parameter V CCT A 25q C T A 40q C to 85q CUnits(V)C L 50 pFC L 50 pF (Note 9)Min Typ Max Min Max t PLH Propagation Delay 5.0 3.08.010.0 3.011.0ns Data to Output t PHLPropagation Delay 5.03.08.010.03.011.0ns Data to OutputSymbol ParameterTyp Units ConditionsC IN Input Capacitance4.5pF V CC OPEN C PDPower Dissipation Capacitance for AC25.0pFV CC 5.0Vfor ACT80 674A C 14 • 74A C T 14Physical Dimensions inches (millimeters) unless otherwise noted14-Lead Small Outline Integrated Circuit (SOIC), JEDEC MS-012, 0.150" NarrowPackage Number M14A74AC14 • 74ACT14Physical Dimensionsinches (millimeters) unless otherwise noted (Continued)Pb-Free 14-Lead Small Outline Package (SOP), EIAJ TYPE II, 5.3mm WidePackage Number M14D 874A C 14 • 74A C T 14Physical Dimensions inches (millimeters) unless otherwise noted (Continued)14-Lead Thin Shrink Small Outline Package (TSSOP), JEDEC MO-153, 4.4mm WidePackage Number MTC14974AC14 • 74ACT14 Hex Inverter with Schmitt Trigger InputPhysical Dimensions inches (millimeters) unless otherwise noted (Continued)14-Lead Plastic Dual-In-Line Package (PDIP), JEDEC MS-001, 0.300" WidePackage Number N14AFairchild does not assume any responsibility for use of any circuitry described, no circuit patent licenses are implied and Fairchild reserves the right at any time without notice to change said circuitry and specifications.LIFE SUPPORT POLICYFAIRCHILD ’S PRODUCTS ARE NOT AUTHORIZED FOR USE AS CRITICAL COMPONENTS IN LIFE SUPPORT DEVICES OR SYSTEMS WITHOUT THE EXPRESS WRITTEN APPROVAL OF THE PRESIDENT OF FAIRCHILD SEMICONDUCTOR CORPORATION. As used herein:1.Life support devices or systems are devices or systems which, (a) are intended for surgical implant into the body, or (b) support or sustain life, and (c) whose failure to perform when properly used in accordance with instructions for use provided in the labeling, can be rea-sonably expected to result in a significant injury to the user.2. A critical component in any component of a life support device or system whose failure to perform can be rea-sonably expected to cause the failure of the life support device or system, or to affect its safety or effectiveness.。
工厂专有名词中英文对照表
Contract Electronic Manufacturing Customer Focus Executive Cost,Insurance,and Freight Carriage and Insurance Paid TO Common Management Information Protocol Cost of Goods Sold Component Purchase Agreement Carriage Paid to Change Request Customer Service Division Customer Selling Price Configure To Order Full Descripition Delivered At Frontier Document Center Delivered Duty Paid Delivered Duty Unpaid Design For Assembly Design For Manufacture Dead on Arrival Defect Per Hunderd Unit Defect Per Percent Million Dynamic Random Access Memory Design For Test Design For X(test,manufacture,assembly) Dual in-line Package Domain Name System Defect per Million Desktop Design TO Cost Design Verification Test Full Descripition End to End Engineering Change Engineering Change Management Engineering Change Notice Engineering Change Order Engineering Change Request Engineering Directive Enhanced Industrial Standard Architecture Early Life Performance Test Environment Protection Association Erasable Programable Read Only Memory Engineering Specification
BD139-10;BD136-16;BD139-16;BD140;BD139;中文规格书,Datasheet资料

May 2008Rev 51/9BD135 - BD136BD139 - BD140Complementary low voltage transistorFeatures■Products are pre-selected in DC current gainApplication■General purposeDescriptionThese epitaxial planar transistors are mounted in the SOT -32 plastic package. They are designed for audio amplifiers and drivers utilizingcomplementary or quasi-complementary circuits. The NPN types are the BD135 and BD139, and the complementary PNP types are the BD136 and BD140.Table 1.Device summaryOrder codes Marking Package PackagingBD135BD135SOT -32TubeBD135-16BD135-16BD136BD136BD136-16BD136-16BD139BD139BD139-10BD139-10BD139-16BD139-16BD140BD140BD140-10BD140-10BD140-16BD140-16Contents BD135 - BD136 - BD139 - BD140Contents1Electrical ratings . . . . . . . . . . . . . . . . . . . . . . . . . . . . . . . . . . . . . . . . . . . . 32Electrical characteristics . . . . . . . . . . . . . . . . . . . . . . . . . . . . . . . . . . . . . 42.1Electrical characteristics (curves) . . . . . . . . . . . . . . . . . . . . . . . . . . . . . . . 5 3Package mechanical data . . . . . . . . . . . . . . . . . . . . . . . . . . . . . . . . . . . . . 6 4Revision history . . . . . . . . . . . . . . . . . . . . . . . . . . . . . . . . . . . . . . . . . . . . 82/9BD135 - BD136 - BD139 - BD140Electrical ratings3/91 Electrical ratingsTable 2.Absolute maximum ratingsSymbolParameterValueUnitNPNPNPBD135BD139BD136BD140V CBO Collector-base voltage (I E = 0)4580-45-80V V CEO Collector-emitter voltage (I B = 0)4580-45-80V V EBO Emitter-base voltage (I C = 0)5-5V I C Collector current 1.5-1.5A I CM Collector peak current 3-3A I B Base current0.5-0.5A P TOT Total dissipation at T c ≤ 25 °C 12.5W P TOT Total dissipation at T amb ≤ 25 °C 1.25W T stg Storage temperature-65 to 150°C T jMax. operating junction temperature150°CTable 3.Thermal dataSymbolParameterMax valueUnit R thj-case Thermal resistance junction-case 10°C/W R thj-amb Thermal resistance junction-ambient100°C/WElectrical characteristics BD135 - BD136 - BD139 - BD1404/92 Electrical characteristics(T case = 25 °C unless otherwise specified)Table 4.On/off statesSymbolParameterPolarityTest conditionsValueUnitMin.Typ.Max.I CBOCollector cut-off current (I E =0)NPN V CB = 30 VV CB = 30 V , T C = 125 °C 0.110µA µA PNP V CB = -30 VV CB = -30 V , T C = 125 °C -0.1-10µA µA I EBOEmitter cut-off current (I C =0)NPN V EB = 5 V 10µA PNP V EB = -5 V -10µA V CEO(sus)(1)1.Pulsed: pulse duration = 300 µs, duty cycle 1.5%Collector-emittersustaining voltage(I B =0)NPNI C = 30 mA BD135BD1394580V V PNP I C = -30 mA BD136BD140-45-80V V V CE(sat) (1)Collector-emitter saturation voltage NPN I C = 0.5 A, I B = 0.05 A 0.5V PNP I C = -0.5 A, I B = -0.05 A -0.5V V BE (1)Base-emitter voltageNPN I C = 0.5 A, V CE = 2 V 1V PNP I C = -0.5 A, V CE = -2 V -1V h FE (1)DC current gainNPNI C = 5 mA, V CE = 2 V I C = 150 mA, V CE = 2 V I C = 0.5 A, V CE = 2 V 254025250PNPI C = -5 mA, V CE = -2 V I C = -150 mA, V CE = -2 V I C = -0.5 A, V CE = -2 V 254025250h FE (1)h FE groupsNPNI C = 150 mA, V CE = 2 V BD139-10BD135-16/BD139-1663100160250PNPI C = -150 mA, V CE = -2 V BD140-10BD136-16/BD140-1663100160250BD135 - BD136 - BD139 - BD140Electrical characteristics 2.1 Electrical characteristics (curves)Figure 2.Safe operating area Figure 3.Derating5/9Package mechanical data BD135 - BD136 - BD139 - BD140 3 Package mechanical dataIn order to meet environmental requirements, ST offers these devices in ECOPACK®packages. These packages have a lead-free second level interconnect. The category ofsecond level interconnect is marked on the package and on the inner box label, incompliance with JEDEC Standard JESD97. The maximum ratings related to solderingconditions are also marked on the inner box label. ECOPACK is an ST trademark.ECOPACK specifications are available at: 6/9BD135 - BD136 - BD139 - BD140Package mechanical data7/9Revision history BD135 - BD136 - BD139 - BD1408/94 Revision historyTable 5.Document revision historyDate RevisionChanges16-Sep-2001422-May-20085Mechanical data has been updated.BD135 - BD136 - BD139 - BD140Please Read Carefully:Information in this document is provided solely in connection with ST products. STMicroelectronics NV and its subsidiaries (“ST”) reserve the right to make changes, corrections, modifications or improvements, to this document, and the products and services described herein at any time, without notice.All ST products are sold pursuant to ST’s terms and conditions of sale.Purchasers are solely responsible for the choice, selection and use of the ST products and services described herein, and ST assumes no liability whatsoever relating to the choice, selection or use of the ST products and services described herein.No license, express or implied, by estoppel or otherwise, to any intellectual property rights is granted under this document. If any part of this document refers to any third party products or services it shall not be deemed a license grant by ST for the use of such third party products or services, or any intellectual property contained therein or considered as a warranty covering the use in any manner whatsoever of such third party products or services or any intellectual property contained therein.UNLESS OTHERWISE SET FORTH IN ST’S TERM S AND CONDITIONS OF SALE ST DISCLAIM S ANY EXPRESS OR IM PLIED WARRANTY WITH RESPECT TO THE USE AND/OR SALE OF ST PRODUCTS INCLUDING WITHOUT LIM ITATION IM PLIED WARRANTIES OF MERCHANTABILITY, FITNESS FOR A PARTICULAR PURPOSE (AND THEIR EQUIVALENTS UNDER THE LAWS OF ANY JURISDICTION), OR INFRINGEMENT OF ANY PATENT, COPYRIGHT OR OTHER INTELLECTUAL PROPERTY RIGHT. UNLESS EXPRESSLY APPROVED IN WRITING BY AN AUTHORIZED ST REPRESENTATIVE, ST PRODUCTS ARE NOT RECOMMENDED, AUTHORIZED OR WARRANTED FOR USE IN MILITARY, AIR CRAFT, SPACE, LIFE SAVING, OR LIFE SUSTAINING APPLICATIONS, NOR IN PRODUCTS OR SYSTEMS WHERE FAILURE OR MALFUNCTION MAY RESULT IN PERSONAL INJURY, DEATH, OR SEVERE PROPERTY OR ENVIRONMENTAL DAMAGE. ST PRODUCTS WHICH ARE NOT SPECIFIED AS "AUTOMOTIVE GRADE" MAY ONLY BE USED IN AUTOMOTIVE APPLICATIONS AT USER’S OWN RISK.Resale of ST products with provisions different from the statements and/or technical features set forth in this document shall immediately void any warranty granted by ST for the ST product or service described herein and shall not create or extend in any manner whatsoever, any liability of ST.ST and the ST logo are trademarks or registered trademarks of ST in various countries.Information in this document supersedes and replaces all information previously supplied.The ST logo is a registered trademark of STMicroelectronics. All other names are the property of their respective owners.© 2008 STMicroelectronics - All rights reservedSTMicroelectronics group of companiesAustralia - Belgium - Brazil - Canada - China - Czech Republic - Finland - France - Germany - Hong Kong - India - Israel - Italy - Japan - Malaysia - Malta - Morocco - Singapore - Spain - Sweden - Switzerland - United Kingdom - United States of America9/9分销商库存信息:STMBD139-10BD136-16BD139-16 BD140BD139BD135-16 BD135。
1W Amber SPHAM2A1N1C0高功率LED FX系列产品数据表说明书

111 Product Family Data Sheet Rev. 1.1 2020.05.041W AmberSPHAM2A1N1C0Features∙Package : Phosphor converted Amber LED package∙Dimension : 1.2 mm x 1.6 mm∙Chip Configuration : 1 chip∙ESD Voltage : Up to 8 kV acc. to ISO 10605-contact∙Viewing Angle: 120˚∙Qualifications: The product qualification test based on the guidelines of AEC-Q102.Table of Contents1. Characteristics ----------------------- 32. Product Code Information ----------------------- 43. Typical Characteristics Graphs ----------------------- 74. Soldering Temperature Location ----------------------- 115. Mechanical Dimension ----------------------- 126. Soldering Conditions ----------------------- 137. Tape & Reel ----------------------- 148. Label Structure ----------------------- 159. Packing Structure ----------------------- 1610. Precautions in Handling & Use ----------------------- 1711. Company Information ----------------------- 181. Characteristicsa) Typical Characteristics[1]Item Symbol Value Unit. Luminous Flux (I F = 350 ㎃) ΦV Typ. 85 ㏐Forward Voltage (I F = 350 ㎃) V F Typ. 3.0 VViewing Angle ΦTyp. 120 ºReverse Current I R Not designed for reverseoperationReal Thermal Resistance (Junction to Solder point) R th_J-S (Real)Typ. 7.6K/WMax. 8.2Electrical Thermal Resistance (Junction to Solder point) R th_J-S (Elec.)Typ. 6.0K/WMax. 6.5Radian Surface A 0.7 mm2Note:[1] The measurement condition means that temperature dependence is excluded by applying pulse current for typically 25㎳.b) Absolute Maximum RatingItem Symbol Rating UnitAmbient / OperatingTemperatureT a-40 ~ +125 ºC Storage Temperature T stg-40 ~ +125 ºC LED Junction Temperature T j150 ºC Maximum Forward current[2](T S:25℃) [3]I F700 ㎃Minimum Forward current[2](T S:25℃) [3]I F50 ㎃Maximum Reverse currentDo not apply for reverse currentESD Sensitivity[4]- ±8 for HBM kVNote:[2] Driving the product at forward current (IF) below Min. IF or above Max. IF may result in unpredictable behavior of the product.[3] The measurement condition means that temperature dependence is excluded by applying pulse current for typically 25㎳[4] It is included the device to protect the product from ESD.2. Product Code Information1 2 3 4 5 6 7 8 9 10 11 12 13 14 15 16 17 18S P H A M 2 A 1 N 1 C 0 A B C D E F Digit PKG Information1 2 company name and Samsung LED PKG (SP for Samsung PKG)3 power variant (H for automotive high power)4 5 color variant (AM for automotive Amber color)6 LED PKG version (2 for 2nd version )7 8 product configuration and type (A1 for automotive PKG type)9 lens configuration (N for no lens)10 Max power (1 for 1±0.5W)11 12 specific property (C0 for FX Series)13 14 forward voltage property15 16 CIE coordination property17 18 luminous flux propertya) Luminous Flux Bins [5] (I F= 350 ㎃, T S= 25 ºC)Symbol Flux Bin CodeFlux Range (㏐)Min Max ΦVE1 80 90F1 90 100 b) Voltage Bins [5] (I F= 350 ㎃, T S= 25 ºC)Symbol Bin CodeVoltage Range (V)Min MaxV FC5 2.50 3.00H5 3.00 3.50Note:[5] Luminous flux measuring equipment: CAS140CTΦV and V F tolerances are ±7% and ±0.1V, respectively.c) Color Bin [6] (I F= 350 mA)Symbol Bin Code C x C yC x, C y L0 0.5760 0.5490 0.5620 0.5890 0.4070 0.4250 0.4380 0.4110[6] Chromaticity coordinates: C x, C y according to CIE 1931. C x and C y tolerances are ±0.005, respectively.3. Typical Characteristics Graphsa) Spectrum Distribution (I F = 350 mA, T s = 25 ºC) [7]b) Typical Chromaticity Coordinate Shift vs Radiation Angle (I F = 350 mA, T s = 25 ºC) [7]Note:[7] The measurement condition means that temperature dependence is excluded by applying pulse current for typically 25ms.0.00.20.40.60.81.01.2380430480530580630680730780R e l a t i v e I n t e n s i t yWavelengthλ[㎚]-0.010.000.010.020.030.040.05-80-60-40-2020406080C h r o m a t i c i t y C o o r d i n a t e S h i f tRadiation Angle△Cx △Cyφ[º]∆C x , ∆C yW d W d(max)c) Forward Current Characteristics (T S = 25 ºC) [8]Note:[8] The measurement condition means that temperature dependence is excluded by applying pulse current for typically 25㎳0.00.40.81.21.62.00100200300400500600700R e l a t i v e L u m i n o u s F l u xForward Current0.80.91.01.1100200300400500600700R e l a t i v e F o r w a r d V o l t a g eForward Current-0.004-0.0020.0000.0020.0040100200300400500600700C h r o m a t i c i t y C o o r d i n a t e S h i f tForward CurrentI v I v(350mA)V F V F(350mA)∆C x , ∆C yI F [㎃]I F [㎃]I F [㎃]d) Temperature Characteristics (I F = 350 ㎃)0.60.70.80.91.01.11.2-40-2020406080100120140R e l a t i v e L u m i n o u s F l u xTemperature0.900.951.001.051.10-40-2020406080100120140R e l a t i v e F o r w a r d V o l t a g eTemperature-0.04-0.020.000.020.04-40-20020406080100120140C h r o m a t i c i t y C o o r d i n a t e S h i f tTemperature△Cx △CyI v I v(25℃)V F V F(25℃)∆C x , ∆C yT j [ºC]T j [ºC]T j [ºC]e) Derating Curve [9]Note:[9] The measurement condition means that temperature dependence is excluded by applying pulse current for typically 25㎳.f) Beam Angle Characteristics (I F = 350 ㎃, T S = 25 ºC)0.00.10.20.30.40.50.60.70.80102030405060708090100110120130140F o r w a r d C u r r e n tTemperature0.00.20.40.60.81.01.2-80-70-60-50-40-30-20-101020304050607080R e l a t i v e L u m i n o u s F l u xRadiation AngleI F [A]T S [ºC]I v I v(0º)φ[º]4. Soldering Temperature LocationT j: Temperature of JunctionT S: Temperature of Solder PadR th_J-S: Thermal Resistance from Junction to Solder Pad5. Mechanical DimensionNote:The dimensions in parentheses are for reference purposes. Notes: Unit: mm, Tolerance: ±0.1mm, Approximate Weight : 3.2mga) Pick and PlaceDo not place pressure on the resin molded partIt is recommended to use a pick & place nozzle AM03-024820A(Hanhwa Techwin), etc.b) Electric Schematic Diagramc) Material InformationDescriptionMaterialSubstrate Cu Lead FrameLED Die Flip Chip Phosphor Phosphor Zener DiodeSilicon Wire Au Resin MoldSiliconeTolerance: ±0.1㎜① Cathode pad ② Anode pad ① ②6. Soldering Conditionsa) Pad Configuration & Solder Pad LayoutNotes: Tolerance : ±0.10㎜, recommended stencil thickness 120㎛Unit: ㎜b) Reflow Conditions (Pb free)Reflow frequency: 2 times max.c) Manual Soldering ConditionsNot more than 5 seconds @ max 300 ºC, under soldering iron. (One time only)7. Tape & Reela) Taping DimensionNote:Unit: ㎜, LED taping quantity: 3,000ea (1 Reel)b) Reel DimensionNotes:Unit: ㎜, Tolerance: ±0.2㎜User feed direction →Bin CodeProduct CodeLot NumberABCDEFSPHWH2A1N1C0XXXXXX YYYYYY 01II I IIIIIII I IIIIIII III III II IIIIII I IIIIIII I IIIIIIII①②③④⑤⑥⑦⑧⑨/1ⓐⓑⓒ/ 3,000 pcsIIIIII I IIIIIII III IIII I III I III I III III IIIIII8. Label Structurea) Label StructureNote: Denoted bin code and product code above is only an example (see description on page 5)Bin Code:ⓐⓑ: Forward Voltage bin (refer to page 5)ⓒⓓ: Chromaticity bin (refer to page 6)ⓔⓕ: Luminous Flux bin (refer to page 5)b) Lot NumberThe lot number is composed of the following characters:①②③③②③④⑤⑥⑦⑧⑨ / 1ⓐⓑⓒ / 3,000 pcs①②: Production site③: Product state (A: Normal, B: Bulk, C: First Production, R: Reproduction, S: Sample)④: Year (D: 2019, E: 2020, F: 2021…)⑤: Month (1~9, A, B, C)⑥: Day (1~9, A, B~V)⑦⑧⑨: Serial number (001 ~ 999)ⓐⓑⓒ: Product serial number (001 ~ 999)ⓐⓑⓒⓓⓔⓕABCDEFSPHWH2A1N1C0XXXXXX YYYYYYII I IIIIIII I IIIIIII III III II IIIIII I IIIIIII I IIIIIIIISLAAC4001 / I001 / 3,000 pcsIIIIII I IIIIIII III IIII I III I III I III III IIIIII9. Packing Structurea) Packing ProcessDimension of Transportation Box in mmWidth Length Height220 245 18210. Precautions in Handling & Use1)For over-current-proof function, customers are recommended to apply resistors to prevent suddenchange of the current caused by slight shift of the voltage.2)This device should not be used in any type of fluid such as water, oil, organic solvent, etc. Whenwashing is required, IPA is recommended to use.3)When the LEDs illuminate, operating current should be decided after considering the ambientmaximum temperature.4)LEDs must be stored in a clean environment. If the LEDs are to be stored for 3 months or moreafter being shipped from Samsung Electronics, they should be packed by a sealed container withnitrogen gas injected.(Shelf life of sealed bags: 12 months, temp. ~40℃, ~90% RH)5)After storage bag is open, device subjected to soldering, solder reflow, or other high temperatureprocesses must be:a. Mounted within 672 hours (28 days) at an assembly line with a condition of no more than30℃/ 60% RH.b. Stored at <10% RH.6)Repack unused products using anti-moisture packing, fold to close any openings and store in a dryplace with <10% RH7)Devices require baking before mounting, if humidity card reading is >60% at 23±5℃.8)Devices must be baked for 1 day at 60±5℃, if baking is required.9)The LEDs are sensitive to the static electricity and surge. It is recommended to use a wrist band oranti-electrostatic glove when handling the LEDs. If voltage exceeding the absolute maximum ratingis applied to LEDs, it may cause damage or even destruction to LED devices. Damaged LEDs mayshow some unusual characteristics such as increase in leak current, lowered turn-on voltage, orabnormal lighting of LEDs at low current.10)VOCs (volatile organic compounds) may be occurred by adhesives, flux, hardener or organicadditives which are used in luminaires (fixture) and LED silicone bags are permeable to it. It maylead a discoloration when LED expose to heat or light. This phenomenon can give a significant lossof light emitted (output) from the luminaires (fixtures). In order to prevent these problems, werecommend you to know the physical properties for the materials used in luminaires, it requiresselecting carefully.11)Risk of Sulfurization (or Tarnishing)The lead frame from Samsung Electronics is a plated package and it may change to black(or darkcolored) when it is exposed to Ag (a), Sulfur (S), Chlorine (Cl) or other halogen compound. Itrequires attention.Sulfide (Sulfurization) of the lead frame may cause a change of degradation intensity, chromaticitycoordinates and it may cause open circuit in extreme cases. It requires attention.Sulfide (Sulfurization) of the lead frame may cause of storage and using with oxidizing substancestogether.Therefore, LED is not recommend to use and store with the below list. : Rubber, Plain paper, leadsolder cream etc.11. Company InformationAbout Samsung Electronics Co., Ltd.Samsung inspires the world and shapes the future with transformative ideas and technologies. The company is redefining the worlds of TVs, smartphones, wearable devices, tablets, digital appliances, network systems, and memory, system LSI, foundry and LED solutions. For the latest news, please visit the Samsung Newsroom at .Copyright © 2018 Samsung Electronics Co., Ltd. All rights reserved.Samsung is a registered trademark of Samsung Electronics Co., Ltd.Specifications and designs are subject to change without notice. Non-metricweights and measurements are approximate. All data were deemed correctat time of creation. Samsung is not liable for errors or omissions. All brand, product, service names and logos are trademarks and/or registered trademarks of theirrespective owners and are hereby recognized and acknowledged.Samsung Electronics Co., Ltd.95, Samsung 2-roGiheung-guYongin-si, Gyeonggi-do, 446-711KOREA/led。
收藏德国顶级156台电子管收音机名单
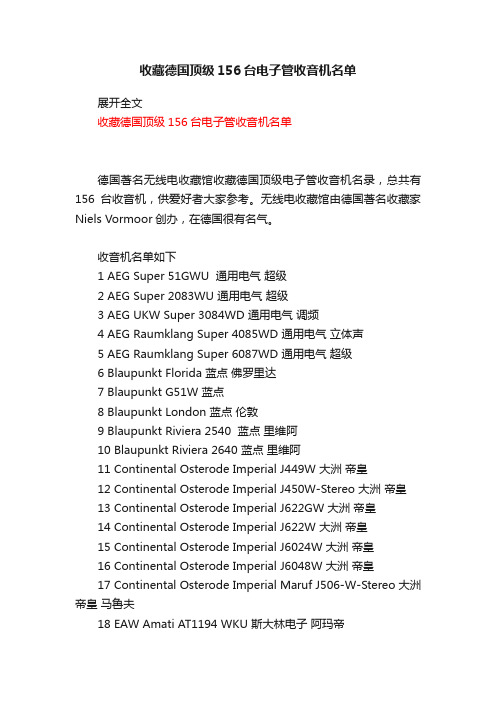
收藏德国顶级156台电子管收音机名单展开全文收藏德国顶级156台电子管收音机名单德国著名无线电收藏馆收藏德国顶级电子管收音机名录,总共有156台收音机,供爱好者大家参考。
无线电收藏馆由德国著名收藏家Niels Vormoor创办,在德国很有名气。
收音机名单如下1 AEG Super 51GWU 通用电气超级2 AEG Super 2083WU 通用电气超级3 AEG UKW Super 3084WD 通用电气调频4 AEG Raumklang Super 4085WD 通用电气立体声5 AEG Raumklang Super 6087WD 通用电气超级6 Blaupunkt Florida 蓝点佛罗里达7 Blaupunkt G51W 蓝点8 Blaupunkt London 蓝点伦敦9 Blaupunkt Riviera 2540 蓝点里维阿10 Blaupunkt Riviera 2640 蓝点里维阿11 Continental Osterode Imperial J449W 大洲帝皇12 Continental Osterode Imperial J450W-Stereo 大洲帝皇13 Continental Osterode Imperial J622GW 大洲帝皇14 Continental Osterode Imperial J622W 大洲帝皇15 Continental Osterode Imperial J6024W 大洲帝皇16 Continental Osterode Imperial J6048W 大洲帝皇17 Continental Osterode Imperial Maruf J506-W-Stereo 大洲帝皇马鲁夫18 EAW Amati AT1194 WKU 斯大林电子阿玛帝18 EMUD DE LUXE 62 艾穆德豪华20 EMUD Rekord 698 艾穆德录音21 Gerufon Gegentakt Ultra 格鲁风推挽极典22 Graetz Fantasia 622 歌丽幻想曲23 Graetz Melodia M418 歌丽旋律24 Graetz Melodia M818-Stereo 歌丽旋律25 Graetz Super 162W 歌丽26 Graetz Super 163W 歌丽27 Graetz Super 176W 歌丽28 Graetz Super 177W 歌丽29 Grundig 3012W 根德30 Grundig 4004GW 根德31 Grundig 4004W 根德32 Grundig 4008W 根德(带唱机)33 Grundig 4010GW 根德34 Grundig 4010TB 根德 (带唱机)35 Grundig 4010W 根德36 Grundig 4035W 根德37 Grundig 4035W-3D-56 根德38 Grundig 4040W 根德39 Grundig 4040W-3D 根德40 Grundig 4055W-3D 根德41 Grundig 495W 根德41 Grundig 5005W 根德43 Grundig 5010W 根德44 Grundig 5040GW 根德45 Grundig 5040GW-3D 根德46 Grundig 5040W 根德47 Grundig 5040W-3D 根德48 Grundig 5050W 根德49 Grundig 5050W-3D 根德50 Grundig 5080W-3D 根德51 Grundig 5089TB 根德 (带磁带机)52 Grundig Stereomeister 15H 根德53 Hornyphon Souverän 57 豪尼峰君王54 Kaiser Breslau W1090 王者布雷斯劳55 Kaiser Hymne W790 王者赞歌56 Koerting Dynamic Stereo 830W 科尔庭动感57 Koerting Dynamic Stereo 20730 科尔庭动感58 Koerting Konzert 430W 科尔庭音乐会59 Koerting Selector 53W 科尔庭选择器60 Koerting Royal Syntektor 55W 科尔庭皇家合成器61 Krefft Weltfunk W5510 克雷夫特韦德风62 Loewe Opta Hellas 542W 雄狮希腊63 Loewe Opta Hellas 552W 雄狮希腊64 Loewe Opta Hellas 552WP 雄狮希腊65 Loewe Opta Hellas 841W 雄狮希腊(带发光面板)66 Loewe Opta Hellas 1841W 雄狮希腊67 Loewe Opta Hellas 2841W 雄狮希腊68 Loewe Opta Hellas 3841W 雄狮希腊69 Loewe Opta Rheingold 3953W 雄狮莱茵黄金70 Loewe Opta Rheingold 3953W-S 雄狮莱茵黄金71 Loewe Opta Rheingold 4054W 雄狮莱茵黄金72 Loewe Opta Rheingold 5055W 雄狮莱茵黄金 (三喇叭)73 Loewe Opta Rheingold 5055W Plastik (四喇叭高低音组合)74 Loewe Opta Rheingold 5055W Plastik (四喇叭两个低音)75 Loewe Opta Venus 雄狮维纳斯76 Lorenz Goldsuper W45 罗兰仕金版超级77 Lorenz Goldsuper W45-3D 金版超级78 Lorenz Goldsuper W52 金版超级79 Metz 402W 美兹(一个短波波段)80 Metz 402W 美兹(两个短波波段)81 Metz 403-WF 美兹82 Metz 405-3D 美兹83 Metz 409-3D 美兹84 Metz Hawai S 美兹夏威夷85 Neckermann Konzert 101/70 内卡人音乐会86 Neckermann Konzert 111/20 内卡人音乐会87 Neckermann Konzertmeister 111/32 内卡人音乐会大师88 Neckermann Royal Syntektor 111/21 内卡人皇家合成器89 Nordmende 500-10 乐满地90 Nordmende Othello 58 乐满地奥赛罗91 Nordmende Othello 59 乐满地奥赛罗92 Nordmende Tannhaeuser 58 乐满地唐怀瑟93 Nordmende Tannhaeuser 59 乐满地唐怀瑟94 Nordmende Tannhaeuser 60 Stereo 乐满地唐怀瑟立体声95 Nora Csardas 56 W1140 诺拉卡萨达斯舞96 Nora Imperator 53 诺拉皇帝97 Nora Reigen 诺拉圆舞98 Philips BA753A Pastorale 飞利浦田园99 Philips BX653A 飞利浦100 Philips B7X63A 飞利浦101 Philips BX998A 飞利浦102 Philips Capella 51 飞利浦卡佩拉103 Philips Capella 643A 飞利浦卡佩拉104 Philips Capella 663A 飞利浦卡佩拉105 Philips Capella 673A 飞利浦卡佩拉106 Philips Capella 753/4E/3D 飞利浦卡佩拉107 Philips Saturn 653/4E/3D 飞利浦土星108 Philips Saturn Tonmeister 653/4E/3D mitRaumklangboxen 飞利浦土星(带立体声音箱)109 REMA 1800 雷玛110 Rochlitz Beethoven II 罗赫利兹贝多芬111 Rochlitz Stradivari I 罗赫利兹斯特拉迪瓦利(EL84输出)112 Rochlitz Stradivari I 罗赫利兹斯特拉迪瓦利(6V6输出)113 Rochlitz Stradivari I-3D 罗赫利兹斯特拉迪瓦利114 Rochlitz Stradivari II 罗赫利兹斯特拉迪瓦利115 Rochlitz Stradivari III 罗赫利兹斯特拉迪瓦利116 Saba Bodensee Automatik 3DS 世霸博登湖117 Saba Bodensee WIII 世霸博登湖118 Saba Freiburg Autiomatik 6-3D 世霸弗莱堡119 Saba Freiburg Autiomatik 8 世霸弗莱堡120 Saba Freiburg WII 世霸弗莱堡121 Saba Freiburg WIII 世霸弗莱堡122 Saba Freiburg Automatik 3DS 世霸弗莱堡123 Saba Meersburg WII 世霸梅尔斯堡124 Saba Meersburg W5 世霸梅尔斯堡125 Saba Meersburg W5-3D 世霸梅尔斯堡126 Schaub Lorenz Goldsuper W46-3D 秀珀罗兰仕金版超级127 Schaub Lorenz Gross-Super 55 秀珀罗兰仕加大版超级128 Schaub Transatlantic 55 秀珀罗兰仕泛大西洋129 Schaub Supraphon 52 秀珀罗兰仕超级录音机130 Schaub Lorenz Weltsuper 500 Stereo 秀珀罗兰仕131 Siemens Luxus Super 54 西门子豪华132 Siemens Schatulle M47 西门子百宝箱133 Siemens Schatulle M57 西门子百宝箱134 Siemens Schatulle P48 西门子百宝箱135 Siemens Spitzensuper 51 西门子顶级136 Siemens Spitzensuper 52 西门子顶级面包箱137 Siemens Spitzensuper 53 西门子顶级面包箱138 Siemens Spitzensuper M7 西门子顶级139 Stern Radio Erfurt II WU 明星埃尔富特140 Stern Radio Erfurt II GWU 明星埃尔富特141 Stern. Stassfurt Admiral 10E152 斯塔斯福特将军142 Stern. Stassfurt Globus 11E171 斯塔斯福特环球143 Tefi M540 (mit Tefifon) 特伟风(带音带机)144 Tefifon T573 (mit Tefifon) 特伟风(带音带机)145 Telefunken Concertino 55GW 德律风根音乐会146 Telefunken Concertino 55 TS 德律风根音乐会147 Telefunken Fortissimo W 德律风根大力神148 Telefunken Operette 52 GW 德律风根轻歌剧149 Telefunken Operette 52 W 德律风根轻歌剧150 Telefunken Orchestra 德律风根管弦乐队151 Telefunken Opus 55 德律风根 55号作品153 Telefunken Opus 7 德律风根 7号作品154 VEB Sternradio Rossini 5701 金箭罗西尼155 VEB Sternradio Rossini 5801 金箭罗西尼156 Wega 401 唯佳。
TraceTek TT-TS12面板安装说明书

Front Panel USB PortDoor Latch12" Display and Interactive Touch ScreenTT-TS12TraceTek TT-TS12 Panel Installation Instructions2 | a b c d e f THESE INSTRUCTIONS APPLY TO THE FOLLOWING SET OF TT-TS12-PANELS:Catalog Number Part Number DescriptionTT-TS12-Panel-0 P000001486 Enclosure mounted TT-TS12 with no SIMs TT-TS12-Panel-S1-1 P000001487 Enclosure mounted TT-TS12 with 1 TTSIM-1TT-TS12-Panel-S1-2 P000001488 Enclosure mounted TT-TS12 with 2 TTSIM-1TT-TS12-Panel-S1-3 P000001489 Enclosure mounted TT-TS12 with 3 TTSIM-1TT-TS12-Panel-S1-4 P000001490 Enclosure mounted TT-TS12 with 4 TTSIM-1TT-TS12-Panel-S1A-1 P000001491 Enclosure mounted TT-TS12 with 1 TTSIM-1A TT-TS12-Panel-S1A-1 P000001492 Enclosure mounted TT-TS12 with 2 TTSIM-1A TT-TS12-Panel-S1A-1 P000001493 Enclosure mounted TT-TS12 with 3 TTSIM-1A TT-TS12-Panel-S1A-1P000001494Enclosure mounted TT-TS12 with 4 TTSIM-1AAll panels include: TT-TS12 Screen, power supply, ADAM-4522 (RS232-to-RS485 Converter), ADAM-4069 (8 channel relay module), buzzer, front panel USB extension, field wiring terminal blocks and space for up to 4 TTSIM units.DESCRIPTIONPlease read these instructions carefully and keep them in a safe place (preferably close to the panel) for future reference. These instructions must be followed carefully to ensure proper operation.The nVent RAYCHEM TraceTek TT -TS12-Panel has been designed specifically for use with nVent RAYCHEM TraceTek sensor interface modules and relay modules.See the TT-TS12 Data Sheet H80617 for further information on system capabilities.See the TT-TS12 Operation Manual H80780 for details on system operation.See the TTSIM-1 Installation Instructions H56830 for details on sensor cable connection.See the TTSIM-1A Installation Instructions H57338 for details on sensor cable connection.INSTALLATION ITEMS (NOT SUPPLIED)• Wall fasteners for surface mounting (four screws) appropriate to the wall surface material• (Optional) TT-TS12 TRIM FLANGE Part Number P000000780 (available for semi-flush mounting of the TT-TS12-Panel) TOOLS REQUIRED:• Drills and chassis punch for electrical conduit or cable gland entries into TT-TS12-Panel at desired locations• Center punch• Phillips (cross-head) screwdriver• Small flat-head screwdrivers for terminal block connections• Large flat head screwdriver (or coin) to operate door latch• Wire cutter and stripper for field wiring connections• Long handle 4mm T-Bar Allen wrenchSTORAGE:Keep the TT-TS12-Panel in a dry place prior to installation to avoid possible damage to internal components.TT-TS12-PANEL GENERAL INFORMATION:Power Requirement 100 to 240 Vac; 50/60 Hz (A separate 15 Amp Branch Circuit with dedicated Circuit Breaker is required) Weight 11.8kg (26.0 lb) (typical with 4 SIM’s installed)Dimensions (W x H x D) 431.8 mm x 330.2 mm x 152.4 mm (17.0 in x 13.0 in x 6.0 in)Power consumption 40 W (typical with 4 SIM’s installed)Built-in relays 3 SPDT Pre-assigned (Buzzer Control, LEAK, and TROUBLE); 1 SPST Pre-assigned (Watchdog)1 SPDT; 3 SPST User Programmable RelaysAdditional channel specific relays available if TTSIM-1A units are installedRating: 5 A at 250 Vac or 5 A at 24 VdcExternal Relays: Expandable to 320 user programmed relays using TT-NRM-BASE and TT-NRM-2RO modulesStorage temperature –20°C to 60°C (–4°F to 140°F)Operating temperature –20°C to 60°C (–4°F to 140°F)Ingress Protection NEMA 1; IP 10Approvals and Certifications: All internal components are UL Listed or Recognized. Panel is built and approved to UL 508A Standard. | 34 | INSTALLING THE TT-TS12-PANELIgnition hazard. Do not mount the TT-TS12-Panel unit in a hazardous location. The TT-TS12-Panel must be in an ordinary area. Choose anoffice or control room location indoors where the TT-TS12-Panel will be protected from the elements and temperature extremes.Note: The TT-TS12-Panel is an electronic unit. During installation, take the following precautions to avoid damage to its electronic components:• Store the TT-TS12-Panel in its cardboard shipping box until ready to install • Handle with care, avoid mechanical damage • Keep the electronics dry• Avoid exposure to static electricity• Use personal grounding strap in high static environments• Avoid contamination with metal filings, liquids, or other foreign matter • Use caution when drilling or punching holes for conduit entry• Do not remove the protective film from the computer screen on the front of the unit until ready for use15.46'(393 mm)0.31' dia.(8 mm)4 places11.4'(290 m m )17.36'(441 mm)0.27' dia. (6.9 mm)4 places5.75'(146 mm) | 5CABLE GLAND AND CONDUIT ENTRIESThe primary cable entry surface is the bottom edge of the TT-TS12-Panel enclosure. Alternate entry points may be appropriate for some installations. It is the responsibility of the installer to note internal clearance and choose standard entry points such that the wire and cable routing do not interfere with the internal components.Note: Remove the back plane assembly and wire harness prior to drilling or punching holes for cable glands or conduit entries because of the risk of damage to the components or contamination due to metal filings.REMOVING THE BACK PLANE ASSEMBLY AND WIRE HARNESS:1. The back plane assembly and wire harness are designed to be removed as a single unit with a minimum of disruption to the internal wiring.2. At the rear of the TS12 touch screen, disconnect:a. 24VDC Power Connection terminal block (may be secured by small screws).b. RS485/RS422 Connector (may be secured by small screws or finger tighteners).c. RS232 Connector (may be secured by small screws or finger tighteners).2c 2b 2aDoor wire harness holders6 | | 7CABLE GLAND AND CONDUIT ENTRIESThere are three categories of cable connections. See Figure 2 for reference.A. Mains power – generally positioned in the lower right corner of the enclosure.B. N etwork connections – (all of the following are optional and may not be relevant for a specific installation). Positioned on right half of enclosure bottom surface.a. RS485 twisted pair cable to any external SIM units; TT-NRM relay units; Smart Gateways; RTU radios; Fiber Optic Modem.b. RS485 twisted pair cable to any host BMS, PLC, or DCS system using serial communications.c. Up to two Ethernet cable connections to local LAN.d. Dry contact relay pairs from summary relays for LEAK, TROUBLE and Watchdog alarm signals.e. Dry contact relay pairs from user programmable contacts 5 through 8 of built in ADAM 4069 module.f. Dry contact relay pairs from TTSIM-1A units (if installed).C. Leader Cables to TraceTek sensor cable or probe circuits - generally positioned to the center or left side of the enclosure bottom surface.8 | RE-INSTALL BACK PLANE ASSEMBLY AND WIRE HARNESSMAKING CONNECTIONS:1. Re-install the back plane assembly by reversing the removal procedures.2. Reinstall the four bolts that secure the back plane assembly.3. Restore wire harness connectors on back of TT-TS12 touchscreen.4. Slip wire harness into wire harness holders on door and left side of enclosure. Snap wire harness holders closed.5.Check for interference by carefully opening and closing the door and adjust wire harness position if necessary.1. Assure branch circuit to TT-TS12 has been de-energized prior to working with line voltage wiring.Connect mains power wires (100- 240 Vac 50/60 Hz) and ground to the terminal blocks in the lower right corner. There is no preferred position for line or neutral. Maximum conductor size is 10 AWG (4.5 mm). Connect ground wire (if provided) to yellow/green terminal block. See picture below.2. Make connections to summary relays if required. See picture below.a. Leak Summary Relay (NO: 1 COM: 2 NC: 3 )(NO: 4 COM: 5 NC: 6 )b. Trouble Summary Relay3. Connections to External SIM Network. See picture below.a. External Modbus slave devices can be connected via twisted pair at terminals 7 (+) and 8 (-).i. Permitted devices include: nVent RAYCHEM TraceTek TTSIM-1; TTSIM-1A; TTSIM-2; ADAM-4069 relay modules; ADAM-4051digital input modules; TT-NRM Relay Modules; Emerson/Rosemount Smart Gateway; GE-MDS RTU radios (or equivalent);RS-485-to-fiber optic modems.ii. All slave devices must respond to 9600 baud ModbusRTU protocol.4. Connections to Host Port. See picture below.a. 2-wire RS485 serial ModbusRTU communications to host computers is supported at terminal 9 (+) and 10 (-).b. Modbus address, baud rate, stop bits and parity, are adjustable to match the host system requirements. See TT-TS12 OperationManual H80780 for details.c.See Modbus Register Map for detailed listing of all available mapped parameters. | 910 | 5. Connecting sensor circuit leader cables to internal SIMs.a. A maximum of four TTSIM-1 or TTSIM-1A units are installed within the TT-TS12-Panel enclosure. Each TTSIM unit is designed to monitor one sensor cable circuit or one sensor probe circuit.b. Each sensor circuit is connected to the TS12 enclosure with a 4-conductor leader cable. The standard color code for TraceTek leader cables is RED-GREEN-YELLOW-BLACK.c. Remove the snap-on wire duct covers and use the vertical and horizontal wire duct to organize the leader cables as suggested in the photo below.TTSIM-1 TTSIM-1Ae. Detailed discussion of TTSIM-1 and TTSIM-1A installation and configuration can be found in publications H56830 and H57338respectively.ii. Lift the ADAM-4522 module out of the way to expose the ADAM 4069 module beneath.iii. The ADAM-4069 module has 4 available Form-A (SPST) Normally Open relays available and 1 Form-C (SPDT) terminal strips on the top and bottom connector. Relays 4, 5 and 6 are Form-A; relay 7 is Form-C.iv. The connectors are removable for easier wiring.v. Make relay connections as appropriate. The watchdog signal is between RL3 NO and RL3 COM.vi. Reinstall ADAM-4522 module on top of ADAM-4069 module and secure screws.7. Ethernet Connectionsa. The TT-TS12 has two RJ-45 Ethernet/LAN connector sockets on the rear of the TT-TS12 touch screen.b. Use standard network cables to connect the TT-TS12 to the local LAN for: email alarm notification, remote screen viewing andoperation via VNC, Modbus/TCP and future network services.c. There are no terminal blocks or LAN connections on the back plane, so make the Ethernet connections the last field wiring stepand leave sufficient slack to run from the conduit entries to the rear of the TT-TS12 touchscreen as mounted on the door panel.d. Take care when closing the enclosure door to avoid pinching the LAN cable.USB Ports Ethernet PortsFINAL INSPECTION:Check for:• No metal filings or other foreign materials present (vacuum or blow out)• Back plane assembly hold down bolts are tight• Mounting hardware tight• Conduit or cable glands tightened• All screw connections at terminal blocks snug (do not over tighten smaller screw terminals)• All wires routed such that the door opens and closes freely• All wire duct covers replaced• Leader cables from sensor circuits identified• Generally neat and organized appearance• Fuses installed in terminal block fuse holders at mains power connection point (lower right corner of back plane assembly) APPLY POWER:Ensure that fuse holders at mains power connection terminal block are properly seated. Apply mains power at circuit breaker panel. (Note that the fuses in the TT-TS12-Panel mains power connection terminal block are designed to act as local disconnect for panel servicing).Observe any installed TTSIM units for successful power on indications:• TTSIM-1 indication is a red LED that blinks once every 10 seconds to indicate power and CPU activity• TTSIM-1A has a green power on LED that blinks once every 5 seconds to indicate power and CPU activityCLOSE AND SECURE THE DOOR LATCH:Observe the front screen of the TT-TS12 touchscreen for boot-up sequence. This process will take about 1 minute and the screen may go dark or appear to pause for several seconds from time to time during a normal start-up. Proper start up is indicated by a screen like that shown below, however the number and type of TTSIM may be different than what is shown in this example.See the TT-TS12 Operation Manual H80780 for system configuration, set-up and operating instructions.North AmericaTel +1.800.545.6258 Fax +1.800.527.5703 **********************Europe, Middle East, AfricaTel +32.16.213.511Fax +32.16.213.604**********************Asia PacificTel +86.21.2412.1688Fax +86.21.5426.3167*************************Latin AmericaTel +1.713.868.4800Fax +1.713.868.2333**********************。