BAO Bootcamp Lab 1
bea tuxedo
BEA TUXEDO Application AdministrationTUX-A11-XX-01Lab ExercisesBEA Systems, Inc.Educational ServicesCopyright © 2001, BEA Systems, Inc. All Rights Reserved.Restricted Rights LegendThis software and documentation is subject to and made available only pursuant to the terms of the BEA Systems License Agreement and may be used or copied only in accordance with the terms of that agreement. It is against the law to copy the software except as specifically allowedin the agreement. This document may not, in whole or in part, be copied photocopied, reproduced, translated, or reduced to any electronic medium or machine readable form without prior consent, in writing, from BEA Systems, Inc.Use, duplication or disclosure by the U.S. Government is subject to restrictions set forth in the BEA Systems License Agreement and in subparagraph (c)(1) of the Commercial Computer Software-Restricted Rights Clause at FAR 52.227-19; subparagraph (c)(1)(ii) of the Rights in Technical Data and Computer Software clause at DFARS 252.227-7013, subparagraph (d) of the Commercial Computer Software--Licensing clause at NASA FAR supplement 16-52.227-86; or their equivalent.Information in this document is subject to change without notice and does not represent a commitment on the part of BEA Systems. THE SOFTWARE AND DOCUMENTATION ARE PROVIDED "AS IS" WITHOUT WARRANTY OF ANY KIND INCLUDING WITHOUT LIMITATION, ANY WARRANTY OF MERCHANTABILITY OR FITNESS FOR A PARTICULAR PURPOSE. FURTHER, BEA Systems DOES NOT WARRANT, GUARANTEE, OR MAKE ANY REPRESENTATIONS REGARDING THE USE, OR THE RESULTS OF THE USE, OF THE SOFTWARE OR WRITTEN MATERIAL IN TERMS OF CORRECTNESS, ACCURACY, RELIABILITY, OR OTHERWISE.Trademarks or Service MarksBEA, BEA eLink, BEA Jolt, Distributed Application Framework, and Enterprise Middleware Solutions are trademarks of and are developed and licensed by BEA Systems, Inc., Sunnyvale, California. TUXEDO is a registered trademark of Novell, Inc., exclusively licensed to BEA Systems, Inc.OpenView is a registered trademark of Hewlett-Packard Company. SunNet Manager and Solstice are trademarks of Sun Microsystems, Inc. in the United States and other countries. IBM and NetView are registered trademarks of International Business Machines Corporation. Oracle is a registered trademark of Oracle Corporation. Informix is a registered trademark of Informix. Cabletron Spectrum is a trademark of Cabletron Systems, Inc. UNIX is a registered trademark in the United States and other countries, licensed exclusively through X/Open Company Limited.All other company names may be trademarks of the respective companies with which they are associated.BEA Tuxedo Application AdministrationDocument Edition Part Number Date Software Version Comment1.0 Sep 2001 BEA Tuxedo 6.5, 7.1,8..0 Initial Labs VersionContentsGeneral Lab Instructions (3)Lab Instructions (3)Environment Variables (3)Lab Directories (5)INSTL–Lab Installation and Verification (7)Part 1 – Copying the Lab Files (8)Part 2 – Viewing the Tuxedo Documentation (10)Part 3 – Verifying the Lab Machine Environment (10)Part 4 – Building Tuxedo Programs for the Lab Workshops..11 DEPL–Deploying a Basic Tuxedo Application (13)CONF–Configuring Application Servers (17)ADAC–Administration and Additional Configuration (21)CLNT–Configuring /WS Support (25)SECU–Configuring Tuxedo Security (29)MMC–Multiple Machine Configuration (33)SRVG–Server Groups and Data Dependent Routing (37)TRAN–Configuring Transactions (41)CQUE–Administering Queues (45)MIBS–Accessing MIBs (51)PERF–Performance Considerations (55)DOMS–Multiple Domains (59)General Lab InstructionsThis guide contains general instructions for the lab workshop exercises for the BEA Tuxedo Application Administration course. The course lab exercises can be performed on a system with either BEA Tuxedo 6.5, 7.1, or 8.0 software installed.The lab exercises can be performed in a variety of classroom environments, both public classrooms and on-site customer locations. The lab exercises are supplied for two generic platform types – UNIX (Sun, HP, other versions) and Microsoft WindowsNT/Windows2000. The lab machine/s used should have been previously set up for the class; the BEA Tuxedo product and a C compiler should be installed. On Windows systems, the only C compiler tested with the labs is Microsoft Visual C++ 6.0.The lab exercises are labeled with the same abbreviated module name used for a particular Module in the student material, for example INSTL. Each exercise describes the objective and the steps for performing the exercise. Consider the time suggested for each lab as a “guideline” and not a requirement. Your instructor will end the lab session when it is appropriate.Lab InstructionsInstructions for each lab are usually common for both Windows and UNIX and any differences are noted in the instructions.The first set of actions that you will perform for any lab is common to all labs and are:1. Open a Windows/DOS command window or UNIX shell window.2. Change directory to the lab exercises directory – the lab refers to the <xyz> lab directory:[Windows]: cd<root-directory>\exercises\<xyz>[ UNIX]: cd<root-directory>/exercises/<xyz>3. Edit the setenv command script file that sets the environment variables:[Windows]: setenv.cmd[ UNIX]: setenv.ksh4. Execute the setenv command script file:[Windows]: setenv[ UNIX]: . setenv.ksh(Note the <space> between . and setenv.ksh)Environment VariablesYou should make sure that the environment variables shown below are set. In Windows, you can edit your system environment variables through the Control Panel so that these are always set when you startup a DOS or shell command prompt. The actual paths may differ for your system, for example Tuxedo might be installed in D:\ instead of C:\ as the table below suggests.Set environment variables according to your computer-specific installation directories. For the PATH environment variables, we suggest that you add the paths listed in the table below to thebeginning of the variable because you might have other software installed that may interfere. Ifyou choose not to change the environment variables and use the provided setenv.bat orsetenv.ksh file, you may need to edit this file to reflect your actual installation folders.For Windows systems:Env. Variable Windows Example DescriptionTUXDIR C:\tuxedo Tuxedo installation directory TUXCONFIG C:\tuxa11\exercises\depl\tuxconfig LocationofTUXCONFIGPATH %TUXDIR\bin;%PATH% Path should include theTuxedo bin directoryTUXDIR should be set on supported Windows platforms when Tuxedo 6.5 or 7.1 is installed.Tuxedo 8.0 installation does not set these environment variables and they have to be set either inthe Settings-> Control Panel-> System->Environment control panel or before executing aTuxedo program. In the lab exercises, we will usually set them for each lab exercise.For UNIX systems:Env. Variable UNIX Example Description TUXDIR /opt/tuxedo71 Tuxedo installation directory TUXCONFIG /home/stu01/exercises/abcs/tuxconfig LocationofTUXCONFIGPATH .:$TUXDIR/bin:$PATH/opt/.. or /usr/.. Path should include these Tuxedo related directories…… and any C compiler directories…<include directory path> $TUXDIR/include Usually specified in thecompile commandLD_LIBRARY_PATH (SVR4, Solaris)SHLIB_PATH (HP-UX)LIBPATH (AIX) $TUXDIR/lib:$LD_LIBRARY_PATH$TUXDIR/lib:$SHLIB_PATH$TUXDIR/lib:$LIBPATHAdd the Tuxedo librarydirectory to the library searchpathLANG CorEn_US If you get Tuxedo catalog errors, you may need to reset this to “C” instead of En_US; check which of these two directories has been installed under the $TUXDIR/locale directoryTUXDIR– obtain the directory name where Tuxedo has been installed on the UNIX system from the Instructor or the UNIX Administrator.Lab DirectoriesThe parent directory for the lab exercises contains files used to build the lab exercises. It also contains the exercises and s olutions s ub-directories. Each lab exercise directory is under the exercises directory in a different lab-specific sub-directory (this directory will be the application directory, APPDIR). A lab exercise directory is named to match the corresponding module name, for example DEPL but the lab directory name is in lower-case as in “depl”.Each lab exercise directory contains the files required for the lab exercise described. These files include template files (that you need to complete) or completed files:- a template configuration file named UBBconfig.template- a template file, setenv.cmd.template (Windows) or setenv.ksh.template (UNIX), for setting the environment variables- client and/or server source program template files, <name>.template- completed client or server programs, <name>.c, or executables, <name> in UNIX or <name>.exe in Windows.The UBBconfig.template configuration file requires the following information to be filled for each lab:machine name The configured system name for this machineTUXDIR The directory where the Tuxedo product is installedAPPDIR Application directory, which is the current lab exercise directory TUXCONFIG The TUXCONFIG file in the <APPDIR> directoryYou will need to change the value of these parameters to the appropriate values and complete any other lab-specific directions.You can obtain the machine name from the %COMPUTERNAME% environment variable or from the Network control panel [Windows], or [UNIX] by ‘uname –n’ or ‘hostname’. Note that for Windows systems, the machine name specified in a Tuxedo configuration file should always be in upper case – example, GUMBY and not gumby.A corresponding lab directory in the solutions sub-directory contains the UBBCONFIG configuration solution files for the lab exercise. You should try to avoid using the solution files unless you are really stuck or the Instructor is busy with other students. The Instructor is there to help you !Each lab solution directory contains solution configuration files for Windows and UNIX for each lab exercise, generically represented by the lab directory <labname> below. These solution files use the following values for the above information in the solutions:machine name The node name for the system: NODE1TUXDIR Tuxedo install directory:[Windows] c:\tuxedo[UNIX] /opt/tuxedoAPPDIR Application directory, the current lab directory:c:\tuxa11\solutions\<labname>[Windows][UNIX] /home/student/tuxa11/solutions/<labname> TUXCONFIG The TUXCONFIG file in the <APPDIR> directory:%APPDIR%\tuxconfig[Windows][UNIX] $APPDIR/tuxconfigTo use a lab solution, copy the solution files to the equivalent lab exercise directory; replace the above values in the solution files with values appropriate for your lab machine and follow the instructions to run the lab exerciseINSTL–Lab Installation and VerificationReference Course Section(s): INSTL, Lab Guide: Getting Started Suggested Time: 40 minutesObjectiveThe objective of this exercise is to install the labs and make you familiar with the lab exercise environment.DescriptionYou will install the lab exercises from the Student CD supplied with your course materials and become familiar with the lab machine environment. Installing the labs consists of two main tasks – copying the labs from the Student CD and then compiling the C source programs to generate the client and server executable programs for the platform being used for the lab exercises.You will also become familiar with the Tuxedo documentation layout on the Student CD. Finally, you will follow some simple instructions to verify that Tuxedo has been installed on your machine.SummaryThere is no lab exercise directory or files associated with this lab exercise. You will need the Student CD packaged with your course materials.• Copy the labs from the CD-ROM to your lab machine• View the Tuxedo documentation with a browser• Verify that Tuxedo is installed on the lab machine• Build the client and server executable programs for use in the other lab exercisesStepsPart 1 – Copying the Lab Files(This step may already have been done for the class – check with the Instructor.)1. All the code and template files that you need to accomplish the Lab Workshop exercises aresupplied on the Student CD-ROM that is bundled with the course Student Materials. This CD is in a PC format and may not be readable on most UNIX machines.• On a Windows system, load the Student CD.• On a UNIX system, the tar file containing the lab exercise files may have already been copied from the CD to a directory on the system – check with the Instructor.2. Install the Lab Workshop exercise files:To install the lab exercises on a WindowsNT/Windows2000 system• Create a <lab root directory> such as C:\tuxA11 on your student machine.• Copy the contents (directories and files) from the labs directory on the student CD to this <lab root directory>on the Windows system: select all files and directories, and drag and drop them into the newly-created labs directory.• The files copied to your lab directory will be copied as read-only. To change the read-only attributes, open a DOS/Command window and change directory to your lab root directory.Type the following command to change the read-only attributes on all the files: > attrib –r *.* /S• In the DOS/Command window, verify that the Microsoft Visual C++ 6.0 compiler is installed by typing “cl”, the command to run the compiler; if it is installed, the banner heading from the compiler will be printed in the window.• If the previous command fails, try to find and execute the following command file to set the correct system environment. This file is typically located in:C:\Program Files\ Microsoft Visual Studio\vc98\bin\Vcvars32.bat Try the previous step again. If this still fails, the Visual C++ compiler may not be installed on the PC you are using. Notify the Instructor.To install the lab exercises on a UNIX system• If the System Administrator has already transferred the tar file from the Student CD to the UNIX system, make a copy of the tar file in your lab root directory using the cp command: > cp \…\TUX-A11-XX-01-labs.tar .• If not, transfer the labs\UNIX\TUX-A11-XX-01-labs.tar file from the student CD to the student’s <lab root directory>on the UNIX system being used. You can useFTP binary mode to transfer the file. An example of <lab root directory> is/home/student01.• Use tar to uncompress the TUX-A11-XX-01-labs.tar file:> tar xvf TUX-A11-XX-01-labs.tar3. This completes the copy of the lab files to your directory.For both Windows and UNIX systems, the previous steps will create a directory structure underneath the <lab root directory> containing the lab directories corresponding to the Modules in the Student Guide. The root directory should contain the following sub-directories plus some other command files that will be used to build the client and server programs:The formats for directory names are (using the Windows path name convention): • Exercises described in the lab guide: <root-directory>\exercises\ <xyz>• Solutions to exercises in the lab guide: <root-directory>\solutions\<xyz>where <root-directory> represents the root directory where the labs were installed, and <xyz> and <XYZ> are the lab directory name and the associated module name respectively.There is another step to be done before the lab exercises can be performed – build the client and server program executables to be used for each lab exercise. This is described later in this lab exercise.4. This completes the copying of the lab files to your machine.Part 2 – Viewing the Tuxedo Documentation5. We will now examine the Tuxedo documentation supplied on the Student CD. [If the courseis being delivered on a UNIX platform, the Tuxedo docs may have been transferred to aUNIX directory.] Using Windows Explorer or other File Manager, move to the following directory on the Student CD :[Student-CD] \Tuxedo Docs\ xxxwhere xxx is either v6_5, v7_1, or v8_0 depending on whether Tuxedo release 6.5, 7.1, or 8.0 respectively is being used in the class.6. Double-click on the index.htm file in the above directory. This will start-up a browserprogram and bring up the Tuxedo documentation index page. The display will be different for the different Tuxedo releases but there will be common displayed items, including a link to the (ATMI) Reference section.Click on the Reference link. Under Reference Topics, you should see several sections such as Command Reference – Section 1. The Tuxedo reference documentation is organized into sections very much like UNIX man pages.7. In the course slides you will see references to items such as tmadmin(1). This means thatthe reference information for the Tuxedo command tmadmin is in Section 1 of the reference documentation. The Tuxedo file formats are in Section 5. Click on this link.The displayed page shows all the BEA Tuxedo File Formats, Data Descriptions, MIBs, and System Processes listed in alphabetical order.8. Click on one of the topics, such as UBBCONFIG(5), displayed in the left column. Thedisplayed page shows the details of the Tuxedo Configuration file format including all the required and optional parameters.Part 3 – Verifying the Lab Machine Environment9. Open a DOS/Command or Shell window. Display the current environment variables:• On Windows type:set | more• On UNIX: env | more10. Check the listed variables to see if the TUXDIR variable is set. If not, set it – (if needed, askyour Instructor for the location of the Tuxedo directory on your PC or UNIX system): [ On Windows] set TUXDIR=<Tuxedo installed directory>[On UNIX (ksh)] export TUXDIR=<Tuxedo installed directory>11. If necessary, add the Tuxedo bin directory to your command execution path:[ Windows] set PATH=%TUXDIR%\bin;%PATH%[UNIX (ksh)] export PATH=$TUXDIR/bin:$PATHAlso, set and export the LIBRARY PATH as appropriate (see theUNIX Environment Table for information on some UNIX systems)to include $TUXDIR/lib.12. Type the Tuxedo administration command tmadmin with the –v option :tmadmin –vThis should print out the Tuxedo license information such asIf a message similar to the one above was printed on your console, your environmentvariables were set correctly and Tuxedo is installed on your machine.13. If you get Tuxedo catalog message errors, you may also need to set (and export) theenvironment variable that defines the locale, for example:LANG=C [for US English]14. This completes the initial lab installation.Part 4 – Building Tuxedo Programs for the Lab WorkshopsYou will now build all client and server executable programs to be used in the lab exercises. These programs need to be built as the lab exercises can be run on a number of platforms, using different versions of operating system and C compiler. The next step requires that the environment is suitably setup - Tuxedo must be installed, the Tuxedo Software Development (SDK) license installed must be valid, and a C compiler must be installed. 15. After installing the lab files, to compile all C programs in the solutions directories and buildthe executable programs:- cd to the <root-directory> that contains the exercises and solutions sub-directories- edit the appropriate buildlabs script file[Windows] buildlabs.bat[UNIX] buildlabs.kshto set the environment variables identified there- In the <root-directory>, run the appropriate buildlabs script (examples are below): [Windows]: Note that you have to supply the root directory name if you did notset it in the buildlabs.bat file.buildlabs [<root-directory>][UNIX]: Note the {space} between {. } and {buildlabs.ksh}. buildlabs.kshWindows Example: cd c:\tuxa11(In a DOS Window)[Edit/set the appropriate environment variables in the buildlabs.bat file; run the bat file as shown below.]buildlabs c:\tuxa11 [Note that the root lab directory name isrequired as a parameter if not set inbuildlabs.bat]UNIX Example: cd /home/student01(ksh)[Edit/set the appropriate environment variables in the buildlabs.ksh file; in the command line below note the <space> between “.” andbuildlabs.ksh)]. buildlabs.ksh16. When the build command script is successfully completed, verify that it has built the clientand server executables by looking at the files in a lab directory such as ‘adac” under the exercises subdirectory. There should be some executable program files (*.exe in Windows, executable files in UNIX). If necessary, you can re-run the buildlabs command file again at any time.17. This completes the lab installation and familiarization. Review the notes in the General LabInstructions section at the beginning of this Lab Guide to become familiar with thegeneralized instructions for the rest of the Lab Workshop exercises.DEPL–Deploying a Basic Tuxedo ApplicationReference Course Modules: DEPLSuggested Time: 20 minutesObjectiveYou will be following instructions to make you familiar with the computer and lab exercise environment, and to configure and run a basic sample application to verify the successful installation of the Tuxedo product. In doing so, you will also be deploying a simple Tuxedo application. You will be performing some of these instructions in this lab without fully knowing the details, such as the configuration file, that will be explained later. An important objective of this lab exercise is to make you comfortable with the lab environment and begin to use some of the basic Tuxedo commands.DescriptionThe configuration for this lab is a basic single machine (SHM mode) application with one client and one server. This basic application, which is shipped with the BEA Tuxedo product, is called simpapp. It consists of the simpcl client that sends a text string, supplied by the user, to the TOUPPER service implemented in the simpserv server. The TOUPPER service converts the text string to uppercase and returns the resultant text string to the client for display to the user.The following files are provided• command script files to set the appropriate environment variables (setenv.cmd for Windows, setenv.ksh for UNIX)• a template Tuxedo configuration file, UBBconfig.template• a client source program, simpcl.c (that you will copy from the Tuxedo product directory)• a server source program, simpserv.c (that you will copy from the Tuxedo product directory)Steps1. The working directory for this lab is depl in the lab exercises directory.• Open a [Windows] DOS command or [UNIX] shell window and “cd” to this directory.2. Edit the appropriate setenv command file replacing the remarks within <> with appropriatevalues for TUXDIR, APPDIR, TUXCONFIG :[Windows] setenv.cmd[UNIX, Korn shell] setenv.kshSet the environment variables using:[Windows] >setenv [Note: Runs the setenv.cmd file][UNIX, Korn shell]$. setenv.ksh[Note: <space> between “.” & “setenv.ksh”] 3. Copy or rename the UBBconfig.template file to UBBconfi g.[Note: This configuration file is almost identical to the one supplied with the simpappapplication, except that we are using the configuration file name convention that we will use for the rest of the lab exercises.]4. Edit the UBBconfig file:• set appropriate values for IPCKEY, TUXDIR, TUXCONFIG, APPDIR, and for the machine name in the MACHINES section.5. Build the TUXCONFIG file using the command:tmloadcf -y UBBconfigIgnore the warning message “WARN: Missing SERVICES section”. If you encounter any other errors, edit the configuration file and correct the errors. Re-build the TUXCONFIG file.6. Copy the client and servers programs, simpcl.c and simpserv.c, from the TUXEDOsample applications directory into the lab directory (depl):[Tuxedo 6.x]copy %TUXDIR%\apps\simpapp\simpcl.*Windows:UNIX: cp $TUXDIR/apps/simpapp/simpcl.* .[Tuxedo 7.1, 8.0]copy %TUXDIR%\samples\atmi\simpapp\simpcl.*Windows:UNIX:cp $TUXDIR%/samples/atmi/simpapp\simpcl.* .Repeat the appropriate command above to copy simpserv.* to the current directory.7. Build the client program executable using the buildclient command:buildclient -v -f simpcl.c -o simpclThis builds a Tuxedo client executable, simpcl, from the C source file, simpcl.c.8. Build the server program executable using the buildserver command:buildserver -v -f simpserv.c -o simpserv -s TOUPPERThis builds a Tuxedo server executable, simpserv, from the C source file, simpserv.c, that will provide a service called TOUPPER when it is started. This server is defined in the Tuxedo configuration file.9. Boot the application using the Tuxedo command:tmboot -y10. Run the Tuxedo administration command line utility program, tmadmin:• Use the printserver subcommand to view the active servers• Use the printservice subcommand to view the information on services• Exit from tmadmin with the quit subcommand11. At the command line prompt, run the client and observe the input text string returned as anuppercase string:simpcl “hello tuxedo”12. Re-run the tmadmin program, and run the same sub-commands as before to observe anydifference in the statistics printed. (Hint: We submitted a request for the TOUPPER service that was completed successfully and was performed by the SIMPSERV server). Exit the tmadmin program.13. Shut down the Tuxedo application system:tmshutdown -y14. Tuxedo messages are logged in a file called the userlog or ULOG file. The file is namedULOG.mmddyy where mmddyy are the two-digit month, day, and year respectively. For example, the file for August 9, 2001 would be named ULOG.080901. We will cover the details of the ULOG file later; for now, be aware that this log file exists and contains valuable error and information messages logged by the Tuxedo system.The ULOG file is a text file and you can examine it with any text editor or with commands such as type or more.Windows: type ULOG* | moreUNIX: more ULOG*Look up the details of some of the logged messages (such as the LIBTUX_CAT:262 message) in the Messages section of the Tuxedo documentation on the Student CD.CONF–Configuring Application ServersReference Course Chapter: CONFSuggested Time: 30 minutesObjectiveThis lab exercise is intended to provide experience in configuring a functional basic application consisting of essential configuration components and to observer the synchronous client-server communication mechanism.DescriptionThis lab utilizes an SHM configuration with one client and three servers.The clientdb program calls a service (specified on the command line) and then prints out information when it receives a reply back from the server. It operates in a synchronous mode – it sends a request for the service and then waits for the response before sending the next request. The three servers provided are SvrInq, SvrUpdate, and SvrDelete and the services each provides simulate the inquiry, update, and delete operations to a database in a typical application.The following files are provided:• template command script files to set the appropriate environment variables (setenv.cmd for Windows, setenv.ksh for UNIX)• template Tuxedo configuration file, UBBconfig.template• application executables (one client and 3 servers): clientdb; servers SvrInq, SvrUpdate, and SvrDelete。
MPLAB Harmony 帮助文档说明书
Using the MPLAB Harmony Help MPLAB Harmony Integrated Software Framework2013-2015 Microchip Technology Inc. All rights reserved.Using the MPLAB Harmony Help Help FeaturesUsing the MPLAB Harmony HelpThis topic contains general information that is useful to know before using the MPLAB Harmony help. DescriptionHelp FormatsMPLAB Harmony Help is provided in three formats:• Stand-alone HyperText Markup Language (HTML)• Microsoft Compiled HTML Help (CHM)• Adobe® Portable Document Format (PDF)Help File LocationsEach of these help files are included in your installation of MPLAB Harmony in the following locations: • HTML - <install-dir>/doc/html/index.html• CHM - <install-dir>/doc/help_harmony.chm• PDF - <install-dir>/doc/help_harmony.pdfRefer to Help Features for more information on using each output format.Help FeaturesDescribes the features available in the Help files provided in MPLAB Harmony.CHM Help FeaturesProvides detailed information on the features available in the CHM Help file.DescriptionThe MPLAB Harmony CHM file (<install-dir>/doc/help_harmony.chm) provides many useful features for accessing Help content. Figure 1 shows the initial Help window.Figure 1: Initial CHM Help ViewHelp IconsSeveral icons are provided in the interface of the Help, which aid in accessing the Help content.Table 1: Help Icon FeaturesHelp Icon DescriptionUse the Hide icon to turn off the left Help pane. Once the Hide icon is selected, it is replaced with the Show icon.Clicking the Show icon restores the left Help pane.Use the Locate icon to visually locate the H elp topic you are viewing in the Contents. Clicking the Locate iconcauses the current topic to be highlighted in blue in the Contents pane.Use the Back icon to move back through the previously viewed topics in the order in which they were viewed.Use the Forward icon to move forward through the previously viewed topics in the order in which they were viewed.Use the Home icon to return to the first topic in the Help.Use the Print icon to print the current topic or the selected heading and all subtopics.Use the Options icon to:• Hide tabs• Locate a topic• Go Back, Forward, and Home• Stop• Refresh• Set Internet Explorer options• Print topics• Turn Search Highlight Off and OnTopic WindowThe Topic Window displays the current topic. In addition to the Help content, special links are provided in the upper portion of the window, as shown in Figure 2. Table 2 lists and describes the different links by their categoryFigure 2: Help LinksTable 2: Help LinksLink Category DescriptionBreadcrumb TrailThe path (i.e., trail) of the current topic is provided at the top and bottom of each topic, beginningwith the top-level section name.Support and Feedback Links: • Documentation Feedback• Microchip Support Click this link to send feedback in the form of an email (see Note 1). Click this link to open the Microchip Support Web page. Main Help Links: • Contents• Index • HomeClick this link to open the Contents in the left pane. Click this link to open the Index in the left pane (see Note 2). Click this link to go to the initial Help topic (see Note 2). Navigation Links: • Previous • Up • NextClick this link to go back to the previously viewed topic. Click this link to go to the parent section of the topic. Click this link to go to the next topic.Notes:1. To use the Documentation Feedback link, you must have an email system such as Outlook configured. Clicking the link automatically opens a new email window and populates the recipient and subject lines.2. The Home and Index links do not appear initially. Once you begin traversing the topics, they dynamically appear.TabsThe CHM Help provides four Tabbed windows: Contents, Index, Search, and Favorites.ContentsThe Contents tab displays the top-level topics/sections. Figure 3 shows the initial view when the CHM Help is first opened.Figure 3: Initial Contents Tab ViewAs topics are explored, the information in the Contents tab dynamically updates. For example, by clicking Prebuilt Libraries Help and using the Next link in the current topic to traverse through this section, the collapsed section automatically expands and the current topic is highlighted in light gray, as shown in Figure 4.Figure 4: Current Topic HighlightingIndexClicking the Index tab results in an alphabetic list of all Help index entries. Figure 5 shows the default Index interface.Figure 5: Default Index Interface• To locate a specific entry, enter the keyword in the Type in the keyword to find: box. As you type, the index list dynamically updates.• To display the desired item in the list, select the item and click Display, or double-click the desired item. The related content appears in the Help window.SearchClicking the Search tab provides an efficient way to find specific information. Figure 6 shows the default Search interface.Figure 6: Default Search Interface• Enter the specific word or words in the Type in the word(s) to search for: box• Clicking the drop-down arrow provides the list of previously searched words• The right arrow provides Advanced Search options: AND, OR, NEAR, and NOT• Located at the bottom left of the Search window, three options are provided to narrow-down your search. By default, Match similar words is selected. To reduce the number of returned words, clear this box and select Search titles only, which restricts the search to only the topic titles in the Help, as shown in Figure 7.Figure 7: Search Titles Only• The Title column provides the list of related topics• The Location column lists in which Help system the topic was found (see Note)• The Rank column determines to search result that most closely matches the specified wordNote: The Legend column is automatically included in the CH M H elp when the Advanced Search features are implemented and cannot be excluded. Its purpose is to provide the name of the Help system in which the topic islocated for Help output that is generated from multiple sources. Since the MPLAB Harmony Help is contained withina single Help system, this information is the same for all searches. Do not confuse this column to mean the actualtopic location.FavoritesUse the Favorites tab to create a custom list of topics that you may want to repeatedly access. Figure 8 shows the default Favorites interface.Figure 8: Default Favorites Interface• The title of the current topic is shown in the Current topic: box.• Click Add to add the topic to the Topics: list, as shown in Figure 9.• Click Display to view the selected topic.• Click Remove to remove the selected topic from the list of favorites.Figure 9: Adding a Favorite TopicUsing the MPLAB Harmony Help Help FeaturesHTML Help FeaturesProvides detailed information on the features available in the stand-alone HTML Help.DescriptionThe HTML Help output for MPLAB Harmony has two purposes. First, it can be used as "stand-alone" Help. Second, the HTML files are used by the MPLAB Harmony Configurator (MHC) when using MHC in MPLAB X IDE.Stand-alone HTML HelpTo use the HTML Help in a "stand-alone" manner. Open the file, <install-dir>/doc/index.html, in your browser of choice.The following figure shows the initial view after opening the HTML Help.The following links are provided:•Topic Breadcrumb Trail - At the top and bottom of each topic, the help path is listed•Contents - The Contents topic is a static file, which lists the major sections available in the Help. Due to a restriction with the Help browser used by the MHC, a dynamic Contents topic cannot be used.•Index - The Index provides the ability to dynamically search for and display related keywords (see Note 1)•Home - This link returns to the Introduction topic (see Note 1)•Previous and Next navigation links - Use these links to traverse through the Help topics•Documentation Feedback - Use this link to provide feedback in the form of an email (see Note 2)•Microchip Support - Use this link to open the Support page of the Microchip websiteNotes: 1.The Home and Index links do not appear initially. Once you begin traversing the topics, they dynamically appear.2.To use the Documentation Feedback link, you must have an email system such as Outlook configured. Clickingthe link automatically opens a new email window and populates the recipient and subject lines.HTML Help FeaturesProvides detailed information on the features available in the PDF version of the Help.DescriptionThe MPLAB Harmony Help provided in Portable Document Format (PDF) provides many useful features. By default, PDFbookmarks should be visible when opening the file. If PDF bookmarks are not visible, click the PDF Bookmark icon, which is located near the top of the left navigation pane or by selecting View > Show/Hide > Navigation Panes > Bookmarks.To make full use of the PDF features, it is recommended that Adobe products be used to view the documentation (see Note ). Help on how to use the PDF output is available through your copy of Acrobat (or Acrobat Reader) by clicking Help in the main menu.Note: The MPLAB H armony H elp PDF file can be viewed using a PDF viewer or reader that is compatible with Adobe PDF Version 7.0 or later. PDF Help FeaturesUsing the MPLAB Harmony Help Help Features PDF Help FeaturesUsing the MPLAB Harmony HelpTypographic ConventionsThis topic describes the typographic conventions used in the MPLAB Harmony Help.DescriptionThe MPLAB Harmony Help uses the following typographic conventions: DescriptionRepresentsExample Italic CharactersReferenced documentation and emphasized text •MPLAB X IDE User's Guide •...is the only option.InitialCapitalization • A window • A dialog• A menu selection•the Output window •the SaveAs dialog •the Enable Programmer menu Indicates a process step thatis automated by the MPLABHarmony Configurator (MHC)TIP!Provides helpful information to assist the user Note: Provides useful information tothe userImportant! Provides important informationto the userWarningWarns the user of a potentiallyharmful issue Quotation Marks A field name in a window or dialog"Save project before build"Italic text with right anglebracketA menu pathFile > Save Bold Characters •Topic headings• A dialog button •Prerequisites •Click OKText enclosed in angle brackets A key on the keyboard Press <Ctrl><V>Courier New text •Sample source code •File names •#define START•system_config.hSquare Brackets Optional arguments command [options] file [options]Curly Bracesand PipeC Choice of mutually exclusive arguments; an ORerrorlevel {0|1} Typographic ConventionsUsing the MPLAB Harmony Help Recommended ReadingRecommended ReadingThe following Microchip documents are available and recommended as supplemental reference resources.DescriptionUsing the MPLAB Harmony Help DocumentationIf you are new to MPLAB Harmony, read the Understanding MPLAB Harmony section and follow the Creating an Application tutorial to create your first MPLAB Harmony application.For an overview of the libraries, demonstration projects, and other resources provided in the MPLAB Harmony installation, review the tables in the Release Contents section.Refer to the Applications Help section for more information on the demonstration projects and the Framework Help section for more information on the libraries that make up the MPLAB Harmony framework. There are also help sections available for the third-party material, board support packages, and prebuilt libraries that you should review for more information on each of those items.The help documentation for each MPLAB Harmony library is organized into common topics. The "Introduction" section provides a brief description of the library for those who are new to it. "Release Notes" and "Software License Agreement" provide the latest release information about the library and its license terms. Read the "Using the Library" section to understand the library's usage model and see examples of how to use the library's interface functions to create the solutions you need. The "Files", "Building the Library", and "Configuring the Library" sections describe how to add the library to your project and configure it for your desired usage. The "Library Interface" section provides a convenient programmer's reference dictionary of the library's interface functions, data types, and constants with a convenient hyper-linked summary table. Use it while you are developing your own applications. PIC32 Family Reference Manual SectionsPIC32 Family Reference Manual sections are available, which explain the operation of the PIC32 microcontroller familyarchitecture and peripheral modules. The specifics of each device family are discussed in the individual family’s device data sheet.To access this documentation, please visit, /pic32/, and click Documentation. Then, expand Reference Manual to see the list of available sections.PIC32 Device Data SheetsRefer to the appropriate device data sheet for device-specific information and specifications.Reference information found in these data sheets includes:•Device memory maps•Device pin out and packaging details•Device electrical specifications•List of peripherals included on the devicesTo access this documentation, please visit, /pic32/, and click Documentation. Then, expand Data Sheets to see the list of available documents.MPLAB® XC32 C/C++ Compiler User’s Guide (DS50001686)This document details the use of Microchip’s MPLAB XC32 Compiler for PIC32 microcontrollers to develop 32-bit applications.Please visit the Microchip website to access the latest version of this document.MPLAB® X IDE User’s Guide (DS50002027)Consult this document for more information pertaining to the installation and implementation of the MPLAB X IDE software. Please visit the Microchip website to access the latest version of this document.Using the MPLAB Harmony Help Documentation FeedbackDocumentation FeedbackThis topic includes information on how to provide feedback on this documentation.DescriptionYour valuable feedback can be provided to Microchip in several ways. Regardless of the method you use to provide feedback, please include the following information whenever possible:•The Help platform you are viewing:•Adobe® PDF•Windows® Compiled Help (CHM)•HTML•The title of the topic and the section in which it resides• A clear description of the issue or improvementHow To Send Your FeedbackIt is preferred that you use one of the following two methods to provide your feedback:•Through the Documentation Feedback link, which is available in the header and footer of each topic when viewing compiled Help (CHM) or HTML Help•By email at: ***********************If either of the two previous methods are inconvenient, you may also provide your feedback by:•Contacting your local Field Applications Engineer•Contacting Customer Support at: 。
Transition SISPM1040 PoE PoE+ 外部电源矩阵交换机说明书

Switches3+1.952.941.7600||********************Bundled Product DescriptionsOCA-P181610Outdoor cabinet with vent, (2) DIN rails, (2) ground terminal blocks and (1) each low voltage DC positive and negative and AC mains line and neutral/line terminal block, plus (1) power and (10) data wire glands SISPM1040-384-LRT-CManaged Hardened Gigabit Ethernet PoE+ Switch with (8) 10/100/1000Base-T PoE+ Ports + (4) 100/1000Base-X SFP Slots SISPM1040-582-LRTManaged Hardened Gigabit Ethernet PoE++ Switch with (8) 10/100/1000Base-T PoE++ Ports + (2) 100/1000Base-X SFP Slots 25160Input 90-264 VAC, 127-370 VDC Output: 48 ~ 55 VDC, 10A, 480 Watts PS-DC-DUAL-5624T345W Dual Industrial Power Supply, 24VDC + 56VDC SESPM-4P-FMKITFiber Management Tray, accommodates (2) splices EDCA-DIO-01Enclosure Door Contact Alarm, DIN Rail Mount OCA-PMK-26Outdoor Switch Enclosure Pole Mount Bracket Kit for 2-6" diameter poleOrdering InformationBundle OptionsPoE/PoE+ Switch BundlesOCA-1AA200(1) OCA-P181610+ (1) SISPM1040-384-LRT-C + (1) 25160 + (2) SESPM-4P-FMKIT + Wall Mount OCA-1AA201(1) OCA-P181610+ (1) SISPM1040-384-LRT-C + (1) 25160 + (2) SESPM-4P-FMKIT + (1) OCA-PMK-26OCA-1AA2A0(1) OCA-P181610+ (1) SISPM1040-384-LRT-C + (1) 25160 + (2) SESPM-4P-FMKIT + (1) EDCA-DIO-01 + Wall Mount OCA-1AA2A1(1) OCA-P181610+ (1) SISPM1040-384-LRT-C + (1) 25160 + (2) SESPM-4P-FMKIT + (1) EDCA-DIO-01 + (1) OCA-PMK-26OCA-1AB200-xx (1) OCA-P181610+ (1) SISPM1040-384-LRT-C + (1) PS-DC-DUAL-5624T+ (2) SESPM-4P-FMKIT + Wall Mount -xx: Country Specific Power Cord Option OCA-1AB201-xx(1) OCA-P181610+ (1) SISPM1040-384-LRT-C + (1) PS-DC-DUAL-5624T+ (2) SESPM-4P-FMKIT + (1) OCA-PMK-26 -xx: Country Specific Power Cord OptionPoE/PoE+/PoE++ Switch BundlesOCA-1BA100(1) OCA-P181610+ (1) SISPM1040-582-LRT + (1) 25160 + (1) SESPM-4P-FMKIT + Wall Mount OCA-1BA101(1) OCA-P181610+ (1) SISPM1040-582-LRT + (1) 25160 + (1) SESPM-4P-FMKIT + (1) OCA-PMK-26OCA-1BA1A0(1) OCA-P181610+ (1) SISPM1040-582-LRT + (1) 25160 + (1) SESPM-4P-FMKIT + (1) EDCA-DIO-01 + Wall Mount OCA-1BA1A1(1) OCA-P181610+ (1) SISPM1040-582-LRT+ (1) 25160 + (1) SESPM-4P-FMKIT + (1) EDCA-DIO-01 + (1) OCA-PMK-26OCA-1BB100-xx (1) OCA-P181610+ (1) SISPM1040-582-LRT 18 x 16 x 10” Polycarbonate Enclosure, Hardened Switches, Power Supplies & AccessoriesPower Cord IncludedTo order the corresponding country specific power cord, add the extension from the list below to the end of the SKU; Ex: OCA-P1AB200-NA-xx = Country CodeNA = North America, LA = Latin America, EU = Europe UK = United Kingdom, SA = South Africa, JP = Japan OZ = Australia, BR = Brazil100220。
MPLAB Code Configurator SMPS Library说明书
MPLAB® Code Configurator SMPS Library Release NotesWhat is the MPLAB Code Configurator SMPS LibraryThe MPLAB Code Configurator SMPS Library allows quick and easy configuration, and code generation for 8-bit PIC SMPS applications.System Requirements1.MPLAB® X IDE v5.40 or later2.MCC v4.0.1 or later3.MCC Core v5.0.0 or later4.MCC PIC10 / PIC12 / PIC16 / PIC18 MCU Library 1.81.6 or later5.XC8 compiler v2.20 or laterRelated Hardware and Documentation SupportMPLAB Code Configurator Switch Mode Power Supply Library User's GuideCIP Hybrid Power Starter KitInstalling the MPLAB Code Configurator SMPS Library1.To install the MPLAB® Code Configurator Plugin:1.1.In the MPLAB X IDE, select Plugins from the Tools menu1.2.Select the Available Plugins tab1.3.Check the box for the MPLAB® Code Configurator v4, and click on Install2.To install the SMPS Library:2.1.In the MPLAB X IDE, select Options from the Tools menu2.2.Select the MPLAB® Code Configurator 4.x tab from Plugins option2.3.Click on Install Library/Open Library Folder2.4.Add SMPSPowerLibrary_vX.X.X.jar2.5.Restart MPLAB X IDE (optional)3.To load different SMPS Library version:3.1.Open MPLAB® Code Configurator v4 from the Tools menu3.2.Expand the Versions tab under Software/SMPS Power Library (loaded version is indicated by thegreen mark)3.3.Right click on the desired version of the library and select Mark for load3.4.Click on the Load Selected Libraries button to load the libraryWhat’s New•v1.4.0–Compatibility update with MCC Plugin v4.0.1 and MCC Core v5.0.0–Various output pin fixes•v1.3.0–Added CIP Hybrid Starter Kit (PCMC/VMC) Demo modules–Added a CIP SEPIC LED Driver Demo module•v1.2.1–Removed local peripheral modules–Added dependency to the MCC 8bit PIC Library•v1.2.0–Added support for PIC16(L)F176x devices–Updated the Compensator Block module with an override setting–Updated the Fault Block module with CIN- pin options–Updated the PCMC Control Mode module with LED dimming options –Added the Pulse Modulator Block module–Added the SEPIC_LED Topology module–Added up to four instances of each SMPS Library module•v1.0.0–Initial release with support for a Synchronous Buck Topology moduleSupported Families•8-bit Families–PIC16(L)F177x–PIC16(L)F176xTable of ContentsWhat is the MPLAB Code Configurator SMPS Library (1)1.System Requirements (1)2.Related Hardware and Documentation Support (1)3.Installing the MPLAB Code Configurator SMPS Library (1)4.What’s New (1)5.Supported Families (2)The Microchip Website (4)Product Change Notification Service (4)Customer Support (4)Microchip Devices Code Protection Feature (4)Legal Notice (5)Trademarks (5)Quality Management System (6)Worldwide Sales and Service (7)The Microchip WebsiteMicrochip provides online support via our website at /. This website is used to make files and information easily available to customers. Some of the content available includes:•Product Support – Data sheets and errata, application notes and sample programs, design resources, user’s guides and hardware support documents, latest software releases and archived software•General Technical Support – Frequently Asked Questions (FAQs), technical support requests, online discussion groups, Microchip design partner program member listing•Business of Microchip – Product selector and ordering guides, latest Microchip press releases, listing of seminars and events, listings of Microchip sales offices, distributors and factory representativesProduct Change Notification ServiceMicrochip’s product change notification service helps keep customers current on Microchip products. Subscribers will receive email notification whenever there are changes, updates, revisions or errata related to a specified product family or development tool of interest.To register, go to /pcn and follow the registration instructions.Customer SupportUsers of Microchip products can receive assistance through several channels:•Distributor or Representative•Local Sales Office•Embedded Solutions Engineer (ESE)•Technical SupportCustomers should contact their distributor, representative or ESE for support. Local sales offices are also available to help customers. A listing of sales offices and locations is included in this document.Technical support is available through the website at: /supportMicrochip Devices Code Protection FeatureNote the following details of the code protection feature on Microchip devices:•Microchip products meet the specifications contained in their particular Microchip Data Sheet.•Microchip believes that its family of products is secure when used in the intended manner and under normal conditions.•There are dishonest and possibly illegal methods being used in attempts to breach the code protection features of the Microchip devices. We believe that these methods require using the Microchip products in a manner outside the operating specifications contained in Microchip’s Data Sheets. Attempts to breach these codeprotection features, most likely, cannot be accomplished without violating Microchip’s intellectual property rights.•Microchip is willing to work with any customer who is concerned about the integrity of its code.•Neither Microchip nor any other semiconductor manufacturer can guarantee the security of its code. Code protection does not mean that we are guaranteeing the product is “unbreakable.” Code protection is constantly evolving. We at Microchip are committed to continuously improving the code protection features of our products.Attempts to break Microchip’s code protection feature may be a violation of the Digital Millennium Copyright Act.If such acts allow unauthorized access to your software or other copyrighted work, you may have a right to sue for relief under that Act.Legal NoticeInformation contained in this publication is provided for the sole purpose of designing with and using Microchip products. Information regarding device applications and the like is provided only for your convenience and may be superseded by updates. It is your responsibility to ensure that your application meets with your specifications.THIS INFORMATION IS PROVIDED BY MICROCHIP “AS IS”. MICROCHIP MAKES NO REPRESENTATIONS OR WARRANTIES OF ANY KIND WHETHER EXPRESS OR IMPLIED, WRITTEN OR ORAL, STATUTORY OR OTHERWISE, RELATED TO THE INFORMATION INCLUDING BUT NOT LIMITED TO ANY IMPLIED WARRANTIES OF NON-INFRINGEMENT, MERCHANTABILITY, AND FITNESS FOR A PARTICULAR PURPOSE OR WARRANTIES RELATED TO ITS CONDITION, QUALITY, OR PERFORMANCE.IN NO EVENT WILL MICROCHIP BE LIABLE FOR ANY INDIRECT, SPECIAL, PUNITIVE, INCIDENTAL OR CONSEQUENTIAL LOSS, DAMAGE, COST OR EXPENSE OF ANY KIND WHATSOEVER RELATED TO THE INFORMATION OR ITS USE, HOWEVER CAUSED, EVEN IF MICROCHIP HAS BEEN ADVISED OF THE POSSIBILITY OR THE DAMAGES ARE FORESEEABLE. TO THE FULLEST EXTENT ALLOWED BY LAW, MICROCHIP'S TOTAL LIABILITY ON ALL CLAIMS IN ANY WAY RELATED TO THE INFORMATION OR ITS USE WILL NOT EXCEED THE AMOUNT OF FEES, IF ANY, THAT YOU HAVE PAID DIRECTLY TO MICROCHIP FOR THE INFORMATION. Use of Microchip devices in life support and/or safety applications is entirely at the buyer’s risk, and the buyer agrees to defend, indemnify and hold harmless Microchip from any and all damages, claims, suits, or expenses resulting from such use. No licenses are conveyed, implicitly or otherwise, under any Microchip intellectual property rights unless otherwise stated.TrademarksThe Microchip name and logo, the Microchip logo, Adaptec, AnyRate, AVR, AVR logo, AVR Freaks, BesTime, BitCloud, chipKIT, chipKIT logo, CryptoMemory, CryptoRF, dsPIC, FlashFlex, flexPWR, HELDO, IGLOO, JukeBlox, KeeLoq, Kleer, LANCheck, LinkMD, maXStylus, maXTouch, MediaLB, megaAVR, Microsemi, Microsemi logo, MOST, MOST logo, MPLAB, OptoLyzer, PackeTime, PIC, picoPower, PICSTART, PIC32 logo, PolarFire, Prochip Designer, QTouch, SAM-BA, SenGenuity, SpyNIC, SST, SST Logo, SuperFlash, Symmetricom, SyncServer, Tachyon, TempTrackr, TimeSource, tinyAVR, UNI/O, Vectron, and XMEGA are registered trademarks of Microchip Technology Incorporated in the U.S.A. and other countries.APT, ClockWorks, The Embedded Control Solutions Company, EtherSynch, FlashTec, Hyper Speed Control, HyperLight Load, IntelliMOS, Libero, motorBench, mTouch, Powermite 3, Precision Edge, ProASIC, ProASIC Plus, ProASIC Plus logo, Quiet-Wire, SmartFusion, SyncWorld, Temux, TimeCesium, TimeHub, TimePictra, TimeProvider, Vite, WinPath, and ZL are registered trademarks of Microchip Technology Incorporated in the U.S.A.Adjacent Key Suppression, AKS, Analog-for-the-Digital Age, Any Capacitor, AnyIn, AnyOut, BlueSky, BodyCom, CodeGuard, CryptoAuthentication, CryptoAutomotive, CryptoCompanion, CryptoController, dsPICDEM, , Dynamic Average Matching, DAM, ECAN, EtherGREEN, In-Circuit Serial Programming, ICSP, INICnet, Inter-Chip Connectivity, JitterBlocker, KleerNet, KleerNet logo, memBrain, Mindi, MiWi, MPASM, MPF, MPLAB Certified logo, MPLIB, MPLINK, MultiTRAK, NetDetach, Omniscient Code Generation, PICDEM, , PICkit, PICtail, PowerSmart, PureSilicon, QMatrix, REAL ICE, Ripple Blocker, SAM-ICE, Serial QuadI/O, SMART-I.S., SQI, SuperSwitcher, SuperSwitcher II, Total Endurance, TSHARC, USBCheck, VariSense, ViewSpan, WiperLock, Wireless DNA, and ZENA are trademarks of Microchip Technology Incorporated in the U.S.A. and other countries.SQTP is a service mark of Microchip Technology Incorporated in the U.S.A.The Adaptec logo, Frequency on Demand, Silicon Storage Technology, and Symmcom are registered trademarks of Microchip Technology Inc. in other countries.GestIC is a registered trademark of Microchip Technology Germany II GmbH & Co. KG, a subsidiary of Microchip Technology Inc., in other countries.All other trademarks mentioned herein are property of their respective companies.© 2020, Microchip Technology Incorporated, Printed in the U.S.A., All Rights Reserved.ISBN:Quality Management SystemFor information regarding Microchip’s Quality Management Systems, please visit /quality.Worldwide Sales and Service。
用U盘给苹果电脑安装WIN7成功,附加bootcamp等软件地址
第一次给苹果装win7时,在网上恶补安装攻略,文章看了不少,方法也用了不少,当然遇到的问题也不少,现在根据自己的经验整理下,给大家提供一个捷径,避免走弯路以下文档为网上搜集的前辈们的经验,再结合我自己在安装过程中遇到的问题加以整理一、准备工作1、硬件要求:(1)4G以上U盘一个(用于制作WIN7安装盘),2G优盘一个(转载bootcamp)(2)苹果电脑一台(用于安装WIN7)(3)其他安装了WIN系统的电脑一台(用于制作WIN7安装盘、下载需求软件、看本教程等)(4)网络环境:必须的,可以采用WIFI网络,也可以采用适配器接入有线网络(配件约170元)。
(用于MAC BOOK AIR下载WIN7驱动)2、软件需求(1)WIN7安装版ISO镜像(建议使用正版,如果没可以下载其他版本,地址问百度,最好不要使用ghost,还有什么合成版本也免谈!)重要是64bit ,这个在mac的很多机器上面都没有问题。
都可以解决的。
但是air上面存在一些小问题主要集中在驱动上面!!!慎重考虑使用。
/down?cid=04C3C27FF4248080A6F90D6FBE8E8735E261D759(2)UltraISO软件,用于制作WIN7安装盘,下载地址问百度或搜狗,有绿色版的和安装版的都可以,只要有注册码就行。
这个软件功能超强,可以编辑镜像文件,提取或添加文件到镜像中,我们只用他的一个功能:把Win7的镜像写入到U盘中。
/search?search=%55%6c%74%72%61%49%53%4f&id=10000016&w=1&z=0(把以上地址复制后粘贴到浏览器中就可以)(3)rEFIt.dmg (用于让AIR启动时显示选择启动盘)/project/refit/rEFIt/0.14/rEFIt-0.14.dmg我用的软件点地址:/file/c2dcmhlk#BootCamp3.0Win驱动.zip.zip/file/c2dcmb77#UltraISO_Premium_Edition_9.3.6.2750_最新多国语言注册版(内附简体中文.繁体中文.英文.日文等多国语言版,在安装时会自动判断).rar/file/anh8tt22#UltraISO_软碟通_v9.5.0.2800_简体中文完美注册版_特别版.rar/file/dpxj2lww#UltraISO(软碟通)_v9.3.6.2750_星空不寂寞免注册破解版.rar/file/dpxjymut#BootCamp_3.2_32-bit.exe/file/anh84o5o#BootCamp_3.1_32-bit.exe/file/anhrvkme#rEFIt-0.14.dmg二、正式开始1、首先下载自己钟情的win7版本。
PowerLab系统基本操作指南
PowerLab系统基本操作指南PowerLab系统是国际流行的应用于生命科学研究的数据采集和分析系统。
在扩展性和升级性甚佳的软件如Chart, Scope支持下,若选用合适的传感器和前置放大器,即可采集、记录和分析所需要的生物信号;若与一台电脑相连,则几乎可完全替代多通道实时生物信号记录仪、多导生理记录仪、X-Y绘图仪、数字电压计、记忆示波器以及色谱工作站的全部功能。
全套系统提供了强大的显示、记录和分析数据的功能,可进行机体血液动力学、心电、脑电、药物量效关系、细胞内外电生理记录和色谱分析等方面的研究,是强大的药理学研究工具。
该系统有如下特点:1、记录功能强大:高速、高精度采样,长时程记录,多通道显示。
2、分析和处理功能强大:兼有实时分析和记录后分析。
3、后处理方便:与通用办公软件融洽连接,方便提供数据、图表报告。
PowerLab是一个程控仪器,需要在软件的支持下发挥强大作用。
我们药理学实验中主要运用的软件是Chart和Scope,下面我们主要讲述Chart的用法。
一般步骤1、首先,确定PowerLab是否与计算机正确连接,是否打开电源。
2、双击桌面上的“Chart 4.0”图标,启动PowerLab,出现Chart应用窗口和文件窗口(figure 1、2)3、点击Chart文件窗口右下角的“Start”按钮,就可以开始采样了(此时右下方按钮变为“Stop”)。
4、改变采样速率,可以使用速率改变下拉菜单:(如fig 2所示)按下Chart文件窗口右上方带向下箭头的按钮。
采样速率显示在这个按钮的下方,点击鼠标右键关闭通道控制区域,否则指针所在位置显示时间。
5、如果信号范围太大或太小,可以使用增幅范围下拉菜单改变通道的灵敏度(如fig 2所示)。
按下通道名称左边的有向下箭头的按钮。
6、点击Chart窗口右下方的“Stop”按钮停止采样,从文件菜单选择“save”文件,从文件菜单选择退出,退出Chart。
Boot Camp 安装与设置指南

安装概述
在 Mac 电脑上安装 Windows 包括以下步骤: 步骤 1:检查更新 步骤 2:准备 Mac 以安装 Windows “Boot Camp 助理”(位于“实用工具”文件夹中)会准备 Mac 以安装 Windows,方法是为 Windows 创建分区,然后启动 Windows 安装程序。 步骤 3:安装 Windows 步骤 4:安装 Windows 支持软件 【重要事项】开始前,请确定您已备份电脑上的重要信息。
4
步骤 2:准备 Mac 以安装 Windows
“Boot Camp 助理”会帮助准备 Mac 以安装 Windows,方法是为 Windows 创建新分区,然 后启动 Windows 安装程序。 确定您拥有空白 CD 或 DVD 或者格式化为 MS-DOS (FAT) 的外置驱动器,以便可以存储“Boot Camp 助理”下载的 Windows 支持软件。如果您需要将外置驱动器格式化为 MS-DOS (FAT), 请使用“实用工具”文件夹中的“磁盘工具”。 【重要事项】如果您使用的是便携式电脑,请先连接电源适配器,然后再继续安装。 若要准备 Mac 以安装 Windows: 1 打开“Boot Camp 助理”(位于“实用工具”文件夹中)。 2 按照屏幕指示来下载 Windows 支持软件并将它存储到 CD、DVD 或外置磁盘。 在后续步骤中,您会将 Windows 支持软件安装在 Windows 分区上。 3 按照屏幕指示,为 Windows 创建分区。 如果需要帮助来确定 Windows 分区的最佳大小,请参阅 Windows 安装程序文稿。 在后续步骤中,您将格式化您所创建的分区。
如果在创建分区时遇到问题
如果您在创建 Windows 分区时遇到问题,请检查以下事项:
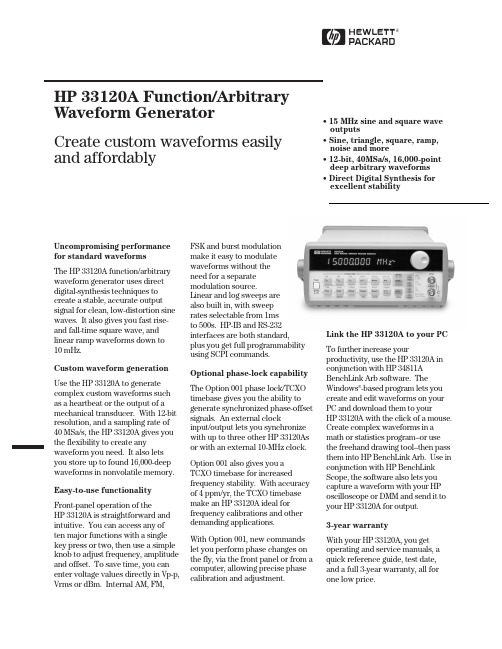
西部数据HP 33120A波形生成器说明书
HUncompromising performance for standard waveformsThe HP 33120A function/arbitrary waveform generator uses direct digital-synthesis techniques to create a stable, accurate output signal for clean, low-distortion sine waves. It also gives you fast rise-and fall-time square wave, and linear ramp waveforms down to10mHz.Custom waveform generationUse the HP 33120A to generate complex custom waveforms such as a heartbeat or the output of a mechanical transducer. With 12-bit resolution, and a sampling rate of 40MSa/s, the HP 33120A gives you the flexibility to create any waveform you need. It also lets you store up to found 16,000-deep waveforms in nonvolatile memory. Easy-to-use functionalityFront-panel operation of theHP33120A is straightforward and intuitive. You can access any often major functions with a single key press or two, then use a simple knob to adjust frequency, amplitude and offset. To save time, you can enter voltage values directly in Vp-p, Vrms or dBm. Internal AM, FM,FSK and burst modulationmake it easy to modulatewaveforms without theneed for a separatemodulation source.Linear and log sweeps arealso built in, with sweeprates selectable from 1msto 500s. HP-IB and RS-232interfaces are both standard,plus you get full programmabilityusing SCPI commands.Optional phase-lock capabilityThe Option 001 phase lock/TCXOtimebase gives you the ability togenerate synchronized phase-offsetsignals. An external clockinput/output lets you synchronizewith up to three other HP 33120Asor with an external 10-MHz clock.Option 001 also gives you aTCXO timebase for increasedfrequency stability. With accuracyof 4 ppm/yr, the TCXO timebasemake an HP 33120A ideal forfrequency calibrations and otherdemanding applications.With Option 001, new commandslet you perform phase changes onthe fly, via the front panel or from acomputer, allowing precise phasecalibration and adjustment.Link the HP 33120A to your PCTo further increase yourproductivity, use the HP 33120A inconjunction with HP 34811ABenchLink Arb software. TheWindows®-based program lets youcreate and edit waveforms on yourPC and download them to yourHP33120A with the click of a mouse.Create complex waveforms in amath or statistics program--or usethe freehand drawing tool--then passthem into HP BenchLink Arb. Use inconjunction with HP BenchLinkScope, the software also lets youcapture a waveform with your HPoscilloscope or DMM and send it toyour HP 33120A for output.3-year warrantyWith your HP 33120A, you getoperating and service manuals, aquick reference guide, test date,and a full 3-year warranty, all forone low price.HP 33120A Function/ArbitraryWaveform GeneratorCreate custom waveforms easily and affordably • 15 MHz sine and square wave outputs• Sine, triangle, square, ramp, noise and more• 12-bit, 40MSa/s, 16,000-point deep arbitrary waveforms • Direct Digital Synthesis for excellent stabilityWaveformsStandard Sine, square, triangle,ramp, noise, sin(x)/x,exponential riseexponential fall, cardiac,dc volts.ArbitraryWaveform length8 to 16,000 points Amplitude resolution12 bits (including sign) Sample rate40 MSa/sNon-volatile memory Four (4) 16,000 waveforms Frequency CharacteristicsSine100 µHz - 15 MHz Square100 µHz - 15 MHz Triangle100 µHz - 100 kHz Ramp100 µHz - 100 kHz White noise10 MHz bandwidth Resolution10 µHz or 10 digits Accuracy10 ppm in 90 days,20 ppm in 1 year,18°C - 28°CTemp. Coeff< 2 ppm/°CAging< 10 ppm/yr Sinewave Spectral PurityHarmonic distortiondc to 20 kHz-70 dBc20 kHz to 100 kHz-60 dBc100 kHz to 1 MHz-45 dBc1 MHz to 15 MHz-35 dBcSpurious (non-harmonic)DC to 1 MHz< -65 dBc1 MHz to 15 MHz< -65 dBc + 6 dB/octave Total harmonic distortionDC to 20 kHz<0.04%Phase noise<-55 dBc in a 30 kHz band Signal CharacteristicsSquarewaveRise/Fall time< 20 nsOvershoot4%Asymmetry1% + 5nsDuty cycle20% to 80% (to 5 MHz)40% to 60% (to 15 MHz) Triangle, Ramp, ArbRise/Fall time40 ns (typical) Linearity<0.1% of peak output Setting Time<250 ns to 0.5% offinal valueJitter<25nsOutput CharacteristicsAmplitude (into 50Ω)50 mVpp - 10 Vpp [1]Accuracy (at 1 kHz)±1% of specified outputFlatness (sinewave relative to 1 kHz)< 100 kHz±1% (0.1 dB)100 kHz to 1 MHz±1.5% (0.15 dB)1 Mz to 15 MHz±2% (0.2 dB) Ampl≥3Vrms±3.5% (0.3 dB) Ampl<3VrmsOutput Impedance50Ω(fixed)Offset (into 50Ω) [2]+ 5 Vpk ac + dcAccuracy±2% of setting + 2 mVResolution 3 digits, amplitude andoffsetUnits Vpp, Vrms, dBmIsolation42 Vpk maximum to earthProtection Short circuit protected±15Vpk overdrive < 1 minuteModulationAMCarrier -3dB Freq.10 MHz (typical)Modulation any internal waveformincluding ArbFrequency10 mHz - 20 kHzDepth0% - 120%Source Internal/ExternalFMModulation any internal waveformincluding ArbFrequency10 mHz - 10 kHzDeviation10 mHz - 15 MHzSource Internal onlyFSKInternal rate10 mHz - 50 kHzFrequency Range10 mHz - 15 MHzSource Internal/External(1 MHz max.)BurstCarrier Freq. 5 MHz max.Count 1 to 50,000 cyclesor infiniteStart Phase-360°to +360°Internal Rate10 mHz - 50 kHz ±1%Gate Source Internal/External GateTrigger Single, External orInternal RateSweepType Linear or LogarithmicDirection Up or DownStart F/Stop F10 mHz - 15 MHzSpeed 1 ms to 500 s ±0.1%Trigger Single, External, or InternalRear Panel InputsExt. AM Modulation±5 Vpk = 100% modulation5kΩinput resistanceExternal Trigger/TTL low trueFSK/Burst GateSystem Characteristics[3]Configuration Times[4]Function Change:[5]80 msFrequency Change:[5]30 msAmplitude Change:30 msOffset Change:10 msSelect User Arb:100 msModulation ParameterChange:<350 msArb Download Times over HP-IBArb Length Binary ASCII Integer ASCII Real[6]16,000 points8 sec81 sec100 sec8,192 points 4 sec42 sec51 sec4,096 points 2.5 sec21 sec26 sec2,048 points 1.5 sec11 sec13 secArb Download Times over RS-232 at 9600 Baud:[7]Arb Length Binary ASCII Integer ASCII Real[8]16,000 points35 sec101 sec134 sec8,192 points18 sec52 sec69 sec4,096 points10 sec27 sec35 sec2,048 points 6 sec14 sec18 sec[1] 100 mVpp - 20 Vpp into open circuit[2] Offset ≤2x pk - pk amplitude[3] Times are typical. May vary based on controllerperformance[4] time to change parameter and output the new signal.[5] Modulation or sweep off.[6] Times for 5-digit and 12-digit numbers.[7] For 4800 baud, multiply the download times by two;For2400 baud, multiply the download times by four, etc.[8] Time for 5-digit numbers. For 12-digit numbers, multiplythe 5-digit numbers by two.2Option 001 Phaselock/TCXO TimebaseTimebase AccuracySetability< 0.01 ppmStability±1 ppm 0°- 50°Aging< 2ppm in first 30 days(continuous operation)0.1 pm/month(after first 30 days)External Reference InputLock Range10 MHz ±50 HzLevel-10 dBm to + 15 dBm+25 dBm or 10 Vpp maxinputImpedance50Ω±2%, 42 Vpk isolationto earthLock Time< 2 secondsInternal Reference OutputFrequency10 MHzLevel> 1 Vpp into 50 ΩPhase OffsetRange+ 360°to - 360°Resolution0.001°Accuracy25 nsTrigger OutputLevel5V zero-going pulse Pulse Width> 2µs typicalFanout Capable of driving up tothree 33120AsOrdering InformationHP 33120A Function/Arb GeneratorOpt. 001 Phase Lock/TCXO Timebase OptionGeneralPower Supply110V/120V/220V/240V ±10% Power Line Frequency45 Hz to 66 Hz and 360 Hzto 440 HzPower Consumption50VA peak (28 W average) Operating Environment0°C to 55°CStorage Environment-40°C to 70°CState Storage Memory Power Off stateautomatically saved, 3 UserConfigurable Stored States Interface IEEE-488 and RS-232standardLanguage SCPI - 1993, IEEE-488.2 Dimensions (W x H x D)Bench top254.4mm x 103.6mm x374mmRack mount212.6mm x 88.5mm x348.3mmWeight 4 kg (8.8 lbs)Safety Designed to UL-1244, CSA 1010,EN61010EMC Tested to MIL-461C, EN55011,EN50082-1Vibration and Shock MIL-T-28800, Type III,Class5Acoustic Noise30 dBaWarm-up Time 1 hourWarranty3 years standard3Ordering InformationHP 33120A Function/Arbitrary Waveform GeneratorAccessories includedOperating manual, service manual, quick reference guide, test data, and power cord.OptionsOpt. 001Phase lock/TCXO timebaseOpt. 106HP BenchLink Arb software (HP 34811A)Opt. 1CM Rack Mount Kit (P/N 5062-3972)*Opt. W50Additional 2-year warranty (5-year total)Opt. 910Extra manual setManual language options (please specify one)ABA US English ABD German ABE Spanish ABF French ABJ Japanese ABZ ItalianABO Taiwan Chinese AB1 KoreanAccessoriesHP 34161A Accessory pouchHP 34811A BenchLink Arb software*For racking two side-by-side, order both items below Lock-link Kit (P/N 5061-9694)Flange Kit (P/N 5062-3974)HData subject to change.Printed in the U.S.A. 8/98© Hewlett-Packard Company 1998Windows is a registered trademark of Microsoft Corporation.5968-0125ENFor more information about HP’s waveform generators and all other Hewlett-Packard basic instruments, and for a current sales office listing, visit our web site at /go/tmdir.You can also contact one of the following centers and ask for a test and measurement sales representative.United States:Hewlett-Packard CompanyTest and Measurement Call Center P.O. Box 4026Englewood, Colorado 80155-4026180****4844Canada:Hewlett-Packard Canada Ltd.5150 Spectrum Way Mississauga, Ontario L4W 5G1(905) 206 4725Europe:Hewlett-PackardEuropean Marketing Centre P.O. Box 9991180 AZ Amstelveen The Netherlands (31 20) 547 9900Japan:Hewlett-Packard Japan Ltd.Measurement Assistance Center 9-1, Takakura-Cho, Hachioji-Shi,Tokyo 192, Japan Tel: (81) 426 56 7832Fax: (81) 426 56 7840Latin America:Hewlett-PackardLatin American Region Headquarters 5200 Blue Lagoon Drive 9th FloorMiami, Florida 33126U.S.A.Tel: (305) 267-4245(305) 267-4220Fax: (305) 267-4288Australia/New Zealand:Hewlett-Packard Australia Ltd.31-41 Joseph StreetBlackburn, Victoria 3130Australia 1 800 629 485Asia Pacific:Hewlett-Packard Asia Pacific Ltd.17-21/F Shell Tower, Times Square,1 Matheson Street, Causeway Bay,Hong KongTel: (852) 2599 7777Fax: (852) 2506 9285。
- 1、下载文档前请自行甄别文档内容的完整性,平台不提供额外的编辑、内容补充、找答案等附加服务。
- 2、"仅部分预览"的文档,不可在线预览部分如存在完整性等问题,可反馈申请退款(可完整预览的文档不适用该条件!)。
- 3、如文档侵犯您的权益,请联系客服反馈,我们会尽快为您处理(人工客服工作时间:9:00-18:30)。
Loading Connection Details Concept
1. Enter a description to the type of action being performed 2. Change Input parameter type of String a. Enter the name of the adapter you configured in Grid Manager 3. Change Output Context Type: Context item 4. Create a context name by selecting the pencil 5. Check the Concept box 6. Select AutoPilot-OA-Common_Utilities:ConnectionDetails a. Click on adapter-name
› After the previous step, this
is what the connection details looks like now. › Notice adapter-name contains the value of command line adapter › This structure or object is now stored in a variable called cli connection details
› After the previous step, this is
what the connection details looks like now. › Notice adapter-name contains the value of command line adapter › Notice invocation-mechanism holds the value of commandline › This structure or object is now stored in a variable called cli connection details
RAW Connection Details
<ConnectionDetailsxmlns="AutoPilot-OA-Common_Utilities"> <adapter-name xmlns="" /> <invocation-mechanism xmlns="" /> <hostname xmlns="" /> <port xmlns="" /> <username xmlns="" /> <password xmlns="" /> <password-encryption-type xmlns="" /> <target xmlns="" /> <prompt xmlns="" /> <login-prompt xmlns="" /> <password-prompt xmlns="" /> <working-dir xmlns="" /> <command-dir xmlns="" /> <command-encryption-type xmlns="" /> <timeout xmlns="" /> <connection-name xmlns="" /> <terminate-connection xmlns="" /> <known-hosts-configxmlns="" /> <allow-unknown-hosts xmlns="" /> <preferred-pk-algorithm xmlns="" /> </ConnectionDetails>
Loading Connection Details Concept
You ought to have a properties screen that looks similar to the above screen shot. Remember, Where you see a Green OK check box… please select it… or face loosing all your work.
Loading Connection Details Concept
1. Enter a description to the type of action being performed 2. Change Input parameter type of String a. Enter the name method by which you’ll connect to the target system 3. Change Output Context Type: Context item 4. Select the context name that holds the concept by selecting the context browser 5. Check the Concept box 6. Select AutoPilot-OA-Common_Utilities:ConnectionDetails a. Click on innvocation-mechanism
Loading Connection Details Concept
1. Create workflow with an assign activity 2. Double click to bring up the properties of the assign activity 3. Press the Green Plus icon to add a new property
YOUR TURN
End Lab 1
POPULATED Connection Details
<ConnectionDetailsxmlns="AutoPilot-OA-Common_Utilities"> <adapter-name xmlns=””>CLI Adapter</adapter-name> <invocation-mechanism xmlns=””>command-line</invocation-mechanizm> <hostname xmlns="" /> <port xmlns="" /> <username xmlns="" /> <password xmlns="" /> <password-encryption-type xmlns="" /> <target xmlns="" /> <prompt xmlns="" /> <login-prompt xmlns="" /> <password-prompt xmlns="" /> <working-dir xmlns="" /> <command-dir xmlns="" /> <command-encryption-type xmlns="" /> <timeout xmlns="" /> <connection-name xmlns="" /> <terminate-connection xmlns="" /> <known-hosts-configxmlns="" /> <allow-unknown-hosts xmlns="" /> <preferred-pk-algorithm xmlns="" /> </ConnectionDetails>
Loading Connection Details Concept
<ConnectionDetailsxmlns="AutoPilot-OA-Common_Utilities"> <adapter-name xmlns=””>command line adapter</adapter-name> <invocation-mechanism xmlns=””>command-line<invocation-mechanism> <hostname xmlns="" /> <port xmlns="" /> <username xmlns="" /> <password xmlns="" /> <password-encryption-type xmlns="" /> <target xmlns="" /> <prompt xmlns="" /> <login-prompt xmlns="" /> <password-prompt xmlns="" /> <working-dir xmlns="" /> <command-dir xmlns="" /> <command-encryption-type xmlns="" /> <timeout xmlns="" /> <connection-name xmlns="" /> <terminate-connection xmlns="" /> <known-hosts-configxmlns="" /> <allow-unknown-hosts xmlns="" /> <preferred-pk-algorithm xmlns="" /> </ConnectionDetails>