平板示~1
手机转平板的操作方法
手机转平板的操作方法
要将手机转换为平板,可以按照以下步骤操作:
1. 手机连上无线网络或者移动数据网络,确保网络连接正常。
2. 打开手机设置,找到显示设置选项。
3. 在显示设置中,找到“显示模式”或者“分辨率”选项。
4. 点击“显示模式”或者“分辨率”选项后,会出现几个选项供选择,例如“标准”、“适配”、“高清”等。
选择“适配”或者类似的选项。
5. 选择“适配”后,手机的显示效果会切换为平板模式,应用的界面会以更大的屏幕尺寸呈现。
6. 如果有需要,还可以调整其他显示设置,例如字体大小、显示比例等。
请注意,手机转平板只是通过调整显示设置来改变手机的显示效果,并不能真正改变手机的硬件特性。
因此,即使手机已经转换为平板模式,其他功能和性能仍然与手机相同。
戴尔 2007FP 平板显示器说明书
Back to Contents PageAbout Your MonitorDell™ 2007FP Flat Panel MonitorFront ViewBack ViewFront ViewBack ViewSide ViewBottom View Monitor Specifications Universal Serial Bus (USB) Interface Plug and play capability Caring for Your Monitor1Input indicators 2Input Source Select 3OSD Menu / Select 4Down (-) 5Up (+) 6 Power button (with power light indicator)Side ViewRight side1VESA mounting holes (100mm) (Behind attached base plate) Use to mount the monitor. 2Connectors label Indicate the positions and types of connectors.3Barcode serial number label Refer to this label if you need to contact Dell for technical support.4Security lock slot Use a security lock with the slot to help secure your monitor.5Monitor Lock/Release Button Press to release the stand from the monitor.6Regulatory rating label List the regulatory approvals.7Dell Soundbar mounting brackets Attach the optional Dell Soundbar.8 Lock down/release buttonPush the monitor down, press the button to unlock the monitor, and then lift the monitor to the desired height. 9Cable management hole Help organize cables by placing them through thehole.Left sideBottom ViewMonitor Specifications1USB downstream ports1AC power cord connector2DVI connector3VGA connector4Composite video connector5S-Video connector6USB upstream port7USB downstream ports8DC power connector for Dell™ SoundbarGeneralModel number 2007FPFlat PanelScreen type Active matrix - TFT LCD-compliant as well as TCO '99/ TCO '03 power management compatible.* Zero power consumption in OFF mode can only be achieved by disconnecting the main cable from the monitor.Pin Number15-pin Side of the Connected Signal Cable 1Video-RedPin Number24-pin Side of the Connected Signal CablePin Number1USB Upstream ConnectorPin Number1NOTE:NOTE:attached peripherals may take a few seconds to resume normal functionality.LAMP(S) INSIDE THIS PRODUCT CONTAIN(S) MERCURY AND MUST BE RECYCLED OR DISPOSED OFF ACCORDING TO LOCAL, STATE OR FEDERAL LAWS. FOR MORE INFORMATION, GO TONOTE:NOTE: In certain countries, support specific to DellIf you do not see a telephone number listed that is specific for XPS computers, you may contact Dell through the support number listed and your call will be routed appropriately.NOTE:NOTE:To take advantage of the "Display Rotation" function (Landscape versus Portrait view) an updated graphics driver is required for your Dell™ Computer not included with this monitor. Please download the graphics driver from and refer to the "download" section for "Video Drivers" for latest driver updates.NOTE: When in "Portrait View Mode", you may experience performance degradation in graphic-intensive applications (3D Gaming etc.)Rotating Your Operating SystemAfter you have rotated your monitor, you need to complete the procedure below to rotate your operating system.NOTE: If you are using the monitor with a non-Dell computer, you need to go to the graphics driver website or your computer manufacturer website for information on rotating your operating system.Back to Contents PageSetting Up Your MonitorDell™ 2007FP Flat Panel MonitorConnecting Your MonitorUsing the Front Panel ButtonsUsing the OSDSetting the Optimal ResolutionUsing the Dell™ Soundbar (Optional)Connecting Your MonitorCAUTION: Before you begin any of the procedures in this section, follow the Safety Instructions.1AC power cord connector2DVI connector3VGA connector4Composite video connector 5S-Video connectorAInput Source SelectUse Input Source Select button to select between four different video signals that may be connected to your monitor.1.VGA input2.DVI-D input3.S- Video inputposite video inputIf either VGA or DVI-D input is selected and both VGA and DVI-D cables are not connected, a floating dialog box as shown beorororOSD Menu / SelectDown (-) and Up (+)Power button(with power light indicator)Using the OSDAccessing the Menu SystemIf you change the settings and then either proceed to another menu, or exit the OSD menu, the monitor automatically saves those changes. The changes are also saved if you change the settings and then wait for the OSD menu to disappear.Push the MENU button to launch the OSD menu and display the main menu.NOTE: AUTO ADJUST is only available when you are using the analog (VGA) connector.Push the and buttons to move between the setting options. As you move from one icon to another, the option name is highlighted. See the table for a complete list of all the options available for the monitor.Push and button to select the desired parameter.Push MENU to enter the slide bar and then use the and buttons, according to the indicators on the menu, to make your changes.Push to select Back to go back to the main menu.Brightness adjusts the luminance of the backlight.Push the button to increase brightness and push the button to decrease brightness (min 0 ~ max 100).Adjust Brightness first, and then adjust Contrast only if further adjustment is necessary.Push the button to increase contrast and push the button to decrease contrast (min 0 ~ max 100).The Contrast function adjusts the degree of difference between darkness and lightness on the monitor screen.Push to exit the OSD main menu.NOTE: In most cases, Auto Adjust produces the best image for your configuration.Push to select Back to go back to the main menu.Select VGA input when you are using the analog (VGA) connector. Push to select the VGA input source.Select DVI-D input when you are using the Digital (DVI) connector. Push to select the DVI input source.Select S-Video input when you are using S-Video connector. Push to select the S-Video input source.Select Composite input when you are using composite video connector. Push to select the composite input source.Push button to scan for available input signals.Push to exit the OSD main menu.Push to select Back to go back to the main menu.NOTE:'Red') favor blue and red accordingly. Select each one to see how each range suits your eye....or utilize the 'Custom Colo to customize the color settings to your exact choice.Push to exit the OSD main menu.Image mode submenu for VGA/DVI-D input Image mode submenu for Video inputNOTE: Image modes are different between the VGA/DVI-D and Video inputsPush to select Back to go back to the main menu.Push to exit the OSD main menu.Push to select Back to go back to the main menu.Adjust the image ratio as 1:1, aspect or full screen.NOTE:Wide Mode adjustment is not required at optimal preset resolution 1600 x 1200.When making changes to either the 'Horizontal' or 'Vertical' settings, no changes will occur to the size of the viewing area: th will simply be shifted in response to your selection/change.Use the and buttons to adjust image to left/right and up/down. Minimum is '0' (-). Maximum is '100' (+).This feature can make the image look sharper or softer. Use or to adjust the sharpness from '0' to '100' .Use the Zoom function to zoom in to specific area of interest.Using the and keys to zoom in and out.When using the zoom function.Use the and buttons to adjust image to left/right and up/down. Minimum is '0' (-). Maximum is '100' (+).main OSD menu, by selecting 'Image Settings'.the and buttons to adjustPush to exit the OSD main menu.Push to select Back to go back to the main menu.Language option to set the OSD display to one of five languages (English, Espanol, Francais, Deutsch, Japanese).and buttons move OSD to the left and right.and buttons move OSD up and down.OSD Hold Time: Sets the length of time the OSD will remain active after the last time you pressed a button.Use the and buttons to adjust the slider in 5 second increments, from 5 to 60 seconds.Controls user access to adjustments. When 'Yes' (+) is selected, no user adjustments are allowed. All buttons are locked ex menu button.Push to exit the OSD main menu.input)orPIP submenu when PIP ON (main source is VGA/DVI-D input)input)orNOTE:available.Push to select Back to go back to the main menu.There is one mode: PIP (Picture in Picture)Use and to browse and to select "Off" or "PIP".Select an input signal for PIP. (VGA/DVI/S-Video/Composite)Use and to browse and to select.Select PIP window position.Use and to browse and to select.Select PIP window size.Use and to browse and to select.Adjust the contrast level of the picture in PIP Mode.reduce the contrastincreases the contrastThis function shifts the color of PIP image to green or purple. This is used to adjust for desired flesh tone color.shifts image color towards greenshifts image color towards purpleAdjust the color saturation of PIP image.makes the image look more monochromemakes the image look more colorfulPush to exit the OSD main menu.See Solving Problems for more information.message:This means that the monitor cannot synchronize with the signal that it is receiving from the computer. Either the signal is too high or too low for the monitor to use. See MonitorSpecifications for the Horizontal and Vertical frequency ranges addressable by this monitor. Recommended mode is 1600 X 1200 @ 60Hz.You will see the following message before the DDC/CI function is disabled.When monitor get into Power Save mode, one of the following messages will appear depending upon the selected input.Activate the computer and wake up the monitor to gain access to the OSDIf either VGA or DVI-D input is selected and both VGA and DVI-D cables are not connected, a floating dialog box as shown below will appear. orWhen the monitor does not sense the selected video input, one of the following messages will appear depending upon the selected input as long as you press any button other than power button.VGA / DVI-D input Video Inputor Occasionally, no warning message appears, but the screen is blank: this could also indicate that the monitor is not synchronizing with the computer or themonitor is in a power save mode.In PIP mode, when the monitor does not sense the selected second signal input, one of the following messages will appear depending upon the selected input as long as the OSD screen is closed.1. VGA2. DVI-D3. S-Video4. CompositeorororNOTE: When the cable is connected back to the input of the monitor, any active PIP window will disappear. Please enter PIP submenu to bring back the PIPSetting the Optimal Resolution1.Right-click on the desktop and select Properties .2.Select the Settings tab.3.Set the screen resolution to 1600 x 1200.4.Click OK .If you do not see 1600 x 1200 as an option, you may need to update your graphics driver. Depending on your computer, complete one of the following procedures.If you have a Dell™ desktop or portable computer:¡Go to , enter your service tag, and download the latest driver for your graphics card.If you are using a non-Dell™ computer (portable or desktop):¡Go to the support site for your computer and download the latest graphic drivers. ¡Go to your graphics card website and download the latest graphic drivers.Using the Dell™ Soundbar (Optional)Soundbar Attachment to the Monitor1.Attach mechanism2. Headphone connectors3.Power indicator4. Power/Volume controlBack to Contents PageNOTE: Soundbar Power Connector - 12V DC output is for optional Dell™ Soundbar only. NOTICE: DO NOT USE WITH ANY DEVICE OTHER THAN DELL Soundbar. 1.Working from the rear of the monitor, attach Soundbar by aligning the two slots with the two tabs along the bottom rear of the monitor.2. Slide the Soundbar to the left until it snaps into place.3. Connect the Soundbar with the DC power connector.4.Insert the mini stereo plug from the rear of the Soundbar into the computer's audio output jack.CAUTION:orBack to Contents PageUsing Your Adjustable Monitor StandDell™ 2007FP Flat Panel MonitorAttaching the StandOrganizing Your CablesUsing the Tilt, Swivel and Vertical ExtensionRemoving the StandAttaching the Stand1.Place the stand on a flat surface.2.Fit the groove on the back of the monitor onto the 2 tabs of upper stand.3.Lower the monitor so that the monitor mounting area snaps on or locks to stand.Organizing Your CablesAfter attaching all necessary cables to your monitor and computer, (See Connecting Your Monitor for cable attachment,) use the Cable management hole to neatly organize all cables as shown above.Using the Tilt, Swivel and Vertical ExtensionTilt/SwivelWith the built-in pedestal, you can tilt and/or swivel the monitor for the most comfortable viewing angle.Vertical ExtensionStand extends vertically up to 130mm via the Lock down / release button.Removing the StandAfter placing the monitor panel on a soft cloth or cushion, press and hold the Monitor Lock / Release Button, and then remove the stand.NOTE: Stand is detached and extended when the monitor is shipped from the factory.NOTE: If locked in the down position, press the Lock down / release button on the bottom rear of stand. Lift the front panel up and extend the stand to the desired height.NOTICE: Before relocating or moving the monitor to a different location, make sure that the stand is LOCKED DOWN. To lock it down, lower the height of the panel until it clicks and is locked into place.Back to Contents PageNOTE: To prevent scratches on the LCD screen while removing the stand, ensure that the monitor is placed on a clean surface.。
小米平板屏幕时间管理

小米平板屏幕时间管理1. 引言随着科技的不断发展,智能设备在我们日常生活中扮演越来越重要的角色。
尤其是平板电脑,如小米平板,已经成为人们工作、学习和娱乐的重要工具之一。
然而,过度使用平板电脑可能导致许多问题,如眼睛疲劳、注意力不集中等。
因此,学会管理平板电脑的使用时间是非常必要的。
本文将详细介绍如何在小米平板上进行屏幕时间管理,帮助您更好地控制平板电脑的使用时间,提高工作和生活效率。
2. 设置屏幕时间限制小米平板提供了屏幕时间限制的设置,可以帮助您控制每天使用平板电脑的时间。
您可以按照以下步骤进行设置:1.打开小米平板的设置应用。
2.在设置应用中找到“屏幕时间”选项并点击进入。
3.在屏幕时间设置界面中,您可以选择设置每日可用时间。
4.点击“设置每日限制”,您可以选择平板电脑的可用时间段。
例如,您可以设置每天只能使用平板电脑2个小时。
通过设置屏幕时间限制,您可以定期检查自己的平板电脑使用情况,并合理安排使用时间,从而避免长时间使用平板电脑而忽略其他重要事务。
3. 制定使用时间计划除了设置屏幕时间限制外,制定使用时间计划也是管理平板电脑使用时间的有效方法。
您可以根据自己的工作和生活需要,确定每天使用平板电脑的具体时间段。
以下是一些建议的使用时间计划:•早晨:在早晨,您可以使用平板电脑进行工作或学习。
例如,检查邮件、回复工作消息,或者预习课程内容等。
•白天:白天时间可以用于处理日常事务,如购物、看新闻、社交媒体等。
•晚上:晚上可以留给休闲娱乐时间,如看电影、玩游戏等。
但请注意,不要过度使用平板电脑,以免影响睡眠质量。
根据个人情况,您可以根据以上建议进行合理的时间分配,制定适合自己的使用时间计划,并且尽量遵守计划安排。
4. 设置提醒功能小米平板提供了提醒功能,可以帮助您控制使用时间。
您可以根据自己的需求设置时间提醒,以保持注意力集中和合理使用时间。
以下是设置提醒功能的步骤:1.进入小米平板的设置应用。
2.在设置应用中找到“提醒”选项并点击进入。
平板湍流边界层课件
图 11 6 紊流边界层自由边界示意图
第20页/共49页
湍流平板边界层的湍动特性
为了深入理解边界层中的紊流结构,常对紊流中两 个相邻测点同时进行脉动流速的量测,以分析紊流 的空间特性。 空间相关函数(space correlation function):
层中间歇系数 的分布规律如图
11-5所示并可用下式表示:
1 2
1
erf
5
y
0.78
(11-11)
第19页/共49页
图 11 5 紊流平板边界层间歇系数[3]
湍流平板边界层的湍动特性
边界层内紊流与边界层外势流的交界面有时称为边界 层的自由(freeboundary)。图11-6为自由边界的示意 图。自由边界随时间而变动,具有随机的性质。光滑
中无量纲量采用 u' v' 表示单位质量切应力的无量纲量。在紧靠壁面处未
U2
能量测到有关数据。
在边界层的外边界,即紊流边界 层与上部势流的交界面处紊流具 有间歇性质。克莱巴诺夫[3]测得 的资料显示,在 y 0.8 处,平
板紊流边界层即具有明显的间歇 性质,而当 y 1.2 时则流速基本 上不再呈现脉 动。平板紊流边界
一般用y 表示x2 ,认为:
粘性底层: 0 y 5 10 过渡区:5 10 y 30 70
对数区: 30 70 y , y 0.2
以上三个区域统称内区。 尾流区(外区): 0.2 y 1.0
第8页/共49页
湍流平板边界层的流速分布与分区结构
第9页/共49页
平板显示技术(PDP)
PDP发光原理与结构图 发光原理与结构图
等离子显示屏的组成、 等离子显示屏的组成、结构特征
PDP像素放电、发光单元结构 像素放电、 像素放电
对放电气体的要求是: 、着火电压低; 、 对放电气体的要求是:1、着火电压低;2、辐射的真空紫外光谱与荧光粉的 激励光谱相匹配,而且强度高; 、 激励光谱相匹配,而且强度高;3、放电本身发出的可见光对荧光粉发光色纯 影响小; 、放电产生的离子对介质保护膜材料溅射小; 、化学性能稳定。 影响小;4、放电产生的离子对介质保护膜材料溅射小;5、化学性能稳定。 因此,彩色AC-PDP可以选用稀有气体 、Ne、Ar、Kr、Xe作为放电气体, 可以选用稀有气体He、 、 、 、 作为放电气体 作为放电气体, 因此,彩色 可以选用稀有气体 它们的谐振辐射波长分别为58.3nm、73.6nm、106.7nm、123.6nm、147.0 nm。 它们的谐振辐射波长分别为 、 、 、 、 。
放电气体
具有不同组成成分放电气体的着火电压、放电电流、 具有不同组成成分放电气体的着火电压、放电电流、辐射的光谱分布和强 度不同,造成彩色AC-PDP的工作电压、功耗、亮度、光效和色度等性能 的工作电压、 度不同,造成彩色 的工作电压 功耗、亮度、 存在较大差异。因此,为了使彩色AC-PDP具有优良的显示性能,必须合 具有优良的显示性能, 存在较大差异。因此,为了使彩色 具有优良的显示性能 理选择放电气体的组成成分。 理选择放电气体的组成成分。 彩色AC-PDP对放电气体的要求是:1、着火电压低;2、辐射的真空紫外 对放电气体的要求是: 、着火电压低; 、 彩色 对放电气体的要求是 光谱与荧光粉的激励光谱相匹配,而且强度高; 、 光谱与荧光粉的激励光谱相匹配,而且强度高;3、放电本身发出的可见 光对荧光粉发光色纯影响小; 、 光对荧光粉发光色纯影响小;4、放电产生的离子对介质保护膜材料溅射 可以选用稀有气体He、 、 小;5、化学性能稳定。因此,彩色 、化学性能稳定。因此,彩色AC-PDP可以选用稀有气体 、Ne、 可以选用稀有气体 Ar、Kr、Xe作为放电气体,它们的谐振辐射波长分别为 作为放电气体, 、 、 作为放电气体 它们的谐振辐射波长分别为58.3nm、73.6nm、 、 、 106.7nm、123.6nm、147.0 nm。 、 、 。
ipad使用的20个小技巧_ipad平板如何使用
ipad使用的20个小技巧_ipad平板如何使用iPad是由苹果公司于2010年开始发布的平板电脑系列,定位介于苹果的智能手机之间。
下面店铺给大家分享ipad使用技巧,希望能帮到大家。
ipad的使用技巧1 揭开隐藏的键盘字符iPad屏幕上的键盘不仅仅是你所见的。
按住某键能提供额外的字符选项。
长按逗号键会带来一撇号。
旁边的Period键还提供引号。
在数字键盘上,如图所示,按住引号键一秒钟,你会发现隐藏的智能引号和其他符号。
如果你不知道,双击空格键便会插入一个period键。
2 以Flash形式登陆应用程序对与你的iPad,你可能有太多的应用程序需要处理。
(现在,应用程序商店提供超过65000平板电脑专用程序,而且每天都在增加!)一旦你开始囤积应用程序,你不得不一个一个的文件夹,一页一页找程序,想快速寻找你的程序变得越来越难。
有个容易的方法解决这个问题。
从主屏幕,向左轻扫,你会看见搜索屏幕,在这里你可以快速键入你想要寻找的应用程序名称,预测键使之变的更简单。
搜索不紧能搜索到你的应用程序,还能搜索媒体,电子邮件,日历事件等等。
自定义你的搜索设置:设置>一般>Spotlight Search3 抓取屏幕图片想抓取iPad上任何的图片,按住电源按钮(Power button),点击主页按钮。
你将看到屏幕闪烁和一下快门声,这个图片就被你保存到相机相册(Camera Roll)中拉!在相册中,点击右上角的箭头图标,可以进行电子邮件,打印或复制图片,用作墙纸,或是发送给你的朋友等操作。
4 对电子邮件图片附件的简易存储如果电子邮件有图片,点击它,你会得到一个弹出式菜单,让您选择复制或保存图像。
选择后,图像将被保存到你的相机胶卷中。
你可以将图片复制粘贴到其它应用程序中。
5 防止数据漫游收费每个人都会听到一些,由于忘记关闭手机漫游程序,而导致花费数千元在流量收费上的恐怖故事。
如果你是有3G功能的iPad,有两种方法可以禁用你的手机收音机,这样你就不会为流量使用付费了。
平板平台产品名称英汉翻译

按照用途分类
——平板平台英汉翻译研究(5)
划线平台
英语表达1:marking out plate 英语表达2:marking plate 英语表达3:marking off table 英语表达4:layout plate 英语表达5:marking & layout plate 英语表达6:marking off plate 英语表达7:surface plate 英语表达8:face plate 英语表达9:surface plate for marking out
检验平台
英语表达1:inspection surface plate
英语表达2:surface plate for inspection
说明: inspection: 【inˈspekʃn】n. 检验 surface plate:平台
装配平台
英语表达1:surface plate for assembling
说明: slot【slɔt】n. 槽 T-slotted:带有T型槽的 surface plate:平台
研磨平台
英语表达:lapping plate
说明: lapping【ˈlæpiŋ】n. 研磨 plate:平台
刮研平台
英语表达:hand scraped surface plate
说明: scrape 【skreip】v. 刮擦,刮 hand scraped:手工刮研的 surface plate:平台
surface plate:平台
八边形平台
英语表达: octagonal surface plate 说明: octagonal【ɔkˈtæɡənl】 a. 八边形的
surface plate:平台
平板显示技术基础—习题答案
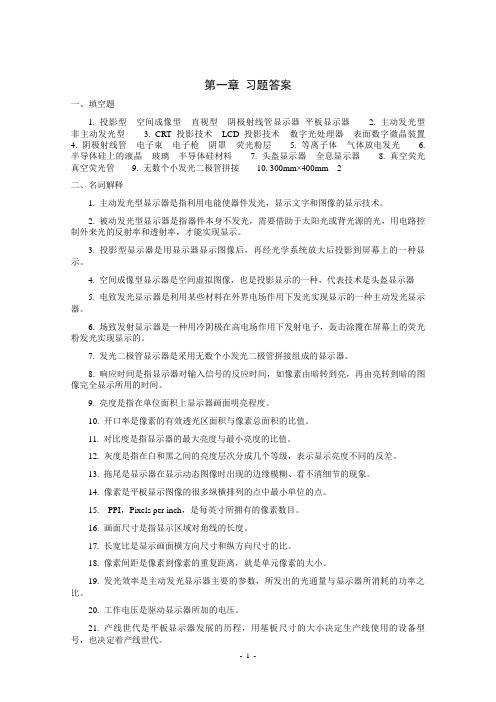
第一章习题答案一、填空题1. 投影型空间成像型直视型阴极射线管显示器平板显示器2. 主动发光型非主动发光型3. CRT投影技术LCD投影技术数字光处理器表面数字微晶装置4. 阴极射线管电子束电子枪阴罩荧光粉层5. 等离子体气体放电发光6. 半导体硅上的液晶玻璃半导体硅材料7. 头盔显示器全息显示器8. 真空荧光真空荧光管9. 无数个小发光二极管拼接10. 300mm×400mm 2二、名词解释1. 主动发光型显示器是指利用电能使器件发光,显示文字和图像的显示技术。
2. 被动发光型显示器是指器件本身不发光,需要借助于太阳光或背光源的光,用电路控制外来光的反射率和透射率,才能实现显示。
3. 投影型显示器是用显示器显示图像后,再经光学系统放大后投影到屏幕上的一种显示。
4. 空间成像型显示器是空间虚拟图像,也是投影显示的一种,代表技术是头盔显示器5. 电致发光显示器是利用某些材料在外界电场作用下发光实现显示的一种主动发光显示器。
6. 场致发射显示器是一种用冷阴极在高电场作用下发射电子,轰击涂覆在屏幕上的荧光粉发光实现显示的。
7. 发光二极管显示器是采用无数个小发光二极管拼接组成的显示器。
8. 响应时间是指显示器对输入信号的反应时间,如像素由暗转到亮,再由亮转到暗的图像完全显示所用的时间。
9. 亮度是指在单位面积上显示器画面明亮程度。
10. 开口率是像素的有效透光区面积与像素总面积的比值。
11. 对比度是指显示器的最大亮度与最小亮度的比值。
12. 灰度是指在白和黑之间的亮度层次分成几个等级,表示显示亮度不同的反差。
13. 拖尾是显示器在显示动态图像时出现的边缘模糊、看不清细节的现象。
14. 像素是平板显示图像的很多纵横排列的点中最小单位的点。
15. PPI,Pixels per inch,是每英寸所拥有的像素数目。
16. 画面尺寸是指显示区域对角线的长度。
17. 长宽比是显示画面横方向尺寸和纵方向尺寸的比。
- 1、下载文档前请自行甄别文档内容的完整性,平台不提供额外的编辑、内容补充、找答案等附加服务。
- 2、"仅部分预览"的文档,不可在线预览部分如存在完整性等问题,可反馈申请退款(可完整预览的文档不适用该条件!)。
- 3、如文档侵犯您的权益,请联系客服反馈,我们会尽快为您处理(人工客服工作时间:9:00-18:30)。
2.6液晶反射式投影显示(LCOS)投影显示用硅基液晶(Liquid Crystal on Silicon,LCOS)是一种很有前途的新型显示器件,正投向超大屏幕发展,背投向127.00-203.20 cm(50英寸~80英寸)左右的电视发展。
需突破的难点一是光学引擎,二是成像模块的芯片IC设计、制造及芯片与液晶屏的结合,制成LCOS模块,三是高效长寿命的光源。
从目前情况来看,LCOS像素可做到1024⨯768、1280⨯1024,今后能做到1920⨯1024,符合HDTV的要求。
国内LCOS试制工作开展较好的有上海华显公司、中国电子信息产业集团下属中原电子集团公司、江西鸿源数码公司、北京电影机械研究所、浙江大学等。
LCOS(Liquid Crystal on Silicon)是一种在硅芯片上的液晶反射式投影显示,它可以说属于液晶显示器,不过LCOS是以在单晶硅芯片上的CMOS阵列取代TFT-LCD在玻璃片上的a—SiTFT阵列。
相比之下,前者的生产技术更为成熟。
而且单晶硅的迁移率远高于a—Si(非晶硅),因此可以实现高密度,即高分辨率。
LCOS的市场主要将定位在大屏幕投影显示产品和数字式HDTV上,目前限制LCOS应用的主要问题在于放大图像的光学系统。
2.7发光二极管(LED)上世纪九十年代,由于超高亮度LED的出现,使LED阵列的显示亮度高达10000cd/m2以上,是世界上最亮的显示器,特别适合于做露天的大屏幕显示和指示灯。
又由于蓝色LED 的出现,使LED阵列能做成全彩色的超高亮度显示器。
因此,LED显示器的市场是很广阔的。
LED是结型电致发光,是在电场作用下,少数载流子向PN结的另一方注入,同多数载流子复合而发光的。
这类显示器已由点,线、面型结构发展成矩阵平板型结构,并做成智能型显示屏(计算机控制)。
LED的特点是驱动电压低、寿命长、可靠性高,价格低。
为了实现全色化,关键是提高兰光LED辉度等级。
国外LED也有电视及监视器产品问世。
国内开展LED 的研制工作有很多厂家和科研单位,但多是单色信息显示系统。
LED的发展过程主要经历了以下3个发展阶段第一阶段:1923年,Losev发现了p-n节放大的现象。
随后半导体单晶生产技术、半导体制作技术的发展为LED发展奠定了基础。
第二阶段:20世纪70年代发光二极管进人批量化、商品化。
这个时期的LED是普通型的中、低亮度的红、橙、黄、绿LED。
第三阶段:20世纪90年代以来,新型LED主要以蓝光LED和高亮度、超高亮度的LED为主。
LED技术研发热点尽管LED目前还无法进入电视、显示器、移动设备等主流应用领域,但它在户外、大屏幕、超大屏幕领域的主导地位很难被其他显示技术动摇。
LED技术含量大多在于它的发光二极管灯泡和控制系统方面,因此LED的研发热点主要集中在:提高LED亮度的一致性,或开发出对每个象素都能进行亮度调节的系统;改善象素单元结构,控制点阵元间节距的均匀性;降低成本,尤其是高亮蓝光LED的成本偏高。
2.8真空荧光显示器(VFD)真空荧光显示器(Vacuum Fluorescent Display,VFD)是由一种丝状直热式氧化物阴极、网状或丝状栅极和表面涂覆有发光粉的阳极构成,呈现彩色画面的平板技术。
VFD具有色彩艳丽(可有绿、红、黄和蓝多色)、视角宽、工作电压低、体积小、显示图案灵活等特点。
产品主要用于影碟机、音响的功率放大器、空调器、汽车上的时钟、仪表盘、收款机、教学仪器等。
浙江京东方公司现已达到年产2000万片的生产能力,尤其是薄膜生产线的建成,使VFD 产品提高了档次,增强了市场竞争能力;上海广电三星公司已达到年产3000万片以上;长沙LG曙光电子集团公司、广东风华集团公司等也形成了一定的生产规模,使国内VFD生产能力达到了1亿只。
另外,国内9种颜色的VFD显示屏试制成功也为彩色显示技术增添了新家族。
在所有的平板显示器中,最廉价的当属VFD了,其生产成本很低,在低信息容量的显示市场上仍占有一席之地,如家用电器和仪表上的分段式显示器。
VFD技术发展传统的VFD是厚膜产品,在采用了半导体光刻技术后,现在主要是生产薄膜产品。
薄膜产品质量稳定,产品先进,适用于对电源要求不高,而又要求有比较高的可读性或装饰效果的各种电器,可广泛用于各种仪表和DVD、VCD等整机产品中。
VFD特别适合于面积为50mm⨯200mm以下的多色字符显示,现在屏的尺寸一般从25mm⨯100mm到15mm⨯l50mm。
目前正在开发用于汽车上的各种VFD屏。
我国VFD需要对高密度、低功耗屏、点(矩)阵屏开发、CIG技术应用进行攻关,增加无排气管屏的比例,在技术上与国际上的先进厂家竞争。
2.9高分子分散型液晶显示器(NPD—LCD)二十世纪九十年代初。
出现了一种新型的液晶材料—PD-LC(Polymer Dispersed Liquied Crystal),即高分子分散型液晶。
与一般液晶材料不同的是,PD-LC中的液晶分子被高分子材料所包围,呈分散状态。
用PD-LC做成的LCD不需要一般LCD所需要的偏振片,因而避免了偏振片遮光的影响,故其亮度很高。
另外,PD-LC材料对两片玻璃之间的距离,即液晶薄膜的厚度的精度要求远不如普通LCD高,制造工艺简单,一般的镀膜工艺、甚至于印刷工艺都能满足要求,故制造成本低。
但是,PD-LCD目前也存在一些严重的缺陷:如它的视角较小,一般只能达到100度,只适合于做直视型显示器;它的响应速度较慢;它因为没有采用TFT矩阵寻址技术,所以分辨率很低,也难以实现彩色显示。
因此,NPD-LCD还仅仅停留在材料研究阶段,离产业化还有很长一段距离。
3液晶显示器的技术发展状况3.1超视角技术液晶显示器的视角是其主要指标,世界各大液晶显示器厂家在加宽液晶显示器的视角方面均下了很大的功夫。
SHARP公司2000年推出的Super VA(超视角)技术使TFT-LCD的上下和左右视角已达170O。
这种超视角技术是在液晶显示器的薄膜晶体管结构和偏振板之间加了一层特殊的光学校正膜,校正了从两边看液晶显示图像所产生的光学性能的变化,使其达到和中间看液晶显示图像同样的效果。
又如NEC公司、日立公司采用了扩展的IPS(In-Plane Switching)技术实现了170O的宽视角。
IBM公司则采用了IPS技术和双域(dual-domain)技术实现了170O的宽视角。
其它如三星公司的APVA(Advanced Patterned Vertical Aligment)技术、松下公司的OCB技术、富士通公司的MVA技术都是为了加宽液晶显示器的视角。
3.2高分辨率技术目前20英寸TFT-LCD的分辨率已普遍达到1600⨯1200,而IBM公司的20.8英寸的TFT-LCD 模块(ITQX20)的分辨率则高达2048⨯1536。
目前在提高分辨率方面主要采用了SFT(Super FineTFT)技术,即超微型薄膜晶体管结构。
3.3快响应时间技术响应时间慢是液晶显示器的主要缺点,提高液晶显示器的响应速度,一方面是改进液晶材料,如采用低温多晶硅材料,但成本很高。
另一方面是改进驱动电路,如三菱公司采用的FFD(Feedforward Driving)技术,即前馈驱动技术。
该技术的核心是在液晶分子改变状态时,由FFD电路(含DRAM和ROM)提供一个加速电压,加快其改变状态的速度。
目前采用这种技术的液晶显示器的响应时间已小于7ms。
3.4低反射技术为了使液晶显示器适应在高环境照度的条件下使用,各大液晶显示器厂家普遍采用了在偏光板上加黑色抗反射镀膜的技术,显示屏表面的反射率可小于1.5%。
3.5数字接口技术液晶显示器本身是数字显示设备,目前使用时是将显卡输出的数字信号转换成模拟信号输入至显示器,然后在显示器内部又将模拟信号转换成数字信号输入至液晶显示屏,这就明显降低了图像质量。
因此,液晶显示器的数字接口已经为各大液晶显示器厂家普遍采用。
数字接口的规格包括:LVDS、LMDS、GVIF、P&D、DFP和DVI,随着液晶显示器分辨率的提高,上述规格中有若干种已不适用。
目前普遍采用的是LVDS和DVI接口。
3.6高亮度、高对比度技术各大液晶显示器厂家普遍采用高透光率的ITO玻璃制造Un模块,并采用高效、低耗的CCF 背光源,使大屏幕的液晶显示器亮度可≥450cd/m2,对比度可≥500:1。
4世界液晶显示器产业的发展状况在LCD产品中,占主流地位的是TFT—LCD和STN—LCD,而STN—LCD的需求市场主要集中在亚洲。
2000—2003年,TFT—LCD的产值增长率达到58%,2003年TFT—LCD的市场规模达到200亿美元,其中日本占56%,韩国占29.5%,中国台湾占13.7%,美国占0.8%。
日本是世界上LCD产业最发达的国家,全球十大LCD厂家日本占其七,其中SHARP公司占据了全球LCD市场的相当可观的份额。
日本主要生产LCD的厂家,从1994年开始,投入巨资开发和生产TFT—LCD,2000年其TFT—LCD的产值已超过110亿美元,因此目前日本在TFT—LCD的技术和产业化规模方面总体上居世界领先地位。
眼下的问题是,日本的LCD产业面临韩国和台湾的严重挑战,这迫使他们不得不调整产业政策,重点发展高端产品。
以三星和LG为代表的韩国LCD生产企业发展极其迅速,他们为打破日本的垄断,从1997年开始,投入20多亿美元,兴建TFT—LCD工厂,并且年增长率高达138.6%,2000年其TFT —LCD产值已超过58亿美元。
在大尺寸LCD方面,LG—Philips和三星公司仅2000年就投入20亿美元建第五代生产线。
目前三星公司24英寸(分辨率1920 1200)的LCD和LG—Philips公司20英寸快速响应的LCD已大量投放市场。
2002年,LG—Philips和三星公司的LCD产量已全面超过日本的公司,分别占全球LCD市场的份额的25%和21%,为世界第一位和第二位。
美国曾经是LCD技术的发源地,但是目前其LCD产业谈不上规模,无法与日本相比,其他欧洲国家的LCD产业规模也不大,这并不是欧美国家缺乏建立大规模LCD产业的资金和技术,而是他们认为自己做LCD模块不如买日本和韩国的LCD模块划算。
我国LCD产业发展较慢,技术也比较落后,虽说我国生产LCD的厂家也有30多家,但都是生产低档的TN—LCD和STN—LCD。
由于日韩厂商逐渐淡出STN—LCD的市场,我国已成为全球TN—LCD和STN—LCD的最大的供货商,其中TN—LCD的产量占全球的75%以上,STN—LCD 的产量占全球的35%以上。
STN—LCD工艺简单,价格低廉,但是它的响应速度太慢,达300ms以上,根本满足不了视频显示的要求。