ubuntu12.04安装OpenCV2.4.1
LINUX(UBUNTU)下OPENCV安装教程

详细的步骤,在ubuntu14.04上安装OpenCV2.4.3成功。
安装OpenCV:1.安装必要的软件apt-get install build-essential cmake libgtk2.0-dev pkg-config python-dev python-numpy libavcodec-dev libavformat-dev libswscale-dev2.下载OpenCV,我的OpenCV-2.4.3.tar.bz2是在csdn上下载的3.解压到任意目录进入到压缩包存放的目录tar xvf OpenCV-2.4.3.tar.bz2cd OpenCV-2.4.3/mkdir releasecd release4.cmake编译OpenCV源码,所有的lib文件都会被安装到/usr/local目录下cmake-D CMAKE_BUILD_TYPE=RELEASE-D CMAKE_INSTALL_PREFIX=/usr/local..5.安装makesudo make installNow you have to configure OpenCV.First,open the opencv.conf file with the following code: 1sudo gedit/etc/ld.so.conf.d/opencv.confAdd the following line at the end of the file(it may be an empty file,that is ok)and then save it:1/usr/local/libRun the following code to configure the library:1sudo ldconfigNow you have to open another file:sudo gedit/etc/bash.bashrcAdd these two lines at the end of the file and save it:PKG_CONFIG_PATH=$PKG_CONFIG_PATH:/usr/local/lib/pkgconfig export PKG_CONFIG_PATHFinally,close the console and open a new one,restart the computer or logout and then login again.OpenCV will not work correctly until you do this.Now you have OpenCV2.4.1installed in your computer with Python,TBB,OpenGL, video,and Qt support./*下面这段可忽略环境变量pkg_config_path提供编译时和运行时库的路径查询。
UBUNTU OPENCV 环境搭建

Opencv交叉编译到ARM(基于Qt)一、开发环境:环境:ubuntu10.04交叉编译工具:gcc version4.5.1(ctng-1.8.1-FA)友善的东西opencv版本:OpenCV-2.3.1a.tar.bz2(这里可以下载:/projects/opencvlibrary/files/)cmake:cmake version2.8.0()*:前提是Qt交叉编译已经完成,并能正常使用。
一些依赖:在终端运行:sudo apt-get install build-essential libgtk2.0-dev libavcodec-dev libavformat-dev libjpeg62-dev libtiff4-dev cmake libswscale-dev libjasper-dev安装:cmakeapt-get install cmake-guiapt-get install cmake解压:tar xvf OpenCV-2.3.1.tar.bz2我使用的是天嵌提供的交叉编译工具EABI_4.3.3。
安装在/opt/EmbedSky/4.3.3/bin/目录下,解压后,进入目录cd OpenCV-2.3.1运行:cmake-gui如果没有安装,系统会提示你安装选择source file 选择build目录点configure然后选择:next填路径:Operating System:arm-none-linuxCompilers:是交叉编译工具GCC与G++的目录,图中是我的目录Target Root:****点Finish然后再回到Cmake目录下:在这里选择该先与不先的东西,同时因为我之前在x86上编译过所以我把CMAKE_INSTALL_PREFIX改成:/usr/local/arm同时添加了WITH_QT因为添加WITH_QT_OPENGL时编译出错,所以后来去掉了。
Ubuntu 12.04 硬盘安装教程(图文详解)

Ubuntu 12.04硬盘安装教程图文详解1.下载Ubuntu 12.04光盘镜像文件。
下载网址/12.04/。
找到“ubunt-12.04.1-desktop-amd64.iso”点击下载保存到C盘。
2.下载好后用解压工具打开。
3.进入“casper”文件夹。
解压“vmlinuz和initrd.lz”文件到C盘。
“grub4dos-0.4.4-2009-01-11.zip”压缩包,点击下载保存到桌面。
5.下载好后用压缩工具打开进入“grubdos-0.4.4”文件夹。
6.把这四个文件解压到C盘“grldr”“grldr.mbr”“grub.exe”“menu.lst”。
7.查看C盘增加的文件。
8.打开C盘的menu.lst文件,在文件末尾添加以下内容:(添加完后保存)title Install Ubuntu12.04root (hd0,0)kernel (hd0,0)/vmlinuz boot=casper iso-scan/filename=/ubuntu-12.04-desktop-amd64.iso locale=zh_CN.UTF-8initrd (hd0,0)/initrd.lz9.打开“控制面板”的“文件夹选项”,在“查看栏”显示所有文件的文件夹。
10.打开C盘的boot.ini文件,在末尾添加以下内容:(添加完后要保存)c:\grldr=”Ubuntu Install”11.磁盘分区:打开控制面板、双击“管理工具”、双击“计算机管理”、点击“磁盘管理”。
12.分区说明:制作一个空白分区,如果你的分区上有资料,则把资料转移到其他分区上,确保你的数据安全。
删除分区,分配25GB的磁盘空间来安装Ubuntu 12.04。
建立分区不要格式化,以便安装Ubuntu 12.04时好找分区。
13.重启电脑,选择启动项:Ubuntu Install14.选择最后一个Install Ubuntu 12.0415.等待片刻即出现Ubuntu桌面,用Alt+Ctrl+t 调出终端,输入指令:sudo umount -l /isodevice16.双击“安装Ubuntu 12.04 LTS”。
(2021年整理)虚拟机安装与Ubuntu12.04系统安装详细教程

(完整版)虚拟机安装与Ubuntu12.04系统安装详细教程编辑整理:尊敬的读者朋友们:这里是精品文档编辑中心,本文档内容是由我和我的同事精心编辑整理后发布的,发布之前我们对文中内容进行仔细校对,但是难免会有疏漏的地方,但是任然希望((完整版)虚拟机安装与Ubuntu12.04系统安装详细教程)的内容能够给您的工作和学习带来便利。
同时也真诚的希望收到您的建议和反馈,这将是我们进步的源泉,前进的动力。
本文可编辑可修改,如果觉得对您有帮助请收藏以便随时查阅,最后祝您生活愉快业绩进步,以下为(完整版)虚拟机安装与Ubuntu12.04系统安装详细教程的全部内容。
(完整版)虚拟机安装与Ubuntu12.04系统安装详细教程编辑整理:张嬗雒老师尊敬的读者朋友们:这里是精品文档编辑中心,本文档内容是由我和我的同事精心编辑整理后发布到文库,发布之前我们对文中内容进行仔细校对,但是难免会有疏漏的地方,但是我们任然希望(完整版)虚拟机安装与Ubuntu12.04系统安装详细教程这篇文档能够给您的工作和学习带来便利。
同时我们也真诚的希望收到您的建议和反馈到下面的留言区,这将是我们进步的源泉,前进的动力。
本文可编辑可修改,如果觉得对您有帮助请下载收藏以便随时查阅,最后祝您生活愉快业绩进步,以下为〈(完整版)虚拟机安装与Ubuntu12。
04系统安装详细教程> 这篇文档的全部内容。
虚拟机安装与Ubuntu系统安装详细教程2017-3-7一、双击打开“家庭仿真所有文件”文件夹。
二、安装虚拟机(vmware—workstation)。
1.解压缩“vmware-workstation-9.0。
0-官方原版-带注册机—汉化包”文件。
2.单机左上角“解压到”。
3.点击确定,完成解压。
4.生成文件夹“vmware-workstation-9。
0。
0-官方原版—带注册机-汉化包”。
5.双击打开“vmware—workstation-9。
ubuntu12.04 下面conky安装流程

ubuntu12.04 下面conky安装流程背景:conky在网络了解大概,两个感觉,效果很炫,配置很难。
参考很多文章大概整理下自己的配置流程,整理了一个比较简单配置流程。
希望可以帮到更多朋友快速配置起来,迈出第一步。
**【正文开始】文章类型:安装流程方法分享知识背景:需要了解基本安装软件方法适合人群:希望通过conky监控系统运行情况操作系统:ubuntu12.04*1、conky简单介绍Conky是一个建设在X-window之上的系统监视工具,它占用系统资源非常小而功能却非常强大,同时,Conky是在根窗口上绘制界面,因此本身就支持透明,可以和桌面完美地结合在一起,如果你愿意,Conky也可以以窗口的形式运行。
同时也是一个高度可定制的系统监视器,可以在显示许多常用的信息,包括系统信息、天气、邮件数等等,甚至orgmode正在计时的任务也能够显示在上面。
显示的信息在桌面上看到是不可以通过鼠标进行拖移,改变位置的方法只有修改配置文件,conky能够自动侦测到配置文件被改动,并读取新的配置,程序会自动reload。
2、安装conky2.1、安装conky 及相关组件sudo add-apt-repository ppa:norsetto/ppasudo apt-get updatesudo apt-get install conky-allsudo apt-get install python-statgrab ttf-droid curlsudo apt-get install lm-sensors hddtempsudo sensors-detect (一路回车,软件会自动检测)sudo /etc/init.d/module-init-tools startsudo chmod u+s /usr/sbin/hddtemp2.2、conkycolors配置软件到这里下载conky colors 源代码并解压/content/show.php/CONKY-colors?content=92328tar zxvfcd conky_colorsmakemake install (安装完成conky-color)接下来生成配置文件.conkycolors$ conky-colors –lang=en –theme=human –clock=modern –calendar –hdtemp1=sda –cpu=2 –cputemp –swap –updates –proc=6 –mpd –network –eth=0 –battery –ubuntu –weather=CHXX0037 –unit=C –ring重点是通过colors生成conkyrc配置文件,减去中间的复杂语法。
OpenCV安装与移植
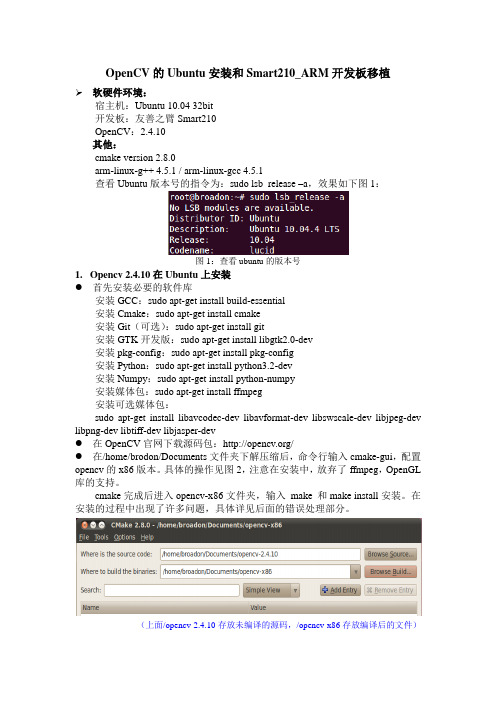
OpenCV的Ubuntu安装和Smart210_ARM开发板移植软硬件环境:宿主机:Ubuntu 10.04 32bit开发板:友善之臂Smart210OpenCV:2.4.10其他:cmake version 2.8.0arm-linux-g++ 4.5.1 / arm-linux-gcc 4.5.1查看Ubuntu版本号的指令为:sudo lsb_release –a,效果如下图1:图1:查看ubuntu的版本号1.Opencv2.4.10在Ubuntu上安装●首先安装必要的软件库安装GCC:sudo apt-get install build-essential安装Cmake:sudo apt-get install cmake安装Git(可选):sudo apt-get install git安装GTK开发版:sudo apt-get install libgtk2.0-dev安装pkg-config:sudo apt-get install pkg-config安装Python:sudo apt-get install python3.2-dev安装Numpy:sudo apt-get install python-numpy安装媒体包:sudo apt-get install ffmpeg安装可选媒体包:sudo apt-get install libavcodec-dev libavformat-dev libswscale-dev libjpeg-dev libpng-dev libtiff-dev libjasper-dev●在OpenCV官网下载源码包:/●在/home/brodon/Documents文件夹下解压缩后,命令行输入cmake-gui,配置opencv的x86版本。
具体的操作见图2,注意在安装中,放弃了ffmpeg,OpenGL 库的支持。
cmake完成后进入opencv-x86文件夹,输入make 和make install安装。
opencv安装指南
说明:操作系统ubuntu 12.04 desktop LTS1.前期准备采用OpenCV2.3.1(2.4也适合)。
官方下载地址/projects/opencvlibrary/files/opencv-unix/2.3.1/OpenCV-2.3.1a.tar.bz2/download安装cmakesudo apt-get install cmakeCMake是一个跨平台的安装(编译)工具,可以用简单的语句来描述所有平台的安装(编译过程)。
他能够输出各种各样的makefile或者project文件,能测试编译器所支持的C++特性,类似UNIX下的automake。
OpenCV使用cmake进行makefile的创建。
安装qtcreatorsudo apt-get install qtcreator2.安装将OpenCV包解压到用户目录下,得到opencv文件夹cd ~/opencvmkdir releasecd releasecmake -D CMAKE_BUILD_TYPE=RELEASE -D CMAKE_INSTALL_PREFIX=/usr/local ..(注意“..”前有空格)make等待大概十分钟make完成sudo make install至此opencv库安装到了/usr/local/lib目录下,重启电脑,或者执行sudo ldconfig(关于ldconfig:ubuntu把在开机时所有库文件装入到缓存,这样避免每次使用链接库都需装载,提高系统的效率,ldconfig命令就是重新装载,可通过ldconfig -v查看已经在缓存里的库。
)3.QT4+OpenCV组合配置示例下面就可以使用QT和OpenCV进行开发了。
打开QTcreator新建项目,添加头文件,源文件及其代码(如下,示例项目在附件里也有)//////////////////////opencv_example.h#ifndef OPENCV_EXAMPLE_H#define OPENCV_EXAMPLE_H#include<QtGui/QMainWindow>#include<QtGui>#include"cv.h"#include"highgui.h"class OpenCV_Example:public QMainWindow{Q_OBJECTpublic:OpenCV_Example();QPushButton*b1;IplImage*img;public slots:void slot_imgshow();};#endif//OPENCV_EXAMPLE_H///////////////////////////////opencv_example.cpp#include"opencv_example.h"OpenCV_Example::OpenCV_Example(){setGeometry(100,100,100,100);b1=new QPushButton("Show Image",this);connect(b1,SIGNAL(clicked()),this,SLOT(slot_imgshow()));}void OpenCV_Example::slot_imgshow(){QMessageBox::information(this,"title","Hello this is popup");img=cvLoadImage("/home/guo/OpenCV_Example/OpenCV_Example/21.jpg",1);//要打开的图片//create a new windowcvNamedWindow("Window",1);//display the image in the windowcvShowImage("Window",img);//wait for key to close the windowcvWaitKey(0);cvDestroyWindow("Window");//destroy the window }在main中编写:#include<QtGui/QApplication>#include"opencv_example.h"int main(int argc,char*argv[]){QApplication a(argc,argv);OpenCV_Example w;w.show();return a.exec();}在.pro文件中添加编译/链接选项INCLUDEPATH+=/usr/local/includeINCLUDEPATH+=/usr/local/include/opencvLIBS+=/usr/local/lib/libopencv_core.soLIBS+=/usr/local/lib/libopencv_highgui.soLIBS+=/usr/local/lib/libopencv_imgproc.so然后构建运行。
Ubuntu下的Opencv的安装与初步使用
Ubuntu下的Opencv的安装与初步使⽤⼀、认识 OpenCV 开源计算机视觉(OpenCV)是⼀个主要针对实时计算机视觉的编程函数库。
OpenCV的应⽤领域包括:2D和3D功能⼯具包运动估计⾯部识别系统⼿势识别⼈机交互移动机器⼈动作理解物体识别分割和识别实体影像⽴体视觉:来⾃两个摄像机的深度感知运动中的结构(SFM)运动跟踪增强现实为了⽀持上述⼀些领域,OpenCV包括⼀个统计机器学习库,其中包含:提升(Boosting)决策树学习梯度提升树期望最⼤化算法k最近邻算法朴素贝叶斯分类器⼈⼯神经⽹络随机森林⽀持向量机(SVM)深层神经⽹络(DNN)⼆、安装 OpenCV2.1 下载 OpenCV 3.4.11 数据包2.22.32.4unzip opencv-3.4.11.zip2.5 使⽤ cmake 安装 opencv ⾸先进⼊解压后的⽂件夹:opencv-3.4.11cd opencv-3.4.11⾸先进⼊ root ⽤户,并更新⼀下。
sudo susudo apt-get updatesudo apt-get install cmakesudo apt-get install build-essential libgtk2.0-dev libavcodec-dev libavformat-dev libjpeg.dev libtiff5.dev libswscale-dev libjasper-dev接下来创建 build ⽂件夹mkdir build然后进⼊我们创建的⽂件夹:buildcd build使⽤ cmake 编译参数,或者使⽤第⼆条默认参数,都可以的。
cmake -D CMAKE_BUILD_TYPE=Release -D CMAKE_INSTALL_PREFIX=/usr/local ..cmake ..2.6使⽤ make 创建编译仍然是在 build ⽂件夹下进⾏。
树莓派极简安装OpenCv的方法步骤
树莓派极简安装OpenCv的⽅法步骤因为最近在开发使⽤树莓派+usb摄像头识别模块,打算⽤OpenCv,发现⽹上的树莓派OpenCv安装教程都过于繁琐占⽤内存⼤,我经过⾃⼰的实验,发现出了⼀种⾮常简易快捷的⽅式,⽹速OK的话,⼗分钟能安装完成。
我⽤的环境:树莓派3b+Python3.5.4树莓派官⽅操作系统以下是安装步骤:树莓派相关库安装:sudo apt-get updatesudo apt-get install libjpeg-devsudo apt-get install libatlas-base-devsudo apt-get install libjpeg-devsudo apt-get install libtiff5-devsudo apt-get install li.jpg12-devsudo apt-get install libqtgui4 libqt4-testsudo apt-get install libjasper-devOpenCV模块pip安装sudo pip3 install opencv-python安装完成测试在终端输⼊:python3然后:import cv2如果安装成功,则import不会有问题下⾯就可以输出OpenCv的版本号使⽤:print(cv2.version)退出python⽤: exit()简单应⽤使⽤OpenCv库读取usb摄像头,实时显⽰,拍照代码如下:import cv2import numpy as npcap = cv2.VideoCapture(0)while(1):# get a frameret, frame = cap.read()# show a framecv2.imshow("capture", frame)if cv2.waitKey(1) & 0xFF == ord('q'):#退出并拍照cv2.imwrite("takephoto2.jpg", frame)print("take Photo Ok")breakcap.release()cv2.destroyAllWindows()运⾏截图以上就是本⽂的全部内容,希望对⼤家的学习有所帮助,也希望⼤家多多⽀持。
KUbuntu12.04应用技巧
KUBUNTU 12.04 应用技巧一、Muno软件中心安软件提示:“另一个应用程序似乎在使用包管理系统。
您必须关闭所有其他的包管理器才能安装或移除软件包。
”解决办法:打开终端,然后输入:sudo pkill dpkgsudo pkill apt-getsudo apt-get update二、KDE4桌面显示回收站图标,解决办法(二选一):1.新建URL链接,目标地址为trash:/,重命名为回收站。
2.在右上角的工具箱里,重新添加一个部件,选择回收站的部件。
三、安装IBUS框架拼音输入法:sudo apt-get install ibus ibus-gtk ibus-gtk3 ibus-qt4ibus-pinyin #安装ibus框架、设置面板、拼音输入法四、在KDE下,装了IBUS框架输入法并更新字体后,无法打开输入法,输入法图标不显示,解决办法:sudo apt-get install gnome-icon-themesudo apt-get install ibus ibus-gtk ibus-gtk3 ibus-qt4sudo apt-get install ibus-pinyinim-switch -s ibus五、Kubuntu安装软件命令:1.从服务器获取并安装软件sudo apt-get install *** 新安装软件,***为软件名称,*也可以代表通配符,例如:安装ibus,可以在终端中输入:sudo apt-get install ibu*,服务器将自动匹配相似的文件,选择服务器列表中你所需要的软件即可。
Sudo apt-get -f install *** 修复安装软件Sudo apt-get --reinstall install *** 重新安装软件Sudo apt-get update 更新软件包列表Sudo apt-get upgrade 更新所有已安装的软件包Sudo apt-get dist-upgrade 将系统升级到新版本2.源码安装(.tar、tar.gz、tar.bz2、tar.Z)①安装安装编译程序sudo apt-get install build-essential②通过tar命令来解压:a.解压***.tar.gz:tar zxf ***.tar.gzb.解压***.tar.Z: tar zxf ***.tar.Zc.解压***.tgz: tar zxf ***.tgzd.解压***.bz2: bunzip2 ***.bz2e.解压***.tar: tar xf ***.tar③进入到已解压目录中:Cd ***/a.鉴于不同源码包或者预编译包可能存在差异,建议先读一下README之类的说明文件,b.使用ls -F --color 或者 ls -F 命令查看可执行文件,可执行文件会以*号的尾部标志。
- 1、下载文档前请自行甄别文档内容的完整性,平台不提供额外的编辑、内容补充、找答案等附加服务。
- 2、"仅部分预览"的文档,不可在线预览部分如存在完整性等问题,可反馈申请退款(可完整预览的文档不适用该条件!)。
- 3、如文档侵犯您的权益,请联系客服反馈,我们会尽快为您处理(人工客服工作时间:9:00-18:30)。
ubuntu12.04安装OpenCV2.4。
1分类:opencv2012-06-26 14:411230人阅读评论(0)收藏举报目录(?)[+] The Installation ProcedureTo install and configure OpenCV 2.4.1, complete the following steps. The commands shown in each step can be copy and pasted directly into a Linux command line.1. R emove any installed versions of ffmpeg and x264.sudo apt-get remove ffmpeg x264 libx264-dev2. G et all the dependencies for x264 and ffmpeg.sudo apt-get updatesudo apt-get install build-essential checkinstall git cmakelibfaac-dev libjack-jackd2-dev libmp3lame-devlibopencore-amrnb-dev libopencore-amrwb-dev libsdl1.2-devlibtheora-dev libva-dev libvdpau-dev libvorbis-dev libx11-devlibxfixes-dev libxvidcore-dev texi2html yasm zlib1g-dev3. D ownload and install gstreamer.sudo apt-get install libgstreamer0.10-0 libgstreamer0.10-devgstreamer0.10-tools gstreamer0.10-plugins-baselibgstreamer-plugins-base0.10-dev gstreamer0.10-plugins-goodgstreamer0.10-plugins-ugly gstreamer0.10-plugins-badgstreamer0.10-ffmpeg4. D ownload and install gtk.sudo apt-get install libgtk2.0-0 libgtk2.0-dev5. D ownload and install libjpeg.sudo apt-get install libjpeg8 libjpeg8-dev6. C reate a directory to hold source code.cd ~mkdir src7. D ownload and install install x264.a. Download a recent stable snapshot of x264 fromftp:///pub/videolan/x264/snapshots/. The exact versiondoes not seem to matter. To write this guide, I used versionx264-snapshot-20120528-2245-stable.tar.bz2, but I have usedprevious versions too.cd ~/srcwgetftp:///pub/videolan/x264/snapshots/x264-snapshot-20120528-2245-stable.tar.bz2tar xvf x264-snapshot-20120528-2245-stable.tar.bz2cd x264-snapshot-20120528-2245-stableb. Configure and build the x264 libraries../configure --enable-staticmakesudo make installIMPORTANT: If you are running a 64-bit version of Ubuntu, you mustconfigure x264 as shown in the following command:./configure --enable-shared --enable-picThe -shared and -pic options might also be required when you compilefor some other architectures, such as ARM. You know you need theseoptions if you get the following error when compiling OpenCV:[ 25%] Building CXX objectmodules/highgui/CMakeFiles/opencv_highgui.dir/src/bitstrm.cpp.oLinking CXX sharedlibrary ../../lib/libopencv_highgui.so/usr/bin/ld: /usr/local/lib/libavcodec.a(avpacket.o):relocation R_X86_64_32S against `av_destruct_packet' cannot be used when making a shared object; recompile with-fPIC/usr/local/lib/libavcodec.a: could not read symbols: Badvalue8. D ownload and install install ffmpeg.a. Download ffmpeg version 0.11.x from /download.html.cd ~/srcwget /releases/ffmpeg-0.11.tar.bz2tar xvf ffmpeg-0.11.tar.bz2cd ffmpeg-0.11b. Configure and build ffmpeg. //如果是ubuntu是安装在虚拟机上,需要加上--enable-shared./configure --enable-gpl --enable-libfaac--enable-libmp3lame --enable-libopencore-amrnb--enable-libopencore-amrwb --enable-libtheora--enable-libvorbis --enable-libx264 --enable-libxvid--enable-nonfree --enable-postproc --enable-version3--enable-x11grabmakesudo make installIMPORTANT: Just like with x264 in the previous step, you mustconfigure ffmpeg with the -shared option if you are running a 64-bitversion of Ubuntu or some other architectures, such as ARM. The -picoption is not necessary for ffmpeg../configure --enable-gpl --enable-libfaac--enable-libmp3lame --enable-libopencore-amrnb--enable-libopencore-amrwb --enable-libtheora--enable-libvorbis --enable-libx264 --enable-libxvid--enable-nonfree --enable-postproc --enable-version3--enable-x11grab --enable-shared9. D ownload and install install a recent version of v4l (video for linux) from/downloads/v4l-utils/. For this guide I used version 0.8.8.cd ~/srcwget /downloads/v4l-utils/v4l-utils-0.8.8.tar.bz2tar xvf v4l-utils-0.8.8.tar.bz2cd v4l-utils-0.8.8makesudo make install10. Download and install install OpenCV 2.4.1.a. Download OpenCV version 2.4.1 from/projects/opencvlibrary/files/cd ~/srcwget/project/opencvlibrary/opencv-unix/2.4.1/OpenCV-2.4.1.tar.bz2tar xvf OpenCV-2.4.1.tar.bz2b. Create a new build directory and run cmake:cd OpenCV-2.4.1/mkdir buildcd buildcmake -D CMAKE_BUILD_TYPE=RELEASE ..c. Verify that the output of cmake includes the following text:found gstreamer-base-0.10▪GTK+ 2.x: YES▪FFMPEG: YES▪GStreamer: YES▪V4L/V4L2: Using libv4ld. Build and install OpenCV.makesudo make install11. Configure Linux.a. Tell linux where the shared libraries for OpenCV are located by enteringthe following shell command:export LD_LIBRARY_PATH=/usr/local/libAdd the command to your .bashrc f ile so that you don’t have to enterevery time your start a new terminal.Alternatively, you can configure the system wide library search path.Using your favorite editor, add a single line containing thetext/usr/local/lib to the end of a file named/etc/ld.so.conf.d/opencv.conf. In the standard Ubuntu install,the opencv.conf file does not exist; you need to create it. Using vi, forexample, enter the following commands:sudo vi /etc/ld.so.conf.d/opencv.confGo/usr/local/lib< Esc>:wq!After editing the opencv.conf file, enter the following command: sudo ldconfig /etc/ld.so.conf.b. Using your favorite editor, add the following two lines to the end of/etc/bash.bashrc:PKG_CONFIG_PATH=$PKG_CONFIG_PATH:/usr/local/lib/pkgconfigexport PKG_CONFIG_PATH8 运行例程测试1 cd ~4 cd openCV_samples/c5 chmod +x build_all.sh6 ./build_all.sh78 ./facedetect--cascade="/usr/local/share/OpenCV/haarcascades/haarcascade_frontalface_alt.xml"--scale=1.5 lena.jpgMore InformationIf you encounter problems installing OpenCV, see the companion guide, “A Comprehensive OpenCV Installation Troubleshooting Guide.”∙Utkarsh Sinha runs AiShack, a site that has easy-to-understand tutorials using OpenCV to solve real-world problems:http://www.aishack.in/topics/tutorials/∙Sebastian Montabone has several articles on installing OpenCV and image processing. His web site is /∙FakeOutdoorsman’s p osted an excellent dependency install guide, which is located on the Ubuntuforums:/showthread.php?t=786095。