Dolphin使用手册
海豚调度使用手册
海豚调度使用手册第一部分:介绍海豚调度是一种高效的任务调度工具,可以帮助用户管理和优化复杂的任务调度流程。
它提供了简单易用的界面和强大的功能,使用户能够更轻松地调度和监控任务的执行情况。
本手册将介绍如何安装和配置海豚调度,以及如何使用其主要功能。
第二部分:安装和配置1.下载海豚调度软件包并解压缩到目标目录。
2.打开配置文件dolphin.conf,根据实际需求进行必要的修改,例如数据库连接和任务调度策略。
3.启动海豚调度服务器。
第三部分:任务管理1.登录海豚调度管理界面。
2.在任务管理模块创建新任务,包括任务名称、执行时间、执行频率等相关信息。
可以选择不同的调度策略,如一次性、定时循环或按某种规律循环。
3.编写任务执行脚本,并将其上传到海豚调度服务器。
4.启动任务并监控任务的执行情况。
第四部分:任务监控1.在任务监控模块中,可以实时查看任务的执行情况,包括执行状态、开始时间、结束时间等。
2.可以通过搜索功能找到特定的任务,并查看其详细信息。
3.可以查看任务的执行日志,以便排查问题或进行性能分析。
第五部分:告警和通知1.在告警和通知模块中,可以设置任务执行失败或超时时的告警机制,例如发送邮件或短信通知相关人员。
2.可以根据不同的告警级别设置不同的告警方式和通知对象。
第六部分:高级功能1.海豚调度还提供了一些高级功能,例如任务依赖、并发控制和负载均衡等。
2.可以设置任务之间的依赖关系,确保任务按顺序执行。
3.可以设置并发控制,限制同时执行的任务数量,以避免资源竞争。
4.可以配置负载均衡策略,将任务分配到不同的调度节点上执行,提高系统的整体性能。
第七部分:常见问题解答1.什么是任务调度?任务调度是指根据一定的规则和策略,在特定的时间点执行指定的任务,用于自动化执行重复性或定时性的任务。
2.如何实现任务依赖?可以在任务的配置中设置前置任务,只有前置任务执行成功后,当前任务才会被触发执行。
3.如何设置任务的执行频率?可以根据任务的实际需求,在任务配置中设置相应的执行时间点和执行频率,如每天、每周、每月等。
海豚快速入门说明书
入门目 录产品概述产品清单11认识产品2产品使用3充电安装手机34电源按键4模式功能介绍5功能操作5四向摇杆操作模式切换键77扳机键操作8手动锁定指示灯状态9免责声明产品参数10118侧面三按键5展开步骤3海豚是专门为手机而设计的手持稳定器,使手机可拍摄稳定流畅的画面。
可折叠收纳,支持手机横、竖屏使用,具有完善的功能设计和简易的操作性。
充电线 ×1三脚架 ×1产品概述1稳定器×1认识产品2本产品不包含手机扳机键手机夹变焦键变焦键快门键产品首次使用时,请务必给稳定器充满电。
若电量过低红灯慢闪,建议您马上充电。
当您不使用时,请关闭电源。
充电采用Type-C 数据线充电,充电时为蓝灯闪烁,充满时四个灯常亮。
3提示:展开步骤①拧松稳定器上的螺丝②往上展开③拧紧螺丝* 安装前建议取下手机保护套。
拉开手机夹具,将手机左右居中置入。
手机安装稳固后才能开机。
①在开机或者关机状态下,长按2秒电源按钮开机或者关机。
②在开机或者关机状态下,单击电源按钮显示稳定器电量。
③在开机状态下,单击拍照录像。
④在开机状态下,双击电源按钮进入待机模式,此时单击任意按钮恢复云台工作状态。
电源键提示:4功能操作航向跟随模式单击模式键横滚锁定(默认模式)再次单击模式键5再次单击模式键第一人称模式变焦键变焦键快门键T键:变焦按键。
快门键:拍照/录像/切换前后摄像头/切换拍照录像模式。
W键:变焦按键。
① 模式长按扳机键全锁定模式6双击模式键,可以切换横竖拍。
② 横竖拍PF Pan Follow 航向跟随模式HL Horizontal Lock 横滚锁定(默认模式)FPV First Person View第一人称模式俯仰和横滚保持方向不变,镜头随手柄转动的方向而转动。
横滚轴保持水平不动,镜头随手柄转动的方向而转动。
镜头跟随手柄投影的方向转动,模拟第一人称视觉的效果。
描述模式竖拍模式扳动锁定GL Global Lock 全锁定模式辅助手机竖向拍摄。
dolphin模拟器怎么设置?dolphin模拟器设置及使用教程图解
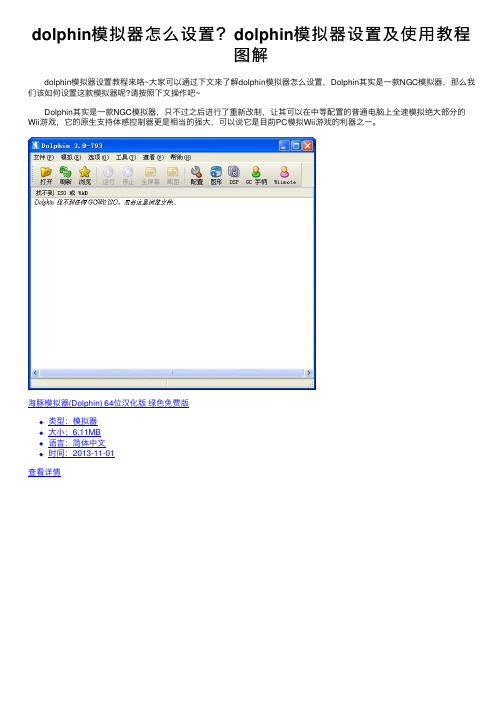
dolphin模拟器怎么设置?dolphin模拟器设置及使⽤教程图解 dolphin模拟器设置教程来咯~⼤家可以通过下⽂来了解dolphin模拟器怎么设置,Dolphin其实是⼀款NGC模拟器,那么我们该如何设置这款模拟器呢?请按照下⽂操作吧~ Dolphin其实是⼀款NGC模拟器,只不过之后进⾏了重新改制,让其可以在中等配置的普通电脑上全速模拟绝⼤部分的Wii游戏,它的原⽣⽀持体感控制器更是相当的强⼤,可以说它是⽬前PC模拟Wii游戏的利器之⼀。
海豚模拟器(Dolphin) 64位汉化版绿⾊免费版类型:模拟器⼤⼩:6.11MB语⾔:简体中⽂时间:2013-11-01查看详情will模拟器 (Dolphin Ver 8.800 Extremum) 绿⾊免费版类型:模拟器⼤⼩:18.03MB语⾔:简体中⽂时间:2013-05-31查看详情Dolphin模拟器 for Mac V5.0-11863 苹果电脑版类型:其他软件⼤⼩:18.7MB语⾔:英⽂软件时间:2020-04-21查看详情 Mac下也有Dolphin模拟器,⾃⼰试⽤了下效果⾮常的不错,界⾯和设置与Windows下的⼀致,⾮常的⽅便。
这下,我们终于可以在Mac下好好模拟⼀下Wii的游戏了。
⼤家打开Dolphin模拟器后,选择Config(设置)来调整各项参数,在Graphics(显卡)中,我们选择OpenGL,如果显卡性能⽐较强,可以开启各项过滤和加速,最后,我们来设置控制器,⼩编⼿头有Wii原版控制器,所以直接在Wiimote1中选择“Real Wiimote”,然后在“Real Wiimotes”中点击刷新的同时按住⼿柄的“1”、“2”键让其闪烁,知道⼿柄震动即完成了配对(注意,之前不要先配对⼿柄,否则这⼀步会失败)。
好了,经过以上步骤的设置,我们就可以开始Wii的游戏之旅了,我们选择Browse来读取游戏,⼩编这⾥就以《异度之刃》来举例,⼤家可以看以下截图。
Dolphin使用手册

首先打开模拟器,可以看到下图所示画面先调整config如图,“Enable Dual Core”使用双核,有多核cpu的最好开启“Enable Idle Skipping”打开空闲跳帧。
不太清楚,貌似可以提高速度。
“Unlimited Jit Cache”允许无限缓存,对任斗X,路易吉的鬼屋和NGC版塞尔达曙光公主有用,可防止莫名其妙的死机“Enable Cheats”打开金手指,可以在游戏中调用那些Advanced Settings可以无视,统统打勾“Confirm On Stop”停止模拟时确认。
推荐打开,因为我有过把“stop”当成“screen shot”按下去的经历……“Use Panic Handlers”可开可关,关掉后如果发生错误不会提示,直接抽风……但是对于马里奥和索尼克在北京奥运来说一定要关掉,否则你根本没法玩,一直跳错误框再往下就没什么好说的了。
接下来是NGC设置:什么也不用改动,跳过即可接下来Wii设置只有一项要注意:“Enable Progressive Scan”就是逐行扫描,玩马车Wii 必须关掉(虽然关掉还是玩不了,但是可以通过网上下载存档解决)下一个:Paths路径选择红框中的Add…来添加一个游戏的文件夹(iso所在地)Plugins没什么好说的然后是Graphics如图,如果要将游戏窗口和模拟器窗口合二为一可以勾选Child WindowKeep Aspect Ratio就是保持画面长宽比例,如果再勾选Crop的话就是允许比例稍微失真不推荐钩选“OSD Hotkeys”,防止万一按到热键其他随便设置接下来高级设置:基本上不要改动,可以改动Info的项目另外,关于hacks:这些游戏玩的时候需要选择各自的hacks,否则图形可能不正常下一个,声音(DSP)没什么好说的,右边是音量调节,其他么……不用改动。
然后,Pad按照自己的喜好设定“Disable”那个最好打勾,防止你在运行模拟器的时候干其它事情影响到游戏Semi-press就是半按,顾名思义,按一半(即轻轻地按)下一步,重点,Wii手柄设置:由于许多游戏用到了nunchunk(鸡腿),所以在Emulated Extension(s)最好一直选Nunchunk那个Real Wiimote下面的两个选项都不要勾关于那个Sideways D-Pad,就是说有些游戏(如超级纸片马里奥)要横着拿手柄,就可以勾选这个,免去修改按键麻烦接下来点左下角的Button Mapping按照自己的喜好设置注意:上方的Roll and pitch按照图中设置接下来,回到主界面,右键一个Rom,选Properties前面两个不说了,这个AR Codes就是金手指,选择Add…添加一个上面写描述,下面写代码然后看Info可以看到游戏的所有信息。
智能会议拾音器 Dolphin520 说明书

This device complies with part 15 of the FCC Rules. Operation is subject to the following two conditions: (1) this device may not cause harmful interference, and (2) this device must accept any interference received, including interference that may cause undesired operation.Any changes or modifications not expressly approved by the party responsible for compliance could void the user's authority to operate the equipment.NOTE: This equipment has been tested and found to comply with the limits for a Class B digital device, pursuant to Part 15 of the FCC Rules. These limits are designed to provide reasonable protection against harmful interference in a residential installation. This equipment generates, uses and can radiate radio frequency energy and, if not installed and used in accordance with the instructions, may cause harmful interference to radio communications. However, there is no guarantee that interference will not occur in a particular installation.If this equipment does cause harmful interference to radio or television reception,which can be determined by turning the equipment off and on, the user is encouraged to try to correct the interference by one or more of the following measures:-- Reorient or relocate the receiving antenna.-- Increase the separation between the equipment and receiver.-- Connect the equipment into an outlet on a circuit differentfrom that to which the receiver is connected.-- Consult the dealer or an experienced radio/TV technician for help.The device has been evaluated to meet general RF exposure requirement. The device can be used in portable exposure condition without restriction。
Dolphin 触摸屏快速参考指南和遥控器快速参考指南说明书

Or browse our free resources at: /support
Ple
Fold here and place behind your keyboard
KEYBOARD SHORTCUTS
Ctrl +0
F1
F2
F3
F4
F5
F6
F7
F8
F9 F10 F11 F12
Voice Help Actions Help & Repeat Continue Start
On / Off
menu info
reading voice
input
Voice volume:
Next item
DOWN / RIGHT ARROW
Previous item
UP / LEFT ARROW
Select item
ENTER
Back to previous screen ESCAPE
Help
F1
Actions
F2
Help & Information F3
Read current item
F4
Start Voice Input
F6
Interrupt speech
CTRL
Shortcut keys for writing
Next / previous word CTRL + RIGHT/LEFT ARROW
Selecting text Copy selected text
SHIFT + ARROWS CTRL + C
Dolphin 6100中文使用说明

附帶 Windows CE® 5.0
快速入門指南
™
Dolphin 6100 行動電腦 快速入門指南
將包裝盒拆封
請檢查包裝盒中是否含有下列物品: • Dolphin 6100 行動電腦 (終端機) • 主電池組 (3.7v 鋰離子電池) • 交流電 (AC) 電源供應器 • 當地制式電源轉換插頭 備註:請務必保留原來的包裝,以備需要時送回 Dolphin 終端機進行維修,詳情
線上產品服務與維修協助
您也可以在 取得線上產品服務與維修協助。
7
Limited Warranty
Honeywell International Inc. ("HII") warrants its products and optional accessories to be free from defects in materials and workmanship and to conform to HII’s published specifications applicable to the products purchased at the time of shipment. This warranty does not cover any HII product which is (i) improperly installed or used; (ii) damaged by accident or negligence, including failure to follow the proper maintenance, service, and cleaning schedule; or (iii) damaged as a result of (A) modification or alteration by the purchaser or other party, (B) excessive voltage or current supplied to or drawn from the interface connections, (C) static electricity or electro-static discharge, (D) operation under conditions beyond the specified operating parameters, or (E) repair or service of the product by anyone other than HII or its authorized representatives.
dolphin pxh840 ntb pcie adapter 用户手册说明书

PCI Express PXH840 AdapterPXH840 NTB PCIe Adapter users guideVersion 1.18Date: 30th July 2021Table of ContentsDISCLAIMER (5)TERMS AND ACRONYMS (5)PXH840 HIGH LEVEL SPECIFICATION (6)P RODUCT VARIANTS (6)MTBF BY T EMPERATURE AND E NVIRONMENT (7)PACKAGING (7)PRE-INSTALLATION QUESTIONS (7)PCI E S LOT DETERMINATION (7)PXH840C ONFIGURATION (8)O PERATING ENVIRONMENT (8)C ABLE C ONNECTIONS (8)T RANSPARENT OPERATION. (8)INSTALLATION (9)S TEP 1-U NPACK BOARD (9)S TEP 3-C ONFIGURE THE BOARD FOR PROPER OPERATION (9)NTB Configuration settings (9)S TEP 4-I NSTALL THE A DAPTER C ARD (9)S TEP 5-I NSTALLING AND R EMOVING C ABLES (10)Connecting Cables (10)Disconnecting Cables (10)S TEP 6–I NSTALLING THE D OLPHIN E X PRESS W ARE SOFTWARE (10)S TEP 5-V ERIFY I NSTALLATION (10)OPERATION AND MAINTENANCE (11)C ONFIGURATION AND DIP S WITCHES (11)DIP Switch Bank – Configuration (11)NTB USE CASES SUMMARY AND SETTINGS (12)U SE C ASE A-2N ODE C ONFIGURATION –NTB M ODE (12)Connecting the cables for 2 Node Configurations, x16 link (12)Connecting the cables for 2 Node Configurations, x8 link (12)Connecting the cables for 2 Node Configurations, x4 link (12)U SE C ASE B-3N ODE C ONFIGURATION –NTB M ODE (13)Connecting the cables for 3 Node Configurations, x8 link (13)TRANSPARENT USE CASES (14)F IRMWARE UPGRADE (14)I DENTIFYING THE C ARD (14)S UPPORT (15)TECHNICAL INFORMATION (15)COMPLIANCE AND REGULATORY TESTING (16)EMC C OMPLIANCE (16)R O HS C OMPLIANCE (16)FCC C LASS A (16)L ASER E YE S AFETY (16)LIMITED WARRANTY (18)W ARRANTY P ERIOD (18)C OVERAGE (18)S ERVICE P ROCEDURE (18)DISCLAIMERDOLPHIN INTERCONNECT SOLUTIONS RESERVES THE RIGHT TO MAKE CHANGES WITHOUT FURTHER NOTICE TO ANY OF ITS PRODUCTS TO IMPROVE RELIABILITY, FUNCTION, OR DESIGN.TO THE FULLEST EXTENT PERMITTED BY LAW, DOLPHIN WILL NOT BE LIABLE FOR ANY INDIRECT, INCIDENTAL, SPECIAL OR CONSEQUENTIAL DAMAGES (INCLUDING LOST PROFITS, LOST DATA, OR LOSS OF USE) ARISING OUT OF ANY USE OF DOLPHIN’S PRODUCTS, SOFTW ARE OR SERVICE PROVIDED. DOLPHIN’S MAXIMUM LIABILITY WILL NOT EXCEED THE TOTAL AMOUNT PAID FOR THE PRODUCT BY THE PURCHASER.LIFE SUPPORT POLICYDOLPHIN INTERCONNECT SOLUTIONS’ PRODUCTS ARE NOT AUTHORIZED FOR USE AS CRITICAL COMPONENTS IN LIFE SUPPORT DEVICES.ENVIRONMENTAL POLICYDolphin is minimizing the amount of printed documentation and software CDs in its shipments; please download additional documentation and software from .Terms and acronymsImportant terms and acronyms used in this manualAOC A ctive O ptical C able. PCIe fiber cable assembly.eXpressWare Dolphins software stack for PCIe clustering and IO. for more information.FireFly Optical fiber solution for PCIe over cable from Samtec IncLane One PCI Express Lane contains a differential pair for transmission and a differential pair for reception.Link A collection of one or more PCI Express Lanes providing the communication path between an Upstream and Downstream Port.Port The PXH840 has two MPO (MTP) connectors providing up four PCIe x4 ports, named L0, L1, L2 and L3. The physical ports are identified by text on the PCIe brackets. The PCIe chip only supports 2 NTB ports.PXH840 high level specificationThe PXH840 is a PCI Express Gen3 x16 adapter card supporting NTB operations. The card comes with firmware and a license to use the eXpressWare PCIe networking software from Dolphin Interconnect Solutions.Product variantsThe PXH840 supports PCIe Gen1, Gen2 and Gen3 speeds and x4, x8 and x16 link-widths. The card will operate at the highest common speed shared between the slot and the card (Gen3) and the widest common link-width (x16).•PCI Express Base Specification, Rev. 3.0.•PCI Express CEM Specification, Rev. 3.0.•PCI Express Gen3 8.0 GT/s per lane signaling – 128 GT/s total signaling.•PCI Express Gen3 x16 edge connector. The card installs in any PCI Express slot that has a physical x16 connector. The slot may have any electrical width x1 – x16.•Compliant with PCI Express Gen1 through Gen3 computers and IO systems, auto detection.•MPO cable connector•The PXH840 in NTB mode supports to two or three other nodes.•NTB Cable port configurations, up too One x16o Two x8•Broadcom / Avago / PLX PEX8733 PCI Express Gen3 chipset.•132 nanosecond cut-through latency port to port.•Support for active optical fibers up to 100 meters.•Low profile, Half-length form factor - Dimensions 167.8mm x 68.9 mm.•Weight 140 Grams with 4 FireFly, heatsink and full-height bracket mounted.•Comes with standard profile PCI Express bracket. Low profile bracket option available, please contact Dolphin for more information.•Host clock isolation. Automatic support for host running CFC or SSC mode.•VAUX powered board management controllers for flexible configuration and cable management.•EEPROM recovery option.•PCI Express power domain isolation.•Power consumption:o12 Volt: Max 14 Watt with 4 FireFlys attached.o 3.3 Volt: Max 3.3 Watto 3.3 Volt Aux: Max 1 Watto Port power (per cable port): 3.3 Volt +/- 5%, 0.6 A•Operational Environmento Operating Temperature: 0°C - 55°C (32°F - 131°F), Air Flow: 150 LFMo Relative Humidity: 5% - 95% (non- condensing)•Regulatoryo CEo Compliant to EN-55022 (2010), EN 55024 (2010), Class A.o RoHSo FCC Class A.o WEEE•Safety Standardso UL 62368-1 and CAN/CSA C22.2 No. 62368-1-14MTBF by Temperature and EnvironmentThe MTBF (in hours) for the PXH840 can be found in the table below. The numbers are calculated using the Telcordia SR-Table 1: MTBF vs. Temperature and EnvironmentPackagingThe PXH840 includes the following components.•PXH840 Adapter Board with a full height PCIe bracket mounted•Anti-static bag•Getting started guide with serial number for quick download of Dolphins eXpressWare PCIe software.Pre-Installation QuestionsCertain steps should be taken prior to installing the PXH840. You should determine the following configuration requirements.•Which PCIe slot and system will the card be installed in?•What is the speed and link width of the slot that the card will be installed in?•What is the operating environment in which the card will be installed?•What width and length of cables will be used?•Proper operational conditions, temperature, air-flow.PCIe Slot determinationThe PXH840 supports PCIe Gen1, Gen2 and Gen3 speeds and x1, x2, x4, x8 and x16 link-widths. The slot width and speed will affect the performance of the card. The card can be physically installed in an x4, x8 or x16 connector. The card will auto configure to the slot speed and width.•Install the board in a slot connecting directly to the CPU for optimal shared memory performance.•Install the board behind a PCIe switch in the IO system for optimal PCIe peer to peer performance (e.g. between GPUs, FPGAs)TIP:After installing the eXpressWare software, run the “sisci_benchmarks” benchm ark suite to verify the expected performance. Please contact Dolphin support if you need assistance to reach the expected performance.PXH840 ConfigurationThe PXH840 has a DIP switch bank to control the main configuration of the card. The DIP switch labeled SW1 can be found close to the upper edge of the board. The default DIP switch setting is single NTB link x16 operations. Alternative NTB configuration settings is two x8 links.Operating environmentTo maximize life time for the product and maintain the warranty, please honor the specified operating temperature and make sure the specified air flow is present. Special care should be considered when PXH840 is used in office type cabinets in combination with other high energy consuming PCIe devices, e.g. not active cooled GPUs:Operating Temperature: 0°C - 55°C (32°F - 131°F), Air Flow: 150 LFMOperating Temperature with AOC: 0°C - 45°C (32°F - 113°F), Air Flow: 150 LFMRelative Humidity: 5% - 95% (non- condensing)TIP: After installing the Dolphin eXpressWare software, you can use the tool dis_diag to determine the actual board temperatures. Cable ConnectionsThe PXH840 is designed for Samtec FireFly optical engines. The card supports any length up to 100 meters without any special PCIe tuning.Transparent operation.The PXH840 variants are designed for NTB operation. The PXH842 is a PCI Express Gen3 x16 Transparent Host and Target card for PCIe IO expansion applications. Please consult the PXH842 users guide for details.InstallationStep 1 - Unpack boardThe PXH840 card is shipped in an anti-static bag to prevent static electricity damage. The card should only be removed from thebag after ensuring that anti-static precautions are taken. Static electricity from your clothes or work environment candamage your PCI Express adapter card or your PC. Always wear a grounded anti-static wrist strap while opening thePC and when the PXH840 is removed from the anti-static bag.Step 3 - Configure the board for proper operationThe PXH840 board support several NTB use-cases and must be configured using the DIP Switch to meet your specific use case.NTB Configuration settingsDIP switch settings for the NTB use cases, two node x16 or three node x8. These settings must be applied to all cards in the PCIe network.Step 4 - Install the Adapter CardBefore installing the adapter card, make sure you are properly grounded to avoid static discharges that may destroy your computer or the adapter card. Ensure you are properly grounded before opening your computer or the anti-static bagcontaining the PXH840. Please follow your computer’s or expansion chassis manual on how to install a PCI Expresscard.The PXH840 Adapter card can be installed into any PCI Express x16 slot. The PXH840 supports PCI Express Gen1, Gen2 and Gen3 signaling. NOTE: A Gen3 slot is recommended as it typically doubles the performance compared to a Gen2 slot. The PXH840 is an x16 card, so maximum performance will only be attained if the slot provides full electrical x16signaling.The PXH840 supports hosts using either spread spectrum or constant frequency clocking. The card implements clock isolation.Step 5 - Installing and Removing CablesInstalling and removing cables in NTB mode can be done while the systems are running. Hot plugging / removing cablesare fully supported. The fiber optic cable(s) are connected to the MPO connector(s) found on the PCIe bracket. Thebracket will have one or two, single or dual MPO connectors depending on the board configuration.Connecting CablesPlease carefully install the fiber patch cable connector into the connector housing on the PXH840 adapter card. To installthe cable, remove the protective cover on both the cable and the card, match the cable house keying with the MPOconnector on the PXH840 adapter card and use light pressure to insert the connector until it is latched. Cables shouldalways use strain relief to protect the connected equipment from excessive force on the cable. This is especiallyimportant for cables between racks. Please always save the protective covers for future use if the cable is disconnectedfrom the card.Disconnecting CablesPlease carefully pull the release tab to release the cable from the locking. Always replace the protective cover on both thecard and the cable after disconnecting the cable.Step 6 – Installing the Dolphin eXpressWare softwareThe PXH840 adapter card in NTB mode is com pliant with Dolphin’s eXpressWare software package for the PX product line. Please visit/pxto register and download the latest documentation and software. It is recommended to follow the quick installation guide found on the web page above to install the software for your operating system.TIP: Dolphin provides software and documentation for several product families; please remember to select the PX product family before downloading. The PXH840 requires Dolphin software version DIS 5.5.0 or higher to operate.The software download requires a password to log in. The password will automatically be emailed to you if you follow the instructions found on the getting started document bundled with the adapter card. If you fail to provide the correct serial number found on the getting started document, your request will be managed manually.Step 5 - Verify InstallationThe PXH840 comes with a set of LEDs to verify proper configuration. Table 2: LED below is a chart of the LEDs and their corresponding meaning.The card has four bi-color Link-LEDs visible through the PCI Express front bracket.Please install the Dolphin eXpressWare software and run the included verification tests as suggested by the software installation procedure and documentation.Operation and MaintenanceConfiguration and DIP SwitchesThe PXH840 has one bank of 8 DIP switches. The default factory setting for the PXH840 is NTB mode, short cable, and single (up to x16) link connection.The PXH840 has DIP switches for setting special modes or operations. Please carefully read the documentation before modifying any DIP switch settings. Please pay close attention to ON and OFF positions written on the DIP switch. DIP Switch Bank – ConfigurationFigure 1: DIP Switch shows the DIP switch for the PXH840. It is used to configure the adapter card. Please leave all undocumented DIP switches in the default position. The table below shows all the various DIP switch settings for the PXH840.Note: Some DIP switch configuration options may be changed in the future versions. Please always consult the latest user guide for details.DIP no. Name DescriptionON OFF Default 1 OPT1 Reserved for future use. Must be off.TBD NTB mode OFF 2 OPT2 Reserved for future use. Must be off.TBDNormal operation OFF 3 OPT3 Enable dual x8 link configuration Dual x8 link on cable ports 1-2 and 3-4 Single x16 link, cable ports 1-4OFF 4 OPT4 Reserved for future use. Must be off.TBD Normal operation OFF 5 OPT5 Reserved for future use. Must be off. TBD Normal operation OFF 6 OPT6 TBDTBDNormal operation OFF 7 UTRES Holds the management processors in resetBoard management is held in reset Normal operation OFF 8SAFEEnables the card to boot if the EEPROM has been corruptedSafe EEPROMNormal operationOFFFigure 1: DIP SwitchNTB Use Cases Summary and SettingsUse Case A - 2 Node Configuration – NTB ModeEach node has a PXH840 adapter and a direct x4, x8 or x16 cable connection to the other system. This configuration is fully supported by all Dolphin software, from version DIS 5.5.0 and newer. Both PXH840 adapter cards operate in NTB mode. The DIP-Switch is set to all off.Connecting the cables for 2 Node Configurations, x16 linkTo establish an x16 link, a given port number should beconnected to the same port number on the other card.Table 4: Required x16 cabling. Always connect a cableA failure connecting any of the cables will cause the linkto re-train to x8 or x4.Connecting the cables for 2 Node Configurations, x8 linkTo establish an x8 link, please connect a cable from port L0+L1 to port L0+L1 on the other card.Connecting the cables for 2 Node Configurations, x4 linkTo establish an x4 link when in dual port mode, please connect port L0 to port L0.Use Case B - 3 Node Configuration – NTB ModeEach node has a PXH840 adapter and a direct x4 or x8 cable connection is used between all systems. All PXH840 adapter cards operate in NTB mode. The DIP-Switch OPT3 is ON to enable dual port x8 mode.Connecting the cables for 3 Node Configurations, x8 linkConnect the cables between two nodes as described above, connecting two nodes x8. Connect the third node to the two other cards using similar rules. Always connect L0 + L1 to L0 + L1 or L2 + L3Transparent Use CasesThe PXH840 is designed for NTB operations. The PXH842 should be used for Transparent use cases. Please reference the PXH842 Users Guide for more information.Firmware upgradeThe PXH840 design uses a microcontroller to implement configuration, management and maintenance functions. Dolphin may from time to time publish updated firmware for the microcontroller or EEPROM data for the card. Please note that standard PLX firmware tools cannot be used to upgrade the firmware. More information can be found in the PXH840 Firmware Release Note.Identifying the CardThe card has a label-sticker with the serial number in the format ‘PXH840-YY-ZZZZZZ’, where YY denotes the card revision (e.g. CC) and ZZZZZZ denotes the serialized production number (e.g. 012345) – this whole string makes up the serial number of the card (i.e. PXH840-CC-012345).You can also get this information using lspci in Linux:First, identify the devices for the Dolphin Host card:Than run lspci, and identify the card. It will show up as something likeSecond, doThis shows the card as revision 0x4243 (h exadecimal values of the ‘CC’ letters in the ASCII table), with the production number0x0000000A (0000010 in decimal).SupportMore information about the product, support and software download can be found at /px.html. Please ****************************************************.Technical InformationPlease reference the FireFly PCUO manual available from Samtec for more information.Compliance and Regulatory TestingEMC ComplianceThe Dolphin PCI Express PXH840 adapter is tested to the following relevant test standards for PCI Expresscards, telecommunication and industry equipment installed in a standard PC:EN 55022 (2010), Class BEN 55024 (2010), Class AThis does not ensure that it will comply with these standards in any random PC. It is the responsibility of the integrator to ensure that their products are compliant with all regulations where their product will be used.RoHS ComplianceThe Dolphin PXH840 is RoHS compliant. A Compliance certificate issued by the manufacturer isavailable upon request.FCC Class AThis equipment has been tested and found to comply with the limits for a Class A digital device, pursuant to part 15 ofthe FCC Rules.Laser Eye SafetyThe PXH84x series is classified as a Class 1 laser.Complies with FDA performance standards for laser products except for deviations pursuant to Laser NoticeNo. 50, dated June 24, 2007.Caution – Use of controls or adjustment or performance of procedures other than those specified hereinmay result in hazardous radiation exposure.Limited WarrantyDolphin Interconnect Solutions warrants this product to be free from manufacturing defects under the following terms: Warranty PeriodDolphin warrants the product for one (1) year from the date of purchase. Extended warranties are available. CoverageTo the extent permitted by applicable law, this warranty does not apply to:•Damages caused by operator error or non-compliance with instructions available for the product.•Use or attempt to use or program firmware not approved by Dolphin.•Damage which results from accident, abuse, misuse, neglected improper handling or improper installation; moisture, corrosive environments, high voltage surges, shipping or abnormal working conditions.•Damages which results from violating the specified operating or storage temperatures and airflow.•Damages caused by acts of nature, e.g. floods, storms, fire, or earthquakes.•Damage caused by any power source out of range or not provided with the product.•Normal wear and tear.•Attempts to repair, modify, open or upgrade the product by personnel or agents not authorized by Dolphin.•Products that have had the product serial number tampered with or removed.•Damage to the product caused by products not supplied by Dolphin.Service ProcedureIf the product proves defective during the Warranty Period, you should contact the seller that supplied you with the product, or if youpurchaseditdirectlyfromDolphin,************************************************************************. Products returned to Dolphin without a proper RMA number will not be serviced under this warranty.。
- 1、下载文档前请自行甄别文档内容的完整性,平台不提供额外的编辑、内容补充、找答案等附加服务。
- 2、"仅部分预览"的文档,不可在线预览部分如存在完整性等问题,可反馈申请退款(可完整预览的文档不适用该条件!)。
- 3、如文档侵犯您的权益,请联系客服反馈,我们会尽快为您处理(人工客服工作时间:9:00-18:30)。
首先打开模拟器,可以看到下图所示画面
先调整config
如图,“Enable Dual Core”使用双核,有多核cpu的最好开启
“Enable Idle Skipping”打开空闲跳帧。
不太清楚,貌似可以提高速度。
“Unlimited Jit Cache”允许无限缓存,对任斗X,路易吉的鬼屋和NGC版塞尔达曙光公主有用,可防止莫
名其妙的死机
“Enable Cheats”打开金手指,可以在游戏中调用
那些Advanced Settings可以无视,统统打勾“Confirm On Stop”停止模拟时确认。
推荐打开,因为我有过把“stop”当成“screen shot”按下去的经历……“Use Panic Handlers”可开可关,关掉后如果发生错误不会提示,直接抽风……但是对于马里奥和索尼克在北京奥运来说一定要关掉,否则你根本没法玩,一直跳错误框
再往下就没什么好说的了。
接下来是NGC设置:
什么也不用改动,跳过即可
接下来Wii设置
只有一项要注意:
“Enable Progressive Scan”就是逐行扫描,玩马车Wii 必须关掉(虽然关掉还是玩不了,但是可以通过网上下载存档解决)
下一个:Paths路径
选择红框中的Add…来添加一个游戏的文件夹(iso所在地)
Plugins没什么好说的
然后是Graphics
如图,如果要将游戏窗口和模拟器窗口合二为一可以勾选Child Window
Keep Aspect Ratio就是保持画面长宽比例,如果再勾选Crop的话就是允许比例稍微失真
不推荐钩选“OSD Hotkeys”,防止万一按到热键
其他随便设置
接下来高级设置:
基本上不要改动,可以改动Info的项目
另外,关于hacks:
这些游戏玩的时候需要选择各自的hacks,否则图形可能不正常
下一个,声音(DSP)
没什么好说的,右边是音量调节,其他么……不用改动。
然后,Pad
按照自己的喜好设定
“Disable”那个最好打勾,防止你在运行模拟器的时候干其它事情影响到游戏
Semi-press就是半按,顾名思义,按一半(即轻轻地按)
下一步,重点,Wii手柄设置:
由于许多游戏用到了nunchunk(鸡腿),所以在Emulated Extension(s)最好一直选Nunchunk
那个Real Wiimote下面的两个选项都不要勾
关于那个Sideways D-Pad,就是说有些游戏(如超级纸片马里奥)要横着拿手柄,就可以勾选这个,免去修改按键麻烦
接下来点左下角的Button Mapping
按照自己的喜好设置
注意:上方的Roll and pitch按照图中设置
接下来,回到主界面,右键一个Rom,选Properties
前面两个不说了,这个AR Codes就是金手指,选择Add…添加一个
上面写描述,下面写代码
然后看Info
可以看到游戏的所有信息。
如果在前面打开了“Enable Cheats”的话,在游戏中,
选择上面菜单的Tools,Action Replay Manager,如图
在描述的前面方框内打勾,然后点Apply Changes(!!重要,忘记了就没有任何效果),然后close,就可以了
关于录像:
现在Dolphin只能录制NGC游戏,方法:
1.选中一个游戏
2.选择菜单Emulation中的Start Recording…,选好位置,就开始录像了
3.要停止的话按Stop。