ASA防火墙初始化
ASA防火墙的基本配置
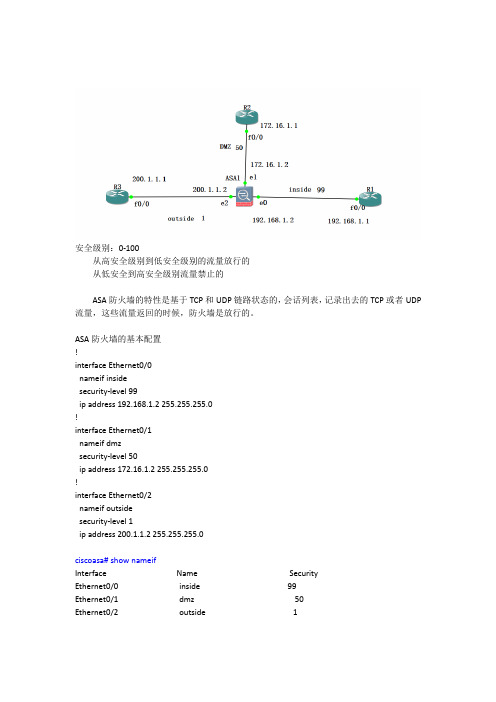
安全级别:0-100从高安全级别到低安全级别的流量放行的从低安全到高安全级别流量禁止的ASA防火墙的特性是基于TCP和UDP链路状态的,会话列表,记录出去的TCP或者UDP 流量,这些流量返回的时候,防火墙是放行的。
ASA防火墙的基本配置!interface Ethernet0/0nameif insidesecurity-level 99ip address 192.168.1.2 255.255.255.0!interface Ethernet0/1nameif dmzsecurity-level 50ip address 172.16.1.2 255.255.255.0!interface Ethernet0/2nameif outsidesecurity-level 1ip address 200.1.1.2 255.255.255.0ciscoasa# show nameifInterface Name SecurityEthernet0/0 inside 99Ethernet0/1 dmz 50Ethernet0/2 outside 12、路由器上配置配置接口地址路由--默认、静态配置VTY 远程登录R3:interface FastEthernet0/0ip address 200.1.1.1 255.255.255.0no shutdown配置去内网络的路由ip route 192.168.1.0 255.255.255.0 200.1.1.2配置去DMZ区域的路由ip route 172.161.0 255.255.255.0 200.1.1.2配置远程登录VTYR3(config)#line vty 0 2R3(config-line)#password 666R3(config-line)#loginR2:interface FastEthernet0/0ip address 172.16.1.1 255.255.255.0no shutdown配置默认路由IP route 0.0.0.0 0.0.0.0 172.16.1.2配置远程登录VTYR3(config)#line vty 0 2R3(config-line)#password 666R3(config-line)#loginR2:interface FastEthernet0/0ip address 192.168.1.1 255.255.255.0no shutdown配置默认路由IP route 0.0.0.0 0.0.0.0 192.168.1.2配置远程登录VTYR3(config)#line vty 0 2R3(config-line)#password 666R3(config-line)#loginR1可以Telnet R3 ,反过来不行R1不可以ping通R3防火墙放行流量防火墙能放行R3低安全级别的---R1高安全级别区域--Telnet流量ciscoasa(config)# access-list 100 permit tcp host 200.1.1.1 host 192.168.1.1 eq 23应用列表到接口ciscoasa(config)# access-group 100 in interface outside验证:防火墙能放行R3低安全级别的---R1高安全级别区域--ICMP流量ciscoasa(config)# access-list 100 permit icmp host 200.1.1.1 host 192.168.1.1验证。
思科ASA防火墙ASDM安装和配置
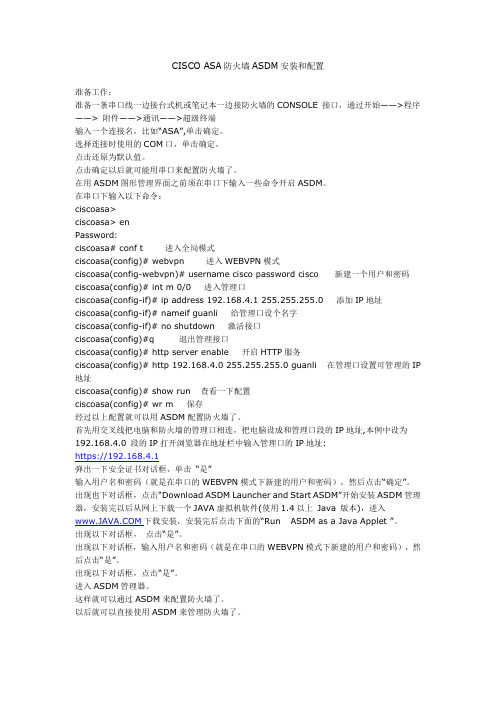
CISCO ASA防火墙ASDM安装和配置准备工作:准备一条串口线一边接台式机或笔记本一边接防火墙的CONSOLE 接口,通过开始——>程序——> 附件——>通讯——>超级终端输入一个连接名,比如“ASA”,单击确定。
选择连接时使用的COM口,单击确定。
点击还原为默认值。
点击确定以后就可能用串口来配置防火墙了。
在用ASDM图形管理界面之前须在串口下输入一些命令开启ASDM。
在串口下输入以下命令:ciscoasa>ciscoasa> enPassword:ciscoasa# conf t 进入全局模式ciscoasa(config)# webvpn 进入WEBVPN模式ciscoasa(config-webvpn)# username cisco password cisco 新建一个用户和密码ciscoasa(config)# int m 0/0 进入管理口ciscoasa(config-if)# ip address 192.168.4.1 255.255.255.0 添加IP地址ciscoasa(config-if)# nameif guanli 给管理口设个名字ciscoasa(config-if)# no shutdown 激活接口ciscoasa(config)#q 退出管理接口ciscoasa(config)# http server enable 开启HTTP服务ciscoasa(config)# http 192.168.4.0 255.255.255.0 guanli 在管理口设置可管理的IP 地址ciscoasa(config)# show run 查看一下配置ciscoasa(config)# wr m 保存经过以上配置就可以用ASDM配置防火墙了。
首先用交叉线把电脑和防火墙的管理口相连,把电脑设成和管理口段的IP地址,本例中设为192.168.4.0 段的IP打开浏览器在地址栏中输入管理口的IP地址:https://192.168.4.1弹出一下安全证书对话框,单击“是”输入用户名和密码(就是在串口的WEBVPN模式下新建的用户和密码),然后点击“确定”。
ASA-NAT配置指南

ASA配置指南,~、文档属性 文档历史; 序号 版本号修订日期 修订人 修订内容 1.郑鑫 文档初定 2. ·3.4.<)(, 属性 内容标题 思科ASA 防火墙配置指南文档传播范围发布日期目录一、文档说明 (5)二、基础配置 (6)(一)查看系统信息 (6)(二)版本区别简介 (6)《(三)接口配置与安全级别简介 (7)(四)NTP 配置 (8)(五)SNMP配置 (9)(六)telnet配置 (9)(七)SSH配置 (9)(八)配置管理 (10)(九)常用设备排错命令 (10)三、NAT静态方向写法 (12)(一)传统静态NAT配置方向写法 (12)(二)新静态NAT配置方向写法 (15)四、NAT配置举例 (16)"(一)Dynamic NAT (16)(二)Static NAT (27)(三)Identity NAT (34)(四)NAT免除 (40)(五)Twice NAT(策略NAT) (40)(六)NAT执行顺序 (52)五、状态化应用监控 (53)(一)状态化监控策略配置 (53)(二)路由、NAT、ACL、策略执行顺序 (57)六、failover (65)(一)配置failover (65)%(二)配置A/A (76)一、文档说明<本文档主要介绍思科ASA防火墙在版本之前与版本之后配置区别和常用的一些管理和运维命令,如:系统管理、防火墙策略、NAT、日志配置等。
思科ASA防火墙目前新出厂的设备都在以后,但有很多老的设备都在以前,所以本文档通过使用ASA 与这两个版本来介绍。
请读者打开文档中的显示批注功能,文档中有部分批注内容。
)二、基础配置(一)查看系统信息hostnat (inside,outside) staticobject networkhostnat (outside,inside) staticaccess-list inbound extended permit ip host host access-group inbound in interface outside@新命令的outbound和inbound流量动作是一样的:(inside,outside)针对outbound流量是源的转换,针对inbound流量是目的的转换(outside,inside)针对outbound流量是转换目的,针对inbound的是转换源。
思科ASA防火墙基本配置

思科ASA防火墙基本配置思科ASA防火墙基本配置Fire Wall 防火墙,它是一种位于内部网络与外部网络之间的网络安全系统,当然,防火墙也分软件防火墙与硬件防火墙。
硬件防火墙又分为:基于PC架构与基于ASIC芯片今天来聊一聊思科的'硬件防火墙 Cisco ASACisco ASA 防火墙产品线挺多:Cisco ASA5505 Cisco ASA5510 Cisco ASA5520 Cisco ASA5540 Cisco ASA5550 等等ASA 的基本配置步骤如下:配置主机名、域名hostname [hostname]domain-name xx.xxhostname Cisco-ASA 5520domain-name 配置登陆用户名密码password [password]enable password [password]配置接口、路由interface interface_namenameif [name]name 有三种接口类型 insdie outside dmzsecurity-level xx(数值)数值越大接口安全级别越高注:默认inside 100 ,outside 0 ,dmz 介于二者之间静态路由route interface_number network mask next-hop-addressroute outside 0.0.0.0 0.0.0.0 210.210.210.1配置远程管理接入Telnettelnet {network | ip-address } mask interface_nametelnet 192.168.1.0 255.255.255.0 insidetelnet 210.210.210.0 255.255.255.0 outsideSSHcrypto key generate rsa modulus {1024| 2048 }指定rsa系数,思科推荐1024ssh timeout minutesssh version version_numbercrypto key generate rsa modulus 1024ssh timeout 30ssh version 2配置 ASDM(自适应安全设备管理器)接入http server enbale port 启用功能http {networdk | ip_address } mask interface_nameasdm image disk0:/asdm_file_name 指定文件位置username user password password privilege 15NATnat-controlnat interface_name nat_id local_ip maskglobal interface_name nat_id {global-ip [global-ip] |interface} nat-controlnat inside 1 192.168.1.0 255.255.255.0global outside 1 interfaceglobal dmz 1 192.168.202.100-192.168.202.150ACLaccess-list list-name standad permit | deny ip maskaccess-list list-name extendad permit | deny protocol source-ip mask destnation-ip mask portaccess-group list-name in | out interface interface_name如果内网服务器需要以布到公网上staic real-interface mapped-interface mapped-ip real-ip staic (dmz,outside) 210.210.202.100 192.168.202.1保存配置wirte memory清除配置clear configure (all)【思科ASA防火墙基本配置】。
ciscoASA防火墙详细配置
access-list 102 extended permit icmp any any
------------------ 设 置
ACL 列表(允许 ICMP 全部通过)
access-list 102 extended permit ip any any 列表(允许所有 IP 全部通过) pager lines 24 mtu outside 1500 mtu inside 1500 icmp unreachable rate-limit 1 burst-size 1 no asdm history enable
address
218.16.37.222
255.255.255.192
------------------vlan2 配置 IP
asa5505(config)#show ip address vlan2 ------------------验证配置
5.端口加入 vlan
asa5505(config)# interface e0/3 ------------------进入接口 e0/3
cisco-asa-5505 基本配置
interface Vlan2nameif outside ----------------------------------------对端口命名外端口
security-level 0 ----------------------------------------设置端口等级
有地址)0 无最大会话数限制
access-group 102 in interface outside
------------------―――设置 ACL
列表绑定到外端口 端口绑定
route outside 0.0.0.0 0.0.0.0 x.x.x.x 1 路由
实验二 ASDM的基本设置
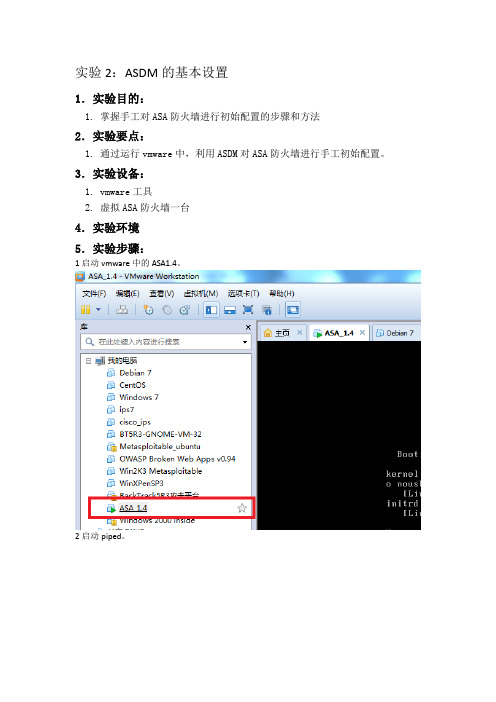
实验2:ASDM的基本设置1.实验目的:1. 掌握手工对ASA防火墙进行初始配置的步骤和方法2.实验要点:1. 通过运行vmware中,利用ASDM对ASA防火墙进行手工初始配置。
3.实验设备:1. vmware工具2. 虚拟ASA防火墙一台4.实验环境5.实验步骤:1启动vmware中的ASA1.4。
2启动piped。
3启动putty。
连接成功后显示如下界面在这里面输入yes后然后回车。
接下来要配置日期时间,IP地址,子网掩码。
Host name处填写你自己的学号,比如你的学号为123456789001,就填写123456789001。
Domain name处随意填写即可注意最下面的要输入yes后,单击回车键当前进入的是用户模式进入特权模式进入全局配置模式下面的IP地址*.*.*.*,这里要根据你的主机IP来设置,在主机里命令行使用ipconfig命令查看本机ip本机的ip为10.16.39.44,那么以下的*.*.*.*中的前三个部分就是10.16.39.最后一个部分为150+你的学号后两位。
例如你的学号为20,那么*.*.*.*处就填入10.16.39.170设置一个接口ciscoasa(config)#int E0/0ciscoasa(config-if)#ip address *.*.*.* 255.255.255.0ciscoasa(config-if)#nameif mangerciscoasa(config-if)#security-level 99ciscoasa(config-if)#no shutdownciscoasa(config-if)#exit在防火墙中配置如下ciscoasa(config)# webvpnciscoasa(config-webvpn)# username cisco password ciscociscoasa(config)# http server enable 开启HTTP服务ciscoasa(config)# http *.*.*.0 255.255.255.0 manger 在管理口设置可管理的IP地址启动asdm,device ip填写*.*.*.* , username为cisco,password 为cisco。
ASA防火墙疑难杂症与Cisco ASA 防火墙配置
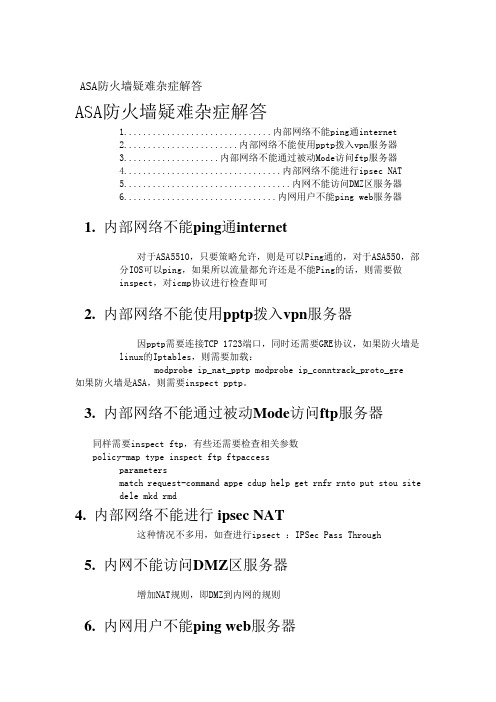
ASA防火墙疑难杂症解答ASA防火墙疑难杂症解答1...............................内部网络不能ping通internet2........................内部网络不能使用pptp拨入vpn服务器3....................内部网络不能通过被动Mode访问ftp服务器4.................................内部网络不能进行ipsec NAT5...................................内网不能访问DMZ区服务器6................................内网用户不能ping web服务器1. 内部网络不能ping通internet对于ASA5510,只要策略允许,则是可以Ping通的,对于ASA550,部分IOS可以ping,如果所以流量都允许还是不能Ping的话,则需要做inspect,对icmp协议进行检查即可2. 内部网络不能使用pptp拨入vpn服务器因pptp需要连接TCP 1723端口,同时还需要GRE协议,如果防火墙是linux的Iptables,则需要加载:modprobe ip_nat_pptp modprobe ip_conntrack_proto_gre如果防火墙是ASA,则需要inspect pptp。
3. 内部网络不能通过被动Mode访问ftp服务器同样需要inspect ftp,有些还需要检查相关参数policy-map type inspect ftp ftpaccessparametersmatch request-command appe cdup help get rnfr rnto put stou sitedele mkd rmd4. 内部网络不能进行ipsec NAT这种情况不多用,如查进行ipsect :IPSec Pass Through5. 内网不能访问DMZ区服务器增加NAT规则,即DMZ到内网的规则6. 内网用户不能ping web服务器如果内网中有一台web服务器,且已经配置了NAT,使用internet用户可以通过外部IP访问这台web服务器。
cisco_ASA防火墙恢复初始化
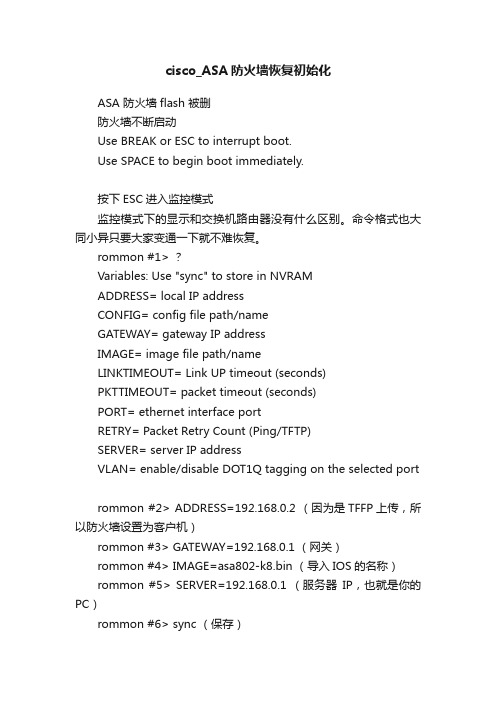
cisco_ASA防火墙恢复初始化ASA 防火墙flash 被删防火墙不断启动Use BREAK or ESC to interrupt boot.Use SPACE to begin boot immediately.按下ESC进入监控模式监控模式下的显示和交换机路由器没有什么区别。
命令格式也大同小异只要大家变通一下就不难恢复。
rommon #1> ?Variables: Use "sync" to store in NVRAMADDRESS= local IP addressCONFIG= config file path/nameGATEWAY= gateway IP addressIMAGE= image file path/nameLINKTIMEOUT= Link UP timeout (seconds)PKTTIMEOUT= packet timeout (seconds)PORT= ethernet interface portRETRY= Packet Retry Count (Ping/TFTP)SERVER= server IP addressVLAN= enable/disable DOT1Q tagging on the selected portrommon #2> ADDRESS=192.168.0.2 (因为是TFFP上传,所以防火墙设置为客户机)rommon #3> GATEWAY=192.168.0.1 (网关)rommon #4> IMAGE=asa802-k8.bin (导入IOS的名称)rommon #5> SERVER=192.168.0.1 (服务器IP,也就是你的PC)rommon #6> sync (保存)Updating NVRAM Parameters...rommon #7> ping 192.168.0.1Sending 20, 100-byte ICMP Echoes to 192.168.0.1, timeout is 4 seconds:Success rate is 95 percent (19/20)确认线路是否连通,开启TFTP软件(这里说明下我测试是ASA5505 所以接的E0/0口。
- 1、下载文档前请自行甄别文档内容的完整性,平台不提供额外的编辑、内容补充、找答案等附加服务。
- 2、"仅部分预览"的文档,不可在线预览部分如存在完整性等问题,可反馈申请退款(可完整预览的文档不适用该条件!)。
- 3、如文档侵犯您的权益,请联系客服反馈,我们会尽快为您处理(人工客服工作时间:9:00-18:30)。
startupconfig (default)
runningconfig
firewall#
write erase
• Clears the startup configuration
Fw1# write erase
© 2005 Cisco Systems, Inc. All rights reserved.
SNPA v4.0—3-16
Functions of the Security Appliance: Security Algorithm
• Implements stateful connection control through the security appliance.
• Allows one-way (outbound) connections with a minimum number of configuration changes. An outbound connection is a connection originating from a host on a more-protected interface and destined for a host on a less-protected network.
firewall> firewall# firewall<config># monitor>
© 2005 Cisco Systems, Inc. All rights reserved.
SNPA v4.0—3-3
Access Privilege Mode
Internet
firewall>
enable [priv_level]
• copy run start – show running-config – show startup-config
• write memory – write terminal
To save configuration changes: copy run start
startupconfig (saved)
firewall# dir
Directory of flash:/
3
-rw- 4902912
13:37:33 Jul 27 2005 pix-701.bin
4
-rw- 6748932
13:21:13 Jul 28 2005 asdm-501.bin
16128000 bytes total (4472832 bytes free)
SNPA v4.0—3-11
File System
Release 6.
and earlier
• Software Image • Configuration file • Private data file • PDM image • Crash
information
© 2005 Cisco Systems, Inc. All rights reserved.
iscoasa(config)# boot system disk0:/asa-802.bin
© 2005 Cisco Systems, Inc. All rights reserved.
SNPA v4.0—3-14
Verifying the Startup System Image
Boot Image flash:/pix-701.bin
firewall#
exit
• Used to exit from an access mode
Ciscoasa> enable password: ciscoasa# configure terminal ciscoasa(config)# exit ciscoasa# exit ciscoasa>
firewall(config)#
sh•owDisbpolaoyttvhearsystem boot image.
10.0.0.11
ciscoasa# show bootvar
BOOT variable = disk0:/asa-802.bin Current BOOT variable = disk0:/asa-802.bin CONFIG_FILE variable = Current CONFIG_FILE variable =
SNPA v4.0—3-2
Security Appliance Access Modes
A Cisco security appliance has four administrative access modes:
• Unprivileged • Privileged • Configuration • Monitor
• Used to control access to the privileged mode • Enables you to enter other access modes
pixfirewall> enable password: pixfirewall#
© 2005 Cisco Systems, Inc. All rights reserved.
pixfirewall > help enable
USAGE:
enable [<priv_level>]
DESCRIPTION:
enable
Turn on privileged commands
© 2005 Cisco Systems, Inc. All rights reserved.
SNPA v4.0—3-6
10.0.0.11
Release 7.
and later
• Software image • Configuration file • Private data • ASDM image • Backup image* • Backup
configuration file* • Virtual firewall
Configuration file*
* Space available
SNPA v4.0—3-12
Displaying Stored Files: System and Configuration
10.0.0.11
firewall(config)#
PIX Firewall Flash:
ASA Disk0: Disk1:
SNPA v4.0—3-10
Reload the Configuration: reload Command
firewall(config)#
reload [noconfirm] [cancel] [quick] [save-config] [max-hold-time [hh:]mm [{in [hh:]mm | {at hh:mm [{month day} | {day month}]}] [reason text]
SNPA v4.0—3-4
Access Configuration Mode: configure terminal Command
firewall#
configure terminal
• Used to start configuration mode to enter configuration commands from a terminal
• Reboots the security appliance and reloads the configuration
• Reboots can be scheduled
ciscoasa# reload Proceed with reload?[confirm] y Rebooting...
© 2005 Cisco Systems, Inc. All rights reserved.
runningconfig
Configuration Changes
ciscoasa# show running-config ciscoasa# show startup-config ciscoasa# write memory
© 2005 Cisco Systems, Inc. All rights reserved.
firewall(config)#
Boot [system | config} <url>
• Can store more than one system image and configuration file
• Designates which system image and startup configuration file to boot
dir [/recursive] [[•{dDiisspkla0y:t|hedidisrekc1to:r|yfcloanstehn:ts}. ][<path>}]]
ciscoasa# dir
Directory of flash:/
3
-rw- 4902912
13:37:33 Jul 27 2005 asa-802.bin
File Management
© 2005 Cisco Systems, Inc. All rights reserved.
SNPA v4.0—3-7
Viewing and Saving Your Configuration
The following commands enable you to view or save your configuration:
clear configure all
• Clears the running-configuration
© 2005 Cisco Systems, Inc. All rights reserved.