路灯说明书
猎鹰系列太阳能路灯说明书

外 壳 材 料/透 镜 材 料
压 铸 铝/ P C /不 锈 钢 螺 丝
充电模式
PWM
亮灯模式 光学透镜
自 动 模 式+省 电 模 式3 6 5天 亮 灯 专业路灯光学
灯 体 尺 寸( m m )
510*215*60 510*215*60 510*215*60 562*245*66 562*245*66
3、请勿私自拆装路灯任何部件
适用于道路照明/区域照明/乡村道路/庭院照明
本产品采用第五代自主研发太阳能控制系统;AI管理系统 结合前四代技术升级为AI管理系统功能实现(学习,管理,应用) 第五代AI管理系统8个突破: 1、解决仓储,运输周期长导致电池欠电。 2、解决春冬季日照时间短,提高电池续航时间。 3、解决充电转换效率低,提高10%效率。 4、/解决阴雨天弱光发电难题。 5、解决寒冷地区低温-40℃充放电难题。 6、解决雷暴释放强大的功率产生的危害,系统自动识别提前保护。 7、解决电池过充过放导致电池寿命短。 8、解决365天不断电,天天亮灯。
建议安装高度
3米 3-4米 4-5米 5-6米 6-8米
安装说明:
插好电源线
插好电源线 动现象; 2、使用前先阅读使用说明书,以免发生意外或损坏; 3、本产品为免维护产品,一般不需要维修,如维修请与本公司联系; 4、使用应认真检查,使用中发生异常现象,请与本公司联系; 5、使用时,表面有一定升温,属正常现象; 6、路灯为纸箱包装,在运输过程中不允许受剧烈机械冲击和曝晒雨淋,不得倒置,严防摔掷、翻 滚、重压; 7、路灯应储存在阴凉、干燥、洁净,的环境中;
猎鹰系列太阳能路灯
产品型号:HC-LY520
产品说明书
技术参数:
标称功率 色温
一体化太阳能路灯使用说明书
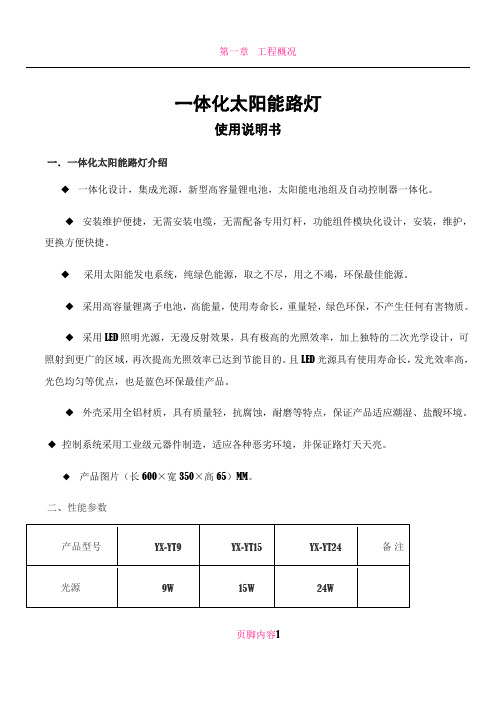
一体化太阳能路灯使用说明书一.一体化太阳能路灯介绍◆一体化设计,集成光源,新型高容量锂电池,太阳能电池组及自动控制器一体化。
◆安装维护便捷,无需安装电缆,无需配备专用灯杆,功能组件模块化设计,安装,维护,更换方便快捷。
◆采用太阳能发电系统,纯绿色能源,取之不尽,用之不竭,环保最佳能源。
◆采用高容量锂离子电池,高能量,使用寿命长,重量轻,绿色环保,不产生任何有害物质。
◆采用LED照明光源,无漫反射效果,具有极高的光照效率,加上独特的二次光学设计,可照射到更广的区域,再次提高光照效率已达到节能目的。
且LED光源具有使用寿命长,发光效率高,光色均匀等优点,也是蓝色环保最佳产品。
◆外壳采用全铝材质,具有质量轻,抗腐蚀,耐磨等特点,保证产品适应潮湿、盐酸环境。
◆控制系统采用工业级元器件制造,适应各种恶劣环境,并保证路灯天天亮。
◆产品图片(长600×宽350×高65)MM。
二、性能参数页脚内容1页脚内容2页脚内容3三、使用说明1.太阳能一体化路灯工作不能离开阳光,请根据安装地的日照强度或太阳能的年辐射总量来选择合适的产品型号。
在日照不足或连续阴雨天过长的地区,太阳能灯具的工作时间会缩短或不亮,此情况下建议选用带市电补偿,具有市电/太阳能双供电功能的太阳能一体化路灯。
2.太阳能一体化路灯采用长寿命锂离子电池作为储能器件,白天的充电条件为0~60℃,低于0℃时充电效率将会大大的降低,当温度回升后会恢复正常。
在夜晚放电条件为-20~60℃,超出此范围将破坏电池性能,会大大缩短放电时间。
使用本太阳能一体化路灯时请确认当地的极端气温不会超过上述条件。
3.太阳能一体化路灯在充满电后最长的存储期为六个月,如经过长时间的运输或存储,需要及时的进行检查,定期充电并记录,否则将会损坏电池。
4.如果在北半球安装本产品时,尽可能使太阳能板朝向南方,以获取最大的光照能量;如果是在南半球,安装时太阳板朝向北方。
同时需要避开房屋、树木等障碍物的阴影,这会降低太阳能板的发电效率,导致其工作时间被缩短。
一体化太阳能路灯使用说明书
一体化太阳能路灯使用说明书一.一体化太阳能路灯介绍◆一体化设计,集成光源,新型高容量锂电池,太阳能电池组及自动控制器一体化。
◆安装维护便捷,无需安装电缆,无需配备专用灯杆,功能组件模块化设计,安装,维护,更换方便快捷。
◆采用太阳能发电系统,纯绿色能源,取之不尽,用之不竭,环保最佳能源。
◆采用高容量锂离子电池,高能量,使用寿命长,重量轻,绿色环保,不产生任何有害物质。
◆采用LED照明光源,无漫反射效果,具有极高的光照效率,加上独特的二次光学设计,可照射到更广的区域,再次提高光照效率已达到节能目的。
且LED光源具有使用寿命长,发光效率高,光色均匀等优点,也是蓝色环保最佳产品。
◆外壳采用全铝材质,具有质量轻,抗腐蚀,耐磨等特点,保证产品适应潮湿、盐酸环境。
◆控制系统采用工业级元器件制造,适应各种恶劣环境,并保证路灯天天亮。
◆产品图片(长600×宽350×高65)MM。
二、性能参数页脚内容1页脚内容2页脚内容3三、使用说明1.太阳能一体化路灯工作不能离开阳光,请根据安装地的日照强度或太阳能的年辐射总量来选择合适的产品型号。
在日照不足或连续阴雨天过长的地区,太阳能灯具的工作时间会缩短或不亮,此情况下建议选用带市电补偿,具有市电/太阳能双供电功能的太阳能一体化路灯。
2.太阳能一体化路灯采用长寿命锂离子电池作为储能器件,白天的充电条件为0~60℃,低于0℃时充电效率将会大大的降低,当温度回升后会恢复正常。
在夜晚放电条件为-20~60℃,超出此范围将破坏电池性能,会大大缩短放电时间。
使用本太阳能一体化路灯时请确认当地的极端气温不会超过上述条件。
3.太阳能一体化路灯在充满电后最长的存储期为六个月,如经过长时间的运输或存储,需要及时的进行检查,定期充电并记录,否则将会损坏电池。
4.如果在北半球安装本产品时,尽可能使太阳能板朝向南方,以获取最大的光照能量;如果是在南半球,安装时太阳板朝向北方。
同时需要避开房屋、树木等障碍物的阴影,这会降低太阳能板的发电效率,导致其工作时间被缩短。
太阳能LED路灯产品说明书
太阳能LED路灯说明书目录一、产品介绍 (1)二、工作原理 (1)三、产品构造 (2)四、储存及工作环境 (3)五、LED灯具简介 (3)1、LED路灯技术参数 (3)2、LED路灯产品特点 (3)六、安装说明 (4)1、安装前须知事项 (4)2、安装前准备 (4)3、安装操作流程 (5)4、安装顺序 (8)5、安装要点 (9)6、注意事项 (10)七、故障处理 (11)一、产品介绍随着人们生活水平的提高和社会的不断发展,为使赐给大地光明的太阳在夜晚也能为人类照明,太阳能路灯应运而生,它采用优质高效太阳能硅片及钢化玻璃生产的太阳能电池供电,安全、可靠、寿命长。
优化低能耗控制电路、过充、过放保护、自动光度控制,性能可靠,蓄电池容量大,可在连续5~7个阴天正常工作。
高强度、耐高温、耐腐蚀的工程塑料灯罩透光率强,不锈钢结构,美观、坚实,安装、维修方便。
太阳能LED路灯白天利用太阳能电池板将太阳能转换成电能给蓄电池充电,晚上蓄电池放电使LED灯发光工作,属于当今社会大力提倡利用的绿色能源产品。
广泛应用于城市道路、小区道路、工业园区、景观亮化、旅游风景区、公园、庭院绿化带、广场、步行街、健身休闲广场等场所。
二、工作原理系统工作原理,利用光生伏特效应原理制成的太阳能电池板白天电池板接收太阳辐射能并转化为电能输出,经过充放电控制器储存在蓄电池中,当夜幕降临时或灯具周围的光照程度较低时,蓄电池提供电力给LED路灯负载。
太阳能路灯主要由LED光源(含驱动)、太阳能电池板、蓄电池(包括蓄电池埋地箱)、太阳能路灯控制器(包括控制箱)、路灯灯杆(含基础)及辅料线材等几部分构成。
太阳能路灯在晴天利用太阳光照发电,产生电能。
控制器对蓄电池的过充、过放进行保护,并对光源的开启和亮灯时间进行控制。
三、产品构造四、储存及工作环境1、储存要求(1)空气流通,灰尘少;(2)环境温度:-30℃~+60℃;(3)相对湿度低于90%,不易结冰霜;(4)远离腐蚀性物质;(5)如长期闲置,需每月充放电一次。
太阳能路灯说明书完整版

太阳能路灯说明书 HEN system office room 【HEN16H-HENS2AHENS8Q8-HENH1688】太阳能路灯说明书TYN-012目录产品说明产品介绍 (3)工作原理 (3)产品质保 (3)免责条款 (3)产品构造主要部件 (4)产品清单 (6)储存及工作环境 (7)主要部件简介 (7)安装说明安装前须知事项 (8)安装前准备 (9)安装操作流程 (11)安装注意 (12)注意项目 (12)安装顺序 (12)安装手册选址 (12)地基 (12)路灯安装太阳能板的安装 (13)LED 灯的安装 (13)控制器的安装 (13)蓄电池的安装 (13)各部件接线 (14)路灯吊装 (14)注意事项 (14)故障处理 (15)太阳能路灯介绍产品介绍LED太阳能路灯是以太阳能作为电能供给用来提供夜间道路照明,采用高光效LED光源设计,具有亮度高、绿色环保、安装简便、工作稳定可靠、不敷设电缆、不消耗常规能源,使用寿命长等优点,特别是本品控制器采用多重节能线路设计,拥有过充、过放、反接,自动光控装置,全面提升LED发光效率,极大节约电能。
本产品白天利用太阳能电池板太阳能转换成电能给蓄电池充电,晚上蓄电池放电使LED灯发光工作,属于当今社会大力提倡利用的绿色能源产品。
主要应用于城市道路、小区道路、工业园区、景观亮化、旅游风景区、公园、庭院绿化带、广场、步行街、健身休闲广场等场所。
工作原理系统工作原理,利用光生伏特效应原理制成的太阳能电池白天太阳能电池板接收太阳辐射能并转化为电能转化为电能输出,经过充放电控制器储存在蓄电池中,夜晚当照度逐渐降低至10lux左右、太阳能电池板开路电压5V左右,充放电控制器侦测到这一电压值后动作,蓄电池对灯头放电。
太阳能路灯主要由太阳能电池组件、、太阳能控制器、免维护蓄电池、LED路灯、灯杆和结构件等组成。
太阳能路灯在晴天利用太阳光照发电,产生电能。
控制器对蓄电池的过充、过放进行保护,并对光源的开启和亮灯时间进行控制产品质保产品保修非自然灾害及人为过失引起的产品质量问题,公司对整套太阳能路灯各主要部件保修如下:蓄电池:3 年LED 路灯:3 年太阳能板:3 年控制器:3年免责条款a.公司对因地震、洪水、雷电等自然灾害,不是因为公司的责任而发生的火灾,第三方操作、失盗、损坏、意外事故或因在不正常情况下使用(如不正确的操作,误操作或其它问题)引起的损失不承担任何责任。
FS-S300W太阳能路灯用户手册说明书

ISO9001:2000 CertifiedFS-S300W Solar Street LightUser Manual DONGGUAN SUNWORTH SOLAR ENERGY CO.,LTD【Contents】I Accessories List (2)II Summary (3)Based on the working principle of Solar Power System, the Solar Street Light is widely applied to provide illumination for roads, social community, park and the like. The Solar Street Light has the advantages of easy installation, stable working, energy saving, and long life-time, and to beautify the city by wire-free, maintenance-free and environmental-free. Nowadays, the green energy source is widely advocated in the whole society. III Working principle (3)Ⅳ、Attention (4)Ⅴ、Installation and Usage (5)5.1、Installation for Lamp (5)5.1.1、Cautions (5)5.1.2、Installation Step (5)5.2、Installation for Solar Panel (6)5.2.1、Attention (6)5.3. Installation of Control Box (8)5.3.1 Cautions: (8)5.3.2 Installation step of Control Box (9)5.4. Solar Street Light Construction Drawing (9)5.5 Diagram of Electrical Connection (9)5.6、Usage (12)5.6.1、 Notice : (12)5.6.2、 Usage (12)Ⅵ Technical Index (12)Ⅷ、System Maintenance (13)1、Forbid opening the door of control box (13)2、Maintenance must be done by trained professional (13)Notes: Thank you for purchasing FS-S series Solar Lights. To ensure the safety of using these products, please peruse the User Manual before installation.I Accessories ListPlease check & ensure all accessories completed before installation.Packing ListItem No. PartSpecification/Model No.Qty Remarks1 SolarPanel FS-PV150W 2 150Wp/36V2 Storage battery100AH/12V 2Maintenance-free,lead-acid3 ControllerCML15-2.1-NL 124V/15A, with UserManual4 Pole 7.5m 15 Arm of Solar Light 1.2m 16 LampHead D10 1 IncludingR ectifier7 Low-power SodiumLamp 55W/24V DC 1Including SwingingRing and Bug-preventedplastic gasket8 Controller Box 500*230*650 1 Including Round Hoop9 Bracket of Solar Panel 7 parts 1 Refer to 5.2.110 Flange of bracket 400*400*370 111 Cable RVV 2.5*2 1 For Solar Panel12 Cable RVV 1.5*2 1 To connect load13 WireBVR 4 3To connect StorageBattery14 Bolts OuterHexagon,M12*259 For flange of bracket 15 Bolts and Nuts Outer Hexagon,M10*30816 Bolts and Nuts Inner Hexagon,M10*251617 Bolts and Nuts Outer Hexagon,M8*20818 Bolts and Nuts Outer Hexagon,M8*30 419 Bolts and Nuts Outer Hexagon,M10*50 4 For Solar Panel Bracket20 Bolts and Nuts Inner Hexagon,M6*2016 For Solar Panel21 Bolts and Nuts Outer Hexagon,M10*558 ForLampArm22 Bolts and Nuts Outer Hexagon,M12*40 4 For Controller Box23 Bolts “+”Head,M3*18 2 ForControllerM6 Inner HexangularWrench 124 Tools (free of charge)M10 Inner HexangularWrench114-17mm Open End Wrenches 1 17-19mm Open End Wrenches 1 Ø25 *500 Fire-retardant Conduit Pipe 2 Vaseline 1Auto-Paint 125 Materials (free ofcharge) Nylon Strapping 1II SummaryBased on the working principle of Solar Power System, the Solar Street Light is widely applied to provide illumination for roads, social community, park and the like. The Solar Street Light has the advantages of easy installation, stable working, energy saving, and long life-time, and to beautify the city by wire-free, maintenance-free and environmental-free. Nowadays, the green energy source is widely advocated in the whole society.III Working principleSolar Street Light is mainly composed of solar panel, controller, storage battery, lamp,and pole(please refer to the illustration 1).Illustration 1: Solar street light systemWorking principle: As illustration 1, solar panel converts ray energy to DC power and stores the power into battery via controller in daytime. At dusk, the load terminal of Controller will open automatically and the storage battery could supply power for Light during the set-up time period, and could be turned off while the time is up. Namely to charge in daytime and discharge in nighttime, and the Solar Street Light works everyday in cycles.Ⅳ、AttentionPlease read this User Manual carefully before using this Solar Street Light and keep this manual well.WarningPlease operate this products by professional personsz It is dangerous if operate incorrectlyDo not contact electricity while install,operate,set-up and maintain.z It could generate DC power when the Solar Panel with irradiation of sunshineor lamp-houses.z Please wear a pair of glove when check or maintain ,otherwise maybe get an electric shock when touch the solar panel or battery conductorz Please disconnect the input power supply when install or maintain in order to avoid getting an electric shock as the ballast output is high voltage electricity.z Please reserve ,move carefullyz The reservation environment temperature should be -20℃~50℃, relative humidity under 90% without bead;Isolate the erosive gas and liquid.z Please charge the battery termly which do not be used usually.z Please move carefully and avoid missing the accessories.z Please do not use this product for lighting at the place of high reliability requested.z It may happen life accident if the power output stability effected by weather.Ⅴ、Installation and Usage5.1、Installation for Lamp5.1.1、CautionsAttention as below:¾Suit the limitations of criterions and standards¾Suit the environment and climate¾Should be installed by professional designer and operator¾Pay attention to the security when install the Lamp Pole.¾Do not scrape the insulation layer and drag the cables¾Do not put the cables into the lamp arms and gaps¾Please make sure the pole is upright and stable , do not be loose and lean5.1.2、Installation Step1、Please put the solar panel cable and the loaded equipment cable into the pipe of the lamp pole and tie in order to avoid sliding when hanging2、Please put the lamp pole cable hole and the lamp arm cable hole in a line before screwing the arm lamp3、Please adjust the arm direction before screw the lamp pole into the ground4、Please check the screw fastness of the r ectifier, Lamp Tube Swinging Ring and Reflector before installing the lamp head5、Please adjust the lamp irradiation direction first and then screw the Lamp Head stably.6、Please put the bug prevented plastic gasket into the rump of lamp and inset the lamp tube into the lamp holder.7、Please pay attention to the r ectifier anode and cathode.Remark: May install the Lamp ,Solar Panel and Controller Box on the ground then hang up the lamp pole and adjust the bracket direction according to the spot status ,but please pay attention to protect the solar panel ,chimney and the glassware etc5.2、Installation for Solar Panel5.2.1、AttentionPlease pay attention as below¾Please cover the surface of the solar panel before installing because it could generate the electricity if the solar panel exposed in sunshine¾Do not touch the terminal of solar panel otherwise may get an electric shock¾Do not hurt the solar panel back¾Do not stand on the solar panel¾Do not mess the junction wires of solar panel in the gap of bracket and lamp pole.¾ 5.2.1、Installation Step for Solar PanelPlease install the solar panel bracket as below like Illustration 2 before installing the solar panelPic.2 Assembly Drawing of solar panel mounting bracketPart code Name Spec.QtyUnitRemark1 Flange of bracket 400×400×370 1 Pcs2 Crossbeam “匚”type×1180(L) 2 Pcs3 Cross mountingpicul“口”type×1384(L) 4Pcs4 Supportinggirder “∟”type×1180(L) 2 Pcs 5 Frontsupport “∟”type×640(L) 2 Pcs 6 Backsupport “∟”type×750(L) 2 Pcs 7 Supportingarm Ø48×470 2 Pcs 8 Supporting stand - 2 Pcsbase9 Pole - 1 Pcs10 Round hoop ofsupporting standbase- 2Pcs11 Bolts OuterHexagon,M12*259 PcsConnect1&912 Bolts and Nuts Outer Hexagon,M10*308SetConnect 2&113 Bolts and Nuts Inner Hexagon,M10*2516SetConnect 3&2,414 Bolts and Nuts Outer Hexagon,M8*208 SetConnect5,6&4,815 Bolts and Nuts Outer Hexagon,M10*504SetConnect 716 Bolts and Nuts Outer Hexagon,M8*30 4 SetConnect8&10 17 Bolts and Nuts Inner Hexagon,M6*2016 Set Fix solar panel Solar panel mounting bracket assembly step:1. First, lie down the pole on the ground, use M10*30 and M10*25 bolts and nuts fix well part code#1/2/3/4(match the part code in the drawing) on the top of the pole.2. Let the cable of solar panel go through the flange of bracket.3. Adjust the incline direction of bracket, face to the right south, use M12*25 bolt fix well the flange of bracket.4. Then install part code #5/6/7/8/10(match the part code in the drawing)5. Screw well all the bolts and nuts on the bracket.6. Open the junction box of solar panel before install solar panel.7. Install solar panel with M6*20 bolts (add one flat gasket on upper and lower surfaces),please set the junction box direction of two 150W solar panels on the same side.8. Connect the cable to solar panel, please take note of the “+””_”polarity in right connection, same color of the wire should be the same polarity (see 5, 4)9. Close the cover of junction box, tidy up and enlace the cables.5.3. Installation of Control Box5.3.1 Cautions:Since the controller and battery will be placed in Controller Box, please pay attention to the following items when install:¾Prevent the short circuit of battery connection. Do not converse connections.¾Be careful do not damage the battery when open the Control Box, do not draw the battery’s terminals.¾Fast connection of controller and battery, keep clean on the connection areas.¾Connect batteries first, then connect solar panel and loads.¾When connect batteries, please connect the battery in series first, then connect to controller, finally connect to the terminals of batteries.5.3.2 Installation step of Control Box1. Install Control Box on the platform of lamp pole with round hoop.2. Put batteries into Control Box, place terminals on the out side.3. Install controller, wipe up the terminals of batteries to be metal brightness, connect cables according to drawing 3(pay attention to “+””_” polarity.)4. Daub anticorrosive Vaseline on the terminals of batteries.5. Install shelf bar of batteries.5.4. Solar Street Light Construction DrawingAfter finish above installation steps, the whole construction is as drawing 45.5 Diagram of Electrical ConnectionThis model of solar street light uses 2pcs of 36V/175W solar panel in parallel connection to form 36V/300W PV array. Use 2pcs of 12v/100Ah battery in series connection to form 24V/100AH battery bank. Electrical connection diagram is as drawing 3.Battery 1Battery 2 Drawing 4 electrical connection diagramDrawing 4 construction drawing of solar street lightPart code Namepanel1 Solar2 Mounting bracket of solar panelarm3 Lamp4 Lampshade5 ControlBox6 Pole5.6、Usage5.6.1、 Notice :¾Don’t open the cover of junction box in order to avoid electric shock.¾Don’t touch PV panel avoid scald¾Don’t take apart or reassemble battery array¾Don’t connect load to battery array for long time¾Don’t open electric control box avoid any damage of inside component.5.6.2、 UsageDetail refer to controller manualⅥ Technical IndexHeight: 7.5mPV panel:300Wp/36VBattery: 24V100AhController: 24V15ALight source:55WV oltage:DC24VSwitch lux :<40LuxWorking temperature: –20℃– +65℃Defend grade: IP 55Wind-throw resistance 120Km/hⅦ、Malfunction or Solution1、First time to usage , battery array should be continuous charged above two sunny days.2、In continuous rainy days, it is normal if solar light may not operate.4、Solar Street light only start to operate when the ray is weak in the evening. It is normalthat solar light will not operate when the ray is strong.5、No output, please check whether any loose of load cable5、When the battery array Can not be charged , please check the connection of all cables in battery and PV panel.6、Other malfunction or solution detail refer to this solar street controller manual7、Solar light still can not operate if you try all the above solutions. Please contact us immediatelyⅧ、System Maintenance1、Forbid opening the door of control box .2、Maintenance must be done by trained professional.3、Professional should check system status regularly and should keep well of the operation record.4、If any failure, professional should solve problem and fill maintenance record.5、Control box inside should keep good ventilation and cleanness. Well done of Rat proof, prevention of burglary and fire proof, dust proof.6、Professional maintains system regularly as per the following item and write down record. If local environment is bad, maintenance should be high frequency than normal. Maintenance item Time Check any broken falling object after windstorm disasterCheck PV Panel Annually Check any corrosion or loose of bracket Annually Check inside cleanness of controller box; please keep clean if it isdirty.Semiannually Check any loose of the connection of all cables Annually When float charging, check total voltage, single voltage, andsurfaceSemiannually Check any loose of connection for battery and controller Annuallykeep clean on the surface of PV panel According to situation7、Maintenance for battery array. Detail refer to battery array manual8、Please contact us immediately if any failure out of your control .Thanks to your commentsDisclaimer1. This product is suitable for the area with 2000 hours solar radiation per year.2. The product has different performance in different area or seasons.3. Cause any damage or accident under any unusual condition, we do not undertake the responsibility.4. The right of final interpretation belongs to Dongguan Sun Worth Solar Energy Co., Ltd.。
太阳能LED路灯产品说明书

太阳能LED路灯说明书目录一、产品介绍 (1)二、工作原理 (1)三、产品构造 (2)四、储存及工作环境 (3)五、LED灯具简介 (3)1、LED路灯技术参数 (3)2、LED路灯产品特点 (3)六、安装说明 (4)1、安装前须知事项 (4)2、安装前准备 (4)3、安装操作流程 (5)4、安装顺序 (8)5、安装要点 (9)6、注意事项 (10)七、故障处理 (11)一、产品介绍随着人们生活水平的提高和社会的不断发展,为使赐给大地光明的太阳在夜晚也能为人类照明,太阳能路灯应运而生,它采用优质高效太阳能硅片及钢化玻璃生产的太阳能电池供电,安全、可靠、寿命长。
优化低能耗控制电路、过充、过放保护、自动光度控制,性能可靠,蓄电池容量大,可在连续5~7个阴天正常工作。
高强度、耐高温、耐腐蚀的工程塑料灯罩透光率强,不锈钢结构,美观、坚实,安装、维修方便。
太阳能LED路灯白天利用太阳能电池板将太阳能转换成电能给蓄电池充电,晚上蓄电池放电使LED灯发光工作,属于当今社会大力提倡利用的绿色能源产品。
广泛应用于城市道路、小区道路、工业园区、景观亮化、旅游风景区、公园、庭院绿化带、广场、步行街、健身休闲广场等场所。
二、工作原理系统工作原理,利用光生伏特效应原理制成的太阳能电池板白天电池板接收太阳辐射能并转化为电能输出,经过充放电控制器储存在蓄电池中,当夜幕降临时或灯具周围的光照程度较低时,蓄电池提供电力给LED路灯负载。
太阳能路灯主要由LED光源(含驱动)、太阳能电池板、蓄电池(包括蓄电池埋地箱)、太阳能路灯控制器(包括控制箱)、路灯灯杆(含基础)及辅料线材等几部分构成。
太阳能路灯在晴天利用太阳光照发电,产生电能。
控制器对蓄电池的过充、过放进行保护,并对光源的开启和亮灯时间进行控制。
三、产品构造四、储存及工作环境1、储存要求(1)空气流通,灰尘少;(2)环境温度:-30℃~+60℃;(3)相对湿度低于90%,不易结冰霜;(4)远离腐蚀性物质;(5)如长期闲置,需每月充放电一次。
智能路灯操作手册
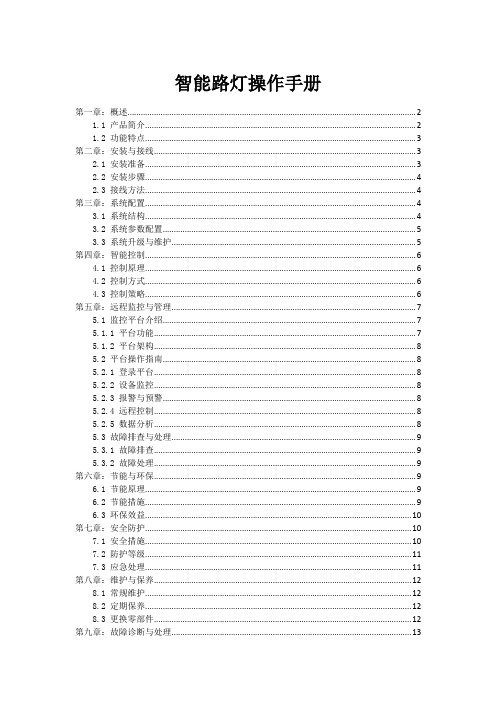
智能路灯操作手册第一章:概述 (2)1.1 产品简介 (2)1.2 功能特点 (3)第二章:安装与接线 (3)2.1 安装准备 (3)2.2 安装步骤 (4)2.3 接线方法 (4)第三章:系统配置 (4)3.1 系统结构 (4)3.2 系统参数配置 (5)3.3 系统升级与维护 (5)第四章:智能控制 (6)4.1 控制原理 (6)4.2 控制方式 (6)4.3 控制策略 (6)第五章:远程监控与管理 (7)5.1 监控平台介绍 (7)5.1.1 平台功能 (7)5.1.2 平台架构 (8)5.2 平台操作指南 (8)5.2.1 登录平台 (8)5.2.2 设备监控 (8)5.2.3 报警与预警 (8)5.2.4 远程控制 (8)5.2.5 数据分析 (8)5.3 故障排查与处理 (9)5.3.1 故障排查 (9)5.3.2 故障处理 (9)第六章:节能与环保 (9)6.1 节能原理 (9)6.2 节能措施 (9)6.3 环保效益 (10)第七章:安全防护 (10)7.1 安全措施 (10)7.2 防护等级 (11)7.3 应急处理 (11)第八章:维护与保养 (12)8.1 常规维护 (12)8.2 定期保养 (12)8.3 更换零部件 (12)第九章:故障诊断与处理 (13)9.1 故障分类 (13)9.2 故障诊断方法 (13)9.3 故障处理流程 (14)第十章:用户操作指南 (14)10.1 使用前的准备 (14)10.1.1 硬件要求 (14)10.1.2 软件要求 (14)10.1.3 系统权限 (14)10.2 基本操作 (15)10.2.1 登录系统 (15)10.2.2 主界面 (15)10.2.3 数据查询 (15)10.2.4 数据录入 (15)10.2.5 数据修改与删除 (15)10.3 高级功能 (15)10.3.1 数据导出 (15)10.3.2 数据备份与恢复 (15)10.3.3 权限管理 (15)10.3.4 系统设置 (16)10.3.5 帮助文档 (16)第十一章:技术支持与售后服务 (16)11.1 技术支持 (16)11.2 售后服务 (16)11.3 联系方式 (17)第十二章:附录 (17)12.1 常见问题解答 (17)12.1.1 页面加载过程相关问题 (17)12.1.2 功能优化相关问题 (17)12.1.3 安全相关问题 (18)12.2 技术参数 (18)12.2.1 页面加载功能参数 (18)12.2.2 功能优化参数 (18)12.2.3 安全功能参数 (18)12.3 相关标准与法规 (18)第一章:概述1.1 产品简介本书将向您详细介绍一款创新性的产品——【产品名称】。
- 1、下载文档前请自行甄别文档内容的完整性,平台不提供额外的编辑、内容补充、找答案等附加服务。
- 2、"仅部分预览"的文档,不可在线预览部分如存在完整性等问题,可反馈申请退款(可完整预览的文档不适用该条件!)。
- 3、如文档侵犯您的权益,请联系客服反馈,我们会尽快为您处理(人工客服工作时间:9:00-18:30)。
路灯说明书
公司标准化编码 [QQX96QT-XQQB89Q8-NQQJ6Q8-MQM9N]
13米LED路灯使用说明书
1、产品特点
寿命长:不低于50000hr
响应时间短:瞬间点亮
节能:同照度下耗能比高压钠灯节能75﹪以上
光源特点:固体发光,无紫外、红外辐射,无闪烁
结构特点:高导热系数的铝合金散热器,确保LED光源散热良好,有效降低光衰并保障LED使用寿命
显色性好:Ra>75,远高于高压钠灯。
光效高:灯具光效大于110Lm/W
色温:5000K
配光特性:60*165°发光,配光均匀合理,光源利用率高。
驱动特性:驱动电路采用高效低耗电路设计,性能优越更节能。
防雷、过流等多重异常保护功能,确保灯具稳定运行其它特性:无高压,不吸附粉尘,避免高压吸附的粉尘使灯罩变黑,
无高温不会导致灯罩长时间工作发黄降低亮度执行标准:灯具执行《道路与街道照明灯具安全要求》
国际水平:产品符合CE标准。
绿色产品:符合RoHS标准,对环境没有任何污染。
防护等级:IP65。
2 、产品应用
交流路灯:主要应用于各类道路照明:主干道、次干道、支路、城市道路,或其它居住区、工业区、商业区、广场、公园等固定场所照明。
直流路灯:主要应用于太阳能配套道路照明,风光互补道路照明及其它直流照明场所。
3、主要性能和参数
3.1、AC路灯基本参数见下表:
、色温与显色指数
色温5000K,显色指数大于75
4、使用与安装
本产品使用环境温度范围为-40℃~60℃。
安装前先确认所提供供电系统输出电压与机种的适用电压相匹配。
安装方法:
4.3.1 打开包装箱,取出灯体,将电缆线引出整理顺畅。
注意:灯体外部电缆仅做电器连接使用,严禁外力牵引。
4.3.2 将路灯输入电缆与电源电缆按如下示意图方法正确联接好。
具体安装步骤见下图图一、图二。
4.3.3 将直径为60mm路灯支撑杆穿入灯孔,并用紧固螺杆将其固定。
检查无误后,接通电源,灯具即可工作。
5、运输和贮存
在运输过程中严禁剧烈机械冲击和曝晒雨淋,严防摔掷、翻滚、重压。
路灯应贮存在阴凉、干燥、洁净的环境中、贮存温度-40~70℃。
6、开箱及检查
先检查路灯外包装箱是否完好;
检查路灯外观各部位是否完整,路灯各部件是否有破损,松动或损坏现象。
确认附件齐全:
紧固螺丝 2个
说明书一份
合格证一张
保修卡一张
7、注意事项
使用前应详细阅读使用说明书,以便正确安装和正确连接电源。
使用前应该认真检查,使用中若发现异常现象,请与本公司联系。
使用时,灯具表面有一定升温,属正常现象。
灯具请勿私自拆解,否则视为自动放弃保修服务。
我司照明不对自然灾害,意外事故及其它非正常使用导致的损失承担责任。
8、安全警示
安装前确保路灯完好无缺方可安装使用。
严防路灯跌落和对路灯施加外力。
安装使用前应存放在阴凉、干燥、洁净的环境中,禁止放入水中或火中。
产品的安装及维护必须是具有相应资质的公司及技术人员进行。