LB2000四轮电动扫地机
电动扫地机使用说明书
电动扫地机使用说明书欢迎您购买本款电动扫地机,为了帮助您更好地使用和保养该产品,特为您提供本使用说明书。
请您在使用前仔细阅读以下内容。
如有任何疑问,请咨询相关专业人士。
一、产品概述本款电动扫地机是一款自动清扫设备,适用于室内地面的清洁工作。
采用先进的智能技术,具备扫地和吸尘两种功能,能够快速高效地清理室内杂物和灰尘。
二、安全须知1. 使用前,请确保电源插座与电动扫地机连接稳固,避免在工作过程中因电源断开而引发意外。
2. 切勿将电动扫地机放置在潮湿的环境下工作,以免发生电器短路或触电危险。
3. 使用时请注意周围安全,确保清洁区域内没有过多的障碍物,以免影响电动扫地机的工作效果。
4. 若发现电动扫地机出现异常声音、异味或其他异常情况,请立即停止使用并联系售后服务中心。
三、使用方法1. 首先,确认电动扫地机已经连接电源,待电源指示灯亮起后,可以开始工作。
2. 按下电动扫地机上的开关按钮,设备将开始工作,同时启动扫地和吸尘功能。
3. 在工作过程中,电动扫地机将自动沿着既定路线进行清扫。
请确保工作区域的门窗关闭,以防设备无法正常工作和意外跌落。
4. 清扫完成后,按下电动扫地机上的停止按钮,设备会停止工作并进入待机状态。
四、保养与维护1. 每次使用后,请清理电动扫地机的滚刷和吸尘器头部,避免堵塞影响下次清洁效果。
2. 定期清空电动扫地机的垃圾箱,并清理滤网,保持吸尘功能的高效运行。
3. 如电动扫地机长时间未使用,请将其放置在干燥通风的地方,并断开电源,以延长产品寿命。
4. 若电动扫地机遇到故障或需要更换配件,请联系售后服务中心进行维修或更换。
五、注意事项1. 请避免将电动扫地机使用在地毯、浅色地板或不平整的地面上,以免刮伤或损坏地面。
2. 本产品仅适用于室内使用,切勿将其带至户外或使用在潮湿环境中,以免损坏设备或引发安全隐患。
3. 如需清理脱落的大块物体,请先手动将其清除,以免堵塞电动扫地机的工作部件。
六、售后服务如遇到任何使用问题或故障,请及时联系我们的售后服务中心,我们将尽快为您提供解决方案和技术支持。
电动扫地机器人说明书详细介绍扫地机器人的操作和维护

电动扫地机器人说明书详细介绍扫地机器人的操作和维护电动扫地机器人说明书一、操作说明1. 开机与关机电动扫地机器人的开机与关机非常简单。
只需按下机器人背部的电源开关按钮即可启动或关闭机器人。
2. 清洁模式选择本扫地机器人拥有多种清洁模式可供选择,如自动清洁、边角清洁、定点清洁等。
用户可按照需要选择不同的模式。
3. 预约清洁机器人还支持预约清洁功能,用户可按需设定机器人的工作时间。
只需按压遥控器上的预约按键,然后设置清洁时间即可。
4. 避障与自主导航电动扫地机器人配备了智能避障和自主导航系统,能够自动辨别障碍物并绕过,确保清洁过程中的安全性和高效率。
5. 污垢感应与自动回充污垢传感器能够主动探测并识别地面上的污垢程度,并根据需要自动增加清洁力度。
当电量不足时,机器人会自动返回充电座充电。
二、维护说明1. 清洁滚刷和毛刷定期清洁滚刷和毛刷,以免因长时间使用而堵塞或损坏。
可以使用工具将其取出,然后清洁并确保无异物残留。
2. 清空集尘盒当集尘盒显示已满时,应及时清空集尘盒。
取下集尘盒,将里面的灰尘和杂物倒入垃圾袋中,再重新安装好集尘盒。
3. 滤网清洗与更换清洁机器人时,应定期清洗滤网以避免堵塞,影响清洁效果。
如滤网无法清洗或清洗后仍不能恢复正常使用,应及时更换新的滤网。
4. 保持机器人干燥使用后应将机器人放置在干燥通风的地方,防止雨水或其他液体进入机器人内部,以免损坏电路。
5. 定期检查电池请定期检查电动扫地机器人的电池状态,确保其电量充足。
如发现电池损坏或电量不足,应及时更换或充电。
三、注意事项1. 避免长时间无人监管电动扫地机器人具备智能避障功能,但仍需避免长时间无人监管的情况。
尤其是在清洁过程中,建议用户待在旁边以防止意外发生。
2. 远离楼梯和陡峭地形机器人在清洁过程中请尽量避免接触楼梯和其他陡峭地形,以免发生跌落或碰撞事故。
3. 避免与其他家电干扰电动扫地机器人在清洁过程中会产生一定的噪音,因此请尽量避免与其他家电同时运行,以免相互干扰影响正常使用。
Swisher 20020 路面拾尘器 路面梳理器说明书
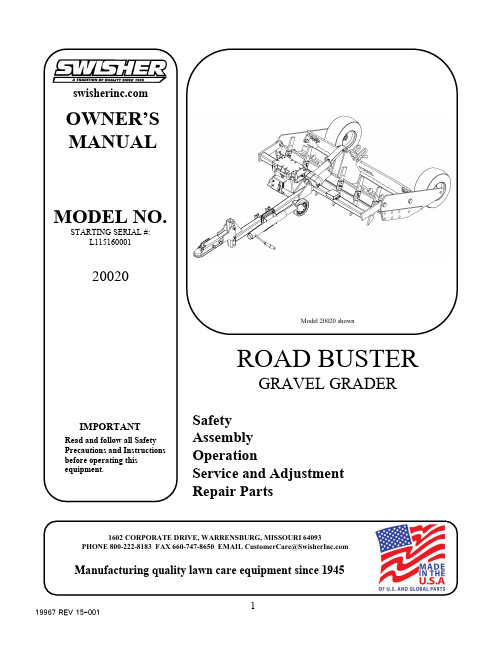
OWNER’SModel 20020 shownROAD BUSTERɘɘɘɘɘɘɘLIMITED WARRANTYTABLE OF CONTENTS WARRANTY (2)SAFETY (3)TOWING (4)MAINTENANCE/STORAGE (5)TRANSMITTER/RECEIVER (6)ASSEMBLY..........................7-8POWER AND CHARGING.. (9)PARTS BREAKDOWN.................10-12 DECALS. (13)NOTES/MAINTENANCE LOG (13)SPECIFICATIONS (14)The manufacturer’s warranty to the original consumer purchaser is: This product is free from defects in materials and workmanship for the period's shown below beginning from the date of purchase by the original consumer purchaser. We will repair or replace, at our discretion, parts found to be defective due to materials or workmanship. This warranty is subject to the following limitations and exclusions:Materials and Workmanship 3 YearsCommercial Use The warranty period for this product when used for commercial or rentalis limited to 1 year from the date of original purchase.Limitation This warranty applies only to products which have been properlyassembled, adjusted, and operated in accordance with the instructionscontained within this manual. This warranty does not apply to anyproduct of Swisher that has been subject to alteration, misuse, abuse,improper assembly or installation, shipping damage or to normal wear ofproduct.Exclusions Excluded from this warranty are normal wear items, normal or routineadjustments, and normal or routine maintenance.In the event you have a claim under this warranty, you must return the product to an authorized service dealer. All transportation charges, damage, or loss incurred during transportation of parts submitted for replacement or repair under this warranty shall be borne by the purchaser. Should you have any questions concerning this warranty, please contact us toll-free at 1-800-222-8183. The model number, serial number, date of purchase, and the name of the authorized Swisher dealer from whom you purchased the splitter will be needed before any warranty claim can be processed.THIS WARRANTY DOES NOT APPLY TO ANY INCIDENTAL OR CONSEQUENTIAL DAMAGES AND ANY IMPLIED WARRANTIES ARE LIMITED TO THE SAME TIME PERIODS STATED HEREIN FOR ALL EXPRESSED WARRANTIES. Some states do not allow the limitation of consequential damages or limitations on how long an implied warranty may last, so the above limitations or exclusions may not apply to you. This warranty gives you specific legal rights and you may have other rights, which vary from state-to-state. This is a limited warranty as defined by the Magnuson-Moss Act of 1975.• Read and understand the manual. Learn to operate this equipment in a safe manner. Familiarize yourself with all of the controls in a safe environment before starting to work with this machine. •DO NOT under any circumstances alter this Grader. This equipment was designed and engineered in accordance with operating instructions. Altering this equipment, or using this equipment in such a way as to circumvent its design capabilities and capacities, could result in serious injury or fatality and WILL VOID THE WARRANTY.• Allow ONLY responsible adults who have read this manual to operate this machine. NEVER allow children to operate this machine.• NEVER operate or allow someone to operate this equipment while under the influence of alcohol, drugs or medication. Being coherent is essential for safety.• NEVER use grader for any other purpose than grading non-public roadways/driveways. Any other usecan result in injury. Your grader is a precision piece of power equipment, not a toy. Therefore, Read this manual completely. This machine can amputate hands, feet, and throw objects. Failure to observe the following safety instructions could result in serious injury or death.Always be careful while backing your grader. You could jackknife your grader if not왆 ﷻﷻ˦ɘWhen storing the grader always lower the grader to which the scarifiers contact the ground and the actuator is relieved of carrying any load. It is not recommended to ever leave the grader stored with the actuator holding the weight of the unit.It is recommended to use the jackstand provided to raise and lower the unit when connecting and disconnecting from vehicles. DO NOT try and lift the weight of the grader by yourself when uncoupling, it may cause injury.INTENDED USE / RECOMMENDED VEHICLESThe grader is intended to refinish non-public driveways or roadways consisting of primarily gravel and or rock. Be aware of your surroundings and what is beneath the ground you intend to use the grader on. ALWAYS avoid large rocks, embedded obstacles, and buried utilities such as gas, electric, or phone lines.A minimum of a 500 cc ATV/UTV or a 20 HP /500 lb. garden tractor is required to pull the grader and Four-wheel or all wheel drive is always recommended when available on the vehicle to gain maximum traction to ensure best performance.Understand that the amount of ground engagement with the scarifiers depends strongly on the type of vehicle you are using and media make up that you are refinishing. The looser the media and the more traction from vehicle allows more ground engagement and the lighter thevehicle and more hard packed the media allows less engagement.It is recommended to start with minimum engagement (1/4”-1/2”) when beginning to refinish an area, and as the ground loosens increase the depth of engagement on scarifiers.The grader design allows the operator to add weight to the unit if necessary to break up the ground when pulled with an adequate vehicle. The weight area is located in the main frame section on the unit on either side of the actuator mount. Any additional weight should not exceed 100 lbs and should always be secured within the weight area by any means possible.MAINTENANCE & STORAGEFig. 1Fig. 2The rear blade on the grader can beused in several positions depending on the work you are doing.In fig. 1 the blade is free floating and only restrained by the a pin in the last pin position. This allows the blade to swing freely and the weight of the blade helps level and smooth loose media. In fig 2 the blade is pinned in the upright position and the grader can act as a scrapping blade when scarifiers are raised up away from media.TRANSMITTER AND RECEIVERThe grader comes equipped with a remote control to raise andlower the unit by electric actuator. The remote has two buttons, one to extend and one to retract the actuator. Follow the directions below to activate the remote once battery is installed.1)Ensure that the wiring harness is connected at all points: battery, switch, actuator, and receiver.2)Press and hold one of the buttons on the wireless handheld remote. While holding the one button down, press the second button and hold both for 3 seconds at which time the red LED will illuminate on the wireless receiver box.3)The wireless system is now activated and operational 4)Press the IN and OUT button as needed.To turn off the wireless system press both buttons on thewireless transmitter simultaneously and hold them down for 3 seconds until the RED light turns off on both the transmitter and receiver.LED Indicator LightSteady RED –The system is active and ready to use.Flashing RED during use –The battery or power source is low.RED light is off –The wireless remote control is turned off, ornot active.Replacing batteriesIf the indicator light on the handheld remoteflashes during use, the batteries are low and should be replaced.1)Remove the two screws from thehandheld remote located on the back of the remote.2)Separate the top and bottom sectionsof the remote using a flat head screw driver or similar device.3)Remove the old batteries and disposein accordance with local environmental regulations.4)Insert (2) new A23 style alkalinebatteries as shown with the positive terminals facing the switches. Do not mix old and new batteries.5)Join the top and bottom sectionsmaking sure they snap together and rubber seal remains intact.6)Secure with the two screws.Battery LocationScrewsOUTIN콆 ﷻﷻ˦ɘASSEMBLYThis grader has been mostly assembled at the factory. Refer to uncrating and assembly instructions below to complete the final assembly steps. Refer to the drawings and part lists should it become necessary to disassemble the unit for repair or replacement of parts.Inspect all components for damage. If you believe you have a damaged part please contact customer service immediately at 1-800-222-8183.TOOLS REQUIRED: (2) ¾” WRENCH OR SOCKET, (2) 1 ¼” WRENCHES/SOCKETS OR LARGE CRESCENT WRENCHES HAMMER, CROW BAR/PRY BAR, WIRE CUTTERS, GLOVES AND PROTECTIVE EYEWEAR RECOMMENDEDWARNING: Exercise extreme caution, as parts are very heavy. Sufficient persons or mechanical handling equipment should be used.Step 1: Carefully remove top,sides, and ends of crate with hammer and pry bar.Step 2: Remove the ball coupler assembly #1 from within the frame assembly and install it on to the tongue assembly with the NB577 (bolts) #2 and NB281 (nuts) #3 provided.STEP 1STEP 2ፆɘStep 4: Once the two main frame assembliesare fastened, install the 20008TK heightindicator bracket #1 over the actuator #4 andslide towards front of unit. While holding actuator up run NB132 bolt #5 through frame,20008TK #1, 19942TK #2, actuator, then through second spacer and opposite side ofbracket. Capture the bolt with the NB281 nut#3 provided.ASSEMBLY CONTINUEDSHOWN BELOW IN FIG. 2 IS THE PROPERASSEMBLY OF HEIGHT INDICATOR ANDACTUATOR.Fig. 2Step 3: Remove main tongue assemblyfrom crate and bolt both frame ends #1 tothe inside of main frame rail sides using(2) 11431 bolts #2 and (2) 13997 nuts #3 provided. Tighten hardware snug but donot lock completely, allow frame assemblies to hinge.STEP 3STEP 4Supplying Power to the GraderThe grader is supplied with two power leads. The remote power lead (20038) isdesigned to be attached to your ATV/UTV or other vehicles 12V battery. The onboard power lead (20039) is designed to hook up to a battery installed directly on the grader. Both power leads plug directly into the grader wiring harness but only one can be used at a time. The 20039 harness requires (2) NB524 nuts and (2) NB690 bolts to fasten to battery posts. These are located in the parts bag.Caution: Always be sure to install RED wire of lead to Positive side of battery and BLACK wire of lead to the negative side of battery. ALWAYS disconnect negative (black) lead from battery first and install negative (black) last when reconnecting to battery.Caution: Always be sure to secure the remote lead to tongue of grader and vehicle so not to drag on ground or become tangled in unit.*Below is a visual of all harnesses and where the connections attach.NOTE: Grader does not come supplied with a battery but has the option of installing an onboard battery. The unit is designed to use a 12 V U1 or U1 deep cycle battery. Any other style of battery may not mount on unit correctly or allow unit to function properly.Maintaining Battery: It is very important to recharge a battery after each use or if completely drained, and also recommended to install a battery tender (charger)on to the battery when not in use. IT IS NOT recommended to charge a batteryat more than a 10 amp rate for extended periods of time.19972 Main Harness20039 H a r n e s s20038 R e m o t e H a r n e s sIN/OUT SwitchRelaysPower SourceActuatorReceiver BoxPower Source ConnectionConnects to 12V Battery10 AMP FUSEPARTS BREAKDOWNɘɘLATCH PIN OPTION(Latch pin plates included in parts bag)ITEM NO.PART NUMBER DESCRIPTION QTY.119946TK Weldment - Main Tongue, Grader; Txt Blk12NB577Bolt - 1/2-13 X 3 1/2 GR5 ZY1319957Actuator - 12VDC, 20:1, ACME 6", 1500#1419942TK Spacer - .515"ID X 1"OD X .500", Txt Blk25NB100Bolt - Carriage, 1/4-20 X 6 GR526NB281Nut - Nyloc 1/2-13 ZY1719974Battery - Box, Grader18NB274Washer - SAE Flat 1/4 ZY29NB180Nut - Nyloc 1/4-2021012447Ubolt - SQ , 3/8-16X2.437 X 3 Lg GR 5 ZY21119179Jackstand11219477TK Plate - Support, Kickstand Txt Blk213NB272Washer - SAE Flat 3/8 ZY Carbon Steel414NB182Nut - Nyloc 3/8-16 ZY415NB577Bolt - 1/2-13 X 3 1/2 GR5 ZY41619958TK Weldment - Hitch, Grader; Txt Blk1177365Coupler - 2" Ball118NB281Nut - Nyloc 1/2-13 ZY41919962TK Plate - Hitch, Latch; Txt Blk2PARTS BREAKDOWN˦ɘɘﷻﷻITEM NO.PART NUMBER DESCRIPTION QTY.119971Tire -13 X 650-6 3/4 ID Smooth2 2NB195Washer - 13/16 X 1 1/4 X 1/8 ZY; Mild2 3NB126Pin - Cotter, 1/8 X 1, Crbn Stl Ext Prng2 415177Bent Pin - W/ Hair Pin 1/2OD X 3.5, ZP1 5NB132Bolt -1/2-13 X 4 HCC GR5 ZY1 619944TK Plate - Rake, Grader, Txt Blk1 7NB121Nut - Jam Lock, 1/2-13 2-Way Gr A8 820057Bolt - Carriage, 1/2-13 X 1 1/2 GR5 ZY8 919961TK Spacer - .750 ID X 1 OD X 1.250, Txt Blk2 1019945TK Bracket - Rake Hinge, Grader; Txt Blk2 1111431Bolt - 3/4-10 X 2 GR8 ZY4 1210501Bolt - Carriage 3/8-16 X 1 1/4 GR5 ZY14 1319941TK Plate - Outer Skid, Grader, Txt Blk2 1419940TK Plate - Inner Skid, Grader, Txt Blk2 15NB280Nut - 2 Way Lock 3/8-16 ZY & Wax Gr A14 16NB127Pin - Hair, #39 (A155H) ZY Std6 1719943TK Scarifier - 4140 Rc28-32, Txt Blk6 1820051Pin - Clevis, Std 3/8 X 1 1/4 ZY6 1919929TK Weldment - Main Frame, Txt Blk1 20NB281Nut - Nyloc 1/2-13 ZY1ﷻɘITEM NO.PART NUMBERDESCRIPTIONQTY.1NB281Nut - Nyloc 1/2-13 ZY 12NB577Bolt - 1/2-13 X 3 1/2 GR5 ZY1319942TK Spacer - .515"ID X 1"OD X .500", Txt Blk 2420008TK Bracket - Height Indicator Txt Blk1519857Button - Plastic, Bottom 2619858Button - Plastic, Top2ITEM NO.PART NUMBERDESCRIPTIONQTY.1NB524Nut - Serr Flange, 1/4-20 Grade 5 ZY2215749Electrical - 12V 30 AMP Relay 23NB690Bolt - Serr Flange, 1/4-20 X 3/4 GR5 ZY2414418Screw - HX TEK 14 X 12519970Remote - Wireless, Grader1619978Switch - DPDT, 30A, On-Off-On MOM1PARTS BREAKDOWNELECTRICAL CONTROLSHEIGHT INDICATORReplace decals immediately if damaged.20068The operation of any grader can produce foreign objects to be thrown into the air, resulting in severe eye damage. Alwayswear certified safety glasses or wide-vision safety gogglesover spectacles before and while operating such a machine.ɘҍSPECIFICATIONSDimensionsLength 95"Width 50"Weight380lbsShipping Dim.51.5" X 51.5" X 24"Shipping Weight460lbsWorking DimensionsWorking Width50"Max. Teeth Ground Clearance 10"Grading Depth Range 1-10"2" max. ground engagement recommended with ATV/UTVTotal Scarifier Adjustment9"MaterialFrame Welded 3/8" Steel & Tube Scarifiers Hardened 1/2" Steel HardwareMinimum Grade 5TowingRecommended Towing Vehicle Minimum 500cc ATV/UTV 4X 4 Desired Hitch Style2" Ball Coupler and Hitch Pin both StandardMiscellaneousActuator 1500 # Industrial Remote Controlled LinearTires/Wheels 13 X 650-6 3/4 ID SmoothPower Source 12V U1 Deep cycle battery recommendedﷻʾSWISHER HISTORYBack before electricity came to rural Missouri Max Swisher was producing lawn mowers from his mother’s chicken house. Max never liked to mow grass. He installed agearbox on his family’s lawn mower creating a self-propelled unit. By tying one end of a rope to the mower and the other end to a tree in the center of the yard the mower circled the tree, shortening the rope and guiding the mower in concentric circles. Max enjoyed relaxing under a shade tree while his invention did all the work.Max had designed his first self-propelled rotary lawn mower to do his dirty work for him. Neighbors noticed his new invention and began asking him to make more. Today, 60 years later, Swisher is still producing innovative lawn and garden and ATV/UTV equipment designed to give us all more “relaxing in the shade”time.Swisher products have been featured nationally on television programs such as Regis and Kathie Lee and seen in publications like ATV Magazine, Country Journal, Popular Mechanics Magazine and others. In January 2000 Popular Mechanics Magazinenamed Max’s zero turning radius riding mower one of the 20th century’s top household inventions.Swisher offers value and function in its products to meet your grounds maintenance needs.CELEBRATING OVER 70 YEARS OF INNOVATIONSINCE 1945OWNER’S。
电动扫地机的操作规程

电动扫地机的操作规程电动扫地机是一种智能化的家庭清洁设备,能够自动扫地净化室内环境。
为了确保电动扫地机的正常运行和用户的安全,以下是电动扫地机的操作规程。
一、准备工作1. 确保电动扫地机已经充电完毕,电量充足。
2. 清除地面上的障碍物,如电线、杂物等。
3. 确保室内门窗关闭,以免电动扫地机离开清扫区域。
二、启动电动扫地机1. 检查电动扫地机的滚刷、滤网等部件是否完好无损。
2. 打开电动扫地机的电源开关,确保设备通电。
3. 根据需要,选择合适的模式(如自动清扫、定时清扫等)和清扫强度。
三、设置清扫区域1. 根据需要,使用边界条或虚拟墙设置清扫区域的范围。
2. 安放充电座,以便电动扫地机在需要充电时能够准确归位。
四、操作电动扫地机1. 在操作电动扫地机前,确保没有人员或宠物在清扫区域内。
2. 按下启动按钮或使用遥控器启动电动扫地机。
3. 在清扫过程中,保持房间内的门窗关闭,以免电动扫地机离开清扫区域,并避免外界干扰。
五、监控清扫过程1. 定期检查电动扫地机的工作状态,确保其正常运行。
2. 如有异常情况(如异常噪音、卡住不动等),立即停止使用并检查原因。
3. 尽量避免将电动扫地机应对特殊情况(如地毯、地板转换、坡道等)。
六、清理电动扫地机1. 清空电动扫地机的垃圾箱,避免堵塞。
2. 清洗滚刷、滤网等部件,保持设备的清洁。
3. 定期检查电动扫地机的边刷、滚刷等零部件的磨损情况,如有需要及时更换。
七、注意事项1. 使用电动扫地机时,避免在清扫区域内丢弃尖锐物品,以免损坏设备。
2. 不要将电动扫地机用于清扫液体、湿地或潮湿表面,以免发生触电等安全问题。
八、维护保养1. 了解并遵循电动扫地机的维护保养指南。
2. 定期对电动扫地机进行彻底清洁,并妥善保管设备。
3. 如需维修或更换配件,应选择原厂正品,确保设备的正常运行。
以上是电动扫地机的操作规程,希望能够帮助您正确使用电动扫地机,保持室内环境的整洁和清洁。
请遵守规程和注意事项,确保使用的安全和设备的正常运行。
电动扫地机器人使用说明书

电动扫地机器人使用说明书1. 引言感谢您选择购买我们的电动扫地机器人。
本使用说明书将为您提供详细的操作指南和注意事项,以确保您能正确地使用和维护机器人,同时获得最佳的清洁效果。
2. 产品概述电动扫地机器人是一款智能家居清洁设备,具备自动规划路径、自动导航、自主清洁等功能。
它能够在您不在家时自动扫除地面上的灰尘、碎屑和头发,让您的家居环境保持清洁和整洁。
3. 事前准备在开始使用电动扫地机器人之前,请确保完成以下步骤:3.1 安装电池打开机器人的电池仓盖,插入充电池,并关闭电池仓盖。
确保电池安装正确,并连接到机器人的电源接口。
3.2 充电将电动扫地机器人放置在充电座上,确保连接正常。
在初次使用之前,建议充电时间至少为8个小时,以确保电池充满电。
3.3 清理工作区域在启动机器人之前,清理工作区域内的障碍物,例如玩具、电线等。
确保机器人能够自由移动并避免碰撞。
4. 使用方法4.1 启动机器人按下机器人上的电源按钮,机器人将启动。
请确保机器人放置在平坦的地面上,避免启动时倾斜或不稳定。
4.2 模式选择本机器人提供手动和自动两种模式。
在手动模式下,您可以使用遥控器或按键来控制机器人的移动。
在自动模式下,机器人将会自主规划路径进行清洁,您无需干预。
4.3 边角模式本机器人还具备边角清扫模式,可用于清洁房间边缘和角落的灰尘。
将机器人沿着墙壁放置,按下边角模式按钮,机器人将会遵循边角清扫路径进行工作。
4.4 设置定时清洁机器人支持定时清洁功能,您可以在机器人上设置每日或每周的清洁时间。
按照说明书中的指引,设置定时清洁模式,机器人将按照设定的时间自动开启清洁任务。
5. 注意事项5.1 安全使用请确保机器人在正常工作时,人员不在其周围。
避免触碰机器人的旋转刷和轮子,以免发生意外。
5.2 高出界限机器人具备识别高出界限的功能,但在使用过程中,仍需留意悬挂物品的高度,以免机器人被卡住。
5.3 长毛绒地毯长毛绒地毯可能会影响机器人的清洁效果,建议在使用前将长毛绒地毯收起,或使用边角模式进行清洁。
机器人擦地机的说明书

机器人擦地机的说明书本说明书旨在介绍机器人擦地机的使用方法、注意事项以及保养维护等相关内容,以确保用户正确操作和有效使用机器人擦地机,并延长其使用寿命。
请仔细阅读本说明书并遵守其中的指示。
一、产品概述机器人擦地机是利用人工智能技术和机械装置结合而成的自动化擦地设备。
它能够根据用户设置,自主完成地面清洁工作,并具有智能感应、自主导航等功能。
二、使用方法1. 开箱检查:打开包装后,请仔细检查机器人擦地机及配件是否完好,并确保配件齐全。
2. 充电:将机器人连接至电源适配器,并将电源适配器插入电源插座,启动充电功能。
3. 参数设置:在机器人擦地机的控制面板上,根据实际需求设置清洁时间、清洁区域、清洁模式等参数。
4. 启动机器人:按下启动按钮,机器人将根据预设参数开始工作,并按照设定路径进行擦地清洁。
5. 完成清洁:机器人将在清洁任务完成后,自动返回充电座,并待机等待下一次指令。
三、注意事项1. 安全操作:在机器人擦地机工作期间,请确保人员不要站在其工作区域内,以免发生误伤。
2. 避免障碍:在使用机器人擦地机时,请确保清洁区域内没有杂物、电线或其他障碍物,以免影响机器人的工作或损坏机器人。
3. 防水防潮:机器人擦地机仅可用于清洁干燥的地面,严禁将其用于潮湿或有水的地面,以免发生电路短路或机器人损坏。
4. 定期清洁:为了保证机器人擦地机的持续性能和寿命,建议定期清洁机器人的擦地毛刷、过滤器等部件,并按照说明书进行保养。
四、保养维护1. 清洁滚刷:定期清洁机器人擦地机的滚刷,去除毛发、纤维等杂物,以保证清洁效果和工作效率。
2. 更换滤芯:根据机器人擦地机的使用频率和情况,定期更换滤芯,以保证机器人擦地机的作业效果。
3. 定期充电:请注意保持机器人擦地机的电量充足,以确保其正常工作。
4. 存放环境:当机器人擦地机暂时不使用时,请将其存放在干燥通风的环境中,避免阳光直射或长时间潮湿存放,以免影响其性能和寿命。
五、常见问题解答1. 机器人擦地机无法启动:请检查是否电量不足,是否已正确连接电源适配器,并确认充电座是否插入电源。
电动扫地机的故障排除与维修指南

电动扫地机的故障排除与维修指南随着科技的不断进步,电动扫地机在我们日常生活中扮演着越来越重要的角色。
然而,当电动扫地机出现故障时,对于大部分人来说,修理它是一项艰巨的任务。
本文将为您提供一份电动扫地机故障排除与维修指南,帮助您解决一些常见的问题。
1. 电源问题如果电动扫地机无法启动或者运行时间非常短,首先检查电源是否插好以及插座是否正常工作。
尝试用其他电器设备插座测试以确认电源是否正常供应电能。
2. 电池问题电动扫地机通常使用可充电电池供电,如果您发现电动扫地机无法充电或充电时间缩短,首先检查电池连接是否牢固。
清洁电池接触处,确保无灰尘或污垢。
3. 刷子故障如果电动扫地机的刷子停止工作或者工作效果不佳,可能是由于刷子被缠绕了杂物或长时间使用导致刷毛磨损所致。
检查刷子是否有杂物缠绕,若有,清除杂物。
如果刷毛磨损,建议更换刷子。
4. 吸力问题如果发现吸尘效果下降,先检查吸嘴部分是否堵塞。
清理吸嘴、过滤器和储物箱内积尘,以确保正常吸力。
5. 轮子故障当电动扫地机运行异常或者行驶困难时,可能是轮子故障所致。
检查轮子是否有杂物或毛发缠绕,将其清除。
如果轮子磨损严重,建议更换轮子。
6. 遥控器问题如果您的电动扫地机配备了遥控器,但无法正确控制,首先确保遥控器的电池是否正常工作。
如果电池正常,可能是由于信号干扰或电动扫地机接收器故障。
尝试更靠近电动扫地机使用遥控器,或者使用替换新的遥控器。
7. 噪音问题电动扫地机在工作时产生噪音是正常现象,但如果噪音过大或者异常,需要调查原因。
首先检查刷子、轮子和吸嘴是否有杂物缠绕,将其清除。
如果仍然存在噪音,可能是电机老化,需要将其更换。
8. 自动充电问题一些电动扫地机具备自动识别充电功能,当电量低时会自动返回充电桩。
如果电动扫地机无法自动充电,首先检查充电桩是否接触良好,清理充电桩和电动扫地机的金属触点。
如果问题仍然存在,可能是由于电动扫地机与充电桩间的通信故障,建议联系售后服务进行进一步的维修。
电动扫地机的功能和参数配置

电动扫地机的功能和参数配置
电动扫地机的发明和问世,给城乡清洁劳动者的工作带来了便利,下面程力专用汽车股份有限公司官网小编为您详细介绍几款热门电动扫地机的功能和报价。
电动扫地机的功能说明:
智能式系列扫地机为吸尘、扫地、喷水相结合的自动清洁一体机,为户外环境下使用。
此款扫地机主要用于公园、环卫、保洁公司、物业管理公司、广场、高校的室外清扫。
一、TF-2000全封闭式智能扫地机参数配置
性能特征:
1.采用48V电池组为动力,节能环保,连续使用时间长。
2.采用全封闭驾驶室,避免天气、噪音等恶劣条件对清扫工作的影响。
3.人性化的设计理念,在同类产品中,在前驾驶室前轮增加减震功能,有效保
护电子元器件的同时提高操作舒适性。
4.采用双吸尘内芯设计,吸尘、控尘能力超强,高达12平方米聚酯纤维
PTFE高效过滤器,使得0.3微米灰粉有效控制率在99%以上,震尘电机轻松清理过滤器。
5.驱动系统上置,增加垃圾箱的容积。
6.驾驶室双边门的设计,两侧门均能独立开关,后视库门可左右打开。
6.进口电控系统,过流,欠压保护,加重底盘,垃圾箱容积更大。
主要技术项目参数。
- 1、下载文档前请自行甄别文档内容的完整性,平台不提供额外的编辑、内容补充、找答案等附加服务。
- 2、"仅部分预览"的文档,不可在线预览部分如存在完整性等问题,可反馈申请退款(可完整预览的文档不适用该条件!)。
- 3、如文档侵犯您的权益,请联系客服反馈,我们会尽快为您处理(人工客服工作时间:9:00-18:30)。
240/450 300
12 驱动功率(电机)(w) 3000
作业功率(电机)
13 (v)主刷+风机+边刷+ 700x5+400 X2+100x4+100x2
振尘
14 一次充电时间(h) 8
15
一次充电使用时间( h)
6
16 尺寸(LxWxH) (mm) 3250*1800*2200
谢谢观看
POWERPOINT TEMPLATE
2000
2 清扫速度(km/h) 5-10
3
铅酸免维护电池动力 源免维护铅酸蓄电池
48v210Ah
x2
4 5
01 蕞大保洁效率(㎡
/h) 爬坡能力(%)
16000 20
6 主刷长度(mm)
800
7 转弯半径 (mm)
4300
8 边刷直径(mm)
Φ700X2+Φ500X2
9
垃圾箱容量(L) 水箱容量(L)
3.验收标准
国家标准
01 4.此款新品集多种特色于
一身
——集尘 垃圾从入口进入圾箱,然后启动液压泵 将垃圾倾倒。操作方便,省力 高压冲洗、雾化。 ——雾化水降尘 专用莲蓬头将水雾化以降低由于扫地车作 业产生的“扬尘”,保护驾驶员和行人免受二 次污染。
sdlvbei007
——高清触摸屏+单片机(核心)
B.自行开发的驱动桥控制系统,接 入安全的48V 210Ah x2免维护铅 酸电池组 4、其他 A、驾驶室,全景玻璃结构,后开 门设计。 B.低人工。无需持证,无需特殊培 训即可上岗。比请专业驾驶员的费 用低许多。 C.环保。符合国家“鼓励使用清洁 能源”的战略。
序 项目名称 号
参数
1 清扫宽度(mm)
——机身后置 1000×200mm LED数字 显示器,可自定义显示内
01 容,如:左右转弯箭头,
xx会字幕,流动广告等。 ——大灯,示宽灯,近射 灯均采用LED,节能环保。
3、驱动和控制系统。 A.驱动桥,电刹手刹,配合车用方 向机。让驾驶者的操纵感倍加舒适, 让驾驶更安全。(电刹手刹的结合
01 提高了车辆驻泊的安全和稳定)
LB2000四轮电动扫地 机
汇报人: 绿倍零气七
1
目录
2
CONTENTS
3
4
1.电控部分
*一种扫地机触摸屏
01 *一种新型的扫地机控制电路
*一种新型的扫地机存储以及实 时时钟日历电路。
2.机构部分
*一种扫地机的扫地及传输机构
01 *一种扫地机的扫地及传输机构
*一种新型的扫地车障碍自动收 回装置 *扫地机边刷防撞装置 *一次成型的扫地车底盘
Unlimited progress
汇报人: 深度视觉
采用自行开发、具有专利技术的扫地车
专用智能单片机。
01 A.控制。
扫地、振尘、洒水、灯光“一触即开”。
电机正转、反转、上升、下降“一呼百
应”。 B.显示和报警。
实时日期、行走里程、扫地速度、电池
电量、油耗、水箱水量“一目了然”。 C.倒车影音和多媒体.空调配置 9寸倒车雷达屏幕,实时监控倒车过程。并可播放多媒体影 音资料,支持主流外插接口(SD,USB),接入驾驶室自 带的音箱。暖风可调配置,操作舒适 D.LED显示、照明。