【无限互联】IOS开发 阅读器类APP可用开源框架介绍(2)
【无限互联】浅析开源框架SDWebImage

【无限互联】浅析开源框架SDWebImage本节要点1.SDWebImage的功能和基本用法2.SDWebImage的实现原理SDWebImage的功能SDWebImage提供了一个UIImageView类别以支持加载来自网络的远程图片,具有缓存管理,异步加载等特性SDWebImage的基本用法#import导入"UIImageView+WebCache.h",调用如下方法可实现加载网络图片,并可以设置图片加载前的默认图片,监听图片加载进度以及图片加载完成事件[objc]view plaincopyprint?1.[_imageView setImageWithURL:url placeholderImage:niloptions:SDWebImageRetryFailed progress:^(NSInteger receivedSize, NSInteger expectedSize) {//查看下载进度2.NSLog(@"receive = %d,expected = %d",receivedSize,expectedSize);3.} completed:^(UIImage *image, NSError *error, SDImageCacheType cacheType){//加载成功后调用4.NSLog(@"加载成功");5.}];基本方法为:- (void)setImageWithURL:(NSURL *)url;调用此方法时,会对加载的图片作出判断,若是GIF图,则会调用”UIImage+GIF"中的方法+ (UIImage *)sd_animatedGIFWithData:(NSData *)data;使UIImageView显示GIF动图#import导入"SDWebImageManager.h",使用SDWebImageManager类可以对网络图片的加载进行管理,它可以读取imageCache(图片缓存)和imageDownloader(图片下载器),实现SDImageCache和SDWebImageDownloader的回调,从而进行一些异步加载的工作[objc]view plaincopyprint?1.SDWebImageManager *manager = [SDWebImageManager sharedManager];2.manager downloadWithURL:url options:SDWebImageRetryFailed progress:NULLcompleted:^(UIImage *image, NSError *error, SDImageCacheType cacheType,BOOL finished) {3._imgView.image = image;4.];调用此方法会下载URL所指向的网络图片(如果本地无缓存的话),并且可以监听下载进度以及下载完成事件#import导入"SDWebImageDownloader.h",可以使用独立的异步图像下载[objc]view plaincopyprint?1.SDWebImageDownloader *downloader = [SDWebImageDownloadersharedDownloader];2.[downloader downloadImageWithURL:urloptions:SDWebImageDownloaderUseNSURLCache progress:NULLcompleted:^(UIImage *image, NSData *data, NSError *error, BOOL finished) {3._imgView.image = image;4.}];#import导入“SDImageCache.h”可实现储存加载的图像到缓存,并且可以找出储存的缓存,使图片显示[objc]view plaincopyprint?1.SDWebImageDownloader *downloader = [SDWebImageDownloadersharedDownloader];2.SDImageCache *cache = [SDImageCache sharedImageCache];3.[downloader downloadImageWithURL:urloptions:SDWebImageDownloaderUseNSURLCache progress:NULLcompleted:^(UIImage *image, NSData *data, NSError *error, BOOL finished) {4.[cache storeImage:image forKey:@"myCache"];5.}];6.UIImage *img = [cache imageFromDiskCacheForKey:@"myCache"];7._imgView.image = img;SDWebImage清除缓存的方法[objc]view plaincopyprint?1.[[SDWebImageManager sharedManager].imageCache clearDisk];2.[[SDWebImageManager sharedManager].imageCache clearMemory];SDWebImage的实现原理(1)- (void)setImageWithURL:(NSURL *)url placeholderImage:(UIImage *)placeholder options:(SDWebImageOptions)optionsprogress:(SDWebImageDownloaderProgressBlock)progressBlockcompleted:(SDWebImageCompletedBlock)completedBlock;调用此函数实现网络图片加载时,首先会将placeholder设为未加载图片时的默认图片,然后SDWebImageManager会通过URL处理图像(2)调用- (id <SDWebImageOperation>)downloadWithURL:(NSURL *)urloptions:(SDWebImageOptions)optionsprogress:(SDWebImageDownloaderProgressBlock)progressBlockcompleted:(SDWebImageCompletedWithFinishedBlock)completedBlock方法对URL进行判断,创建新的SDWebImageCombinedOperation(3)然后通过SDImageCache调用- (NSOperation *)queryDiskCacheForKey:(NSString *)key done:(void (^)(UIImage *image,SDImageCacheType cacheType))doneBlock,先检查内存,若没有再检查硬盘缓存目录中是否存在图片缓存,若存在,则通过doneBlock块,将缓存图片传给SDWebImageManager,再交由UIImageView显示,若没有,则生成SDWebImageDownloader,通过方法- (id<SDWebImageOperation>)downloadImageWithURL:(NSURL *)urloptions:(SDWebImageDownloaderOptions)options progress:(void(^)(NSInteger,NSInteger))progressBlock completed:(void (^)(UIImage *,NSData *,NSError *,BOOL))completedBlock开始下载图片(4)通过NSURLConnection来实现图片下载,通过NSURLConnection的delegate来监听图片的下载开始,下载过程以及下载结束(5)connectionDidFinishLoading:图片下载完成后,通过sd_imageWithData:来判断图片的格式,并对不同的格式进行不同的处理(6)decodedImageWithImage:对图片进行解码处理,解码完成后调用completionBlock,将数据传出给SDWebImageDownloader,再UIImageView显示图片(7)将图片保存到SDImageCache中。
无限互联iOS开发课件

类
学生
对象
学生生:张三 姓名 = 张三 年龄 = 20 班级 = 6 学生生:李四 姓名 = 李四 年龄 = 25 班级 = 3
抽象
学生
-姓名 -年龄 -班级 +显示姓名 +显示年龄 +修改姓名 +显示班级
实例
版权所有:无无限互联移动互联⺴网网研发培训中心心
12年9月26日日星期三
类与类之间的关系—继承关系
/* * 声明了一个NSString类型的指针变量,但它并并没有指向任何一个对象。 */ NSString *s; /* * 使用alloc方法创建了一个NSString * 类型的对象并用s指向它 * 以后可以通过s完成对其的操作 */ s = [[NSString alloc] initWithString:@"Hello iPhone4S"];
・一个实例或者类本身需要传入
多个参数
・这个方法的方法名称是? ・嵌套发送消息
版权所有:无无限互联移动互联⺴网网研发培训中心心
12年9月26日日星期三
类的实现
@implementation Person - (id) initWithAge:(int) _age identify: (int) _identify { if (self = [super init]) { age = _age; identify = _identify; } return self; } - (int) getIdentify { return identify; } - (int) getAge { return age; } - (void) setAge:(int) _age { age = _age; } @end
【无限互联】学员作品:最美应用iOS客户端

【无限互联】学员作品:最美应用iOS客户端1,项目介绍这款应用是手机和传播高品质应用的新媒体的社区,由用户和设计师一起发现和分享最好玩,最好用的应用,这款应用会每天推荐一款,是发现号应用的不错途径,并提供多源的下载地址,接受用户评论,评分,测试。
2.项目效果截图3.项目架构介绍这个客户端使用MVC的整体架构,根据数据分类抽取出4个模块,每个模块也是使用MVC来进行构建,首先在创建整体框架的时候,根据项目的需求来剥离出每一个视图的基类,构建出整体的Base类库,包括想BaseModel,BaseViewController,BaseTableView等,在其中封装了大量的子类化控件。
如:下拉刷新,上拉加载,加载视图,状态栏提示等功能,减少在编写大量重复代码的劳动量。
整体是使用Storyboard来创建,在子类化的时候有少量的xib创建。
4.项目技术点介绍(1)整体的框架在一个自定义tabbar上展开,自定义tabbar上添加多个storyboard,实现视图的跳转(2)网络请求使用第三方框架AFNetWorking,并封装出一个MyDataService工具类方便请求(3)首页和发现页面实现翻页效果,分别使用了翻转的tableView和横向滑动的collectionView来实现效果(4)使用通知来实现首页页面滑动整体背景颜色变化,日期变化,底部collectionView视图滑动(5)详情页面使用tableView分组来实现页面布局,第一组进行图片的变形动画,第二组实现应用详情介绍,第三组展示评论列表(6)在应用详情显示是使用了DTCoreText来进行布局,并对得到的Html连接进行修改实现图片文字的混排(7)使用友盟SDK来实现分享功能(8)在分享页面加入了添加图片截图和删除图片截图功能(9)侧滑功能使用开源框架MMDrawerController来实现(10)使用开源框架SDWebImage来实现网络图片的异步加载与缓存处理(11)集成关键字搜索,应用下载并在状态栏显示进度5.总结此次项目是第一个独立编写的一个项目,在编写过程中遇见了很多自己平常并不注意的问题,磕磕绊绊但也收获颇多。
【转】iOS的APP资源,开源的哦

【转】iOS的APP资源,开源的哦完整项⽬ ⽂章转⾃这个开源项⽬为半糖,官⽹➡,类似于美丽说,⼀款电商App,使⽤语⾔:Swift2.0,开发⼯具: Xcode 7.1,纯代码开发,耗时两个多⽉,数据为本地数据,⽤Charles进⾏抓包Dropbox收购公司内部社交服务商Zulip,然后全部开源,这是iOS App类似于Instagram的⼀款AppObjective-C写的完整的聊天应⽤《猿已阅》码农周刊iOS客户端绘图应⽤. Painting app for the iPhone and iPad.Swift 写的⼀个 iOS 版的 Phonetic Contacts,功能很多,其中昵称功能⾮常实⽤,已在 GitHub 开源并上架 App Store– v2ex 的客户端,新闻、论坛。
– “新⼿开源⼀个⽤Swift(2.0)写的论坛客户端”。
– apps-ios-wikipedia 客户端。
– ⼀款 Uber 的 MVC 框架。
它同时提供了多⽤户实时通讯⽀持,⼀旦启动 JetStream 后端服务,通过 WebSocket 协议可以分分钟建⽴多⽤户实时通讯应⽤。
– 在相同 WiFi ⽹络环境内,通过iPhone 控制并播放 Mac 中的 PDF ⽂档。
– 扫扫图书:可以扫描条形码查询图书,也可以关键字搜索,遇到合乎你⼝味的书,还可以看看别⼈的读书笔记,不同⾓度去体会。
– Swift 开发的 DesignerNews 客户端,看着美美的!– 调⽤新浪API⾃⼰写的第三⽅微博客户端。
– 逗趣IOS⼿机端(⼀款笑话软件),拥有完整的功能的⼿机应⽤app 。
– IT江湖iOS客户端。
– 艺术品拍卖的投标亭平台,⽤swift与反应式编程框架 ReactiveCocoa。
– 模仿“看图猜成语”App,功能齐全,配有⾳效,效果很不错。
游戏使⽤cocoa框架完成,没有使⽤cocos2d的框架。
– 谁CALL我,iOS来电信息语⾳提醒,⽆需越狱。
开发移动应用的常见开发框架
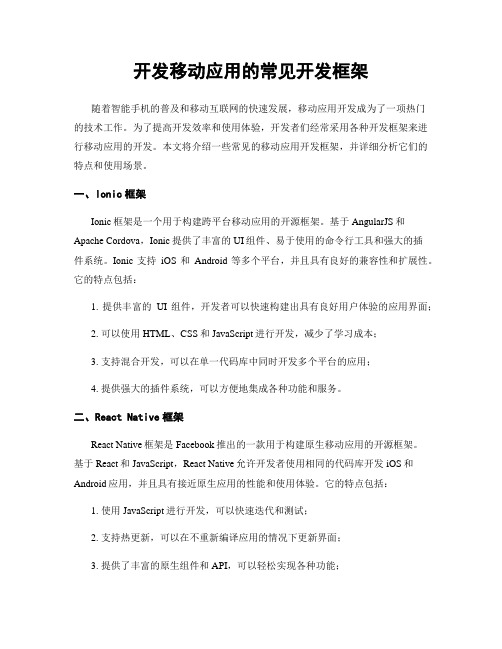
开发移动应用的常见开发框架随着智能手机的普及和移动互联网的快速发展,移动应用开发成为了一项热门的技术工作。
为了提高开发效率和使用体验,开发者们经常采用各种开发框架来进行移动应用的开发。
本文将介绍一些常见的移动应用开发框架,并详细分析它们的特点和使用场景。
一、Ionic框架Ionic框架是一个用于构建跨平台移动应用的开源框架。
基于AngularJS和Apache Cordova,Ionic提供了丰富的UI组件、易于使用的命令行工具和强大的插件系统。
Ionic支持iOS和Android等多个平台,并且具有良好的兼容性和扩展性。
它的特点包括:1. 提供丰富的UI组件,开发者可以快速构建出具有良好用户体验的应用界面;2. 可以使用HTML、CSS和JavaScript进行开发,减少了学习成本;3. 支持混合开发,可以在单一代码库中同时开发多个平台的应用;4. 提供强大的插件系统,可以方便地集成各种功能和服务。
二、React Native框架React Native框架是Facebook推出的一款用于构建原生移动应用的开源框架。
基于React和JavaScript,React Native允许开发者使用相同的代码库开发iOS和Android应用,并且具有接近原生应用的性能和使用体验。
它的特点包括:1. 使用JavaScript进行开发,可以快速迭代和测试;2. 支持热更新,可以在不重新编译应用的情况下更新界面;3. 提供了丰富的原生组件和API,可以轻松实现各种功能;4. 具有高度的可扩展性,可以通过编写原生模块来实现更底层的功能。
三、Flutter框架Flutter框架是由Google开发的一款跨平台移动应用开发框架。
Flutter使用Dart 语言进行开发,并且具有强大的渲染引擎和丰富的UI组件库。
它的特点包括:1. 基于自定义渲染引擎,具有良好的性能和动画效果;2. 支持快速热重载,可以立即查看界面的变化;3. 提供了丰富的UI组件库,可以方便地构建各种风格的应用界面;4. 具备良好的用户体验,支持响应式布局和自适应屏幕。
iOS系统框架概述
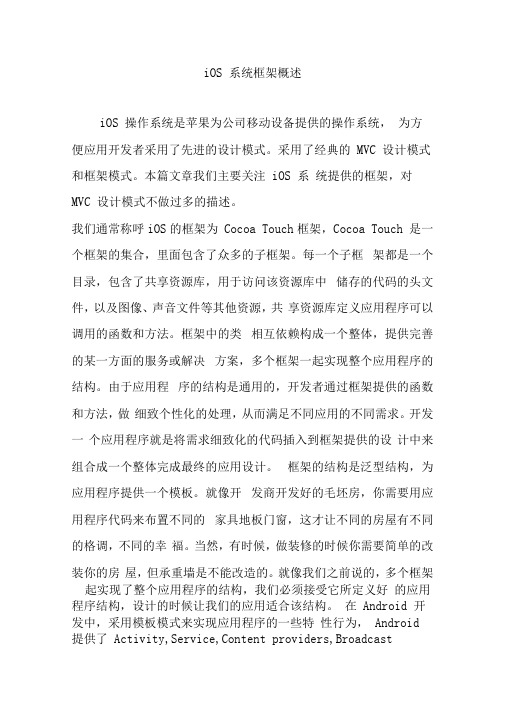
iOS 系统框架概述iOS 操作系统是苹果为公司移动设备提供的操作系统,为方便应用开发者采用了先进的设计模式。
采用了经典的MVC 设计模式和框架模式。
本篇文章我们主要关注iOS 系统提供的框架,对MVC 设计模式不做过多的描述。
我们通常称呼iOS的框架为Cocoa Touch框架,Cocoa Touch 是一个框架的集合,里面包含了众多的子框架。
每一个子框架都是一个目录,包含了共享资源库,用于访问该资源库中储存的代码的头文件,以及图像、声音文件等其他资源,共享资源库定义应用程序可以调用的函数和方法。
框架中的类相互依赖构成一个整体,提供完善的某一方面的服务或解决方案,多个框架一起实现整个应用程序的结构。
由于应用程序的结构是通用的,开发者通过框架提供的函数和方法,做细致个性化的处理,从而满足不同应用的不同需求。
开发一个应用程序就是将需求细致化的代码插入到框架提供的设计中来组合成一个整体完成最终的应用设计。
框架的结构是泛型结构,为应用程序提供一个模板。
就像开发商开发好的毛坯房,你需要用应用程序代码来布置不同的家具地板门窗,这才让不同的房屋有不同的格调,不同的幸福。
当然,有时候,做装修的时候你需要简单的改装你的房屋,但承重墙是不能改造的。
就像我们之前说的,多个框架起实现了整个应用程序的结构,我们必须接受它所定义好的应用程序结构,设计的时候让我们的应用适合该结构。
在Android 开发中,采用模板模式来实现应用程序的一些特性行为,Android 提供了Activity,Service,Content providers,Broadcastreceivers 四大组件默认功能,应用通过继承这些组件根据需要覆盖组件的一些方法来完成应用程序开发。
在iOS 中则采用代理和协议模式来实现应用的特性行为。
例如Cocoa Touch 框架集合中的UIKit 框架的UIApplication 对象,它负责整个应用程序生命周期的事件分发。
在移动应用开发中常用的框架有哪些?
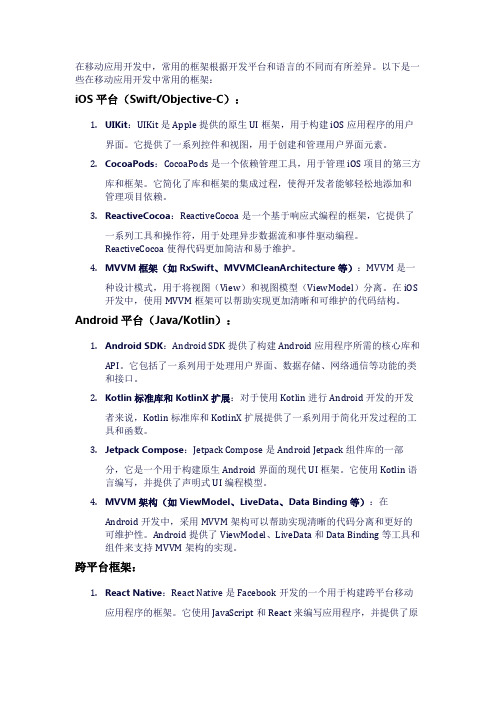
在移动应用开发中,常用的框架根据开发平台和语言的不同而有所差异。
以下是一些在移动应用开发中常用的框架:iOS平台(Swift/Objective-C):1.UIKit:UIKit是Apple提供的原生UI框架,用于构建iOS应用程序的用户界面。
它提供了一系列控件和视图,用于创建和管理用户界面元素。
2.CocoaPods:CocoaPods是一个依赖管理工具,用于管理iOS项目的第三方库和框架。
它简化了库和框架的集成过程,使得开发者能够轻松地添加和管理项目依赖。
3.ReactiveCocoa:ReactiveCocoa是一个基于响应式编程的框架,它提供了一系列工具和操作符,用于处理异步数据流和事件驱动编程。
ReactiveCocoa使得代码更加简洁和易于维护。
4.MVVM框架(如RxSwift、MVVMCleanArchitecture等):MVVM是一种设计模式,用于将视图(View)和视图模型(ViewModel)分离。
在iOS 开发中,使用MVVM框架可以帮助实现更加清晰和可维护的代码结构。
Android平台(Java/Kotlin):1.Android SDK:Android SDK提供了构建Android应用程序所需的核心库和API。
它包括了一系列用于处理用户界面、数据存储、网络通信等功能的类和接口。
2.Kotlin标准库和KotlinX扩展:对于使用Kotlin进行Android开发的开发者来说,Kotlin标准库和KotlinX扩展提供了一系列用于简化开发过程的工具和函数。
3.Jetpack Compose:Jetpack Compose是Android Jetpack组件库的一部分,它是一个用于构建原生Android界面的现代UI框架。
它使用Kotlin语言编写,并提供了声明式UI编程模型。
4.MVVM架构(如ViewModel、LiveData、Data Binding等):在Android开发中,采用MVVM架构可以帮助实现清晰的代码分离和更好的可维护性。
无限互联iOS开发之KYCircleMenu框架
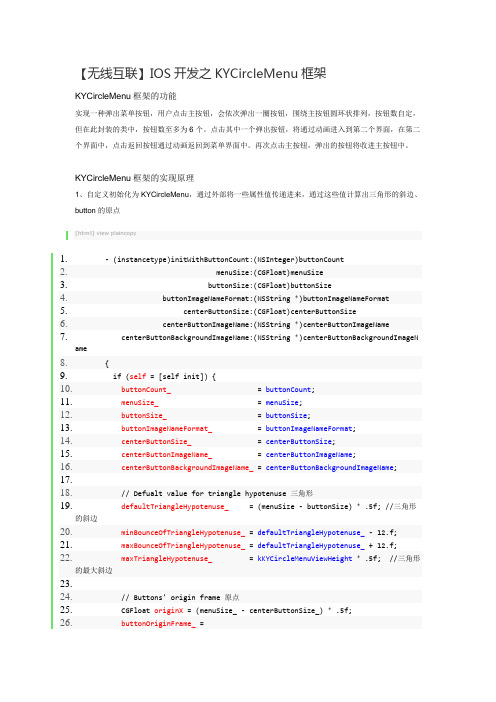
【无线互联】IOS开发之KYCircleMenu框架KYCircleMenu框架的功能实现一种弹出菜单按钮,用户点击主按钮,会依次弹出一圈按钮,围绕主按钮圆环状排列,按钮数自定,但在此封装的类中,按钮数至多为6个。
点击其中一个弹出按钮,将通过动画进入到第二个界面,在第二个界面中,点击返回按钮通过动画返回到菜单界面中。
再次点击主按钮,弹出的按钮将收进主按钮中。
KYCircleMenu框架的实现原理1、自定义初始化为KYCircleMenu,通过外部将一些属性值传递进来,通过这些值计算出三角形的斜边、button的原点[html]view plaincopy1.- (instancetype)initWithButtonCount:(NSInteger)buttonCount2. menuSize:(CGFloat)menuSize3. buttonSize:(CGFloat)buttonSize4. buttonImageNameFormat:(NSString *)buttonImageNameFormat5. centerButtonSize:(CGFloat)centerButtonSize6. centerButtonImageName:(NSString *)centerButtonImageName7. centerButtonBackgroundImageName:(NSString *)centerButtonBackgroundImageName8.{9. if (self = [self init]) {10.buttonCount_ = buttonCount;11.menuSize_ = menuSize;12.buttonSize_ = buttonSize;13.buttonImageNameFormat_ = buttonImageNameFormat;14.centerButtonSize_ = centerButtonSize;15.centerButtonImageName_ = centerButtonImageName;16.centerButtonBackgroundImageName_ = centerButtonBackgroundImageName;17.18. // Defualt value for triangle hypotenuse 三角形19.defaultTriangleHypotenuse_ = (menuSize - buttonSize) * .5f; //三角形的斜边20.minBounceOfTriangleHypotenuse_ = defaultTriangleHypotenuse_ - 12.f;21.maxBounceOfTriangleHypotenuse_ = defaultTriangleHypotenuse_ + 12.f;22.maxTriangleHypotenuse_ = kKYCircleMenuViewHeight * .5f; //三角形的最大斜边23.24. // Buttons' origin frame 原点25. CGFloat originX = (menuSize_ - centerButtonSize_) * .5f;26.buttonOriginFrame_ =27. (CGRect){{originX, originX}, {centerButtonSize_, centerButtonSize_}};28. }29. return self;30.}2、在加载视图(loadView)中,计算出self.view的frame; 在计算self.view 的高度时,还判断了当前控制器是否隐藏了导航栏,如果隐藏了,则此视图的高度就为整个屏幕的高度,否则,就要减去导航栏的高度[html]view plaincopy1.- (void)loadView2.{3. CGFloat viewHeight =4. (self.navigationController.isNavigationBarHidden5. ? kKYCircleMenuViewHeight : kKYCircleMenuViewHeight - kKYCircleMenuNavigationBarHeight);6. CGRect frame = CGRectMake(0.f, 0.f, kKYCircleMenuViewWidth, viewHeight);7. UIView * view = [[UIView alloc] initWithFrame:frame];8.self.view = view;9.}3、在viewDidLoad方法中,作了以下操作<1>设置menu_视图,这个用来装载button菜单按钮的<2>根据buttonCount_外部传进来的值来确定button菜单按钮的个数,来创建button,并将这些button全都叠放在menu_视图的中间<3>并创建了中间的主按钮centerButton,用来控制是否显示菜单按钮,将centerButton添加到了当前视图的正中间,与菜单按钮的原始frame重叠<4>监听了菜单按钮关闭的通知[html]view plaincopy1.- (void)viewDidLoad2.{3. [super viewDidLoad];4.5. // Constants6. CGFloat viewHeight = CGRectGetHeight(self.view.frame);7. CGFloat viewWidth = CGRectGetWidth(self.view.frame);8.9. //菜单视图的frama10. CGRect centerMenuFrame =11.CGRectMake((viewWidth - menuSize_) * .5f, (viewHeight - menuSize_) * .5f, menuSize_, menuSize_);12. //menu_指菜单视图13.menu_ = [[UIView alloc] initWithFrame:centerMenuFrame];14. [menu_ setAlpha:0.f];15. [self.view addSubview:menu_];16.17. // Add buttons to |ballMenu_|, set it's origin frame to center18. //buttonCount_ 周围菜单按钮的个数19. NSString * imageName = nil;20. for (int i = 1; i <= buttonCount_; ++i) {21. UIButton * button = [[UIButton alloc] initWithFrame:buttonOriginFrame_];22. [button setOpaque:NO]; //NO 设置控件透明, YES 设置控件不透明,默认为YES23. [button setTag:i];24.imageName = [NSString stringWithFormat:self.buttonImageNameFormat, button.tag];25. [button setImage:[UIImage imageNamed:imageName]26. forState:UIControlStateNormal];27. [button addTarget:self action:@selector(runButtonActions:) forControlEvents:UIControlEventTouchUpInside];28. [self.menu addSubview:button];29. }30.31. // Main Button32. CGRect mainButtonFrame =33.CGRectMake((CGRectGetWidth(self.view.frame) - centerButtonSize_) * .5f,34. (CGRectGetHeight(self.view.frame) - centerButtonSize_) * .5f,35. centerButtonSize_, centerButtonSize_);36.37.centerButton_ = [[UIButton alloc] initWithFrame:mainButtonFrame];38. [centerButton_ setBackgroundImage:[UIImage imageNamed:self.centerButtonBackgroundImageName]39. forState:UIControlStateNormal];40. [centerButton_ setImage:[UIImage imageNamed:self.centerButtonImageName]41. forState:UIControlStateNormal];42. [centerButton_ addTarget:self43. action:@selector(_toggle:)44. forControlEvents:UIControlEventTouchUpInside];45. [self.view addSubview:centerButton_];46.47. // Setup notification observer48. //监听关闭menu_视图的通知49. [self _setupNotificationObserver];50.}4、在viewWillAppear视图将要显示时,隐藏导航栏,并判断它的子视图是否按下按钮,如果是则将菜单通过recoverToNormalStatus方法将其恢复到原始的位置由于此处使用的是ios7,所以当我们隐藏导航栏时,状态栏也会跟着隐藏,如果是ios6,则状态栏不会隐藏,所以应该进行版本的判断,对其做出相应的处理,则不会出现此处不兼容的情况(此处我作了相应的修改,代码如下:)[html]view plaincopy1.- (id)init2.{3. if (self = [super init]) {4.isInProcessing_ = NO;5.isOpening_ = NO;6.isClosed_ = YES;7.shouldRecoverToNormalStatusWhenViewWillAppear_ = NO;8.#ifndef KY_CIRCLEMENU_WITH_NAVIGATIONBAR9.10. //隐藏导航栏11. if (ios7) {12. [self setNeedsStatusBarAppearanceUpdate];13. }14. else {15.16. [[UIApplication sharedApplication] setStatusBarHidden:YES];17. }18. [self.navigationController setNavigationBarHidden:YES];19.#endif20. }21. return self;22.}到此时,视图已经显示出来,其效果为5、当我们点击主按钮centerButton,则会触发此按钮的事件[html]view plaincopy1.//循环切换菜单(关闭、打开)2.- (void)_toggle:(id)sender3.{4. (isClosed_ ? [self open] : [self _close:nil]);5.}通过此方法,循环切换菜单(关闭、打开)因为是第一次触发此按钮,isClosed_的初始值为YES,则会调用open方法6、open方法:此方法是用来打开菜单视图<1>通过动画效果来打开菜单视图,通过传递不同的三角形斜边的值来实现缩放的动画效果<2>通过调用_updateButtonsLayoutWithTriangleHypotenuse,将三角形的斜边值传递给此方法来改变菜单按钮的frame,实现过程:_updateButtonsLayoutWithTriangleHypotenuse根据三角形斜边的值来更新按钮的布局,通过三角函数计算出各个按钮的x、y坐标,将point值以及按钮的tag值传递给_setButtonWithTag:origin:此方法,<3>_setButtonWithTag:origin:此方法的作用:根据tag值取出menu视图中的button,再根据CGPoint设置其frame[html]view plaincopy1.- (void)open2.{3. if (isOpening_) return;4.5.isInProcessing_ = YES;6. // Show buttons with animation7. [UIView animateWithDuration:.3f8. delay:0.f9. options:UIViewAnimationCurveEaseInOut10. animations:^{11. //将menu视图透明度设为112. [self.menu setAlpha:1.f];13. // Compute buttons' frame and set for them, based on |buttonCount|14. //计算按钮的frame15. [self _updateButtonsLayoutWithTriangleHypotenuse:maxBounceOfTriangleHypotenuse_];16. }17. completion:^(BOOL finished) {18. [UIView animateWithDuration:.1f19. delay:0.f20. options:UIViewAnimationCurveEaseInOut21. animations:^{22. [self _updateButtonsLayoutWithTriangleHypotenuse:defaultTriangleHypotenuse_];23. }24. completion:^(BOOL finished) {25.isOpening_ = YES;26.isClosed_ = NO;27.isInProcessing_ = NO;28. }];29. }];30.}[html]view plaincopy1.- (void)_updateButtonsLayoutWithTriangleHypotenuse:(CGFloat)triangleHypotenuse2.{3. //4. // Triangle Values for Buttons' Position5. //6. // /| a: triangleA = c * cos(x)7. // c / | b b: triangleB = c * sin(x)8. // /)x| c: triangleHypotenuse9. // ----- x: degree10. // a11. //12. //通过设置按钮中心点来来更新按钮的布局13. //通过三角函数计算出各个按钮的中心点14. CGFloat centerBallMenuHalfSize = menuSize_ * .5f;15.// CGFloat buttonRadius = centerButtonSize_ * .5f;16.17. //triangleHypotenuse:三角形的斜边18. if (! triangleHypotenuse) triangleHypotenuse = defaultTriangleHypotenuse_;// Distance to Ball Center 距离球中心19.20.21. //22. // o o o o o o o o o o o o o23. // \|/ \|/ \|/ \|/ \|/ \|/24. // 1 --|-- 2 --|-- 3 --|-- 4 --|-- 5 --|-- 6 --|--25. // /|\ /|\ /|\ /|\ /|\ /|\26. // o o o o o o o o27. //28. switch (buttonCount_) {29. case 1:30. [self _setButtonWithTag:1 origin:CGPointMake(centerBallMenuHalfSize -buttonRadius,31. centerBallMenuHalfSize - triangleHypotenuse - buttonRadius)];32. break;33.34. case 2: {35. CGFloat degree = M_PI / 4.0f; // = 45 * M_PI / 18036. CGFloat triangleB = triangleHypotenuse * sinf(degree);37. CGFloat negativeValue = centerBallMenuHalfSize - triangleB - buttonRadius;38. CGFloat positiveValue = centerBallMenuHalfSize + triangleB - buttonRadius;39. [self _setButtonWithTag:1 origin:CGPointMake(negativeValue, negativeValue)];40. [self _setButtonWithTag:2 origin:CGPointMake(positiveValue, negativeValue)];41.42. break;43. }44.45. case 3: {46. // = 360.0f / self.buttonCount * M_PI / 180.0f;47. // E.g: if |buttonCount_ = 6|, then |degree = 60.0f * M_PI / 180.0f|;48. // CGFloat degree = 2 * M_PI / self.buttonCount;49. //50. CGFloat degree = M_PI / 3.0f; // = 60 * M_PI / 18051. CGFloat triangleA = triangleHypotenuse * cosf(degree);52. CGFloat triangleB = triangleHypotenuse * sinf(degree);53. [self _setButtonWithTag:1 origin:CGPointMake(centerBallMenuHalfSize -triangleB - buttonRadius,54. centerBallMenuHalfSize - triangleA - buttonRadius)];55. [self _setButtonWithTag:2 origin:CGPointMake(centerBallMenuHalfSize +triangleB - buttonRadius,56. centerBallMenuHalfSize - triangleA - buttonRadius)];57. [self _setButtonWithTag:3 origin:CGPointMake(centerBallMenuHalfSize -buttonRadius,58. centerBallMenuHalfSize + triangleHypotenuse - buttonRadius)];59.60. break;61. }62.63. case 4: {64. CGFloat degree = M_PI / 4.0f; // = 45 * M_PI / 18065. CGFloat triangleB = triangleHypotenuse * sinf(degree);66. CGFloat negativeValue = centerBallMenuHalfSize - triangleB - buttonRadius;67. CGFloat positiveValue = centerBallMenuHalfSize + triangleB - buttonRadius;68. [self _setButtonWithTag:1 origin:CGPointMake(negativeValue, negativeValue)];69. [self _setButtonWithTag:2 origin:CGPointMake(positiveValue, negativeValue)];70. [self _setButtonWithTag:3 origin:CGPointMake(negativeValue, positiveValue)];71. [self _setButtonWithTag:4 origin:CGPointMake(positiveValue, positiveValue)];72. break;73. }74.75. case 5: {76. CGFloat degree = M_PI / 2.5f; // = 72 * M_PI / 18077. CGFloat triangleA = triangleHypotenuse * cosf(degree);78. CGFloat triangleB = triangleHypotenuse * sinf(degree);79. [self _setButtonWithTag:1 origin:CGPointMake(centerBallMenuHalfSize -triangleB - buttonRadius,80. centerBallMenuHalfSize - triangleA - buttonRadius)];81. [self _setButtonWithTag:2 origin:CGPointMake(centerBallMenuHalfSize -buttonRadius,82. centerBallMenuHalfSize - triangleHypotenuse - buttonRadius)];83. [self _setButtonWithTag:3 origin:CGPointMake(centerBallMenuHalfSize +triangleB - buttonRadius,84. centerBallMenuHalfSize - triangleA - buttonRadius)];85.86. CGFloat centerX1 = centerBallMenuHalfSize - triangleB;87. CGFloat centerY1 = centerBallMenuHalfSize - triangleA;88. CGFloat centerX2 = centerBallMenuHalfSize + triangleB;89. CGFloat centerX3 = centerBallMenuHalfSize;90. CGFloat centerY3 = centerBallMenuHalfSize - triangleHypotenuse;91. [self _setButtonCenterWithTag:1 origin:CGPointMake(centerX1, centerY1)];92. [self _setButtonCenterWithTag:2 origin:CGPointMake(centerX2, centerY1)];93. [self _setButtonCenterWithTag:3 origin:CGPointMake(centerX3, centerY3)];94.95.96.degree = M_PI / 5.0f; // = 36 * M_PI / 18097.triangleA = triangleHypotenuse * cosf(degree);98.triangleB = triangleHypotenuse * sinf(degree);99. [self _setButtonWithTag:4 origin:CGPointMake(centerBallMenuHalfSize -triangleB - buttonRadius,100. centerBallMenuHalfSize + t riangleA - buttonRadius)];101. [self _setButtonWithTag:5 origin:CGPointMake(centerBallMenuHalfSize + triangleB - buttonRadius,102. centerBallMenuHalfSize + tr iangleA - buttonRadius)];103. break;104. }105.106. case 6: {107. CGFloat degree = M_PI / 3.0f; // = 60 * M_PI / 180108. CGFloat triangleA = triangleHypotenuse * cosf(degree);109. CGFloat triangleB = triangleHypotenuse * sinf(degree);110. [self _setButtonWithTag:1 origin:CGPointMake(centerBallMenuHalfSize - triangleB - buttonRadius,111. centerBallMenuHalfSize - t riangleA - buttonRadius)];112. [self _setButtonWithTag:2 origin:CGPointMake(centerBallMenuHalfSize - buttonRadius,113. centerBallMenuHalfSize - t riangleHypotenuse - buttonRadius)];114. [self _setButtonWithTag:3 origin:CGPointMake(centerBallMenuHalfSize + triangleB - buttonRadius,115. centerBallMenuHalfSize - t riangleA - buttonRadius)];116. [self _setButtonWithTag:4 origin:CGPointMake(centerBallMenuHalfSize - triangleB - buttonRadius,117. centerBallMenuHalfSize + t riangleA - buttonRadius)];118. [self _setButtonWithTag:5 origin:CGPointMake(centerBallMenuHalfSize - buttonRadius,119. centerBallMenuHalfSize + t riangleHypotenuse - buttonRadius)];120. [self _setButtonWithTag:6 origin:CGPointMake(centerBallMenuHalfSize + triangleB - buttonRadius,121. centerBallMenuHalfSize + tr iangleA - buttonRadius)];122.123. }124.125. default:126. break;127. }128.}此时,所有的菜单按钮都显示出来了7、当我们再次点击主按钮时,此时的isClosed的值为NO,则会调用_close方法,将所有的按钮的frame都设置为菜单按钮的初始值buttonOriginFrame_,并为其设置动画,这样所有的按钮将会回到原先最初始的frame[html]view plaincopy1.- (void)_close:(NSNotification *)notification2.{3. if (isClosed_)4. return;5.6.isInProcessing_ = YES;7. // Hide buttons with animation8. [UIView animateWithDuration:.3f9. delay:0.f10. options:UIViewAnimationCurveEaseIn11. animations:^{12. for (UIButton * button in [self.menu subviews]) {13. [button setFrame:buttonOriginFrame_];14. }15. [self.menu setAlpha:0.f];16. }17. completion:^(BOOL finished) {18.isClosed_ = YES;19.isOpening_ = NO;20.isInProcessing_ = NO;21. }];22.}8、当我们点击菜单按钮时,则会触发此按钮的事件方法:runButtonActionsrunButtonActions:此方法可以通过使用此框架的用户自己调用此方法来设置其所要跳转的页面,此处演示是跳转到导航控制器,在runButtonActions中通过此方法pushiViewController 跳转到另一个控制器,并设置按钮的动画消失效果,实现过程就是将三角形的斜边设为最大的三角形斜边maxTriangleHypotenuse_,再通过_updateButtonsLayoutWithTriangleHypotenuse方法计算出按钮的frame[html]view plaincopy1.- (void)pushViewController:(id)viewController2.{3. [UIView animateWithDuration:.3f4. delay:0.f5. options:UIViewAnimationOptionCurveEaseInOut6. animations:^{7. // Slide away buttons in center view & hide them8. [self _updateButtonsLayoutWithTriangleHypotenuse:maxTriangleHypotenuse_];9. [self.menu setAlpha:1.f];10.11. /*/ Show Navigation Bar12. [self.navigationController setNavigationBarHidden:NO];13. CGRect navigationBarFrame = self.navigationController.navigationBar.frame;14. if (navigationBarFrame.origin.y <0) {15.navigationBarFrame.origin.y = 0;16. [self.navigationController.navigationBar setFrame:navigationBarFrame];17. }*/18. }19. completion:^(BOOL finished) {20. [self.navigationController pushViewController:viewController animated:YES];21. }];22.}9、从跳转的控制器返回到菜单页面时,再将按钮通过动画返回到原先的位置,将三角形斜边从最大值到默认三角形斜边,_updateButtonsLayoutWithTriangleHypotenuse方法根据给定的三角形斜边,计算出按钮的frame,也就是回到了如下的效果图KYCircleMenu框架的使用KYCircleMenu框架的使用其实很简单,首先需要创建一个KYCircleMenu的控制器,将此控制器显示在window上,再根据用户的需求,设置菜单按钮的个数,按钮的大小,以及点击菜单按钮后所要push到的页面等等,部分实现代码如下:[html]view plaincopy1.UINavigationController * navigationController = [UINavigationController alloc];2.3. // Setup circle menu with basic configuration4. CircleMenuViewController * circleMenuViewController;5.circleMenuViewController = [CircleMenuViewController alloc];6. (void)[circleMenuViewController initWithButtonCount:kKYCCircleMenuButtonsCount7. menuSize:kKYCircleMenuSize8. buttonSize:kKYCircleMenuButtonSize9. buttonImageNameFormat:kKYICircleMenuButtonImageNameFormat10. centerButtonSize:kKYCircleMenuCenterButtonSize11. centerButtonImageName:kKYICircleMenuCenterButton12. centerButtonBackgroundImageName:kKYICircleMenuCenterButtonBackground];13.14. // Set the cricle menu vc as the root vc15. (void)[navigationController initWithRootViewController:circleMenuViewController];16. [navigationController.navigationBar setBarStyle:UIBarStyleBlackTranslucent];17.18. // Set navigation controller as the root vc19. [self.window setRootViewController:navigationController];[html]view plaincopy1.- (void)runButtonActions:(id)sender2.{3. [super runButtonActions:sender];4.5. // Configure new view & push it with custom |pushViewController:| method6. UIViewController * viewController = [[UIViewController alloc] init];7. [viewController.view setBackgroundColor:[UIColor blackColor]];8. [viewController setTitle:[NSString stringWithFormat:@"View %d", [sender tag]]];9. // Use KYCircleMenu's |-pushViewController:| to push vc10. [self pushViewController:viewController];11.}。
- 1、下载文档前请自行甄别文档内容的完整性,平台不提供额外的编辑、内容补充、找答案等附加服务。
- 2、"仅部分预览"的文档,不可在线预览部分如存在完整性等问题,可反馈申请退款(可完整预览的文档不适用该条件!)。
- 3、如文档侵犯您的权益,请联系客服反馈,我们会尽快为您处理(人工客服工作时间:9:00-18:30)。
继续介绍一个有用的TableView中全选单元格的例子,里面的方法可以用在阅读器中用户对阅读内容来源的选择上,如图所示:核心代码如下:[objc]view plaincopy1.- (void)viewDidLoad2.{3. [super viewDidLoad];4.5.//创建表视图 _table6. _table = [[UITableView alloc]initWithFrame:CGRectMake(0, 64, 320, 500) style:UITableViewStylePlain];7. _table.delegate = self;8. _table.dataSource = self;9. [self.view addSubview:_table];10.11.//将字典 "NO"-> @"checked" 装入可变数组中,来控制单元格左边对勾视图12. _contacts = [NSMutableArray array];13.for (int i = 0; i <10; i++) {14.NSMutableDictionary *dic = [NSMutableDictionary dictionary];15. [dic setValue:@"NO" forKey:@"checked"];16. [_contacts addObject:dic];17. }18.19.//创建屏幕左上方的"全选"按钮20. _button = [UIButton buttonWithType:UIButtonTypeRoundedRect];21. [_button setTitle:@"全选" forState:UIControlStateNormal];22. _button.frame = CGRectMake(10, 10, 100, 50);23. [_button addTarget:self action:@selector(allSelect:) forControlEvents:UIControlEventTouchUpInside];24. [self.view addSubview:_button];25.}[objc]view plaincopy1.// 全选按钮的触发事件2.- (void)allSelect:(UIButton*)sender{3.4.//将表视图的所有的单元格放在数组里5.NSArray *anArrayOfIndexPath = [NSArray arrayWithArray:[_table indexPathsForVisibleRows]];6.7.for (int i = 0; i < [anArrayOfIndexPath count]; i++) {8.9.// 得到表视图的indexPath10.NSIndexPath *indexPath= [anArrayOfIndexPath objectAtIndex:i];11.//创建每个单元格,12.LTableViewCell *cell = (LTableViewCell*)[_table cellForRowAtIndexPath:indexPath];13. NSUInteger row = [indexPath row];14.NSMutableDictionary *dic = [_contacts objectAtIndex:row];15.16.// 判断当前按钮的状态是全选还是取消,设置不同的标记17.if ([[[(UIButton*)sender titleLabel] text] isEqualToString:@"全选"]) {18. [dic setObject:@"YES" forKey:@"checked"];19. [cell setChecked:YES];20. }else {21. [dic setObject:@"NO" forKey:@"checked"];22. [cell setChecked:NO];23. }24. }25.26.// 两种状态的切换27.if ([[[(UIButton*)sender titleLabel] text] isEqualToString:@"全选"]){28.for (NSDictionary *dic in _contacts) {29. [dic setValue:@"YES" forKey:@"checked"];30. }31.32. [(UIButton*)sender setTitle:@"取消" forState:UIControlStateNormal];33. }34.35.else{36.for (NSDictionary *dic in _contacts) {37. [dic setValue:@"NO" forKey:@"checked"];38. }39. [(UIButton*)sender setTitle:@"全选" forState:UIControlStateNormal];40. }41.}[objc]view plaincopy1.- (UITableViewCell *)tableView:(UITableView *)tableView cellForRowAtIndexPath:(NSIndexPath *)indexPath{2.static NSString * identifier = @"Cell";3.4.// 创建单元格5.LTableViewCell * cell = [tableView dequeueReusableCellWithIdentifier:identifier];6.if (cell == nil) {7. cell = [[LTableViewCell alloc]initWithStyle:UITableViewCellStyleDefault reuseIdentifier:identifier];8. }9. NSUInteger row = [indexPath row];10.11.NSMutableDictionary *dic = [_contacts objectAtIndex:row];12.13.14.if ([[dic objectForKey:@"checked"] isEqualToString:@"NO"]) {15. [dic setObject:@"NO" forKey:@"checked"];16. [cell setChecked:NO];17.18. }else {19. [dic setObject:@"YES" forKey:@"checked"];20. [cell setChecked:YES];21. }22.return cell;23.}[objc]view plaincopy1.- (void)tableView:(UITableView *)tableView didSelectRowAtIndexPath:(NSIndexPath *)indexPath2.{3. [tableView deselectRowAtIndexPath:indexPath animated:YES];4.5.LTableViewCell *cell = (LTableViewCell*)[tableView cellForRowAtIndexPath:indexPath];6.7. NSUInteger row = [indexPath row];8.9.NSMutableDictionary *dic = [_contacts objectAtIndex:row];10.11.// 创建单元格左边的打钩视图12.if ([[dic objectForKey:@"checked"] isEqualToString:@"NO"]) {13. [dic setObject:@"YES" forKey:@"checked"];14. [cell setChecked:YES];15. }else {16. [dic setObject:@"NO" forKey:@"checked"];17. [cell setChecked:NO];18. }19.}在LTableViewCell中[objc]view plaincopy1.// 用 checked 来判断是否加上对勾视图2.- (void)setChecked:(BOOL)checked{3.4.5.if (checked)6. {7. m_checkImageView.image = [UIImage imageNamed:@"Selected.png"];8.self.backgroundView.backgroundColor = [UIColor colorWithRed:223.0/255.0 green:230.0/255.0 blue:250.0/255.0 alpha:1.0];9. }10.else11. {12. m_checkImageView.image = [UIImage imageNamed:@"Unselected.png"];13.self.backgroundView.backgroundColor = [UIColor whiteColor];14. }15. m_checked = checked;16.17.18.}代码的逻辑简单,通用性强,核心就是用字典来控制对勾视图的显示,对我们以后的视图设计有参考价值。