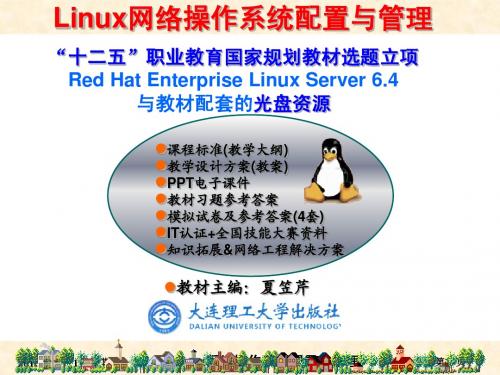
RHEL Linux网络服务器配置
RHEL6版-项目6 网络配置与软件包管理
2013年11月1日星期五
Linux网络操作系统配置与管理
第3 页
6.2 项目知识准备
6-2-1 网络配置的方式
表6-1
路径及文件名 /etc/hosts
主要的网络配置文件
功能 完成主机名映射为IP地址的功能
/etc/sysconfig/network
/etc/sysconfig/network-scripts/
用于对网络服务进行总体配置,如是否启用网络 服务功能,是否开启IP数据包转发服务等。 在没有配置或安装网卡时,也需要设置该文件, 以使本机的回环设备(lo)能够正常工作,该设 备是Linux内部通讯的基础。 常用的设置项主要有:
⑴ NETWORKING=yes|no 设置系统是否使用网络服务功能。 ⑵ NETWORKING_IPV6=yes|no 设置系统是否支持IPv6网络。
代表该软件适用于 Intel 80386以上的 x86架构的计算机硬 件平台适用。
第16 页
2013年11月1日星期五
Linux网络操作系统配置与管理
2.YUM管理工具
6.2 项目知识准备
YUM(全称为Yellow dog Updater, Modified)则能
在线下载、安装、卸载、升级rpm软件包等任务,并且能 够自动查找并解决rpm包之间的依赖关系后,一次性完成 所有具有依赖关系rpm包的安装,而无需管理员逐个、手 工地去安装每一个rpm包。 要实现YUM的功能,有赖于三个机制的建立
会配置主机名和网卡 会设置路由 会配置客户端名称解析 能使用常用网络调试命令维护主机 会启动与停止网络服务,能配置网络服务的启动状态 能使用rpm、yum命令安装、查询、升级和删除rpm软件包
RHEL5.4配置HTTP服务

RHEL5.4配置HTTP服务下面是关于linux下面配置HTTP服务的讨论,HTTP介绍HTTP的全名为Hyper Text Transfer Protocol(超文本传输协议)在linux下面实现web服务,通常使用Apache来实现,Apache一直是Internet上面最流行的web服务器,web服务器的架设,在linux下面有个很著名的架构叫lamp:linux+apache+mysql+php。
下面是关于HTTP这个服务的属性HTTP的相关软件包HttpdHTTP的守护进程/usr/sbin/httpdHTTP的脚本/etc/init.d/httpdHTTP的端口80(http) 443(https)HTTP的配置文件/etc/http/* /var/www/*下面来具体搭建HTTP服务现在我们主要来实现虚拟主机的搭建,虚拟主机可以实现在一台服务器上面运行多个站点,而且之间互不影响。
可以大大的节约成本。
虚拟主机技术可以通过三种方式来实现:基于域名,基于IP,基于端口的虚拟主机。
下面主要讨论基于域名的虚拟主机的实现,在实现基于域名的虚拟主机的之前,我们先要在DNS服务器里面做好解析。
我已经为192.168.0.254这个IP地址做了两个解析,一个是,还有一个。
第一步,安装软件包[root@localhost ~]#[root@localhost ~]# yum -y install httpdLoaded plugins: rhnplugin, securityThis system is not registered with RHN.RHN support will be disabled.Cluster | 1.3 kB 00:00ClusterStorage | 1.3 kB00:00Server | 1.3 kB 00:00VT | 1.3 kB 00:00Setting up Install ProcessResolving DependenciesThere are unfinished transactions remaining. You might consider runningyum-complete-transaction first to finish them.The program yum-complete-transaction is found in the yum-utils package.--> Running transaction check---> Package httpd.i386 0:2.2.3-31.el5 set to be updated--> Processing Dependency: libapr-1.so.0 for package: httpd--> Processing Dependency: libaprutil-1.so.0 for package: httpd--> Running transaction check---> Package apr.i386 0:1.2.7-11.el5_3.1 set to be updated---> Package apr-util.i386 0:1.2.7-7.el5_3.2 set to be updated--> Processing Dependency: libpq.so.4 for package: apr-util--> Running transaction check---> Package postgresql-libs.i386 0:8.1.11-1.el5_1.1 set to be updated--> Finished Dependency ResolutionDependencies Resolved============================================================= ===================Package Arch Version Repository Size============================================================= ===================Installing:httpd i386 2.2.3-31.el5 Server 1.2 MInstalling for dependencies:apr i386 1.2.7-11.el5_3.1 Server 123 kapr-util i386 1.2.7-7.el5_3.2 Server76 kpostgresql-libs i386 8.1.11-1.el5_1.1 Server196 kTransaction Summary============================================================= ===================Install 4 Package(s)Update 0 Package(s)Remove 0 Package(s)Total size: 1.6 MTotal download size: 1.2 MDownloading Packages:httpd-2.2.3-31.el5.i386.rpm | 1.2 MB 00:00 Running rpm_check_debugRunning Transaction TestFinished Transaction TestTransaction Test SucceededRunning TransactionInstalling : apr1/4Installing : postgresql-libs2/4Installing : apr-util3/4Installing : httpd4/4Installed:httpd.i386 0:2.2.3-31.el5Dependency Installed:apr.i386 0:1.2.7-11.el5_3.1 apr-util.i386 0:1.2.7-7.el5_3.2 postgresql-libs.i386 0:8.1.11-1.el5_1.1Complete![root@localhost ~]#HTTP软件包就安装成功了,第二步,编辑http的配置文件http服务的配置文件在/etc/httpd/conf/httpd.conf。
linux 服务管理网络安装RHEL6.4---实验报告

Linux 网络服务实验手册Linux-8--linux 服务管理--RH254-dhcp+pxe+ftp+kickstart网络安装RHEL6.4---实验Linux实验手册Linux精英联盟实验一:dhcp+pxe+ftp+kickstart网络安装一:实验内容:1:实验环境:所有操作均在虚拟机里面完成,虚拟机网卡设置同一网段,A虚拟机已安装linux6.4系统;B虚拟机无操作系统2:挂载关盘(光盘内有RHEL6.4安装文件),配置本地YUM3:安装vsftp,并启动4:安装tftp以及tftp-server,并配置tftp设置,开启tftp5:安装DHCP,并配置DHCP文件,开启DHCP6:安装syslinux,并配置pxe7:安装kickstart软件包,并制作ks.cfg文件,保存到/var/ftp目录下8:重新挂载RHCL安装光盘,到FTP的pub目录下9:禁用selinux并关闭防火墙10:B虚拟机修改BIOS从网络启动,进行测试=-==--=-=-=-=-=-=-=-=-=-=-=-=-=-=-=-=-=--=-=-=-=-=-=-= 安装原理:客户端PXE网卡启动—DHCP服务器—获得IP—从TFTP目录上下载pxelinux.0—根据配置文件指定的vmlinuz、initrd—启动系统内核—通过内核指定地点去下载ks.cfg文件—根据ks.cfg去(HTTP、FTP、NFS)服务器下载RPM包并安装系统—完成安装Linux实验手册Linux精英联盟注:所谓的无人值守安装,就是不需要管理员繁琐的插入系统光盘或者启动U盘,而是从网络引导进行安装,这里就说到了PXE了,PXE是由intel 公司开发的网络引导技术,工作在Client/Server模式,允许客户机通过网络从远程服务器下载引导镜像,并加载安装文件或者整个操作系统。
并且要实现自动安装还需要一个工具,那就是kickstart。
Red Hat Enterprise Linux 8 配置和管理网络说明书

Red Hat Enterprise Linux 8配置和管理网络管理网络接口、防火墙和高级网络功能Last Updated: 2023-08-04Red Hat Enterprise Linux 8 配置和管理网络管理网络接口、防火墙和高级网络功能法律通告Copyright © 2023 Red Hat, Inc.The text of and illustrations in this document are licensed by Red Hat under a Creative Commons Attribution–Share Alike 3.0 Unported license ("CC-BY-SA"). An explanation of CC-BY-SA is available at/licenses/by-sa/3.0/. In accordance with CC-BY-SA, if you distribute this document or an adaptation of it, you must provide the URL for the original version.Red Hat, as the licensor of this document, waives the right to enforce, and agrees not to assert, Section 4d of CC-BY-SA to the fullest extent permitted by applicable law.Red Hat, Red Hat Enterprise Linux, the Shadowman logo, the Red Hat logo, JBoss, OpenShift, Fedora, the Infinity logo, and RHCE are trademarks of Red Hat, Inc., registered in the United States and other countries.Linux ® is the registered trademark of Linus Torvalds in the United States and other countries. Java ® is a registered trademark of Oracle and/or its affiliates.XFS ® is a trademark of Silicon Graphics International Corp. or its subsidiaries in the United States and/or other countries.MySQL ® is a registered trademark of MySQL AB in the United States, the European Union and other countries.Node.js ® is an official trademark of Joyent. Red Hat is not formally related to or endorsed by the official Joyent Node.js open source or commercial project.The OpenStack ® Word Mark and OpenStack logo are either registered trademarks/service marks or trademarks/service marks of the OpenStack Foundation, in the United States and other countries and are used with the OpenStack Foundation's permission. We are not affiliated with, endorsed or sponsored by the OpenStack Foundation, or the OpenStack community.All other trademarks are the property of their respective owners.摘要利用 Red Hat Enterprise Linux (RHEL)的网络功能,您可以配置主机以满足您组织的网络和安全要求。
RHEL5.4下IPVS安装配置

RHEL 5.4下IPVS安装配置一.安装环境:RHEL 5.4 ipvsadm-1.24.tar.gz二.拓扑图:三.安装过程:1.从官方网站下载ipvsadm:下载地址:/software/kernel-2.6/下载ipvsadm-1.24.tar.gz,因为最新版ipvsadm-1.25这个版本只支持2.6.28以上的内核,RHEL 5.4内核版本达不到要求,所以选择安装前一个版本。
2.创建一个连接文件,其命令为:ln -sv /usr/src/kernels/2.6.18-92.el5PAE-i686 /usr/src/linux注意一定要与当前的运行的内核相一致,因为/usr/src/kernels目录下可能有多个目录。
如果不创建这个连接文件,在编译时会出错,从而不能继续进行安装。
3.解包。
#tar zxvf ipvsadm-1.244.编译并安装。
#cd ipvsadm-1.24#make#make install可执行文件被安装到/sbin/ipvsadm5.检验ipvsadm是否被正确安装(1) 执行ipvsadm,看是否有如下输出。
IP Virtual Server version 1.2.1 (size=4096)Port LocalAddress:Port Scheduler Flags->RomoteAddress:PortForward Weight ActiveConn InActConn(2) 检查当前加载的内核模块,看是否存在ip_vs模块。
[root@hd-4 ipvsadm-1.24]# lsmod | grep ip_vsip_vs 77569 0注1:只有执行ipvsadm以后,才会在内核加载ip_vs模块。
注2:不能以查进程的方式判断ipvs是否运行。
注3:如果下载最新的ipvsadm-1.25.tar.gz这个版本,在创建连接文件/usr/src/linux后,执行编译时,可能需要修改/boot/grub/grub.conf启动内核名称。
网络服务器搭建、配置与管理-Linux 第4版 第4章 配置与管理代理服务器

03 配置squid服务
3.在Client1上安装httpd服务
安装httpd服务,让防 火墙允许,并测试默 认网络配置是否成功。
[root@Client1 ~]# dnf install httpd -y
#安装Web
[root@Client1 ~]# systemctl start httpd
[root@Client1 ~]# systemctl enable httpd
项目目标
● 了解代理服务器的基本知识 ● 掌握squid代理服务器的配置
主要内容
CONTENTS
01
代理服务器概述
02
使用squid服务
03
配置squid服务器
01 代理服务器概述
01 代理服务器概述
1.1 代理服务器的工作原理
代 理 服 务 器 ( Proxy Sห้องสมุดไป่ตู้rver ) 等 同 于 内 网 与 Internet的桥梁。
(2)用户访问限制:设置相应限制,过滤或屏蔽信息。
(3)安全性得到提高:只能知道使用代理服务器相关信息。
02 使用squid服务
项目需求
客户端不需要设置代理服务器地址和端口就能够 访问互联网上的Web服务器,即透明代理。
主 机 名 称 操作系统
IP地址
角色
内网服务器 Server01
squid代理服务器 Server02
2.在Server02上安装并配置squid服务
[root@Server02 ~]# rpm -qa |grep squid
[root@Server02 ~]# mount /dev/cdrom /media
[root@Server02 ~]# dnf clean all
Redhat-6.5基于网络安装服务器配置
概述本文以Redhat6.5为基础,通过配置网络安装服务器,实现Redhat Linux的网络安装。
主要用到的软件(服务)有DHCP,TFTP,NFS,Kickstart等。
本文只列出具体步骤,不含原理说明。
1. 基础配置1.1 更改IP地址[root@localhost ~]# vi /etc/sysconfig/network-scripts/ifcfg-eth0[root@localhost ~]# cat /etc/sysconfig/network-scripts/ifcfg-eth0DEVICE=eth0HWADDR=08:00:27:53:44:fbTYPE=EthernetUUID=82affeef-922e-40b2-b89f-a5df8e9fa236ONBOOT=yesNM_CONTROLLED=yesBOOTPROTO=noneIPADDR=192.168.7.30NETMASK=255.255.255.0GATEWAY=192.168.7.1IPV6INIT=noUSERCTL=no[root@localhost ~]# ifup eth0Active connection state: activatedActive connection path: /org/freedesktop/NetworkManager/ActiveConnection/11.2 更改hostnme[root@localhost ~]# vi /etc/sysconfig/network[root@redhatnis ~]# cat /etc/sysconfig/networkNETWORKING=yesHOSTNAME=redhatnis[root@localhost ~]# vi /etc/hosts[root@localhost ~]# cat /etc/hosts127.0.0.1 localhost localhost.localdomain localhost4 localhost4.localdomain4 ::1 localhost localhost.localdomain localhost6 localhost6.localdomain6 192.168.7.30 redhatnis1.3 关闭SELINUX及防火墙(iptables)[root@localhost ~]# vi /etc/selinux/config[root@redhatnis ~]# cat /etc/selinux/config |grep disa# disabled - SELinux is fully disabled.SELINUX=disabled[root@localhost ~]# chkconfig |grep iptaiptables 0:off 1:off 2:on 3:on 4:on 5:on 6:off[root@localhost ~]# chkconfig --level 2345 iptables off[root@localhost ~]# shutdown -ry 02. 软件安装1.1 挂载安装光盘[root@redhatnis ~]# mount /dev/sr0 /mntmount: block device /dev/sr0 is write-protected, mounting read-only[root@redhatnis ~]# df -hFilesystem Size Used Avail Use% Mounted on/dev/mapper/vg_root-lv_root 20G 6.2G 12G 35% /tmpfs 940M 72K 940M 1% /dev/shm/dev/sda1 485M 39M 421M 9% /boot/dev/sr0 3.6G 3.6G 0 100% /mnt1.2 配置YUM源[root@redhatnis ~]# cd /etc/yum.repos.d[root@redhatnis yum.repos.d]# vi installmedia.repo[root@redhatnis yum.repos.d]# cat installmedia.repo[InstallMedia]name=Red Hat Enterprise Linux 6.5baseurl=file:///mnt/Serverenabled=1gpgcheck=0[root@redhatnis yum.repos.d]# yum listLoaded plugins: product-id, refresh-packagekit, security, subscription-managerThis system is not registered to Red Hat Subscription Management. You can usesubscription-manager to register.InstallMedia | 3.9 kB 00:00 ...Installed PackagesConsoleKit.x86_64 0.4.1-3.el6 @anaconda-RedHatEnterpriseLinux-201311111358.x86_64/6.51.3 安装所需软件[root@redhatnis ~]# yum install -y -q xinetd tftp tftp-server ftp vsftpd dhcpnfs-utilsThis system is not registered to Red Hat Subscription Management. You can usesubscription-manager to register.3. 配置DHCP Server[root@redhatnis ~]# cd /etc/dhcp[root@redhatnis dhcp]# vi dhcpd.conf[root@redhatnis dhcp]# cat dhcpd.conf## DHCP Server Configuration file.# see /usr/share/doc/dhcp*/dhcpd.conf.sample# see 'man 5 dhcpd.conf'#allow booting;allow bootp;#Boot 所需文件filename "pxelinux.0";#TFTP服务器IPnext-server 192.168.7.30;subnet 192.168.7.0 netmask 255.255.255.0{option subnet-mask 255.255.255.0;#IP地址范围range 192.168.7.31 192.168.7.100;default-lease-time 21600;max-lease-time 43200;}[root@redhatnis dhcp]# service dhcpd startStarting dhcpd: [ OK ][root@redhatnis dhcp]# chkconfig --level 345 dhcpd on[root@redhatnis dhcp]# chkconfig |grep dhcpddhcpd 0:off 1:off 2:off 3:on 4:on 5:on 6:off4. 通过FTP(vsftpd)方式上传ISO镜像[root@redhatnis ~]# cd /etc/vsftpd/[root@redhatnis vsftpd]# vi ftpusers[root@redhatnis vsftpd]# cat ftpusers |grep root#root[root@redhatnis vsftpd]# vi user_list[root@redhatnis vsftpd]# cat user_list |grep root#root[root@redhatnis ~]# service vsftpd startStarting vsftpd for vsftpd: [ OK ][root@redhatnis ~]# chkconfig --level 345 vsftpd on此处上传ISO镜像[root@redhatnis ~]# ll /tmp |grep iso-rw-r--r-- 1 root root 3853516800 Feb 16 08:40 rhel-server-6.5-x86_64-dvd.iso 5. 配置NFS[root@redhatnis ~]# mkdir /iso[root@redhatnis ~]# mv /tmp/rhel-server-6.5-x86_64-dvd.iso /iso[root@redhatnis ~]# vi /etc/exports[root@redhatnis ~]# cat /etc/exports/iso *(ro)/mnt *(ro)[root@redhatnis ~]# service rpcbind statusrpcbind (pid 931) is running...[root@redhatnis ~]# service rpcidmapd statusrpc.idmapd (pid 1435) is running...[root@redhatnis ~]# service nfs startStarting NFS services: [ OK ]Starting NFS quotas: [ OK ]Starting NFS mountd: [ OK ]Starting NFS daemon: [ OK ]Starting RPC idmapd: [ OK ][root@redhatnis ~]# showmount -eExport list for redhatnis:/mnt */iso *[root@redhatnis ~]# chkconfig --level 345 nfs on[root@redhatnis ~]# chkconfig |grep nfsnfs 0:off 1:off 2:off 3:on 4:on 5:on 6:off6. 配置TFTP Server[root@redhatnis ~]# mkdir /tftpboot[root@redhatnis ~]# vi /etc/xinetd.d/tftp[root@redhatnis ~]# cat /etc/xinetd.d/tftp# default: off# description: The tftp server serves files using the trivial file transfer \# protocol. The tftp protocol is often used to boot diskless \# workstations, download configuration files to network-aware printers, \# and to start the installation process for some operating systems.service tftp{socket_type = dgramprotocol = udpwait = yesuser = rootserver = /usr/sbin/in.tftpdserver_args = -s /tftpbootdisable = noper_source = 11cps = 100 2flags = IPv4}7. 复制相关文件[root@redhatnis ~]# mount -t iso9660 -o loop,ro /iso/rhel-server-6.5-x86_64-dvd.iso /mnt[root@redhatnis ~]# cp -pr /mnt/images /iso[root@redhatnis ~]# cp -pr /mnt/Packages/syslinux-4.02-8.el6.x86_64.rpm /iso[root@redhatnis ~]# ll /isototal 3764068dr-xr-xr-x 3 root root 4096 Nov 12 2013 images-rw-r--r-- 1 root root 3853516800 Feb 16 14:10 rhel-server-6.5-x86_64-dvd.iso -r--r--r-- 1 root root 879224 Jan 4 2013 syslinux-4.02-8.el6.x86_64.rpm [root@redhatnis ~]# ll /iso/images/total 185548-r--r--r-- 1 root root 380928 Nov 12 2013 efiboot.img-r--r--r-- 1 root root 37976064 Nov 12 2013 efidisk.img-r--r--r-- 1 root root 145731584 Nov 12 2013 install.img-r--r--r-- 1 root root 5898240 Nov 12 2013 product.img[root@redhatnis ~]# cd /iso[root@redhatnis iso]# rpm2cpio syslinux-4.02-8.el6.x86_64.rpm |cpio -dimv[root@redhatnis iso]# lsimages rhel-server-6.5-x86_64-dvd.iso syslinux-4.02-8.el6.x86_64.rpm usr[root@redhatnis iso]# cp ./usr/share/syslinux/pxelinux.0 /tftpboot[root@redhatnis iso]# cp ./images/pxeboot/{vmlinuz,initrd.img} /tftpboot[root@redhatnis iso]# cd /tftpboot/[root@redhatnis tftpboot]# cp /boot/grub/splash.xpm.gz ./8. 创建default文件[root@redhatnis tftpboot]# mkdir pxelinux.cfg[root@redhatnis tftpboot]# cd pxelinux.cfg[root@redhatnis pxelinux.cfg]# cp /mnt/isolinux/isolinux.cfg ./default[root@redhatnis pxelinux.cfg]# vi default[root@redhatnis pxelinux.cfg]# cat defaultdefault linuxprompt 1timeout 60menu background splash.jpgmenu title Welcome to Red Hat Enterprise Linux 6.5!menu color border 0 #ffffffff #00000000menu color sel 7 #ffffffff #ff000000menu color title 0 #ffffffff #00000000menu color tabmsg 0 #ffffffff #00000000menu color unsel 0 #ffffffff #00000000menu color hotsel 0 #ff000000 #ffffffffmenu color hotkey 7 #ffffffff #ff000000menu color scrollbar 0 #ffffffff #00000000label linuxmenu label ^Install or upgrade an existing systemmenu defaultkernel vmlinuzappend ks=nfs:192.168.7.30:/iso/ks.cfg initrd=initrd.imglabel vesamenu label Install system with ^basic video driverkernel vmlinuzappend initrd=initrd.img xdriver=vesa nomodesetlabel rescuemenu label ^Rescue installed systemkernel vmlinuzappend initrd=initrd.img rescuelabel localmenu label Boot from ^local drivelocalboot 0xfffflabel memtest86menu label ^Memory testkernel memtestappend -[root@redhatnis pxelinux.cfg]# cd ..[root@redhatnis tftpboot]# lltotal 36676-r--r--r-- 1 root root 33383449 Feb 16 15:07 initrd.img-rw-r--r-- 1 root root 26828 Feb 16 14:59 pxelinux.0drwxr-xr-x 2 root root 4096 Feb 16 15:04 pxelinux.cfg-rw-r--r-- 1 root root 1341 Feb 16 15:06 splash.xpm.gz-r-xr-xr-x 1 root root 4128944 Feb 16 15:07 vmlinuz9. 创建Kickstart 配置文件系统安装完后会在/root下生产anaconda-ks.cfg文件,也可以通过Kickstart Configurator软件来配置生成该文件。
RHEL6服务器操作系统参数及安全配置
RHEL6服务器操作系统参数及安全配置Red Hat Enterprise Linux (RHEL) 6是一种企业级的操作系统,本文将介绍RHEL6服务器的操作系统参数和安全配置。
1.系统参数配置:a. 文件描述符限制:通过修改/etc/security/limits.conf文件,设置nofile的值来增加文件描述符的限制。
例如,添加以下行:b. 系统资源限制:通过修改/etc/sysctl.conf文件,设置系统资源限制的参数。
例如,增加以下参数来增大内存的共享限制:* kernel.shmmni = 4096c. 网络参数:通过/etc/sysctl.conf文件修改网络参数。
例如,禁用ICMP重定向和ARP代理:* net.ipv4.conf.all.accept_redirects = 0* net.ipv4.conf.all.send_redirects = 0* net.ipv4.conf.all.proxy_arp = 0d. 文件系统参数:通过/etc/fstab文件和tune2fs工具来设置文件系统参数。
例如,设置ext4文件系统在挂载时启用日志功能:* tune2fs -O journal_dev /dev/sda1* mount -o journal_data /dev/sda1 /mnt/data2.安全配置:a. 防火墙配置:使用iptables防火墙来配置和管理网络连接。
通过配置规则限制进出服务器的网络数据流量,可以提高服务器的安全性。
例如,只允许指定的IP地址访问SSH端口:* iptables -A INPUT -p tcp --dport 22 -s 192.168.1.1 -j ACCEPT* iptables -A INPUT -p tcp --dport 22 -j DROP* service iptables saveb. SELinux配置:RHEL6默认启用了Security-Enhanced Linux (SELinux),通过配置SELinux策略可以提高服务器的安全性。
Linux系统网络配置教程
Linux系统网络配置教程一、引言在现代信息技术时代,网络已经成为我们生活和工作中不可或缺的一部分。
而对于使用Linux操作系统的用户来说,正确配置网络是十分重要的。
本章将介绍Linux系统网络配置的基本步骤和常见问题解决方法。
二、网络配置概述网络配置是指将计算机与网络相连,并配置正确的网络参数,以实现与其他计算机之间的通信。
Linux系统的网络配置可分为两个方面,即物理连接和逻辑配置。
2.1 物理连接物理连接是指将计算机与网络相连的操作。
首先要确保计算机已经正确连接到局域网或因特网。
如果是有线连接,需要插入以太网线到计算机的网卡插槽和路由器的网络接口;如果是无线连接,需要确保无线网卡已经连接到正确的无线网络。
2.2 逻辑配置逻辑配置是指在物理连接完成后,需要对计算机进行相应的软件设置,以使其能够正确地与其他网络设备进行通信。
逻辑配置的主要内容包括IP地址的配置、网关的配置、DNS的配置以及防火墙的配置等。
三、IP地址配置IP地址是互联网中用于标识和定位计算机的一种地址。
在Linux系统中,可以通过以下两种方式来配置IP地址:3.1 动态IP地址配置动态IP地址配置是指使用DHCP服务器为计算机分配IP地址的方式。
DHCP是一种网络协议,它可以自动为计算机分配IP地址和其他网络配置信息。
要使用动态IP地址配置,在终端中输入以下命令:```shellsudo dhclient eth0```其中,eth0是计算机的网卡接口名,根据实际情况进行相应更改。
3.2 静态IP地址配置静态IP地址配置是指手动为计算机分配一个固定的IP地址。
这种方式适用于需要长期使用特定IP地址的情况。
要进行静态IP 地址配置,需要编辑网络配置文件。
在终端中输入以下命令:```shellsudo nano /etc/network/interfaces```在文件中添加以下配置信息:```shellauto eth0iface eth0 inet staticaddress 192.168.0.100netmask 255.255.255.0gateway 192.168.0.1```其中,eth0是计算机的网卡接口名,address是计算机的IP地址,netmask是子网掩码,gateway是网关地址。
Linux服务器管理与网络配置教程
Linux服务器管理与网络配置教程第一章:Linux服务器管理基础Linux 服务器管理是使用 Linux 操作系统来管理和维护服务器的过程。
本章将介绍如何使用一些基础的 Linux 命令和工具来管理服务器,包括登录服务器、创建用户账户、修改文件权限等。
1.1 登录服务器要管理 Linux 服务器,首先需要登录服务器。
常用的远程登录工具有 SSH(Secure Shell)和 PuTTY。
本节将详细介绍如何使用SSH 和 PuTTY 远程登录服务器,并提供一些常用的登录命令示例。
1.2 创建用户账户为了管理服务器,需要创建一个具有管理员权限的用户账户。
本节将介绍如何使用命令行和图形界面工具来创建用户账户,并授予相应的权限。
1.3 修改文件权限为了保护服务器的安全性和文件的完整性,需要正确设置文件权限。
本节将介绍如何使用命令行和图形界面工具来修改文件和目录的权限,并阐述权限的含义和作用。
第二章:Linux 服务器网络配置本章将介绍如何配置 Linux 服务器的网络设置,包括 IP 地址、子网掩码、网关和 DNS 配置等。
还将介绍如何进行网络故障排除和常见网络问题的解决方法。
2.1 配置静态 IP 地址静态IP 地址是指服务器在启动过程中不会改变的固定IP 地址。
本节将介绍如何使用命令行和图形界面工具来配置静态 IP 地址。
2.2 配置子网掩码和网关子网掩码和网关是用于确定服务器与其他网络设备之间的连接的重要参数。
本节将介绍如何设置子网掩码和网关,并解释其原理。
2.3 配置 DNSDNS(Domain Name System)用于将域名转换为 IP 地址。
本节将介绍如何配置 DNS 服务器的设置,包括使用本地 DNS 服务器和公共 DNS 服务器。
2.4 网络故障排除网络故障是服务器管理中常见的问题。
本节将介绍一些常用的网络故障排除方法,例如检查网络连接、排查网络配置问题等。
第三章:Linux 服务器服务管理本章将介绍如何管理 Linux 服务器中的服务,包括启动和停止服务、设置开机自启动等。
- 1、下载文档前请自行甄别文档内容的完整性,平台不提供额外的编辑、内容补充、找答案等附加服务。
- 2、"仅部分预览"的文档,不可在线预览部分如存在完整性等问题,可反馈申请退款(可完整预览的文档不适用该条件!)。
- 3、如文档侵犯您的权益,请联系客服反馈,我们会尽快为您处理(人工客服工作时间:9:00-18:30)。
即可
恢复:只需要停用VMnet1,启用"本地连接2",另外,将host-only改 成bridged
or "make uninstallmo" to remove them.
#cd /usr/local/samba/ 到安装目录看看
#ls
Samba服务器
安装
检查是否有etc目录和smb.conf文件,若没 有,自己创建。
# cd /usr/local/samba
# mkdir etc
# cp /root/samba-3.3.9/examples/smb.conf.default /usr/local/samba/etc/smb.conf
Samba服务器
安装
1、安装
(1)下载源码包:/samba/ftp/stable/samba3.3.9.tar.gz
(2)安装(源码安装)
# tar -zxvf samba-3.3.9.tar.gz
# cd samba-3.3.9
# find -name configure
service iptables stop service network restart /usr/local/samba/sbin/smbd -D /usr/local/samba/sbin/nmbd -D 在win-xp下是看不到我们共享的read2。 可能是smb.conf有问题,我们用testparm工具检查一下。 [root--~]testparm bash: testparm: command not found 没有输入完整路径。 [root--~]/usr/local/samba/bin/testparm
Samba服务器
目标1
• Load smb config files from /usr/local/samba//lib/smb.conf Processing section "[homes]" Processing section "[printers]" Processing section "[read]" Loaded services file OK. Server role: ROLE_STANDALONE Press enter to see a dump of your service definitions 就是没有read2,我们仔细看看第一行,Load smb config files from /usr/local/samba//lib/smb.conf,好像testpart工具是根据 lib/smb.conf得到的,lib下的smb.conf和etc下的smb.conf完全不一样 嘛,因为我们增加了read2,我们可以复制覆盖了它 cp -f /usr/local/samba/etc/smb.conf /usr/local/samba/lib/ 然后
telnet 192.168.0.188
telnet服务器
无网线情况
如果有网线、交换机或路由器之类的设备,只要将本地连接的ip地址与 虚
拟机中eth0的ip地址设置成一个网段即可。 在没有网线的情况下:
(1) 停用"本地连接2“ (2) 停用"VMnet8“ (3) 启用"VMnet1“ (4) 配置"VMnet1"的IP为192.168.1.110 子网掩码
网络服务器配置
网络服务器配置
内容
• Telnet服务器 • Samba服务器 • WWW服务器 • FTP服务器 • rsync服务器
Telnet服务器
安装
1、安装telnet
# yum install "telnet*"
进入到/etc/xinetd.d文件夹中
# cd /etc/xinetd.d
Linux/Windows系统之间文 件共享——Samba
• 什么是Samba • Samba是用来实现SMB的一种软件,它的工作
原理是让Netbios(Windows 95网络邻居的通 讯协议)和SMB(Server Message Block)两 个协议运行于TCP/IP通信协议之上,并且使用 Windows的NetBEUI协议让Unix计算机可以在 网络邻居上被Windows计算机看到。它的功能有: • (1)共享Linux磁盘给Windows。 • (2)共享Windows磁盘给Linux。 • (3)共享Linux打印机给Windows。 • (4)共享Windows打印机给Linux。
telnet服务器
启动xinetd服务
3、启动xinetd服务 telnet是基于xinetd的服务,所以我要先 在配置文件中将服务开启,然后在重新启动 xinetd服务 # service xinetd restart Note:修改了XINETD服务的时候,要重 新启动xinetd才能生效
telnet服务器
time-dgram
daytime-dgram echo-dgram time-stream
gssftp
rsync
在该目录中包含了telnet文件
Telnet服务器
修改配置文件
2、修改telnet文件 # vi telnet 将文件最后disable =yes中的yes改no,然后保存退出。 disable 是控制语句,为yes就是不启动telnet,我们把 它改成no
Samba服务器
目标1
• Can't load /usr/local/samba//lib/smb.conf - run testparm to debug it 怎么出错了,好像没有在lib下 没有smb.conf,那我就加上吧 [root--~]cp /usr/local/samba/etc/smb.conf /usr/local/samba/lib/ [root--~]/usr/local/samba/bin/smbpasswd -a nxgz 添加samba用户成功 New SMB password: Retype new SMB password: startsmbfilepwent_internal: file /usr/local/samba//private/smbpasswd did not exist. File successfully created. Added user nxgz.
Samba服务器
设置账号
• 设置samba帐户方法: 1、# cat /etc/passwd │ mksmbpasswd.sh >; /usr/local/samba/sbin/smbpasswd (把linux本机用户加到smb用户里去) //mksmbpasswd.sh 用find / -name mksmbpasswd.sh 找到
测试
4、测试 可以在xp里面试试看能不能登陆,如果不行,我们就还需 要一个设置,在/etc/hosts 文件中加入服务器和client的正 向解析,域名可以乱取,只要IP地址对应就OK了。 在xp下用ipconfig获取ip地址,在linux下用ifconfig获取ip 地址。修改/etc/hosts
[root--~]/usr/local/samba/sbin/nmbd -D
到win-xp下,在ie中输入file://192.168.1.9/read1
Samba服务器
目标1
• 方法2 在smb.conf最后加上如下 [read2] comment = read2 path = /home/read2 public = yes read only = yes mkdir /home/read2 ; cd !$ ; cat >; linux ; chmod -R 777 /home/read2 ; 创建共享目录及修改权限 然后
# ls
chargen-dgram daytime-stream echo-stream klogin tcpmux-server
chargen-stream discard-dgram eklogin telnet telnet
krb5-
cvs
discard-stream ekrb5-telnet kshell
# cp -rf /usr/local/samba/etc/smb.conf /usr/local/samba/lib/ //testpart工具是根据 /usr/local/samba/lib//smb.conf得到的
Samba服务器
安装
编译方式安装samba出现以下错误: error while loading shared libraries: libtalloc.so.1: cannot open shared object file: No such file or directory 解决办法: vi /etc/ld.so.conf 加入: /usr/local/samba/lib 执行
Samb root umask 0022 mkdir /home/read1 cd !$ cat >; linux hi linux ll /home/read1/ 总用量 4 -rw-r--r-- 1 root root 9 10月 24 11:20 linux 644 adduser nxgz ; passwd !$ ; 创建系统用户 [root--~]/usr/local/samba/bin/smbpasswd -a nxgz 再把这 个用户添加为samba用户
service iptables stop service network restart /usr/local/samba/sbin/smbd -D /usr/local/samba/sbin/nmbd -D 回到win-xp下可以找到,虽然它的权限为777,但是由read only控制,不 可以删除,添加。