手工毛线袜编织方法
宝宝袜子的编织方法
宝宝袜子的编织方法
宝宝袜子的编织方法步骤如下:
1. 准备材料:2支针、毛线、针尖钩、剪刀、织布针。
2. 计算袜子的尺寸:按照宝宝的脚长和脚围,计算出袜子的尺寸,确保袜子穿着舒适。
3. 编织袜筒:根据袜子长度计算出链针的数量,然后开始编织袜筒。
可以采用各种花纹进行编织,要确保无论是哪种花纹,都要保证袜子的口径相同。
4. 编织脚部:在袜筒的底部以链针的方式织出每一个脚指的分离部分,然后按照袜子的长度织出脚部。
在织出脚底部的时候,要添加一些针的数量,以确保袜子可以松紧自如。
5. 编织袜口:在完成袜子的长度之后,挑选一些针进行收口织出袜子的口径。
一般来说,袜子的口径应该比脚底多一些针。
6. 编织鞋底:可以在袜子的脚底部添加一些编织鞋底的针和花纹,以确保袜子的抓地力更加出色。
7. 缝合:将袜子的筒口和鞋底部进行缝合,然后再将拼好的袜子进行清洗和晾
晒,最终完成一双漂亮的宝宝袜子。
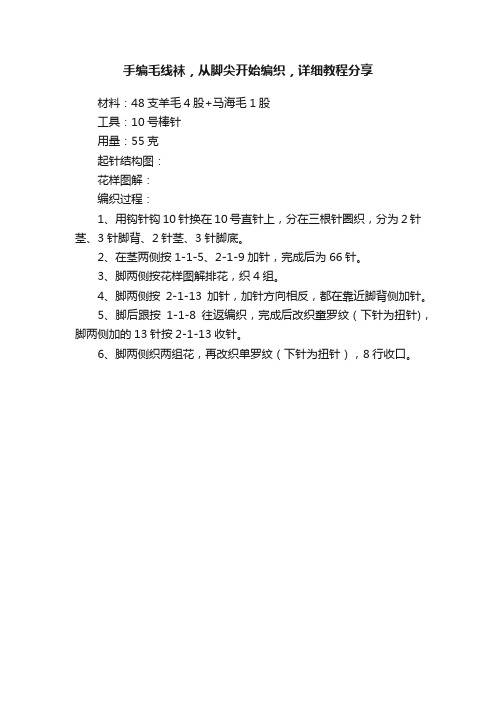
手编毛线袜,从脚尖开始编织,详细教程分享
3、脚两侧按花样图解排花,织4组。
4、脚两侧按2-1-13加针,加针方向相反,都在靠近脚背侧加针。
5、脚后跟按1-1-8往返编织,完成后改织童罗纹(下针为扭针),脚两侧加的13针按2-1-13收针。
6、脚两侧织两组花,再改织单罗纹(下针为扭针),8行收口。
1用钩针钩10针换在10号直针上分在三根针圈织分为2针茎3针脚背2针茎3针脚底
手编毛线袜,从脚尖开始编织,详细教程分享
材料:48支羊毛4股+马海毛1股
工具:10号棒针
用量:55克
起针结构图:
花样图解:
编织过程:
1、用钩针钩10针换在10号直针上,分在三根针圈织,分为2针茎、3针脚背、2针茎、3针脚底。
钩针编织毛线袜子步骤详解_最详细的袜子编织教程.docx
天冷了,再厚的棉袜都抵不过一双踏踏实实的毛线袜来得温暖,下面就是小编给大家带来的钩针编织毛线袜子步骤详解_最详细的袜子编织教程,希望能帮助到大家!袜子分成三部分来织:前脚尖,后脚跟和袜子主体。
1、我们先来织前脚尖。
行一:起针48针辫子针。
行二:竖三辫子针,钩47针长针。
2、行三:竖三辫子针,在第2,3孔两针并一针,然后连续钩长针,直到第23,24辫孔两针并一针;一长针,在26,27孔两针并一针,连续钩长针,直到第47,48孔两针并一针;钩完后,行三比行二少了4针,共44针。
毛线袜钩针编织教程毛线袜钩针编织教程毛线袜钩针编织教程3、行四:竖三辫子针,在第2,3孔两针并一针,然后连续钩长针,直到第21,22辫孔两针并一针;一长针,在24,25孔两针并一针,连续钩长针,直到第43,44孔两针并一针;钩完后,行三比行二少了4针,共40针。
4、行五:竖三辫子针,在第2,3,4孔三针并一针,然后连续钩长针,直到第18,19,20辫孔三针并一针;一长针,在22,23,24孔三针并一针,连续钩长针,直到第38,39,40孔三针并一针;钩完后,行三比行二少了8针,共32针。
5、行六:竖三辫子针,在第2,3,4孔三针并一针,然后连续钩长针,直到第14,15,16辫孔三针并一针;一长针,在18,19,20孔三针并一针,连续钩长针,直到第30,31,32孔三针并一针;钩完后,行三比行二少了8针,共24针对折后,即是脚尖的形状。
6、脚后跟的钩法和脚尖很类似。
行一:起针24辫子针。
行二:竖三辫子针,23个长针行三:竖三辫子针,2,3孔处两针并一针,长针至23,24孔处两针并一针行四:类似行三头尾减针两针行五:头尾减针四针行六:头尾减针四针行七:头尾加针四针行八:头尾加针四针行九:头尾加针两针行十:头尾加针两针行十一:竖三辫子针,不加不减23长针7、下面开始织袜子的筒:以脚尖部位48针的辫子针为始。
行一:第一个孔中1短针3辫子针,空三个孔后1短针3辫子空一孔针1短针三辫子,空三孔后一短针这样为一个花型。
袜子编织入门
袜子编织入门襪子編織入門- 第2篇織襪子基本上就是兩種: 從上往下(小腿往趾頭) 與T oe Up (從趾頭打起). 這兩種打法都不難打, 完全看個人喜好. 從小腿往下打是比較普遍的打法, 但是我是比較喜歡從趾頭打起因為在打的時候可隨時”試穿”, 這樣打出來的襪子我覺得比較合腳.從趾頭打起的起針方法有幾種. Short Rows (迴轉? 輪轉? –忘了中文是啥米. 哪位知道的請出聲引返編織.), 土耳其起針法, 8字型, 與簡易8字型. 我們就從Short Rows 介紹起. 大家也一起來織織看, 看你喜歡哪種起針法.為了容易了解起見, 我就用"要打的這雙襪子在腳趾頭部位需要48目(量尺繞腳趾頭部位一圈)”來做示範, 不過你可以很簡單的用其他目數(能被4整除的)來做. 你需要5支雙頭針, 襪線(練習用什麼線都可), 別線與鉤針(線, 針要符合).首先, 將你[腳趾頭部位需要目數]除以2, 48除以2 = 24目.用鉤針鉤別線, 比所需的24目多幾針(30目), 將別線打結後減斷多餘的線. 在別線”突起”部位挑24針, 打一段上針.再來就要開始引返編織了.拿另1支針第一段: 打23下針, 將線拉過針好像要打上針一樣, 然後將左針剩下的1針滑到右針. 轉面第二段: 滑第1目, 將線繞回(線把前一目繞了一圈), 打21上針, 線像要打下針一樣繞回前方, 滑最後1目第三段: 滑第1目, 打下針到最後1目(前一段繞的針前,) 將線拉過針好像要打上針一樣, 繞線, 轉面第四段: : 滑第1目, 將線繞回(線把前一目繞了一圈), 打上針到最後1目(前一段繞的針前,) 繞線,轉面重複第三, 四段直到有8目被繞線(左邊), 中間8目沒繞, 右邊也有8目被繞線.相片中右邊有6目繞線針. 此時就可以開始打右邊.腳趾頭部位已完成一半.注意: 中間沒繞的部位是看你腳趾頭有多寬, 你要寬一點就少作幾段Short Rows, 你要窄一點就多做幾段Short Rows.接下來做腳趾頭部位的第二步.第一段: 將沒繞線的針目打下針到繞線目. 下一目,挑起繞線與下一個繞線目打2併1(人).繞下一目(這時下一目共有2繞線), 轉面.第二段: 滑上邊有2繞線的那目, 打上針到繞線目,挑起繞線與下一個繞線目打2上併1. 繞下一目(這時下一目共有2繞線), 轉面.重複這兩段直到所有的繞線目都併完, 這時針上有24目是沒繞線的.將這24目平分到2支雙頭針上.解開(不要抽掉)別線, 將第3支雙頭針1目1目的穿過一目一目抽出別線處的圈圈.然後將這24目均分到2支(第3, 4支)雙頭針上.如果在打下一段時有”洞洞”的情況, 你可從起針處挑加1目把洞洞”填”平. 但是要記的在下一段把加的針併收掉, 也就是說每支針上應該各有12目. Size: women's medium (large)Note: You can adjust this pattern for any size, any gauge. Measure around the ball of your foot. Multiply the number of inches you get by the number of stitches you get per inch when you do a gauge swatch. Then subtract 10% from that total. Fudge your number so it’s divisible by 4. This willmake a nice, snug-fitting sock. This pattern iswritten using 60 stitches around for the sock, with changes for 64 stitches in parentheses.Gauge: 8st/inch -- I use US size 0 (2mm) needles with sock yarn. Your mileage may vary -- check your gauge!Start Your ToeUsing a provisional cast-on, cast on 30 (32) stitches (half the total circumference of the sock). I do my provisional cast-on using a crochet chain as follows:Using waste yarn, crochet a chain that is several chain stitches longer than the number of knit stitches you need. Knit into the center loops of the back side of the chain, 30 (32) stitches. Purl back across stitches.Row 1: Knit 29 (31) stitches. Move the working yarn as if to purl. Slip the last, unworked stitch from the left needle to the right needle. Turn your work.Row 2: Slip the first, unworked, stitch from the left needle to the right needle. Purl the next stitch (you will have wrapped that first stitch around its base with the working yarn) and purl across to the last stitch. Move the working yarn as if to knit and slip last stitch. Turn.Row 3: Slip the first stitch and knit across to the last stitch before the unworked stitch. Wrap and turn.Row 4: Slip the first stitch and purl across to thestitch before the unworked stitch. Wrap and turn.Repeat Rows 3 and 4 until 8 (9) of the toe stitchesare wrapped and on left side, 14 (14) stitches are"live" in the middle, and 8 (9) are wrapped and onthe right. At this stage, you should be ready to worka right side row. Your toe is half done.Note: How many stitches you leave unworked inthe middle depends on how wide you want your sock toe to be. If you want it a bit wider, do a couple fewer short rows. If you want it a bit narrower, do a couple more short rows.Now you'll work the second half of the toe:Row 1: Knit across the 14 live stitches across to the first unworked, wrapped stitch. To work this stitch, pick up the wrap and knit it together with the stitch. Wrap the next stitch (so that it now has two wraps) and turn.Row 2: Slip the first (double-wrapped) stitch and purl across to the first unworked, wrapped stitch. Pick up the wrap and purl it together with the stitch. Wrap the next stitch and turn.On subsequent rows you will pick up both wraps and knit or purl them together with the stitch. Continue until you have worked all the stitches and you once again have 30 (32) "live" stitches.When all 30 (32) stitches are once again "live," divide those stitches over 2 needles. Unzip your provisional cast-on and divide those 30 (32) stitches over 2 more needles. On your first round, you may want to pick up an extra stitch or two between the "live" stitches and the stitches you've picked up from the cast-on, to close up any holes there might be there. On the next round remember to decrease back down to 15 (16) stitches per needle.Note: Insert the tip of your needle into the stitch you knit up from the provisional cast-on before you unzip the chain – this will make it much easier topick up the loops of the stitches. I usually insert myneedle through four or five loops at a time, unzip thechain from them, do the next four or five loops,unzip, until I’ve picked them all up. When you unzipyour provisional cast-on, you will have one lessstitch than the total you picked up and knit. You cancreate that extra stitch at the end, by picking up theloop between the last stitch created with theprovisional cast-on and the first live stitch.You now have a total of 60 (64) stitches.Work straight until the foot is about 2 inches shorter than the desired finished length. Place the 30 (32) instep stitches on one needle and put the 30 (32) heel stitches on another needle. work a short row heel on the 30 (32) heel stitches as for the toe, as follows.Short Row HeelRow 1: Knit 29 (31) stitches. Move the working yarn as if to purl. Slip the last, unworked stitch from the left needle to the right needle. Turn your work.Row 2: Slip the first, unworked, stitch from the left needle to the right needle. Purl the next stitch (you will have wrapped that first stitch around its base with the working yarn) and purl across to the last stitch. Move the working yarn as if to knit and slip last stitch. Turn.Row 3: Slip the first stitch and knit across to the last stitch before the unworked stitch. Wrap and turn.Row 4: Slip the first stitch and purl across to the stitch before the unworked stitch. Wrap and turn.Repeat Rows 3 and 4 until 8 (9) of the heel stitches are wrapped and on left side, 14 (14) stitches are "live" in the middle,and 8 (9) are wrapped and on the right. At this stage, you should be ready to work a right side row. Your heel is half done.Note: How many stitches you leave unworked inthe middle depends on how wide you want yoursock heel to be. If you want it a bit wider, do acouple fewer short rows. If you want it a bit narrower,do a couple more short rows.Now you'll work the second half of the heel:Row 1: Knit across the 14 live stitches across to thefirst unworked, wrapped stitch. To work this stitch,pick up the wrap and knit it together with the stitch.Wrap the next stitch (so that it now has two wraps)and turn.Row 2: Slip the first (double-wrapped) stitch andpurl across to the first unworked, wrapped stitch.Pick up the wrap and purl it together with the stitch.Wrap the next stitch and turn.On subsequent rows you will pick up both wrapsand knit or purl them together with the stitch.Continue until you have worked all the stitches andyou once again have 30 (32) "live" stitches.When you have all stitches live again, divide thestitches as you did for the toe. Once again, on yourfirst round, you may want to pick up an extra stitchor two between the "live" stitches and the stitchesyou left on a needle for the instep, to close up anyholes there might be there. On the next roundremember to decrease back down to 15 (16)stitches per needle.Work until the leg is the desired length to the ribbing,then work in ribbing to the desired finished length.Note: Individuals with wide feet and/or heavier legsmight find it difficult to get socks on and off. Isometimes increase stitches when I start the ribbingfor the cuff. If I start out with 15 stitches per needle,I’ll increase to 16 stitches per needle, and do a k4p4 rib. If I start out with 16 stitches per needle, I’llincrease to 18 stitches per needle, and do a k3 p3rib. As you can see, it’s not an exact science – youcan fudge wherever you feel the need to, to suit thesock’s recipient.Cast off loosely.Size: Women's small-medium (I wear a size US 7.5shoe. The circumference of my foot at the ball is 8.5inches. My foot length is 9 inches)Gauge: 8 stitches per inchMaterials: Trekking XXL 104, 5 bamboo DPNs in USsize 1 (2.25mm)Note on Trekking:Some Trekking yarns will make a beautiful entrelacpattern without any planning or forethought. You canjust pick out the yarn and start knitting. To do this, make sure you use a colorway with very long color blocks. Other Trekking yarns with shorter color repeats will create stripped entrelac squares. The other option is to use two solid colors of sock yarn and alternate.Worked toe-up with a short row toe and a short row heel. I use Wendy's pattern as a reference.Begin by casting on 32 stitches using a provisional cast-on.Knit across cast-on stitches. Purl back across.Begin short row toe:Row 1: Knit to last stitch, wrap last stitch with yarn in front as if to purl, slip last stitch from left needle to right. Turn work, slip first stitch (the one you just wrapped and slipped) onto right needle.Row 2: Purl to last stitch, wrap last stitch with yarn in front as if to knit, slip last stitch from left needle to right. Turn work, slip first stitch (the one you just wrapped and slipped) onto right needle. You now have one wrapped stitch on each end of the needle. Row 3: Knit to stitch before the wrapped stitch (second to last stitch), wrap stitch with yarn in front as if to purl, slip wrapped stitch from left needle to right. Turn work, slip stitch (the one you just wrapped and slipped) onto right needle.Row 4: Purl to stitch before the wrapped stitch (second to last stitch), wrap stitch with yarn in front as if to knit, slip wrapped stitch from left needle toright. Turn work, slip stitch (the one you just wrappedand slipped) onto right needle. You now have twowrapped stitches on each end.Continue repeating rows 3 and 4 until you havewrapped 8 stitches on each side and have 16unwrapped stitches in the middle. Now you will beginpicking up the wrapped stitches, beginning with a knitrow.Picking up wrapped stitches and make a toe box:Row 1: Knit across 16 center stitches to the firstwrapped stitch. Pick up the wrap, knit the stitch, passwrap over knitted stitch. Move yarn to front as if topurl. Slip next stitch, turn, slip stitch back to righthand needle, purl to first wrapped stitch.Row 2: Pick up the wrap, purl the stitch, pass wrap over knitted stitch. Move yarn to front as if to knit. Slip next stitch, turn, slip stitch back to right hand needle, knit to wrapped stitch.Continue repeating rows 1 and 2 until all wrapped stitches have been worked. You know have a toe box and have just finished a purl row.Knit 16 stitches onto your needle, pick up a new needle and knit the next 16 stitches onto the new needle.Unzip the provisional cast on and place these stitches onto two needles, distributed evenly. You may need to pick up one stitch. Knit across these 32 stitches. You now have a total of 64 stitches on your needle.Knit one row even.Next row, decrease 22 stitches as follows: k2tog twice. (k1, k2tog) repeat 20 times. [42 stitches on needles] Knit one row even.Entrelac Base Triangles:Each base triangle is worked across a total of 6 base stitches. After each row, turn the work.Row 1: (RS) K2, turnRow 2: (WS) Slip 1 stitch purlwise, purl 1, turnRow 3: (RS) K3, turnRow 4: (WS) Slip 1 stitch purlwise, purl 2, turnRow 5: (RS) K4, turnRow 6: (WS) Slip 1 stitch purlwise, purl 3, turnRow 7: (RS) K5, turnRow 8: (WS) Slip 1 stitch purlwise, purl 4, turnRow 9: (RS) K6Repeat these 9 rows across the remaining stitches.You will end up with 7 triangles. Distribute trianglesacross 4 needles. Needles 1 and 2 will be the instepstitches. Each will have 2 triangles. Needles 3 and 4will be the heel stitches. Needle 3 will have onetriangle and needle 4 will have 2 triangles.Entrelac Squares Set 1With wrong side facing, pick up 5 stitches along theside of the first triangle, starting at the tip andworking down to the base. Purl 1 stitch from theadjacent triangle. Turn. This section may seem very awkward, but it will work out.Row 1: Knit 6, turn.Row 2: Purl 5, p2tog, turn.Continue repeating two rows until all 6 stitches adjacent triangle have been purled. Pick up 5 stitches down the side of the triangle. and repeat Entrelac Square Set 1 until all triangles have been consumed and you have 7 squares.Entrelac Squares Set 2With right side facing, pick up 6 stitches along side of entrelac square. Knit one stitch from lefthand needle. Pass the 6th picked up stitch over the just knit stitch. Turn.Row 1: Purl 6, turnRow 2: K5, slip 1 stitch from lefthand needle to right, psso. Turn.Continue repeating two rows until all stitches from left hand square have been consumed.Continue alternating each set of squares until the sock length is approximately two incehs shorter than your foot length, end by completing Set 2.HeelPurl back across 6 stitches.Pick up 5 stitches purlwise, purl 1 stitch from left needle.End Triangle:Row 1: Slip 1 stitch knitwise, k1 Row 2: Slip 1 stitch purlwise, p2Row 3: Slip 1 stitch knitwise, k3Row 4: Slip 1 stitch purlwise, p4Row 5: Slip 1 stitch knitwise, k5Row 6: Slip 1 stitch purlwise, p6Row 7: Slip 1 stitch knitwise, k6, k2 togRow 8: Slip 1 stitch purlwise, p6, slip 1, p2tog, pssoRepeat across needles 3 and 4. You will have 6 squarestitches and 24 end triangle stitches. Put all 30 stitchesand on one needle. You will also now have 2 squareson needle 1 and 1 square on needle 2. Now you willbegin the short row heel by repeating the process for ashort row toe.After making a short row heel, pick up 5 stitchespurlwise down side of adjacent square.Work Entrelac Squares Set 1 across the three squareson needles 1 and 2. Contine and consume the first 6stitches off the needle containing the heel stitches. Ifthere is a gap before the 6 stitches, pick up 2 stitchesand k2tog them together on row 2 of entrelac square.Now you are at the heel stitches.Base triangles:Row 1: P2tog, p2togRow 2: Slip 1 knitwise, k1Row 3: P3Row 4: Slip 1 knitwise, k2Row 5: P4Row 6: Slip 1 knitwise, k3Row 7: P5Row 8: Slip 1 knitwise, k4Row 9: P6Repeat base triangles three times.You have now knit all the heel stitches. Rearrange needles if you need to.Continue in entrelac until leg is the desired length. Knit a set of end triangles all the way around the leg [56 stitches].Knit 1 round, increasing 8 stitches evenly.K2, p2 rib for 1-2 inches. Bind off loosely.。
冬天毛线袜子编织,这个冬天脚不再冷
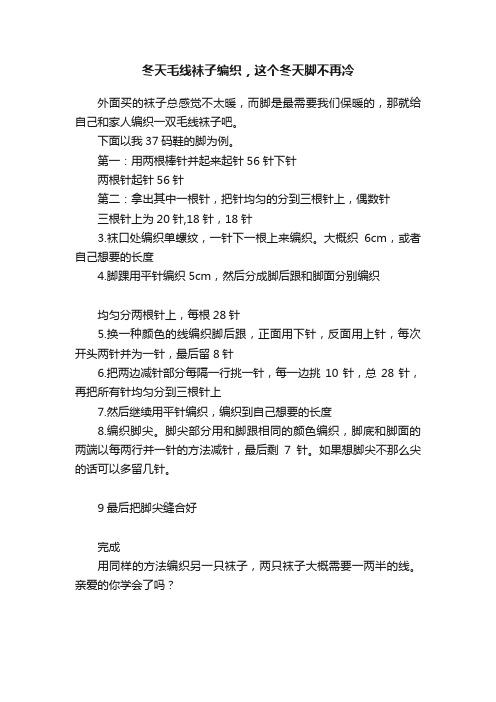
冬天毛线袜子编织,这个冬天脚不再冷
外面买的袜子总感觉不太暖,而脚是最需要我们保暖的,那就给自己和家人编织一双毛线袜子吧。
下面以我37码鞋的脚为例。
第一:用两根棒针并起来起针56针下针
两根针起针56针
第二:拿出其中一根针,把针均匀的分到三根针上,偶数针
三根针上为20针,18针,18针
3.袜口处编织单螺纹,一针下一根上来编织。
大概织6cm,或者自己想要的长度
4.脚踝用平针编织5cm,然后分成脚后跟和脚面分别编织
均匀分两根针上,每根28针
5.换一种颜色的线编织脚后跟,正面用下针,反面用上针,每次开头两针并为一针,最后留8针
6.把两边减针部分每隔一行挑一针,每一边挑10针,总28针,再把所有针均匀分到三根针上
7.然后继续用平针编织,编织到自己想要的长度
8.编织脚尖。
脚尖部分用和脚跟相同的颜色编织,脚底和脚面的两端以每两行并一针的方法减针,最后剩7针。
如果想脚尖不那么尖的话可以多留几针。
9最后把脚尖缝合好
完成
用同样的方法编织另一只袜子,两只袜子大概需要一两半的线。
亲爱的你学会了吗?。
简单毛线袜子织法图解几个小诀窍教你如何织毛线袜子
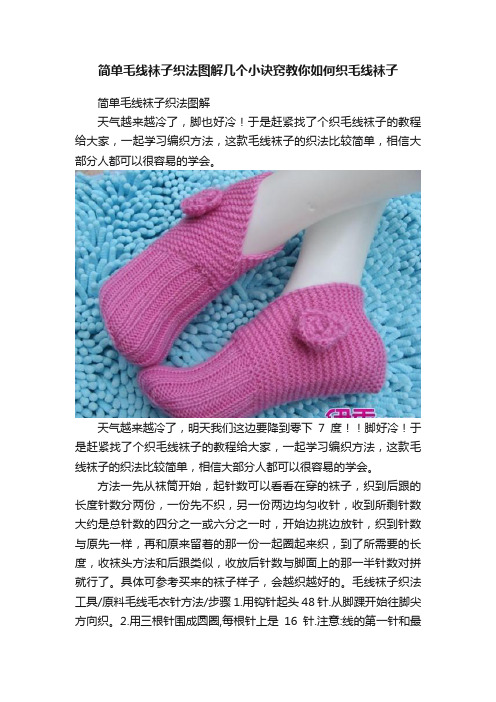
简单毛线袜子织法图解几个小诀窍教你如何织毛线袜子简单毛线袜子织法图解天气越来越冷了,脚也好冷!于是赶紧找了个织毛线袜子的教程给大家,一起学习编织方法,这款毛线袜子的织法比较简单,相信大部分人都可以很容易的学会。
天气越来越冷了,明天我们这边要降到零下7度!!脚好冷!于是赶紧找了个织毛线袜子的教程给大家,一起学习编织方法,这款毛线袜子的织法比较简单,相信大部分人都可以很容易的学会。
方法一先从袜筒开始,起针数可以看看在穿的袜子,织到后跟的长度针数分两份,一份先不织,另一份两边均匀收针,收到所剩针数大约是总针数的四分之一或六分之一时,开始边挑边放针,织到针数与原先一样,再和原来留着的那一份一起圈起来织,到了所需要的长度,收袜头方法和后跟类似,收放后针数与脚面上的那一半针数对拼就行了。
具体可参考买来的袜子样子,会越织越好的。
毛线袜子织法工具/原料毛线毛衣针方法/步骤1.用钩针起头48针.从脚踝开始往脚尖方向织。
2.用三根针围成圆圈,每根针上是16针.注意:线的第一针和最后一针要交换过来,这样织连接没有缝隙,美观3.再细看一下连接的部分。
4.开始织第一圈。
5.这是我织好的脚踝的图案6.再按照上图解继续织。
直到你认为适合的长度。
(可以织长一点配上短靴,打些褶露出花边更漂亮)袜子共48针:一半是24针织带花纹的。
另一半背面是平针。
7.我只织到这个长度。
下一步开始要织袜跟了。
8.织袜子的平针那一面(也就是袜子环形的一半)共24针。
你可以织平针,但是我这里织的是加厚针。
第一针织滑针(就是挑下不织),第二针织正针,第三针织滑针。
第四针织正针,重复这样继续织下去。
直到织完这一行。
反过来再织反面:第一针挑下不织,第二针织上针。
重复这样织下去,直到织完反面这一行。
9.织到中心12针。
第13针织正针,第14针和第15针织右上2针并1针。
第三16针织正针。
剩下8针不织了。
就停留在左侧针上。
10.翻过来第一针挑下不织,编织3针上针(也就是我们通常所说的反针),织上针的两针并一针。
怎样编织毛线袜子
怎样编织毛线袜子
怎样编织毛线袜子
导语:袜子的编织分为五阶段组成:袜口、脚踝、袜跟、脚面和脚底、袜尖。
以下是小编为大家精心整理的怎样编织毛线袜子,欢迎大家参考!
工具/原料
需要用到的工具:3.5和4.0的双尖短棒针各一付、留针扣、剪刀、缝合针、毛线
方法/步骤
1织袜口的地方用松紧针法,也就是正反针针法,即一针正针、一针反针。
2起针:毛线挂在左针上,右针从侧面插到针圈里,毛线从下往上绕到右针上,用右针把线挑出来,再把右针上的针圈套到左针上。
这是正针。
接下来起反针:右针从外面的两线圈的缝里插进来,从下往上绕线后,挑出去,再套到左针上面。
这就是反针的起法。
就按这个方法起针。
这里的袜子的35-37码起34针。
3分针:为了织圈,所以要分三针,两支棒针上是12针,另外一个棒针上是10针。
把针圈挑到棒针上。
最后有一个小窍门:把第一针和最后一针交换一下,就形成了织圈。
这样织出来的'袜口就看不到接口,相对要平整一些。
4开始正针、反针地织下去。
按这个织法织袜口,长度根据自己的需要,这里我织5-6厘米的长度,也就是12行。
5织完了袜口的阶段,现在过度到脚踝的阶段,全部织的是正针。
这里换大半个号的棒针织(4MM的棒针)。
这里织18行。
毛线袜子的编织方法

毛线袜子的编织方法毛线袜子的编织方法有很多种,下面我将详细介绍几种常见的编织方法。
1. 直针编织法:直针编织法是最基础的毛线袜子编织方法,适合初学者。
首先,选择合适的毛线和针,通常使用2.5至3.5号的编织针,根据自己的脚掌尺寸选择毛线的适量。
开始编织时,先编织袜口,使用2号针将约30至40针的弹性带编织出来。
然后,换成3号针,在弹性带上增加约4至6针,满足袜筒的宽度要求。
接下来,根据脚部尺寸,继续用3号针编织后跟和脚掌。
根据脚踝到脚头的长度,编织约55至70针,然后转向编织腰部。
用3.5号针继续编织腰部,增加约4至6针,使得袜子腰部逐渐变宽,以适应小腿和腿部的曲线。
最后,继续用3.5号针编织脚尖和脚跟,直到袜子的长度能够覆盖住脚部。
最后,下针,用尾线固定,即可完成一只毛线袜子。
2. 管针编织法:管针编织法也是一种常见的毛线袜子编织方法。
相比直针编织法,管针编织法可以更好地塑造袜子的形状,适合有一定经验的编织者。
首先,选择合适的管针,长度与袜子高度相匹配,通常使用40至60厘米长的管针。
根据脚部尺寸和样式选择适合的毛线。
开始编织时,先编织袜筒,使用2号管针将约30至40针的弹性带编织出来。
然后,换成3号管针,继续沿着袜筒的高度增加针数,满足袜筒的宽度要求。
接下来,根据脚部的轮廓,继续用3号管针编织脚跟和脚掌部分。
在适当的位置转换为4号管针,编织脚背和脚尖。
最后,用4号管针继续编织脚尖,并逐渐减少针数,直到能够覆盖住脚部。
最后,下针,用尾线固定,即可完成一只毛线袜子。
3. 环针编织法:环针编织法是一种无缝编织毛线袜子的方法,比较适合有经验的编织者。
使用环针可以避免针脚显眼的缝线,使袜子更加光滑。
首先,选择合适的环针和毛线,通常使用2.5至3.5号的环针,根据自己的脚掌尺寸选择适量的毛线。
开始编织时,先编织脚背部分,使用2号环针将约30至40针的弹性带编织出来。
然后,换成3号环针,继续沿着袜筒的高度增加针数,满足袜筒的宽度要求。