java3D安装使用教程
3D游戏编程入门详解

必不可少. 3:资源 在 Win 编程中,窗口的图标,鼠标光标,菜单等都是资源的类型,在 VC 环境 下,Tab 页也专门为资源进行了有效的管理,它将资源进行编译存放在.rc 格式文 件中,我们可以用代码来控制何时何地调用哪个资源. 4:模块 在 Win 编程中,模块其实就是 DLL 编程.Dynamic Link Library 动态链接 库其实就是一种动态的函数库封装.对于我们频繁使用的函数库,我们可以将它 封装到 DLL 文件中,动态的调用比原先静态的 Lib 库优点显而易见,极大的减少了 应用文件大小.因为我们可以重复调用. 5:实例 Instance 也是 WIN 编程中重要的句柄.我们每使用一个应用程序,我们都 会获得一个对应的实例.然而实例和窗口句柄是不同的.我们这里可以举例,当我 们一个程序开启多个窗口时,我们将仅仅一个实例,而有许多的窗口句柄,但值得 注意的是,实例并不是锁定某个程序的,当我们的程序关闭,实例将释放消失,当 我们再次启动该程序时,将获得一个新的实例,而与原先的实例完全不同,当然这 个实例对应的窗口句柄也将更新. 6:内存块 我们必须清楚,在早期计算机中,内存和硬盘是严格区分的,内存拥有 着独特的寻址方式,然而这并不利于我们的内存操作.所以现在通常使用"页"式 内存管理。这将更加符合我们硬盘的寻址方式.所以当现在我们的计算机内存不 足时候,计算机将会将一部分的硬盘虚拟的做为内存供给我们应用程序来使用, 也就是"虚拟内存".然而硬盘数据读取速率和内存的读取速率是无法比拟的,所 以当我们内存不足而使用虚拟内存时,程序的运行速度将会大大降低..我们进行 编程设计时应当合理使用内存,避免使用虚拟内存。
UCHAR 无符号 Windows 字符 UINT 无符号整型 ULONG 无符号长整型 32 位 USHORT 无符号短整型 16 位 VOID 任意类型 WINAPI 相当于 FAR PASCAL WNDPROC 指向应用程序中定义的窗口的指针 WORD 无符号字 16 位 WPA准备好一些硬性的知识: 1:随便一种面向对象设计的语言的熟练运用. 2:对 3D 美工基本概念流程的简单理解. 3:对空间矩阵变换有一定的理解. 4:英语入门,起码没有烂到家. 最后,期望你本身拥有的一些素质: 1:对游戏编程的爱好 2:对学习编程的耐心和毅力 3:勤于动手,能够主动的学习
Java3D总结

Java3D介绍Java3d是适应与internet 环境下开发的三维图形开发包,它针对底层库openGL 和DirectX 的封装。
这样使得他们摆脱了单机三维束缚,面向与网络方向。
OpenGL :图形编程库。
(如坐标的变化,基本形体,关照效果等)DirectX :微软公司三维库传统下的Internet 图形处理,数据不是从本地硬盘中读取,运行环境也不是事先安装好的,如果用OpenGL 等传统的可视手段,只能在Web服务器端生成图像,在发到客户端显示。
但是当前的网络传输能力是不可能满足的。
(但是java3的是传输的不是图像本生,而是三维图像生成的程序和数据)当前下的Java3d是这样的:java3d是基于OpenGL或DirectX底层的API。
他和java 一样需要安装,jre(java虚拟机)一次编程,跨平台运行。
所以说他很好的运用了pc机的硬件加速器。
(当前我们现在用的是WebStart来下载java3d程序,他保证了如果服务器端没有升级变化时,只需要下载一次,以后就可以直接运行)。
Java3d 本质是一个交互式三维图形应用编程接口(api),他可以和java2d,swing,awt 结合。
其目标是:让用户在浏览器中观看或操作三维动画图形。
一次编程,到处运行。
适应不同的软件平台。
适应各种显示环境和输入设备。
Java3d的编程思想Java3d编程的空间采用场景图结构,是一种有向无环图。
如图:locale下有一到多个branchgroup节点,在他下有一个基准坐标系transformgroup,就可以相对此坐标系摆放所需的形体(shape3d)也可以给出形体的外观appearance及geometry。
所以:他就是将许多对象安放在这个虚拟空间的过程,在设置各个方面的属性,如:形状,位置,外观,贴图,透明效果等;再在三维环境下设置灯光,雾,背景,声音等。
最后定义我们自己的观察角度,最终达到效果。
JAVA3D安装小结(转)
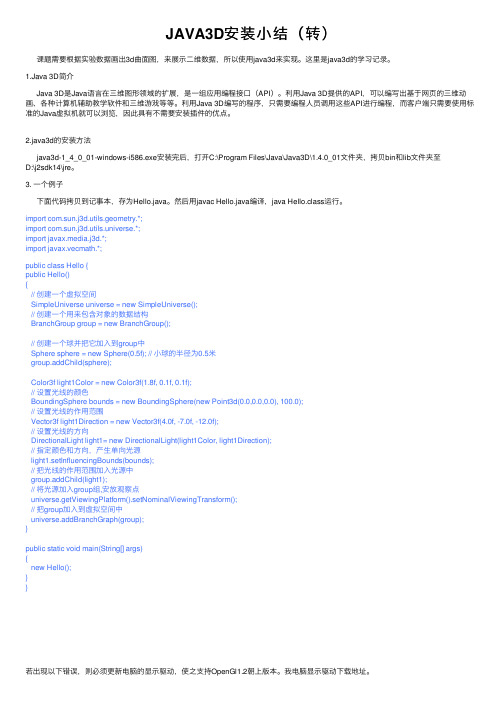
JAVA3D安装⼩结(转)课题需要根据实验数据画出3d曲⾯图,来展⽰⼆维数据,所以使⽤java3d来实现。
这⾥是java3d的学习记录。
1.Java 3D简介Java 3D是Java语⾔在三维图形领域的扩展,是⼀组应⽤编程接⼝(API)。
利⽤Java 3D提供的API,可以编写出基于⽹页的三维动画、各种计算机辅助教学软件和三维游戏等等。
利⽤Java 3D编写的程序,只需要编程⼈员调⽤这些API进⾏编程,⽽客户端只需要使⽤标准的Java虚拟机就可以浏览,因此具有不需要安装插件的优点。
2.java3d的安装⽅法java3d-1_4_0_01-windows-i586.exe安装完后,打开C:\Program Files\Java\Java3D\1.4.0_01⽂件夹,拷贝bin和lib⽂件夹⾄D:\j2sdk14\jre。
3. ⼀个例⼦下⾯代码拷贝到记事本,存为Hello.java。
然后⽤javac Hello.java编译,java Hello.class运⾏。
import com.sun.j3d.utils.geometry.*;import com.sun.j3d.utils.universe.*;import javax.media.j3d.*;import javax.vecmath.*;public class Hello {public Hello(){// 创建⼀个虚拟空间SimpleUniverse universe = new SimpleUniverse();// 创建⼀个⽤来包含对象的数据结构BranchGroup group = new BranchGroup();// 创建⼀个球并把它加⼊到group中Sphere sphere = new Sphere(0.5f); // ⼩球的半径为0.5⽶group.addChild(sphere);Color3f light1Color = new Color3f(1.8f, 0.1f, 0.1f);// 设置光线的颜⾊BoundingSphere bounds = new BoundingSphere(new Point3d(0.0,0.0,0.0), 100.0);// 设置光线的作⽤范围Vector3f light1Direction = new Vector3f(4.0f, -7.0f, -12.0f);// 设置光线的⽅向DirectionalLight light1= new DirectionalLight(light1Color, light1Direction);// 指定颜⾊和⽅向,产⽣单向光源light1.setInfluencingBounds(bounds);// 把光线的作⽤范围加⼊光源中group.addChild(light1);// 将光源加⼊group组,安放观察点universe.getViewingPlatform().setNominalViewingTransform();// 把group加⼊到虚拟空间中universe.addBranchGraph(group);}public static void main(String[] args){new Hello();}}若出现以下错误,则必须更新电脑的显⽰驱动,使之⽀持OpenGl1.2朝上版本。
supermap iobjects java处理正射影像的例子
supermap iobjects java处理正射影像的例子SuperMap iObjects是一款强大的地理信息系统(GIS)开发平台,提供了丰富的功能和工具,用于处理和管理地理数据。
其中,使用Java语言进行正射影像处理是其重要的应用之一。
本文将一步一步详细介绍如何使用SuperMap iObjects Java处理正射影像。
第一步:环境准备在开始处理正射影像之前,我们首先需要准备好开发环境。
首先,确保已经安装了Java Development Kit(JDK),以及SuperMap iObjects Java开发包。
其次,需要一张正射影像数据作为处理的对象。
可以从SuperMap官网、云服务或其他GIS数据提供商处获取合适的数据。
第二步:导入SuperMap iObjects库使用Java进行正射影像处理,我们需要将SuperMap iObjects库导入到项目中。
在Java开发环境中,选择项目并右击,然后选择“Properties”->“Java Build Path”。
在“Libraries”选项卡中,点击“Add External JARs”按钮,选择SuperMap iObjects Java库所在的路径,并将其导入项目。
第三步:加载正射影像数据在Java中使用SuperMap iObjects处理正射影像时,首先需要加载正射影像数据。
下面的代码片段演示了如何加载一幅正射影像数据:javaimport com.supermap.data.*;public class OrthophotoProcessing {public static void main(String[] args){初始化SuperMap iObjects引擎Environment.initialization();打开工作空间Workspace workspace = new Workspace();workspace.open("D:\\data\\workspace.smwu");打开数据源Datasource datasource =workspace.getDatasources().open("D:\\data\\datasource.udb");获取影像数据集Dataset dataset =datasource.getDatasets().get("orthophoto");加载影像数据集Layer layer = workspace.getLayers().add(dataset, true);}}在上述代码中,首先需要初始化SuperMap iObjects引擎。
Java-Me实用教程

关键字就是Java语言中已经被赋予特定意义的一些单词
,它们在程序中有着不同的用途,不可以把关键字作为标识
符来用。
第33页,共505页。
Java语言中的关键字
abstract boolean
class
continue
extends false
右键点击“我的电脑”,弹出菜单,然后选择“属性”,弹 出“系统属性”对话框,再单击该对话框中的“高级”选项,
然后点击按钮“环境变量”,添加如下的系统环境变量(如图 1.2所示):
第10页,共505页。
图1.2 设置环境变量path
第11页,共505页。
4)系统环境ClassPath 值的设置
编辑系统环境变量ClassPath的值。对于Windows 2000、
可用“-source”参数约定字节码适合的Java平台。如 javac –source 1.2 <FileName.java>
第31页,共505页。
返回
第2章 基本数据类型和数组
本章导读 1. 标识符和关键字 2. 基本数据类型 3. 基本数据类型的转换 4. 数据的输入与输出 5. 数组
网络、多线程等重要的基础知识,而且很多新的技术领域都涉及
到了Java语言,因此,学习和掌握Java已成为共识,国内 外许多大学已将Java语言列入了本科教学计划,IT行业对 Java人才的需求正在不断的增长,一些软件公司对其开发 人员周期地进行Java的基础培训工作。在IT行业发达的北美
洲,有将近60%的软件开发人员在使用Java完成他们的工作,
<applet code=Boy.class height=100 width=300> </applet>
Huawei DevEco Studio使用指南_鸿蒙学堂

文档内容来自鸿蒙官方网站,鸿蒙学堂 整理
Huawei DevEco Studio 使用指南
2.3 运行 Hello World.........................................................................................................11 3 工程管理......................................................................................................................................14
3.2 支持的设备模板和编程语言 ........................................................................................ 17 3.3 创建一个新的工程.........................................................................................................18
2.2 配置开发环境 ................................................................................................................... 4 2.2.1 npm 设置............................................................................................................. 4 2.2.2 设置 Gradle 代理................................................................................................ 5 2.2.3 设置 DevEco Studio 代理................................................................................ 6 2.2.4 下载 HarmonyOS SDK .................................................................................... 8
java3D安装教程
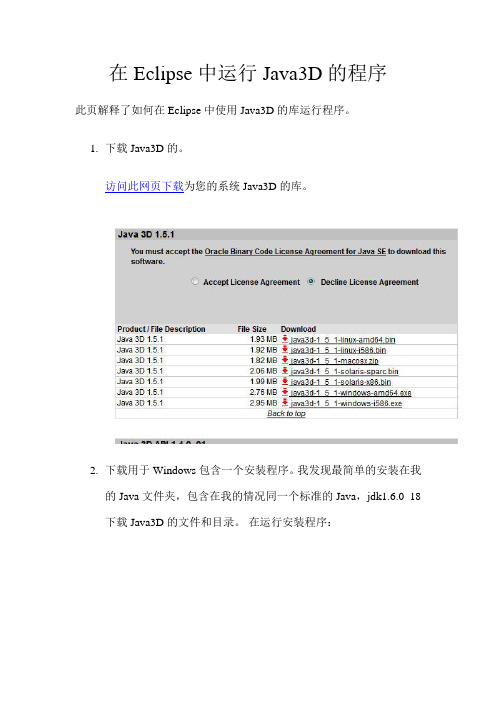
在Eclipse中运行Java3D的程序此页解释了如何在Eclipse中使用Java3D的库运行程序。
1.下载Java3D的。
访问此网页下载为您的系统Java3D的库。
2.下载用于Windows包含一个安装程序。
我发现最简单的安装在我的Java文件夹,包含在我的情况同一个标准的Java,jdk1.6.0_18下载Java3D的文件和目录。
在运行安装程序:3.启动Eclipse。
你可以创建一个Java3D的代码为您的新项目,或使用一个已经存在的项目。
我将创建一个新的名为3DExamples 项目4.下载HelloUniverse.java和添加项目,从第3步。
HelloUniverse.java有很多语法错误,因为它是指一些Java3D的非标准类。
我们需要告诉到哪里寻找这些类的项目。
5.在Eclipse菜单,选择“项目” - >“属性”6.在弹出窗口中选择 Java Build Path,然后单击 Add Library ...“按钮。
7.在下一个窗口中,选择用户库,点击“下一步”按钮。
8.在下一个窗口中单击“用户库”...“按钮9.在未来的点击新建...“按钮。
10.在窗口,弹出新的库名称。
使用名称Java3DLib。
然后单击“确定”按钮。
11.选择您刚才创建的库,然后单击“添加JAR文件...”按钮。
12.在弹出浏览文件夹,你在第2步安装Java3D的文件选择。
(Java3D的jar文件的路径在我的机器是用Java3D - > 1.5.2 - >库- >分机- >)选择所有三个jar文件(j3dcore.jar,j3dutils.jar,和vecmath.jar的)。
所有三个jar文件,选择后单击“打开”按钮13.后加入的罐子在首选项窗口点击的好吧按钮。
14.在弹出的窗口中单击 Finish按钮。
15.在构建路径“窗口中选择回到您刚才添加的Java3DLib,展开它,并选择本机库的位置属性。
Orbix 3.3 SP 16 安装指南说明书

Micro FocusThe Lawn22-30 Old Bath RoadNewbury, Berkshire RG14 1QNUK© Copyright 2012-2021 Micro Focus or one of its affiliates.MICRO FOCUS, the Micro Focus logo and Orbix are trademarks or registered trademarks of Micro Focus or one of its affiliates.All other marks are the property of their respective owners.2021-01-06iiContentsInstalling Orbix 3.3 SP16 (1)Introduction (1)Prerequisites to Installing Orbix 3.3 SP 16 (2)Installing Orbix 3.3 SP 16 without the GUI (6)Installing Orbix 3.3 SP 16 with the GUI (7)Verifying your Installation (8)Changing Java version after installation (11)Uninstalling Orbix 3.3 SP 16 (12)Further Information (12)Orbix Installation Guide iiiiv Orbix Installation GuideInstalling Orbix 3.3SP16This document provides instructions for installing Orbix 3.3 SP 16on all supported platforms.IntroductionThis document providyinges instructions for installing Orbix 3.3 SP16 on a wide range of platforms.For a full list of supported platforms, see/prodavail.aspxProduct setsOrbix 3.3 SP 16 consists of three product sets, each enabled by aseparate license code:• Orbix 3.3 SP 16 Java Edition• Orbix 3.3 SP 16 C++ EditionYou can purchase and license any valid combination of these sets.Product componentsOrbix 3.3 SP 16 comprises the following components:• Development Platform for Java• Development Platform for C++• OrbixNamesIn addition OrbixSSL 3.3 SP 16 is separately available. For detailson how to install OrbixSSL, see the OrbixSSL 3.3 SP 16Installation Guide.JRE requirementsThe Orbix 3.3 SP 16 installation was built with InstallAnywhere,which is a Java application. The installer requires a JRE (JavaRuntime Environment). Before launching the installer, you shouldprovide the JRE yourself (see “Installation prerequisites”), or use apre-installed JRE or JDK.Installation stepsTo install Orbix 3.3 SP 16, follow these steps:• Determine your installation type.• Check the prerequisites for installing Orbix 3.3 SP 16.• Install Orbix 3.3 SP 16 on your host machine.Orbix Installation Guide 12 Orbix Installation Guide• Verify your installation.Before you begin your installationBefore installing Orbix 3.3 SP 16, see the latest version of the Orbix 3.3 SP 16 Release Notes , and check for any updates to this Installation Guide on the following web page:/productdoc.aspxOrbix 3.3 SP 16 license codesYou must have a valid license code to install Orbix 3.3 SP 16 Java Edition or Orbix 3.3 15 C++ Edition. All other components of Orbix 3.3 SP 16 are activated by these license codes. The code is a long numeric string taking the general form:00000000-11111111-22222222-33333333-44444444Your license code should be included in a loose sheet in your Orbix 3.3 SP 16 pack. Otherwise, because Orbix 3.3 SP 16 is a service pack release of Orbix 3.3, the license codes provided for Orbix 3.3 are valid for Orbix 3.3 SP 16. If you do not have any license codes, please contact Support before proceeding further.Determine your installation typeOrbix 3.3 SP 16 comprises two product sets:• Orbix 3.3 SP 16 Java Edition• Orbix 3.3 SP 16 C++ EditionYou can purchase the Java Edition and the C++ Edition separately or together:Prerequisites to Installing Orbix 3.3 SP 16Existing Orbix installationsIf you install Orbix 3.3 SP 16 in the same location as an existing Orbix installation, the existing installation is overwritten. If you have an older version of Orbix on your system and you do notNote:Due to legal restrictions in some countries, OrbixSSL is supplied in a separate installer. OrbixSSL 3.3 SP 16 can beenabled with Orbix 3.3 SP 16 Java Edition or Orbix 3.3 SP 15 C++ Edition license codes.Note:When installing Orbix 3.3 SP 16 using PCAnywhere (aremote client), use a display resolution of type VGA (640 x 480). Component Java Edition C++ EditionDevelopment Platform for JavaEnabled -Development Platform for C++-Enabled OrbixNames Enabled Enabledwant it overwritten, you should install Orbix 3.3 SP 16 in a new location on your file system.Installation prerequisitesThe prerequisites for installing Orbix 3.3 SP 16 are as follows: Prerequisite NotesPrivileges GeneralTo install in a non-default location, you musthave permission to create files and directoriesin that location.WindowsTo install in the default location, Windows usersmust have administrator privileges.UNIXTo install into the default location, UNIX usersmust have root privileges.UNIX DISPLAY The installer was built using InstallAnywhere, which is a GUI application. To install Orbix 3.3 SP 16 without the GUI, see “Installing Orbix 3.3 SP 16 without the GUI”.For a GUI application to run on UNIX, you must install on a UNIX host with X and a windowing environment configured. Ensure your display environment variable is set to the workstation you are logged into. For example, set the following environment variable, substituting the full Domain Name System (DNS) name of your workstation for : export DISPLAY=:0.0 Contact your system administrator if you require assistance.JRE The installer was built using InstallAnywhere,which is a Java application, and requires a JRE.You must provide the location of the JRE for theinstallation to run.You need access on all platforms to an existingJRE (or JDK). Alternatively, you should obtainand install the JRE yourself on your systembefore running the installer. When installing aJRE, install all required patches on all platforms.Domain name The installer requires your domain name forOrbix 3.3 SP 16 configuration to resolve Internet or UNIX computer names. Contactyour network administrator to obtain thedomain name for your TCP/IP internet prior to installing Orbix 3.3 SP 16.Orbix Installation Guide 3Obtaining the installersEnsure that you have the correct installers for your platform.The table below shows the installer file names for eachplatform.Platform Orbix installerAIX microfocus_orbix_3_3_16_aix.binSolaris (Sparc)microfocus_orbix_3_3_16_solaris.binSolaris (x86)microfocus_orbix_3_3_16_solaris_x86.binSolaris (x64)microfocus_orbix_3_3_16_solaris_x64.binHP-UX ia64 11v31microfocus_orbix_3_3_16_hpux_ia_classic.bin (classic 32-bit)HP-UX ia64 11v31microfocus_orbix_3_3_16_hpux_ia_64_classic.bin (classic 64-bit)HP-UX ia64 11v31microfocus_orbix_3_3_16_hpux_ia_standard.bin (standard 32-bit)HP-UX ia64 11v31microfocus_orbix_3_3_16_hpux_ia_64_standard.bin (standard 64-bit)Linux (x86)microfocus_orbix_3_3_16_linux.binLinux (x64)microfocus_orbix_3_3_16_linux_x64.binWindows Visualmicrofocus_orbix_3_3_16_win_32_vs2010.exe Studio 2010 (32-bit)Windows Visualmicrofocus_orbix_3_3_16_win_64_vs2010.exe Studio 2010 (64-bit)Windows Visualmicrofocus_orbix_3_3_16_win_32_vs2012.exe Studio 2012 (32-bit)Windows Visualmicrofocus_orbix_3_3_16_win_64_vs2012.exe Studio 2012 (64-bit)4 Orbix Installation GuideOrbix Installation Guide 5Operating systems and compilersFor the latest supported platform and compiler combinations, please refer to the following:1The Product Availability page for the latest information on platforms supported by Orbix 3.3 SP 16.2The "Platforms and Compilers" section of the Orbix 3.3 SP 16Release Notes .Disk space requirementsThe following table lists the approximate amount of disk space taken up by the Orbix 3.3 files. The install program also requires approximately 50 MB of temporary work space.Default locationThe default location of your Orbix 3.3 installation is as follows:Windows Visual Studio 2013 (32-bit)microfocus_orbix_3_3_16_win_32_vs2013.exeWindows Visual Studio 2013 (64-bit)microfocus_orbix_3_3_16_win_64_vs2013.exeWindows VisualStudio 2015 (32-bit), Windows VisualStudio 2017 (32-bit),and Windows Visual Studio 2019 (32-bit)microfocus_orbix_3_3_16_win_32_vs2015.exe Windows VisualStudio 2015 (64-bit),Windows Visual Studio 2017 (64-bit),and Windows VisualStudio 2019 (64-bit)microfocus_orbix_3_3_16_win_64_vs2015.exe Platform Orbix installerComponent Solaris HP-UXDevelopment Environment for Java& C++135 MB 140 MB Documentation 75 MB 75 MBNote:On Windows, please check that you have enough disk space before starting the installation.Platform Default LocationUNIX main installation/opt/microfocus/orbix336 Orbix Installation Guide Installing Orbix 3.3 SP 16 without the GUIInstalling Orbix 3.3 SP 16 in silent install mode allows you to run the installer without using the GUI. The silent mode installer looks to a template file that provides the required information.Installing in silent mode1To install in silent mode, use the following command:./<installer > -f /path /to /template.fileFor example, to run the Solaris (Sparc) installer silently, issue the following command:./microfocus_orbix_3_3_16_solaris.bin -f /path /to /template.file Windows C:\Program Files\Micro Focus \Orbix3.3 SP16 for WindowsWindows (installing 32-bit kit on a 64-bitWindows)C:\Program Files (x86)\MicroFocus\Orbix 3.3 SP16 for Windows Platform Default LocationNote:Orbix 3.3 SP 16 installs in a fixed location relative to thepath you specify.Note:When installing Orbix 3.3 SP 16 on Windows in a folderprotected by UAC (such as Program Files or Program Files (x86)), you must ensure that the following access permissions are set forthe "Users" group on the installation folder:• modify• read + execute• list folder contents• read• writeIf these permissions are not set on the installation folder, you will need to ensure that the implementation repository, naming service and IFR run in elevated mode.template.file should contain the following information:2The LICENCE_KEY_1 and LICENCE_KEY_2 lines signify the C++ and Java licence keys respectively. If you want to install just one license set (that is, C++ or Java, but not both), then you can modify the silent installer file as follows:• To license only the C++ runtime:• To license only the Java runtime:Installing Orbix 3.3 SP 16 with the GUIThis section describes how to install Orbix 3.3. SP 16 using the GUI installer, which is based on InstallAnywhere.Installation stepsTo install Orbix 3.3. SP 16 using the GUI, perform the following steps:1In the Select Product screen, select the Orbix 3.3 SP 16 product set that you have purchased (for example, Orbix 3.3 Java Edition). Click Next to continue.2In the License Information screen, enter the license code(s)that you have purchased in the appropriate text field(s). Click Next to continue. The license keys requested here depend on the product set you selected in the previous screen.3In the License Agreement screen, click Yes to agree to the terms of the License Agreement, and click Next to continue.##Specimen properties for Solaris 2.9 silent install with licence codes##-------------------------------------------------------------------------##C++, Java, and OTS##-------------------------------------------------------------------------##Specify the directory where you want Orbix 3.3 SP 16 installedUSER_INSTALL_DIR=/path/to/install/dir##Specify the location of your Java Developemnt KitJAVA_LOCATION=/path/to/jdk/dirJAVA_VERSION=1.6INSTALLER_UI=SILENT##Specify the components of Orbix you want to installPRODUCTS="Orbix 3.3 - Java Edition and C++ Edition"##Specify your licence keys: c++ and javaLICENCE_KEY_1=<Licence Key1>LICENCE_KEY_2=<Licence Key2>##Specify the domain for the installation DOMAIN=PRODUCTS="Orbix 3.3 - C++ Edition"LICENCE_KEY_1=<c++-licence-key>PRODUCTS="Orbix 3.3 - Java Edition"LICENCE_KEY_1=<java-licence-key>4In the Choose Orbix Installation Folder screen, enter the file location that you wish to install Orbix 3.3 SP 16 into (for example, C:\orbix3). Click Next to continue.5In the Domain Information screen, enter your domain name, and click Next to continue.6In the JDK Configuration screen, enter the location of your Java Development Kit. This is not required for Orbix 3.3 SP 16 C++ Edition. Click Install to continue.7 A progress bar is displayed while the files are installed.8After the installation is complete, the Orbix welcome page launches automatically.9In the Reboot Computer screen, choose whether to restart your computer now or later.10The Install Complete screen is displayed to confirm that the installation is finished. Click Done to finish the installation.Verifying your InstallationConfiguration checksWhen the installation is complete, follow these steps to ensure correct operation:1Check the contents of the Orbix configuration files, to ensure that the specified directory paths and domain name match those for your site.2Read the Orbix 3.3 SP 16 Release Notes .3Before attempting to run the Orbix daemon or the Orbix Java activator from a terminal or command shell, run the supplied scripts that set the following environment variables:IT_CONFIG_PATH ORBIX_ROOTNote:You must have permission to create files anddirectories in this location.Platform LocationUNIX$ORBIX_ROOT/config/iona.cfg$ORBIX_ROOT/config/common.cfg$ORBIX_ROOT/config/orbix3.cfg$ORBIX_ROOT/config/orbixweb3.cfg$ORBIX_ROOT/config/orbixnames3.cfg Windows %ORBIX_ROOT%\config\iona.cfg%ORBIX_ROOT%\config\common.cfg%ORBIX_ROOT%\orbix3.cfg%ORBIX_ROOT%\orbixweb3.cfg%ORBIX_ROOT%\orbixnames3.cfgJAVAHOMEPATH .To run these scripts, type the following commands in a terminal:Testing your Orbix 3.3 SP 16 Java Edition installationTo ensure that your installation is fully operational, you should change directory to the demos directory of your Orbix 3.3 SP 16 installation, for example:Read the index.html file for instructions to run the demonstration program.Testing your Orbix 3.3 SP 16 C++ Edition installationTo ensure that your installation is fully operational, you should change directory to the demos directory of your Orbix 3.3 SP 16 installation, for example:Read the index.html file for instructions to run the demonstration program.Platform CommandUNIX $ORBIX_ROOT/setenvs.shUNIX (to source a 64-bit environment in amixed-mode installer)$ORBIX_ROOT/setenvs64.sh Windows %ORBIX_ROOT%\setenvs.bat Platform Location Make commandUNIX $ORBIX_ROOT/demos/common/jumpstart/basic/javamake Windows %ORBIX_ROOT%\demos\common\jumpstart\basic\java nmake Platform Location Make commandUNIX $ORBIX_ROOT/demos/common/jumpstart/basic/cxxmake Windows %ORBIX_ROOT%\demos\common\jumpstart\basic\cxx nmakeNote:If you are building the demos on a Linux system with the -std=c++11 flag, you should set the environment variableORBIXCPP_STD=-std=c++11 before you start building.Reinstalling the license codeIf the licensed applications fail to run (for example, orbixd , idl , idlj ), you may have made an error in entering your licenseauthorization code.You can reinstall the license by changing to the bin directory of your Orbix 3.3 SP 16 installation, and typing the following line, using your authorization code as shown in the following example:You should replace orbixd with the filename of the application that fails to run, and replace licence_code with your licenceauthorization code.The following Orbix 3.3 SP 16 application files are enabled by the corresponding Orbix 3.3 SP 16 product license authorization codes:Structure of installed directoriesA complete installation of Orbix 3.3 SP 16 has the following directory structure in the installation location:Platform CommandUNIX install_license orbixd licence_codeWindows license.exe orbixd LicenceCode Application Java Edition code C++ Edition codeorbixd - Orbix C++ Daemon Code enables Code enables idl - Orbix C++ IDL compiler -Code enables idlj - Orbix Java IDLcompiler Code enables -Directory Description\bin Binary images for all components\config Repositories and configuration files for all components\contrib Utilities contributed by Orbix engineers and partners\demos Demonstrations for all components\docs Links to the latest information on Orbix 3.3 SP 16\idl IDL files\include Header files\lib Development librariesChanging Java version after installationAfter you have installed Orbix 3.3.16, it is possible to alter the version of Java that is used. This may be useful in circumstances where there is a demand to move to another version of Java for improved security features.1Ensure that all Orbix servers and the Orbix daemon are stopped.2Open the common.cfg configuration file located at:<orbix-installation>/config/common.cfg3Change the line:IT_JAVA_INTERPRETER = "c:\java\java8\bin\java.exe";toIT_JAVA_INTERPRETER ="c:\java\updated_java8\bin\java.exe";4Open up the environment script (this may be setenvs.bat file on Windows or a setenvs(64).sh file on Unix systems) located at the root of the installation tree.Change the value that the JAVA_HOME environment variable is set to.5If the JDK being updated is Java 11, then switch to the Changing to Java 11 section before step 6.6This completes migrating to the new version of Java. Re-run theupdated environment scripts.7Restart the Orbix daemon.Changing to Java 11Changing to Java 11 will require some more changes. These extra changes are in the same environment script in which you already updated the JAVA_HOME environment variable.Change the following environment variables:• Change IT_JAVA_MODERN to "true ".• Change JAVA_P_FLAG to "/a ".\OrbixSSL OrbixSSL files, utilities and examples (OrbixSSL installation required)\tools GUI Tools\UninstallOrbixFiles for uninstalling Orbix 3.3 SP 16DirectoryDescription Note:Any Java servers that were registered in the IMR(implementation repository) may need to be recreated.Uninstalling Orbix 3.3 SP 16Uninstalling OrbixTo uninstall Orbix 3.3 SP 16, run the UninstallOrbix file in the UninstallOrbix directory of your Orbix 3.3 SP 16 installation. For examples:Further InformationTechnical supportIf you require further technical assistance with using this product, please see the following web page:https:///Platform Uninstall scriptUNIX $ORBIX_ROOT/UninstallOrbix/UninstallOrbixWindows%ORBIX_ROOT%\UninstallOrbix\UninstallOrbix Note:The uninstaller removes the complete installation of Orbix3.3 SP 16, but does not remove any files added or generated after installation (for example, log files, executables generated in demo runs, implementation repositories, and so on). If OrbixSSL has been installed, it should be uninstalled first.。
- 1、下载文档前请自行甄别文档内容的完整性,平台不提供额外的编辑、内容补充、找答案等附加服务。
- 2、"仅部分预览"的文档,不可在线预览部分如存在完整性等问题,可反馈申请退款(可完整预览的文档不适用该条件!)。
- 3、如文档侵犯您的权益,请联系客服反馈,我们会尽快为您处理(人工客服工作时间:9:00-18:30)。
在Eclipse中运行Java3D的程序
此页解释了如何在Eclipse中使用Java3D的库运行程序。
1.下载Java3D的。
访问此网页下载为您的系统Java3D的库。
2.下载用于Windows包含一个安装程序。
我发现最简单的安装在我
的Java文件夹,包含在我的情况同一个标准的Java,在运行安装程序:
3.启动Eclipse。
你可以创建一个Java3D的代码为您的新项目,或
使用一个已经存在的项目。
我将创建一个新的名为3DExamples 项目
4.下载HelloUniverse.java和添加项目,从第3步。
HelloUniverse.java有很多语法错误,因为它是指一些Java3D的非标准类。
我们需要告诉到哪里寻找这些类的项目。
5.在Eclipse菜单,选择“项目” - >“属性”
6.在弹出窗口中选择 Java Build Path,然后单击 Add Library ...“按
钮。
7.在下一个窗口中,选择用户库,点击“下一步”按钮。
8.在下一个窗口中单击“用户库”...“按钮
9.在未来的点击新建...“按钮。
10.在窗口,弹出新的库名称。
使用名称Java3DLib。
然后单击“确
定”按钮。
11.选择您刚才创建的库,然后单击“添加JAR文件...”按钮。
12.在弹出浏览文件夹,你在第2步安装Java3D的文件选择。
(Java3D
的jar文件的路径在我的机器是用Java3D - > 1.5.2 - >库- >分机- >)选择所有三个jar文件(j3dcore.jar,j3dutils.jar,和vecmath.jar
的)。
所有三个jar文件,选择后单击“打开”按钮
13.后加入的罐子在首选项窗口点击的好吧按钮。
14.在弹出的窗口中单击 Finish按钮。
15.在构建路径“窗口中选择回到您刚才添加的Java3DLib,展开它,
并选择本机库的位置属性。
然后单击“编辑”按钮。
16.在窗口弹出单击外部文件夹“按钮。
17.在弹出的窗口中,浏览到Java3D的文件夹中的bin文件夹。
(在
我的机器,这是在JAVA3D - > 1.5.2 - > bin)中选择的文件夹,然后点击确定。
18.关闭Preferences窗口。
HelloUniverse现在应该编译没有任何语法
错误。
当你运行程序,你应该看到一个旋转的彩色立方体。