bartende条码打印软件设置手册
Bartender软件使用说明
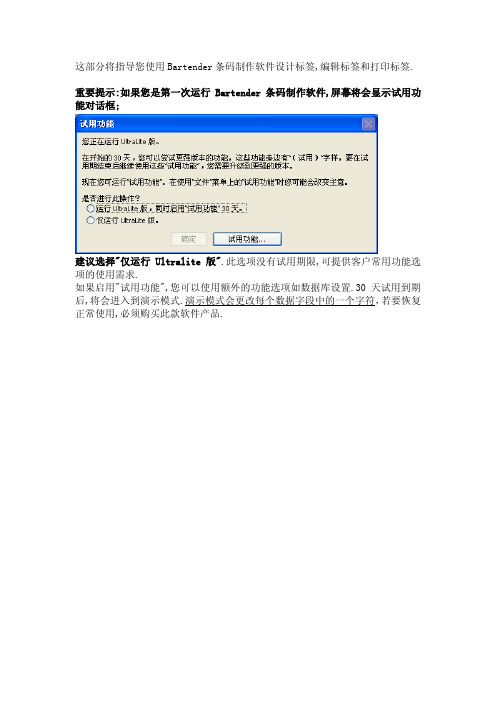
这部分将指导您使用Bartender条码制作软件设计标签,编辑标签和打印标签.重要提示:如果您是第一次运行Bartender条码制作软件,屏幕将会显示试用功能对话框;建议选择"仅运行Ultralite版".此选项没有试用期限,可提供客户常用功能选项的使用需求.如果启用"试用功能",您可以使用额外的功能选项如数据库设置.30天试用到期后,将会进入到演示模式.演示模式会更改每个数据字段中的一个字符,若要恢复正常使用,必须购买此款软件产品.一. 设计标签1.运行Bartender条码制作软件,进入程序界面后点击画面左上角"文件"菜单栏选择"新建".此时,将打开新建格式向导.向导将指导您完成开始格式设计所需要的步骤;2.选择用于此标签格式的打印机驱动(此处以CP-2140打印机为例),点击"下一步";3.选择"指定自定义设置",点击"下一步";5.参照自身使用标签规格,选择设定标签卷四边的特性,点击"下一步";7.参照自身使用标签规格,设定标签的大小,点击"下一步";8.点击"完成";9.新建标签格式已完成.二.编辑标签内容创建文本对象1.单击主工具栏上的创建文本按钮.2.将光标移动到标签视图区域中, 单击希望放置文本的位置.3.双击文本控件,在屏幕数据源中输入您想要输入的信息内容,若要更改字体,请单击字体选项卡,选择所需要更改的对象,完成后点击"确定".创建条形码对象1.单击主工具栏上的创建条形码按钮.2.将光标移动到标签视图区域中, 单击希望放置条形码的位置.3.双击条形码控件,在屏幕数据源中输入您想要输入的信息内容.若要更改条形码符号体系,请单击条形码选项卡,选择所需要更改的对象,完成后点击"确定".导入图片1.单击主工具栏上的创建图片按钮.2.将光标移动到标签视图区域中,单击希望放置图片的位置.3.双击该图片控件,显示修改图片对话框,在图片源处点击"文件"按钮选择要导入的图片文件,完成后点击"确定".移动标签对象要在标签视图区域中更改一个对象的位置,最简单的方法是使用鼠标单击并将其拖动到一个新的位置.拉伸对象和调整对象大小若要调整标签对象的大小,请单击已选中标签对象,然后拖拽对象边线上出现的其中一个小方形把手.1.单击选中对象,并将指针光标置于其中一个边角把手,以便同时更改高度和宽度.如果只需要调整一个方向的尺寸,将指针置于其中一个边线把手.如果光标的位置正确,将变为一个双向细箭头.2.单击并拖拽所选的把手,直到对象达到所需的尺寸.复制,剪切,粘贴,删除标签对象所有标签对象均可进行复制、剪切、粘贴、删除的动作.单击对象,点击右键选择所需要处理的动作.指定正确的打印机1.进入标签视图后,可通过单击主工具栏上的打印机按钮,或文件菜单中的打印选项以显示打印对话框.2.单击名称选项右侧的下箭头显示已安装的打印驱动程序列表.3.单击您打印时要使用的打印机的名称.注意:如果所需的打印机未列出,则使用Seagull驱动程序向导安装其打印机驱动程序.请参阅<Seagull驱动安装向导>.4.单击关闭.指定标签大小1.进入标签页面后,可通过单击主工具栏上的页面设置按钮,或单击文件菜单中的页面设置,或双击标签试图区域的空白部分,以显示页面设置对话框.2.单击纸张选项卡,设定纸张大小.3.单击布局选项卡,并指定边距以及行数和列数.4.若要自定义标签大小,请选中手动设置框,输入标签的宽度和高度.注意:如果没选中手动设置框,Bartender将自动设置标签的高度和宽度.5.单击确定.三.打印标签1.单击主工具栏上的打印机按钮,或文件菜单中的打印选项以显示打印对话框.2.确定选择了正确的打印机名称(此处以CP-2140打印机为例).3.将标签需要打印的份数输入同样标签的份数选项.4.单击打印按钮,Bartender将开始打印您的标签.。
BarTender条码打印软件基础教程及使用技巧资料
BarTender条码打印软件基础教程及使用技巧厦门远景达目录1 Seagull打印机驱动 (3)1.1 Seagull驱动的优势 (3)1.2 内嵌字体与Windows字体的对比 (3)1.3 如何下载字体到打印机 (3)1.4 如何获取一台电脑的BarTender、打印机以及PC本身的信息 (4)2 简单界面操作 (5)2.1基本的类似Windows的友好操作(拖拽、排列) (5)2.2 组件、自定义工具箱功能 (6)2.3 图像导出 (7)2.4背景设置 (8)3 口令设置 (8)4 数据库和序列打印 (9)4.1 基本的数据库打印以及字体大小自动调整功能 (9)4.2 每条记录得打印数量问题 (12)4.3 查询和SQL功能 (13)4.4 数据库字段---打印数量 (14)4.5 关于文本数据库的打印 (15)4.6 SAP(中间文档)打印 (16)4.7 序列打印 (16)5 子串和共享 (17)5.1 子串的创建 (17)5.2 共享名的使用 (18)6 打印前提示 (19)6.1 简单数据的打印提示 (19)6.2 打印数量的打印前提示 (21)6.3 打印前提示使用技巧(快捷方式的巧用) (23)7 灵活的中间件:Commander (23)7.1 Commander的基本使用 (23)7.2 Commander的启示 (26)8 RFID条码的打印 (26)1 Seagull打印机驱动1.1 Seagull驱动的优势Seagull驱动非常全面,并且随时更新,有时候很多问题本机自带驱动的问题1.2 内嵌字体与Windows字体的对比Seagull有丰富的打印机驱动,支持所有打印机内嵌字体,支持所有条码字体,内嵌字体的好处:速度快,效率高,无须下载Windows字体,以下是调用内嵌字体和Windows 字体的对比:左侧的图是直接调用打印机字体是打印机所接受的打印机指令,右侧的图则是调用Windows字体时所接受的打印机指令,很明显如果调用Windows字体需要经过一个字符集的下载过程,如果要是打印序列或者是同样的标签时,会屡次调用Windows字体,会影响效率。
bartender 快速参考指南说明书
件的数据 • 标签设计支持 Amazon
Transparency
专业版
通过数据录入表单、强大的 Intelligent Templates™、数据库连接、编码,能 够随时随地使用任意打印机实现动态 商业标签打印。适用于需要标签打印 标准化的任意规模企业
BarTender 能够遵循大量针对处方药全球追踪法规的要求,包括 DSCSA 和 FMD。
BarTender 为企业提供条形码,RFID 和智能标签工具,帮助其在当 今竞争激烈的零售环境中紧跟快速发展的标准、技术和要求
在整个航空航天和国防供应链中,对零件的准确跟踪和维护可确保 符合法规要求,提高安全性并防止盗用和假冒备件的危害。
适用于受监管行业,跨越多个站 点或需要集中控制其标签设计和 打印的企业。
全面的企业标签管理
• 集中式文档存储和管理,便 于版本修订控制
• 编排工作流程,实现更快速 的标签设计,批准和发布
• 全面的安全性和可审核流程 • 可追溯性和序列化,以满足
行业法规 • 与几乎任何业务系统无缝
集成 • 提高关键任务环境的可靠性
•
运输与物流 制造 化学 餐饮 医疗保健 医疗器械 制药 零售 航空航天
行业
实现完整供应链标签打印流程标准化,创造互操作性、透明度及高 速度。
无论是小型制造商还是世界上最大的全球运营组织,BarTender 是 全球分散型、流程型或加工型等制造商标签策略中不可或缺的组成 部分。
世界各地的化学品制造商、分销商和进口商都信任 BarTender 能够 帮助他们遵循层出不穷的标签制作、序列化和安全性相关规则和 法规。
BarTender 被称为食品行业的顶级技术,可帮助简化 FSMA 204 合 规性的独特要求,实现和企业间互操作性、食品标签制作和可追溯 性,以确保全球食品供应链的安全。
Bartender模板设置
BarTender条形码设计技巧V1.11、序列设置 (2)2、条形码大小固定 (3)3、条形码不显示条码内容 (4)4、条形码位置居中 (5)5、文字自动调整大小并居中 (6)6、水洗唛打印 (7)7、数据源字段组合显示 (11)8、添加打印时间 (15)福利(BT10.1 破解补丁) ........................................................................................ 错误!未定义书签。
1、序列设置给打印出来的每张条形码打印上序号,例如打印100张条码,第一张上面显示数字1,第二张显示2,以此类推,最后一张显示100。
模板上还可以加上打印日期时间等信息。
2、条形码大小固定条形码有长有短,这样设置可以使得条形码不管怎么变打印出来都不会超出纸张大小。
条形码宽度:条形码的最大长度,可以设置为纸张的宽度短一点3、条形码不显示条码内容不显示条形码内容之后可以在条形码下面添加一个文本框,输入想要显示的内容即可。
4、条形码位置居中5、文字自动调整大小并居中类似于2、条形码大小固定,可以根据纸张大小自动调整文字,似的文字不会超出纸张大小。
单行和段落设置类似。
6、水洗唛打印BarTender中有一个字体Seagull:Textile care v1.0,是专门用来打印水洗标的。
设置方法如下:(1)添加一个文本框,改字体格式为Seagull:Textile care v1.0;(2)改变文本的数据源字段,PS:字符和水洗唛对应关系见下图。
7、数据源字段组合显示有两种方法可以实现降两个数据源合并显示,一种是通过字处理器文本框,另一种可以使用多数据源组合的方法实现。
两种方法可以根据不同需要选择使用。
第一种:(1)添加文本对象-字处理器添加一个字处理器文本框,编辑其属性。
(2)点击合并字段-命名的数据源,选择需要合并显示的数据源,中间可以加上别的文本,比如【】等。
5.BarTender操作说明书

BARTENDER 软件的基本使用标签的设置1.先启动BarTender软件。
2.建立新的标签格式。
3.选择空白标签格式。
4.选择安装完成的打印机型号。
5.如没有合适的标签格式,选择自定义设置。
6.根据实际的标签样式,选择标签格式。
例如一排上有三张小标签,那么选择第二项,行数为:1,列数为:3。
7.请注意标签的边缘宽度数值。
8.请选择标签的形状。
9.定义标签的实际大小值。
可以通过右侧预览查看形状。
10.完成后显示一空白标签,且屏幕上的鼠标光标应该处于指针模式(形状象一个箭头)。
标签内容的编辑创建条形码或文本对象1. 单击主工具栏上的创建条形码按钮或创建文本按钮,单击的按钮取决于要创建条形码还是文本区域(称为“文本对象”)。
2. 将光标移动到标签视图区域中,单击对象中心应处的位置。
注:还可以使用BarTender 工具箱在标签中添加对象。
请参阅下文的BarTender 工具箱。
选择或取消选择对象要选择对象,只需单击该对象。
对象被选中后,将有八个实心手柄,每个边角一个,四条边线每条边线的中点一个,用于调整对象的大小。
单击对象外面的任意位置可以取消选择。
移动标签对象要在标签视图区域中更改一个对象的位置,最简单的方法是使用鼠标单击并将其拖动到一个新的位置。
关于如何将对象从一种标签格式移动到另一种标签格式。
拉伸对象和调整对象大小若要调整标签对象的大小,请单击以选中标签对象,然后拖曳对象边线上出现的小方形手柄中的一个。
1. 选中对象,并将指针光标置于四个边角把手中的一个,以便同时更改高度和宽度。
如果只需要调整一个方向的尺寸,将指针置于边线把手中的一个。
如果光标的位置正确,将变为一个双向细箭头。
2. 单击并拖曳所选的把手,直到对象达到所需的尺寸。
使用单击和拖曳也可以单击对象并将对象拖曳到标签格式的新位置。
这样做时如果按住Ctrl 键,将在新位置创建一个副本。
最后,还可以右键单击并拖曳到所需的位置。
放开鼠标键后将出现一个弹出式菜单。
BarTender 应用程序英语用户指南说明书
English Getting Started withthe BarTender®AppUSER GUIDEContentsGetting Started with the BarTender App3 Requirements3 Terminology3 Downloading the BarTender App4 Managing Your Print Services5 Adding a Print Service5 Editing a Print Service5 Deleting a Print Service6 Switching to a Different Print Service6 Managing Your Printers7 Detecting and Adding Printers7 Deleting Printers8 Printing Documents9 Selecting a Document to Print9 Printing Your Document10 Troubleshooting12 Related Documentation13Getting Started with the BarTender AppThe BarTender®app makes professional printing as easy and flexible as using your Android smartphone or tablet and as powerful and secure as printing with BarTender2021and BarTender 2022by Seagull Scientific.The BarTender app works with BarTender2021Enterprise edition and BarTender2022Enterprise, Professional,and Automation editions to let you choose label designs,complete print-time data entry forms and query prompts,and start print jobs on any printer that is connected to your device over the internet.By using the BarTender app,you can do the following:l Use your device to print to internet-connected printers and to Bluetooth-connected printers.l Automatically authenticate with a BarTender Print Portal website or server and then browse toa specific document folder within the Print Portal installation.l Add or edit data in real time by using in-app BarTender data entry forms and query prompts.l Use BarTender security features to monitor and access permissions to documents. RequirementsThe BarTender app requires that Android11or a newer version of the Android operating system be installed on your mobile device.The BarTender app connects remotely to a print service,which is an instance of Print Portal that hosts your BarTender documents.The app requires that one of the following editions of BarTender be installed on your network:l BarTender2021Enterprise edition with Print Portal installed and configuredl BarTender2022Professional,Automation,or Enterprise edition with Print Portal installed and configuredTerminologyThe following terms appear in this document:l BarTender app refers to the BarTender mobile app that you download to your device.l Print Portal refers to the Print Portal companion application that is installed with BarTender 2021and BarTender2022.Print Portal must be installed and configured on your networkbefore you can use the BarTender app.For more information,refer to Installing BarTender Print Portal in the BarTender help system.l Print service refers to the web service that hosts your BarTender documents,which might be a Print Portal website or a Print Portal server.Collectively,these websites and servers are called print services.You can add more than one print service to the app.However,the app can connect to only one print service at a time.The app must be connected to a print service to print the documentsthat are hosted on the service.Typically,a print service is installed and configured by your BarTender administrator.When this is the case,you do not need to configure the print service to use the BarTender app to print;you need only to connect to it.For more information,refer to the Managing Your Print Services section of this document.Downloading the BarTender AppYou can download the BarTender app from the Google Play store.The app is free to download and does not require a BarTender product key code.Search for"BarTender by Seagull",or use the following link:l https:///store/apps/details?id=com.seagullscientific.printportalThe BarTender app interface includes a navigation menu,which is displayed when you tap in the upper left corner.This menu includes the following options:l Discover Printers:Opens the Configure Printers page,which you can use to view,add,delete, and configure the printers that the app is connected to.Printers in your network areautomatically detected,and you can manually add printers as needed.For more information, refer to Managing Your Printers.l Print Services:Opens the Print Services page,which you can use to connect to a print service, add one or more print services to the app,and edit or delete a print service.For moreinformation,refer to Managing Your Print Services.l About:Displays version information,a link to online help documentation,and a list of the open-source licenses that the BarTender app uses.Click a license name to view its terms.Managing Your Print ServicesAfter you download the BarTender app,you must add a print service to the app(if one has not already been added for you by your administrator)and then connect to it to be able to print your documents. When you first open the BarTender app,the Print Services page is displayed.This page lists the print services that have been added to the app,if any,and provides options to add more print services and to edit or delete existing ones.To connect to a print service,tap to select it.To return to the Print Services page from another page in the app,tap,and then tap Print Services.Adding a Print ServiceTo add a print service to the app,follow these steps:1.On the Print Services page,tap.2.On the Add Print Service page,enter the following information for the print service that youwant to connect to:l A name for the print servicel The print service URL(this is the Print Portal URL for your installed instance of BarTender 2021or BarTender2022Print Portal,such as https://print.<companyname>.com/Browse)l The Print Router URL,which includes the port number that the print router uses(such as https://print.<company name>.com:5950/)3.Tap Save.Editing a Print ServiceTo edit the settings of an existing print service,follow these steps:1.On the Print Services page,tap Edit.2.On the Edit Print Service page,tap for the print service that you want.3.On the Edit Print Service page,make the changes that you want.4.Tap Save.The print service is displayed automatically.Deleting a Print ServiceTo delete a print service from the app,follow these steps:1.On the Print Services page,tap Edit.2.On the Edit Print Service page,tap for the print service that you want to delete.Switching to a Different Print ServiceIf you have configured more than one print service,you can switch to a different print service at any time.To do this,on the Print Services page,tap the print service that you want to switch to.Managing Your PrintersTypically,printers are added to a print service by your BarTender administrator.When this is the case, you do not need to add printers to the BarTender app to print your documents;you need only to connect to the print server that hosts the printers.However,in some cases,you might need to add one or more local printers to the app.This topic describes how to manage printers that are added to the app,not the printers that are hosted on a print service.Use the Configure Printers page to detect local printers,to manually add a printer to the app,and todelete a printer.To open the Configure Printers page,tap,and then tap Discover Printers. Detecting and Adding PrintersWhen you open the BarTender app,it automatically detects connected Bluetooth printers and connected network printers that use an IP address.These printers are then listed on the Configure Printers page.If the printer that you want is not listed,you can tap to instruct the app to detect connected printers and refresh the printer list.Or,you can manually add a printer to the list.When you do this, the added printer is shared with your print service when you connect to the service.The procedure to follow depends on whether the printer that you want to add is Bluetooth-enabled or is a network IP printer.Adding a Bluetooth PrinterTo manually add a Bluetooth printer,follow these steps:1.On the Configure Printers page,tap Tap to manually add printer.2.Tap Go to Bluetooth Settings.3.On your device's Bluetooth settings page,enable pairing if it is not already enabled,andthen select the printer that you want to add.4.In the BarTender app,tap Done.Adding a Network IP PrinterTo manually add a network IP printer,follow these steps:1.On the Configure Printers page,tap Tap to manually add printer.2.Tap Add Network Printer Manually.3.In the Add network printer manually dialog,enter the following information:l The IP address or host name for the printerl The port numberl The printer manufacturer name and model numberl The height and width of the labels to be printed(this information is required by most printers)l Offset information as needed4.Tap Save.5.Tap Done.Deleting PrintersYou can delete printers that you manually added to the app.To do this,tap next to the printer that you want to delete.Printing DocumentsAfter you connect to a print service,you can select documents that are hosted on the service and select a printer to send the print job to.The BarTender app supports data entry forms and query prompts,so you can add this data at print time.Occasionally,the BarTender app might be unable to send a print job tothe selected printer.If this occurs,the app notifies you so that you cancontact your administrator and request that a driver be added to theprint service server for the printer that you want.Selecting a Document to PrintTo select the document that you want to print,follow these steps:1.Open the BarTender app.2.Connect to the print service that you want to use,as follows:lIf you have not configured a print service,tap.On the Add Print Service page,enter a name,URL,and Print Router URL for the print service,and then tap Save.Theapp connects to and displays the print service.l If you have configured one print service,the app automatically connects to and displays it.l If you have configured more than one print service,the app lists them on the Print Services page.Tap the print service that you want to connect to and display it.3.Scroll through the displayed documents to find the document that you want.Alternatively,entera search term in the Search field.4.Tap the document to open it and to start the printing process.The BarTender app supports the BarTender2021and BarTender2022versions of Print Portal as print services.For more information about how to print a document in Print Portal,refer to Printing a Document in the Print Portal help system.You can also access the Print Portal help system in the BarTender app when the print service isdisplayed.To do this,tap,and then tap Help.Printing Your DocumentTo print a document,follow these steps:1.Locate the document that you want,and then tap it to open the Print dialog.2.In the Printer list,select the printer that you want.3.In the Copies field,enter the number of copies that you want to print.4.If your document contains serialized data,enter the number of serial numbers and the numberof copies per serial number that you want to print in the Serial Numbers and Copies per Serial Number fields.5.Tap Print.l If the Select Records dialog opens,select the records that you want to print,and then tap Print.l If a query prompt or data entry form is displayed,enter the required data,and then tap Print.The print job runs.6.In the Print dialog,review the print job details,and then click Close to return to the Print dialog.If you printed to a PDF,you can optionally tap Download to download a copy of the printeditems and/or tap Open and then select a PDF viewer to review the printed items.Using Print PreviewYou can view the document in Print Preview to verify that it is correct before you print it.Print Preview displays the printed items exactly as they will appear,including any data that is pulled from connected databases or entered from query prompts or data entry forms.To use Print Preview,follow these steps:1.Locate the document that you want,and then tap it to open the Print dialog.2.In the Printer list,select the printer that you want.3.In the Copies field,enter the number of copies that you want to print.4.If your document contains serialized data,enter the number of serial numbers and thenumber of copies per serial number that you want to print in the Serial Numbers and Copies per Serial Number fields.5.Tap Preview.l If the Select Records dialog opens,select the records that you want to print,and then tap Preview.l If a query prompt or data entry form is displayed,enter the required data,and then tap Preview.6.In the Print Preview dialog,a preview of your printed item is displayed.If your print jobincludes more than one page,you can tap Page and then select the page that you want to view.Tap Print to print the document,or tap Cancel to close Print Preview.TroubleshootingThe following answers to commonly asked questions provide solutions to help you troubleshoot your BarTender app configuration.Why doesn't my app connect to the print service?l Make sure that a Wi-Fi connection is available and that you are connected to the internet.l Make sure that the Wi-Fi capabilities of your mobile device are enabled.l Make sure that the print service that you are trying to connect to is turned on and functioning correctly.l If you still can't connect,turn off your device,turn it on again,open the BarTender app, and then try to connect again.Why can't I find a printer?l Make sure that one or more printers are available on Bluetooth or an IP port and are connected to the print service that you are using.l Make sure that the printer that you are trying to connect to is turned on and functioning correctly.l If you are connected to a printer but the document still is not printed,refer to Troubleshooting printing problems on the BarTender Support Center website.Why is my document displayed or printed incorrectly?l Verify that the document's formatting and settings are correct in BarTender Designer.For more information,refer to Modifying the Page Setup in the BarTender help system andthe"Template Design"articles on the BarTender Designer page of the BarTender SupportCenter website.Related DocumentationTechnical Documentsl BarTender2021Print Portall BarTender2022Print PortalTo view and download technical documents,visit:https:///resources/white-papers/Other Resourcesl BarTender Software Websitehttps://l BarTender Support Centerhttps://l BarTender Online Help Systemhttps://©2022Seagull Scientific,Inc.BarTender,BarTender Cloud,Intelligent Templates,Drivers by Seagull, the BarTender logo,the BarTender Cloud logo,and the Drivers by Seagull logo are trademarks or registered trademarks of Seagull Scientific,Inc.All other trademarks are the property of their respective owners.。
barTender制作条码操作手册
BarTender软件制作标签操作手册XXXX(苏州)有限公司内部使用特别声明:本手册制作目的是为使XXXX(苏州)有限公司员工快速、便捷的掌握bartender 制作标签操作使用,所以本手册仅供内部使用,严禁外传。
目录目录 .......................................................................................................................................................... 第一部分:设置标签格式(创建新的标签)...................................................................................... 第二部分:设定标签内容。
..................................................................................................................一、界面介绍....................................................................................................................................二、增量标签设定(自动增加)。
..................................................................................................三、不变标签设定。
........................................................................................................................四、条码标签设定............................................................................................................................ 第三部分:打印设置 ..............................................................................................................................一、递增标签列印............................................................................................................................二、打印不变的标签。
BarTender操作说明书

.BarTender操作说明书————————————————————————————————作者:————————————————————————————————日期:BARTENDER 软件的基本使用标签的设置1.先启动BarTender软件。
2.建立新的标签格式。
3.选择空白标签格式。
4.选择安装完成的打印机型号。
5.如没有合适的标签格式,选择自定义设置。
6.根据实际的标签样式,选择标签格式。
例如一排上有三张小标签,那么选择第二项,行数为:1,列数为:3。
7.请注意标签的边缘宽度数值。
8.请选择标签的形状。
9.定义标签的实际大小值。
可以通过右侧预览查看形状。
10.完成后显示一空白标签,且屏幕上的鼠标光标应该处于指针模式(形状象一个箭头)。
标签内容的编辑创建条形码或文本对象1. 单击主工具栏上的创建条形码按钮或创建文本按钮,单击的按钮取决于要创建条形码还是文本区域(称为“文本对象”)。
2. 将光标移动到标签视图区域中,单击对象中心应处的位置。
注:还可以使用BarTender 工具箱在标签中添加对象。
请参阅下文的BarTender 工具箱。
选择或取消选择对象要选择对象,只需单击该对象。
对象被选中后,将有八个实心手柄,每个边角一个,四条边线每条边线的中点一个,用于调整对象的大小。
单击对象外面的任意位置可以取消选择。
移动标签对象要在标签视图区域中更改一个对象的位置,最简单的方法是使用鼠标单击并将其拖动到一个新的位置。
关于如何将对象从一种标签格式移动到另一种标签格式。
拉伸对象和调整对象大小若要调整标签对象的大小,请单击以选中标签对象,然后拖曳对象边线上出现的小方形手柄中的一个。
1. 选中对象,并将指针光标置于四个边角把手中的一个,以便同时更改高度和宽度。
如果只需要调整一个方向的尺寸,将指针置于边线把手中的一个。
如果光标的位置正确,将变为一个双向细箭头。
2. 单击并拖曳所选的把手,直到对象达到所需的尺寸。
- 1、下载文档前请自行甄别文档内容的完整性,平台不提供额外的编辑、内容补充、找答案等附加服务。
- 2、"仅部分预览"的文档,不可在线预览部分如存在完整性等问题,可反馈申请退款(可完整预览的文档不适用该条件!)。
- 3、如文档侵犯您的权益,请联系客服反馈,我们会尽快为您处理(人工客服工作时间:9:00-18:30)。
BarTender 10使用
目录
•第一章软件简介•第二章基本应用•第三章常见问题
第一章软件简介
•BarTender是由美国seagull scientific推出的一款优秀的条码打印软件。
BarTender 是最快速,最容易设计专业、高质量标签的条码打印软件。
产品支持广泛的条形码码制和条形码打印机,不但支持条形码打印机而且支持激光打印机。
还为世界知名品牌条形码打印机开发了增强驱动。
BarTender 是一个行业领先的标签设计和条形码软件。
第二章基本应用
• 1.单行单列标签创建
• 2.一行多列标签创建
• 3.文本建立
• 4.条码建立
• 5.条码中连接字段的建立
• 6.打印机属性设置
•7.下载字体到打印机
•8.把标签档案打印成TSPL语言
•功能:设置单行单列标签的宽度、高度等。
•1).运行BarTender,选择开启新BarTender文件,选择空白标签。
•2).选择已经安装的打印机驱动型号,点击“下一步”
•3).默认选择指定自订设定,点击“下一步”
•4).标签一行一列时选择每页包含一个项目,点击“下一步”。
•5).根据需要选择侧边是否有未使用的材料
•6).默认选择圆角矩形,点击“下一步”
•7). 修改标签宽度和高度后点击“完成”
高度为标签的高度
宽度为标签的宽度
•8).创建完毕后的界面。
软件界面的工具箱、设计栏、文本栏
•功能:设置一行多列标签的宽度、高度等。
•1).运行BarTender,选择开启新BarTender文件,选择空白标签。
•2).选择已经安装的打印机驱动型号后单击“下一步”
•3).默认选择指定自订设定,点击“下一步”
•4).选择每页包含多个行和/或列的项目,并填写数量。
•5).根据需要选择侧边是否有未使用的材料
•6).修改标签宽度和高度后点击“下一步”
高度为标签的高度
宽度为底纸的宽度
•7).默认选择圆角矩形,点击“下一步”
•8).手动设定水平间距,点击“完成”
默认,不需修改
选择手动设定,设
定两张标签纸之间
的距离
•功能:编辑除条码外的文字
•1).点击文字图标单行,在标签空白部分点击后如下图所示。
(备注:选择多行,当编辑内容多时可以实现自动换行)
•2).修改文字内容(如欲打印文字:天津国聚科技)。
在文字范例上双击,出现文字属性窗口,点击窗口左侧红色标记处,在窗口右侧资料来源下红色标记处编辑欲打印的文字内容(天津国聚科技),点击关闭即可。
•3).修改类型(日期等,如欲打印日期)。
在文字范例上双击,出现文字属性窗口,点击窗口左侧红色标记处,点击窗口右侧资料类型类型选择“日期”,选择格式后,点击关闭即可。
(打印实时日期请参考第三章常见问题11.打印实时日期)
•4).文本序列化(如欲打印3张标签,给张标签内容分别为:001、002、003)。
在文字范例上双击,出现文字属性窗口,点击窗口左侧红色标记处,在窗口右侧资料来源下红色标记处编辑欲打印的文字内容(001),点击窗口右侧转换序列化末尾的小图标。
•4).文本序列化(接上)。
勾选序列,据需要设置序列增量或减量,间隔,一般默认即可,点击确定。
•5).修改文字字体(如打印效果欲设置为:华文宋体)。
点击窗口左侧字体后,在窗口右侧选择字体大小等,点击关闭。
• 6).打印(无序列化时)。
编辑完毕后,点击打印图标,输入欲打印的数量,点击打印。
•6).打印(序列化时)。
编辑完毕后,点击打印图标,输入欲打印的数量,点击打印。
说明:序号指的是含有变量的标签需要变动的张数;每个序号的份数指的是一个标签重复打印的张数。
如:标签中设置计数“001”,每个序号的份数中输入1,序号中输入3打印内容为:001,002,003;而如果份数中输入3,序列数中输入1,打印
内容为:001,001,001
•功能:编辑条码
•1).选择条码图标更多条码
•2).在选取条码窗口选择欲打印条码后,点击标签空白部分,会弹出如右图窗口。
•3).修改条码内容。
双击条码,弹出条码属性窗口,点击左侧窗口红色标记处,可在右侧窗口红色标记处修改条码内容。
•4).修改列印方式。
点击窗口左侧符号体系与大小,点击窗口右侧列印方式,在新窗口选择条码和可读文字由BarTender控制。
•功能:将两个文本合并到条码中,使条码包含原条码及连接的两个文本,共3部分内容。
(还可单独设置各部分内容序列化,使各部分内容各自序列化。
序列化设置请参看第二章基本应用 3.文本建立4)文本序列化)
•1).建立文本1(1111)。
双击文本,弹出文字属性窗口,点击窗口左侧文字1后,点击窗口右侧不列印物件,表示内容可显示但打印无印出
•2).依相同操作建立文本2(20130501)
•3).建立条码(33333)。
双击条码,弹出条码属性窗口,点击窗口左侧左下角新增资料源
•4).在弹出窗口选择物件值下一步选择文本1,主资料源,完成。
•5).重复步骤3)、4),选择文本2。
合并后条码的内容为33333111120130501,预览图如右图
•1).点击打印图标,或点击菜单栏文件打印
•2).点击属性
•3).选项中修改打印的速度和浓度
打印深度
打印速度
6.打印机属性设置
•4).卷中设置列印方式,感测器类型,打印选项等
热转印:打印机使用碳带
设置打印模式热敏:打印机不使用碳带
设置介质类型
有间隙的标签
有标记的标签
连续纸
间隙标签
黑标标签
设置间隔高度
或黑标高度
当类型选择有间隙的标签时,
间隙高度为垂直方向两张标签
之间的距离
当类型选择有标记的标签时,
黑标高度为黑标的实际高度。
设置整体对象的移动位置
无切刀模组、拨纸模组时选择“撕去”,若要
屏蔽打印机回退动作,则选择“无
第三章常见问题
• 1.如何屏蔽试用功能
• 2.软件打印出的内容出现随意变更
• 3.打印标签位置偏移
• 4.连接打印机总提示“发现新硬件”的问题• 5.打印的条码与软件中显示的不一样
• 6.打印QRCODE中文乱码
•7.软件如何切换中英文界面
•8.碳带回卷轴不转
•9.条码无法序列化
•10. 没有数据源被设置为序列化
•11.打印实时日期
1.如何屏蔽试用功能
•问题描述:使用软件时提示试用版本,并提示30天后过期。
•解决方案:屏蔽试用功能。
(10.0以前版本)选择菜单文件/帮助试用功能试用功能,取消启用试用功能即可(如左图),(在10.0版本) 选择菜单帮助版本选取,选择版本UltraLite(如右图),这样软件就只显示可正常使用的功能。
2.软件打印出的内容出现随意变更
•问题描述:打印时提示随机修改一个字符,打印出的标签内容每行有一个字符被修改。
(这是因为使用了软件中标注“试用”字样的功能,这些试用功能在30天后不能再正常使用。
)
•解决方案:(10.0以前版本)中可查看菜单文件/帮助试用功能当前格式。
界面中会显示用户正在使用的这些试用功能。
请取消这些试用功能即可恢复正常列印。
(10.0版本)直接屏蔽试用功能即可正常列印(屏蔽试用功能方法参照1.如何屏蔽试用功能)。
3.打印标签位置偏移
• 问题描述:打印出的内容不在正确位置。
• 解决方案如下:
• 1)请先确定打印机走纸正常。
•2)核对软件中的标签设置。
在标签空白处双击,弹出“页
面设置”窗口,测量实际使用
的标签宽度和高度,其中宽度
是指底纸的宽度,高度是指实
际粘贴的标签高度,不包括上
下间隙值在内。
设置完成可查
看右边的预览标签参数,如果
与实际参数有出入请点击向导
修改。
(设置方法请参看第二章
基本应用中的标签创建)
•3)核对标签的上下左右间距,一般上下边距默认为0(左图),左右边距与实际使用一致。
•4)选择图标“打印”“属性”
•5)在属性窗口“卷”,在卷界面中修改相关参数。
设置列印模式热转印:打印机使用碳带
热敏:打印机不使用碳带
设置感测器类型
有间隙的标签
有标记的标签
连续纸
间隙标签
黑标标签
设置间隔高度
或黑标高度
当类型选择有间隙的标签时,
间隙高度为垂直方向两张标签
之间的距离
当类型选择有标记的标签时,
黑标高度为黑标的实际高度。
设置整体对象的移动位置
无切刀模组、拨纸模组时选择“撕去”,若要
屏蔽打印机回退动作,则选择“无”
4.连接打印机总提示“发现新硬件”的问题
•问题描述:连接USB线后开启打印机提示:发现新硬件界面,如下图。
•解决方案:点取消不要继续安装即可。
5.打印的条码与软件中显示的不一样
•问题描述:打印出的条码内容与软件中显示的内容不一样。
•解决方案如下:
•1).在条码上双击,弹出“条码属性”窗口(左图),点击窗口左侧的“符号体系与大小”,再点击窗口右侧的“列印方式”
•2).选择“条码和可读文字由BarTender控制”。