红外温度计使用说明书
红外测温仪操作使用方法
红外测温仪操作使用方法(总9页)--本页仅作为文档封面,使用时请直接删除即可----内页可以根据需求调整合适字体及大小--红外测温仪操作使用法1.操作测温仪测温仪会在按下扳机或按下黄色键时打开。
若连续8秒钟没有检测到活动,测温仪会自动关闭。
测量温度时,将测温仪瞄准目标,拉起并保持扳机按下不动。
松开扳机以保持温度读数。
一定要考虑距离与光点尺寸比以及视场。
激光仅用于瞄准目标物体。
1)找出热点或冷点要找出热点或冷点,将测温仪瞄准目标区域之外。
然后,缓慢地上下移动以扫描整个区域,直到找到热点或冷点为止。
见图 5。
图5 找出热点或冷点2)距离与光点尺寸随着与被测目标距离(D)的增大,仪器所测区域的光点尺寸(S)变大。
光点尺寸表示 90 % 圆能量。
当测温仪与目标之间的距离为 1000 mm(100 in),产生 20 mm(2 in)的光点尺寸时,即可取得最大 D:S。
见图 6。
图6 距离与光点尺寸3)视场要确保目标大于光点的大小。
目标越小,则应离它越近。
(见图7)图7 视场4)发射率发射率表征的是材料能量辐射的特征。
大多数有机材料和涂漆或氧化处理表面的发射率大约为。
如果可能,可用遮蔽胶带或无光黑漆(< 150 ℃/302℉)将待测表面盖住并使用高发射率设置,补偿测量光亮的金属表面可能导致的错误读数。
等待一段时间,使胶带或油渍达到与下面被覆盖物体的表面相同的温度。
测量盖有胶带或油漆的表面温度。
如果不能涂漆或使用胶带,可使用发射率选择器来提高您的测量准确度。
即使是使用发射率选择器,对带有光亮或金属表面的目标也很难取得完全准确的红外测量值。
5)用户设置操作SET键:循环切换设置状态,循环次序为发射率设定锁定测量设定℃/℉选择设定正常测量。
按黄色键可直接保存设置并退出。
6)发射率设定此功能为改变发射率的值。
设定时“E=0.”字样闪烁。
单击▲递加,长按快速增加,当加到后停止。
单击▼递减,长按快速减少,当减到后停止。
红外线温度计使用说明书-ThermoWorks

IR-IND Industrial Infrared & IRK-2 InfraredOperating InstructionsFor tips on using infrared thermometers visit the Learning Center at .FeaturesFunction Keys (Press Mode button to scroll)Lock Mode Operating InstructionsIntroductiontrigger, and the temperature reading of the surface being measured will be shown on the LCD display. Use the circle laser pattern to identify the target area being measured. On the side of the unit are slots to insert a type K thermocouple probe (sold separately) for contact measurements.Infrared measurements are affected by many factors including emissivity, distance, ambient temperature, material of target being measured and many other factors. For tips on using infrared thermometers visit the Learning Center at .-strument is factory tested and a certificate of conformance is included to ensure that it was tested against NIST-Traceable standards. Please review this operation guide prior to use. Current emissivity setting. (The default emissivity is 0.95.)Press ‘Mode’ button, then press ‘Up’ key or ‘Down’ key to set the emissivity . Press ‘Mode’key to save. The emissivity is settable from 0.10 (10E) to 1 (100E).Press ‘Mode’ button to view Maximum (MAX), Minimum (MIN), Different between MAXand MIN (DIF) and Average (AVG) modes . All functions are reset when measurements resume.Press ‘Up’ key or ‘Down’ key to change the High Alarm (HAL) or Lo Alarm (LAL), then press‘Meas.’ key to save. Alarm will sound and screen will flash when limits are exceeded. Alarmis for infrared measurements only.Connect a suitable type K thermocouple probe to the connection on the side of the unit.Within the PRB function the temperature of the probe will be displayed in the lower display.Press the “Lock” button to enable the continuous operation mode. In this mode the unit will measure without requiringthe press of the trigger. Press ‘Lock’ button again to disable continuous operation mode.Socket ‘Trigger’BacklightLaser Storage & CleaningSpecificationsTroubleshootingThe thermometer should be stored at room temperature. The sensor lens is the most delicate part of the thermometer. The lens should be kept clean at all times; care should be taken when cleaning the lens using only a soft cloth or cotton swab with water or medical alcohol, allowing the lens to fully dry before using the thermometer. Do not submerge any part of the thermometer.When the ‘Low Battery’ icon flashes, the battery should be replaced immediately with AAA, 1.5V batteries. Please note: Turn the instrument off before replacing the battery.Dispose of used battery promptly and keep away from children.Range IR-INDRange IRK-2Type K Thermocouple RangeOperating RangeAccuracy*(Tamb=25°C)Accuracy*(Tamb=23±3°C)Emissivity RangeResolutionResponse Time (90%)Distance:Spot IR-INDDistance:Spot IRK-2Battery LifeDimensionsWeight -76 to 1400°F (-60 to 760°C) -76 to 1022°F (-60 to 550°C)-83.2 to 2552°F (-64 to 1400°C) 32 to 122°F (0 to 50°C) 59 to 95°F ±1.8°F (15 to 35°C ±1.0°C) -60 to 0: ±(2+0.05/deg C) deg C, 0 to 760: 2% of reading or 4°F (2°C), whichever is greater 0.95 default — adjustable 0.1 to 1 step .010.1° at -83.2 to 999.9°, otherwise 1°1 sec.30:1 (90% energy covered) 12:1 (90% energy covered)Typical 140 hours continuous use (Alkaline, without Laser and Backlight)4.7 x 1.87 x 6.76 inches (119.2 x 47.5 x 171.8 mm)9.02 oz. (255.7g) including batteries (AAA x 2)EMC/RFI: Readings may affected if the unit is operated within the radio frequency electromagnetic field strength of approximately 3 volts per meter, but the performance of the instrument will not be permanently affected.*IR accuracy can be affected by the emissivity setting, target spot size and rapid changes in ambient temperature.The thermometer incorporates visual diagnostic messages as follows:‘Hi’ or ‘Lo’ is displayed when the temperature being measured is outside of the settings ofHAL and LAL.‘Er2’ is displayed when the thermometer is exposed to rapid changes in the ambient (working/ room) temperature. ‘Er3’ is displayed when the ambient temperature exceeds 32°F (0°C)or 122°F (50°C). The thermometer should always be allowed plenty of time (minimum of 30minutes) to stabilize to the ambient temperature.Error 5-9 is displayed for all other error messages; it is necessary to reset the thermometer. To reset the thermometer, turn it off, remove the battery and wait for a minimum of oneminute, reinsert the battery and turn on. If the error message remains, please contact*****************************************************************.‘Hi’or‘Lo’isdisplayed when the temperature being measured is outside of the measurement range.‘Battery Low ’ Replace batteries. Measurements are not affectedReplace batteriesTo turn on the LCD backlight, press the “Lock” button while holding down the trigger. Press again to turn the backlight off.To turn on the circle laser, press the “C/F” button while holding down the trigger. Press again to turn the laser off.P-14-008-02-a。
双色红外测温仪使用说明
双色红外测温仪使用说明1.准备工作在使用之前,确保双色红外测温仪处于正常工作状态。
检查电池电量,确认电池充足。
确保设备的红外测量窗口干净清晰,没有污垢或划痕,以保证准确测量。
2.开机和关机按下开机按钮,双色红外测温仪将开始自检程序。
在自检完成后,测温仪将进入待机模式,显示当前的环境温度。
在待机模式下,按下关机按钮可以关闭双色红外测温仪。
3.测量目标表面温度将双色红外测温仪对准目标表面,按下测量按钮。
双色红外测温仪将同时显示目标表面温度和环境温度。
确保准星对准目标表面,保持稳定不动,以获取准确的温度测量值。
4.温度单位切换使用双色红外测温仪时,可以根据需要切换温度单位。
按下单位切换按钮,可以在摄氏度(°C)和华氏度(°F)之间切换。
5.最大和最小测量值记录6.温度报警根据需要,可以设置温度报警功能。
按下报警设置按钮,可以进入温度报警设置模式。
根据双色红外测温仪的具体型号,可以设置上限温度和下限温度。
当目标表面的温度超过或低于设定的温度范围时,双色红外测温仪将发出声音或显示报警提示。
7.数据保存和传输在一些型号的双色红外测温仪中,可以保存测量的温度数据。
通过连接电脑或移动设备,可以将数据传输到电脑或移动设备进行进一步分析和处理。
8.使用注意事项-在使用双色红外测温仪之前,请阅读设备的使用说明书,并按照说明进行操作。
-在使用双色红外测温仪时,确保仪器的测量窗口清洁,没有遮挡物。
-在测量目标表面温度时,确保准星对准目标表面,保持稳定不动,以获得准确的测量值。
-双色红外测温仪测量到的温度是目标表面的温度,而非内部温度。
-在使用双色红外测温仪时,避免直接将仪器暴露在强烈的阳光下,以免影响测量精度。
-在长时间不使用时,请关闭双色红外测温仪,以节省电池电量。
以上是双色红外测温仪的使用说明,希望能对您有所帮助。
ThermoPro TP30 数字激光红外温度计使用说明书
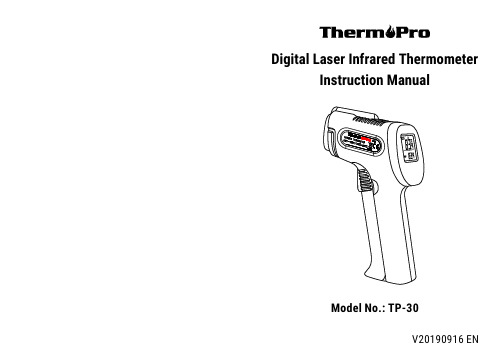
Digital Laser Infrared Thermometer Instruction ManualModel No.: TP-30Thank you for purchasing the ThermoPro TP30 Infrared Thermometer. This easy-to-use device lets you conveniently and accurately measure surface temperatures from a distance without the need of any direct contact. Features & SpecificationsLaser guided targeting for better aiming precisionNarrow distance-spot ratio for accurate results at long distances Safely measure hazardous or inaccessible objectsBattery: 2*AAA batteries, 3.0V Measurement Range: -58F~1022 (-50°C~550°C)°°F Accuracy: ±1.5%Resolution: 0.1 or 0.1°C°FWavelength: 5um-14umDistance-Spot Ratio: 12: 1 Response Time: 500ms Emissivity: 0.10-1.00 (Default 0.95) Backlight: Auto-off after 15 seconds Auto-off: Auto-off after 90 seconds of inactivityLow battery IndicatorFunction Diagram1. SCAN: When pressing the measure-ment trigger, SCAN will appear on thedisplay.2. HOLD: When the measurement triggeris released, HOLD will appear on the display.3Laser Pointer Indication: When pressing the measurement trigger, a laser beam will appear to help guide you.. 4Low battery Indication: Will appear on the display when the battery voltage is lower than 2.6V . 5UPPER DISPLAY: Displays the latest temperature measurement. . 6EMISS: Press and hold the MODE button for 3 seconds, EMISS will appear, and you can now adjust the emissivity.. 7LOWER DISPLAY: Displays MAX/MIN/ AVG temperature; When adjusting the. 8MAX/MIN: Maximum and minimum temperature for the latest measurement.. 9AVG: Average temperature for the latest measurement.. 10. Press once to turn on/off Laser Pointer; Press and hold for 3 seconds, to switch between °C and °F; When adjusting the emissivity, press the button to lower the emissivity. 11MODE: Press mode button to cycle through and display MAX/MIN/AVG temperature; Press and hold for 3 seconds, to allow you to adjust the emissivity.. emissivity, the current emissivity will be displayed.12. Pbacklight; When adjusting theemissivity, press the button toincrease the emissivity.ress to turn on/off theOperationSurface Temperature Measurement NOTE: The ThermoPro TP30 cannot measure the temperature of objects behind glass. Inaccuracy may also occur when exposed to steam, dust or any other contaminants in the air.1. Once the batteries are properlyinstalled, press the MeasurementTrigger to activate the device.2. Point the TP30 towards the surface you wish to measure.3. Press and hold the MeasurementTrigger and the laser will activate for aiming guidance. (Laser will onlyappear if turned on. Laser is turned on by default.)4. Keep holding the MeasurementTrigger as you move the TP30 if you wish to continually take a measure- ment of the surface.5. Once the laser is pointed to thedesired point of measurement, release the Measurement Trigger and theUpper Display will show the last13. Laser Hole14. IR Sensor15. Measurement Trigger: Hold and release to measure and hold the temperature.16. Battery CompartmentReplacing BatteriesLow Battery Indication will appear on the Upper Display when the thermometer’s batteries are running low. Immediately replace the batteries when the icon appears.HOLD for continuous temperature readingRELEASE to lockthe temperature result1. Open the Battery Compartment and remove the used batteries. Disposeof the used batteries properly.2. Insert two new AAA batteries with the correct polarity.3. Close the Battery Compartment.Distance-Spot RatioThe ThermoPro TP30 measures surface temperature on the basis of distance to spot diameter ratio (D: S). As thedistance between the thermometer and the surface increases, the total surface area measured will also increase. With a distance to spot ratio of 12: 1 the surface area measured has a diameter of roughly 1/12 the distance.6. Press the Measurement Trigger once again to make another measurement. measured temperature.To take accurate temperature measure-ment of reflective surfaces with low emissivity, place a strip of masking tape over the surface and allow for it to adjust to the temperature of the surface for approximately 30 minutes. Measure the surface, scanning the taped section, eliminating the issue of inaccuracy.EmissivityThe emissivity of a material is its efficiency in emitting thermal energy. Non-reflective surfaces have a higher emissivity (closer to 1) than reflective surfaces (closer to 0). Inaccurate results may occur when measuring reflective surfaces such as glass, polished wood, and granite.The emissivity of most organicFor the most accurate results, make sure the target has a surface area of twice the corresponding spot diameter. Insufficient surface area will result in inaccurate results. The recommended distance to hold the thermometer from the surface of measurement is 7.87inch (20cm). This creates a spotmeasurement area of 0.66inch(1.67cm) in diameter.materials and painted objects is 0.95.The default emissivity of this device is 0.95, no need to modify. If you would like to improve the measurement accuracy of different objects, you can refer to the emissivity data table below. Objects Emissivity Objects Emissivity CopperSludgeFrozen foodHot foodGlassIce0.950.940.900.930.850.98SkinSnowSteelFabricWaterWood0.980.900.800.940.930.94Aluminum Asbestos Asphalt Basalt Brass Brick Carbon Ceramics Concrete 0.300.950.950.700.500.900.850.950.95IronLeadLimestoneOilPaintPaperPlasticRubberSand0.700.500.980.940.930.950.950.950.90Objects Emissivity Objects EmissivityThe device certification information islabeled directly on the device. Thesticker is located on the left side of thethermometerThe device warning and aperture safety information are also labeled directly on the device; this sticker is located on theright side of the thermometer.Safe Use & CareDO NOT point the laser beam at another person or animal.DO NOT attempt to point laser beamat an aircraft.Avoid direct/indirect eye contact with the laser-beam. Laser radiation may cause eye damage.DO NOT view the beam with optical instruments.If using near bystanders, make them aware of the dangers of looking directly into the laser beam.Package Contents1x ThermoPro TP30 Infrared Thermometer 2x AAA batteries 1x User Manual Make sure to insert the batteries in accordance with the correct polarities.DO NOT allow children to operate the device.Use two 1.5V AAA batteries when replacing the batteries within the device.ALWAYS remove the batteries when cleaning the device.DO NOT use leaking batteries or dispose of old batteries in fire. Remove the batteries if storing the device for a prolonged period of time. DO NOT disassemble the device or tamper with internal components. Doing so will void any warranty.DO NOT touch the lens or wipe it using anything other than a soft cloth or cotton swab.Keep the thermometer away from electromagnetic fields produced by objects such as arc welders and induction heaters.DO NOT expose the thermometer to direct sources of heat for extended periods of time.The thermometer measures surface temperature, not internal temperature. Do not use it as a reliable source to measure body temperatures.Meaning of the “Dustbin”SymbolProtect our environment:do not dispose ofDisposalPlease return anyelectrical equipmentthat you will no longeruse to the collectionpoints provided for theirdisposal.electrical equipment inthe domestic waste.This will contribute to the recycling and otherforms of reutilisation of electrical and electronic equipment.Information concerning where the equipmentcan be disposed of can be obtained from your local authority. This helps avoid the potential effects ofincorrect disposal on the environment and human health.Your town or local authority can provide information about public collection points.Take spent batteries to the appropriate collection point or to a dealer.The batteries must be removed from the appliance.This symbol can be found on batteries/rechargeable batteries which contain hazardous:Pb = contains leadCd = contains cadmium Hg = contains mercury Li = contains lithiumThis warranty gives you specific legal rights and you may also have other rights which vary from state to state.Limited one-year WarrantyThermoPro warrants this product to be free of defects in parts, materials and workmanship for a period of one year, from date of purchase.Should any repairs or servicing under this warranty be required, contactCustomer Service by phone or email for instructions on how to pack and ship the product to ThermoPro.Email:************************Hours: Weekdays 8:00 AM- 8:00 PM EST (USA & Canada only)Weekdays 1:00 PM - 12:00 PM CET(UK)Customer serviceTelephone: 1-877-515-7797(USA & Canada only)44-203-769-1321(UK)。
TANITA家庭用非接触式红外体温计说明书
本体 说明书(含EMC技术信息、保修卡) 合格证 试用电池(AAA 碱性电池(LR03) × 2)说明书含保修卡家庭用TANITA 非接触式红外体温计本仪器测量从物体表面辐射的红外线量,将其转换为温度,并以数字方式显示(温度测量模式)。
它还测量从人的额头表面发出的红外辐射量,并将其转换为舌下温度并以数字方式显示(体温测量模式)。
舌下温度通常高于腋窝温度。
本文文件说明了以下几点,以防止对用户和他人造成伤害以及财产损失。
请仔细阅读本文并正确使用本机。
此设备仅用于额头测量。
不要用它来测量其他区域的体温,可能导致无法准确测量。
自我诊断或自行解读测量结果可能会导致疾病恶化,请遵循医生指导。
请勿使用它来测量人体以外的体温,可能导致无法准确测量。
如果处理不当,电池可能会爆炸,导致受伤。
请勿充电,拆卸或着火。
放在儿童接触不到的地方。
另外,请不要让儿童单独使用它。
将电池放在儿童接触不到的地方。
有误食的危险。
如果吞下了电池,请立即就医。
用正确的 更换电池。
否则可能会导致液体泄漏,发热,破裂等,从而导致人身伤害或财产损失。
仅使用指定的电池(AAA 碱性电池)。
否则可能会导致液体泄漏,发热,破裂等,从而导致人身伤害或财产损失。
如果电池液进入您的眼睛,请立即用大量清水冲洗。
可能导致失明。
请务必立即就医。
如果电池液沾到皮肤或衣服上,请立即用大量清水清洗。
有受伤的危险。
请勿拆卸,修理或改装,可能导致无法准确测量。
请勿强行弯曲,掉落或使其受到强烈撞击。
有击穿的危险。
请勿在会产生静电或电磁波的地方(IH 电磁炉,微波炉,通讯设备等附近)使用。
存在故障或故障的风险。
请依出货说明书的储存环境温度及湿度保存本机,请勿将本机置于温度/湿度过高或阳光直接曝晒之环境下。
本产品建议每两年校正一次准确度。
请避免遮挡从被测目标发出的红外线,导致影响测量结果。
如果额头的状况与正常状况不同,则可能无法将其准确地转换为舌下温度。
·请勿用头发,汗水或化妆品遮盖额头表面。
红外线测温仪使用说明书
红外线测温仪使用说明书一、产品概述红外线测温仪是一款便携式的温度测量设备,利用红外线技术可以非接触地测量物体的表面温度。
本说明书将为您介绍如何正确使用红外线测温仪以及注意事项。
二、产品外观和组成1. 外观描述红外线测温仪外观美观,手持式设计,便于携带和操作。
正面为显示屏,显示测量结果;背面为操作按钮和电源开关。
2. 组成部分红外线测温仪由以下部分组成:- 显示屏:用于显示测量结果和相关信息;- 红外线接收头:用于接收被测物体发出的红外线信号;- 按钮:用于设置测量参数,如温度单位切换、背光灯开启等;- 电池仓:用于放置电池。
三、使用步骤1. 安装电池打开红外线测温仪背部的电池仓盖,按照电池极性正确安装电池,然后将电池仓盖盖好。
2. 打开测温仪按下电源开关,红外线测温仪将开始初始化,并打开显示屏。
3. 设置测量参数使用测量按钮切换测量参数,根据需要选择温度单位(摄氏度或华氏度)和背光灯开关。
4. 对准测量目标将红外线测温仪对准测量目标,确保测量目标在测温仪的测量范围内。
5. 进行测量按下测量按钮,红外线测温仪将发射红外线并接收被测目标发出的红外线信号,将测得的温度数值显示在屏幕上。
6. 关闭测温仪使用完毕后,按住电源开关数秒,红外线测温仪将关闭。
四、注意事项1. 测量距离:根据测温仪的规格,确保测量距离在规定范围内,通常为5-10厘米。
2. 避免干扰:在测量过程中,避免红外线测温仪与其他物体接触,以防止干扰和误差。
3. 测量目标表面:红外线测温仪测量的是物体表面温度,而非内部温度。
确保测量目标表面干净、光滑,并没有被遮挡。
4. 环境条件:红外线测温仪的测量结果会受环境温度和其他因素的影响。
使用时,请确保环境条件稳定并且符合规定要求。
5. 温度范围:根据红外线测温仪的规格,了解其测量温度范围,并确保被测目标的温度在范围内。
6. 温度单位切换:按需切换温度单位,确保选择正确的摄氏度或华氏度。
7. 电池更换:当电池电量不足时,及时更换电池。
InfraScan 红外温度计说明书

IR 101InfraScan™Infrared ThermometerTABLE OF CONTENTSPage GeneralQuick instructions 3Equipment Supplied 3Description of Measuring Principle 3OperationDisplay and Operator Controls 4Making a Measurement 45Minimum and Maximum TemperatureIndicationChanging the Temperature Units 5Back Light 5Measurement Inaccuracies 5-6Trouble Shooting 6MaintenanceChanging the Batteries 7Cleaning 7 Fastening the Infrared Thermometer 7Technical Information8-9Warranty Information 10General1.Quick InstructionsPress and hold the operating button for more than 1.5 seconds. Thetemperature of the surface the lens is aimed at will read on the top of thedisplay. The minimum and maximum temperatures of the currentmeasurement are shown on the bottom of the display. When the operatingbutton is released “Hold” will be displayed between “min” and “max”indicating the measurement is completed. After 4 seconds the backlightwill turn off. The unit will switch off after 8 seconds. Press and hold theoperating button again to begin a new measurement. To switch between °Fand °C simply “double click” the operating button.2.Equipment Supplieda.Infrared Thermometer base unitb. 4 button cell batteries (already in unit)c.Neck strapd.Soft sided case3.Description of measuring principleWhen making a temperature measurement, the surface radiation of theobject to be measured is evaluated using the principle of radiationthermometry. This is a purely passive process, i.e. no radiation istransmitted, but instead, use is only made of the natural electromagneticradiation energy (heat radiation) that every body above a temperature ofabsolute zero (-273 °C) has. The temperature can be determined veryaccurately from this radiation energy if the emission factor of the objectbeing measured is known.Operation1.Display and operator controlsAll of the functions of the measuring unit are controlled and monitored usingb.Hold indicatorc.d.Temperature display - maximum valuee.Battery symbol – low battery indicatorf.Temperature units – °F or °Cg.Operating Buttonh.Lens2.Making a measurementThe object being measured should be a minimum of twice the size of theinfrared thermometer’s lens. The ideal measuring distance is 3 to 12 inches, which will yield a measurement area of ½ inch to 2 inches. As the infraredthermometer is moved away from the object being measured the area beingmeasured increases (6:1 ratio).The infrared thermometer is switched on by holding the operating button down for 1.5 seconds or more. By continuously holding down the operating button the measured value will be updated as long as the operating button is pressed.Releasing the operating button will finish the measurement. The “Hold”indication signals that measuring has stopped. The backlight will shut off 4seconds after the operating button is released. The infrared thermometer will automatically switch off 8 seconds after the last measurement. Holding down the operating button again will clear the minimum and maximum memory and begin a new measurement.3.Minimum and maximum temperature indicationThe minimum and maximum value memories are cleared at the start of ameasurement by pressing the operating button. The temperature will bemeasured and the minimum and maximum temperatures will be determined for as long as the button is pressed. The minimum temperature is shown in thelower left-hand part of the display and the maximum temperature can be seen in the lower right hand part. These values each apply to the current measuring cycle and are cleared as soon as the button is pressed again.4.Changing the temperature units ( °F/°C )The units for the temperature display can be switched between degrees Celsius (°C) and degrees Fahrenheit (°F) by pressing the button briefly twice (double click).5.Back lightThe LCD back light is constantly switched ON while the operating button ispressed. When the operating button is released, the backlight will be ON for approximately 4 seconds before automatically switching off 8 seconds after the last measurement.6.Measurement inaccuraciesThe following points should be observed in order to avoid measurement errors:a.It must be ensured that the object to be measured completely fills theInfrared Thermometer monitoring area. Errors can occur whenmeasuring small objects, as the unit also monitors the temperature ofthe surroundings as well as the object to be measured.b.The principle of measurement requires the ambient temperature to bedetermined. This takes place at one-minute intervals or each time theunit is switched on. Changes in the ambient temperature, which canoccur when the user holds the unit in their hand, are not monitoredwithin this time period and therefore neither of them is taken intoaccount when determining the indicated temperature. A gradualwarming of the unit (the lens) between ambient temperaturemeasurements can, for example, lead to the indicated temperatureslowly falling.c.If the emission factor for the object does not correspond to the presetvalue of 0.95, the temperature will not be calculated correctly. Mostsurfaces have an emission factor in the range of 0.8 to 0.98. In general,the darker and more matte the surface is, the larger their emissionsfactor. If the factor is greater the 0.95, the temperature indicated willbe greater than the actual temperature of the object being measured. Ifthe factor is less then 0.9, the temperature indicated will be less thanthe surface temperature. Polished metals have a very low emissionfactor and are therefore not suitable for measuring with an infraredthermometer. On the other hand, affixing adhesive tape to or paintingthe surface will increase the emission factor and reduce the inaccuracyof the measurement.d.It is not possible to take measurements through transparent materials(glass, plexiglas, etc.).e.It is not possible to measure air temperatures.f.Measurement errors can occur due to air contaminated with dust,steam, smoke, etc.7.TROUBLESHOOTINGProblem: Display shows -.-Solution: The operating button has not been pressed for long enough. This must be pressed for at least the duration of one measurement, i.e. for at least 1.5seconds.Problem: Display shows Err 1Solution: The ambient temperature is outside the permitted rangeProblem: Display shows 1Solution: The measured value is outside the permitted range.Problem: Battery symbol illuminatesSolution: The batteries are dead.NOTE: For problems not solved, please contact La Crosse Technology. Maintenance1.Changing the batteriesIf the battery symbol appears in the display, the batteries must be changed. The four button cells are accessible after opening the battery compartment at the rear of the unit. The used batteries must be removed from the battery holders and replaced by new button cells of the same type. Only LR44 type batteries may be used. Care must be taken to ensure that the polarity is correct when inserting.The plus terminal of all four batteries should point upwards. The batteries must be checked to see that they are properly seated before closing the batterycompartment.2.CleaningClean the unit using only a dry cloth. If the unit is very dirty, the cloth may be slightly dampened. Do not use cleaners containing solvents. Make sure that no moisture enters the interior of the unit. When cleaning the lens, loose particles must be removed using compressed air. Any remaining dirt can then beremoved with a soft brush or with a cotton swab moistened with water. CAUTION Do not use cleaners containing solvents.Fastening the Infrared ThermometerA soft-sided pouch with a belt loop and a quick release neck strap are included with the infrared thermometer. To attach the infrared thermometer to the neck strap simply insert the clip of the neck strap into the buckle end of the thermometer until it clicks. To release, press both sides of the clip on the neck strap and pull the buckle end until it is free.Technical Information1.Accuracy: The larger of the two values given is applicable in each case.2.Distance to measuring spot size: The parameter D : S characterizes the sizeof the measuring spot in proportion to the distance between the object to bemeasured and the Infrared Thermometer. For example, with a ratio of 6 : 1: °F or °CUnitDistance to measuring spot size D:S : 6:1Ambient temperature range : 32°F to 104°F: 0.95factorEmissionLR44: 4xsupplyPowerbutton cellbatteriesBattery life (approx.) : 2000 measurements(depending on theusage)Dimensions (L”xW”xH”) : 2.25” x 1” x 4”3.Emissions factor: The physical quantity known as the emission factordescribes to what extent the infrared heat radiation that is emitted from anobject is determined by its own temperature. Accordingly, a value of 1 tellsus that the infrared heat radiation from the object is based only on its owntemperature. A value of less than 1 means that the radiation emitted fromthe object is not only determined by its own temperature but also byreflections from neighboring bodies or due to the transmission, i.e. thediathermancy, of the object. The emission factor thus has an effect on theresult of the measurement. The Infrared Thermometer works with anemission factor of 0.95, i.e. the measuring unit assumes that the objectbeing monitored has a factor of 0.95. If this is not the case, there will beinaccuracies in the measurement (see Section 2.6 “MeasurementInaccuracies”).WARRANTY INFORMATIONLa Crosse Technology provides a 1-year warranty on this infrared thermometer. Contact La Crosse Technology immediately upon discovery of any defects covered by this warranty.Before sending the infrared thermometer in for repairs, contact La Crosse Technology. The infrared thermometer will be repaired or replaced with the same or similar model.This warranty does not cover any defects resulting from improper use, unauthorized repairs or faulty batteries.LA CROSSE TECHNOLOGY WILL NOT ASSUME LIABILITY FOR INCIDENTAL, CONSEQUENTIAL, PUNITIVE, OR OTHER SIMILAR DAMAGES ASSOCIATED WITH THE OPERATION OR MALFUNCTION OF THIS INFRARED THERMOMETER. THIS PRODUCT IS NOT TO BE USED FOR MEDICAL PURPOSES OR FOR PUBLIC INFORMATION. THIS PRODUCT IS NOT A TOY. KEEP OUT OF CHILDRENS’ REACH.This warranty gives you specific legal rights. You may also have other rights specific to your State. Some States do no allow the exclusion of consequential or incidental damages therefore the above exclusion of limitation may not apply to you. For warranty work, technical support, or information contact:La Crosse Technology2809 Losey Blvd. S.La Crosse, WI 54601Phone: 608.782.1610Fax: 608.796.1020e-mail:******************************(warranty work)****************************(information on other products)web:。
红外测温仪使用说明书
红外测温仪使用说明书红外测温仪是一种用于非接触式测量物体温度的仪器,它能够快速、准确地测量目标物体表面的温度。
本使用说明书旨在帮助用户了解红外测温仪的基本操作,并提供必要的安全提示和注意事项。
1. 仪器介绍红外测温仪由以下部分组成:- 机身:包含显示屏、测温探头和按钮等;- 电源:通常使用电池或者充电器供电;- 功能按钮:用于开机、测温范围选择等操作;- 显示屏:显示测量结果、菜单选项等。
2. 使用前的准备在使用红外测温仪之前,请注意以下事项:- 确保仪器和目标物体的环境温度稳定,避免环境影响测量结果;- 清洁目标物体表面,确保无油污、尘埃等杂质的干扰;- 查阅用户手册,熟悉仪器的特性和基本操作;3. 测温操作步骤请按照以下步骤正确使用红外测温仪:- 打开电源,等待仪器自检完成;- 按下测温按钮,对准目标物体,观察显示屏上的温度读数;- 确保保持适当的距离,通常在5至15厘米之间;- 可以使用仪器配备的瞄准激光来辅助定位;- 根据需要,选择合适的测温范围;- 安全使用仪器,避免直接对人体或易燃物测温。
4. 注意事项在使用红外测温仪时,请注意以下要点:- 避免使用在强电磁场或电流较大的环境下,可能干扰测量结果;- 当测量高温物体时,请确保仪器耐高温,并按照相关操作要求进行;- 定期校准仪器,以保证测量的准确性;- 遵循仪器的使用寿命和贮存条件,避免过度使用或长时间不用。
本使用说明书旨在为用户提供红外测温仪的基本使用方法和注意事项,帮助用户正确操作仪器、确保测量的准确性和安全性。
请严格按照本说明书的指引进行操作,如有任何疑问,请咨询相关专业人士。
- 1、下载文档前请自行甄别文档内容的完整性,平台不提供额外的编辑、内容补充、找答案等附加服务。
- 2、"仅部分预览"的文档,不可在线预览部分如存在完整性等问题,可反馈申请退款(可完整预览的文档不适用该条件!)。
- 3、如文档侵犯您的权益,请联系客服反馈,我们会尽快为您处理(人工客服工作时间:9:00-18:30)。
产品名称:表面红外温度计
型号:TES-1326S
检测项目:表面温度测定
检测样品:各类食品、食品包装、食品生产环境
产品简介:
本产品为一只手携式、使用简单,设计坚实之红外线温度计,并附有雷射指标点,此产品不但有显示器背光阅读功能,并有自动读值锁定功能及自动开机功能。
红外线温度计可用于测量那些不适合使用传统接触式测量方法来测量舞台的表面温度(例如移动舞台,带电表面和难接触到的物体)
适用范围:a、高压危险区域。
b、高温不可接触的物体。
c、量测物距离遥远。
d、转动中或运动中的物体。
产品规格
2-1一般规格:
显示器:LCD数位显示有背光功能。
自动关机:大约15秒。
资料记忆容量:50笔(可直接于LCD上读取)。
超过测量范围指示:“OL”或“-OL”。
电池电力指示:当电池电压不足时,将显示“”。
电源:单个9V电池,006P或IEC6F22或neda1604。
电源寿命:约100小时(雷射指标及显示器背光灯均不使用时)。
(碱性电池)
操作温湿度: 0℃至50℃(32℉至122℉)低于80%RH。
储存温度:-10℃至60℃(14℉至140℉)低于70%RH。
尺寸: 172(长)*118(宽)*46(高)mm。
重量:约220公克。
附件:说明书,9V电池。
2-2电器规格:
温度量测范围:-35℃至500℃(-31℉至932℉)。
解析度: 0.1℃/0.2℉
准确度:±2%读值或±2℃或±4℉(以误差较大者为准且操作环
境温度在
18℃至28℃范围内)。
温度系数:操作环境温度>28℃或<18℃时,每增减1 ℃须增加0.1
倍的误差。
反应时间: 0.5秒。
感应光谱:约6至14um
距离与目标比: 12:1;25mm最小点尺寸。
照准:单束雷射光 <1豪瓦特(class2)。
侦测感应器:热电堆。
特点
1、可选择℃/℉单位。
2、背光显示。
3、雷射指示测量位置。
4、自动锁定读值功能。
5、最大、最小读值记录功能。
6、测试资料记忆存储及读取功能。
7、自动关机功能。
品牌:天迈生物
产地:杭州。