JEEP大切诺基2010产品手册
克莱斯勒Cherokee漫步者 快速维修技术资料手册.doc
Cherokee快速维修技术资料手册2007年4月目录1.车辆识别号码 (2)2.车辆排放控制信息(VECI) (4)3.车辆证明书标签 (5)4.公英制转换 (6)5.车辆常用扭矩参考说明 (8)6.液体、润滑油技术参数 (9)7.保险丝位置和类型 (18)8.车轮定位参数 (24)9.差速器与动力传动系统电子诊断DTC诊断故障码 (29)10.制动器部件维修信息 (30)11.ABS及APS的DTC故障码和验证测试 (32)12.车身电器 (38)1. 车辆识别号码车辆识别号码(VIN)牌挂在仪表板的左上侧上。
VIN包含提供关于车辆的数据的17个字符。
参见解码图以确定车辆的识别。
为保护消费者免遭盗窃,也避免受欺骗,制造商必须将车辆识别号码的第9位数设为“检查数字”。
制造商和政府机构可利用此检查数字检验车辆及政府文件是否为真。
检查数字的译码公式不对一般大众公布。
2. 车辆排放控制信息(VECI)所有车辆配备有组合车辆排放控制信息(VECI)标签。
标签位于车辆发动机罩上的发动机舱内。
两条标签用于为在加拿大出售而制造的车辆。
●VECI标签包含下列各项:●发动机系列和排量●蒸发系列●排放控制系统示意图●证明书申请●火花塞和间隙标签也包含发动机真空示意图。
在加利福尼亚和加拿大销售的车辆标签唯一。
加拿大标签用英语和法语两种语言书写。
标签永久连接在车辆上,不毁坏信息且损坏标签就无法摘下标签。
3. 车辆证明书标签每一台戴姆勒克莱斯勒公司制造的车辆都有车辆证明书标签。
标签证明车辆符合所有适用的联邦汽车标准。
标签还列出:●车辆制造的年份和月份。
●车辆总重量(GVWR)。
前车桥和后车桥总重量(GAWR)以最小轮缘尺寸和最大冷胎充气压力为准。
●车辆识别号码(VIN)。
●车辆类型。
●后轮类型。
●条形码。
●最后组装的月、日、时(MDH)。
●油漆和饰件代码。
●原产国家。
标签位于驾驶员侧车门关闭面上。
4. 公英制转换公制系统以一、十、百、千和百万为基数。
2010日产Cube快速参考手册说明书

2010c u beLOW TiRe PReSSuRe WARninG LiGHT inSTRuMenT BRiGHTneSS cOnTROL* TWin TRiP OdOMeTeR*HeAdLiGHT And TuRn SiGnAL cOnTROL WindSHieLd WiPeR AndWASHeR SWiTcHSTeeRinG WHeeL SWiTcHeS fOR AudiOcOnTROL/BLueTOOTH®cRuiSe cOnTROLTiL T STeeRinGVeHicLe dYnAMic cOnTROL (Vdc)Off SWiTcHfueL-fiLLeR dOOR ReLeASeHOOd ReLeASe*AudiO SYSTeMfROnT PASSenGeR AiR BAGSTATuS LiGHTcLiMATe cOnTROL01 02 03 0405081206091314 0710110102030405090612070814 111013*See your Owner’s Manual for more information.This easy-to-use Quick Reference Guide is intended to help you more fully appreciate some of the unique features and functions of your new vehicle. However, it is not intended to replace your Owner’s Manual. The Owner’s Manual contains more detailed information to help you better understand the important safety warnings, features, operation and maintenance of your vehicle. All information, specifications, photographs and illustrations in this publication are those in effect at the time of printing. niSSAn reserves the right to change specifications or design without notice and without obligation.The niSSAn intelligent key™ allows you to lock or unlock your vehicle, opennOTe: it is important to make sure the intelligent key is with you (that is, inonce.01 Move the shift lever to the P (PARk) position and applyAcceSSORY POSiTiOnPress the ignition switch START/STOP button once without depressing the brake pedal to access the Acc position. This position activates electrical accessories such as the radio.Press the ignition switch START/STOP button a second time without depressing the brake pedal to access the On position. This position turns on the ignition switch and all electrical accessories.niSSAn inTeLLiGenT keY™ BATTeRY diScHARGeif the battery of the intelligent key is completely discharged, the Array intelligent key system warning light in the instrument panel blinks inyellow after pushing the ignition switch START/STOP button. To startthe engine with a discharged intelligent key, perform the followingprocedure:Move the shift lever to the P (PARk) position.firmly apply the foot brake.Touch the ignition switch START/STOP button with the intelligentkey. A chime will sound.Push the ignition switch START/STOP button while depressingthe brake pedal within 10 seconds after the chime sounds. Theengine will start.if the intelligent key system warning light in the instrument panel is blinking in green, replace the battery as soon as possible. This warning means that the intelligent key battery is almost discharged. nOTe: if the ignition switch is pushed without depressing the brake pedal, the ignition switch will change to the Acc position.OPeninG THe BAck dOORTo open the back door, unlock and pull the handle.unlock the back door using one of the following01 operations:Push the button on the keyfob or the intelligentkey twice.Push the back door Request Switch 01(if soequipped).Push the power door lock switch to the unlock position.insert the key into the driver’s door key cylinder and turn towards the rear of the vehicle twice.1B 04051A 02 030102AB STEERING WHEEL SWITCHES FOR AUDIO CONTROL/* (if socan be used to perform the following:switch for less than 1.5 seconds to changeswitch for more than 1.5 secondsswitch for less than 1.5 seconds to change tracks on a cd, iPod® orvolume control is a trademark of Apple inc., registered in the u.S. and other countries.6switch or tap the brake pedal.switch. The vehicle returns to the last set cruising speed when the vehicle speed is over 24 MPH (38 km/h).switch. The cRuiSe indicator light in AUTOMATIC CLIMATE CONTROL (if so equipped)01 AUTO BUTTONPress the AUTO button 01 . use the temperature control buttons 02 to set the desired temperature. This will allow the fan speed, air flow distribution and temperature to be automatically maintained at the selected temperature.T o disable auto mode, press the MODE button 03 , one of the fan speed control buttons 04 or the front defroster control button 05 .02 TEMPERATURE CONTROL BUTTONS Press the temperature control buttons 02 , up to increase the temperature or down to decrease the temperature.The temperature range is between 60°f and 90°f .0510040308090702010603MODE BUTTONPress the MODE button03to cycle through the following air flow outlets:Air flows from the center and side vents.Air flows from the center, side and foot vents.Air flows mainly from the foot vents.Air flows from the defroster and foot vents.Air flows mainly from the defroster vents.04FAN SPEED CONTROL BUTTONSPress the (slower) or (faster) button to adjust the fan speed.using the fan speed control buttons will disable the auto mode; to resume auto mode, press the AUTO button01.05DEFROSTING/DEMISTING FRONT AND SIDE WINDOWSPress the defroster control button to turn the system on. The A/c automatically turnson when the defroster mode is selected.use the temperature control buttons02to set the desired temperature.T o set the defroster on high, press the fan speed control button to increase the fanspeed to the maximum setting.06DEFROSTING REAR WINDOW AND OUTSIDE HEATED MIRRORS (if so equipped)Push the rear window defroster switch on.Push the rear window defroster switch again to manually turn the defroster off.This function automatically turns off after approximately 15 minutes.07A/C BUTTONPress the A/C button to manually turn the A/c on or off.08AIR RECIRCULATION BUTTONPress the air recirculation button to recirculate air inside the vehicle; the indicator light on the button will illuminate.The air recirculation mode can only be selected if the air flow mode control is in thefollowing positions: , or.Press and hold the air recirculation button for more than 2 seconds to set automatic control for the air recirculation and outside air circulation modes.09OUTSIDE AIR BUTTONPress the outside air button to draw fresh air into the vehicle; the indicator light on the button will illuminate.10OFF BUTTONPress the OFF button to turn the climate control system off.8FM/AM/SAT* RADIO WITH CD PLA YER (if so equipped)01SCAN BUTTONPress the SCAN button to stop at each broadcasting station (fM, AM or XM ®) for 5 seconds. Pressing the button again during this 5-second period will stop scan tuning and the radio willremain tuned to that station.02EJECT BUTTONPress the button. The cd will eject.03STATION SELECT BUTTONSY our radio is equipped with three separate banks, each with six station presets. choose a radio band AM, fM1 or fM2 using the FM/AM button. T une to the desired station using Seek/cAT or ScAn tuning. Press and hold any of the desired STATiOn SeLecTbuttons (1 - 6) until a beep is heard. The station is now set in memory.04RDM and 05RPT BUTTONSPress the RDM or RPT buttons to change the play pattern while listening to a cd or iPod ®/uSB.06SEEK/CAT BUTTONSTo scan through each broadcasting station, press the SEEK/CAT buttons.To skip from one track to another on a cd, iPod ® or uSB device, press the SEEK/CAT buttons.To rewind or fast forward a cd, iPod ® or uSB device, press and hold the SEEK/CATbuttons. Release the buttons to return to normal play.07FM/AM BUTTONPressing the FM/AM button will change the band to either AM, fM1 or fM2 radio stations.08CD BUTTONPress the CD button to play a cd.01030405070911100612020809AUX BUTTONPress the AUX button to play a compatible device such as an MP3 player when it is plugged into the AUX (auxiliary) jack. The AUX button is also used to play a device plugged into the USB jack. if there are devices plugged into both the AUX jack and the USB jack, pressing the AUX button will toggle between the two functions. if so equipped, you can also press the AUX button to access XM® SAT1 and SAT2 preset banks.nOTe: Y ou may need to adjust the volume on any compatible device plugged into the auxiliary jack to find the most desired sound level of the audio system.10ENTER/SETTINGS BUTTON AND11TUNE/SCROLL CONTROL DIAL T o manually tune the radio, turn the TUNE/SCROLL dial. if playing a cd that is formattedwith MP3/WMA folders, turn the TUNE/SCROLL dial to scroll through the available folders.To adjust the Bass, Treble, fade, Balance, Speed Sensitive Volume (SSV), Brightness,contrast and clock (On/Off) press the ENTER/SETTINGS button until the desiredmode is displayed, then turn the TUNE/SCROLL dial to adjust to the desired level.12iPod® PLA YER OPERATION (if so equipped)The USB jack is located in the lower center of the instrument panel. connect the cable that is supplied with your iPod® to the outlet, and then attach the other end of the cable to your iPod®. if compatible, the battery of your iPod® will charge during the connection to the vehicle.PLA YING AN iPod®The interface for iPod® operation shown on the vehicle center display is similar to the iPod®interface. The iPod® can only be operated by the vehicle audio controls while connected.Select the iPod® by using one of the following methods:Press the12iPod®/MENU button.Press the SOURCE select switch on the steering wheel.SEEK/CAT BUTTONS AND TUNE/SCROLL DIALPress the SEEK/CAT buttons while a track is being played; the next track or the beginning of the current track will be played.Press and hold either SEEK/CAT (rewind or fast forward) button for more than approximately1.5 seconds, the track will play while rewinding or fast forwarding. When the SEEK/CAT(rewind or fast forward) button is released, the track will return to the normal playing speed.Press the iPod MENU button, then use the TUNE/SCROLL dial to scroll through themenu (Playlists, Artists, Albums, Songs, Podcasts, Genres, composers and Audiobooks) and press ENTER to make a selection. The display will return to the previous menu or list screen each time the iPod MENU button is pressed.if the system is turned off while the iPod® is playing, the iPod® will start when the ON/OFF or iPod MENU button is pressed. depending on the iPod® or software version, some functions may not work as described.*XM® Satellite Radio is only available on vehicles equipped with optional XM® Satellite subscription service.jack cover, connect the uSB end of the cable supplied to the jack, then connect the other end of the cable to the iPod®. When the(if compatible) will01When the shift lever is moved to the R (ReVeRSe) position, the monitorellow 3 ft (1 m); Green 7 ft (2 m) and 10 ft (3 m).01switch again to activate the Vdc system. The The Vdc system is active while the vehicle is running until the switch is pushed to turn off.by a small adult, child or child restraint as outlined in the Owner’s Manual, the will illuminateair bag is OFF and will not inflate in a crash.When the front-passenger’s seat is occupied and the passenger meets the conditions outlinedto indicate that the front passenger air *When the system detects that the front-passenger’s seat is unoccupied, the front passenger air bag status light will not illuminate even though the front passenger air0101030202010101.o raise the seatback, lift up each seatback and push it to the upright position until it is latched. After raising the seatback, pull the seat belt buckles out of the seat cushion pockets until theyHANDS-FREE PHONE SYSTEM (if so equipped)button on the steering wheel to activate voice recognition.Speak in a clear and natural voice without pausing between words.To go back to the previous command, say “Go back” or “correction.”To cancel a voice recognition session, simply wait 5 seconds; say “cancel,” “Quit” or pressTo increase or decrease the volume of the voice prompts, press the VOL (volume) control switch or on the steering wheel or turn the POWER/VOLUME knob on theaudio system while the system is responding.if the Voice Recognition system does not recognize your voice commands, train the system using the Speaker Adaptation Mode. See your Owner’s Manual for detailed information.Some commands are not available while the vehicle is in motion.The “Help” command can be used in any menu to hear a list of available commands.Please refer to the cellular phone manufacturer’s Owner’s Manual for detailed information regarding your Bluetooth® phone.For recommended phones and detailed instructions, please visit/bluetooth.cOnnecTinG YOuR PHOneTo use the hands-free feature, you need to set up, or connect, the system to recognize your compatible cellular phone(s). five compatible Bluetooth®-enabled phones can be connected. After setup, the system automatically connects with a connected phone when the ignition is in the Acc or On position, as long as the phone is on and in the vehicle.nOTe: Some cellular phones require the user to enable the automatic reconnection feature. Please refer to the cellular phone manufacturer’s Owner’s Manual for Bluetooth® setup information. cOnnecTinG PROceduRenOTe: The vehicle must be stationary when connecting the phone.1. Press the button on the steering wheel. The system announces the available commands.2. Say “connect Phone.”3. The system acknowledges the previous command and announces the next set of availablecommands. Say “Add phone.”4. initiate connecting from the phone.The connecting procedure varies according to each cellular phone model. for detailedconnecting instructions and a list of compatible phones, please visit/bluetooth.When prompted for a Passkey code, enter “1234” from the handset. (The Passkey code is assigned by niSSAn and cannot be changed.)5. Say a name for the phone when the system asks you to provide one. Y ou can give the phonea name of your choice.MAkinG A PHOne cALL1. Press the button.2. After the tone, do one of the following:Say “call.” After the system responds, say the name of the person in the phonebook.Say “call Phone number.” After waiting for the tone, say [number]. for example, say “call Phone number.” After waiting for the tone, say “123-456-7891.”Say “Redial” to redial the previous phone number.16 Say “call Phone number.” After the system responds, say “Special number” to dial more than 10 digits or special characters.Y ou can say all the digits of a 7- or 10-digit phone number at one time.for a 10-digit number, saying the phone number in groups of 3, 3 and 4 digits may improve recognition for some speakers. To use this group dialing method, say only the first 3 digits of the phone number. After the system recognizes the number, it will request the next 3 digits and finally the last 4 digits.if a phone number is incorrectly recognized, you can try entering the phone number again using the 3-3-4 group dialing procedure by saying “correction.”When you have finished speaking the phone number wait for the system to repeat it back to you, then say “dial.”ReceiVinG/endinG A PHOne cALLWhen you receive a phone call, a ring tone sounds through the audio system.To accept the call, press the button. To reject the call, press the button.To hang up the phone at the end of a call or to disconnect during call placement, pressthe button.HOW TO SAY nuMBeRSniSSAn Voice Recognition permits numbers to be spoken in a variety of ways.Say “zero” or “oh” for “0.” example: 1-800-662-6200 – Say “one eight zero zero six six two six two oh oh.”Say “pound” for “#.” Say “star” for “*” (available when using the “call Phone number” then “Special number” command and the “Send” command during a call).Say “plus” for “+” (available only when using the “call Phone number” then “Special number”command).Say “pause” for a 2-second pause.uSinG YOuR PHOneBOOkWhen a compatible phone is connected to the system, the phonebook is automatically downloaded. This allows you to access your phonebook from the Bluetooth® system to call contacts by name. up to 1,000 phone numbers will be transferred. T o access your phonebook:1. Press the button and wait for the tone.2. Say “Phonebook.”3. Wait for the tone, then say [a name] or say “List names.” The name must be said exactly as itis entered in your phonebook for the system to recognize it. for example, say “Phonebook”then after the system responds, say “Michelle.”The phonebook can transfer multiple numbers for each entry. if you select a name with multiple numbers, the system will ask you which number you want to dial.17The system allows for up to 40 voice tags to be recorded. Y ou can record a voice tag for phone-book entries that the system has difficulty recognizing or to directly dial an entry with multiple numbers. To record a voice tag:1. Press the button and wait for the tone.2. Say “Phonebook.”3. Wait for the tone, then say [a name] or say “List names.” Select the name for which you want to record a voice tag.4. Say “Record name.”nissan, the nissan Brand Symbol, “SHifT_” tagline, Z and nissan model names are nissan trademarks.© 2009 nissan north America, inc.QR0e-0Z12u0Printing: October 2009 (03)。
jeep汽车

Jeep在中国的发展
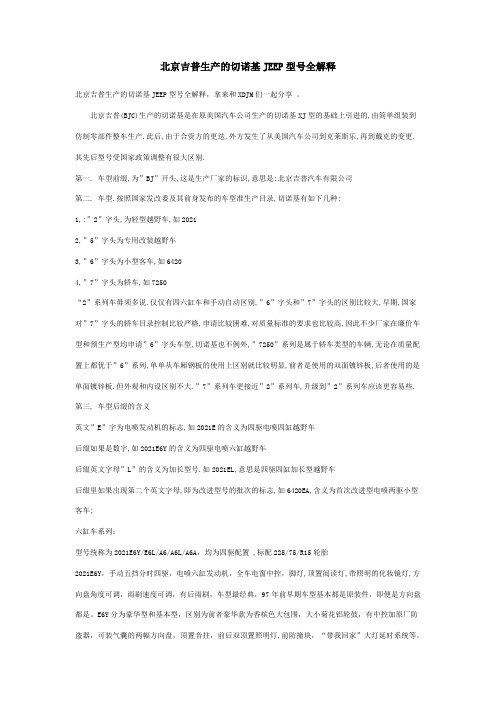
• 图片说明: Jeep®家族的 旗舰车型, “三排七座” 的高端越野车 型,搭载 “世 界十佳越野引 擎”HEMI V8 发动机,售价 49.80-64.99万
Jeep在中国的发展
图片说明: 越野、公路两相宜的大切诺基, 提供3.7L和5.7L两款,售价为 42.19-59.69万元
• 2001年初举行的 北美国际汽车展 上,克莱斯勒新 款吉普“liberty” (自由)亮相。 “liberty”又称为第 二代切诺基。
Jeep—大切诺基
• 2004年3月全新的 05款大切诺基亮相 纽约车展,并于当 年在杰夫森装配工 厂和奥地利graz市 magna steyr装配 厂生产,在过去一 年的时间里仅北美 地区就卖出了售价 为3万~5万的大切 诺基8万多辆。
Jeep车发展历史
2011 作为全路况 都市SUV代表之作, 2011款Jeep指南 者代表了美系城市 SUV的全新面貌, 兼备出色的四驱性 能与灵敏的公路体 验,同时也提供了 堪比轿车的燃油经 济性和美系车型一 贯的舒适与安全。
Jeep车发展历史
2011款Jeep Patriot自由客延 续了自Jeep Willys威利斯时 代流传至今的 70年
照片说明:1966年11月10日, 毛泽东主席在天安 门广场乘212检阅 红卫兵
Jeep在中国的发展
• 军用领域的应用更加广泛:
BJ-212广泛地装备 解放军部队,除主 要用于指挥员的乘 用车,也有一些用 于武器运载平台和 其它用途。
照片说明: 改装为火炮架的BJ212
Jeep在中国的发展
• 1983年,北京汽车制造 厂和美国汽车公司(后 被克莱斯勒汽车有限公 司收购)组建了中国汽 车工业的第一家合资企 业——北京吉普汽车有 限公司(BJC——Beijing Jeep Corporation., LTD), 其所生产的产品就是后 来越野文化的奠基者— —Jeep 2020,车型设计 和生产工艺来自于美国 汽车公司中的Jeep®品牌。
大切诺基维修手册-车架与保险杠
车架与保险杠目录页码保险杠概述 (1)原理 (1)前缓冲器拆卸 (1)安装 (1)前饰板拆卸 (1)安装 (1)后缓冲器拆卸 (2)安装 (2)后饰板拆卸 (2)安装 (4)车架概述 (4)技术规范 (4)页码前滑动保护板拆卸 (7)安装 (7)前拖车钩拆卸 (7)安装 (7)燃油箱滑动保护板概述 (7)后拖车钩拆卸 (7)安装 (7)拖车挂接装置拆卸 (8)安装 (8)分动器滑动保护板拆卸 (8)安装 (8)保险杠概述大切诺基的保险杠由固定在整体式车身车架横梁上的缓冲器和前后饰板组成。
某些大切诺基车型还装有紧固在整体式车身的前横梁上的拖车钩支架。
原理保险杠用来吸收小的冲击并且保护外部金属板件。
前缓冲器拆卸(1)拆下前饰板(参见第13章“车架与保险杠/保险杠/前饰板——拆卸”)。
(2)拆下将缓冲器连到饰板的紧固件。
(3)将缓冲器与饰板分离。
安装(1)将缓冲器放置在饰板上 。
(2)安装将缓冲器固定在饰板上的紧固件。
(3)安装前饰板(参见第13章“车架与保险杠/保险杠/前饰板——安装”)。
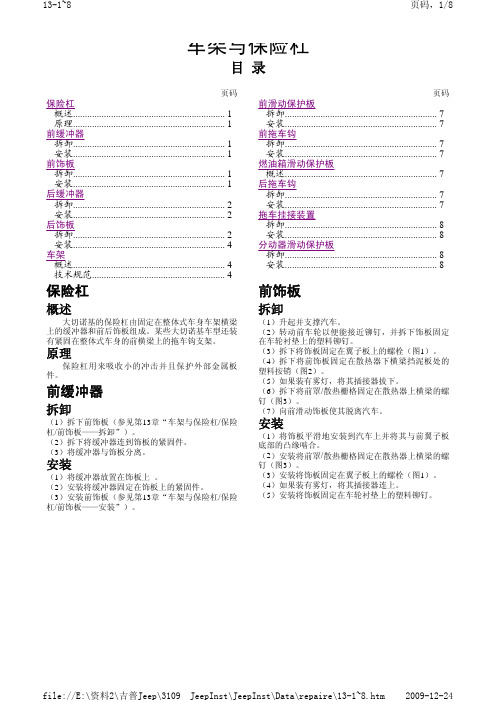
前饰板拆卸(1)升起并支撑汽车。
(2)转动前车轮以便能接近铆钉,并拆下饰板固定在车轮衬垫上的塑料铆钉。
(3)拆下将饰板固定在翼子板上的螺栓(图1)。
(4)拆下将前饰板固定在散热器下横梁挡泥板处的塑料按销(图2)。
(5)如果装有雾灯,将其插接器拔下。
(6)拆下将前罩/散热栅格固定在散热器上横梁的螺钉(图3)。
(7)向前滑动饰板使其脱离汽车。
安装(1)将饰板平滑地安装到汽车上并将其与前翼子板底部的凸缘啮合。
(2)安装将前罩/散热栅格固定在散热器上横梁的螺钉(图3)。
(3)安装将饰板固定在翼子板上的螺栓(图1)。
(4)如果装有雾灯,将其插接器连上。
(5)安装将饰板固定在车轮衬垫上的塑料铆钉。
图3 前饰板1.螺钉 2.饰板 图1 前饰板1.车身 2.饰板后缓冲器拆卸(1)拆下后饰板(参见第13章“车架与保险杠/保险杠/后饰板——拆卸”)。
JEEP指南者操作手册.
本手册包括了截止至该手册印刷时的最新信息。
本公司保留随时更新该手册版本而不另行通知的权利。
本手册由专业维修人员与工程师协助编写,希望有助于您了解新车的各项操作与保养细节。
除本手册外,另外提供“保修信息手册”及其它各种专为客户编写的资料,请务必仔细阅读。
依照本手册各项指示与建议驾驶车辆,可确保您的安全,提高驾驶乐趣。
手册阅读完毕后,请将其存放于车内,以便随时参考,车辆转售时亦应随车附上。
制造商保留改变车辆设计与规格的权利,并(或)可随时增加或改进其产品,对于已售出车辆并无安装新改良装备的义务。
“用户手册”说明和描述标准装备或额外付费的选装件。
因此,本手册中所列的设备和配件并不一定会在您的车上出现。
>$@开始驾驶本车、欲安装零件/配件,或对车辆进行改装之前,请务必先阅读“用户手册”。
>$@鉴于市面上有很多不同制造商生产的替换零件与配件,若您安装此类零件或配件,制造商无法保证您车辆的行驶安全性不会受到影响。
即使这些零件经过正式认可(例如获得一般操作认可的零件或经过原厂正式认可的零件设计),或在加装或安装之后个别发给认可证明,并不代表您车辆的驾驶安全不受影响。
因此,无论是汽车制造商还是正式代理商均不对此负责。
所以,只有在授权经销商处,加装或安装由制造商明确授权或建议的零件,制造商才承担相关责任。
当对制造商车辆原有状况进行修改时,此声明亦同样适用。
您的保修服务范围不涵盖任何非制造商提供的部件,也不涵盖由于安装或使用非制造商零件、部件、设备、材料或附加件所引起的维修和调整成本。
保修还不涵盖车辆上任何不符合制造商规格的改动所造成的损坏或状况的维修成本。
欲取得原装Mopar 零件与配件,以及其它经制造商认可的产品,包括合格的咨询建议,请洽各地授权经销商。
至于维护,请记住:经销商最了解您的汽车,其所有技师经过正式培训,并提供原厂Mopar零件,以顾客满意为最高目标。
版权所有 2006 Chrysler IntemadOnal用户手册使用须知请参阅目录,查询您想要了解的章节内容。
2010款陆虎说明书

103mm
21mm
-7-
-产品外观
LED DIP S/W IR MODE LCD-OUT
SEL
POWER
A/V(IN/OUT)
-8-
RGB(IN)
-插口布线图
*Power Connect
*RGB-IN Connect
①
②
③
④
⑤
⑥
⑦
① ② ③ ④ ⑤ ⑥ ⑦
① ACC (Red) ② GND (Black) ③ CAN-H (Green+Brown) ④ CAN-L (Green) ⑤ F-CAM-DET (Orange) ⑥ SAFE (Violet) ⑦ REAR-C (Grey)
· Analog RGB Mode · Video Mode
在IMAGE Menu上可实现下面的功能 :
- BRIGHTNESS : 调节画面的亮度 - CONTRAST : 调节画面的明暗 - SATURATION :调节画面的色度 - HUE : 调节画面的颜色 - SHARPNESS : 调节画面的清晰度 - USER IMAGE : 设定为最初值
-5-
-产品构成图
IR Switch for source toggle OEM Navi Button (Can Intrface) NAVIGATION Input (Analog RGB) MCU
DISPLAY
Car Installation OEM LCD
A/V 1 A/V 2 A/V 3 CVBS (R (Rear camera) ) Car Screen Input
-14-
OSD(On ( Screen Display) p y)
吉普车大切诺基545RFE自动变速器
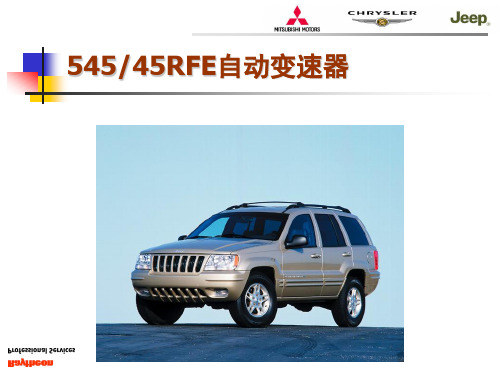
GRAND CHEROKEE
曲轴位置传感器: 曲轴位置传感器:
GRAND CHEROKEE
输出/ 输出/输入转速传感器
GRAND CHEROKEE
TCM间接输入信号 TCM间接输入信号
• • • • • • • • • • 发动机和车身型号识别码—来自PCM/BCM 进气歧管压力—来自PCM 目标怠速—来自PCM 扭距降低信息—来自PCM 巡航控制开关—来自PCM — 相互转速控制—来自PCM 发动机冷却液温度—来自PCM 蓄电池/环境温度—来自PCM 制动状态—来自PCM DRB III 通讯—来自DRB III
• 输入:低速离合器---低速太阳轮 超速离合器—倒档行星架 其中:倒档行星架=输入齿圈
GRAND CHEROKEE
四档
• 输入:超速离合器—反作用太阳轮 倒档行星架 • 锁定:四档制动器—反作用齿圈 • 输出:输入行星架
GRAND CHEROKEE
主二档
• 输入:低速离合器—输入太阳伦 • 锁定:四档制动器—反作用齿圈 • 输出:输入行星架
GRAND CHEROKEE
变速器维护与保养
• 变速器油---MOPAR ATF +4型 • 主副两个滤清器同时更 换 • 油位的检查: 保养--4.7L 大修--11.4L
GRAND CHEROKEE
第一部分 变速器机械部件组成与动力传递
GRAND CHEROKEE
变速器的主要机械部件包括: 变速器的主要机械部件包括: 液力变矩器 三个多片输入离合器 低速档(UD);超速档(OD);倒档(REV) 三个制动器 二档(2C);四档(4C);低/倒档(L/R) ) 单向离合器( 单向离合器(OWC) 三个行星齿轮组 反作用行星齿轮组;倒档行星齿轮组;输入行星 齿轮组 驻车锁止机构
北京吉普生产的切诺基JEEP型号全解释
北京吉普生产的切诺基JEEP型号全解释北京吉普生产的切诺基JEEP型号全解释,拿来和XDJM们一起分享。
北京吉普(BJC)生产的切诺基是在原美国汽车公司生产的切诺基XJ型的基础上引进的,由简单组装到仿制零部件整车生产.此后,由于合资方的更迭,外方发生了从美国汽车公司到克莱斯乐,再到戴克的变更.其先后型号受国家政策调整有很大区别.第一. 车型前缀,为”BJ”开头,这是生产厂家的标识,意思是:北京吉普汽车有限公司第二. 车型.按照国家发改委及其前身发布的车型准生产目录,切诺基有如下几种:1,:”2”字头,为轻型越野车,如20212,”5”字头为专用改装越野车3,”6”字头为小型客车,如64204,”7”字头为轿车,如7250“2”系列车毋须多说.仅仅有四六缸车和手动自动区别,”6”字头和”7”字头的区别比较大,早期,国家对”7”字头的轿车目录控制比较严格,申请比较困难,对质量标准的要求也比较高,因此不少厂家在廉价车型和预生产型均申请”6”字头车型,切诺基也不例外,”7250”系列是属于轿车类型的车辆,无论在质量配置上都优于”6”系列,单单从车厢钢板的使用上区别就比较明显,前者是使用的双面镀锌板,后者使用的是单面镀锌板.但外观和内设区别不大.”7”系列车更接近”2”系列车,升级到”2”系列车应该更容易些. 第三, 车型后缀的含义英文”E”字为电喷发动机的标志,如2021E的含义为四驱电喷四缸越野车后缀如果是数字,如2021E6Y的含义为四驱电喷六缸越野车后缀英文字母”L”的含义为加长型号.如2021EL,意思是四驱四缸加长型越野车后缀里如果出现第二个英文字母,即为改进型号的批次的标志,如6420EA,含义为首次改进型电喷两驱小型客车;六缸车系列:型号统称为2021E6Y/E6L/A6/A6L/A6A,均为四驱配置 ,标配225/75/R15轮胎2021E6Y,手动五挡分时四驱,电喷六缸发动机,全车电窗中控,脚灯,顶置阅读灯,带照明的化妆镜灯,方向盘角度可调,雨刷速度可调,有后雨刷,车型最经典,97年前早期车型基本都是原装件,即便是方向盘都是。