AMAZFIT智能手表使用手册
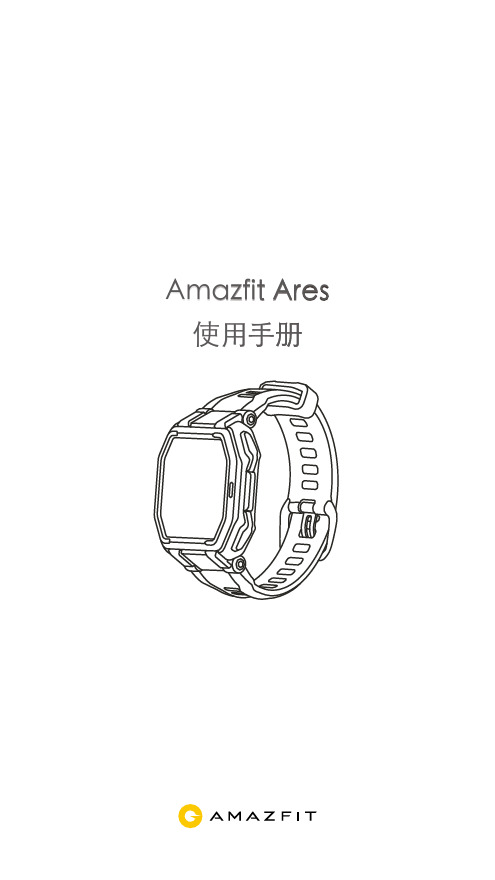
Amazfit Ares 使用手册说明书
Amazfit Ares 使用手册目 录绑定手表日常使用 佩戴 抬腕亮屏 休眠与解锁 勿扰 按键 充电常用功能 表盘 小部件和应用 运动 活动 心率 支付宝离线支付 天气 手机音乐控制 PAI 通知与来电 其他功能 设置运动功能 运动列表0101010102020203040404050606080808090912121314目 录开启运动 开始户外跑 跑步中的操作 跑步中的提醒 暂停或停止跑步 完全恢复时间 运动设定 关于 GPS 搜索 查看运动记录 室内跑校准 运动状态运动生理指标 最大摄氧量(VO2max) 运动效果(TE) 运动负荷手表日常保养141415151616171718192020202223251. 绑定手表第一次开机后,你会看到二维码界面,用 Zepp App 扫码绑定后可以在手表上查看手机通知,查看天气信息,控制手机音乐播放等等。
也可以通过手表与手机的连接,将你的运动健康数据上传,在手机端查看。
扫描手表上的二维码即可下载 Zepp App。
完成注册并登录后,用 Zepp App 再次扫描手表上的二维码,根据提示完成绑定流程即可获得上述智能功能。
2. 手表日常使用一、佩戴建议将手表以适中的松紧度佩戴在离手腕两指距离的位置上,以确保光学心率监测器正常监测数据。
进行运动时,建议将手表以贴合、舒服且不会滑动的松紧度佩戴。
不要过于拉紧,也不要让手表能够自由晃动。
二、抬腕亮屏Amazfit Ares 默认开启抬腕亮屏功能。
系统自动识别抬腕动作,并自动点亮屏幕背光,每次抬起手腕都会清楚的看到表盘上的信息。
抬腕亮屏只是点亮屏幕背光,如果抬腕后想使用手表上的功能,请先按任意物理按键解锁屏幕。
Amazfit Ares 的半透半反式 MIP 显示屏尤其适合户外使用,光线越强屏幕显示越清晰,如果你长期在高亮度户外环境活动,为了延长手表续航你也可以在表盘界面下拉进入控制中心手动关闭屏幕抬腕亮屏功能。
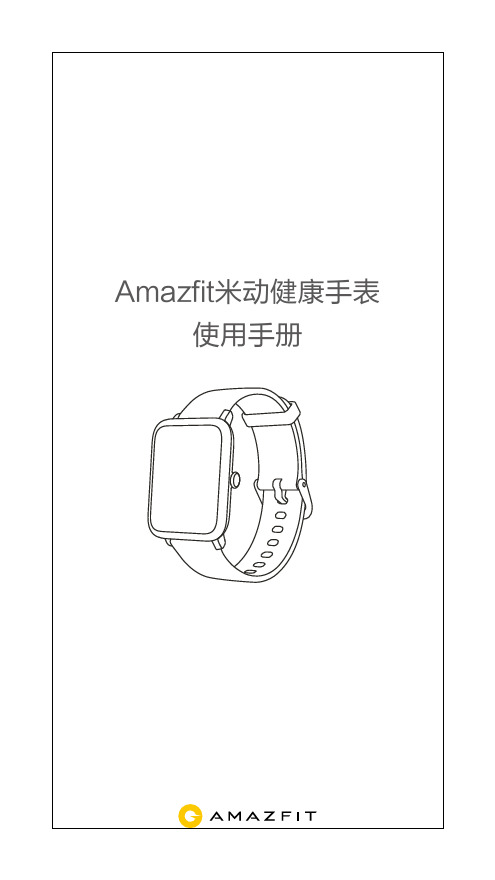
Amazfit米动健康手表使用手册说明书
Amazfit米动健康手表使用手册目 录感谢您购买 Amazfit米动健康手表产品清单产品基本参数了解手表用前准备绑定手表日常使用提醒设置高级设置亲友关注数据解读010101020203040608090901 感谢您购买 Amazfit米动健康手表本产品为Amazfit米动健康手表(以下简称:手表),能够采集和记录您的心电信号、心率、活动量、睡眠,并且在手机上显示和分析。
本产品需要在移动设备中安装米动健康APP,并通过APP绑定手表使用。
请在开始使用手表前仔细阅读本手册,了解手表的基本功能及正确使用方法。
本手册依据现有信息制作,公司保留产品规格和功能变更的权利。
说明书内容仅作为指导和参考使用,其内容如有更改恕不另行通知。
在产品使用中任何疑问,请联系售后人员。
注意1. 本产品提供的健康信息或咨询内容仅供用户参考,不作为诊断治疗依据。
2. 医疗健康信息咨询服务不是电话诊疗,也不等同于任何急救组织或医疗机构提供的急救服务,实际诊疗活动请选择在相关医疗机构进行。
02 产品清单开始前,请检查包装盒内是否包含以下物品,如有缺失,请与经销商联系。
03 产品基本参数04 了解手表05用前准备部件名称:手表由手表主体和可拆卸腕带组成。
手表充电如图示将手表装入充电座的卡槽内,然后将USB 插头连接到手机充电器或者电脑的USB 接口上充电。
当充电开始后手表的屏幕上会显示充电进度动画。
产品名称:Amazfit米动健康手表主体尺寸:42X35X12.5mm防水等级:30米防水无线连接:蓝牙5.0BLE NB-IoT腕扣材料:尼龙电池类型:锂聚合物设备要求:支持蓝牙4.0的Android4.4或iOS9.0及以上版本的设备产品型号:A1916主体重量:25g 工作温度:5℃-40℃腕带材料: 硅胶可调长度:78mm 电池容量:190mAh佩戴手表Amazfit米动健康手表通过测量手腕的血流来检测全天心率。
为了让测量更加准确,请将手表按照图示佩戴在手腕避开腕骨的位置。
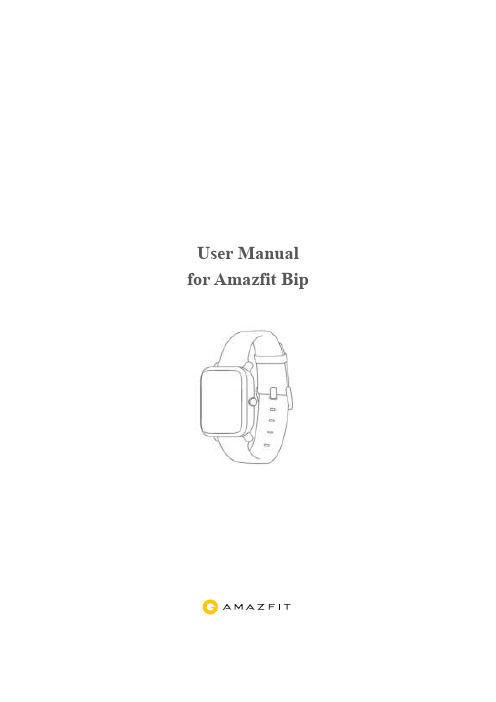
Amazfit Bip 用户手册
User Manual for Amazfit BipContentsDial Function Navigation and Buttons Instruction (1)Dial Function Navigation (1)Keys Instruction (2)Wrist Placement and Charging (2)1.All-day Wearing (2)2.Wearing in Sports (3)3.Charging (3)Watch Functions (4)1.Watch Display Settings (4)Watch Dial (4)Notifications (5)Watch Alerts (11)Activity Tracking (13)1.Starting Activity (13)2.Activity Initiated (13)3.Alerts during Activity (13)4.Basic approach during Activity (15)5.Suspending/Continuing/Ending Activity (15)6.Viewing Activity History (15)7.Deleting Activity History (16)8.Activity Settings (16)9.GPS and A-GPS (17)10.Heart Rate Zone (18)Maintenance (18)side button to set it.Dial Function NavigationYou can navigate thescreen by swipingup, down, left and right. Thewatch displays the dial interface by default.⚫ Swipe up to view notifications history.⚫Swipe down to access DND (Do Not Disturb) Mode setting and check⚫ Swipe left and right to view all APP features.Keys Instruction1.⚫ Wake up the watch screen when the watch is locked⚫ Return to dial interface when the watch is on sub -⚫⚫2. ⚫Turn on the watch⚫ Quickly start the activity if “Long press the button” is turned on⚫ Help reset the watch after you click “Factory reset”⚫Wrist Placement and Charging1. All -day Wearing Please wear your watch two fingers' width below your wrist bone to ensure that the optical heart rate monitor can monitor the data properly2. Wearing in SportsPlease DO NOT wear your watch too tight and it should also be slightly tighter(snug, but not constricting) during exercise thanduring all -daywearing.3.To charge your Amazfit Bip:⚫ Please attach the USB end of the charger to your PC or a normal charging adapter.⚫ Insert the watch into its charging base and make sure to align the two charging pins on the backside of the watch with the ones on the charging base.⚫ Once clipped in, the watch face will light up and show that the watch as “charging”.Note: The charger adapter output values are DC 5.0V/500mA. We suggest you use brand phone power adapters or charge the watch by connecting to a computer.Watch Functions1. Watch Display Settings1) You can choose items like “Status”, “Activities”, “Weather”, “Alarm”, “Timer”, and “Compass” to be displayed on the watch or not.(Open App ➡Profile ➡My devices Amazfitsettings ➡2) Note: “Watch face” and “Settings” are defaulted to be displayed on the watch.Watch Dial1. Change the dial on the watch:⚫From the home screen of the watch, swipe left you can access Set the watch face.⚫⚫Tap on your selection and confirm by tapping OK, thewatch face will update. 2. Change the dial on the Mi Fit App:Open App ➡Profile ➡My devices Amazfit Bip➡settings ➡Tap on your selection and sync it to your watch3. DND (Do Not Disturb) ModeSwipe down from the home screen of the watch; Tap on DND, you will⚫When you choose “Now”, your watch will immediately stop alertingfor phone call, SMS/APP/Email and other pushnotifications from apps you set.⚫ However, if you choose “Auto”, Bip will stop alerting only in thenight when it detects you are sleeping with wearing the watch.Notifications1. Setting up notificationsPlease enable “App alerts” in the Mi Fit App and make sure Bluetooth is⚫ For iOS phones, please connect your watch with your phone inBluetooth settings⚫ For Android phones, please enable auto -start and lock Mi Fit App inthe "Recent apps"/ "App overview" page.2. Viewing notificationsWhen the watch receives a notification reminder, it will vibrate andautomatically display the content of the notification. If you do not view the notification immediately, you can find it later by swiping up from the watch face.3. Delete or clear notificationsThe watch can save up to 10 recent notifications. After this limit is exceeded, the oldest notification will be automatically deleted every time a new one is received. When the content of the notification exceeds one screen and cannot be displayed, it will display on the second screen, and the portion beyond the second screen will not be displayed.1) You can delete the notification by swiping left on the content page.2) Swipe up to the bottom of the notification list and tap “Clear” to delete all notifications.4.Status1)We can see Steps, last-minute heart rate, mileage, calories burned, and sedentary times from “Status” widget.2)Heart rate will be measured automatically when you tap “Status”.5.ActivityFrom home screen of the watch, swipe left till you find Activity. For more details, please refer to Activity Tracking.6.Weatherfrom the home screen of the watch, swipe left till you find “Weather”. Tap “Weather” and view the weather for the current day and the next several days.⚫The weather comes from the server. Therefore, in order to obtain the latest weather information, please keep your watch connected with your phone.⚫In addition, the watch can receive the weather warning notification when “Weather alert push” is turned on. (Mi Fit App➡Profile➡My Devices Amazfit Bip➡Weather settings➡Weather alert push )7.AlarmYou can turn off/on the alarm directly from the watch and add another alarm from Mi Fit App. You can store up to 10 alarms on the watch.⚫When an alarm vibrates, you have two options “Snooze” and “Stop”.If you tap “Snooze”, it will vibrate later. And you can tap “Snooze” to delay reminder by 10 minutes; If you tap “Stop”, it will stop vibrating.⚫If the alarm continuously vibrates 6 times, the alarm will be turned off after the sixth vibration is over.8.TimerThe timer has a stopwatch and a countdown timer.1)The stopwatch can be used to record multiple time periods.2)For countdown timer, you can set a time. And when the time is up, it will vibrate to remind you.passFrom the home screen of the watch, swipe left till you find “Compass”.⚫Tap “Compass”, it will show you a figure 8 pattern. Move your watch around in a figure 8 pattern to calibrate. After calibration successfully, you can see your orientation on the watch screen. “N” will always point North, and the arrow is the direction you are facing.⚫Swipe Left and you can see the altitude and pressure data, which can only be obtained when in an open space outside with GPS signal. It takes some time to enable GPS, please wait patiently.⚫In order to avoid signal interference, please stay away from magnetic interference.10.SettingsFrom the home screen of the watch, swipe left you can access “Watch face”, “Long press the button”, “Adjust brightness”, “Find device”, “About”, “Factory reset”, and “Turn off” in watch “Settings”.⚫Watch face: There are 10 watch faces, which can be applied according to your preferences⚫Long press the button: Tap the check mark next to the activity to make it quick start by long press. You can set to quick start outdoor running, treadmill, cycling and walking. And you can tap the check mark next to “Turn off” to disable this function.⚫Adjust brightness: You can adjust the brightness by tapping the add or subtract buttons on the brightness scale.⚫Find device: Your phone will ring when the watch is connected to your phone by Bluetooth.⚫About: You can check firmware version and Bluetooth address.⚫Turn off: You can turn off your watch.⚫Factory reset: All the data in the watch will be removed after factory reset. And in this case, you need to re-pair the watch with phone.Watch Alerts1.Incoming call notification:When the watch receives an incoming call, it will vibrate. If you want to hang up the phone, click "Hang up" on the reminder page; If you want to ignore the reminder, click "Silent" or press the key to stop the vibration. Before using this function, please go to the app and turn on the alert. (Mi Fit App➡Profile➡My Devices Amazfit Bip➡Incoming call)2.Idle alert:The watch will vibrate to remind you to get up and move for a while if inactivity lasts for one hour. Before using this function, please go to the app and turn on the alert. (Mi Fit APP➡Profile➡My Devices Amazfit Bip➡More➡Idle alert)3.Liked by your friend notification:The watch will vibrate to remind you when someone liked you.4.Goals notification:The watch will vibrate when you reach a goal. Before using this function, please go to the app and turn on the alert. (Mi Fit App➡Profile➡My Devices Amazfit Bip➡More➡Goals notifications)5.Alarms alert:When the alarm on your mobile phone rings, the watch will vibrate to remind you. Before using this function, please go to the app and turn on the alert. (Mi Fit App➡Profile➡My Devices Amazfit Bip➡More➡Watch alarm )6.Disconnection reminder:When your watch is disconnected with your phone the watch will vibrates to remind you. Before using this function, please go to the app and turn on the alert. (Mi Fit App➡Profile➡My Devices Amazfit Bip➡More➡Disconnection reminder )7.Event reminder:The watch will vibrate on time if you have added an event reminder. Before using this function, please go to the app and turn on the alert. (Mi Fit App➡Profile➡My Devices Amazfit Bip➡More➡Event reminder )8.Quick Entry SettingsSwiping the dial to the right gives you a quick view of the weather information.Activity Tracking1.Starting ActivityThere are two ways to start an Activity:⚫From the home screen of the watch, swipe left till you find Activity.⚫Long press the physical button to quick start an Activity set up already in watch Settings.Amazfit Bip supports outdoor running, treadmill, cycling and walking. Before you start an activity, please check if the storage space on the watch is enough. If it is not enough, the previously unsynchronized activity data may be covered during the activity. To ensure that the data will not be covered, it is recommended to connect and sync the data as soon as you finish the activity.For these sports modes like outdoor running, cycling and walking, which need to enable GPS positioning, you can start the activity after the GPS getting location successfully.2.Activity InitiatedIf the GPS option is initiated and started, the watch will offer a three-second countdown before tracking begins.3.Alerts during ActivityFrom the home screen of the watch, swipe left to access “Activity”➡“Activity settings”. Tap “Activity settings” to set “Auto pause”, “Heart rate alert”, “Pace alert”, and “Distance alert”.⚫Heart rate alert: You can set a value to make the watch alert you when your heart rate jumps above the value you set.⚫Pace alert: You can set a target pace to make the watch alert you when your pace is below the target pace.⚫Distance alert: You can set the desired distance to alert you. (eg: The watch will vibrate when you reach every 2 mile/km)⚫Insufficient space alert: The watch will vibrate to remind you whether to continue the activity when there is insufficient space. If you click "Continue", the unsynchronized data will be covered. If you click "End", you will end this activity.⚫Space exhaust alert: If you run out of space during the activity, you will be also alerted by vibration. And the watch will automatically save this activity record for you.⚫GPS status change alert: When you choose an outdoor activity, it will vibrate to alert you after GPS is successful positioned.4.Basic approach during ActivityOn activity interface, long press the key to pause the activity; short press the key to switch the screen. You can also switch the screen by swiping up or down manually.5.Suspending/Continuing/Ending ActivityPress and hold the physical button to pause the activity. The paused interface is displayed. And you can tap “Continue” to resume or tap “End” to stop.Note: If you ran less than 50 meters, watch will prompt you that "distance is too short to save".6.Viewing Activity HistoryYou can view the activity history from both your watch and app.1)WatchFrom the home screen of the watch, swipe left to access “Activity”➡“Activity history”. If there is an unsynchronized activity record, you cansee an unsynchronized icon on the right side of the list column. After the data is synchronized successfully in the app, that icon will no longer be displayed. Click on an activity record to see the detailed data.2)Mi Fit AppPlease open App➡ Click "Activity" right below the app home page to view all activity records that are synchronized from the watch.7.Deleting Activity HistoryFrom the home screen of the watch, swipe left to access “Activity”➡“Activity history”➡ Swipe up till you see "Delete".Note: Please make sure this activity is synchronized with app before you delete it. And if you also want to delete this activity record from app, you need to delete it manually on the app.8.Activity SettingsFrom the home screen of the watch, swipe left to access “Activity”➡“Activity settings”. Tap “Activity settings” to set “Auto pause”, “Heart rate alert”, “Pace alert”, and “Distance alert”. And after the alert is activated, the corresponding reminder will be performed during the activity.9.GPS and A-GPSTap outdoor running, watch will automatically initiate the search for a GPS signal but you can skip this step at that moment by clicking on the “Skip” button, however it will still search GPS during your activity.1)If the GPS option is initiated and started, the watch will offer a three-second countdown before tracking begins. You can long press the physical button to “pause” and tap “continue” to continue or tap “end” to stop.2)After you finish and sync, you can view the GPS route and details in the watch and Mi Fit App.3)GPS signal is better in an open space. After getting location successfully, you can start the activity. If you are in a crowd, please raise your arm to your chest, which can speed up the GPS positioning. Assisted GPS (A-GPS) is a system allowing global positioning system (GPS) receivers to obtain information from network resources to assist in satellite location. An A-GPS system is especially useful when the receiver is in a location where it is difficult for the satellite signals to penetrate. AGPS will help your watch find your precise position quickly and improve accuracy. The A-GPS data updates once a day. The latest A-GPS data is automatically updated each time you sync it with Mi Fit App. Note: If watch hasn’t sync with your Mi Fit App for 7 days, A-GPS data will expire. The positioning speed may be affected when AGPS expiresand watch will remind you to update when you start an activity.10.H eart Rate ZoneDuring activity, the watch calculates your heart rate zone based on your personal information. The heart rate zone will help you determine the effect and intensity of the activity. The current heart rate zone will be displayed next to the heart rate on the watch. After the activity is finished, you can view the duration in each heart rate zone from “Details” page of Activity history on the app.There are six zones (Relaxed, Light, Weight, Aerobic, Anaerobic, and VO2 max) by default, which are calculated based on the estimated maximum heart rate. And the watch calculates the maximum heart rate using the commonly used “220 minus age” formula.MaintenanceAmazfit Bip is water-resistant, but NOT waterproof.⚫Please clean the watch and strap periodically with clean water and then use a dry soft cloth to dry up the watch.⚫Please DO NOT use shampoo, soaps and other chemicals to wipe the dirt in avoidance of irritating skin or corrosion of the watch.⚫Please wipe your wrist and watch with a dry cloth or tissue after workout. Sweat may interfere and cause inaccuracy.Warning:⚫Amazfit Bip is IP 68 certified which means resistant to dust, rain, splashing, and accidental submersion. It can withstand a maximum depth of 1.5 meter water for up to 30 minutes. The resistance testing is performed in fresh water, normal temperature and under static condition. It shouldn’t be used when you are taking a shower/bath, having a spa, swimming or in the sauna or steam room.⚫DO NOT operate the watch underwater. Please wipe the watch with a dry cloth before operating the touch screen or charging it.⚫Amazfit Bip is NOT waterproof. Our warranty does NOT cover damages or defects caused by misuse or abuse, including but not limited to damage caused by corrosive liquids such as sea water, acid and alkaline solution, and chemical reagents.19。
Amazfit T-Rex 用户手册说明书
Amazfit T-Rex User ManualContentsOperating Instructions and Functions Navigation (3)Basic Operations (3)Touch screen (3)Physical Buttons (5)SELECT button: (5)BACK button: (5)UP & DOWN buttons: (5)Functions Navigation (6)Watch Wearing and Charging (7)Use of Functions (8)Device Pairing and Unpairing (8)Shortcut control (9)Flashlight (9)Brightness adjustment (9)DND mode (10)Battery saver mode (10)Screen lock (11)Replace the Watch Face (12)Status (12)Heart Rate (13)Workout functions (14)Start Workouts (14)Start Outdoor Running (14)Operations during Running (15)Pause or Stop Running (15)Pause the workout (15)Finish the workout (16)Workout Settings (16)Workout goal (16)Workout alert (16)Full kilometer alert (16)Safe heart rate reminder (16)Heart rate zone reminder (16)Pace alert (17)Auto pause (17)Real-time graph (17)About GPS Positioning (17)Positioning tips: (17)Assisted Global Positioning System (AGPS): (17)Pool Swimming (17)View Workout Records (18)Indoor Running Calibration (19)Operating Instructions and Functions NavigationAmazfit T-Rex features one AMOLED touch screen and four physical buttons.Basic OperationsTouch screenYou can swipe left/right or up/down on the watch face to switch between different function pages.Tapping and exiting: You can tap to enter a specific function page and also display the tap tips on that page. After entering a certain function page through tapping, you can swipe right to quickly return to the previous menu level. Swipe left from the Notification List page will return you to the watch face.Physical ButtonsSELECT button:•Long press the button for 2 seconds to power on the watch.•Short press to light up the screen.•Short press on the watch face will open the workout list. (You can also set this operation to quickly start other functions by customizing in the system settings.)•Short press on other pages will enter the next menu level, or enter a sub-page when on a list page.•Long press for 10s to shut down.BACK button:•Short press to light up the screen.•Short press on the watch face to turn off the screen.•Short press on other screens to return to the previous page.•Long press on other screens to quickly return to the watch face.UP & DOWN buttons:•Short press on the watch face to switch between different widgets.•Short press on any list screen to change the currently selected item.•Short press on a long page to scroll up and down.Functions NavigationSwipe down from the watch face or short press the UP button to enter the shortcut control screen, where you can quickly turn on the flashlight, set screen brightness, set DND mode, enter battery saver mode, and enable screen lock.Swipe up on the watch face or short press the DOWN button to switch between Health status → Heart rate measurement. Keep swiping up to return to the shortcut control screen → watch face.Swipe left on the watch face to enter the apps listSwipe right on the watch face to enter the notifications listWatch Wearing and ChargingDaily wearing: During daily use, it is recommended to wear the watch with a moderate tightness at a distance two fingers far from your wrist to ensure that the optical heart rate monitor works properly.Wearing during workouts: During workouts, it is recommended to wear the watch comfortably and ensure a tight fit without slipping. Being too tight or too loose may cause the detected workout data to become inaccurate, so avoid doing this.Charging•The watch charger's USB port needs to be plugged into a device that supports power supply through USB, such as a socket, PC, power bank, etc.•When placing the watch onto the magnetic charging base, it's required to keep the watch in a proper direction and position. Be sure that the metal contacts on the back of the watch are closely connected to the charging base.•The screen will display a charging reminder when the watch is placed properly.Use of FunctionsDownload the Amazfit app via the mobile phone before using Amazfit T-Rex. You need to pair the watch using the Amazfit app to enjoy its full functionality. In addition, a paired watch allows the saving of data generated on the watch to your personal account in the cloud, which will avoid data loss.Device Pairing and Unpairing•Please download the Amazfit app through Google play or App store, then scan the QR code on the watch, and register or log into your account.•Open the Amazfit app and tap the "+" icon in the upper right corner or tap "Profile → Add device → Watch → Amazfit T-Rex", and follow the prompts to scan the QR code on thewatch.•Follow the prompts on your watch and mobile phone to complete the pairing process. •Once paired, it is usually necessary to perform a system upgrade on the watch. Please wait while this is happening and keep the phone connected to both the Internet and the watch via Bluetooth, so as to ensure a successful upgrade.•After the watch is paired and upgraded, its functions are available. The Amazfit app can also be used to configure the watch.•If you need to unpair your watch, open the Amazfit app, go to "Profile → Amazfit T-Rex"and choose "Unpair".Shortcut controlSwiping down on the watch face page can quickly open the control shortcut menu page.FlashlightTapping the flashlight icon will turn on the flashlight function. The watch screen will display a white background which can illuminate a small area at night. Once turned on, you can turn the flashlight function off by swiping right or short press the BACK button.Brightness adjustmentTap on the brightness adjustment icon to enter the brightness adjustment screen.Auto brightness: The watch will automatically adjust the screen brightness based on ambient light. Once this mode is enabled, you cannot move the screen brightness slider manually.Manual brightness: You can adjust the brightness by dragging the brightness slider up/down or press the UP/DOWN button.The brightness adjustment will take effect immediately. You can swipe right on the screen or short press the BACK button to return to the previous screen.DND modeTurn on DND: once turned on, the watch will no longer vibrate when notifications and incoming call reminders are received from your mobile phone. Tap again to disable DND mode.Timed DND: You can customize the time period during which DND mode is automatically turned on or off.Smart DND: After you fall asleep with the watch, the watch will automatically turn on DND mode.Battery saver modeThe Battery Saver mode can maximize your watch's battery life. With the Battery Saver mode on, the watch will only display time and record your number of steps and sleep time. Other functions are disabled.Long press the SELECT button to exit the battery saver mode.Screen lockWith the screen lock function on, the watch can only be unlocked by using the watch button. This can prevent any error caused by unintentional screen touches. Once locked, the screen can be unlocked by short pressing the SELECT button to unlock the screen.Replace the Watch FaceTo replace the watch face, either long press the watch face for 2s or go to "Settings → Watch face settings", swipe left and right to browse through the available watch faces, and tap in the middle of the screen to complete the replacement.To do this from the Amaz fit app: Tap "Profile → Amazfit T-REX → Watch face settings" to download more watch faces from the Watch Face Store.Status•Swipe up on the watch face or short press the DOWN button to enter the status screen (You can also select "Status" in the apps list).•The status screen shows the current number of steps, completion progress against the target number, distance covered, and calories burned. Tap anywhere on the screen or short press the SELECT button to enter the Status Details page on which you can check the chart and data for your number of steps, distance, calories and idle time.Heart Rate•Continue swiping up on the watch face to enter the heart rate screen. After entering, the watch automatically starts measuring your heart rate. During measurement, it's required to properly wear the watch and keep the back of the watch fairly close to your skin until the watch can measure a stable heart rate.•To enable the all-day heart rate measurement mode, open the Amazfit app and go to "Profile - Amazfit T-REX - Heart rate detection", and choose to enable all-day heart rate measurement.You can also choose other heart rate measurement modes and detection frequencies here.Workout functionsThe watch supports thirteen workout types: Outdoor Running, Walking, Outdoor Cycling, Pool Swimming, Open Water Swimming, Indoor Running, Indoor Cycling, Elliptical Training, Free Training, Climbing, Trail Running, Hiking, and Skiing.Start WorkoutsAfter unlocking, short press the SELECT button on the watch face to quickly open the workout list. After entering the workout list, swipe up or down on the screen, or short press the UP or DOWN button to choose the workout item you want to start. Tap the item on the screen or short press the SELECT button to enter the corresponding item.Start Outdoor RunningAfter entering the Outdoor Running preparation page, the watch will automatically search for the GPS. Once it’s available, tap "GO" or short press the SELECT button to enter the outdoor running mode and start timing. You can also swipe up on the screen or short press the DOWN button to switch between starting and settings.Operations during RunningPause or Stop RunningPause the workoutShort press the SELECT button to pause the workout, and short press the button again to resume the workout.Finish the workoutAfter entering the Paused page, tap "End" to end the workout, tap "Continue" to return to the Workout page, and tap “Give up” to give up savin g the current workout. Once the workout is finished, your watch will display and save the details of this workout, and you can view them again on your watch or in the Amazfit app later.Path in watch: Watch – Activities.Path in Amazfit app: Amazfit app - Workout - See more statuses.Workout SettingsWorkout goalYou can enable workout goals, such as Duration, Mileage and Consumption, in the Workout goal settings. The watch will alert you once the set goal is reached,.Workout alertWorkout reminder settings allow you to control all different reminders, such as distance, heart rate reminder, etc. You can set reminders as needed in the workout alert settings.Full kilometer alertThe watch will vibrate and display the duration of last kilometer every time when the mileage increases a full kilometer.How to setup: Outdoor running > Workout settings > Workout alert > Distance, choose the number of full kilometers and turn on or off the full kilometer alert.Safe heart rate reminderIf the watch detects that your heart rate goes above the safe heart rate value you set previously, it will vibrate and display the alert on the screen. If this happens, you need to slow down or stop the current workout.How to setup: Outdoor running > Workout settings > Workout reminder > Safe heart rate, choose a safe heart rate value and turn on or off your safe heart rate reminder.Heart rate zone reminderWhen you are running, if the watch detects that your heart rate does not fall within the set heart rate range, it will vibrate and display the alert on the screen. If this happens, you need to increase or decrease your speed to maintain your heart rate within the set range.How to setup: Outdoor running > Workout settings > Workout reminder > Heart rate zone, choose a heart rate range and turn on or off your safe heart rate reminder.Pace alertWhen you are running, if the watch detects that your pace is slower than the one you set, it will vibrate and display the alert on the screen.How to setup: Outdoor running > Workout settings > Workout reminder > Pace, choose a pace and turn on or off your pace alert.Auto pauseThe auto-pause can be turned on or off in the auto-pause settings. Once it is turned on, whenever the exercise speed is too slow, the workout recording will be paused automatically. When the speed increases beyond a certain threshold, the workout recording will resume. Recording can also be resumed manually during the pause.Real-time graphIn the real-time diagram settings, you can set if a real-time data plot should be displayed during workout. The plot for each workout can be different, so one real-time plot using one set of data can be set up for each workout.About GPS PositioningWhen you enter the Workout Preparation page for an outdoor exercise such as running, the watch will automatically start GPS positioning and alert you as soon as your location is confirmed. The watch will turn off GPS positioning automatically when you exit the Workout Preparation page or finish the workout.The GPS searching process will last for 5 minutes maximum. If positioning is not successful after that, you will be prompted to repeat the positioning process. If you do not start exercising within 10 minutes after you are successfully positioned, the watch will automatically turn off positioning to reduce power consumption. You will have to repeat the positioning process if you want to start exercising again.Positioning tips:GPS positioning should be performed in an open area outdoors. Please wait for the positioning process to complete before starting your exercise. If you are in a crowd, raising your watch to your chest level may speed up the positioning process.Assisted Global Positioning System (AGPS):AGPS uses the orbital information of the GPS satellites help the watch perform GPS positioning faster.When the watch is connected with your phone via Bluetooth, the watch will actively synchronize and update AGPS data with Amazfit app every day. If the watch hasn’t synchronized this data with Amazfit app for seven consecutive days, the AGPS data will expire, and the positioning speed may be affected.Pool SwimmingUseful termsLane length: The length of the lanes in your swimming pool. The watch will calculate your swimming data based on the lane length you set.Therefore, every time you change a swimming pool, please set the lane length accordingly so that the watch can accurately assess your swimming data.Lap: under the pool swimming mode, swim for a distance equal to the lane length you set.Stroke: finish a complete paddling action while wearing your watch on your wrist.Stroke rate: the number of strokes per minute.DPS: An abbreviation of distance per stroke, refers to the moving distance after finishing a complete stroke.SWOLF: SWOLF is an important indicator for a swimmer, which uses scores to make a comprehensive assessment of your swimming speed. SWOLF for pool swimming mode = duration of one lap (in seconds) + number of strokes in a single lap. SWOLF for open water swimming mode will be calculated using a lap distance of 100 meters. The smaller the score is, the higher the efficiency of your swimming.Stroke recognitionThe watch will recognize your swimming strokes under swimming mode and display the mainUse touch screen when swimmingTo protect the screen from unintentional touching and water interference, the watch will disable touch screen functions after you start swimming. During this time, you can use the watch buttons to operate. The watch will re-enable touch screen functions after you finish swimming.View Workout RecordsView on watchEnter the workout record screen by tapping or short pressing the SELECT button, and a list of workout history will be displayed. Tap on a certain workout record to view its details.Any workout record that has yet to be uploaded to the app will be marked with a little red dot at the front. We recommend that you open the app to synchronize data in order to avoid the loss of workout records.You can view the details of 20 most recent workout records in the watch's "Workout Activities" app.View on Amazfit appOn the Workout page of the Amazfit app, you can view all the workout details that have been successfully synchronized from the watch.Indoor Running CalibrationOnce your indoor running is ended, select "Calibrate and Save" when saving the records. If the watch records a mileage greater than 0.5km, the calibrated mileage will optimize the algorithm to make subsequent mileage records more accurate.If the mileage records are still inaccurate after multiple calibrations, you can select "Recalibrate".。
小米手表括号wt 06说明书

小米手表括号wt 06说明书
1、点击打开进去到小米商城。
看到左边的菜单栏出行穿戴=》手环手表。
然后在打开的列表里找到“Amazfit小米运动手表”。
2、安装完成后,点击打开“Amazfit小米手表”APP。
3、然后“绑定新手表”,然后里面有两种手表类型,一个是“Amazfit小米运动手表”,两一个是“Amazfit小米运动手表2/2s”。
选择你自己的手表类型。
点击这个手表即可。
4、扫描手表上的二维码图案。
二维码可以通过在设置里恢复出厂设置来打开小米Amazfit运动手表的二维码。
如何用刚刚点开的“Amazfit小米运动手表”扫描二维码。
5、点击确认小米Amazfit手表App上的配对请求。
绑定过程可能会持续几分钟,绑定成功后,手表自动进入表盘,这样子就绑定成功了。
选择就可以使用手表了
1、将nano SIM卡插入主机卡槽,并使用配套的取卡器将SIM卡推入,按住主机背面的开关键即可开机。
2、将主机正面朝上,从表带背面装入,轻按几下,主机就放入表带中了。
3、手机扫描保修卡或包装盒上的二维码,将电话手表的APP安装到手机上。
4、然后在APP上,用手机号码进行注册,点击注册,输入手机号码,点击下一步。
5、最后输入手机收到的验证码,点击下一步,输入设置密码,点击"完成即可成功注册,下次登录时输入手机号及密码即可成功登录。
AMAZFIT GETS 2e说明书
AMAZFIT GETS 2e说明书一、外观二、开机与关机开机:关机状态下,长按手表侧键,手表屏幕亮起显示启动画面。
如关机状态下,长按表冠没有开机,请先给手表充电后尝试。
关机:开机状态下,长按侧键5秒进入关机菜单,可选择关机或重启。
强制关机:在开机状态下,长按侧建10秒将强制进行重启。
三、充电本产品为磁吸式充电,请使用标配的充电底座进行充电。
将充电口对准、贴合充电底座的金属触点,直到手表屏幕出现充电电量指示。
注:请使用包装内自带的充电底座充电,充电前请擦干充电口;请使用额定电压5V,额定输出电流1A及以上的充电器或电脑USB接口为手表充电。
四、佩戴和更换表带手表佩戴既不要太紧也不要太松,同时让皮肤有空间透气,这样不但能够让您感到舒适,也能让传感器发挥功效。
测量血氧饱和度的过程中,请正确佩戴手表,不要戴在手腕骨节上,手臂放平,保持手表与腕部皮肤舒适贴合(适当佩戴得紧一些),测量全程请保持手臂静止。
受外界因素(手臂下垂、手臂晃动、手臂毛发多、有纹身等)影响,可能会出现测量结果不准,或无法出现测量值的情况。
您可在运动时收紧手表表带,运动之后再适当调松。
如果您的手表会在手腕上晃动,或者手表无法产生数据,试着把表带收紧一点。
五、连接与配对使用手机扫描下方的二维码,下载并安装App,为更好的使用体验,请按提示及时将App升级至最新版本。
注:手机系统要求为Android5.0或iOS10.0及以上版本。
首次配对:手表首次启动时,会在屏幕上显示绑定用的二维码;在手机上打开App,登录后按照提示扫描手表上显示的二维码绑定手表。
与新手机配对:<1>在旧手机的App上完成手表数据同步;<2>在旧手机中,进入需要重新配对。
AMAZFIT智能手表使用手册
AMAZFIT 智能手表使用手册目 录手表操作和手表状态手表佩戴及充电方式手表功能使用手表日常保养01030417手表操作说明和手表状态1. 按键说明2. 触摸屏手势操作3. 灭屏模式HOME键手表绑定后默认设置是灭屏模式,该模式在待机状态下为黑屏,不显示时间,在抬腕动作产生后才会显示表盘。
消息通知产生时,手表会亮屏显示消息内容。
灭屏模式的开启会增加手表的待机时间。
在手表中的 系统设置 > 使用偏好 > 锁屏模式 中可以更改成微光模式。
4. 微光模式微光模式在待机状态下为屏幕只显示时间(指针表盘显示指针,数字表盘显示数字时间),在抬腕动作产生后才会显示手表状态待机中解锁后其他按键功能解锁手表表盘界面呼起语音开机按键功能短按按键短按按键长按2秒点击屏幕功能项左右滑动屏幕上下滑动屏幕表盘界面长按屏幕使用该功能、进入下一项或选中当前项横向切换界面上下滚动界面激活表盘选择功能完整表盘。
消息通知产生时,手表会亮屏显示消息内容。
微光模式的开启会降低手表待机时间。
在手表的 系统设置 > 使用偏好 > 锁屏模式 中可更改成灭屏模式。
开启锁屏秒针后,黑屏模式下会在抬腕后的表盘上显示秒针或秒,微光模式下会在待机状态下以及抬腕后都显示秒针或秒。
锁屏秒针是默认关闭的,开启后会减少手表的待机时间。
5. 锁屏秒针模式系统状态符号会出现在解锁后的表盘上,每种符号会代表手表处于不同的状态。
6. 系统状态符号[充电中][充满][低电量保护模式] [与手机断连][勿扰][飞行模式]充电状态。
充满状态。
低电量保护状态。
当手表电量在5%及以下时会进入低电量保护模式,此时需要将手表充电超过5%之后才可以解除保护模式。
与手机连接断开。
当手表与手机距离过远断开了蓝牙连接或手机关闭了蓝牙广播,以及手表开启了飞行模式,手表表盘界面都会显示这个符号。
已开启勿扰模式。
开启该模式后,手表收到消息、来电等提醒后都不会自动显示和震动。
Amazfit米动手环2使用手册
目录
01 表盘功能导航及触摸按键说明 01 手环佩戴及充电 03 手环功能使用 15 运动功能介绍 21 手环日常保养
表盘功能导航及按键说明
手环配有彩色IPS触摸屏和1个触摸按键。
功能导航操作
可以通过左右和上下滑动来导航屏幕。 默认显示表盘页面,在表盘页面: 向上滑动显示手环一级菜单各个入口,点击屏幕可查看不同应用 功能。 向下滑动设置勿扰,也可查看手环当前电量。 向右滑动显示快捷入口,快速查看已设置应用详情。 返回: 在应用详情页面,向右滑动返回上级页面。如在一级菜单入口或 勿扰页面,则返回至表盘页面。 在快捷应用详情页面,向左滑动返回表盘页面。
手环功能使用
手环应用设置
手环应用指的是在手环上可以独立使用的功能,如状态、天 气、锻炼、支付宝等。 默认依次显示的应用列表如下图所示,可以根据个人偏好自定 义屏幕上的应用,请在APP“我的”->“Amazfit Cor 2”-> “手环应用设置”选择需要显示的应用项。
常驻、不支持调整顺序
支持设置
快捷 入口
状态
04
暂停/继续/结束运动
在手环上操作: 与手环上的锻炼一致。 详细可在上一节“暂停/继续/结束锻 炼”中查看。 在APP上操作: 在APP运动中页面,长按按钮进入运动暂停页面,手环上会同 步进入暂停中提示页面,如点击“继续”,则继续记录运动, 手环上会回到继续运动中页面;如点击“结束”,则进入确认 结束提示页面,在该页面点击确定可结束并保存运动记录。
01
触摸按键
触摸手环按键 长按触摸按键
未开启锁屏,当屏幕息屏锁定时,点亮屏幕 运动过程中,当屏幕息屏锁定时,点亮屏幕 运动中暂停运动 恢复出厂提示页面对手环进行恢复出厂
- 1、下载文档前请自行甄别文档内容的完整性,平台不提供额外的编辑、内容补充、找答案等附加服务。
- 2、"仅部分预览"的文档,不可在线预览部分如存在完整性等问题,可反馈申请退款(可完整预览的文档不适用该条件!)。
- 3、如文档侵犯您的权益,请联系客服反馈,我们会尽快为您处理(人工客服工作时间:9:00-18:30)。
AMAZFIT 智能手表使用手册目 录手表操作和手表状态手表佩戴及充电方式手表功能使用手表日常保养01030417手表操作说明和手表状态1. 按键说明2. 触摸屏手势操作3. 灭屏模式HOME键手表绑定后默认设置是灭屏模式,该模式在待机状态下为黑屏,不显示时间,在抬腕动作产生后才会显示表盘。
消息通知产生时,手表会亮屏显示消息内容。
灭屏模式的开启会增加手表的待机时间。
在手表中的 系统设置 > 使用偏好 > 锁屏模式 中可以更改成微光模式。
4. 微光模式微光模式在待机状态下为屏幕只显示时间(指针表盘显示指针,数字表盘显示数字时间),在抬腕动作产生后才会显示手表状态待机中解锁后其他按键功能解锁手表表盘界面呼起语音开机按键功能短按按键短按按键长按2秒点击屏幕功能项左右滑动屏幕上下滑动屏幕表盘界面长按屏幕使用该功能、进入下一项或选中当前项横向切换界面上下滚动界面激活表盘选择功能完整表盘。
消息通知产生时,手表会亮屏显示消息内容。
微光模式的开启会降低手表待机时间。
在手表的 系统设置 > 使用偏好 > 锁屏模式 中可更改成灭屏模式。
开启锁屏秒针后,黑屏模式下会在抬腕后的表盘上显示秒针或秒,微光模式下会在待机状态下以及抬腕后都显示秒针或秒。
锁屏秒针是默认关闭的,开启后会减少手表的待机时间。
5. 锁屏秒针模式系统状态符号会出现在解锁后的表盘上,每种符号会代表手表处于不同的状态。
6. 系统状态符号[充电中][充满][低电量保护模式] [与手机断连][勿扰][飞行模式]充电状态。
充满状态。
低电量保护状态。
当手表电量在5%及以下时会进入低电量保护模式,此时需要将手表充电超过5%之后才可以解除保护模式。
与手机连接断开。
当手表与手机距离过远断开了蓝牙连接或手机关闭了蓝牙广播,以及手表开启了飞行模式,手表表盘界面都会显示这个符号。
已开启勿扰模式。
开启该模式后,手表收到消息、来电等提醒后都不会自动显示和震动。
已开启飞行模式。
开启飞行模式后,手表将关闭蓝牙和Wi-Fi连接。
这个模式下将与手机断开连接。
手表佩戴及充电方式1. 日常佩戴2. 运动中佩戴3. 充电[耳机连接][音乐播放]已连接蓝牙耳机。
此时会增加系统功耗。
音乐播放中。
如果手表未连接蓝牙耳机,音乐则通过手表自带的扬声器播放。
建议将手表以适中的松紧度佩戴在离手腕两指距离的位置上,以确保光学心率监测器正常监测数据。
进行跑步或者其他运动时,建议将手表以贴合、舒服且不会滑动的松紧度佩戴。
不要过于拉紧,也不要让手表能够自由晃动。
将手表与充电底座进行连接,另外一头的USB插头插入USB电源适配器。
此时手表上会显示充电状态,安装时注意底座上充电触点的方向和手表上金属触点的方向一致,压紧后手表不会松脱出底座。
充电中手表将自动灭屏,点击屏幕即可显示到充电进度界1. 表盘2. 小爱语音助手更换表盘在表盘界面长按后,出现表盘选择界面,会显示当前系统内置和已经安装的表盘。
也可以在手机上的“Amazfit手表App” > “我的” > “我的手表” > “表盘商城” 中进行更换。
在表盘时,能够通过短按按键打开小爱语音助手。
小爱语音助手现在支持闲聊、查询天气、百科问答、设定闹钟、设置日程、算数、语音控制米家设备等功能。
可以试着对小爱说:“今天天气怎么样”、“杜甫是谁”、“周五下午三点提醒我开例会”、“设置一个晚上8点的闹钟”等等。
如果已经在Amazfit手表App上进行了小爱帐户的授权,则可以通过小爱来控制你的米家设备,如:“打开客厅的空调”、“将卧室的台灯调成睡眠模式”等。
面。
充电要求:建议使用电脑端USB充电或者品牌手机充电头进行充电,手机充电头额定输入电压必须是DC5.0v,且输入电流大于500mA以上。
手表功能使用3. 小部件及应用“应用”指的是手表上每个独立可以使用的功能,如睡眠、心率、指南针等。
“小部件”指的是在自定义显示在表盘右侧的应用界面,能够显示当前应用摘要信息的状态。
小部件的显示和关闭在Amazfit手表App的“我的手表”界面中可以找到“小部件及应用管理”,里边可以进行是否显示小部件的设置,以及调整小部件和应用在手表上的显示排序。
4. 交通卡公交卡开通如需开通对应地区的公交卡,请在Amazfit手表App上进行开通。
进入我的手表,选择“Amazfit智能手表”,在“应用设置”中选择“卡包”,进入门交通卡页面后根据开卡流程进行开通。
开卡须知:1、手表交通卡与实体卡同享刷卡优惠;2、卡片与手表绑定,开通后不可以删除;3、开卡成功后不支持退还服务费及余额;4、目前手表最多支持开通4张公交卡。
交通卡的使用当需要使用的交通卡已是默认卡时,可以直接刷卡使用。
当交通卡不是默认卡时,则需要切换到需要使用的交通卡后才能使用。
其他使用事宜请参照Amazfit手表App中交通卡功能的说明。
5. 门禁卡门禁卡模拟门禁卡的模拟流程请在Amazfit手表App上开始,进入我的手表,选择“Amazfit智能手表”,在“应用设置”中选择“卡包”,进入门禁卡后可以根据页面引导进行开通。
当需要进行门禁卡模拟时,请将需要模拟的门禁卡贴于手表的表面。
添加说明:1、目前只支持市面上未经加密的、频率为13.56MHz的门禁卡,但若门禁卡存在加密区域就无法模拟;2、因门禁卡或NFC芯片卡标准不同,部分门禁卡虽然能成功模拟,但可能无法开门;3、出于安全原因,带有门卡功能的银行卡、以及储值消费和公交消费功能的门禁卡无法模拟。
即使模拟成功,模拟的门禁卡也不具备银行、消费、公交等功能;4、每人最多添加5张门禁卡。
门禁卡使用当需要使用的门禁卡已是默认卡时,可以直接刷卡使用。
当门禁卡不是默认卡时,则需要切换到需要使用的门禁卡后才能使用。
6. 米家手表与手机上米家App绑定后,将可以通过语音命令、蓝牙命令来控制米家设备。
绑定首先在手表中打开米家应用,并进入待绑定状态,打开米家App进行附近的蓝牙设备扫描,即可扫到手表进行绑定。
第一步,手机米家待绑定界面。
第二步,米家扫描附近的设备。
第三步,手表绑定成功界面。
语音控制米家可以将已经成功控制米家设的语音命令收藏,以便之后快捷使用该条命令。
蓝牙控制米家首先在米家App的“智能”页面中,添加手表所需要控制的设备的条件,并通进入手表插件同步到手表中,即可在手表上激活添加的条件。
7. 运动运动列表最初的版本中手表拥有11项运动模式,如跑步、健走、骑行、室内跑、登山等。
随着系统版本的逐步迭代,将支持更多的运动项目。
开始运动进入如跑步等户外运动的准备页后,手表会自动搜索GPS,搜索成功后点击GO开始跑步。
进入如椭圆机等室内运动后,直接点击GO开始运动。
关于GPS搜索进入跑步等户外运动的运动准备页面时手表会自动开始GPS 定位,并在定位成功时第一时间提醒你。
离开运动准备页面或运动完成时GPS定位会自动关闭。
GPS持续搜索的时间为3分钟,如果超时仍未定位成功会提示你需要进行重新定位。
成功定位后20分钟未开始运动,手表会自动关闭定位状态以节省手表电量。
继续使用则需重新定位。
i. 定位建议:GPS定位请在户外空旷的地方进行,等待定位成功后开始运动。
如果位于人群中,将手臂抬高到胸口处可以加快定位速度。
ii. 辅助搜星(AGPS):AGPS是指一种GPS卫星轨道信息数据,能够帮助手表更快的进行GPS定位。
备注:该控制模式只能通过米家蓝牙网关进行,如没有网关则不能添加创建控制条件,网关如果不在手表蓝牙广播范围,也不能成功激活控制条件。
运动设置在运动准备页向上滑动可以显示“运动设置”入口,点击进入后可以根据需要来调整跑步项目的设置。
i. 运动提醒运动提醒设置为你提供各类提醒的控制,如整公里提醒,心率提醒等。
可在运动设置中按照需要进行设置。
ii. 自动分段跑步等运动中可以设置自动分段里程,以及开启自动分段提醒。
手表会在每个分段节点记录这一分段的运动详情。
在结束运动后可以查看分段详情。
iii. 外设连接手表支持连接蓝牙4.0的心率带设备和A2DP蓝牙耳机设备。
可在运动设置的外设连接设置项中配对或连接以上设备,以便在运动中使用。
同类蓝牙设备手表同时仅会连接一个,运动开始后手表会主动尝试连接最后一次使用的设备。
连接心率带步骤:1)心率带首先要带在身上(皮肤干燥的用户,需要在两极蘸水)2)在手表-运动设置-外接设备中找心率带,配对连接。
跑步训练间歇训练打开Amazfit手表app > 我的 > 我的手表 页面点击应用设置中的“运动”,选择间歇训练,就可以配置适合自己的间歇训练了。
在保持手表与手机蓝牙连接的状态下,手表每日会定时主动与Amazfit手表App同步及更新AGPS数据。
如手表连续7天未从Amazfit手表App同步数据,AGPS数据便会过期。
过期后定位速度可能会受到影响,届时在开始运动时手表会提醒你更新。
i. 数据屏幕的切换运动中从从待机模式通过短按按键解锁后,可以通过横向滑动来切换各个数据屏幕。
最左侧屏幕为运动操作界面。
其他屏幕为数据项和其他运动中图表屏幕。
ii. 数据项更换运动中所显示的实时数据项可以通过Amazfit手表app > 我的 > 我的手表 页面点击应用设置中的“运动”,在“运动实时数据项设置”中配置各项运动的显示。
iii. 运动暂停在解锁状态单击物理按键即可暂停运动,再次按下按键即可继续运动。
或滑动到最左侧界面,也可以在界面上点击暂停按钮来控制运动。
iv. 结束运动暂停后选择保存即可结束运动,选择继续就会返回运动状态,选择放弃就会不进行当前运动的保存。
结束运动后手表会为你展示并保存本次运动的详情,你可以在手表或Amazfit手表App中再次查看。
手表路径:手表-运动记录-查看所有运动数据Amazfit手表APP路径:Amazfit手表APP-运动-所有运动中找到记录查看。
运动数据的查看手表上查看8. 健康每天的佩戴手表产生的步数、消耗以及累计运动统计都会汇总到健康应用里。
每周一的上午9点还会生成上一周的数据周报,方便查看前一周的整体运动和健康数据周报。
备注:累计爬楼是指每日上楼的楼层数,“一层楼“约等于海拔升高3米。
Amazfit智能手表两种模式的心率测量,分别是“单次测量”模式和“全天心率”模式,可以在心率应用内进行切换。
备注:为提高手表心率测量的准确性,请正确佩戴手表,并保持手表佩戴部位的清洁和避免防晒霜的涂抹。
单次测量模式可以在你需要的时候进行手动心率的测量。
在测量时为请保持相对静止,以便手表能够更准的输出心率数据。
全天心率模式开启全天心率后,心率应用会显示你每分钟的心率值(bpm),以及当日的非运动状态的平均心率、最大最小心率、静息心率(需佩戴手表入睡后方可评估)。