精控火候全智能电压力锅CYSB40FZ11-90 CYSB50FZ11-100说明书
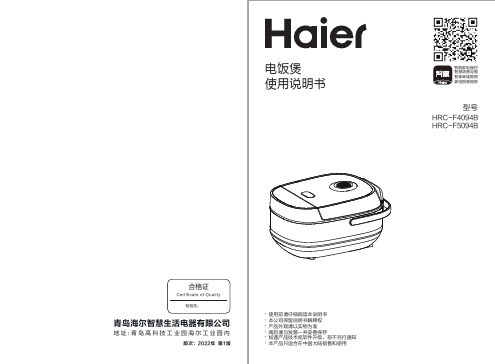
海尔 HRC-F5094B 双控温防溢电饭煲 使用说明书
灾、触电或短路; 6.产品不使用时,请关闭电源并拔下电源插头;长时间不使用产品时,应将插
头从插座上拔出,并置于通风干燥处收藏。 7.请用软布和清水清洁内锅,勿用锅刷、钢丝球、粗硬洗碗布擦洗。
2
使用方法
备注: ①.当功能选定后,选择“预约”,预约灯亮起,预约时间设置完成后,按
“开始/再加热”进入预约工作。如按下“预约”键后无任何操作,约20 秒蜂鸣器响10 次提示,2分钟后返回待机状态。
②.煲仔饭、蛋糕、再加热没有预约功能 。
5、功能选择 在待机状态下,按“功能”键,可选择功能(柴火饭、快速饭、杂粮饭、 煲汤、煮粥、煲仔饭、蒸煮、蛋糕),选定功能的指示灯常亮。 功能选择完成后,按“开始/再加热”键进入工作状态,若是不按“开始/ 再加热”键且没有其他任何操作,约20秒蜂鸣器响10次提示,2分钟后 返回待机状态。 备注:机器刚通电时,全部功能指示灯亮,然后默认功能“柴火饭”指 示灯常亮。选定功能后按“开始/再加热”键进行烹饪,则只有烹饪这个 功能的指示灯亮,其余功能指示灯不亮 。如上电后无进行下一步操作, 则只有“柴火饭”指示灯常亮,电饭煲进入待机状态。
8、定时 定时功能显示时间为烹饪开始时间。 按“功能”键,选择“柴火饭”,同时连续按2次“预约”键,“定时” 指示灯亮,按“时”或“分”进行调节时间,按“开始/再加热”键即进 入定时功能。煲仔饭、蛋糕、保温功能无法进行定时。
3
使用方法
使用前的准备工作
1、保持发热盘干净 ● 发热盘上如有水或其他污渍,请用抹布擦干净。
产品特点
苏泊尔电压力锅sy50yc8082g使用说明

苏泊尔电压力锅sy50yc8082g使用说明电压力锅在我们的家庭生活中经常使用到,它可以进行全密封烹调、压力连续可调,彻底解决了压力锅的安全问题,是厨房的小能手。
电压力锅的品牌种类较多,其中苏泊尔电压力锅受到了人们的喜爱,接下来齐装小编将为大家详细介绍苏泊尔电压力锅使用方法!
一、苏泊尔电压力锅使用方法——把盖打开
用手握紧锅盖手柄,按顺时针方向旋转锅盖至限位边,然后向上就打开了。
接着取出内锅,将食物和水放入内锅中,记住食物和水不得超过内锅高度的4/5,不得少于内锅高度的1/5;水中易膨胀食物不得超过内锅高度的3/5;*4L、5L、6L煮米量分别为8杯、10杯、12杯。
1杯米配1杯水。
也可以根据自己的口味适当调整水量。
*量杯容量为180ml。
二、苏泊尔电压力锅使用方法——放入外锅
放入前,先把内锅及发热盘抹干净,外锅内及发热盘表面不得放入杂物;放入后,左右轻轻旋转内锅,保证内锅与发热盘接触良好。
合盖之后记得检查密封圈是否已放入锅盖内侧钢圈上;用手左右旋转一下密封圈,使它自由均匀放置在钢圈上;盖上锅盖,然后逆时针旋转锅盖到扣合位置,并听到“咔嚓”扣合声。
三、苏泊尔电压力锅使用方法——放置气阀
放置好限压放气阀,将限压放气阀拨到“密封”位置,并检查浮子阀是否落下(没有加热前浮子阀是落下的噢),接着接通电源,升压灯亮。
(如果没有设置保压时间的话,升压灯亮一会儿熄灭,保压灯亮,就会是处于保温状态。
)不设定时间香喷喷的米饭就不会煮好了哟,所以记得设定保压时间,并根据不同食物设定保压时间。
好了一切准备待续,大家就等着香喷喷的米饭出炉吧!。
电子饭煲家用模式号:SR-ZS185 SR-ZS105用户操作指南说明书

Operating InstructionsElectric Rice Cooker Household UseModel No. / N ˚ de modèle : Table of ContentTable des matièresThank you for purchasing the Panasonic product.• This product is intended for household use only.• Please read these instructions carefully and follow safety precautions when using this product.• Before using this product please give your special attention to “Safety Precautions” (Page 3-4).Reserve it for later useNous vous remercions d'avoir acheté ce produit Panasonic.• Ce produit est destiné à un usage domestique uniquement.• Veuillez lire ces instructions attentivement et respecter les consignes de sécurité lors de l'utilisation de ce produit.• Avant d'utiliser ce produit, veuillez porter une attention particulière au chapitre « Précautions de sécurité » (Pages 21-22).À conserver pour référence ultérieureManuel d'utilisationCuiseur de riz électrique Usage domestique USA/CANWhen using electrical appliances, basic safety precautions should always be followed, including the following:1. Read all instructions.2. Do not touch hot surfaces. Use handles or knobs.3. To protect against electrical shock, do not immerse cord, plugs, or appliance in water or other liquid.4. Close supervision is necessary when any appliance is used by or near children.5. Unplug from outlet when not in use and before cleaning. Allow to cool before putting on or taking offparts.6. Do not operate any appliance with a damaged cord or plug or after the appliance malfunctions orhas been damaged in any manner.Return appliance to the nearest authorized service facility for examination, repair, or adjustment.7. The use of accessory attachments not recommended by the appliance manufacturer may causeinjuries.8. Do not use outdoors.9. Do not let cord hang over edge of table or counter, or touch hot surfaces.10. Do not place on or near a hot gas or electric burner, or in a heated oven.11. Extreme caution must be used when moving an appliance containing hot oil or other hot liquids.12. Always attach plug to appliance first, then plug cord into the wall outlet. To disconnect, turn anycontrol to “off”, then remove plug from wall outlet.13. Do not use appliance for other than intended use.14. SAVE THESE INSTRUCTIONS.This product is intended for household use only.a. A short power-supply cord (or detachable power-supply cord) is to be provided to reduce the riskresulting from becoming entangled in or tripping over a longer cord.b. Longer detachable power-supply cords or extension cords are available and may be used if care isexercised in their use.c. If a longer detachable power-supply cord or extension cord is used,(1) The marked electrical rating of the cord set or extension cord should be at least as great as theelectrical rating of the appliance, and(2) The cord should be arranged so that it will not drape over the countertop or tabletop where itcan be pulled on by children or tripped over unintentionally.This appliance has a polarized plug (one blade is wider than the other). To reduce the risk of electric shock, this plug is intended to fit into a polarized outlet only one way. If the plug does not fit fully into the outlet, reverse the plug. If it still does not fit, contact a qualified electrician. Do not attempt to modify the plug in any way.2WARNING3In order to prevent accidents or injuries to the users, other people, and damage to property, please follow the instructions below.■The following charts indicate the degree of damage caused by wrong operation.■Do not use the applianceif the power cord or power plug is damaged or the power plug isloosely connected to the power outlet.■Do not damage the power cordor power plug.■Do not plug or unplug thepower plug with wet hands.■Do not modify, disassemble,or repair this appliance.■Insert the instrument plugand the power plug fi rmly.■Do not immerse the appliance inwater or splash it with water.■Do not insert any objectsin the steam vent or gap.■This appliance is notintended for use by persons(including children) withreduced physical, sensory or mental capabilities, or lack of experience and knowledge, unless they have been given supervision or instruction concerninguse of the appliance by aperson responsible for theirsafety. Children should besupervised to ensure thatthey do not play with the appliance. ■Clean the power plugregularly.Especially metal objects such as pins or wires.(It may cause an electric shock or malfunction.)(It may cause an electric shock or fi re caused by short circuit.)Following actions are strictly prohibited.(It may cause an electric shock.)Modifying, placing near heating elements, bending, twisting, pulling, putting heavy objects on top, and bundling the cord. (It may cause an electric shock or fi re caused by short circuit.)• If the supply cord is damaged, it must be replaced by a special cord or assembly available from the manufacturer or its service agent.(It may cause a fi re caused byshort circuit or electric shock.)(It may cause a fi re, electricshock or injury.)(Otherwise it may cause an electricshock and fi re caused by the heat that may generate around the instrument plug or the power plug.)(Plugging other devices into the same outlet may cause electric overheating,which may cause a fi re.)• Please enquire with an authorized dealer if water gets inside the appliance.(A soiled power plug may cause insuf fi cient insulation due to the moisture, and may cause a fi re.)(It may cause burn or injury.)(e.g. for abnormal situations or breaking down)→ Please make enquiries at a Panasonic authorized service center for immediate inspection and repair.• Unplug the power plug, and wipe with a dry cloth.• Use only an extended cord rated at 10 amperes minimum.• Please make enquiries at the store or the repair department of an authorized dealer.• Do not use a broken power plug or a loose power outlet.(It may cause smoking, a fi re, or electric shock.)• The power plug and the power cord become abnormally hot.• The power cord is damaged or power failure occurs when touched.• The main body is deformed or abnormally hot.• The unit gives out smoke or scorching smell.• There are cracks, looseness or wobbles of the appliance.• The cast heater is warped or the pan is deformed.■Use only a power outlet rated at a minimum of 10 amperes and alternating electric voltage at 120 volts. ■Discontinue using the appliance immediately and unplug the powercord in cases of abnormal situations and breaking down.The symbols are classi fi ed and explained as follows.Precautions for UseCAUTION4■Do not touch heatingelements while the appliance is in use or after cooking.■Do not touch the hookbutton while moving the appliance.■Be careful when openingthe outer lid while cooking.■Do not use other pans thanthe one speci fi ed.■Do not use the cord set (forinstrument plug and power plug) that is not speci fi ed for use with this appliance. Also do not transfer them.■Heating element is subjected toresidual heat after use. Please allow the appliance to cool down before cleaning it.■Unplug the power plug from thepower outlet when the applianceis not in use.Please put in correct amount of rice and water and selectfunctions correctly according to the operating instructions.Before using the appliance, the anti-tarnish paper between the pan and the cast heater should beremoved.Do not cover the outer lid with cloth or other objects when the appliance is in use.Do not serve out rice with any metal object.Do not put ingredients to becooked directly into the appliance in which no pan is placed. Do not cook without pan.(Otherwise it may cause an electric shock and fi re caused by short circuit due to the insulation deterioration.)(So as to avoid over fl ow of rice water, half-cooked rice or scorched rice.)(So as to avoid poor cooking or fi re.)(So as to avoid deformation, color change of the outer lid or failure.)(So as to avoid scratching the pan coating and causing peeling of the coating.)When there is any over fl owof rice water from the steam vent, pull out the power plug immediately to disconnect the power supply. Do not resume the use until the rice water on the power plug and the instrument plug is cleaned with a dry cloth.The appliance is forhousehold use only. Do not use it for any commercial or industrial purposes or any purposes other than cooking.When power failure occurs during the operation of the appliance, the cooking result may be affected.(So as to prevent any impurities from causing failure.)Especially the cast heater. (It may cause a burn.)(It may cause the outer lid to open, resulting in a burn.)(It may cause a burn.)(It may cause aburn and injury due to overheat or malfunction.)(It may cause an electric shock, leak, and fi re.)(Touching hot elements may cause a burn.)■Be sure to hold the instrument plugor the power plug when unplugging. unplugging. Do not pull the power cord.Avoid using the appliance under direct sunlight.(So as to avoid color change.)Do not use scouring pad to clean the inner surface of the pan. Use only with a sponge.(Otherwise it may cause an electric shock or fi re caused by short circuit.)DisplayParts identifi cation1. Press this button to select a cooking function.2. Press this button to enter Keep Warm mode.3. Press this button to preset timer.4. Press this button to set clock or cooking timer.5. Press this button to start setting cooking timer.6. Press this button to cancel the operation.7. Press this button to start cooking.5Lithium batteryPower source for the clock ■Battery ReplacementIf lithium battery is consumed, please contact authorized service center for replacement.■The life time of battery is around 5 years (At 20°C room temperature and plugged in 12 hours each day.)■When the battery is consumed, the following phenomenon will happen:• The clock becomes vague or disappears.• Memory of preset time is lost.•The clock can be used again when power plug is connected.(The clock resetting is required.)Note: Do not put the lithium battery into the fi re, or do not recharge, disassemble or heat the battery, etc.■When plugged61• Measure rice with the measuring cup provided.• The volume of the measuring cup is about 180 mL.• For the maximum quantity of rice to be cooked at once, refer to speci fi cations in P.19.2Wash the rice till the water turns relatively clear.1 Wash the rice quickly with plenty of water and stirring the rice lightly to wash it while changing water.2 Repeat it for several times (wash the rice → pour out water), till the water turns relatively clear.Attention• In order to avoid scratching the non-stick coating on the pan surface, do not wash rice in the pan.• Wash the rice thoroughly. Otherwise, rice crust may appear and the residual rice bran may affect the taste of the rice.3Add the washed rice or other ingredients into the pan.• Use water line on the pan to measure water quantity as follows:Function Water line White Rice White Rice Jasmine Jasmine Rice Multi Grain Multi Grain Quinoa Refer to P.10Quick Cook White Rice Brown Rice Brown Rice Sticky Rice Sticky Rice Porridge Porridge Soup/Slow CookWhite Rice• In the Soup/Slow Cook function, the total amount of ingredients and water shall not exceed the maximum water line for "White Rice".• Dry the outside surface of the pan. If it is wet, it may cause noise while cooking. Any foreign matters between the pan and the cast heater may damage the unit.• Please make sure that the pan is on leveled surface.• Please measure water by aligning water line left side and right side.• If rice is too hard or too soft, please adjust water quantity according toyour personal taste.7SR-ZS18584Put the pan into the body and close the outer lid.Connect the plugs.• Please insert the instrument plug into the body fi rst, and then connect the power plug. Make sure that both plugs are tightly connected.1Press button to point to White Rice, Jasmine, Multi Grain, Quick Cook, Brown Rice or Sticky Rice function.2•Before cooking is completed, the LCD display will show the remaining time in 1 minute decrement.Stir and loosen the rice.• Keep Warm function indicator turns off and the indicator lights up automatically).9Operations(Cooking with the White Rice, Jasmine, Multi Grain, Quick Cook, Brown Rice or Sticky Rice function.)The cooking is overKeep Warm• When cooking is over, the electric rice cooker beeps and automatically switches to the Keep Warm function indicator turns off and the indicator lights up automatically). However, we do not recommendKeep Warm button to exit the Keep Warm function and unplug the power plug.101Pressbutton to pointto Quinoa function.2• Before cooking is completed, the LCD display will show the remaining time in 1 minute decrement.Operations (Cooking with the Quinoa function.)The cooking is over1 button to pointto Porridge function.2• Before cooking is completed, the LCD display will show the remaining time in 1 minute decrement.Operations (Cooking with the Porridge function.)The cooking is over• Keep Warm functionindicator turns off and theindicator lights up automatically). However, we do not recommendusing the Keep WarmKeep Warmfunction and unplug the power plug.Preparations• Add the required amount of water.• Place the adjustable steam basket into the pan as shown.• Place foods to be steamed into the adjustable steam basket.• Close the outer lid.n Correspondence between the amount of water and time of steaming• When cooking is over, the electric rice cooker beeps and automatically switches to the Keep Warm function indicator turns off and the indicator lights up automatically ). However, we do not recommendKeep Warm button to exit the Keep Warm function and unplug the power plug.• Bring out the pan and leave it cool for 2-3 minutes. Then put the pan upside down onto a tray or grill.• Decorate the cake surface as your desire.PreparationsPressbutton to pointto Cake/Bread function.Operations (Cooking with the Cake/Bread function.)• Prepare Cake/Bread mix.• For cake : Beat all the mixture as instructed in the recipe book.For bread : Knead all the mixture as instructed in the recipe book.• Coat the inner surface area (bottom and sides) of the pan with butter (or cooking oil), place the prepared ingredients in the pan and close the outer lid.Operations (Cooking with the Soup/Slow Cook function.)Preparations• Place all ingredients into the pan.• Close the outer lid.When cooking is over, the electric rice cooker beeps and automatically switches to the indicator turns off and the indicator lights up automatically ). However, we do not recommendKeep Warm button to exit the Keep Warm function and unplug the power plug.The presetting time is desired time for eating.• Time can be preset 24 hours in advance.ExampleIf the timer is set for 18:30, cooking will be completed at 18:30.* When the preset timing is less than the required timing .※ M consumed. Please contact authorized service center for replacement.Operations1Press button to select function.• Applicable functions for timer setting:indicator lights up.When the display shows as followsDetailsCooking problemsKeep Warmproblems No powerStrange sound occursToo hardUndercookedToo softWater over fl owBurnt rice at bottom of panColor changeBad smellToo dryWrong rice and water proportion. ●●●●●●Pull out plug and check the socket.Sound occurs because of water that has stuck to pan.Inadequate washing of the rice.●●●●Foreign matters between pan and cast heater. ●●●●Cooking with a lot of oil.●●●●●The rice has been warmed more than 12 hours. ●●●The outer lid is not securely closed. ●●●●●The pan is not adequately washed.●●The power cord is not connected to the socket securely.●●DetailsBaking Cake/Bread problemsNo powerStrange sound occursUndone Cake/BreadUndercooked Cake/BreadWet Cake/BreadThe Cake/Bread sticks to the base of panBottom of the Cake/Bread burntNot fl uffedCrumblyToo much dough.●●Pull out plug and check the socket.Sound occurs because of water that has stuck to pan.Not enough mixing before baking.●●●Used with incompatible cake mix.●●●●Used with cake mix that contains too much chocolate, sugar or fruit ingredients.●●●●Outer lid not close while cooking.●●●Foreign matters between pan and cast heater.●●●●●Not enough butter or cooking oil applied to the bottom of the pan.●Cake/Bread left in the pan too long.●●Inadequate mixing or mixed too long.●●Wrong ingredient quantity.●●●●Rice CookingCake/Bread BakingModel No. Power Source 120 V g 60 HzPower Consumption In the Cooking function 775 WIn the Keep Warm function 86.9 W81 WCapacityWhite Rice 2 - 10 cups 1 - 5.5 cups Jasmine 2 - 10 cups 1 - 5.5 cups Multi Grain 2 - 8 cups 1 - 4 cups Quinoa 2 - 4 cups 1 - 2 cups Quick Cook 2 - 10 cups 1 - 5.5 cups Brown Rice 2 - 6 cups 1 - 3 cups Sticky Rice 3 - 6 cups 1 - 3 cups Porridge0.5 - 2 cups0.5 - 1 cup Cake/Bread500 g500 g Soup/Slow Cook 3.2 L 1.8 LDimensions (Height х Length х Width) (approx.) 241 х 385 х 261 mm201 х 385 х 261 mm Weight (approx.) 3.4 k g 3.1 k gKeep Warm 12 hours• For power cord replacement and product repair, please contact Panasonic authorized service center.• The design and specifi cations are subjected to change without prior notice.*1 Cooking time may vary depending on supply voltage, room temperature, kind of rice, cooking quantity,water quantity and water temperature.*2 Rice cooked (white rice at minimum cooking quantity) within 15 minutes. (Under Panasonic test method)。
捷赛自动烹饪锅
捷赛自动烹饪锅捷赛自动烹饪锅:给你带来的智能烹饪革命随着科技的快速发展,智能家居产品成为现代家庭中不可或缺的一部分。
而在各种智能家居产品中,捷赛自动烹饪锅无疑是一款备受青睐的厨房神器。
捷赛自动烹饪锅的出现,为我们带来了极大的便利和愉悦的烹饪体验。
今天,我们就来深入了解捷赛自动烹饪锅,并探讨它对我们家庭生活的影响。
捷赛自动烹饪锅采用最先进的科技设计,结合了高效加热系统和智能化控制面板,使得烹饪变得如此简单与快捷。
不需要繁琐地操作,只需轻轻一触,捷赛自动烹饪锅就能根据菜谱智能调整加热时间和温度,为你制作出一道道美味的佳肴。
它能够满足各种烹饪需求,从煮、炒、炖、炸到蒸,应有尽有。
捷赛自动烹饪锅的智能化特点让它成为当代厨师的最佳助手。
通过先进的传感技术,它能够实时检测食材的温度和湿度,以确保每一道菜的口感和营养价值。
而且,捷赛自动烹饪锅内置了大量经典菜谱,我们不需要去背诵复杂的菜谱步骤,只需按下按钮,捷赛烹饪锅就会自动调整温度和时间,让每一道菜品都能达到最佳烹饪效果。
此外,捷赛自动烹饪锅还注重用户的健康饮食需求。
它采用了非粘涂层和304不锈钢材质,确保食物的健康与安全。
同时,捷赛自动烹饪锅还具备智能的防灼保护措施,当锅内温度过高时,它能自动停止加热,避免食物烧焦和阳性反应的发生。
这让我们无需担心烹饪过程中的安全问题,只需享受烹饪的乐趣。
除了智能化和健康饮食方面的优势,捷赛自动烹饪锅还具有节能环保的特点。
它运用了高效加热系统和节能技术,能够确保烹饪的同时最大限度地减少能源的浪费。
与传统的烹饪方式相比,捷赛自动烹饪锅能够节省大量的时间和电力资源,让我们的生活更加环保和便捷。
此外,捷赛自动烹饪锅还采用了一体化设计,方便清洁和储藏。
它内置的传感器和控制系统可以拆卸,让我们可以轻松地清洁。
而且,它的外观设计时尚简约,体积小巧,不占用太多的厨房空间,还可以轻松地收纳。
捷赛自动烹饪锅的问世,无疑给我们的厨房带来了巨大的变革。
BOSCH 多功能料理烹饪机 COOKIT MCC9555CWC 使用说明书

zh2更多信息,请参考《数字用户指南》。
目录1安全性 (4)1.1一般注意事项 (4)1.2使用范围 (4)1.3用户群的限制 (4)1.4安全须知 (5)2避免材料损坏 (8)3环境保护和节约 (8)3.1处理包装材料 (8)3.2节能 (8)4安装和接通 (8)4.1拆开机器包装 (8)4.2供货范围 (9)4.3安装设备 (11)4.4清洁本机 (11)4.5放入锅具 (11)4.6安装上盖 (11)4.7接通机器电源 (12)4.8进行首次调试 (12)5了解机器 (13)5.1设备 (13)5.2图标 (15)5.3控制元件 (16)5.4触摸屏 (16)5.5感温呼吸灯 (17)5.6上盖 (17)5.7锅具 (17)6配件和附件 (18)6.1插入多功能搅拌刀 (19)6.2放入 3D翻炒桨 (19)6.3装入双联打发头 (19)6.4取下配件 (19)6.5插入带切削圆盘的片丝配件........ 206.6片丝刀盘概览.. (21)6.7配件 (21)7操作基本知识 (22)7.1开机 (22)7.2关闭电源 (22)7.3打开和关闭上盖 (22)7.4设置速度 (22)7.5使用涡轮模式 (22)7.6设置温度 (22)7.7清空锅具 (23)8时间功能 (23)8.1设置持续时间 (23)8.2更改持续时间 (23)8.3设置秒表 (24)9我的食谱 (24)9.1管理我的收藏 (24)10食谱中心 (24)10.1选择食谱 (24)10.2筛选食谱 (24)10.3准备食谱 (24)11辅助烹饪 (25)11.1使用辅助烹饪 (25)11.2辅助烹饪概览 (25)12沸点自动调节 (26)12.1设置沸点自动调节 (26)13自由烹饪 (26)13.1设置自由烹饪 (26)14清蒸 (27)14.1使用蒸篮 (27)14.2使用双层蒸架 (27)14.3设置清蒸 (28)zh315真空低温慢煮............................. 2815.1设置 真空低温慢煮................... 2816智能秤........................................ 2816.1使用智能秤............................... 2917安全系统和操作帮助................... 2917.1过载保护装置........................... 2917.2温度传感器............................... 2917.3不平衡传感器........................... 2917.4盖保险装置............................... 2917.5盖锁......................................... 2917.6溢出识别.................................. 2917.7儿童锁...................................... 2918基本设置.................................... 3018.1更改基本设置........................... 3018.2基本设置概览........................... 3019清洁和保养................................. 3119.1清洁剂...................................... 3119.2清洁概述.................................. 3119.3拆卸上盖.................................. 3219.4去除配件连接轴........................ 3219.5清洁主机.................................. 3319.6清洁多功能搅拌刀.................... 3319.7清洁双联打发头........................ 3419.8清洁锅具.................................. 3419.9锅具除垢.................................. 3419.10清洁配件连接轴...................... 3419.11使用清洁程序......................... 3420处理故障.................................... 3521处理旧机器................................. 3821.1处理旧机器............................... 3822客户服务.................................... 3822.1产品编号(E-Nr.)、制造编号(FD)及货号(Z-Nr.)........ 3822.2保修......................................... 3823技术数据.................................... 3823.1有关自由开源软件的信息.......... 3924成功的做法................................. 3924.1最佳操作方法 (39)24.2切碎 (40)24.3打泥......................................... 4024.4揉和......................................... 4024.5混合......................................... 4324.6乳化......................................... 4424.7打发......................................... 4524.8切丝......................................... 4524.9切片......................................... 4624.10清蒸....................................... 4624.11真空低温慢煮......................... 4824.12融化....................................... 5024.13煨炖和低温水煮...................... 5024.14加热....................................... 5124.15烧煮....................................... 5124.16红烧....................................... 5224.17煎炒....................................... 5325执行标准 (54)zh 安全性41 安全性请注意以下安全注意事项。
苏泊尔智能电压力锅常见故障e0e1e2e3代码拆卸维修实例图纸

苏泊尔智能电压力锅常见故障e0 e1 e2 e3代码拆卸维修实例图纸苏泊尔智能电压力锅常见故障E0 E1 E2 E3代码拆卸维修实例图纸我自己买的苏泊尔电压力锅,型号是 CYSB50FZ11-100 ,为精控火候全智能电压力锅。
因为出现“E3”故障,打开了内部,已经修好。
因为缺乏图纸参考,便四处寻找,终于得到,的确如实。
可能也属于售后维修部的内部资料吧,分享给大家。
美食家系列、精控火候全智能、全智能方形的某些型号,只是外形与内胆的差异,压力控制原理的电路控制是雷同的,关键都是上盖、底板双测温, IC程序控制,和开关电源电源板双电压(12V\18V)供电、数码显示。
以下资料,推测适用于苏泊尔电压力锅型号:1、FZ11精控火候全智能系列CYSB40FZ11-90CYSB50FZ11-1002、FC10全智能方形系列 CYSB40FC10-90CYSB50FC10-1003、FC3美食家系列 CYSB40FC3-90CYSB50FC3-100CYSB60FC3-1104、FC5美食家系列CYSB40FC3W-90CYSB50FC3W-100CYSB60FC3W-1105、YC5美食家系列CYSB40YC5-90CYSB50YC5-100CYSB60YC5-1106、FC5尚膳系列 CYSB40FC5CYSB50FC5首先是拆上盖的难题,我是摸索了半天才找到门道,真是如下图---------- 这一类别的电压力锅,电路是类似的,我亲自拆开验证了-------常见问题及报警故障代码 --------------下面是赠送的广告宣传方案不需要的朋友可以下载后编辑删除!!!!!广告宣传方案每个人在日常生活中都有意、无意的接受着广告的洗礼,继而有意戒无意的购买、使用广告中的产品和服务。
这是每个厂家所希望的,也是他们做广告的初衷。
当今社会的广告媒体大致分为:电视媒体、、电台媒体、报纸报刊媒体、网站媒体、户外广告媒体,以及最新的网吧桌面媒体。
苏泊尔 电压力锅 SY-50FC5009Q 使用说明书

“快手好菜”功能使用方法1、食谱:红烧肉食材: 五花肉350g、料酒10g、白糖5g、老抽10g、生抽10g、姜2片(约5g)蒜2瓣、水60ml 。
操作方法:五花肉洗净切小块(厚<2.5cm),所有配料置于锅内,搅拌均匀盖锅盖,按“红烧肉”功能。
2、食谱:三杯鸡食材:鸡腿肉350g、老抽5g、黑麻油5g、红尖椒1根、米酒10g、葱3-4段、姜片2片、大蒜8瓣、罗勒10g、冰糖5g、水30-40g。
操作方法:鸡腿肉切块(小于30mm),焯水去血沫,清水洗净和所有配料放入内锅,合盖,选择“三杯鸡”功能,开盖后按需要选择“开始/开盖收汁”功能进行收汁,并适当搅匀,完成后装盘。
3、食谱:啤酒鸭食材:鸭肉350g、啤酒40g、生抽10g、老抽10g、冰糖10g、胡椒粉2g、生姜15g、大蒜10g、小葱3根、红尖椒10g、桂皮4g、料酒(焯水用)适量。
操作方法:鸭肉切小块(小于30mm),焯水去血沫后洗净和所有配料放入内锅,合盖,选择“啤酒鸭”功能,完成后开盖装盘。
4、食谱:油焖虾食材:对虾350g、番茄酱10g、生抽15g、老抽10g、白糖10g、料酒15 g、大蒜4瓣、葱1根、生姜4片、食用油15g、水15g。
操作方法:对虾去虾线,清水洗净和所有食材配料放入内锅,合盖,选择‘油焖虾’功能,完成后开盖装盘。
5、食谱:营养蒸食材:生蚝4-8个、大葱半根、大蒜3瓣、小米椒2个、色拉油20-30g、酱油2勺、小葱1根、生姜1块。
操作方法:内锅中放入150g水,放入蒸笼,蒸笼上放生蚝,撒姜丝和葱丝,合盖,选择“营养蒸”功能,完成后开盖装盘。
葱姜蒜剁成沫,加入酱油和色拉油,搅拌均匀淋在生蚝上即可。
塑料陶瓷GB 4806.7-2016PP 饭勺、汤勺、量杯等GB 4806.4-2016陶瓷炖盅等GB 4806.3-2016搪瓷内锅等GB 4806.11-2016硅橡胶密封圈等涂层GB 4806.10-2016聚甲基硅氧烷涂层(铝合金3003、3103A基材)内锅等如涂层脱落,建议更换GB 4806.10-2016聚四氟乙烯涂层(镀铝板基材)烘烤篮等如涂层脱落,建议更换不得直接接触pH <5的酸性食品使用温度不得高于250℃注1:产品不宜作为容器长期存储食品,上述部件仅限与本品牌对应整机配套使用。
ELX GAS 和 ZAN GAS 品牌的 Gas 烹饪机产品说明书

SPARE PARTS CATALOGUECATALOGO PARTI DI RICAMBIOCUCINE GAS MONOBLOCCO E700XPGAS RANGES E700XP PNC Model Ref Brand Version Notes371002 E7GCGH4CG0 a ELX GAS 4-BURNER +GAS OVEN 800 MM371003 E7GCGH4CE0 c ELX GAS 4-BURNER +ELECTRIC OVEN 800 MM 371005 E7GCGL6C10 b ELX GAS 6-BURNER +GAS OVEN+CUPB.1200 MM 371006 E7GCGL6C20 d ELX GAS 6-BURNER +EL.OVEN+CUPB.1200MM 371125 E7GCGH4CEN e ELX GAS 4-BURNER +ELEC.OVEN 800MM-230V 371168 E7GCGH4CGA f ELX GAS 4-BURNER +GAS OVEN 800 MM-AUS 371169 E7GCGH4CEA i ELX GAS 4-BURNER +ELECTR.OVEN 800MM-AUS 371171 E7GCGL6C1A g ELX GAS 6-BURN.+GAS OVEN+CUPB.1200-AUS 371172 E7GCGL6C2A h ELX GAS 6-BURN.+EL.OVEN+CUPB.1200MM-AUS 372002 Z7GCGH4CG0 j ZAN GAS 4-BURNER +GAS OVEN 800 MM372003 Z7GCGH4CE0 m ZAN GAS 4-BURNER +ELECTRIC OVEN 800 MM 372005 Z7GCGL6C10 l ZAN GAS 6-BURNER +GAS OVEN+CUPB.1200 MM 372006 Z7GCGL6C20 n ZAN GAS 6-BURNER +EL.OVEN+CUPB.1200MM 372125 Z7GCGH4CEN o ZAN GAS 4-BURNER +ELEC.OVEN 800MM-230V 372148 Z7GCGH4CGA p ZAN GAS 4-BURNER +GAS OVEN 800 MM-AUS 372149 Z7GCGH4CEA r ZAN GAS 4-BURNER +ELECTR.OVEN 800MM-AUS 372151 Z7GCGL6C1A q ZAN GAS 6-BURN.+GAS OVEN+CUPB.1200-AUS 372152 Z7GCGL6C2A s ZAN GAS 6-BURN.+EL.OVEN+CUPB.1200MM-AUS 372155 Z7GCGH4CGH t ZAN GAS 4-BURNER +OVEN 800MM-HAKVOORT 372157 Z7GCGL6C1H u ZAN GAS 6-BURN.+OVEN+CUPB.1200MM-HAKV. 373002 A7GCGH4CG0 w OEM GAS 4-BURNER +GAS OVEN 800 MM373003 A7GCGH4CE0 v OEM GAS 4-BURNER +ELECTRIC OVEN 800 MM 373005 A7GCGL6C10 z OEM GAS 6-BURNER +GAS OVEN+CUPB.1200 MM 373125 A7GCGH4CEN b1 OEM GAS 4-BURNER +ELEC.OVEN 800MM-230V 373222 A7GCGH4CGK a1 KIP GAS 4-BURNER +GAS OVEN 800 MMPag Index Indice Note2 3 4 5 6-8 General componentsGas componentsBurner nozzlesElectric componentsSpare parts listComponenti strutturaComponenti gasUgelli bruciatoriComponenti elettriciLista ricambiBrand/Marchio: AllFactory code: 9PDX。