爱国者f5002说明书
Flagro Industries FVO-400 无直接燃烧空气加热器操作指南说明书

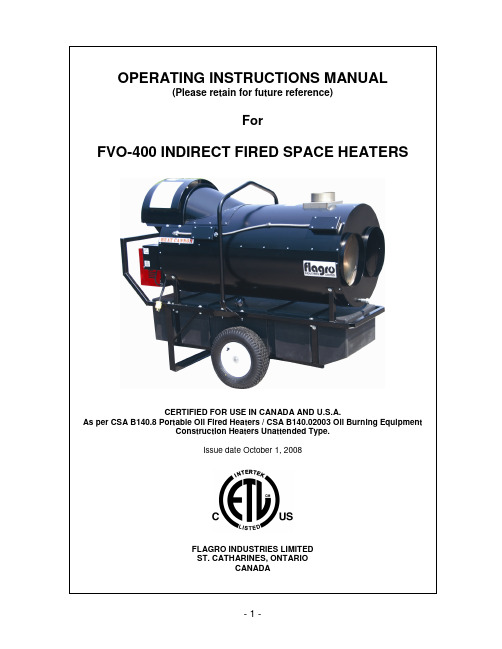
OPERATING INSTRUCTIONS MANUAL(Please retain for future reference)ForFVO-400 INDIRECT FIRED SPACE HEATERSCERTIFIED FOR USE IN CANADA AND U.S.A.As per CSA B140.8 Portable Oil Fired Heaters / CSA B140.02003 Oil Burning EquipmentConstruction Heaters Unattended Type.Issue date October 1, 2008FLAGRO INDUSTRIES LIMITEDST. CATHARINES, ONTARIOCANADAGENERAL HAZARD WARNING:FAILURE TO COMPLY WITH THE PRECAUTIONS AND INSTRUCTIONS PROVIDED WITH THIS HEATER, CAN RESULT IN DEATH, SERIOUS BODILY INJURY AND PROPERTY LOSS OR DAMAGE FROM HAZARDS OF FIRE, EXPLOSION, BURN, ASPHYXIATION, CARBON MONOXIDE POISONING, AND/OR ELECTRICAL SHOCK.ONLY PERSONS WHO CAN UNDERSTAND AND FOLLOW THE INSTRUCTIONS SHOULD USE OR SERVICE THIS HEATER.IF YOU NEED ASSISTANCE OR HEATER INFORMATION SUCH AS AN INSTRUCTIONS MANUAL, LABELS, ETC. CONTACT THE MANUFACTURER.WARNING:FIRE, BURN, INHALATION, AND EXPLOSION HAZARD. KEEP SOLID COMBUSTIBLES, SUCH AS BUILDING MATERIALS, PAPER OR CARDBOARD, A SAFE DISTANCE AWAY FROM THE HEATER AS RECOMMENDED BY THE INSTRUCTIONS. NEVER USE THE HEATER IN SPACES WHICH DO OR MAY CONTAIN VOLATILE OR AIRBORNE COMBUSTIBLES, OR PRODUCTS SUCH AS GASOLINE, SOLVENTS, PAINT THINNER, DUST PARTICLES OR UNKNOWN CHEMICALS.WARNING:NOT FOR HOME OR RECREATIONAL VEHICLE USE.WARNING:INTENDED USE IS PRIMARILY THE TEMPORARY HEATING OF BUILDINGS UNDER CONSTRUCTION, ALTERATION, REPAIR OR EMERGENCIES ONLY.ALWAYS PROVIDE ADEQUATE VENTILATION. 1 SQ. IN. OF FRESH AIR MUST BE SUPPLIED FOR EVERY 1000 BTUH OF HEAT.THIS HEATER SHALL BE INSTALLED SUCH THAT IT IS NOT DIRECTLY EXPOSED TO WATER SPRAY, AND/OR DRIPPING WATER.This heater is designed and approved for use as aconstruction heater under CSA B140.8 Portable OilFired Heaters / CSA B140.02003 Oil Burning Equipment.We cannot anticipate every use which may be madeof our heaters. CHECK WITH YOU LOCAL FIRESAFETY AUTHORITY IF YOU HAVE QUESTIONSABOUT APPLICATIONS.Other standards govern the use of fuel gases and heatproducing products in specific applications. Your localauthority can advise you about these.SPECIFICATIONSModel …………………………………………………….…. FVO-400 Input …………………………………………………….…... 390,000 btuh Fuel …………………………………………………………. No.1, No. 2,diesel orkerosene Fuel Pressure …………………………………………….... 170 psi Nozzle ………………………………………………………. 2.25 x 45B (Delavan)Ignition ………………………………………………………. Direct Spark …….……………………………………………...…. ThermostatControlAir Circulation ………………………………………………. 2500 cfm Fuel Consumption ………………………………………...... 2.75 Gal/hr Approved …………………………………………………...... cETLus listedINSTALLATION:The installation of this heater for use with No.1, No.2, Diesel or Kerosene and shall conform with local codes or, in the absence of codes, with the National Fuel Gas Code ANSI Z223.1/NFPA 54. Installation of the unit shall be in accordance with the regulations of the authorities having jurisdiction or the CSA Standard B139.CLEARANCE TO COMBUSTIBLES:TOP FRONT SIDES REAR FLUE PIPE3 ft 10 ft 3 ft 3 ft 3 ft FUEL:This heater will operate with No.1, No.2, Diesel or Kerosene.Note:No.1 Fuel Oil or Kerosene must be used fortemperatures less than –10º C (8º F).ELECTRICAL:WARNINGElectrical Grounding InstructionsThis appliance is equipped with a three-prong (grounding)plug for your protection against shock hazard and should beplugged directly into a properly grounded three-prongreceptacle.115v supply must be available. Please note that the heaterrequires 15 amps for proper operation. Ensure appropriategauge extension cord is used.• 12/3 AWG at 50 Feet• 10/3 AWG at 100 FeetFLUE PIPE: Flue pipe connection must terminate with a vertical run atleast 2ft long.The vent outlet on the heater is 6” diameter. Certified ventingmust be used at all times. Vent cap should be installed insituations where downdrafts occur. All venting mustcorrespond with the CSA B149 standard or in its absence,local codes.FV SERIES CONSTRUCTION HEATER – VENTING REQUIREMENTS1. VERTICAL FLUE TERMINATIONSDFLUE OUTLET OF HEA TER2. HORIZONTAL FLUE TERMINATIONSFLUE OUTLET OF HEAALLA - VENT TERMINATION MUST BE A MINIMUM OF 2FT HIGHER THAN ANY POINTWITHIN 10FT.B - MAXIMUM HORIZONTAL RUN IS 30FT.NOTE: 90deg ELBOW = 10ft HORIZONTAL VENT ALLOWANCE45deg ELBOW = 5ft HORIZONTAL VENT ALLOWANCEC - VENT TERMINATION IN HORIZONTAL POSITION MUST BE MINIMUM 4ft FROM ANYCOMBUSTABLE SURFACED - EXTERIOR VERTICAL VENT TERMINATION MUST BE A MINIMUM OF 2ft.NOTE: ALL VENT TERMINATIONS MUST HAVE A RAIN CAP INSTALLED AS PER LOCAL CODE REQUIREMENTS.DUCTING: Canvas heater duct with a minimum temperature handling of300 deg F. including wire reinforcement to prevent collapsing.Heater is designed for use with 2 x 12” diameter ductsequipped with pin lock couplings (FV-D12).Install ducting to outlet on the heater using pin-locks providedon collar of ducting. Ducting should be inspected periodicallyfor tearing and/or wear marks. Ducting should be stored in adry area when not in useMAINTENANCE:1. Every construction heater should be inspected before each use, and atleast annually by a qualified service person. Incorrect maintenance my result in improper operation of the heater and serious injury could occur.2. Service and Maintenance only to be performed by a qualified service person.3. The hose assemblies shall be visually inspected prior to each use of theheater. If it is evident there is excessive abrasion or wear, or the hose is cut, it must be replaced prior to the heater being put into operation. The replacement hose assembly shall be that specified by the manufacturer.4. The flow of combustion and ventilation air must not be obstructed. Be sure tocheck the fan assembly and ensure that the motor and blade are operating properly.5. Compressed air should be used to keep components free of dust and dirt buildup. Note: Do not use the compressed air inside any piping or regulator components.6. Change fuel filter insert (Part# FVO-418) once per month. Change fuel filtercartridge (Part# FVO-419) once every 6 months.7. Change oil nozzle (Part# FV-435) once per year.8. Fan Limit Switch (Part# FV-407A) should be replaced if the fan motor does notshut off after the heat exchanger has cooled down.9. The High Limit Switches (Part# FV-406 & FV-437) should be checked eachseason. These limit switches will ensure the burner shuts down if the temperature exceeds 150º F at rear of unit and 290º F at the outlet.10. Fuel tank should be drained on a regular basis by removing drain plug.11. CAUTION – Do not have any source of ignition near the heater when drainingtank.NOTE: No.1 fuel oil or kerosene is recommended for temperatures below -10º C / 8º F11. Heat Exchanger should be cleaned if smokey conditions continue even afterthe air adjustments on the burner are made.START UP INSTRUCTIONS:1. Be sure the switch in is the “OFF” position.2. Ensure electrical cord is grounded and heater is on a level surface.3. Plug in supply cord to 115V 15amp outlet.4. Move switch to “MANUAL” position for manual control.5. Move switch to “THERMOSTAT” position for thermostatic control. Please Note:1. If using Thermostat on unit, unit must be started in Thermostat position.2 When changing between manual and thermostat operation, the heatermust be left in the “OFF” position for 30 seconds to prevent the burner from locking out.3. When using a generator for electrical supply, make sure the generatoris properly grounded and generator is at a 60Hz frequency.4. In the event that a Generator is being used and the generator runs out offuel, make sure the heater switch is in the “OFF” position before restarting generator, failure to do so may damage heater.TO SHUT DOWN:1. Move switch to “OFF” position.NOTE: Fan will continue to operate after the burner shuts down. Once the unit cools down, the fan will stop.IF HEATER FAILS TO START:1. Press manual reset button at rear of burner.2. Check fuel level. There must be 2-4 gallons of fuel in the tank for theheater to start properly.3. Make sure there are no air locks in fuel lines or filter.4. Ensure proper power supply and extension cord is being used.5. Check for dirty fuel filter or blocked fuel supply line.6. Check burner nozzle assembly.NOTE: IF THE BURNER HAS BEEN RESET SEVERAL TIMES THERE MAY BE AN ACCUMULATION OF OIL IN THE CHAMBER! DO NOT CONTINUE TO TRY AND START THE HEATER!DRAIN OIL FROM HEAT EXCHANGER USING DRAIN HOLE AT FRONT OF HEAT EXCHANGER FOR 15-20 MINUTES BEFORE ATTEMPTING TO RELIGHT. LET REMAINING EXCESS OIL BURN OFF BEFORE CHECKING COMBUSTION OF UNIT.SAFE OPERATION PRECAUTIONS:1. Do not fill fuel tank while heater is operation.2. Do not attempt to start heater if excess oil remains in the heatexchanger.3. Use switch to shut down the heater. Do not try to shut down the heaterby unplugging the electrical cord.4. Do not plug anything other that the thermostat into the “Thermostat”plug.5. Do not use any fuel other that those listed on rating plate.6. Follow electrical requirements shown on rating plate and/or Electricalrequirements section of this manual.7. Before removing any guards or performing any maintenance, be surethat the main power supply is disconnected.COMBUSTION AIR ADJUSTMENTS:NOTE: Proper combustion air adjustment must be achieved using a certified combustion analyzer and smoke tester to ensure completecombustion.The air adjustment should be made to achieve 10% CO2and No. 1 or “trace” smoke. (Bacharach Scale)SETTING THE AIR ADJUSTMENT PLATEA) Regulation of thecombustion air flow is madeby adjustment of the manualAIR ADJUSTMENT PLATE(1) after loosening the FIXINGSCREWS (2 & 3). The initialsetting of the air adjustmentplate should be madeaccording to Column 5 in theBurner Set-up Chart.B) The proper number on themanual AIR ADJUSTMENTPLATE (1) should line up withthe SETTING INDICATOR (4)on the fan housing cover.Once set, the air adjustmentplate should be secured inplace by tightening SCREWS2 and 3.C) The final position of the airadjustment plate will vary on each installation. Use instruments to establish the proper settings for maximum COand a smoke reading of zero.2NOTE: Variations in flue gas, smoke, COand temperature readings may be2experienced when the burner cover is put in place. Therefore, the burner cover must be in place when making the final combustion instrument readings, to ensure proper test results.BURNER SET-UP CHART1 2 3 4 5ACTUAL FIRING RATE± 5%NOZZLESIZEPUMP PRESSUREGPH GPH PSI BAR TURBULATORSETTINGAIRDAMPERSETTING2.75 2.25 x 45°150 10 54 - 6* Note – Air damper setting is typically set at 4 for operation in coldertemperatures. A combustion analyzer should always be used when setting the the burner.TEMPERATURE FEELER GAUGE ADJUSTMENT(ATTACHED TO FAN SWITCH)The temperature feeler gauge is required to be always touching the heater exchanger.The temperature feeler gauge controls the air flow over the fan switch, which eliminates any unnecessary fan cycling. The temperature feeler gauge can be adjusted for different outside temperatures, by rotating the location of the temperature feeler gauge holes. This will provide maximum performance of the unit in different applications.If supply air is warm (-5º C, indoor application):Turn the temperature feeler gauge so that the holes are parallel with the heat exchanger. This will help the fan switch to remain cool and not overheat. See following:If supply air is cold (under -5ºC):Turn the temperature feeler gauge so that the holes are closed off as the air goes over the heat exchanger. This will reduce fan cycling and the unit from shutting down. See following:In extreme cold conditions, cover the holes on the temperature feeler gauge using foil tape. Ensure that the temperature feeler gauge is readjusted for warmer weather conditions. Failure to do so may result in burning out fan switches- notcovered under warranty.ELECTRICAL CONNECTIONSIt is advisable to leave the control box off the sub-base while completing the electrical connections to the burner.The burner may be controlled using either a DIRECT LINE VOLTAGE control circuit (120V AC 60 cycle) OR a LOW VOLTAGE control (24V AC 60 cycle) using a R8038A Honeywell switching relay or equivalent.Using the appropriate diagram below, make electrical connections to the burner. All wiring must be done in accordance with existing electrical codes, both national and local.When all electrical connections have been made, the control box may be put back in place on the sub-base.WARNING: DO NOT activate burner until proper oil line connections have been made, or failure of the pump shaft seal may occur.APPLICATION FIELD WIRINGREMOTE SENSING OF SAFETY LOCKOUT: The SAFETY SWITCH in the 530SE CONTROL BOX is equipped with a contact allowing remote sensing of burner lockout. The electrical connection is made at terminal 4 (●) on the SUB-BASE. Should lockout occur the 530SE CONTROL BOX will supply a power source of 120Vac to the connection terminal. The maximum allowable current draw on this terminal (4) is 1 Amp.WARNING: If a neutral or ground lead is attached to this terminal, the CONTROL BOX on the burner will be damaged should lockoutoccur.INSERTION / REMOVAL OF DRAWER ASSEMBLYA) To remove drawer assembly, loosen SCREW (3), then unplug CONTROLBOX (1) by carefully pulling it back and then up.B) Remove the AIR TUBE COVER PLATE (5) by loosening the two retainingSCREWS (4).C) Loosen SCREW (2), and then slide the complete drawer assembly out of thecombustion head as shown.D) To insert drawer assembly, reverse the procedure in items A to C above, andthen attach fuel line to the pump.NOZZLE PLACEMENTA) Remove the NOZZLE ADAPTER (2) from the DRAWER ASSEMBLY byloosening the SCREW (1).B) Insert the proper NOZZLE into the NOZZLE ADAPTER and tighten securely(Do not over tighten).C) Replace adapter, with nozzle installed, into drawer assembly and secure withscrew (1).ELECTRODE SETTINGTURBULATOR SETTINGA) Loosen NUT (1), then turn SCREW (2) until the INDEX MARKER (3) is alignedwith the correct index number as per the Burner Set-up chart, on page 12.B) Retighten the RETAINING NUT (1)NOTE: Zero and five are scale indicators only. From left to right, the first line is5 and the last line 0.OIL LINE CONNECTIONSNote:Pump pressure must be set at time of burner start-up. A pressure gauge is attached to the PRESSURE PORT (8) for pressure readings. Two PIPE CONNECTORS (5) are supplied with the burner for connection to either a single or a two-pipe system. Also supplied are two ADAPTORS (3), two female 1/4” NPT, to adapt oil lines to burner pipe connectors. All pump port threads are British Parallel Thread design. Direct connection of NPT threads to the pump will damage the pump body. Riello manometers and vacuum gauges do not require any adaptors, and can be safely connected to the pump ports. An NPT (metric) adapter must be used when connecting other gauge models.。
APDQO-F系列产品说明书

For 200L openAir type (with filter ) cleaner for drum can Manual■APDQO-FItems1 ・・・・・・・For Safety1 ~3 ・・・・・・・Attention before the use4・・・・・・・Operation Conditions4 ~7 ・・・・・・・How to fix8 ・・・・・・・How to use9 ・・・・・・・Trouble shootingFilter Maintenance10 ~12 ・・・・・・・Specifications, ExternalDimensions and Part List13 ・・・・・・・Assurance & After ServiceFor Safety:・ This Manual covers important points for safe and correct operation.We request all the users/dealers/distributor to read this Manual carefully and understand correctly, before this Product is used. (Incorrect operation may result in troubles and/or accident)・ Be noted to keep this Manual properly, so that the Manual can be immediatelyread at any time, whenever needed.DangerWarningCautio nAttention before the useDanger○Operate the Product correctly, after the manual for liquid is carefully read.Warning・・・・・・・・・・・・・・・・・・・・・・・・・・・・・・・・・・・・・・・・・・・・・・・・・・・・・・・・・・・・・・・・・・・・・・・・・・・・・・・・○Operate at safe places only:Operate at safe places only, where no infants/children play.Keep watching while operated.・・・・・・・・・・・・・・・・・・・・・・・・・・・・・・・・・・・・・・・・・・・・・・・・・・・・・・・・・・・・・・・・・・・・・・・・・・・・・・・・○Contact a doctor:Whenever the operators feels uncomfortable during theoperation, immediately contact a doctor.・・・・・・・・・・・・・・・・・・・・・・・・・・・・・・・・・・・・・・・・・・・・・・・・・・・・・・・・・・・・・・・・・・・・・・・・・・・・・・・・○Wear the protectives:Always wear the protectives, according to the liquid manual. ・・・・・・・・・・・・・・・・・・・・・・・・・・・・・・・・・・・・・・・・・・・・・・・・・・・・・・・・・・・・・・・・・・・・・・・・・・・・・・・・○Do not disassemble, repair and/or remodel:Unauthorized person is not allowed to disassemble, repairand/or remodel the Product.・・・・・・・・・・・・・・・・・・・・・・・・・・・・・・・・・・・・・・・・・・・・・・・・・・・・・・・・・・・・・・・・・・・・・・・・・・・・・・・・○Always use new liquid:Whenever the liquid is changed, be sure to wipe previousliquid out, completely wash away, and then apply newliquid. Once the liquids are mixed together, chemicalreaction may be generated.・・・・・・・・・・・・・・・・・・・・・・・・・・・・・・・・・・・・・・・・・・・・・・・・・・・・・・・・・・・・・・・・・・・・○Acceptable temp. for the liquid:Acceptable temp. for the liquid is 0-60℃.・・・・・・・・・・・・・・・・・・・・・・・・・・・・・・・・・・・・・・・・・・・・・・・・・・・・・・・・・・・・・・・・・・・・Caution・・・・・・・・・・・・・・・・・・・・・・・・・・・・・・・・・・・・・・・・・・・・・・・・・・・・・・・・・・・・・・・・・・・・・・・・・・・・・・・・○Contact us for inspection or repairIn case the Product does not properly work or anythingabnormal is found, immediately stop the operation, andcontact your purchase shop for inspection or repair.Otherwise, it may cause an accident or injury.・・・・・・・・・・・・・・・・・・・・・・・・・・・・・・・・・・・・・・・・・・・・・・・・・・・・・・・・・・・・・・・・・・・・・・・・・・・・・・・・○Do not shock the Product:The shock may trouble normal function, and may causetrouble and/or liquid leakage.・・・・・・・・・・・・・・・・・・・・・・・・・・・・・・・・・・・・・・・・・・・・・・・・・・・・・・・・・・・・・・・・・・・・・・・・・・・・・・・・○After used, completely take the liquid in a cleaner out:The remained liquid may cause the rust, which may cause trouble or ruin the performance.○Remove the moisture in the pressed air:In case of handling the liquid, remove the moisture in the compressed air by air-filter. (Separately sold)○In case the product is moved or a person in chargeis changed:Always attach this Manual with the Product ortransfer together.○In case this Manual is lost or damaged:Please order to sales shop.○APDQO-F is for indoor application only:In case used outdoor, be sure to apply the cover or to operate in a hut, so that the product is protected from wind and/or rain.○The installer/seller of this Product is requested:To pass this Manual to the person in charge of the operation. ○Be sure to use the compressor with 5Hp or higher.(0.4~0.6MPa)○This Product is designed for a drum can applicationDo not use for any other applications.○If the air is filled in, the air is discharged from theexit mouth. Pay attention for its direction.○Just before the tank is full, the liquid may get outtogether with discharged air.○Be sure to use the hose with dia.3/8 or bigger:If the hose dia.is not big enough, the pressureis ruined, resulting in less performance.(The couple with 20PM is attached)3OperationOperation Condition1. Apply to 200L Open Drum can (JIS Specification)2. Supplying Air Pressure :0.4~0.6MpaHow to Fix※ This product is packed.※ As total weight is 38.5Kg, be careful for handling, when fixed.Carry on fixing, according to the procedures ① to ⑩.① shows when unpacked.② Shows to fix the ejector and float portion as shown in ②.※ Open drum can is notattached.① ②EjectorFloatO Ring(P22A)③ Discharging pipe to be fixed.④ Place it on a drum can.※As the weight is 35Kgs,be careful for handling.⑤ Firmly fix the Product and a drum can with the band⑥ Unscrew 3 knobs and open the lid .⑥③④⑤Outside Lever Band One Side Long Nipple⑦Fix plate (filter) and O ring (P195) on filter (small) ,as below picture shows.Fix filter (small) and filter (large) in order.⑧Close the lid, and screw it with 3 knobs.Filter (Small)Filter (Large)Plate (filter)O Ring(P195)⑨Attach fix hose and hose band.⑩Connect the head of ball valve and discharging/suction pipe, and hose crip (large) to the hose.Then, fixing job is completed.How to use1.Make sure the lid is screwed with 3 knobs.2.Make sure supply pressure is strong enough(0.4~0.6Mpa).3.Supply the compressed air to the coupler of ①ejector ASSY.(Equivalent to NITTO-KOUKI 20PM)【Collection to a drum can→to stop】1.Connect a coupler (air hose, equivalent toNITTO KOUKI 20PM) to air coupler (B).2. Turn ejector (A) to IN side.3. Turn valve (C) to IN side.4. Open air coupler (B).5. Open ball valve(D).Then, the collection job is possible.6. Open ball valve (D)7. Close air coupler (B)Then, you can stop operation.【The discharge from a drum can→to stop】1. Connect a coupler (air hose, equivalent toNITTO KOUKI 20PM) to air coupler(B).2. Turn ejector(A) to OUT side.3. Turn valve (C) to OUT side.4. Open air coupler (B).5. Open ball valve (D).Then, you can start discharging.6. Close ball valve (D)7. Close air coupler (B)Then, you can stop the operation.As the pressure is kept in a drum can, keep ejector knob (A) to IN side.(D)(A)(C)(B)Trouble Shooting1.In case suction function does not work, make sure● If air-hose is firmly connected.● If air valve is open.● If a drum can is not deformed or damaged.● If a hose or filter is not clogged.2.In case suction volume is not much enough, make sure● If the pressure to the pump is strong enough (0.4~0.6Mpa).● If air valve is fully open● If viscosity is not too highIf anything unusual is found, be sure not to disassemble the Product. Please contact us or purchase shop.Filter MaintenanceFilter (small) (150μm) andfilter (large) (40μm) are kept inside.Open the lid, and take filter (small) andfilter (large) out, as right picture shows.As stainless is used, periodically washwith water, washing liquid, or air blow etc.※Always wear protection glasses, and carefullytake care of splashing maching dust etc.SpecificationsExternal DimensionParts List:Assurance・After ServiceThank you for choosing our product. Our product is produced strictly under our regulations and quality control. However, if any of the defects, related with our production processes, is found, our assurance covers, according to the below limitation.1.To repair:To order the parts or request for repair, prepare to inform us Part No., Mfg No.,the purchased date with the receipt and then contact the purchased shop.2.Within 12 months after the purchased date, if the below case* happens, we willrepair it at free of charge.* Despite of regular maintenance and/or inspection specified in Manual, ifthe trouble or damage happens due to the defect of our design or assembling,within 12 months from the purchased date.※However, we are not responsible for all and any expenses or other damagesrelated with the above trouble and/or damage due to the defect of the product.※When the free repair is taken care, if the part replacement is judged necessaryby us, as the consumables, the expenses for such replaced parts shall be borneby the user.3.If the assurance period of 12 months is over, or the above assurance conditiondoes not meet even within the assurance period of 12 months, the repairing expenses shall not be covered by us, but borne by the user.(Also, in case our product is applied to other manufacturer’s product, we takeno responsibility and our assurance cannot be applied)4.In any case, delivery cost both to us and from us shall be borne by the user/customers.5.Exception from our responsibility (even within 12 months from purchased date)①Any problems, due to wrong handling (not following our Manual)②Any problems, due to repair, disassemble or remodel by a third party.③Any problems, due to improper storing or improper maintenance.④Any problem, without evidence to show the purchase of our product, suchas invoice or receipt etc.⑤Unusual part consumption, due to heavy uses.Contact the below for any question/request on the repair or after-servicewithin assurance period.。
爱国者平板电脑使用说明书

联系我们
爱国者电子 公司名称:爱国者电子科技有限公司 地址:北京市海淀区北四环西路58号理想国际大厦1006室 网址: 邮政编码:100080 阳光服务热线: 400-610-6666
5
目
录
第 一 章 认识您的 aigoPad................................................................................ 7 1.主要功能.................................................................................................................... 7 2.包装内容.................................................................................................................... 7 3.按键说明.................................................................................................................... 7 第 二 章 准备使用............................................................................................... 8 1.充电............................................................................................................................ 8 2.连接电脑传输文件..................................................................................................... 9 3.插入存储卡.................................................................................................................9 4.开/关机.................................................................................................................... 10 5.主界面...................................................................................................................... 10 6.使用虚拟键盘........................................................................................................... 11 7.使用触摸屏或按键................................................................................................... 12 第 三 章 使用您的 aigoPad.............................................................................. 12 1.无线上网.................................................................................................................. 12 2.资源管理器.............................................................................................................. 13 3.播放视频.................................................................................................................. 14 4.播放音乐.................................................................................................................. 16 5.浏览图片.................................................................................................................. 19 6.录音.......................................................................................................................... 20 7.相机.......................................................................................................................... 21 8.电子邮件.................................................................................................................. 23 9.管理应用程序.......................................................................................................... 26 10.其它功能................................................................................................................ 26 11.系统设置................................................................................................................ 27 第四章故障诊断.......................................................................................................... 29 第五章技术规格.......................................................................................................... 30
爱国者h5说明书

aigo无线硬盘客户端软件使用说明V

爱国者无线硬盘 客户端软件使用说明V3.1目录免责声明 (3)特别提示: (4)一、设备的准备与连接 (4)1.1开机 (4)1.2 WiFi信号的连接 (4)1.2.1 Windows 平台 (4)1.2.2 iOS 平台 (5)1.2.3 Android 平台 (8)1.3移动网络存储服务器(移动NAS)模式 (12)二、客户端软件的安装 (13)2.1 Windows 平台 (13)2.2 iOS 平台 (14)2.3 Android 平台 (14)三、Windows客户端软件的界面说明 (17)四、iOS、Android客户端软件的界面说明 (18)4.1登录设备 (18)4.2 DLNA目录 (20)4.3文件播放 (22)4.3.1视频播放 (22)4.3.2音乐播放 (23)4.3.3图片浏览 (24)4.3.4文档浏览 (24)4.3.5 DLNA推送 (25)4.3.6 AirPlay功能 (26)4.4文件管理 (27)4.4.1分享按钮 (29)4.4.2操作按钮 (30)4.4.3传输按钮 (33)4.5设置界面 (35)4.5.1设备设置 (36)4.5.1.1无线设置 (36)4.5.1.2局域网设置 (38)4.5.1.3互联网设置 (39)4.5.1.4系统设置 (43)4.5.2来宾用户 (45)4.5.3缓存设置 (46)4.5.4语言设置 (46)4.5.5关于 (47)4.5.6注销 (47)五、使用第三方软件进行访问 (48)由于产品的更新,本手册中的图片和文字可能与您的设备中显示的图文略有不同,某些细微的变更将不会影响您的操作,请以实物操作为主。
一、感谢您购买爱国者无线硬盘产品。
在使用本产品之前,请认真阅读快速使用说明和本说明书。
当您开始使用爱国者无线硬盘产品时,爱国者电子认为您已经认真阅读了本说明书。
二、本产品为移动存储产品,用于用户数据的冗余备份,请用户在使用过程中及时对其中的数据进行备份。
胜利仪器 VICTOR 851E 851F 851G测距测速望远镜说明书

1、图符“ ” 2、字符“ ” 3、图符“ ” 4、图符“ ” 5、图符“ ” 6、图符“ ” 7、图符“ ” 8、图符“ ” 9、图符“ ”
03
速度模式标志; 测距模式标志; 电池电量标志; 旗杆锁定模式标志; 靶心指示标志; 直线距离数据显示; 速度、直线单位显示; 垂直高度数据显示; 水平距离数据显示;
06
下图是测量结果示意图:
-30° 512M 256M
443M
《每隔0.5秒在高度和角度之间切换》
425M
27° 397M
193M
《每隔0.5秒在高度和角度之间切换》
如果按住 键不松开,则开始扫描测距,屏幕左上方 显示扫描字符“ ”,随着目标的改变,直线距离数 据不断地刷新显示,同时角度,水平距离和垂直高度也 会不断地刷新显示,松开 键,则停止测距。
多功能激光测角、测距仪融聚了最新科技,同时实现 了目标测距离和测角度的测量功能。在获得目标测距离的 同时,还可同时显示望远镜至目标点连线与地平面的夹角 (仰角为正,俯角为负)、相对高度和水平距离。
仪器的激光发射功率小、对人眼安全;不需要配对目 标,可对任何目标测距;体积小,重量轻,便于携带。机 内使用可循环充电锂电池供电。
屈光度调节:调节屈光度用于在目镜显示屏上获得清晰 的影像,首先,启动电源,接着逆时针转动目镜环直至 显示屏获得清晰的对焦。
注意事项
多功能测距仪发射出不可见、无损视力的红外脉冲激光, 然后将其从选定目标反射回光学接收器中。通过测量每 个脉冲激光从测距仪到目标并返回所花的时间,系统采 用先进的精确充电电路来即时计算出被测距离。该设备 的最大测量范围取决于目标的反射率、颜色、表面光洁 度尺寸和实际形状。
胜利仪器 VICTOR 5000电能质量分析仪说明书

警告感谢您购买了本公司的VICTOR5000电能质量分析仪,为了更好地使用本产品,请一定:——详细阅读本用户手册。
——严格遵守本手册所列出的安全规则及注意事项。
◆违规使用仪器可能导致触电、爆炸或火灾。
★任何情况下,使用本仪器应特别注意安全。
★注意仪器面板及背板的标贴文字及符号。
★使用、拆卸、维修本仪表,必须由有授权资格的人员操作。
★由于仪器原因,继续使用会带来危险时,应立即停止使用,并马上封存,由有授权资格的机构处理。
★仪表及手册上的“”危险标志,使用者必须依照指示进行安全操作。
★★当移除或更换电池或SD卡时,请确保断开测量导线、电流钳、电源适配器并关闭电源。
★电流钳必须与仪表对应连接,否则测试误差可能增大。
★如果电池或SD卡插槽缺失、被破坏或未正确安装,请勿使用仪器。
★任何与本仪器无关的系统安全问题,由该系统的建立、运营商负责。
★出于您的安全考虑,请仅使用随设备所附带的导线和配套附件(符合IEC61010-031(2002)标准)。
当低电压等级的传感器或附件连接至设备时,该低电压等级传感器或附件必须适用于该系统。
★使用前请经常检查测试导线、电流钳和附件处于最佳状况。
任一导线、电流钳或附件,如果绝缘受损(甚至只是部分受损),都必须维修或报废。
★遵从环境状况。
(参阅15.3.1)★若环境需要,请使用个人安全保护设备。
★该仪器必须使用在对地交/直流电压不大于600V的第IV类装置设备(IEC61010-1标准),或使用在电压不大于1000V的第Ⅲ类装置设备。
禁止在更高的电压网络或类型下使用。
★仅使用生产商所提供的电源适配器或电池组,它们具有特定安全等级。
★遵循附件或电流钳的安全级别限制,避免和未使用的终端连接。
★危险电压下某些电流钳不能从暴露的导体上安装或移除。
◆使用和连接步骤:★开启仪器。
★根据所需结果并参照网络类型设置仪器相关参数。
★连接电压测试导线和电流钳到仪器上。
★将地线和(或)中性线的电压测试导线连接到电网的地线和(或)中性线。
Shure ADX2FD 手持式发射机用户指南说明书

ADX2FD手持式发射机ADX2FD Frequency Diversity Handheld Transmitter User Guide Version: 7 (2019-D)Table of ContentsADX2FD手持式发射机3警告3 ADX2FD 手持发射机3特性3性能 3设计 4电源 4附带组件4选择以下 Shure 话筒拾音头之一 (1): 4可选配附件4选配 Shure 话筒拾音头: 5 ADX2FD 发射机概览5发射机控制6主屏幕显示6锁定界面7 Shure 可充电电池7检查电池信息 8 Shure 充电电池保养和存储的重要提示 8电池安装 9 ADX2FD SB920 电池工作时间 9菜单参数9编辑菜单参数提示 10菜单地图 10菜单参数说明10无线电菜单 10音频菜单11工具菜单11红外同步12手动设置频率13射频静音13 Safe Start 14在频率分集模式下工作14关闭频率 2 (Freq 2) 14输入过载14音频发生器15匹配音频电平与话筒偏移15 ShowLink 测试16更新固件16固件版本 16更新发射机 16规格16频段和发射机射频功率19澳大利亚无线警告21许可信息21认证21 Information to the user 22•••••••••••••••••••◦◦•◦ADX2FD手持式发射机警告电池组可能爆炸或释放有毒物质。
火灾或烧伤风险。
不要拆开、挤压、修改、拆卸、或加热到 140°F (60°C) 以上或焚烧。
遵循制造厂商的说明只能使用舒尔充电器为舒尔可充电电池充电警告:换用不正确的电池可能出现爆炸危险。
只能更换相同的,或型号相当的电池。
禁止将电池放入口中。
如果吞入,请与外科医生或当地的毒物控制中心联系不要将电池短接,否则可能会导致烧伤或起火请勿使用或给非舒尔充电电池的电池组充电应正确处置电池。
联系当地供应商以正确处理用过的电池组。
- 1、下载文档前请自行甄别文档内容的完整性,平台不提供额外的编辑、内容补充、找答案等附加服务。
- 2、"仅部分预览"的文档,不可在线预览部分如存在完整性等问题,可反馈申请退款(可完整预览的文档不适用该条件!)。
- 3、如文档侵犯您的权益,请联系客服反馈,我们会尽快为您处理(人工客服工作时间:9:00-18:30)。
爱国者f5002说明书
录音功能
1、首先是录音笔的开机,开机的方法非常简单,因为录音笔的外部结构比较简单,都是长按播放键或是停止键来开机的。
2、同样关机则是再长按播放键或是停止键来达到关机的效果的。
当然关机长按播放键的前提是你没有在录音的状态下才可以。
3、录音的话也比较简单,在录音笔的右侧有一个录音键,往上轻轻的一推就可以了。
如果中间红色的闪烁灯开始亮起的话,就证明录音正在开始中。
4、如果没有出现这样的情况,那么就要检查下是否是哪个步骤做错了。
有些用户可能会用到暂停录音这个功能,只要短暂的把录音键往上轻轻的.推就可以了。
播放功能
5、然后如果停止暂停的话,再向上推动就可以开始播放了。
爱国者录音笔的操作方法还是比较简单的,但是大家在使用录音笔的过程中需要注意一些事项。
6、第一不要在温度变化区间过大的环境使用,还有过潮、尘土多的环境都不要使用,这些环境都容易使录音笔的功能不稳定。
7、还有一般爱国者的录音笔或是其他牌子的录音笔都是在没有操作情况下的三分钟之后会自动关机,这个设计跟一般的MP3是一样的。
8、而且如果你把录音笔调制暂停的状态下的话,一般在一分钟
之后就会自动关机的。
爱国者的录音笔在操作的时候,背部会有亮光。
注意事项
9、如果十秒钟内的话没有任何的按键操作,那么背部的亮光就会消灭以达到省电的效果。
在录音的话,尽量把音量调到中间值的位置。
10、如果用高音量的声音欣赏音乐或是声音的话,容易对你的听觉神经造成轻微的伤害。
要是长时间没有使用录音笔的话,尽量把电池取出来,以延长使用寿命。
11、爱国者录音笔作为移动存储设备,应当在使用过程中进行数据备份,以防录音笔出现因硬件损坏而导致数据丢失,恢复起来并不是那么容易。
12、如果需要删除文件,就在停止状态下,用上一首/下一首键调整到需要删除的文件,然后长按删除键即进入删除文件模式。
确认好后短按播放键即可。
10秒没有确认,删除将自动取消。
