
雅马哈 ysp 1400 回音壁 说明书
不能在装有心脏起搏器或去纤颤器 的人员附近 22 cm 以内使用本机。
警告 为了减小火灾或电击的风险,不要 将本机暴露在雨中或放置在潮湿的 地方。
只要本机连接在电源插座上,即使 您使用 按钮关闭了本机,机器与 交流电源的连接也没有切断。在这 种状态,本机仅消耗微小电力。
• Clear voice
只需触摸一下就能让语音 (如对话和解说)变清晰 (第 9 页)。
• UniVolume
在频道、节目、广告和声音源之间保持一致的音量 (第 9 页)。
• Bluetooth ® 连接
播放来自所连 Bluetooth 设备 (第 11 页)的声音。
• 电视遥控器学习功能
使用电视遥控器操作本机 (第 13 页)
抓住插头;请勿拖拉导线。
• 请勿使用化学溶剂清洁本机;这可能 损坏机壳涂层。请使用洁净的干布。
• 只能使用本机规定的电压。在本机 上使用比规定值高的电压是危险的 并可能导致火灾,损坏本机和 / 或造 成人体伤害。 Yamaha 将不对由于在
本机上使用非规定电压而造成的任 何损害负责。 • 为了避免雷击造成损坏,在雷电期 间,将电源导线从墙壁上的电源插 座拔下,也将天线从本机上拔下。 • 请勿尝试修改或修理本机。当需要 任何维修时请联系专业 Yamaha 维 修人员。不能以任何理由打开机壳。 • 当准备长时间 (例如休假)不使用本机 时,请将交流电源线从墙上插座断开。 • 对通常的操作错误,在断定本机出 故障之前,请务必先阅读 “ 故障排 除 ” 一节。 • 在搬动本机之前,请按以将本机设 置为待机模式,并将交流电源插头 从墙上插座断开。 • 如果环境温度剧烈变化,就可能形 成结露。从插座上拔下电源插头, 将本机搁置一旁。 • 将本机靠近交流电源插座安装以便 交流电源的接插。 • 电池不能置于高热环境 , 比如火或直 射日光等。 • 安全放置或安装是用户的责任。由 于扬声器的不当放置或安装造成的 意外事故, Yamaha 概不负责。
销商进行。消费者切勿尝试自行安装。安装错误或安装不当会造 成本机掉落,导致人员受伤。
• 切勿将本机安装在石膏或胶合板等低强度材料制成的墙体上。否 则可能导致本机掉落。
• 确保使用能承受安装重量的市售螺丝(在右侧步骤 2 中指定)。使 用短螺丝、钉子和双面胶等非指定螺丝固定件,可能会导致本机
掉落。
2 从墙上取下安装模板并在墙上的标记上拧入市售 螺丝。
Digital Sound Projector
TK
தจ ଛ˯ߪ
∎䞷広㢝 ࡅۉ۳ֵۭ
注意:在操作本机之前请阅读此部分。
• 要确保最好的性能,请仔细阅读此 手册。请将它保存在安全的地方以 备将来参考。
• 请将本音响系统安装在通风良好、阴凉、 干燥、干净的位置— 远离直射阳光、热 源、振动、灰尘、潮湿和 / 或寒冷。为确 保正常通风,至少需要以下空间。 顶部:10 cm,背面:10 cm, 侧面:10 cm
• 请将本机远离其它电子设备、马达 或变压器以避免嗡嗡声。
• 请勿使本机经受于从冷到热的突然温度 改变,勿将本机放置于高湿度的环境中 (例如有加湿器的房间)以防止本机内 部发生结露,否则可能导致触电、火 灾,损害本机,和 / 或人体伤害。
• 请避免在外部物体可能落入本机的地方 或本机可能遭遇液体滴落或飞溅的地方 安装本机。在本机的顶部,请勿放置: −其它组件机,因为它们可能对本机 表面造成损坏和 / 或导致变色。 −燃烧物体 (例如蜡烛),因为它们 可能导致火灾,对本机造成损害和 / 或造成人体伤害。 −内部装有液体的容器,因为它们可 能会摔落并且液体可能引起用户触 电损坏本机。
使用电视遥控器控制本机 (电视遥控器学习功能)........................ 13 通过本机控制电视机 (当电视机的遥控传感器被挡时).............. 15 调节各声道音量 (CH LEVEL).................................................................... 15 使用外部超低音扬声器.................................................................................. 16 使声音在低音量情况下也容易听清.......................................................... 17 初始化本机的设置............................................................................................ 17
欣赏立体环绕声效果....................................................................................... 10
聆听来自 BLUETOOTH 装置的声音 .................................... 11 设置 ...................................................................................... 13
(电源键) 打开本机电源,或将其设定为待机 模式。
铭牌位于本机的底部。
i Zh
目录
附带的物品..............................................................................2 功能 .........................................................................................2 主机部件名称和功能 ..............................................................3 安装 .........................................................................................4 连接 .........................................................................................6 操作 .........................................................................................8
ATV 输入插孔 用于光纤缆线连接电视机。
BBD/DVD 输入插孔 用于同轴数字缆线连接 Blu-ray Disc (BD)播放机等播放装置。
CANALOG 输入插孔 用于 RCA 立体声缆线连接外部装置。
DPORTABLE 输入插孔 用于 3.5 mm 立体声迷你插头缆线连接便携式装置。
ESUBWOOFER OUT 插孔 用于单声道针脚插头缆线连接外部超低音扬声器。 切换外部超低音扬声器设置 (第 16 页)。
关于本手册 • 本手册介绍使用附带遥控器的操作。 • 本手册中使用的标记
注 这表示与本产品的使用及其功能限制有关的注意事项。
提示 这表示为方便使用而提供的补充说明。Leabharlann Zh 1附带的物品
确保您收到了以下所有物品。
功能
欣赏本机给您带来的强劲而又逼真的音效。本机是一款家庭影院系统,安装方 便,还可以轻松连接电视机和其他设备。
• 为了不阻断热量散发,请勿使用报 纸、桌布、窗帘等遮盖本机。如果 本机内的温度升高,可能会引起火 灾,损坏本机和 / 或导致人体伤害。
• 在所有的连接完成之前请勿将本机 插头插入墙上插座。
• 请勿上下倒置操作本机。它可能过 热,并极有可能导致损坏。
• 请勿在开关、旋钮和 / 或导线上用力。 • 当将电源线从墙上插座断开时,请
F电视遥控中继器 将在电视遥控器传感器上收到的电视遥控器信号传输到电视 (第 15 页)。
Zh 3
安装
将本机置于平坦的表面,如电视柜上。
将本机安装在墙壁上
如何在墙壁上安装 1 将安装模板按在墙上,然后标出螺丝孔的位置。
胶带或图钉 安装模板 (附带)
螺丝孔
注意 • 请勿将本机与 BD 播放机等其他装置上下叠起放置。这样做可能引
• 电视遥控中继器功能
当本机阻挡了电视机的遥控传感器,无法通过遥控器操作电视机时,可以 通过本机传输电视遥控信号 (第 15 页)。
2 Zh
主机部件名称和功能
前面板
后面板
A指示灯 指示本机的状态。 如果 5 秒钟未执行任何操作,指示灯将自动变暗。
B遥控传感器 接收本机的遥控器的红外线信号 (第 8 页)。 在启用电视遥控中继器功能时,接收电视的遥控器的红外线信号 (第 15 页)。
同的电池的形状和颜色可能相同, 所以请仔细阅读包装上的说明。 • 电量耗尽的电池可能会漏液。如果电 池漏液,请立即丢弃。请勿触摸漏出 的液体,也不要让其接触衣物等。安 装新电池以前,请彻底清洁电池舱。 • 请勿将电池与普通家庭垃圾一起丢 弃;请根据当地法规正确丢弃。 • 请将电池远离儿童放置。如果不慎 误吞电池,请立即就医治疗。 • 当打算长时间不使用遥控器时,请 将电池从遥控器内取出。 • 请勿对附带的电池进行充电或拆解。
起振动,从而导致故障。
• 本机内含声悬浮扬声器。请勿在本机附近放置磁敏感物品 (硬盘 驱动器等)。
• 在安装本机之前先连接本机和外部装置 (如电视机等)可能会更 好,具体取决于您的安装环境。
• 请勿将本机放置在离电视机 50 mm 以内。可根据需要拆下后面板 上的壁式安装托架。
雅马哈 DSB50BT, DSB150BT, DSB250BT 便携式防水音响 使用说明书

DSB50BT, DSB150BT, DSB250BT 便携式防水音响操作说明书准备前言4拆开包装5概览6音质6设计6操作6特性与功能7连接挂绳9充电10开启电源14关闭电源14连接方法蓝牙操作15配对15连接15 1 :首次连接162 :重新连接已配对的设备18同时连接多个蓝牙设备(多点功能)19 Envaya Link(DSB50BT)20 Envaya Link(DSB150BT/DSB250BT)21操作调节音量22使用有线连接听音乐23使用Siri进行声音控制24使用Envaya进行免提通话操作25故障诊断提示27故障诊断28扬声器无法开启28 Envaya无法充电28扬声器无声音29声音失真、出现噪音或中断29蓝牙设备无法与扬声器配对30扬声器自动关闭31扬声器故障31无法进行通话31重新启动Envaya32附录播放蓝牙设备33防尘防水措施33商标信息34规格35 DSB50BT35DSB150BT37DSB250BT39索引41前言本操作说明书针对所有三种机型。
从本操作说明书中的名称“Envaya”适用于这三种产品。
其各自机型名称用于具体机型的操作说明书。
拆开包装0不包含USB交流电源适配器。
概览音质0尽管Envaya体积紧凑,通过使用磁路中的钕磁铁并利用无源辐射器中的独创环绕声形状,可产生强劲的播放声音。
0Envaya兼容各种编码,包括高音质的Qualcomm® aptX™、AAC和SBC编码。
Envaya自动为您的蓝牙设备(智能手机或平板电脑)选择高级兼容编码,因此让您可以欣赏高级无线传输的声音。
此外,aptX兼容低延迟特性,因此您可以享受影音同步的视频和游戏。
设计0Envaya采用纤细棒形设计,便于携带。
0Envaya具有防水和防尘设计,如果本机沾水或暴露在灰尘环境也可以保证安全。
这将容许在范围更广的空间使用本机,例如泳池边或户外多尘环境。
操作0通过与蓝牙兼容手机进行配对,可使用Envaya进行免提通话。
雅马哈专业音响培训手册

目录第1章扩音基础什么叫扩音?了解连接和信号流额外的信号路径第2章声音塑形—基本知识和工具第3章根据具体情形选用适当的设备采集各个乐器的声音电缆类型接口类型乐器输出特性场地/观众容量系统扩展最新的数字录音机第4章质量控制第一章扩音基础什么叫扩音?扩音是为了增强和调整表演、嗓音或演讲的音量,使观众能够轻易听见。
在这第一章中,我们将描述需要扩音的某些特殊情形以及扩音所起的作用。
•向观众输送声音请看下例;一位表演者在少数几个人面前演唱并演奏原声吉他,无需提高声音或原声吉他的音量,人们也能清楚地听见。
但当表演者在一大群观众面前表演时,或距离观众较远时,声音不会完全传到人群后面。
在这种情况下,需要通过扩音系统来提高音量。
平衡乐器音量不同乐器的音量大小各不相同。
在前述嗓音伴随原声吉他的例子中,嗓音和原声吉他的音量差别不大。
但如果增加某些大音量乐器,如鼓、电吉他和电贝司,则原声吉他和嗓门所发出的声音就会丢失,除非将它的音量放大。
在这种情况下,必须同时增加原声吉他和嗓音的音量,使乐队中所有乐器的音量得到很好的平衡监听器使演出更容易演出过程中会使用许多不同类型的乐器。
根据您在小组中的位置,您可能无法清楚地听到自己或其他表演者的声音,从而使您难以发挥最佳水平。
主扬声器用于向观众输送声音,监听扬声器用于向表演者提供均衡的混音,使他们能够更舒适地表演根据需要切换音源在事件中,扩音系统使用得比乐器还多。
事件在换景和间歇时可能会有MC 或BGM。
在这种情况下,音响系统就会发挥主要作用,将乐器输出的声音关闭同时打开MC的麦克风并为观众适当调整背景音乐的音量了解连接和信号流右图所示的例子说明了典型扩音系统所使用的设备。
对准声响源的麦克风会采集声音,然后经系统放大后输出至扬声器。
请看各设备所起的作用•麦克风—将声音转换为电信号麦克风用于将语音或乐器产生的声音转换为电信号,使其可通过系统进行调整、修改和放大。
麦克风采集的声音从“声响”转换为“电信号”,然后通过将麦克风连接至调音台的电缆转送至下一设备(调音台•调音台—对已转换为电信号的声音进行调整调音台用于对经由麦克风转换为电信号的声音进行调整。
Yamaha AV RECEIVER 使用手册说明书
目录 连接- 连接扬声器 播放 设置 故障排除附录 补充信息A V RECEIVER使用手册DRX-3.2≫≫≫≫≫≫≫≫包装箱中的物品 5零件名称 6前面板 6显示屏 8后面板 9遥控器 11连接连接扬声器 13扬声器安装 14扬声器连接“Speaker Setup”设置 32扬声器组合 45连接电视 46连接 ARC 电视 47连接非 ARC 电视 48连接播放设备 49连接装有 HDMI 接口的 AV 设备 49连接无 HDMI 接口的 AV 设备 50连接音频组件 51连接视频摄像机等 52连接单独房间中的 AV 设备(多区域连接) 53连接电视 (ZONE 2) 53连接前置主放大器 (ZONE 2) 54连接天线 55网络连接 56连接外部控制设备 57 IR IN/OUT 端口 57 12V TRIGGER OUT 接口 58连接电源线 59播放AV 设备播放 61基本操作 61 BLUETOOTH®播放 62基本操作 62网络电台 63播放 63 AirPlay® 65基本操作 65 DTS Play-Fi® 66播放 66 FlareConnect TM 67播放 67 USB 存储设备 68基本操作 68设备和支持的格式 70播放 PC 和 NAS(Music Server)上的文件 71 Windows Media® Player 设置 71播放 72支持的音频格式 74 Play Queue 75初始设置 75添加 Play Queue 信息 75排序和删除 76播放 76收听 AM/FM 电台 77调谐至一个无线电台 77预设无线电台 79使用 RDS(澳大利亚及亚洲产品类型) 81多区域功能 82切换遥控模式 (Zone 2) 83切换遥控模式 (Zone 3) 84播放 85便利功能 87调整音调 87聆听模式 88选择聆听模式 88聆听模式效果 90可选聆听模式 93设置Setup 菜单 102菜单列表 102菜单操作 1041. Input/Output Assign 1052. Speaker 1093. Audio Adjust 1134. Source 1145. Listening Mode Preset 1156. Hardware 1167. Multi Zone 1298. Miscellaneous 130 Quick Menu 131菜单操作 131 Web Setup 133菜单操作 133 Firmware Update 134本机中的更新功能 134通过网络更新固件 135通过 USB 更新 137使用自动启动向导进行 Initial Setup 139操作 139故障排除当本机错误运行 143故障排除 144附录关于 HDMI 152一般规格 1541. 主机 (1) Array2. 遥控器 (RC-912R) (1)3. 扬声器设置麦克风 (1)• 在 Initial Setup 过程中使用。
雅马哈 R V 中文使用说明书
一般安装过程. . . . . . . . . . . . . . . . . . . . . . . . . . . . . . . . . . . . . . . . . . . . . . . . . . . .11
音箱布置方式. . . . . . . . . . . . . . . . . . . . . . . . . . . . . . . . . . . . . . . . . . . . . . . . . . . .12
缆线插头和插孔 . . . . . . . . . . . . . . . . . . . . . . . . . . . . . . . . . . . . . . . . . . . . . . . . .15
音频 / 视频插孔 . . . . . . . . . . . . . . . . . . . . . . . . . . . . . . . . . . . . . . . . . . . . . . . . . . . . . . . . . . . . . . . . . . . . . . . . . . . . . . . . . . .15 模拟视频插孔 . . . . . . . . . . . . . . . . . . . . . . . . . . . . . . . . . . . . . . . . . . . . . . . . . . . . . . . . . . . . . . . . . . . . . . . . . . . . . . . . . . . . .15 音频插孔 . . . . . . . . . . . . . . . . . . . . . . . . . . . . . . . . . . . . . . . . . . . . . . . . . . . . . . . . . . . . . . . . . . . . . . . . . . . . . . . . . . . . . . . . . .15
YAMAHA PJP-EC200 会议用回声消除器 说明书
安装和初始设置........................................................................11 直接连接麦克风和扬声器 ....................................................11 结合使用 PA 系统.................................................................13
1. 指定本设备 LAN 端口的 IP 地址 ....................................21 2. 指定默认网关 ....................................................................22 3. 指定 DNS 服务器 ..............................................................23 限制访问 Web 菜单..................................................................24 控制回声....................................................................................25 控制声反馈................................................................................26 控制噪音....................................................................................27 自动调节输入增益 (自动增益控制器)................................28 调节 MIC/LINE INPUT 的输入增益 .....................................29 调节音量....................................................................................30 使用内部混音器........................................................................31 配置幻像电源设置....................................................................32 自动配置本设备的设置 (自动分析仪)................................33 开启/关闭音频引导................................................................34
Yamaha NS-F160扬声器连接说明书
注意•确保有另一个人提供支撑。
•请特别注意避免划伤扬声器的表面。
•请小心不要对扬声器的侧面用力,否则扬声器可能跌落导致损坏或人体受到伤害。
•为了避免绊到松散的扬声器线缆而发生意外,请将线缆固定在地板上。
•将本装置放置在距离 CRT 电视过近的地方,会影响图像的色彩或发出嗡嗡噪音。
发生此类情况时,请将扬声器移到远离电视的地方。
LCD 电视和等离子电视不存在上述问题。
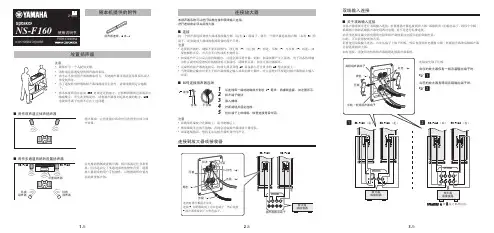
■用作双声道立体声扬声器扬声器成一定角度朝向听众时可获得更好的立体声效果。
■用作多通道系统的前置扬声器在电视的两侧放置扬声器。
扬声器的定位非常重要,因为这决定了多通道系统的整体音质。
遵循放大器附带的用户手册操作,以您的聆听位置为基础放置扬声器。
© 2012 Y amaha CorporationPrinted in IndonesiaTZF19940NS-F160SpeakerՓ⫼䇈 к随本机提供的附件扬声器连线,4米x1放置扬声器NS -F160环绕扬声器中置扬声器NS -F160环绕扬声器本扬声器系统可以进行标准连接和双线输入连接。
进行连接前必须关闭放大器。
■连接将一个扬声器连接到放大器或接收器左侧(标有 L)的端子,将另一个扬声器连接到右侧(标有 R)的端子。
请参阅放大器或接收器附带的用户手册。
注意•连接扬声器时,确保不要弄错极性,即正极 (+) 与正极 (+) 相连,负极 (-) 与负极 (-) 相连。
如果将极性弄反,声音会不自然或听不到低音。
•如果某些声音以高音量持续输出,可能会损坏扬声器。
例如,如果试碟产生正弦波,电子设备持续输出低音或电唱盘的唱针接触到唱片表面时,请降低音量,以防止扬声器损坏。
•完成所有扬声器的连接后,将放大器及其他 AV 设备插入符合要求的 AC 壁式插座上。
•当使用额定输出功率大于扬声器的额定输入功率的放大器时,应注意绝对不要超过扬声器的最大输入功率。
■如何连接扬声器连线1从连线每一端的绝缘部分剥去 15 毫米,将裸线盘紧,如左图所示。
Ats1090说明书
Ats1090说明书
简而不简。
让您仅凭电视机前不显眼的回音壁,就可以在您喜爱的电影、音乐、游戏中体验雅马哈品质声音。
支持杜比数字及DTS等环绕音效格式。
只需一根线连接到电视机,设置简单。
配备蓝牙功能方便无线传输音乐。
兼容Qplay 功能,可通过网络播放来自“QQ 音乐”流媒体服务上的音乐文件
一体化设计: 内置双低音喇叭输送强劲低音
Clear Voice模式使电影对白清晰明显、更易聆听
DTS® Virtual:X™带来虚拟3D环绕声
为您的音乐和播客提供蓝牙®流媒体
产品信息如有变动,恕不另行通知。
网站上信息仅供参考,一切以具体实物为准。
Yamaha YAS-101 小型音箱说明书
Enjoy great sound without sacrificing the style of your room with this powerful mini sound bar and slim subwoofer that blends in instead of standing out. Fill any space with theater-style surround sound and thunderous bass, while the 2-way flexible subwoofer tucks away easily between or underneath future. Stream music easily with Bluetooth ®1 and even control playback with your phone.2 It’sthe perfect choice when style and sound matter.• Stylish, compact design fits a wide variety of spaces• Slim wireless subwoofer with “sofa mode” and flexible, 2-way setup• Surround yourself with S-Force PRO Front Surround sound• Connect and stream music easily via Bluetooth ® with NFC 1• Enjoy music playback via USB3FeaturesImpressive sound meets modern styleThe stylish, compact design, neutral tones and soft angles are designed to complement and fit almost any space ordecor, while delivering impressive, room-filling sound. Ultra-slim and simple to set up, it has a low profile that fits anywhere you need, without blocking your TV.2-way, wireless subwoofer with “sofa mode”Tuck the 2-way, wireless subwoofer between or underneath furniture and still experience bold, uncompromised sound and deep bass with the optimized “sofa mode”.Surround yourself with soundS-Force PRO Front Surround technology puts you right at the heart of the movies you love by emulating theater-style surround sound.4Connect and stream music easily 1Connect and stream all your favorite tracks and playlists via Bluetooth ® with NFC.1Enjoy music playback via USBConnect a USB device to the USB port to enjoy audio playback .3HT-MT300/BPowerful Mini Sound Bar with Wireless SubwooferBulletsSpecifications1. Interoperability and compatibility among Bluetooth® devices vary2. Requires download of SongPal app for iPhone from the App Store or for Android from Google Play. User must link compatible devices in order to control operation. Subject to app terms and conditions.3. Not all USB devices are compatible. Consult https:/// for complete details.4. Requires HDMI cable (sold separately).©2017 Sony Electronics Inc. All rights reserved. Reproduction in whole or in part without written permission is prohibited. Sony, Song Pal and the Sony logo are registered trademarks of Sony Corporation. Bluetooth is a trademark of Bluetooth SIG, Inc. DTS-HD is a trademark of DTS, Inc. All othertrademarks are trademarks of their respective owners. Features and specifications are subject to change without notice.。
雅马哈 YAMAHA YST-SW40 低音盘 说明书
21 Read Instructions – All the safety and operatinginstructions should be read before the unit is operated.2Retain Instructions – The safety and operating instructionsshould be retained for future reference.3Heed Warnings – All warnings on the unit and in theoperating instructions should be adhered to.4Follow Instructions – All operating and other instructionsshould be followed.5Water and Moisture – The unit should not be used nearwater – for example, near a bathtub, washbowl, kitchensink, laundry tub, in a wet basement, or near a swimmingpool, etc.6Carts and Stands – The unit should be used only with acart or stand that is recommended by themanufacturer.6A A unit and cart combination should bemoved with care. Quick stops, excessiveforce, and uneven surfaces may causethe unit andcart combination to overturn.7Wall or Ceiling Mounting – The unit should be mounted toa wall or ceiling only as recommended by themanufacturer.8Ventilation – The unit should be situated so that its locationor position does not interfere with its proper ventilation.For example, the unit should not be situated on a bed,sofa, rug, or similar surface, that may block the ventilationopenings; or placed in a built-in installation, such as abookcase or cabinet that may impede the flow of airthrough the ventilation openings.9Heat – The unit should be situated away from heat sourcessuch as radiators, stoves, or other appliances that produceheat.10Power Sources – The unit should be connected to a powersupply only of the type described in the operatinginstructions or as marked on the unit.11Power-Cord Protection – Power-supply cords should berouted so that they are not likely to be walked on orpinched by items placed upon or against them, payingparticular attention to cords at plugs, conveniencereceptacles, and the point where they exit from the unit.12Cleaning – The unit should be cleaned only asrecommended by the manufacturer.13Nonuse Periods – The power cord of the unit should beunplugged from the outlet when left unused for a longperiod of time.14Object and Liquid Entry – Care should be taken so thatobjects do not fall into and liquids are not spilled into theinside of the unit.15Damage Requiring Service – The unit should be servicedby qualified service personnel when:A.The power-supply cord or the plug has been damaged;orB.Objects have fallen, or liquid has been spilled into the unit;orC.The unit has been exposed to rain; orD.The unit does not appear to operate normally or exhibits amarked change in performance; orE.The unit has been dropped, or the cabinet damaged.16Servicing – The user should not attempt to service the unitbeyond those means described in the operatinginstructions. All other servicing should be referred toqualified service personnel.17Power Lines – An outdoor antenna should be located awayfrom power lines.18Grounding or Polarization – Precautions should be takenso that the grounding or polarization is not defeated. SAFETY INSTRUCTIONS3FCC INFORMATION (for US customers only)YAMAHA and the Electronic Industries Association’sConsumer Electronics Group want you to get the most out of your equipment by playing it at a safe level. One that lets the sound come through loud and clear without annoying blaring or distortion – and, most importantly, without affecting yoursensitive hearing. Since hearing damage from loud sounds isoften undetectable until it is too late, YAMAHA and the Electronic Industries Association’sConsumer Electronics Group recommend you to avoid prolonged exposure from excessive volume levels.We Want You Listening For A Lifetime (for US customers only)1.IMPORTANT NOTICE : DO NOT MODIFY THIS UNIT!This product, when installed as indicated in the instructions contained in this manual, meets FCCrequirements. Modifications not expressly approved by Yamaha may void your authority, granted by the FCC, to use the product.2.IMPORTANT :When connecting this product toaccessories and/or another product use only high quality shielded cables. Cable/s supplied with this product MUST be used. Follow all installation instructions.Failure to follow instructions could void your FCC authorization to use this product in the USA.3.NOTE :This product has been tested and found tocomply with the requirements listed in FCC Regulations,Part 15 for Class “B” digital devices. Compliance with these requirements provides a reasonable level of assurance that your use of this product in a residential environment will not result in harmful interference with other electronic devices.This equipment generates/uses radio frequencies and, if not installed and used according to the instructions found in the users manual, may cause interference harmful to the operation of other electronic devices.Compliance with FCC regulations does not guarantee that interference will not occur in all installations. If this product is found to be the source of interference, which can be determined by turning the unit “OFF” and “ON”, please try to eliminate the problem by using one of the following measures:Relocate either this product or the device that is being affected by the interference.Utilize power outlets that are on different branch (circuit breaker or fuse) circuits or install AC line filter/s.In the case of radio or TV interference, relocate/reorient the antenna. If the antenna lead-in is 300 ohm ribbon lead,change the lead-in to coaxial type cable.If these corrective measures do not produce satisfactory results, please contact the local retailer authorized to distribute this type of product. If you can not locate the appropriate retailer, please contact Yamaha Electronics Corp., U.S.A. 6660 Orangethorpe Ave, Buena Park, CA 90620.The above statements apply ONLY to those products distributed by Yamaha Corporation of America or its subsidiaries.41.To assure the finest performance, please read this manual carefully. Keep it in a safe place for future reference.2.Install this unit in a cool, dry, clean place – away from windows,heat sources, sources of excessive vibration, dust, moisture and cold. Avoid sources of humming (transformers, motors). To prevent fire or electrical shock, do not expose the unit to rain or water.3.Never open the cabinet. If something drops into the set, contact your dealer.4.Do not use force on switches, controls or connection wires. When moving the unit, first disconnect the power plug and the wires connected to other equipment. Never pull the wire itself.5.Do not attempt to clean the unit with chemical solvents; this might damage the finish. Use a clean, dry cloth.6.Be sure to read the “TROUBLESHOOTING” section regarding common operating errors before concluding that the unit is faulty.7.When not planning to use this unit for long periods of time (ie.,vacation, etc.), disconnect the AC power plug from the wall outlet.8.To prevent lightning damage, disconnect the AC power plug when there is an electrical storm.9.Since this unit has a built-in power amplifier, heat will radiate from the rear panel. Therefore, place the unit apart from the walls,allowing a space of at least 10 cm (3-15/16”) above, behind and on the both sides of the unit. Also, do not position with the rear panel facing down on the floor or other surface.10.Super-bass frequencies reproduced by this unit may cause aturntable to generate a howling sound. In such a case, move this unit away from the turntable.11.This unit features a magnetically shielded design, but there is still a chance that placing it too close to a TV set might impair picture color. Should this happen, move this unit away from the TV set.12.If you hear distortion (i.e., unnatural, intermittent “rapping” or“hammering” sounds) coming from this unit, reduce the volume level. Extremely loud playing of a movie soundtrack’s lowfrequency, bass-heavy sounds or similarly loud popular music passages can damage this speaker system.13.This unit has a port called “air woofer” which is for reproducing asuper-bass sound.Be careful not to put a hand or some objects into the port,otherwise it may give you an electric shock or give this unit a damage, or cause a fire.14.Voltage Selector (General Model only)The voltage selector on the rear panel of this unit must be set for your local main voltage BEFORE plugging into the AC main supply.Voltages are AC 110/120/220/240V, 50/60 Hz.IMPORTANTPlease record the serial number of this unit in the space below.Serial No.:The serial number is located on the rear of the unit.Retain this Owner’s Manual in a safe place for future reference.WARNINGTO REDUCE THE RISK OF FIRE OR ELECTRIC SHOCK, DO NOT EXPOSE THIS UNIT TO RAIN OR MOISTURE.CAUTION (FOR CANADA MODEL)TO PREVENT ELECTRIC SHOCK, MATCH WIDE BLADE OF PLUG TO WIDE SLOT AND FULLY INSERT.FOR CANADIAN CUSTOMERTHIS CLASS B DIGITAL APPARATUS MEETS ALLREQUIREMENTS OF THE CANADIAN INTERFERENCE-CAUSING EQUIPMENT REGULATIONS.For U.K. customersIf the socket outlets in the home are not suitable for the plug supplied with this appliance, it should be cut off and anappropriate 3 pin plug fitted. For details, refer to the instructions described below.Note:The plug severed from the mains lead must be destroyed,as a plug with bared flexible cord is hazardous if engaged in a live socket outlet.SPECIAL INSTRUCTIONS FOR U.K. MODELIMPORTANTTHE WIRES IN THE MAINS LEAD ARE COLOURED IN ACCORDANCE WITH THE FOLLOWING CODE:Blue: NEUTRAL Brown: LIVEAs the colours of the wires in the mains lead of this apparatus may not correspond with the coloured markings identifying the terminals in your plug, proceed as follows:The wire which is coloured BLUE must be connected to the terminal which is marked with the letter N or coloured BLACK. The wirewhich is coloured BROWN must be connected to the terminal which is marked with the letter L or coloured RED. Making sure thatneither core is connected to the earth terminal of the three pin plug.The apparatus is not disconnected from the AC power source as long as it is connected to the wall outlet, even if the apparatus itself is turned off.CAUTION: READ THIS BEFORE OPERATING YOUR UNIT.Caution ...........................................................................4Features .........................................................................5Placement ......................................................................5Connections ...................................................................6Controls and their functions .. (9)Adjusting volume ..........................................................10Active Servo Technology ..............................................11Troubleshooting ............................................................12Specifications (12)CONTENTS5•This subwoofer system employs YAMAHA Active Servo Technology which YAMAHA developed for reproducing higher quality super-bass sound. (Refer to page 11 for details on Active Servo Technology.)This unit does not only enhance bass frequency response of sound output in your audio system, but, by reproducing the bass frequencies, the subwoofer permits your existing amplifier and speakers to operate under less strenuous conditions, improving overall system performance.•This unit can be added easily to your existing audio system by connecting to either the speaker terminals or the line output (pin jack) terminals of the amplifier.•For the effective use of this unit, this unit’s super-bass sound must be matched to the sounds of your main speakers. Therefore, this unit employs a continuously variable high frequency cut-off point (HIGH CUT) control.•A newly employed AUTO POWER ON/OFF switch saves you the trouble of pressing the POWER switch when turning the power on and off.If using one subwoofer, it is recommended to place it on theoutside of either the right or the left main speaker. (See fig..) If using two subwoofers, it is recommended to place themon the outside of each main speaker. (See fig. .) Theplacement shown in fig. is also possible, however, if thesubwoofer system is placed directly facing the wall, the bass effect may die because the sound from it and the sound reflected by the wall may cancel. To prevent this, face thesubwoofer system obliquely to the wall as shown in fig. or.One subwoofer will have a good effect on your audio system,however, the use of two subwoofers is recommended to obtain more presence.NoteThere may be a case that you cannot obtain enough super-bass sounds from this unit when listening at the middle of the room. This is because “standing waves” have developed between two parallel walls and the bass sounds are being canceled.In such a case, face the unit obliquely to the wall. It also may be necessary to break up the parallel surfaces by placing bookshelves etc. along the walls.FEATURESPLACEMENTABCA A CB B•Before attempting to make any connections to or from this unit, be sure to first switch OFF the power to this unit and to any other components to which connections are being made.•When making connections between this unit and other components, be sure all connections are made correctly and consistently, that is to say L(left) to L, R(right) to R, “+” to “+” and “–” to “–”.•This unit can be connected to either the speaker terminals or the line output (pin jack) terminals of the amplifier. Choose one of the ways shown below according to your audio system. Also, refer to the owner’s manual for each component to be connected to this unit.Disconnect your main speakers from the amplifier and connect them to this unit.If using one unitRight speaker Left speakerIf using two unitsRight speaker Left speaker67If your amplifier has two sets of speaker terminalsFor connections, cut the speaker wires as short as possible. If the connections are faulty, no sound will be heard from the speakers. Make sure that the polarity of the speaker wires is correct, that is, + and – markings are observed. If these wires are reversed, the sound will be unnatural and will lack bass.Do not let the bare speaker wires touch each other and do not let them touch the metal parts of this unit as this could damage this unit, your amplifier and/or speakers.How to Connect:Red: positive (+)Unscrew the knob. Insert the bare wire.[Remove approx. 5mm (1/4”) insulation from the speaker wires.] Tighten the knob and secure the wire.*Banana Plug connections are also possible (except for U.K.and Europe models). Simply insert the Banana Plug connector into the corresponding terminal.Connecting to this unit’s OUTPUT/INPUT terminals•Leave the main speakers connected to the amplifier.•Amplifier line output terminals are generally labeled PRE OUT or SUBWOOFER OUT.*For PRE OUT terminal connection, the amplifier must possess at least two sets of PRE OUT terminals. With some amplifiers with only one set of PRE OUT terminals, connection can result in no sound from the main left and right speakers. In thiscase, select the method of connecting to the speaker terminals.•To connect with a YAMAHA DSP amplifier, connect the LOW PASS (or SUBWOOFER etc.) terminal on the rear of the DSP amplifier to either the left (L) or right (R) INPUT 2 terminal.If using one unitIf using two unitsNotes•When connected to line output terminals of the amplifier, other speakers should not be connected to the OUTPUT terminals on the rear panel of this unit. If connected, they will not produce sound.•When connecting to a monaural line output terminal of the amplifier, connect to either the left or right INPUT 2 terminal.8Front panel Rear panel1POWER indicatorLights up when the POWER switch is turned ON, andgoes off when turned OFF.*<For U.K. and Europe models only>If the AUTO POWER ON/OFF switch on the rear panelis set to ON, this indicator is illuminated dimly when nosignal is input to this unit.2POWER switchTurns the power of this unit ON and OFF wheneverpressed. When this switch is turned ON, the indicator onthe left of the POWER switch lights up.3HIGH CUT controlAdjusts the high frequency cut off point.Frequencies higher than the frequency selected by thiscontrol are all cut off (and not output).*One graduation of this control represents 10 Hz.4VOLUME controlAdjusts the volume level. 5AUTO POWER ON/OFF switchBy setting this switch to the ON position, this unit’sautomatic power ON/OFF function operates as described below. If you do not need this function, set to the OFFposition.*Make sure to change the setting of this switch onlywhen the power of this unit is off.Automatic power ON/OFF functionWhen you play a source, the power to this unit turns on automatically by sensing audio signals input to this unit.The power turns off automatically if the source beingplayed is stopped or the input signal is cut off for several minutes.*This function will operate responding to a certain level ofinput signal. Increase the output level on the inputsource if the automatic power ON function will notoperate, or decrease the level if the automatic powerOFF function will not operate.*There may be a case that the power turns onunexpectedly by sensing noise from other appliances. Ifit occurs, set the AUTO POWER ON/OFF switch to theOFF position.This function is available only when the power of thisunit is on (by setting the POWER switch (2) to “on”).9101Set the VOLUME control to minimum.2Turn on the power supply to all the components.3Play any source and adjust the amplifier’s volume control to the desired listening level.4Turn up the VOLUME control gradually to adjust thevolume balance between this unit and the main speakers.5Adjust the HIGH CUT control to the position where the desired response can be obtained.Notes•Once the volume balance between this unit and the main speakers is adjusted, you can adjust the volume of your whole sound system by using only the amplifier’s volume control.•For adjusting the VOLUME control and the HIGH CUT control, refer to “FREQUENCY CHARACTERISTICS” on the right hand.For effective adjustment of the HIGH CUT controlFirst set this control at about the main speakers’ rated minimum reproduceable frequency. Then turn up theVOLUME control gradually and set it at a level where you can obtain a little more bass effect than when this unit is not used.On the basis of this setting, if desired, adjust the VOLUME control and the HIGH CUT control again.*The main speakers’ minimum reproduceable frequency can be looked up in the speakers’ catalog or owner’s manual.FREQUENCY CHARACTERISTICSAdjustment of the VOLUME control and the HIGH CUT control should be changed according to the main speakers, listening condition, source, etc.Following figures show the optimum adjustment of each control and the frequency characteristics when this unit is combined with a typical speaker system.This unit’s frequency characteristics•When combined with a 3” or 4” acousticsuspension, 2 way system•When combined with 5” acousticsuspension, 2 way systemPOWERHIGH CUTVOLUMEVOLUMEHIGH CUTVOLUMEHIGH CUTEnglish11SYMPTOMPower is not supplied even though the POWER switch is ON.No sound .Sound level is too low.CAUSEThe power plug is not securely connected.The VOLUME control is set to 0.Speaker cables are not connected securely.Speaker cables are connected incorrectly.A source sound with few bass frequencies isplayed.It is influenced by standing waves.REMEDYConnect it securely.Turn the VOLUME control to right.Connect them securely.Connect them correctly, that is to say L (left)to L, R (right) to R, “+” to “+” and “–” to “–”.Play a source sound with bass frequencies.Set the HIGH CUT control to a higherposition. (Turn the knob to right.)Re-position the subwoofer or break up theparallel surface by placing bookshelves etc.along the walls.If the unit fails to operate normally, check the following points to determine whether the fault can be corrected by the simple measures suggested. If it cannot be corrected, or if the fault is not listed in the SYMPTOM column, disconnect the power cord and contact your authorized YAMAHA dealer or service center for help.TROUBLESHOOTINGSPECIFICATIONSype........................Active Servo Processing Subwoofer System Speaker Unit...................20 cm (7-7/8”) cone woofer (JA2157)magnetic-shield type Amplifier Output...................................................50W/5 ohms High-Cut Filter...............................50 Hz–150 Hz (–24 dB/oct.) Frequency Response..........................30 Hz–200 Hz (–10 dB) Power SupplyU.S.A. and Canada models........................AC 120V, 60 Hz Australia model..........................................AC 240V, 50 Hz U.K. and Europe models............................AC 230V, 50 Hz General model..................AC 110/120/220/240V, 50/60 Hz Power Consumption..........................................................50W Dimensions (W x H x D).............252 mm x 350 mm x 320 mm(9-15/16” x 13-3/4” x 12-5/8”) Weight.......................................................8.2 kg (18 lbs. 1 oz.) *Please note that all specifications are subject to change without notice.12YAMAHA ELECTRONICS CORPORATION, USA6660 ORANGETHORPE AVE., BUENA PARK, CALIF. 90620, U.S.A.YAMAHA CANADA MUSIC LTD.135 MILNER AVE., SCARBOROUGH, ONTARIO M1S 3R1, CANADAYAMAHA ELECTRONIK EUROPA G.m.b.H.SIEMENSSTR. 22-34, 25462 RELLINGEN BEI HAMBURG, F.R. OF GERMANYYAMAHA ELECTRONIQUE FRANCE S.A.RUE AMBROISE CROIZAT BP70 CROISSY-BEAUBOURG 77312 MARNE-LA-VALLEE CEDEX02, FRANCEYAMAHA ELECTRONICS (UK) LTD.YAMAHA HOUSE, 200 RICKMANSWORTH ROAD WATFORD, HERTS WD1 7JS, ENGLANDYAMAHA SCANDINAVIA A.B.J A WETTERGRENS GATA 1, BOX 30053, 400 43 VÄSTRA FRÖLUNDA, SWEDENYAMAHA MUSIC AUSTRALIA PTY, LTD.17-33 MARKET ST., SOUTH MELBOURNE, 3205 VIC., AUSTRALIA VU 65520 Printed in Malaysia。
雅马哈 AVR-X1500H 网络环绕声接收机 操作说明书
AVR-X1500H INTEGRATED NETWORK AV RECEIVER 操作说明书附件9安装电池10遥控器的操作范围10特点11高音效11高性能11简易操作15部件名称与功能16前面板16显示屏19后面板21遥控器24连接方法扬声器安装28连接扬声器35连接扬声器之前35扬声器配置和“放大器分配”设置39连接5.1声道扬声器40连接7.1声道扬声器41连接5.1声道扬声器:前置扬声器的双功放连接47连接5.1声道扬声器:第二对前置扬声器48连接多区域扬声器49连接电视机50连接1:配备了HDMI端子并兼容ARC(Audio Return Channel)的电视机51连接2:配备了HDMI端子且不兼容ARC(Audio Return Channel)的电视机52连接3 : 未配备HDMI端子的电视机53连接播放设备54连接机顶盒(卫星调谐器/有线电视)55连接DVD播放机或蓝光碟片播放机56连接摄像机或游戏机57连接电唱机58将USB存储设备连接至USB端口59连接FM/AM天线60连接至家庭网络(LAN)62有线LAN62无线局域网63连接电源线64播放基本操作66开启电源66选择输入源66调节音量67暂时关闭声音(静音)67播放DVD播放机/蓝光碟片播放机67播放USB存储设备68播放储存在USB存储设备上的文件69在蓝牙设备上收听音乐72从蓝牙设备播放音乐73与其他蓝牙设备配对74从蓝牙设备重新连接至本机75收听FM/AM广播76收听FM/AM广播77通过输入频率来进行调谐(直接调谐)78更改调谐模式(调谐模式)79自动调谐到电台并进行预设(自动预设)79预设当前广播电台(预设记忆)80收听预设电台80指定预设广播电台的名称(预设名称)81跳过预设的广播电台(跳过预设)82取消跳过预设83收听网络电台84收听网络电台85播放存储在计算机或NAS中的文件86播放存储在计算机或NAS中的文件87获取 HEOS App90 HEOS账户91从流媒体音乐服务播放92在多个房间聆听相同的音乐95 AirPlay功能99从iPhone、iPod touch或iPad播放歌曲100从iTunes播放歌曲100使用本机的遥控器进行iTunes的播放操作101在多个同步设备上播放iPhone、iPod touch或 iPad上的曲目 (AirPlay 2)102 QPlay功能103在本机上播放QQ音乐曲目103便捷功能104添加到HEOS最爱收藏105播放HEOS最爱收藏105删除HEOS最爱收藏106调节各声道的音量以与输入源相符(声道电平调节)107调节音调(音调)108音频播放过程中播放所需视频(视频选择)109在所有区域中播放相同的音乐(所有区域立体声)110选择声音模式111选择声音模式112直通播放113自动环绕播放114声音模式类型介绍115可为每个输入信号选择的声音模式119 HDMI控制功能123设置步骤123智能菜单功能124睡眠定时器功能126使用睡眠定时器127快速选择附加功能128调用设置129更改设定130面板锁定功能131禁用所有键的按键操作131禁用除VOLUME之外的所有按键操作131取消面板锁定功能132远程锁定功能133禁用遥控器的感应窗功能133启用遥控感应窗功能133网络控制功能134通过网络控制对本机进行控制134 ZONE2(区域2)(另一房间)中播放136连接ZONE2(区域2)136ZONE2(区域2)播放137设置菜单图139菜单操作143音频144中置电平调节144低音炮电平144环绕参数145 Restorer149音频延迟150音量151 Audyssey®152手动EQ154视频157 HDMI设置157屏幕显示162 4K信号格式163 TV格式164输入165输入分配165源重命名167隐藏源167输入源电平167输入选择168扬声器169 Audyssey®设置169扬声器的设定步骤(Audyssey®设置)171出错信息177检索Audyssey®设置设定178手动设置179放大器分配179扬声器配置180距离185电平186交叉187低音188前置扬声器189网络190信息190连接190 Wi-Fi设置191设置192网络控制194友好名称194诊断195 HEOS账户196您尚未登录196您已经登录196常规197语言197 ECO197区域2设置201区域重命名202快速选择名称202前显示屏202固件203信息206使用率数据207保存和加载208设置锁定208重置209使用遥控器限制操作区域210提示提示212故障诊断214电源无法开启 / 电源关闭215使用遥控器无法执行操作216本机显示屏不显示内容216不发出声音217所需声音没有发出218声音中断或出现噪音220电视机上不显示视频221菜单屏幕不显示在电视机上222电视机上所显示菜单画面和操作内容的颜色与正常时不同222 AirPlay无法播放223USB存储设备无法播放224无法播放蓝牙设备225网络电台无法播放226计算机或NAS上的音乐文件无法播放227无法播放各种在线服务228 HDMI控制功能无效228无法连接至无线LAN网络229更新/升级错误消息230恢复出厂设置231恢复网络设置232保修和修理233附录关于HDMI234播放USB存储设备237播放蓝牙设备238播放保存在计算机或NAS中的文件239播放网络收音机240个人记忆附加功能240最新功能记忆240声音模式和声道输出241声音模式和环绕参数243输入信号的类型和对应的声音模式246术语解释249商标信息258规格260索引265感谢您选购本款Denon产品。