WIN7 64bit中安装MicroWin_V4.0SP9
SIMATIC英语
SIMATICSTEP 7- Micro/WIN V4.0 SP9Copyright (c) Siemens Industry Inc., 2011ContentsNotes on installation1 Operating system and hardware requirements2 Operating environment3 Installation4 Installing the upgrade licenseNotes on usage5 What's new6 Known problems and remedies6.1Problems6.2National languages6.3General communications6.3.1Multi-master communications6.4Project compatibility7 Using the Force functionNotes on installation1 Operating system and hardware requirementsMicrosoft Windows XP SP3 (32-bit only) or Windows 7 (32-bit and 64-bit).A personal computer (PC) capable of running one of the above operating systems, refer toMicrosoft specifications for more information.At least 350 Mbytes of free hard disk spaceUse the small font setting and a minimum screen resolution of 1024x768 pixelsAny mouse supported by Microsoft WindowsFor communicating with the S7-200 you will need one of the following: –PC/PPI Cable connected to your USB port–PC/PPI Cable connected to your serial communications port (PC COM1 or COM2) –Communications processor (CP) card and multipoint interface (MPI) cable–EM241 modem expansion module–CP243-1 or CP243-1 IT Ethernet expansion moduleCP card support for STEP 7_Micro/WIN V4.0SP9 with Windows XP SP3(32_bit) and Windows 7(32_bit and64_bit):–CP5512 supported–CP5611 supportedThe Set PG/PC Interface device CP5611(PPI) is not supported when installed on Windows 7 64-bit. You may choose the CP5611(MPI) or CP5611(PROFIBUS) as an alternative. The CP5611(MPI) interface may be used for all baud rates except9.6 Kbps. The CP5611(PROFIBUS) interface may be used for all baud rates.–CP5613 not supported–CP5614 not supportedPG/PC interface setup with Windows 7 64-bit operating systemThe format of the device names in the 64-bit version of the PG/PC interface haschanged from the previous 32-bit PG/PC interface that is described in the system manual and Help topics. In the 64-bit version, the device names take the format of: <Dev ice.Protocol.InstanceNumber>, where “Device” is the name of the device such as "PC/PPI cable", Protocol is the communications protocol such as "PPI" or "MPI", and “InstanceNumber” is a number from 1..n (typically 1, unless you have multiple devices of the same type installed).Installation problems with SIMATIC NETIf you have SIMATIC NET V6.2 or earlier installed on you computer you may receive the following error during installation."Fatal error in SIMATIC NET Component sntieno.dll""Installation of protocol siem_isotrans failed with error code hr=0x80070430"If you experience this error follow these steps:1. Finish the installation and reboot your PC. Rebooting is required.2. Use Add/Remove Programs to uninstall the software and reboot your PC.Rebooting is required.3. Install the software again, this time you will not receive the error.Intelligent modules can be placed in any valid module position (if the CPU firmware is version 1.21 or greater). For systems containing earlier CPU firmware that supports intelligent modules, refer to Internet update 9261022. This update for earlier CPUfirmware basically requires all intelligent modules to be located as a group adjacent to the CPU (for example: no discrete or analog module is allowed between the CPU and the group of intelligent modules).Intelligent modules currently available:–EM277 PROFIBUS-DP–EM241 Modem–EM253 Position–CP243-1 Ethernet–CP243-1 IT Internet2 Operating environmentTo be able to install and work with STEP 7-Micro/WIN software under Windows XP, you must have logged on with at least power user privileges.To be able to install and work with STEP 7-Micro/WIN under Windows 7, you must have logged on with administrator privileges.It is recommended that you disable hibernation mode when using STEP 7-Micro/WIN.Entering hibernation mode while online connections are open or while projects are being accessed by STEP 7-Micro/WIN through a network can cause the followingerrors:Unintentional termination of online connectionsData loss in any open projects that were opened through a PC networkTo avoid these errors, set the energy saving options for the operating system in the Windows Control Panel to manual trigger. This ensures that hibernation is notautomatically triggered by a timer. Do not manually trigger hibernation mode during a communication task, as described above.STEP 7-Micro/WIN Version 4.0 SP9 has been tested under the following operating system versions:Windows XP SP3 (32-bit version)Windows 7 (32-bit version)Windows 7 (64-bit version)Only STEP 7-Micro/WIN V4.x releases can accommodate a simultaneous connection with S7-200 PC Access v1.x. For instance you cannot run communications inSTEP 7-Micro/WIN V3.x and S7-200 PC Access v1.x at the same time.Note: If you experience unstable operation or unexplained program lockups,please examine the BIOS settings of your computer and make surehyper-threading is disabled. To resolve other situations please reboot your PC before running the application again.3 Installation1. Close all applications including the MS-Office Toolbar.2. Insert the STEP 7-Micro/WIN CD into the CD-Rom drive. The Setup program willrun automatically if you have not disabled the auto start option. You can manuallystart the Setup program by double clicking the file "Setup.exe" located on the CD.3. Follow the instructions displayed to complete the installation.Note:To install STEP 7-Micro/WIN on a Windows XP or 7 operating system, you must log in with administrator rights.Note:When you install STEP 7-Micro/WIN, the installer program asks you to specifya target directory. It is recommended that you remove previous versions ofSTEP 7-Micro/WIN prior to installing the new version. Use "Add/RemovePrograms" from the Control Panel to uninstall the previous version.4 Installing the upgrade licenseIf a previous version of STEP 7-Micro/WIN is already installed on the computer, simply run the upgrade installation from the Upgrade CD. If you are installing to a newcomputer with a new operating system, first you should install the full Individual License, and then run the upgrade installation from the Upgrade CD.Note:Installing STEP 7-Micro/WIN V4.0 SP9 upgrade license on Windows 7 You must first install a full Individual License of an earlier version of STEP7-Micro/WIN V4.0, and then run the SP9 upgrade installation from the UpgradeCD. A Windows 7 computer can only run STEP 7-Micro/WIN V4.0 SP9. Notes on usage5 What's newTo find out what's new in V4.0, run the STEP 7-Micro/WIN application and double-click on the "What's New" link at the top of the project tree.6 Known problems and remedies6.1 Problems1. Help topics describing Microsoft Windows operationThe STEP 7-Micro/WIN V4.0 SP9 Help system contains graphics and text that describe operation with Microsoft Windows versions and communication devices that are no longer supported. Refer to the “Operating system and hardwarerequirements” section of this readme file for STEP 7-Micro/WIN V4.0 SP9 operating system and communication support information.2. Installing CP CardsYou should always install STEP 7-Micro/WIN before inserting and installing any CP card. STEP 7-Micro/WIN contains I/O driver software that is used by CP cards.3. Managing Applications Access to the Serial PortIf you use the STEP 7-Micro/WIN Communications Setup or the PC/PG Interface under the PC Control Panel to set up the PC COM PORT parameters, certainconditions will cause the COM Port selection field to be shown with an asterisk beside the COM Port number. This asterisk indicates that the user's PC setup has already assigned another application to use the same COM Port. For example, if the Palm Pilot software is installed on the PC and you try to install STEP 7-Micro/WIN, this asterisk will appear because Palm Pilot software typically loads each time the PC is booted up. You must unload (not uninstall) the other application to free up the COM Port so thatSTEP 7-Micro/WIN can gain access to the port.4. HP DeskJet Color PrintersIf you are experiencing problems with an HP DeskJet color printer, or you areexperiencing problems with other printers, try downloading the newest available drivers from the printer manufacturer. Otherwise, you can change the printer driver to the Windows universal driver for your printer. For example (in the case of the DeskJet), the universal driver is the 550c driver.5. TD 200 CommunicationA problem can occur during downloading or uploading a program using a CPU 215or CPU 216 when an older TD 200 (pre-v1.2) is polling the CPU. The currenttime-out error on the TD 200 is no longer appropriate for new CPU models. To work around this error, temporarily disconnect the TD 200 from the network, download or upload the program, and then reconnect the TD 200 to the network.6. TC-35 Cell Phone ModemsCertain Dell laptops used with a Siemens TC-35 modem, will not properlycommunicate. The problem is seen with some Dell laptops that drive the transmit line high when the serial port is not in use. Because of this, the Siemens TC-35 (and possibly other industry standard modems) resets causing initialization sequencing problems followed by communication errors.7. TC-35 Cell Phone Modem Remote ProgrammingRemote modem programming of a Siemens TC-35 modem uses an &WAT-command. Early firmware versions of this modem do not support this command.Programming of this modem will fail, if this command is not supported.8. Network PrintersIf a network printer is assigned as the default printer and the PC network connection is disconnected, there may be an error when starting STEP 7-Micro/WIN.Reconnect the PC to the network or assign a local printer as the default printer and restartSTEP 7-Micro/WIN.9. S7-200 Documentation CDIf you are experiencing problems with the "Programming Tips" section of the S7-200 Documentation CD, you may need to install or update the Java RuntimeEnvironment. To download a free plug-in for this feature, go to and select the "Free Downloads" link. Follow the instructions for installing the Java Runtime Environment, the re-start the S7-200 Documentation browser.10. A box instruction that is connected directly to the left vertical rail does not alwaysexecute. In the LAD network shown below, the DEC_B box will not execute every program scan. The DEC_B box in network 2 will execute only when the result of network 1 evaluates as TRUE (Q0.0=1) and will not execute if network 1 evaluates to FALSE (Q0.0).11. A new Microsoft Windows 7 operating system installation cannot display theSTEP 7-Micro/WIN help (*.hlp) files because the required winhelp32.exe helpviewer is not installed. To view the Help topics, you must use an internet connection and download the new winhelp32.exe file directly from the Microsoft downloadcenter.Go to /kb/917607 and follow the instructions. You must download the Genuine Windows Validation component to get access to thedownload page where you can download the Windows 6.0-KB917607-x64.msu file (for a 64-bit PC) or Windows 6.0-KB917607-x86.msu (for a 32-bit PC).12. Special Characteristics of the Microsoft Windows 7 operating system:The STEP 7_Micro/WIN software in MS Windows is no longer located under "Start menu > SIMATIC"; it is now located under "Start menu > Program Files >Siemens Automation > SIMATIC". This change is necessary due to the currentarchitecture of MS Windows.13. Motion profile table description:The position control wizard correctly generates the required V memory profile data according to the answers you give about your position control system. Advancedusers who want to create their own profile table should know that there are polarity errors in the system manual and Help topic descriptions for negative polarity(POL=1) P/D bit 7 in the IN_OUT_CFG data byte. The text below shows P/D bitpolarity corrections in italic font.P/D This bit specifies the use of P0 and P1Negative Polarity (POL=1)0 –P0 pulses for negative rotationP1 pulses for positive rotation1 - P0 pulses for rotationP1 controls rotation direction (0 –negative, 1- positive)6.2National languagesSTEP 7-Micro/WIN uses several Microsoft common dialog boxes. The text in these dialogs appear in the national language of the operating system, regardless of thelanguage you have chosen for STEP 7-Micro/WIN.6.3General communicationsRefer to the S7-200 Programmable Controller System Manual located on theDocumentation CD for a list of communication configurations.6.3.1 Multi-master communicationsNote: When using Multi-Master communications on networks with several masters (including TDs or OPs), the hardware takes several seconds to initialize onto the PLC network. If communication is attempted before this initialization is complete, an error may occur. Retrying the last request should correct it.Setting STEP 7-Micro/WIN network addresses:As a general rule, use the lower available addresses for masters and the higheravailable addresses for slaves. It is preferable (but not required) to use consecutive addresses for the masters on a network. For example:Network components Possible addressesSTEP 7-Micro/WIN 0TD 200 1OP15 2Several S7-200 slaves 3, 4, and 5 You could leave these numbers free foradditional masters and start the numbering of theS7-200 slaves at 16.TD 200-MPI:A problem can occur during downloading or uploading a program with a CPU 215 orCPU 216 when an older TD 200 (pre-v1.2) is polling the CPU. The current time-out error on the TD 200 is no longer appropriate for these CPU models. To workaround this error, temporarily disconnect the TD 200 from the network, download or upload the program, and then reconnect the TD 200 to the network.Master mode communications error:STEP 7-Micro/WIN might report erroneous communications time-out errors when the PLC is in Master mode. For example, using STEP 7-Micro/WIN to put the CPU inSTOP mode might return this time-out error even though the CPU did go to STOP mode.6.4Project compatibility1. In V4.x when uploading a data block from a CPU 21x PLC, all data block formattinginformation and comments will be deleted.2. Projects prior to V3.0 which have double quotes embedded in strings will notcompile. The projects must be modified as described under the Illegal Syntax rules located in the help system.3. Local memory usage is no longer supported on String operands.4. In rare cases with extremely large programs, there is a new option of downloadingthe program without downloading wizard configurations. The program willdownload and execute properly, but subsequent uploads will not allow re-runningwizards to edit the uploaded program. In previous releases the download wouldhave been blocked.7 Using the Force functionWarning!When you force a value in your program, the operand is reset to that value with each scan of your program, regardless of input/output conditions or other program logic that would ordinarily have an effect on the operand value. Forcing can cause your process to operate unpredictably, and unpredictable process operation can cause death or serious injury to personnel, and/ or damage to equipment. The Force function is an aid for debugging your program; never force a value to compensate for problems with your process equipment. Only experienced personnel should use the Force function. Be sure that all personnel who have authority to maintain or debug your process are aware when program values have been forced.Consider the following when using the Force function:Any forced values will remain forced even when the PLC is in STOP mode.The Force function overrides an output that has been configured to go to a specified value when the PLC transitions to STOP mode.If the PLC is power cycled, any forced values will be reapplied when power is restored to the PLC.For more information regarding the Force function, consult theS7-200 Programmable Controller System Manual.。
WIN7 64位旗舰版系统WINDOWS INSTALLER服务停止

据用户反映,在win7 64位旗舰版系统下安装office 、QQ、杀毒软件、CAD等软件的时候均出现Windows Installer服务停止的提示,不能继续安装下去,无奈只好选择绿色版的软件来用,那么是什么引起不能安装软件,为何会有Windows Installer服务停止的提示呢?
Windows Installer服务是微软的一项软件安装技术,在程序安装失败后会自动将计算机还原为原始状态。
但很多软件并未使用这项技术,在安装时就无须它的支持。
如上我们可知Windows Installer服务是引起软件不能正常安装的原因之一。
解决方法:
1、查看Windows Installer服务是否启动,如未启动则启动它;
先按Win+R组合键打开运行对话框,输入执行命令services.msc(不含外侧引号)打开服务管理器,找到Windows Installer服务并手工将其开启即可
启Windows Installer服务后还是未能解决问题,可以判断Windows Installer服务组件受损
大家可到微软网站搜索下载对应的Microsoft Windows Installer 并重新安装此服务。
很多软件都需要Microsoft Windows Installer服务的支持,所以我们需要一个正常运行的Microsoft Windows Installer服务,另外,有些朋友可能在安装程序时还遇到Windows Installer配置方面的错误,还可以通过Windows Installer Clean up Utility 来清除程序安装信息。
一般都能解决此类问题。
v4.0step7microwinsp6的使用

编程软件的初步使用一、计算机的配置要求STEP 7 Micro/WIN对计算机的最小配置要求如下:(1)操作系统:Windows 2000 SP3 及以上;Windows XP Home;Windows XP Professional;(2)硬盘:100Mb及以上(3)CPU:600MHz及以上(4)内存:256Mb及以上二、软件的安装与卸载1、STEP 7 Micro/WIN 的安装(1)将光盘插入CD-ROM,在光盘目录里双击Setup,或打开STEP 7 Micro/WIN的压缩包,在目录中双击Setup,进入安装向导。
(2)选择安装语言及安装程序,一般默认英文状态下安装。
按照提示进行安装。
(3)软件程序安装路径可使用默认路径,也可以点击“浏览”按钮,选择自定义的安装路径。
(4)出现PG/PC Interface 窗口,单机“OK”按钮,继续安装。
(5)安装结束时,会出现如下选项:是,我现在要重新启动计算机(默认选项)否,我以后再启动计算机此时一般选择默认选项,重新启动计算机,完成安装。
首次完成安装后,会出现下面的选项:是,我现在浏览Readme文件(默认选项)否,我现在要进入STEP 7 Micro/WIN此时可选择“否”,直接进入软件,遇到问题时再去查找有关说明。
2、界面汉化:进入该软件后,界面为全英文版,我们需要设置软件语言,将其改成简体中文界面。
具体操作如下:Tools→Opinions在弹出的Opinions对话框的左侧Opinions树状选项中选择Genera,在language选项框中选择Chinesel,然后点击OK,软件会提示“为了改变设置STEP7 将退出(STEP 7-Micro/WIN will now exit in order to change opinions)”点击“确定”如下图所示:这时系统会提示你“是否保存对工程的修(Do you want to save the changes to your project)”如果需要保存对该工程的修改,点“是”,反之点“否”3、软件卸载逐步打开Windows操作系统的开始→设置→控制面板→添加/删除程序,选择“STEP 7 Micro/WIN ”进行卸载,卸载完成后需要重启计算机。
Windows 7 64bit +VS2008+ CUDA 4.0安装配置完全过程
Windows 7 64bit +VS2008+ CUDA 4.0安装配置完全过程安装CUDA4.0时,碰到了很多意外,花费了较多时间,最终取得了成功,现对期间的经验教训总结如下,供大家分享,期待提高大家的工作质量和效率。
一 安装环境Windows 7 64bit 家庭版,VS2008(安装了X64编译器),CUDA 4.0 64bit版本;二 安装软件Windows 7 64bit 家庭版是购买笔记本时自带的系统,不再详说。
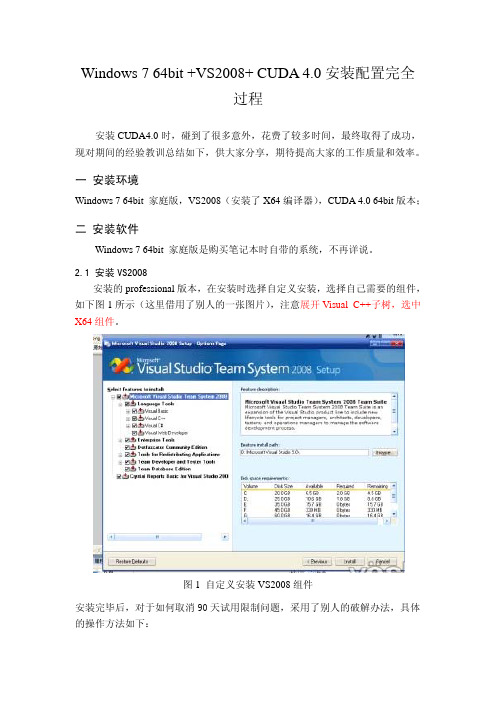
2.1 安装VS2008安装的professional版本,在安装时选择自定义安装,选择自己需要的组件,如下图1所示(这里借用了别人的一张图片),注意展开Visual C++子树,选中X64组件。
图1 自定义安装VS2008组件安装完毕后,对于如何取消90天试用限制问题,采用了别人的破解办法,具体的操作方法如下:打开 控制面板 Î 添加删除程序, 找到VS2008的安装项,运行VS2008的安装卸载程序,出现如下图2所示界面:图2 VS2008的安装卸载界面下载 破解程序CrackVS2008ForWindows7.zip,然后右键点击该破解程序,选择以管理员身份运行,出现如下的图3所示界面:图3 破解程序界面点击图3右上角 按钮“Bug 微软”,则久违的图4界面出现了:图4 破解后的界面输入相应的序列号,就可以了,以下是收集的序列号:1.Visual Studio 2008 Professional Edition:XMQ2Y-4T3V6-XJ48Y-D3K2V-6C4WT2.Visual Studio 2008 Team Test Load Agent:WPX3J-BXC3W-BPYWP-PJ8CM-F7M8T3.Visual Studio 2008 Team System:PYHYP-WXB3B-B2CCM-V9DX9-VDY8T4.Visual Studio 2008 Team Foundation Server:WPDW8-M962C-VJX9M-HQB4Q-JVTDM2.2 安装CUDA4.0在nvidia的下载网页上,下载了64bit的开发组件,包括driver、tookit、sdk 等主要组件,具体如下:devdriver_4.0_winvista-win7_64_275.33_notebook.execudatoolkit_4.0.17_win_64.msigpucomputingsdk_4.0.19_win_64.execudatools_4.0.17_win_64.msiCUDA4_0BuildCustomizationFix.zip注意驱动选择台式机或者笔记本版本。
STEP7_Microwin_V4.0编程软件的使用

STEP7Microwin V4.0编程软件的使用STEP7Microwin V4.0编程软件是专为西门子公司S7-200系列小型机而设计的编程工具软件,使用该软件可根据控制系统的要求编制控制程序并完成与PLC的实时通信,进行程序的下载与上传及在线监控。
一、STEP7-Micro/WIN的窗口组件1、操作栏显示编程特性的按钮控制群组:“视图”:选择该类别,为程序块、符号表,状态图,数据块,系统块,交叉参考及通讯显示按钮控制。
“工具”:选择该类别,显示指令向导、文本显示向导、位置控制向导、EM253控制面板和调制解调器扩展向导的按钮控制。
注释:当操作栏包含的对象因为当前窗口大小无法显示时,操作栏显示滚动按钮,使您能向上或向下移动至其他对象。
2、指令树提供所有项目对象和为当前程序编辑器(LAD、FBD或STL)提供的所有指令的树型视图。
用户可以用鼠标右键点击树中“项目”部分的文件夹,插入附加程序组织单元(POU);也可以用鼠标右键点击单个POU,打开、删除、编辑其属性表,用密码保护或重命名子程序及中断例行程序。
可以用鼠标右键点击树中“指令”部分的一个文件夹或单个指令,以便隐藏整个树。
一旦打开指令文件夹,就可以拖放单个指令或双击,按照需要自动将所选指令插入程序编辑器窗口中的光标位置。
可以将指令拖放在自己“偏好”的文件夹中,排列经常使用的指令。
3、交叉参考允许用户检视程序的交叉参考和组件使用信息。
4、数据块允许用户显示和编辑数据块内容。
5、状态图窗口允许用户将程序输入、输出或变量置入图表中,以便追踪其状态。
您可以建立多个状态图,以便从程序的不同部分检视组件。
每个状态图在状态图窗口中有自己的标签。
6、符号表/全局变量表窗口允许用户分配和编辑全局符号(即可在任何POU中使用的符号值,不只是建立符号的POU)。
您可以建立多个符号表。
可在项目中增加一个S7-200系统符号预定义表。
7、输出窗口在用户编译程序时提供信息。
第7章 STEP7-WINV4.0软件使用 《西门子PLC系统综合应用技术》课件

7.1.3 建立通信联系
设置连接好硬件并且安装完软件之后,可以按下面的步骤进行在线连接: 1)在STEP7-Micro/WIN V4.0运行时,单击浏览条中通信图标,或从菜单检视(View)中选择 -通信(Communications),则会出现一个通信联系对话框,如图7-6所示。 2)双击对话框中的刷新图标,STEP7-Micro/WIN V4.0编程软件将检查所连接的所有S7200CPU站。 3)双击要进行通信的站,在通信建立对话框中,可以显示所选的通信参数,也可以重新设置。 4)通信参数设置。单击浏览条中的系统块图标,或从菜单检视(View)中选择→系统块 (System Block)选项,将出现系统块对话框,默认为“通信端口”选项卡。 检查各参数,确认无误后单击确定。若需要修改某些参数,可以先进行有关的修改,再单击 “确认”。 单击工具条的下载按钮,将修改后的参数下载到可编程控制器。
7.1.2 编程软件的安装
1. 编程软件的安装步骤 1)关闭所有应用程序,将存储有软件的光盘放入光驱。如果没有禁 止光盘插入自动运行,安装程序会自动运行;或者打开光盘中的安装 程序Setup.exe文件。 2)按照安装程序的提示完成安装 1运行Setup.exe文件,选择安装语言,默认使用英语。如图7-2所示。 这里选择的是软件安装过程中的界面语言,STEP7-Micro/WIN使用时 的界面语言环境,需要安装完成后设置选用。 2选择安装目的文件夹。 3安装过程会自动进行,当弹出Set PG/PC Interface窗口时,单击 “OK“按钮,安装过程继续进行。 4安装完成后,单击重新启动计算机窗口的Finish(完成)按钮,重新 启动计算机。要运行软件时,双击图标V4.0 STEP7-Micro/WIN即可 打开软件。 5设置STEP7-Micro/WIN使用时的界面语言环境,在安装完成后,可 以打开软件的Tools(工具)菜单,单击Options(选项),在General (常规)选项的语言选择中,选择“Chinese”,确定并保存,软件会 自动关闭。再重新打开后系统即变为中文界面。
工业自动化最常用PLC编程软件
工业自动化最常用PLC编程软件作为控制系统中的核心,在当代自动化工程项目中起着至关重要的作用。
如果PLC选择正确了,其他部件的选择才有意义。
随着自动化产业热潮不断升温,PLC市场被很多专业市场研究机构看好,我国也将迎来一个PLC市场高速增长的时期。
市场上的PLC品牌琳琅满目,究竟都包含了哪些种类呢?一、西门子系列1、西门子S7-200系列plc编程软件STEP_7_MicroWIN_V4.0_incl_SP92、西门子S7-SMART_200系列PLC编程软件STEP_7_MicroWIN_SMART3、西门子S7-1200系列PLC编程软件SIMATIC_STEP7_Basic_V10_5_SP2_Internet4、西门子S7-307-307-307-307-307-300_400系列PLC编程软件Step7_V5.4_CN5、7-307-300_400系列PLC编程软件Step7_V5.5_CN6、西门子触摸屏组态软件WinCC_flexible_2008_SP4二、三菱系列1、三菱plc编程软件GX_Works22、三菱PLC编程软件GX_Developer_8.863、三菱触摸屏组态软件GT_Designer_3三、欧姆龙系列1、欧姆龙plc编程软件CX-ONE_4.26 CX-Programmer V9.41 2、欧姆龙触摸屏组态软件NBD_V1233、欧姆龙触摸屏组态软件NTST_V4.8C四、松下系列1、松下PLC编程软件FPWIN_GR_V2.9172、松下PLC编程软件FPWIN_Pro_6.3103、松下触摸屏组态软件GTWIN_SPV298E4、松下触摸屏组态软件GH_Screen_Editor_V4.12五、台达系列1、台达PLC编程软件Delta_WPLSoft_V2.342、台达DOP-B系列触摸屏组态软件Delta_DOPSoft 1.01.043、台达网络型DOP系列触摸屏组态软件Delta_DOP eRemote 2.00.06六、罗克韦尔系列1、罗克韦尔AB_PLC编程软件RSLogix500_V8.12、罗克韦尔AB PLC编程软件RSLogix5000_V19_CN七、富士系列1、富士PLC编程软件SX_Programmer_Standard_V32、富士PLC编程软件SX_Programmer_Expert_D300_win_V3440 3、富士触摸屏组态软件V-SFT5(5.4.20.0)八、VB系列1、Visual Basic 6.0中文企业版2、Visual Basic 6.0中文企业Win7 32位兼容版3、Visual Basic 6.0中文企业Win7 64位兼容版九、LabVIEW系列1、LabVIEW 8.6中文版2、LabVIEW 2010中文版3、LabWindows CVI 9.0英文版十、Matlab系列1、Matlab 7.0英文版2、Matlab 2012a英文版3、Matlab 2012b英文版。
第7章-step7MicroWin的安装与使用
Slow Feature Analysis for process monitoring
第七章 STEP7-Micro/WIN的使用
STEP7-Micro/WIN的使用
编程软件和运行环境
• STEP7-Micro/WIN是SIEMENS 公司专为SIMATIC系列S7200PLC研制开发的编程软件
STEP7-Micro/WIN的使用
如果需要同时监控的变量不能在程序编辑器中同时显示,可以使 用状态表监控功能。与PLC的通信连接成功后,打开状态表,执 行菜单命令“调试”→“开始状态表监控”或单击工具栏上的“ 状态表监控”按钮 ,可以启动状态表的监控
STEP7-Micro/WIN的使用
• 用户可以用多选框选择是否下载程序块、数据块、系统块、配 方和数据记录配置,不能下载或上载符号表或状态表
STEP7-Micro/WIN的使用
2. 上载程序 • 上载前应建立起编程软件与PLC之间的通信连接,在STEP7-
Micro/WIN中新建一个空项目来保存上载的块,项目中原有的 内容将被上载的内容覆盖。 • 单击工具栏中的“上载”按钮 ,或者执行菜单命令“文件 ”→“上载”,将会出现“上载”对话框,它与“下载”对话 框的结构基本相同,用户可以用多选框选择是否上载程序块、 数据块、系统块、配方和数据记录配置。单击“上载”按钮, 开始上载数据。
STEP7-Micro/WIN的使用
程序的运行
• 下载成功后,将S7-200 CPU上的状态开关拨到RUN位置,CPU上的 黄色“STOP”指示灯灭,绿色“RUN”指示灯点亮,PLC进入运行 状态。
• 如果S7-200 CPU上的状态开关处于RUN或TERM 位置,还可以在 STEP7-Micro/WIN软件中使用菜单命令“PLC”→“运行”和 “PLC”→“停止”,或单击工具栏按钮 和改变CPU的运行状态
安装 STEP 7 (TIA Portal) V13 的必要条件
安装Deltalogic注意事项
如果电脑上还装有Deltalogic的软件,在线连接时可能会报错。这时,可以检查任务管理器里的“s7oiehsx64”服务(SIMATIC IEPG Help Service)是否在执行。
在Windows 7的“搜索程序和文件”处输入“Regedit”,点击确定后进入注册表。
打开路径:
在Windows 7 32位操作系统:
HKEY_LOCAL_MACHINE\SOFTWARE\Siemens\Automation\_InstalledSW\
TIAP11\TIA_ES_V11\PrivateProperties\INST_TYPE_LEVEL_INTERNAL
No.安装STEP 7 Basic / Professional V13的要求
1
硬件要求安装STEP 7 Basic / Professional V13的计算机必须至少满足以下需求:
处理器:CoreTM i5-3320M 3.3 GHz或者相当
内存:至少8G
硬盘:300 GB SSD
图形分辨率:最小1920 x 1080
插入STEP 7 V13安装盘到计算机的光驱。
如果程序不能自动启动,打开"Start.exe"文件。
选择对话框的显示语言。
选择“修复”选项然后点击“下一步〉”按钮。
按照屏幕上的提示继续操作。
9卸载WinCC (TIA Portal) Professional
如果在安装STEP 7 (TIA Portal) V13的过程中中止,并提示必须先卸载较早版本的WinCC Professional,即使已经卸载过此软件,造成这种情况的原因可能是注册表代码问题。以Windows 7为例,须删除注册表条目,如下:
SIMATIC博途软件安装及使用方法(内部资料)
3、兼容性要求(针对Professional版)
Ø TIA Portal V13、STEP7 V5.5、STEP7 Micro/WIN V4.0 SP9可以在同一台电脑上安装并使用。
Ø TIA Portal WinCC V13和WinCC flexible 2008 SP3可以在同一台电脑上安装并使用。
进入安装界面,选择中文安装
默认为典型安装,安装默认的路径安装即可,不需要修改
接受许可条款和安全权限设置之后,进入安装界面,点击安装 ,安装的时间有点久,耐心等待
如果安装过程中未找到许可密钥,则可以将其传送到 PC中。 如果跳过 许可密钥传送,稍后可通过 Automation License Manager 进行注册。可 能需要重新启动计算机。 在这种情况下,请选择“是,立即重启计算机
。”(Yes, restart my computer now.) 选项按钮。 然后单击“重启 (Restart),直至安装完成。
一、简介
全集成自动化软件TIA portal(中文名为博途), 是西门子工业自动化集团发布的新一代全集成自动化 软件。它几乎适用于所有自动化任务。借助这个软件 平台,用户能够快速、直观地开发和调试自动化控制 系统。与传统方法相比,无需花费大量时间集成各个 软件包,显著地节省了时间,提高了设计效率。到 2016年为止,最新版本是V14。有Basic、comfort、 Advanced、Professional等四个级别版本。
安装方式选择,选择第二项标准安装
接受对系统的更改之后进入安装界面,安装到SQL Server2008这一 步会提示重启,按照要求重启的项目,点击激活按钮运行项目
实际情况中,我们在安装软件的过程中会遇见很多的问题,下
- 1、下载文档前请自行甄别文档内容的完整性,平台不提供额外的编辑、内容补充、找答案等附加服务。
- 2、"仅部分预览"的文档,不可在线预览部分如存在完整性等问题,可反馈申请退款(可完整预览的文档不适用该条件!)。
- 3、如文档侵犯您的权益,请联系客服反馈,我们会尽快为您处理(人工客服工作时间:9:00-18:30)。
WIN7 64bit中安装MicroWin_V4.0SP9
一、支持的操作系统:
二、兼容性:
与所有 S7-200 CPU (CPU 21x 和 CPU 22x)兼容。
可以没有任何限制地打开和进一步处理使用以前的 MicroWin 版本创建的程序。
使用旧版软件既不能打开也不能处理使用新的 Service Pack 创建的项目。
三、安装软件:
安装的时候是英文的,安装完之后你只需要小小的设定就能转换为中文版。
1、将安装包下载到 PC
/CN/llisapi.dll?func= cslib.csinfo&lang=zh&objid=58523240&caller=view
2、将压缩文件和所需的 Service Pack 解压缩。
3、在C盘手动创建目
录 C:\Program Files (x86)\Siemens\STEP 7-MicroWIN V4.0\bin
4、把microwin.exe(老版本的执行文件)拷贝到bin目录下
5、安装STEP 7-MicroWIN V4.0 SP9:在Disk1中找到Setup.exe
6、自动寻找安装路径...(寻找时间较长),在系统找到我们手动建立的路径时,点击“确定”
7、系统提示卸载旧版(是我们在bin目录放置旧版microwin.exe的原因),进入bin目录,删除旧版microwin.exe
8、点“确定”,直至重启。
9、重新启动后点击V4.0STEP7 MicroWIN SP9-Tools(工具)-Option(选项)
-Genera(常规)l里的Language项目里选择语言为Chinese(中文)后点击OK,提示STEP7MicroWIN will now eixt inorder to change options
(STEP7MicroWIN现在将退出,以便改变选项),点击“确认”,再提示
Do you want to save zhe change to your project(你希望将改动存入项目吗?),点击“否”后退出,再点击启动V4.0STEP7 MicroWIN SP9就是中文菜单了。
四、安装帮助补丁:
在Win7(32Bit或者64bit)下安装siemens的软件要使用帮助还要安装一个WIN7的帮助补丁
Windows6.1-KB917607-x86(winhlp32).msu(Win7 32位)
Windows6.1-KB917607-x64(winhlp32).msu(Win 7 64位)
文件才可以使用。
这个要在微软网站上经过正版才可以下载。
五、卸载
首先尝试在控制面板/添加或删除程序中进行卸载。
如果
STEP 7-Micro/WIN V4.0 软件仍然出现在程序列表中且不能被卸载,则请按照以下步骤进行处理。
1、备份现存的 STEP 7-Micro/WIN 项目。
2、删除程序文件
在 Windows Explorer 中找到 STEP 7-Micro/WIN 目录并将其删除 (默认路径:C:\Program Files\Siemens\STEP 7-MicroWIN V4.0)
3、删除注册表条目
建议无论如何先对注册表进行备份,然后再按以下步骤进行操作。
点击 Start > Run....
在命令行中输入 "regedit",点击 "OK" 进行确认
图1: 打开注册表编辑器
保存当前注册表设置,选中 "My Computer" 并通过 File > Export....备份注册表数据。
打开目录
HKEY_LOCAL_MACHINE\ Software\ Microsoft\ Windows\ CurrentVersion\ Unin stall。
选中目录 Uninstall,通过 Edit > Find.... 打开查找对话框。
在 "Find what:" 栏输入 STEP 7-Micro/WIN 并选中所有 "Look at" 选项。
点击 Find Next 按钮开始搜索。
图2: 查找注册表条目
注册表条目取决于所安装的 STEP 7 Micro/WIN 的版本。
为了确保找到正确的注册表条目,请确保 "DisplayName"代码值要与表1中 "MicroWin Release" 列的值匹配 (例如: STEP 7 Micro/WIN V4.0 的 DisplayName 代码是
SIMATIC STEP 7-Micro/WIN V4.0.8.06)。
选中含有带正确数值的 DisplayName 代码所在的文件夹,从注册表目录
HKEY_LOCAL_MACHINE\ Software\ Microsoft\ Windows\ CurrentVersion\ Unin stall中将其删除。
图03: 删除注册表条目
求软件西门子 STEP7-MicroWIN_V40_SP9 我的电脑是64位之前下了一
个老版本的根本运行不了
提问者采纳
现在s9版本能再win7中装,我现在已在win764系统上使用,
下载地址:(下载后有sp8和sp9版本,下载是先看看怎样哪个)
/CN/llisapi.dll?func=cslib.csinfo&lang=zh&objid=58523240& caller=view
另外如果是win7-64位系统的话,建议你下载个Windows6.1-KB917607-x64.msu,这是一个在win 7-64位系统下打开软件中帮助文件必须需要的,要不然你会发现安装好s9后需要在软件中使用帮助的话打不开帮助。
(因为Windows6.1-KB917607-x64.msu在以前的系统中都有,但在win7及以后的系统上没有,微软觉得应该淘汰,但现在还可以自己下下来安装)
/zh-cn/download/details.aspx?id=91。