关于gmt在redhat enterprise linux 6下的安装问题
linux6.0安装过程

linux6.0安装过程1.新建虚拟机,选择自定义选项2.选择虚拟机兼容版本,选择最高的就好3.选择安装系统的方式,我们选择稍后安装64位安装不上就安装32位的.5.设置安装的虚拟机系统名称以及安装的虚拟机存放路径,路径自己定义(建议不要放到C盘)6.为虚拟机分配处理器(cpu)个数和每个cpu核数7.为虚拟机分配内存大小8.选择使用网络类型,我们选择使用桥接网络9.选择I/O设备接口的控制器类型,我们选择默认10.选择新建一块新的虚拟磁盘11.选择虚拟磁盘类型,我们选择scsi磁盘(服务器常用磁盘类型SCSI和SAS)12.定义虚拟磁盘大小13.完成设置14.设置刚才新建的虚拟机15.设置虚拟机cd/dvd选项,使用光盘镜像安装,选择光盘路径16.加电进入安装选项,选择第一个选项17.这个是对光盘进行检查,我们使用的是ISO,我们选择跳过18.开始安装,下一步19.选择安装时使用的语言,我们选择中文简体20.选择键盘格式,一般都选择美国英语式键盘21.选择存储设备类型,我们没有外部的存储所以选择基本存储。
22.格式化我们刚才建的虚拟磁盘,擦除磁盘数据,我们选择yes 就可以了23.为计算机命名,由主机名和域名构成。
我们先默认。
24.设置时区25.设置超级用户root的密码。
密码长度为6位以上26.由于我的密码是redhat过于简单,我们是做实验用所以选择无论如何都使用。
27.选择分区方式,我们手动划分28.创建一个标准分区29.设置根分区的大小为20G30.再新建标准分区,设置/boot分区大小为100M(/boot中主要存放的是我们的linux系统内核)31.新建标准分区,设置swap分区大小,一般为我们内存的2倍32.划分完成后的布局33.格式化磁盘分区34.将分区写入磁盘35.设置安装引导程序,我们选择默认。
36.选择我们所要安装的系统类型,我们做实验用选择桌面。
37.进入安装过程。
38.安装完成,重新引导系统启动。
RHEL6操作系统安装手册

RedHat Enterprise Linux 6 Server 操作系统部署手册2012年8月目录一.安装准备 (3)1、安装介质 (3)2、部署信息准备 (3)二.安装RedHat Enterprise Linux (3)1、配置硬件 (3)2、引导安装介质 (3)3、加载内核,硬件初始化,检查安装介质 (4)4、选择安装程序界面的语言和键盘类型 (5)5、选择安装设备类型 (6)6、设定主机名和网路 (7)7、选择时区 (9)8、设置root帐户密码 (9)9、磁盘分区方式 (10)10、配置磁盘分区 (10)11、配置引导管理器 (12)12、软件包的选择 (12)13、安装完后系统设置 (18)三.操作系统基本配置 (22)1、配置关闭SElinux及Firewall (22)2、本地YUM源配置 (22)一.安装准备1、安装介质在服务器上安装Redhat Enterprise Linux 6系统必须使用符合硬件平台版本的操作系统介质,按照硬件平台的CPU和应用系统的兼容新对操作系统的要求进行选择。
操作系统安装介质为DVD,拥有有效产品订阅的用户可以通过Redhat Network下载。
2、部署信息准备在安装前我们需要准备好安装中所需要的基本信息。
其中硬盘系统的规划是最主要的安装前准备信息,一旦按照指定的硬盘规划进行安装就无法在安装后更改,如果要进行更改必须重新安装。
其他需要的信息:主机名,IP地址/网络掩码,网关,默认密码二.安装RedHat Enterprise Linux1、配置硬件服务器通常都配有磁盘阵列卡,在安装操作系统之前必须先对磁盘阵列卡进行配置,具体配置请参考硬件手册。
我们的安装程序将通过光盘引导,在服务器的BIOS配置中配置为CD-ROM为第一引导选项。
当前的硬件系统大多数均支持UEFI方式引导,由于目前正处于传统BIOS向UEFI的过度过程中,因此请优先使用BIOS方式引导安装,避免不必要的兼容问题。
RedHat LINUX安装全步骤(附图)
LINUX软件安装步骤1.在Vmware 中创建一个Linux 的虚拟机版本是Red Hat Linux ,其中硬盘最少要有2GB 的空间(建议分4GB 其他硬盘,网卡的配置和Windows 虚拟机一样即可)。
2.把Vmware 的光驱制定到对应的镜像文件上,我们这里是linux iso 文件中的第一张盘。
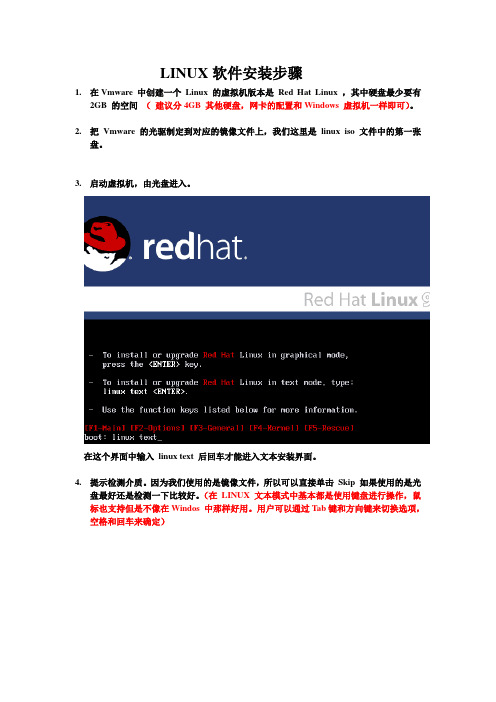
3.启动虚拟机,由光盘进入。
在这个界面中输入linux text 后回车才能进入文本安装界面。
4.提示检测介质。
因为我们使用的是镜像文件,所以可以直接单击Skip 如果使用的是光盘最好还是检测一下比较好。
(在LINUX 文本模式中基本都是使用键盘进行操作,鼠标也支持但是不像在Windos 中那样好用。
用户可以通过Tab键和方向键来切换选项,空格和回车来确定)如果上面选择的是Skip就会直接跳到第8步。
5.开始检测。
如果是使用的光盘CD 需要先插入CD 后在Test 因为我们使用的是镜像文件所以就可以直接Test6.检测完毕。
选择OK7.提示是否检测其他的盘。
如果你为了保险起见可以继续检测,但是时间可能会长一些。
8.选择语言安装过程,在这里选择英语。
(如果选择的不是英语的话,在以后的一些提示显示中会出现乱码看不懂)9.选择键盘类型,在这里选择us 即可。
10.选择鼠标类型,在Linux 这类操作系统中,经常用到三键鼠标,因此,除了选择鼠标类型外,一般还选中下面的“Emulate 3 Buttons?”,这样同时点击鼠标左右键,代表点击中键。
11.选择安装类型。
在这里我们选择第4个Custom(定制)。
12.准备分区。
在这里选择Autopartition 。
13.这里会让用户选择如何处理硬盘上的原始分区。
因为我们是新建的所以选那个都无所谓,但是如果在已经安装好Windows 的系统上进行安装,一般选择第三项。
意思就是使用硬盘当中没有使用的空间来创建相应的分区。
在下面会让用户选择。
要安装到那个硬盘中,在这里只有一个硬盘sda ,所以直接选择即可。
RedHat Linux如何安装软件
RedHat Linux如何安装软件先来看看Linux软件扩展名。
软件后缀为.rpm最初是Red Hat Linux提供的一种包封装格式,现在许多Linux发行版本都使用;后缀为.tar.gz、tar.Z、tar.bz2或.tgz 是使用Unix系统打包工具tar打包的;后缀为.bin的一般是一些商业软件。
通过扩展名可以了解软件格式,进而了解软件安装。
RPM格式软件包的安装1.简介几乎所有的Linux发行版本都使用某种形式的软件包管理安装、更新和卸载软件。
与直接从源代码安装相比,软件包管理易于安装和卸载;易于更新已安装的软件包;易于保护配置文件;易于跟踪已安装文件。
【LINUX公社】PM全称是Red Hat Package Manager(Red Hat包管理器)。
RPM本质上就是一个包,包含可以立即在特定机器体系结构上安装和运行的Linux软件。
2.安装RPM包软件#rpm -ivh MYsoftware-1.2 -1.i386.rpmRPM命令主要参数:-i 安装软件。
-t 测试安装,不是真的安装。
-p 显示安装进度。
-f 忽略任何错误。
-U 升级安装。
-v 检测套件是否正确安装。
这些参数可以同时采用。
更多的内容可以参考RPM的命令帮助。
3.卸载软件#rpm -e 软件名需要说明的是,上面代码中使用的是软件名,而不是软件包名。
例如,要卸载software-1.2.-1.i386.rpm这个包时,应执行:#rpm -e software 4.强行卸载RPM包有时除去一个RPM是不行的,尤其是系统上有别的程序依赖于它的时候。
如果执行命令会显示如下错误信息:## rpm -e xsnowerror: removing these packages would break dependencies:/usr/X11R6/bin/xsnow is needed by x-amusements-1.0-1在这种情况下,可以用--force选项重新安装xsnow:## rpm -ivh --force xsnow-1.41-1.i386.rpmxsnow这里推荐使用工具软件Kleandisk,用它可以安全彻底清理掉不再使用的RPM包。
redhat6安装详解
redhat6安装详解备注:redhat 6 系列OS安装步骤⼀致。
此处安装redhat 6.5 64位版本,即⼀、安装RHEL 6.5⽤光盘成功引导系统,会出现下⾯的界⾯界⾯说明:Install or upgrade an existing system:安装或升级现有的系统install system with basic video driver:安装过程中采⽤基本的显卡驱动Rescue installed system:进⼊系统修复模式Boot from local drive:退出安装从硬盘启动Memory test:内存检测这⾥选择第⼀项,安装或升级现有的系统,回车。
出现是否对CD媒体进⾏测试的提问,这⾥选择“Skip”跳过测试。
出现下⾯的界⾯点击Next:选择语⾔为:English(English)#⽣产服务器建议安装英⽂版本,Next键盘选择为:U.S.English ,点击Next选择第⼀项,基本存储设备,Next选择第⼀项:Yes,忽略所有数据,Next设置主机名,默认即可,也可以⾃定义(可配置主机名和⽹络地址,此处默认,安装完成后配置),Next时区选择:Asia/Shanghai 亚洲/上海,取消"System clock user UTC" 前⾯的勾,不使⽤UTC时间,Next设置root密码,Next注意:如果你使⽤的密码过于简单,系统会⾃动提⽰:您的密码不够安全,过于简单化/系统化,这⾥选择“Use Anyway" ⽆论如何都使⽤,Next选择最后⼀项,Create Custom Layout 创建⾃定义布局,⼀定要选择该项,Next可以看到硬盘的容量,我这⾥显⽰的是20G,现在⾃定义分区。
注意:分区之前,⾃⼰先要规划好,怎么分区。
我这⾥的分区如下:硬盘总共20GSwap 4G #⼀般设置为内存的2倍,最⼤16g,⼀般规律如下:1)物理内存⼩于4G,swap空间1.5*物理内存2)物理内存4G~16G,swap空间⼤⼩=物理内存3)物理内存⼤于16G,swap空间等于16G/ 16G #剩余所有空间特别说明:⽤于正式⽣产的服务器,切记必须把数据盘单独分区,防⽌系统出问题时,保证数据的完整性。
Linux RHEL6.1的安装

Linux操作系统的安装(RHEL6)相信的你安装介质是好的,选择Skip点击Next选择语言为中文简体,下一步Next 选择键盘为美国英语,下一步Next选择存储设备。
根据提示,我们现在选择“基本存储设备”。
下一步Next提示是否清楚存储设备中的数据。
由于我们使用新磁盘安装,因此选择“Yes discard any data”输入主机名。
根据你的实际情况来命名,我这里命名为:testrh6.deeblue。
org。
点击左下角“配置网络",选择“有线”-〉“添加”,输入IPv4设置的IP地址、网关与DNS等参数。
保存应用后,下一步Next选择时区,我们选择“亚洲/上海",下一步Next输入root用户密码,建议使用大小写字母加数字结合。
下一步Next使用所有空间.你可以选择查看并修改分区布局.下一步Next*重点讲述*这里可以看到分区布局磁盘驱动器的名称为sda.被划分为两个物理分区,一个是sda1用于引导的/boot,分配了500MB的空间,分区格式为ext4。
另一个分区是sda2,用了剩下的所有的磁盘空间,并创建了卷组vg_testrh6。
在逻辑卷组的基础上,创建了两个逻辑卷,一个是lv_root,创建ext4文件系统,用于挂载点/;另一个是lv_swap,创建了交换分区。
关于卷LVM是逻辑盘卷管理(Logical Volume Manager)的简称,它是Linux环境下对磁盘分区进行管理的一种机制,LVM是建立在硬盘和分区之上的一个逻辑层,来提高磁盘分区管理的灵活性。
通过LVM系统管理员可以轻松管理磁盘分区,如:将若干个磁盘分区连接为一个整块的卷组(volume group),形成一个存储池。
管理员可以在卷组上随意创建逻辑卷组(logical volumes),并进一步在逻辑卷组上创建文件系统。
管理员通过LVM可以方便的调整存储卷组的大小,并且可以对磁盘存储按照组的方式进行命名、管理和分配,例如按照使用用途进行定义:“development"和“sales”,而不是使用物理磁盘名“sda”和“sdb"。
非常详细的redhatserverLinux6.3安装教程

用途:Rhel6.3的安装以及rhel6.3上安装oracle11g2RHEL6.3安装本文以为RHEL6.3为例,同样适用于CentOS,CentOS的安装镜像文件有两个DVD,安装系统只用到第一个镜像文件DVD1,另外一个镜像文件是附带的软件包。
界面说明:Install or upgrade an existing system 安装或升级现有的系统Install system with basic video driver 安装过程中采用基本的显卡驱动Rescue installed system 进入系统修复模式Boot from local drive 退出安装从硬盘启动Memory test 内存检测这里选择第一项,安装或升级现有的系统,回车,出现是否对CD媒体进行测试的提问,这里选择“Skip”跳过测试。
选择语言为:中文(简体)键盘模式,默认即可选择第一项;选择第一项:是,丢弃所有数据设置计算机名,默认即可时区选择,默认即可。
设置root密码注意:如果你使用的密码过于简单,系统会自动提示,这里选择“仍然使用”选择最后一项,自定义分区。
具体分区标准请视情况而定选择第二项,将修改写入磁盘默认第一个基本服务器,推荐选择基本服务器(无桌面)或软件开发工作站(有 桌面)或最小,视情况而定安装过程安装过程此时按ESC或上下左右任意键可查看启动信息;启动信息安装完成1.网络配置静态动态2.Hostname设置3.时间设置;4.恢复默认语言英文如默认语言为中文,SSH登陆会发现所有汉字变成乱码,请修改;5.防火墙设置当前状态关闭文本启动Minimal最小化安装占用容量(大概1G):Basic Server基本服务器安装占用容量(大概2G):Software Development Workstation软件开发工作站安装占用容量(大概4.5G):首先配置yum源3. 在/var/ftp/pub 下面做mount, 而不是做符号链接,因为如果是符号链接那么从浏览器访问会出现550 Failed to change directory.当然也可以把/Packages下的所有拷贝到pub下。
redhat+linux+64位系统安装过程
redhat+linux+64位系统安装过程Linux操作系统安装手册安装步骤如果在虚拟机下安装64位linux系统时,需要对bios进行一下设置。
而且必须先看看机器是否支持64位系统。
用CPU-Z查看,intel处理器查看如下(指令集需要支持EM64T,VT-x):AMD处理器查看如下(指令集需要支持x86_64,AMD-V):设置BIOS,Virtualization Technology 为enabled 后,保存。
保存好修改后的BIOS后,需要冷启动一下,即:关机,再开机。
这样这个设置才生效,要不然仍然无法生效。
这个一定要注意,直接通过重启Windows无法达到这个目的的。
cold rebooting the machine.详细:BIOS Setup UtilityConfig ==> CPU ==> Intel(R) Virtualization Technology ==> 设置为Enabled When enabled, a VMM can utilize the additional hardwar capabilities provided by Intel(R) Virtualization Technology.NOTE=======After any change in this option, system must be powered off to take effect.1.在计算机启动时把安装盘放入光驱,在计算机自检时,按下ESC 键(此处为台式机适用,笔记本需要根据不同可能为F2,F12,),进入启动项选择菜单。
选择CD-ROM Drive2.进入图形化安装界面,如图中提示:“T o install or upgrade ingraphical mode,press the key,点击回车键进入图形安装模式”,请点击键盘上的【回车】键,选择进入图形化安装模式:3. 在安装开始时系统将询问是否测试安装盘,该测试以避免因为安装盘的问题而导致安装失败。
- 1、下载文档前请自行甄别文档内容的完整性,平台不提供额外的编辑、内容补充、找答案等附加服务。
- 2、"仅部分预览"的文档,不可在线预览部分如存在完整性等问题,可反馈申请退款(可完整预览的文档不适用该条件!)。
- 3、如文档侵犯您的权益,请联系客服反馈,我们会尽快为您处理(人工客服工作时间:9:00-18:30)。
首先下载相关的gmt包/在此网站上下载ftp://anonymous:@:21/pub/gmt/GMT_src.tar.bz2/downloads/netcdf/ftp/netcdf-4.1.1.tar.gzftp://anonymous:@:21/gdal/gdal-1.7.2.tar.gzgoal的安装文档连接/blog/176382一安装netcdf包先解压缩#tar –zxvf netcdf-4.1.1.tar.gz#mv netcdf-4.1.1 netcdf#mv netcdf /usr/local/#chmod –R 775 /usr/local/netcdf#cd /usr/local/netcdf#./configure –prefix=/usr/local/netcdf 默认仪此安装目录#make && make install 如果不报错就表明成功安装二安装godal下解压缩#tar –zxvf gdal-1.7.2.tar.gz#mv gdal-1.7.2 gdal#mv gdal /usr/local/#chmod –R 775 /usr/local/gdal#./configure#make && make install完成安装还有就是在使用过程中可能会出项如下问题error while loading shared libraries: libgdal.so.1: cannot open shared object file: No such file or directory就是无法调用libgdal.so.1库,这是redhat的一个缺陷可以做如下修改#echo /usr/local/lib >/etc/ld.so.conf.d/local.conf#/sbin/ldconfig在使用就不会出现上面的俄库无法找到的问题或者使用如下方法设置环境变量LD_LIBRARY_PATH=/usr/local/lib:/usr/local/erlang/lib; export LD_LIBRA RY_PATH以root身份把库路径加入/etc/ld.so.conf文件#vi /etc/ld.so.config.d/gdal.conf/usr/local/gdal/.libs然后运行ldconfig更行/etc/ld.so.cache或者将gdal相关库拷贝到/usr/lib下共享库搜索顺序一般是$LDLIBRARY_PATH,/etc/ld.so.cache ,usr/lib ,/lib三、在6.0下默认的octave在/usr/share/swig/1.3.40/octave/ 但是悬着a安装会报错所以选择n不完全安装或者直接注释掉install_gm.sh的560-570行,1213-1231行四、安装gmt先下载所有相关的gmt包#chmod 775 install_gmt.sh#./install_gmt.sh进行安装[root@lvs02 gmt]# ./install_gmt.sh====>>>> Interactive installation of GMT <<<<====We first need a questions and answer session todetermine how and where GMT is to be installed.Then, when all parameters have been assembled,we will run the installation (unless you chose-n when starting this script).This script will install GMT version 4.5.3.==> Enter make utility to use [make]:If you are behind a firewall you will need to use a passive ftp session.Only if you have some very old ftp client, you may have to resort to active ftp (which involves the server connecting back to the client).==> Do you want passive ftp transmission (y/n) [y]: n==> Have you installed netcdf (version 3.6 or later)? (y/n) [y]: y==> Enter directory with netcdf lib and include [/usr/local/netcdf-3.6.3]: /usr/local/netcdfGMT offers experimental and optional support for other grid formats and plotting of geotiffs via GDAL. To use this option you must already have the GDAL library and include files installed.==> Use experimental GDAL grid input in GMT (y/n) [y]:If the dirs include and lib both reside in the same parent directory,you can specify that below. If not, leave blank and manually setthe two environmental parameters GDAL_INC and GDAL_LIB.==> Enter directory with GDAL lib and include [/usr/local/gdal]:==> Want to test GMT by running the examples? (y/n) [y]:==> Get any of the GMT version 4.5.3 archives via ftp? (y/n) [y]: nSince ftp mode is not selected, the install procedure willassume the compressed archives are in the current directory.GMT can use two different algorithms for Delauney triangulation.Shewchuk [1996]: Modern and very fast, copyrighted.Watson [1982] : Older and slower, public domain.Because of the copyright, GMT uses Watson's routine by default. However, most will want to use the optional Shewchuk routine.==> Use optional Shewchuk's triangulation routine (y/n)? [y]: yThe installation will install all GMT components in several subdirectories under one root directory. On most Unix systems this root directory will be something like /usr/local or /sw, under which the installation will addbin, lib, share, etc. Below you are asked to select to location of eachof the subdirectories.==> Directory for GMT executables? [/opt/gmt/GMT4.5.3/bin]:==> Directory for GMT linkable libraries? [/opt/gmt/GMT4.5.3/lib]:==> Directory for GMT include files? [/opt/gmt/GMT4.5.3/include]:==> Directory for GMT data resources? [/opt/gmt/GMT4.5.3/share]:Unix man pages are usually stored in /usr/man/manX, where X isthe relevant man section. Below, you will be asked for the /usr/man part; the /manX will be appended automatically, so do not answer /usr/man/man1.==> Directory for GMT man pages? [/opt/gmt/GMT4.5.3/man]:==> Directory for GMT doc pages? [/opt/gmt/GMT4.5.3/share]:At run-time GMT will look in the directory /opt/gmt/GMT4.5.3/share to find configurationand data files. That directory may appear with a different name to remote users if a different mount point or a symbolic link is set.GMT can use the environment variable $GMT_SHAREDIR to point to the right place. If users see a different location for the shared data files, specify it here.(It will be used only to remind you at the end of the installation to setthe enronment variable $GMT_SHAREDIR).==> Enter value of GMT_SHAREDIR selection [/opt/gmt/GMT4.5.3/share]:The answer to the following question will modify the GMT defaults.(You can always change your mind by editing share/gmt.conf)==> Do you prefer SI or US default values for GMT (s/u) [s]:The answer to the following question will modify the GMT defaults.(You can always change your mind later by using gmtset)PostScript (PS) files may contain commands to set ** size, picka specific ** tray, or ask for manual feed. Encapsulated PSfiles (EPS) are not intended for printers (but will print ok) andcan be included in other documents. Both formats will previewon most previwers (out-of-date Sun pageview is an exception).==> Do you prefer PS or EPS as default PostScript output (p/e) [p]:Building the GMT libraries as shared instead of static willreduce executable sizes considerably. GMT supports shared libraries under Linux, Mac OS X, SunOS, Solaris, IRIX, HPUX,and FreeBSD. Under other systems you may have to manually configure macros and determine what specific options to use with ld.==> Try to make and use shared libraries? (y/n) [n]:If you have more than one C compiler you need to specify which, otherwise just hit return to use the default compiler.==> Enter name of C compiler (include path if not in search path): GMT can be built as 32-bit or 64-bit. We do not recommend to explicitly choose 32-bit or 64-bit, as the netCDF install isnot set up to honor either of these settings. The default isto compile without sending any 32-bit or 64-bit options to the compiler, which generally create 32-bit versions on older systems, and 64-bit versions on newer systems, like OS X Snow Leopard.==> Explicitly select 32- or 64-bit executables? (y/n) [n]:==> Produce universal executables (OS X)? (y/n) [n]:GMT passes information about previous GMT commands onto laterGMT commands via a hidden file (.gmtcommands). To avoid thatthis file is updated by more than one program at the same time(e.g., when connecting two or more GMT programs with pipes) weuse POSIX advisory file locking on the file. Apparently, someversions of the Network File System (NFS) have not implementedfile locking properly. We know this is the case with Linuxpre-2.4 kernels when mounting NFS disks from a Unix server.If this is your case you should turn file locking OFF.==> Use POSIX Advisory File Locking in GMT (y/n) [y]:==> Want to test GMT by running the examples? (y/n) [y]:==> Delete all tar files after install? (y/n) [n]:Normally, all coastline files are installed in /opt/gmt/GMT4.5.3/share/coast. However, you can also place some of them in separate directories.These dirs must exist or you must have write permission to make them.If alternate directories are specified then a coastline.conf file willbe kept in /opt/gmt/GMT4.5.3/share/conf to contain the names of these directories. NOTE: Enter full pathname of directory were coastline files are to be stored.==> Directory for int, low, and crude coastline files?[/opt/gmt/GMT4.5.3/share/coast]:==> Directory for high coastline files? [/opt/gmt/GMT4.5.3/share/coast]:==> Directory for full coastline files? [/opt/gmt/GMT4.5.3/share/coast]:Several supplemental packages are available:------------------------------------------------------------------------------dbase: Extracting data from NGDC DEM and other gridsgshhs: Global Self-consistent Hierarchical High-resolution Shoreline extractor imgsrc: Extracting grids from global altimeter files (Sandwell/Smith)meca: Plotting special symbols in seismology and geodesymex: Inte**ce for reading/writing GMT grdfiles (REQUIRES MATLAB or OCTAVE)mgd77: Programs for handling MGD77 data filesmgg: Programs for **, managing, and plotting .gmt filesmisc: Digitize or stitch line segments, read netCDF 1-D tables, and more segyprogs: Plot SEGY seismic data filessph: Spherical triangulation, Voronoi construction and interpolation spotter: Plate tectonic backtracking and hotspottingx2sys: New (Generic) Track intersection (crossover) toolsx_system: Old (MGG-specific) Track intersection (crossover) toolsxgrid: An X11-based graphical editor for netCDF-based .nc files/usr/bin/install -c -m 644 backtracker.1 grdrotater.1 grdspotter.1 hotspotter.1 originator.1 rotconverter.1 /opt/gmt/GMT4.5.3/man/man1make[2]: Leaving directory `/opt/gmt/GMT4.5.3/src/spotter'** install-man in src/x2sysmake[2]: Entering directory `/opt/gmt/GMT4.5.3/src/x2sys'/usr/bin/install -c -m 644 x2sys_init.1 x2sys_put.1 x2sys_get.1 x2sys_binlist.1x2sys_datalist.1 x2sys_cross.1 x2sys_list.1 x2sys_report.1 x2sys_solve.1x2sys_merge.1 /opt/gmt/GMT4.5.3/man/man1make[2]: Leaving directory `/opt/gmt/GMT4.5.3/src/x2sys'** install-man in src/x_systemmake[2]: Entering directory `/opt/gmt/GMT4.5.3/src/x_system'/usr/bin/install -c -m 644 x_edit.1 x_init.1 x_list.1 x_report.1 x_remove.1x_solve_dc_drift.1 x_update.1 x_setup.1 x_over.1 x_system.1/opt/gmt/GMT4.5.3/man/man1make[2]: Leaving directory `/opt/gmt/GMT4.5.3/src/x_system'make[1]: Leaving directory `/opt/gmt/GMT4.5.3'All users must include /opt/gmt/GMT4.5.3/man in their MANPATHAll users should add /opt/gmt/GMT4.5.3/share/gmt/html/gmt_services.html to their browser bookmarksDoing example ex01/job01.sh ... doneDoing example ex02/job02.sh ... doneDoing example ex03/job03.sh ... doneDoing example ex04/job04.sh ... doneDoing example ex04/job04c.sh ... doneDoing example ex05/job05.sh ... doneDoing example ex06/job06.sh ... doneDoing example ex07/job07.sh ... doneDoing example ex08/job08.sh ... doneDoing example ex09/job09.sh ... doneDoing example ex10/job10.sh ... doneDoing example ex11/job11.sh ... doneDoing example ex12/job12.sh ... doneDoing example ex13/job13.sh ... doneDoing example ex14/job14.sh ... doneDoing example ex15/job15.sh ... doneDoing example ex16/job16.sh ... doneDoing example ex17/job17.sh ... doneDoing example ex18/job18.sh ... doneDoing example ex19/job19.sh ... doneDoing example ex20/job20.sh ... doneDoing example ex21/job21.sh ... doneDoing example ex22/job22.sh ... doneDoing example ex23/job23.sh ... doneDoing example ex24/job24.sh ... doneDoing example ex25/job25.sh ... doneDoing example ex26/job26.sh ... doneDoing example ex27/job27.sh ... doneDoing example ex28/job28.sh ... doneDoing example ex29/job29.sh ... doneDoing example ex30/job30.sh ... doneCompleted all examplesDoing animation anim01/anim_01.sh ... anim_01.sh: First frame plotted to anim_01.psdoneDoing animation anim02/anim_02.sh ... anim_02.sh: First frame plotted to anim_02.psdoneDoing animation anim03/anim_03.sh ... anim_03.sh: First frame plotted to anim_03.psdoneDoing animation anim04/anim_04.sh ... anim_04.sh: First frame plotted to anim_04.psdoneCompleted all animationsGMT installation complete. Remember to set these:-----------------------------------------------------------------------For csh or tcsh users:setenv NETCDFHOME /usr/local/netcdfset path=(/opt/gmt/GMT4.5.3/bin $path)For sh or bash users:export NETCDFHOME=/usr/local/netcdfexport PATH=/opt/gmt/GMT4.5.3/bin:$PATHNote: if you installed netCDF as a shared library you may have to addthe path to this library to LD_LIBRARY_PATH or place the library in a standard system path [see information on shared library for your OS].For all users:Add /opt/gmt/GMT4.5.3/man to MANPATHAdd /opt/gmt/GMT4.5.3/share/html/gmt_services.html as browser bookmark-----------------------------------------------------------------------[root@lvs02 gmt]#==> Install any of the supplemental programs? (y/n/a(ll))? [a]: n 选择不完全安装如果选择a标示完全安装,需要在当前主机上安装matlab或者octave五、设置环境变量[root@lvs02 gmt]# vi ~/.bashrc# .bashrc# User specific aliases and functionsalias rm='rm -i'alias cp='cp -i'alias mv='mv -i'# Source global definitionsif [ -f /etc/bashrc ]; then. /etc/bashrcfiexport NETCDFHOME=/usr/local/netcdfexport PATH=/opt/gmt/GMT4.5.3/bin:$PATH六、查看环境变量是否生效[root@lvs02 gmt]# envHOSTNAME=SELINUX_ROLE_REQUESTED=TERM=xtermSHELL=/bin/bashHISTSIZE=1000SSH_CLIENT=192.168.1.3 1972 22SELINUX_USE_CURRENT_RANGE=QTDIR=/usr/lib/qt-3.3OLDPWD=/opt/gmt/GMT4.5.3QTINC=/usr/lib/qt-3.3/includeSSH_TTY=/dev/pts/1USER=rootLS_COLORS=rs=0:di=01;34:ln=01;36:mh=00:pi=40;33:so=01;35:do=01;35:bd=40;33;0 1:cd=40;33;01:or=40;31;01:mi=01;05;37;41:su=37;41:sg=30;43:ca=30;41:tw=30;42:o w=34;42:st=37;44:ex=01;32:*.tar=01;31:*.tgz=01;31:*.arj=01;31:*.taz=01;31:*.lzh=0 1;31:*.lzma=01;31:*.tlz=01;31:*.txz=01;31:*.zip=01;31:*.z=01;31:*.Z=01;31:*.dz=01; 31:*.gz=01;31:*.lz=01;31:*.xz=01;31:*.bz2=01;31:*.tbz=01;31:*.tbz2=01;31:*.bz=01; 31:*.tz=01;31:*.deb=01;31:*.rpm=01;31:*.jar=01;31:*.rar=01;31:*.ace=01;31:*.zoo= 01;31:*.cpio=01;31:*.7z=01;31:*.rz=01;31:*.jpg=01;35:*.jpeg=01;35:*.gif=01;35:*.b mp=01;35:*.pbm=01;35:*.pgm=01;35:*.ppm=01;35:*.tga=01;35:*.xbm=01;35:*.xpm =01;35:*.tif=01;35:*.tiff=01;35:*.png=01;35:*.svg=01;35:*.svgz=01;35:*.mng=01;35: *.pcx=01;35:*.mov=01;35:*.mpg=01;35:*.mpeg=01;35:*.m2v=01;35:*.mkv=01;35:*.ogm=01;35:*.mp4=01;35:*.m4v=01;35:*.mp4v=01;35:*.vob=01;35:*.qt=01;35:*.nuv =01;35:*.wmv=01;35:*.asf=01;35:*.rm=01;35:*.rmvb=01;35:*.flc=01;35:*.avi=01;35: *.fli=01;35:*.flv=01;35:*.gl=01;35:*.dl=01;35:*.xcf=01;35:*.xwd=01;35:*.yuv=01;35: *.cgm=01;35:*.emf=01;35:*.axv=01;35:*.anx=01;35:*.ogv=01;35:*.ogx=01;35:*.aac= 01;36:*.au=01;36:*.flac=01;36:*.mid=01;36:*.midi=01;36:*.mka=01;36:*.mp3=01;36 :*.mpc=01;36:*.ogg=01;36:*.ra=01;36:*.wav=01;36:*.axa=01;36:*.oga=01;36:*.spx= 01;36:*.xspf=01;36:MAIL=/var/spool/mail/rootPATH=/opt/gmt/GMT4.5.3/bin:/usr/lib/qt-3.3/bin:/usr/kerberos/sbin:/usr/kerberos/ bin:/usr/local/sbin:/usr/local/bin:/sbin:/bin:/usr/sbin:/usr/bin:/root/binPWD=/opt/gmtNETCDFHOME=/usr/local/netcdfLANG=en_US.UTF-8KDE_IS_PRELINKED=1MODULEPATH=/usr/share/Modules/modulefiles:/etc/modulefiles LOADEDMODULES=KDEDIRS=/usrSELINUX_LEVEL_REQUESTED=SSH_ASKPASS=/usr/libexec/openssh/gnome-ssh-askpassHISTCONTROL=ignoredupsSHLVL=1HOME=/rootLOGNAME=rootQTLIB=/usr/lib/qt-3.3/libCVS_RSH=sshSSH_CONNECTION=192.168.1.3 1972 192.168.1.111 22 MODULESHOME=/usr/share/ModulesLESSOPEN=|/usr/bin/lesspipe.sh %sDISPLAY=localhost:11.0G_BROKEN_FILENAMES=1module=() { eval `/usr/bin/modulecmd bash $*`}_=/bin/env[root@lvs02 gmt]# vi ~/.bashrc[root@lvs02 gmt]#七、设置manpath的环境变量#vi /etc/man.configMANPATH /opt/gmt/GMT4.5.3/man to MANPATHMANPATH /opt/gmt/GMT4.5.3/share/html/gmt_services.html到此就正常安装完毕如果需要可以将gmt的环境变量设置好。