C#_实现Winform控件dataGridView的打印与分页


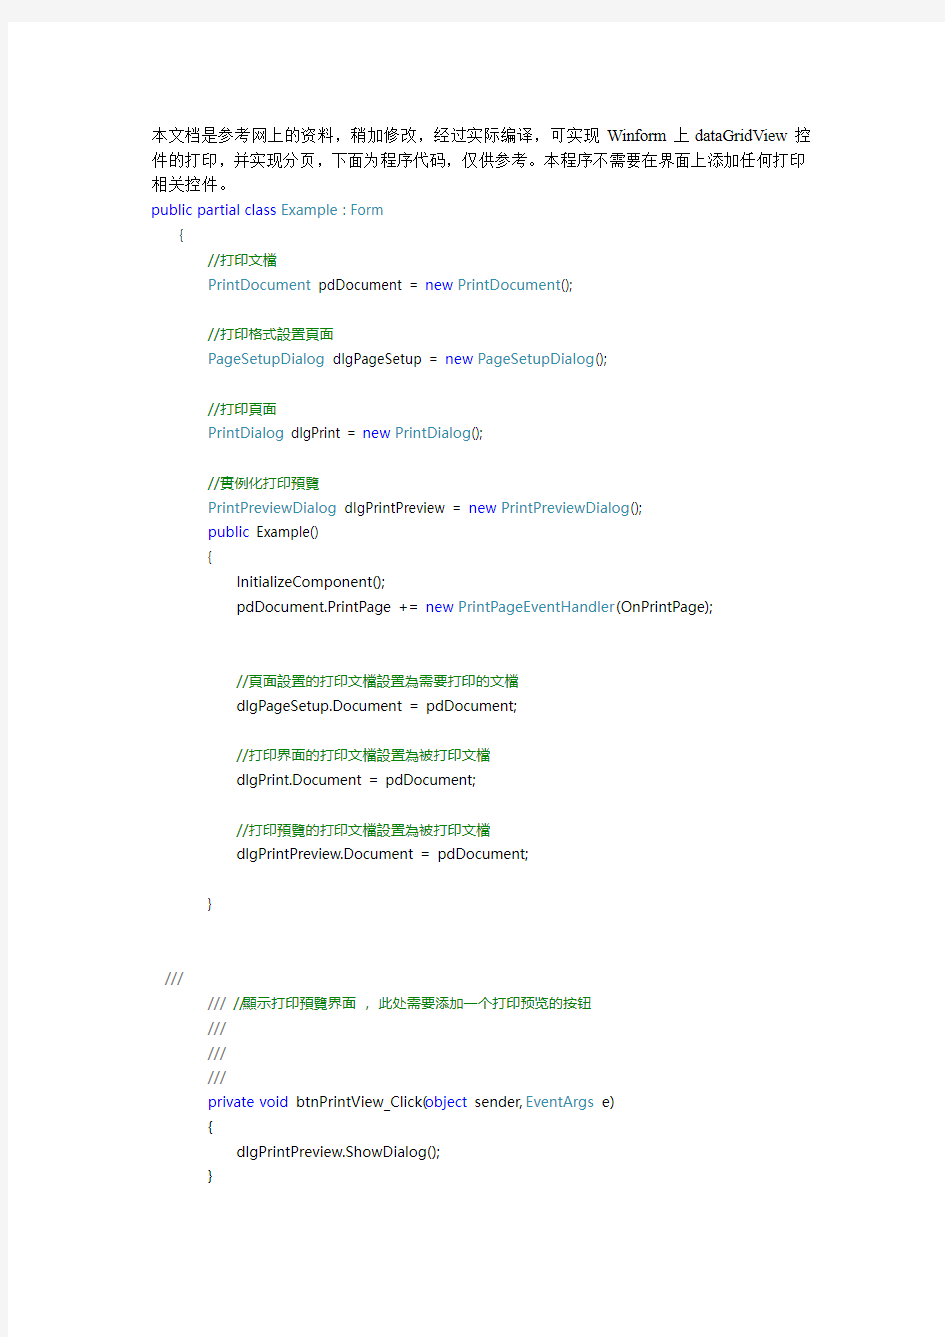
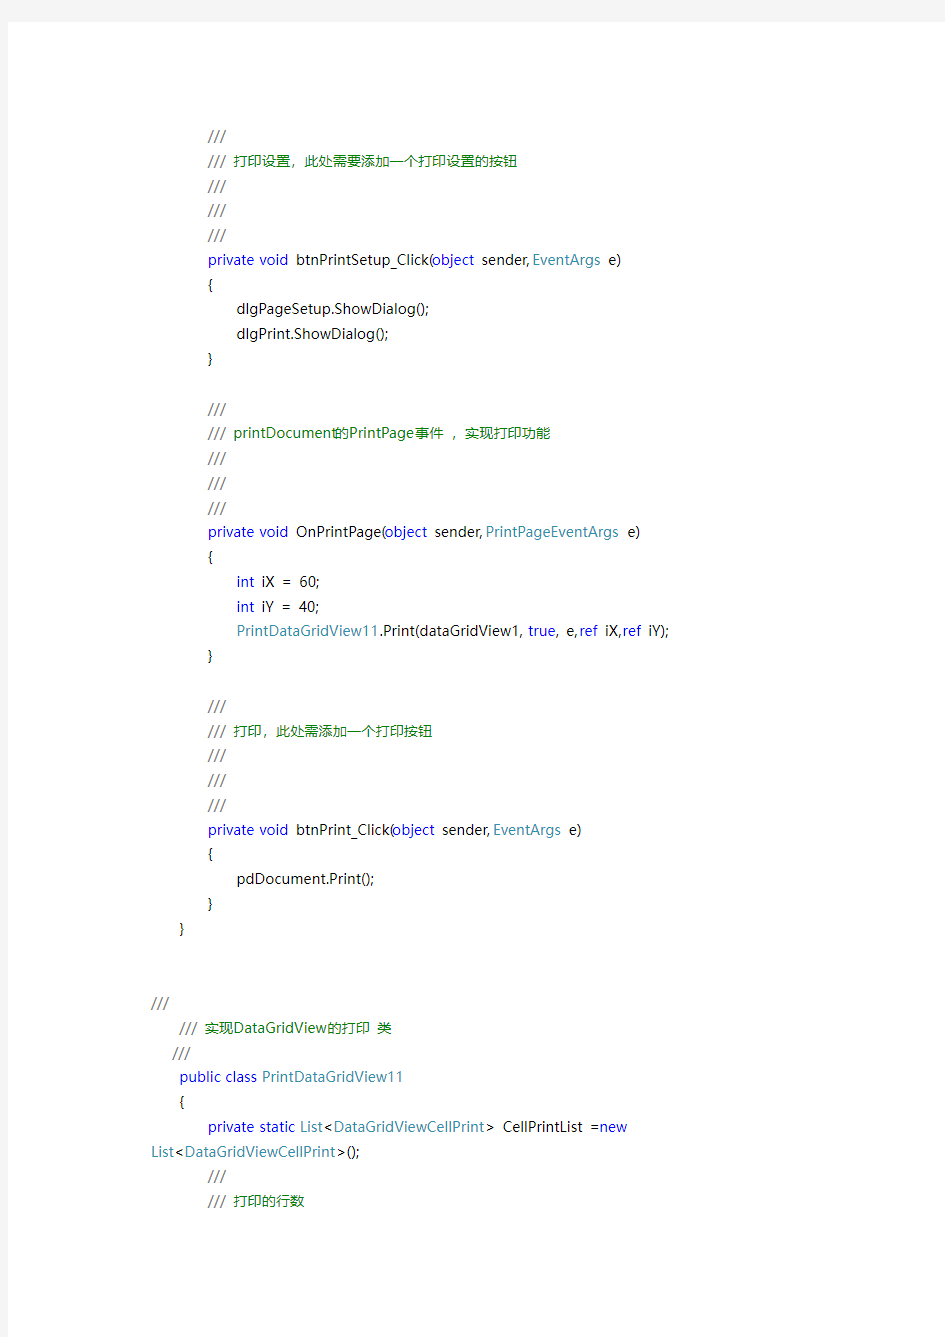
本文档是参考网上的资料,稍加修改,经过实际编译,可实现Winform上dataGridView控件的打印,并实现分页,下面为程序代码,仅供参考。本程序不需要在界面上添加任何打印相关控件。
public partial class Example : Form
{
//打印文檔
PrintDocument pdDocument = new PrintDocument();
//打印格式設置頁面
PageSetupDialog dlgPageSetup = new PageSetupDialog();
//打印頁面
PrintDialog dlgPrint = new PrintDialog();
//實例化打印預覽
PrintPreviewDialog dlgPrintPreview = new PrintPreviewDialog();
public Example()
{
InitializeComponent();
pdDocument.PrintPage += new PrintPageEventHandler(OnPrintPage);
//頁面設置的打印文檔設置為需要打印的文檔
dlgPageSetup.Document = pdDocument;
//打印界面的打印文檔設置為被打印文檔
dlgPrint.Document = pdDocument;
//打印預覽的打印文檔設置為被打印文檔
dlgPrintPreview.Document = pdDocument;
}
///
/// //顯示打印預覽界面,此处需要添加一个打印预览的按钮
///
///
///
private void btnPrintView_Click(object sender, EventArgs e)
{
dlgPrintPreview.ShowDialog();
}
///打印设置,此处需要添加一个打印设置的按钮
///
///
///
private void btnPrintSetup_Click(object sender, EventArgs e)
{
dlgPageSetup.ShowDialog();
dlgPrint.ShowDialog();
}
///
/// printDocument的PrintPage事件,实现打印功能
///
///
///
private void OnPrintPage(object sender, PrintPageEventArgs e)
{
int iX = 60;
int iY = 40;
PrintDataGridView11.Print(dataGridView1, true, e, ref iX, ref iY);
}
///
///打印,此处需添加一个打印按钮
///
///
///
private void btnPrint_Click(object sender, EventArgs e)
{
pdDocument.Print();
}
}
///
///实现DataGridView的打印类
///
public class PrintDataGridView11
{
private static List
List
///
///打印的行数
private static int printRowCount = 0;
///
///是否要打印
///
private static bool IsPrint = true;
///
///设置的起始位置是否大于默认打印的边框
///
private static bool IsRole = true;
///
/// X坐标
///
private static int PoXTmp = 0;
///
/// Y坐标
///
private static int PoYTmp = 0;
///
///列间距
///
private static int WidthTmp = 0;
///
///行间距
///
private static int HeightTmp = 0;
///
///列数
///
private static int RowIndex = 0;
///
///打印DataGridView控件
///
/// DataGridView控件
///是否包括列标题
///为System.Drawing.Printing.PrintDocument.PrintPage 事件提供数据。
///起始X坐标
///起始Y坐标
///
public static void Print(DataGridView dataGridView, bool includeColumnText, PrintPageEventArgs eValue, ref int PoX, ref int PoY)
{
try
{
if (PrintDataGridView11.IsPrint)
{
PrintDataGridView11.printRowCount = 0;
PrintDataGridView11.IsPrint = false;
PrintDataGridView11.DataGridViewCellVsList(dataGridView, includeColumnText); //获取要打印的数据
if (0 == PrintDataGridView11.CellPrintList.Count)
return;
if (PoX > eValue.MarginBounds.Left) //如果设置的起始位置大于默认打印的边框,IsRole为true
PrintDataGridView11.IsRole = true;
else
PrintDataGridView11.IsRole = false;
PrintDataGridView11.PoXTmp = PoX;
PrintDataGridView11.PoYTmp = PoY;
PrintDataGridView11.RowIndex = 0;
WidthTmp = 0;
HeightTmp = 0;
}
if (0 != PrintDataGridView11.printRowCount)//换页后确定打印的初始位置
{
if (IsRole) //如果设置的起始位置大于默认打印的边框,起始位置为默认打印边框
{
PoX = PoXTmp = eValue.MarginBounds.Left;
PoY = PoYTmp = eValue.MarginBounds.Top;
}
else
{
PoX = PoXTmp;
PoY = PoYTmp;
}
}
while (PrintDataGridView11.printRowCount <
PrintDataGridView11.CellPrintList.Count)
{
DataGridViewCellPrint CellPrint =
CellPrintList[PrintDataGridView11.printRowCount];
if (RowIndex == CellPrint.RowIndex)//一行一行打印,CellPrint.RowIndex为datagridview1的行号
PoX = PoX + WidthTmp; //如果数据在一行,x坐标右移
else//换行后Y坐标下移,X坐标回到初始位置
{
PoX = PoXTmp;
PoY = PoY + HeightTmp;
if (PoY + HeightTmp > eValue.MarginBounds.Bottom)//分页
{
HeightTmp = 0;
eValue.HasMorePages = true;
return; //重新触发OnPrintPage事件
}
}
using (SolidBrush solidBrush = new SolidBrush(CellPrint.BackColor))
{
RectangleF rectF1 = new RectangleF(PoX, PoY, CellPrint.Width, CellPrint.Height);
eValue.Graphics.FillRectangle(solidBrush, rectF1);
using (Pen pen = new Pen(Color.Black, 1))
eValue.Graphics.DrawRectangle(pen,
System.Drawing.Rectangle.Round(rectF1));//画出单个数据的方框格子
solidBrush.Color = CellPrint.ForeColor;
eValue.Graphics.DrawString(CellPrint.FormattedValue, CellPrint.Font, solidBrush, new System.Drawing.Point(PoX + 2, PoY + 3));//在方框中画出数据
}
WidthTmp = CellPrint.Width;
HeightTmp = CellPrint.Height;
RowIndex = CellPrint.RowIndex;
PrintDataGridView11.printRowCount++;
}
PoY = PoY + HeightTmp; //全部打印完后不再分页
eValue.HasMorePages = false;
PrintDataGridView11.IsPrint = true;
}
catch
{
eValue.HasMorePages = false;
PrintDataGridView11.IsPrint = true;
throw;//抛出异常
}
}
///
///将DataGridView控件内容转变到CellPrintList
///
/// DataGridView控件
///是否包括列标题
///
private static void DataGridViewCellVsList(DataGridView dataGridView, bool includeColumnText)
{
CellPrintList.Clear();
try
{
int rowsCount = dataGridView.Rows.Count;
int colsCount = dataGridView.Columns.Count;
//最后一行是供输入的行时,不用读数据。
if (dataGridView.Rows[rowsCount - 1].IsNewRow)
rowsCount--;
//包括列标题
if (includeColumnText)
{
for (int columnsIndex = 0; columnsIndex < colsCount; columnsIndex++)
{
if (dataGridView.Columns[columnsIndex].Visible)
{
DataGridViewCellPrint CellPrint = new DataGridViewCellPrint();
CellPrint.FormattedValue =
dataGridView.Columns[columnsIndex].HeaderText;
CellPrint.RowIndex = 0;
CellPrint.ColumnIndex = columnsIndex;
CellPrint.Font =
dataGridView.Columns[columnsIndex].HeaderCell.Style.Font;
CellPrint.BackColor =
dataGridView.ColumnHeadersDefaultCellStyle.BackColor;
CellPrint.ForeColor =
dataGridView.ColumnHeadersDefaultCellStyle.ForeColor;
CellPrint.Width = dataGridView.Columns[columnsIndex].Width;
CellPrint.Height = dataGridView.ColumnHeadersHeight;
CellPrintList.Add(CellPrint); //add:每次添加一个数据
}
}
}
//读取单元格数据
for (int rowIndex = 0; rowIndex < rowsCount; rowIndex++)
{
for (int columnsIndex = 0; columnsIndex < colsCount; columnsIndex++)
{
if (dataGridView.Columns[columnsIndex].Visible)
{
DataGridViewCellPrint CellPrint = new DataGridViewCellPrint();
CellPrint.FormattedValue =
dataGridView.Rows[rowIndex].Cells[columnsIndex].FormattedValue.ToString();
if (includeColumnText)
CellPrint.RowIndex = rowIndex + 1;//假如包括列标题则从行号1开始
else
CellPrint.RowIndex = rowIndex;
CellPrint.ColumnIndex = columnsIndex;
CellPrint.Font =
dataGridView.Rows[rowIndex].Cells[columnsIndex].Style.Font;
System.Drawing.Color TmpColor = System.Drawing.Color.Empty;
if (System.Drawing.Color.Empty !=
dataGridView.Rows[rowIndex].Cells[columnsIndex].Style.BackColor)
TmpColor =
dataGridView.Rows[rowIndex].Cells[columnsIndex].Style.BackColor;
else if (System.Drawing.Color.Empty !=
dataGridView.Rows[rowIndex].DefaultCellStyle.BackColor)
TmpColor =
dataGridView.Rows[rowIndex].DefaultCellStyle.BackColor;
else
TmpColor = dataGridView.DefaultCellStyle.BackColor;
CellPrint.BackColor = TmpColor;
TmpColor = System.Drawing.Color.Empty;
if (System.Drawing.Color.Empty !=
dataGridView.Rows[rowIndex].Cells[columnsIndex].Style.ForeColor)
TmpColor =
dataGridView.Rows[rowIndex].Cells[columnsIndex].Style.ForeColor;
else if (System.Drawing.Color.Empty !=
dataGridView.Rows[rowIndex].DefaultCellStyle.ForeColor)
TmpColor =
dataGridView.Rows[rowIndex].DefaultCellStyle.ForeColor;
else
TmpColor = dataGridView.DefaultCellStyle.ForeColor;
CellPrint.ForeColor = TmpColor;
CellPrint.Width = dataGridView.Columns[columnsIndex].Width;
CellPrint.Height = dataGridView.Rows[rowIndex].Height;
CellPrintList.Add(CellPrint);
}
}
}
}
catch { throw; }
}
private class DataGridViewCellPrint
{
///
///格式化的单元格的值
///
private string _FormattedValue = "";
private int _RowIndex = -1;
private int _ColumnIndex = -1;
private System.Drawing.Color _ForeColor = System.Drawing.Color.Black;
private System.Drawing.Color _BackColor = System.Drawing.Color.White;
private int _Width = 100;
private int _Height = 23;
private System.Drawing.Font _Font = new System.Drawing.Font("宋体", 9F, System.Drawing.FontStyle.Regular, System.Drawing.GraphicsUnit.Point,((byte)(134)));
///
///获取或设置单元格的字体。
///
public System.Drawing.Font Font
{
set { if (null != value) _Font = value; }
get { return _Font; }
}
///
///获取为显示进行格式化的单元格的值。
///
public string FormattedValue
{
set { _FormattedValue = value; }
get { return _FormattedValue; }
}
///
///获取或设置列的当前宽度(以像素为单位)。默认值为100。
///
public int Width
{
set { _Width = value; }
get { return _Width; }
}
///
///获取或设置列标题行的高度(以像素为单位)。默认值为23。
///
public int Height
{
set { _Height = value; }
get { return _Height; }
}
///
///获取或设置行号。
///
public int RowIndex
{
set { _RowIndex = value; }
get { return _RowIndex; }
}
///
///获取或设置列号。
///
public int ColumnIndex
{
set { _ColumnIndex = value; }
get { return _ColumnIndex; }
}
///
///获取或设置前景色。
///
public System.Drawing.Color ForeColor
{
set { _ForeColor = value; }
get { return _ForeColor; }
}
///
///获取或设置背景色。
///
public System.Drawing.Color BackColor
{
set { _BackColor = value; } //只写
get { return _BackColor; } //只读}
}
}
C#(.net)分页控件源码(已测试)
分页控件的用法 align类: using System; namespace MyPaperControls { ///
微软C#中DataGridView控件使用方法
DataGridView动态添加新行: DataGridView控件在实际应用中非常实用,特别需要表格显示数据时。可以静态绑定数据源,这样就自动为DataGridView控件添加相应的行。假如需要动态为DataGridView控件添加新行,方法有很多种,下面简单介绍如何为DataGridView控件动态添加新行的两种方法: 方法一: int index=this.dataGridView1.Rows.Add(); this.dataGridView1.Rows[index].Cells[0].Value = "1"; this.dataGridView1.Rows[index].Cells[1].Value = "2"; this.dataGridView1.Rows[index].Cells[2].Value = "监听"; 利用dataGridView1.Rows.Add()事件为DataGridView控件增加新的行,该函数返回添加新行的索引号,即新行的行号,然后可以通过该索引号操作该行的各个单元格,如dataGridView1.Rows[index].Cells[0].Value = "1"。这是很常用也是很简单的方法。 方法二: DataGridViewRow row = new DataGridViewRow(); DataGridViewTextBoxCell textboxcell = new DataGridViewTextBoxCell(); textboxcell.Value = "aaa"; row.Cells.Add(textboxcell); DataGridViewComboBoxCell comboxcell = new DataGridViewComboBoxCell(); row.Cells.Add(comboxcell); dataGridView1.Rows.Add(row);
DataGridView的用法
在C# WinForm下做过项目的朋友都知道,其中的DataGridView控件默认只支持DataGridViewButtonColumn、DataGridViewCheckBoxColumn、DataGridViewComboBoxColumn、DataGridViewImageColumn、DataGridViewLinkColumn和DataGridViewTextBoxColumn六种列类型,如果你想要在DataGridView的列中添加其它的子控件,则需要自己实现DataGridViewColumn和DataGridViewCell,这就意味着你需要从现有的列中继承并改写一些方法,如实现一个支持单选按钮的列,或支持三种选择状态的多选按钮的列。 上面两个截图分别为RadioButton列和支持三种状态的CheckBox列在DataGridView中的实现效果,我是在Windows 2003中实现的,因此显示的效果跟在XP和Vista下有些区别,Vista下CheckBox的第三种状态(不确定状态)显示出来的效果是一个实心的蓝色方块。 下面我看具体来看看如何实现这两种效果。 要实现自定义的DataGridView列,你需要继承并改写两个类,一个是基于DataGridViewColumn的,一个是基于DataGridViewCell的,因为
RadionButton和CheckBox的实现原理类似,因此我们可以将这两种列采用同一种方法实现。创建DataGridViewDisableCheckBoxCell和DataGridViewDisableCheckBoxColumn两个类,分别继承自DataGridViewCheckBoxCell和DataGridViewCheckBoxColumn。代码如下: public class DataGridViewDisableCheckBoxCell: DataGridViewCheckBoxCell { public bool Enabled { get; set; } // Override the Clone method so that the Enabled property is copied. public override object Clone() { DataGridViewDisableCheckBoxCell cell = (DataGridViewDisableCheckBoxCell)base.Clone(); cell.Enabled = this.Enabled; return cell; } // By default, enable the CheckBox cell. public DataGridViewDisableCheckBoxCell() { this.Enabled = true; } // Three state checkbox column cell protected override void Paint(Graphics graphics, Rectangle clipBounds, Rectangle cellBounds, int rowIndex, DataGridViewElementStates elementState, object value, object formattedValue, string errorText, DataGridViewCellStyle cellStyle, DataGridViewAdvancedBorderStyle advancedBorderStyle, DataGridViewPaintParts paintParts) { // The checkBox cell is disabled, so paint the border, background, and disabled checkBox for the cell. if (!this.Enabled) { // Draw the cell background, if specified. if ((paintParts & DataGridViewPaintParts.Background) == DataGridViewPaintParts.Background) { SolidBrush cellBackground = new SolidBrush(cellStyle.BackColor); graphics.FillRectangle(cellBackground,
Bootstrap组件功能:路径组件、分页组件、标签组件和徽章组件
https://www.360docs.net/doc/a213146578.html, Bootstrap组件功能:路径组件、分页组件、标签组件和徽章组件 本节课我们主要学习一下Bootstrap的四个组件功能:路径组件、分页组件、标签组件和徽章组件。 一.路径组件 路径组件也叫做面包屑导航。 //面包屑导航
https://www.360docs.net/doc/a213146578.html,
DataGridView控件用法合集
DataGridView控件用法合集 目录 DataGridView控件用法合集(一) 1. DataGridView当前的单元格属性取得、变更 2. DataGridView编辑属性 3. DataGridView最下面一列新追加行非表示 4. DataGridView判断当前选中行是否为新追加的行 5. DataGridView删除行可否设定 6. DataGridView行列不表示和删除 DataGridView控件用法合集(二) 7. DataGridView行列宽度高度设置为不能编辑 8. DataGridView行高列幅自动调整 9. DataGridView指定行列冻结 10. DataGridView列顺序变更可否设定 11. DataGridView行复数选择 12. DataGridView选择的行、列、单元格取得 DataGridView控件用法合集(三) 13. DataGridView指定单元格是否表示 14. DataGridView表头部单元格取得 15. DataGridView表头部单元格文字列设定 16. DataGridView选择的部分拷贝至剪贴板 17.DataGridView粘贴 18. DataGridView单元格上ToolTip表示设定(鼠标移动到相应单元格上时,弹出说明信息) DataGridView控件用法合集(四) 19. DataGridView中的ContextMenuStrip属性 20. DataGridView指定滚动框位置 21. DataGridView手动追加列 22. DataGridView全体分界线样式设置 23. DataGridView根据单元格属性更改显示内容 24. DataGridView新追加行的行高样式设置る 25. DataGridView新追加行单元格默认值设置 DataGridView中输入错误数据的处理(五) 26. DataGridView单元格数据错误标签表示 27. DataGridView单元格内输入值正确性判断 28. DataGridView单元格输入错误值事件的捕获 DataGridView控件用法合集(六) 29. DataGridView行排序(点击列表头自动排序的设置) 30. DataGridView自动行排序(新追加值也会自动排序) 31. DataGridView自动行排序禁止情况下的排序 32. DataGridView指定列指定排序 DataGridView控件用法合集(七) 33. DataGridView单元格样式设置 34. DataGridView文字表示位置的设定 35. DataGridView单元格内文字列换行 36. DataGridView单元格DBNull值表示的设定 37. DataGridView单元格样式格式化 38. DataGridView指定单元格颜色设定
SpringBoot实现分页插件
实现分页插件的具体步骤: 1.导入jar包
datagridview在vbnet中的操作技巧.
DataGridView在https://www.360docs.net/doc/a213146578.html,中的操作技巧目录: 1、取得或者修改当前单元格的内容 2、设定单元格只读 3、不显示最下面的新行 4、判断新增行 5、行的用户删除操作的自定义 6、行、列的隐藏和删除 7、禁止列或者行的Resize 8、列宽和行高以及列头的高度和行头的宽度的自动调整 9、冻结列或行 10、列顺序的调整 11、行头列头的单元格 12、剪切板的操作 13、单元格的ToolTip的设置 14、右键菜单(ContextMenuStrip的设置 15、单元格的边框、网格线样式的设定 16、单元格表示值的设定 17、用户输入时,单元格输入值的设定 18、设定新加行的默认值
1、DataGridView 取得或者修改当前单元格的内容: 当前单元格指的是DataGridView 焦点所在的单元格,它可以通过DataGridView 对象的CurrentCell 属性取得。如果当前单元格不存在的时候,返回Nothing(C#是null [https://www.360docs.net/doc/a213146578.html,] ' 取得当前单元格内容MessageBox.Show(DataGridView1.CurrentCell.Value ' 取得当前单元格的列Index MessageBox.Show(DataGridView1.CurrentCell.ColumnIndex ' 取得当前单元格的行Index MessageBox.Show(DataGridView1.CurrentCell.RowIndex 另外,使用DataGridView.CurrentCellAddress 属性(而不是直接访问单元格来确定单元格所在的行:DataGridView.CurrentCellAddress.Y 和 列:DataGridView.CurrentCellAddress.X 。这对于避免取消共享行的共享非常有用。 当前的单元格可以通过设定DataGridView 对象的CurrentCell 来改变。可以通过CurrentCell 来设定 DataGridView 的激活单元格。将CurrentCell 设为Nothing(null 可以取消激活的单元格。[https://www.360docs.net/doc/a213146578.html,] ' 设定(0, 0 为当前单元格 DataGridView1.CurrentCell = DataGridView1(0, 0 -------------------------------------------------------------------------------- 2、DataGridView 设定单元格只读:
JPAGES分页控件案例
//需要导入的样式表,与js文件 /** *css *jPages.css控制分页按钮条的样式,不需要样式的可以不用导入 *animate.css控制要显示的数据的动画效果,不需要动画可以不用导入 *github.css这个不知道是搞什么的,不导入也没发现改变了什么 *js文件jPages.js和jquery肯定是必须的,其他的就看自己了 */ Js代码: $("#tbody").empty();//删除tbody中已经存在的数据 var str=""; $.ajax({ url:'jq/getShipInfoByShipName.action', data:{"shipName":$("#shipNameId").val()},//执行后台Action参数 dataType:'json', type:'post', //回调函数执行之前的动作 beforeSend:function(){ //这是我设置的一个加载中的图标,trShow为图标显示的行 //在数据加载出来之前,显示加载中这个图标,加载完成,隐藏 $('#trShow').css("display","block"); }, success:function(data){ var result=data; //返回数据位json格式,遍历json,拼凑成table中的行 for(var i=0;i"+result[i].shipName+" "+result[0].remark+" "; } //追加如tbody中 $("#tbody").append(str);
vb6.0中DataGrid控件的使用
vb6.0中DataGrid控件的使用 https://www.360docs.net/doc/a213146578.html,/ivu890103@126/blog/static/117734463201122782022384/ DataGrid 控件是一种类似于电子数据表的绑定控件,可以显示一系列行和列来表示 Recordset 对象的记录和字段。可以使用 DataGrid 来创建一个允许最终用户阅读和写入到绝大多数数据库的应用程序。DataGrid 控件可以在设计时快速进行配置,只需少量代码或无需代码。当在设计时设置了DataGrid 控件的 DataSource 属性后,就会用数据源的记录集来自动填充该控件,以及自动设置该控件的列标头。然后您就可以编辑该网格的列;删除、重新安排、添加列标头、或者调整任意一列的宽度。 在运行时,可以在程序中切换 DataSource 来察看不同的表,或者可以修改当前数据库的查询,以返回一个不同的记录集合。 注意 DataGrid 控件与 Visual Basic 5.0中的 DBGrid 是代码兼容的,除了一个例外:DataGrid 控件不支持 DBGrid 的“解除绑定模式”概念。DBGrid 控件包括在 Visual Basic 的 Tools 目录中。 可能的用法 查看和编辑在远程或本地数据库中的数据。 与另一个数据绑定的控件(诸如 DataList 控件)联合使用,使用 DataGrid控件来显示一个表的记录,这个表通过一个公共字段链接到由第二个数据绑定控件所显示的表。 使用 DataGrid 控件的设计时特性 可以不编写任何代码,只通过使用 DataGrid 控件的设计时特性来创建一个数据库应用程序。下面的说明概要地说明了在实现 DataGrid 控件的典型应用时的一般步骤。完整的循序渐进的指示,请参阅主题“DataGrid方案1: 使用 DataGrid 控件创建一个简单数据库应用程序”。 要在设计时实现一个 DataGrid 控件 1. 为要访问的数据库创建一个 Microsoft 数据链接 (.MDL) 文件。请参阅“创建 Northwind OLE DB 数据链接”主题,以获得一个示例。 2. 在窗体上放置一个 ADO Data 控件,并将其 ConnectionString 属性设置为在第 1 步中所创建的OLE DB 数据源。 3. 在这个 Ado Data 控件的 RecordSource 属性中输入一条将返回一个记 录集的 SQL 语句。例如,Select * From MyTableName Where CustID = 12 4. 在窗体上放置一个 DataGrid 控件,并将其 DataSource 属性设置为这个 ADO Data 控件。 5. 右键单击该 DataGrid 控件,然后单击“检索字段”。 6. 右键单击该 DataGrid 控件,然后单击“编辑”。 7. 重新设置该网格的大小、删除或添加网格的列。 8. 右键单击该 DataGrid 控件,然后单击“属性”。 9. 使用“属性页”对话框来设置该控件的适当的属性,将该网格配置为所需的外观和行为。 在运行时更改显示的数据
GridView控件自定义分页详解
GridView控件自定义分页详解 在这里我们将用一个隐藏字段来保存这个PageIndex,即当前页码.当点击上一页时,将它的值减一,知道为0,要注意的一点这里的第一页页码是0而不是1.下面看看代码,然后我们再分析分析! 1
VB6.0中DataGrid的应用
使用DataGrid 控件 DataGrid 控件是一种类似于电子数据表的绑定控件,可以显示一系列行和列来表示Recordset 对象的记录和字段。可以使用DataGrid 来创建一个允许最终用户阅读和写入到绝大多数数据库的应用程序。DataGrid 控件可以在设计时快速进行配置,只需少量代码或无需代码。当在设计时设置了DataGrid 控件的DataSource 属性后,就会用数据源的记录集来自动填充该控件,以及自动设置该控件的列标头。然后您就可以编辑该网格的列;删除、重新安排、添加列标头、或者调整任意一列的宽度。 在运行时,可以在程序中切换DataSource 来察看不同的表,或者可以修改当前数据库的查询,以返回一个不同的记录集合。 注意DataGrid 控件与Visual Basic 5.0中的DBGrid 是代码兼容的,除了一个例外:DataGrid 控件不支持DBGrid 的“解除绑定模式”概念。DBGrid 控件包括在Visual Basic 的Tools 目录中。 可能的用法 查看和编辑在远程或本地数据库中的数据。 与另一个数据绑定的控件(诸如DataList 控件)联合使用,使用DataGrid控件来显示一个表的记录,这个表通过一个公共字段链接到由第二个数据绑定控件所显示的表。 使用DataGrid 控件的设计时特性 可以不编写任何代码,只通过使用DataGrid 控件的设计时特性来创建一个数据库应用程序。下面的说明概要地说明了在实现DataGrid 控件的典型应用时的一般步骤。完整的循序渐进的指示,请参阅主题“DataGrid 方案1: 使用DataGrid 控件创建一个简单数据库应用程序”。要在设计时实现一个DataGrid 控件 1. 为要访问的数据库创建一个Microsoft 数据链接(.MDL) 文件。请参阅“创建Northwind OLE DB 数据链接”主题,以获得一个示例。 2. 在窗体上放置一个ADO Data 控件,并将其ConnectionString 属性设置为在第1 步中所创建的OLE DB 数据源。 3. 在这个Ado Data 控件的RecordSource 属性中输入一条将返回一个记 录集的SQL 语句。例如,Select * From MyTableName Where CustID = 12 4. 在窗体上放置一个DataGrid 控件,并将其DataSource 属性设置为这个ADO Data 控件。 5. 右键单击该DataGrid 控件,然后单击“检索字段”。 6. 右键单击该DataGrid 控件,然后单击“编辑”。 7. 重新设置该网格的大小、删除或添加网格的列。 8. 右键单击该DataGrid 控件,然后单击“属性”。 9. 使用“属性页”对话框来设置该控件的适当的属性,将该网格配置为所需的外观和行为。在运行时更改显示的数据 在创建了一个使用设计时特性的网格后,也可以在运行时动态地更改该网格的数据源。下面介绍实现这一功能的通常方法。 更改DataSource 的RecordSource 更改所显示的数据的最通常方法是改变该DataSource 的查询。例如,如果DataGrid 控件使用一个ADO Data控件作为其DataSource,则重写RecordSource和刷新该ADO Data 控件都将改变所显示的数据。 ' ADO Data 控件连接的是Northwind 数据库的' Products 表。新查询查找所有 ' SupplierID = 12 的记录。
DataGridView实现数据的快速输入
C#利用DataGridView实现数据的快速输入 网络编程2008-03-11 16:04:03 阅读313 评论0 字号:大中小订阅 在做管理软件时,常常需要表格输入功能。表格输入极大地加快了数据输入,提高了工作效率,当然也提高了软件的竞争性。笔者最近用C#在做一套CRM时,成功地使用C# 2005里面的表格控件DataGridView 实现了表格输入功能,现在就把具体实现与各位分享: 1. 初始化工作 (1) 在Vs 2005 里面新建一个C# WinForm 应用程序:DataGridViewTest (2) 在窗体Form1上拖一个DataGridView控件:DataGridView1 (3) 在DataGridView1里添加两个列: Column1: 类型:DataGridViewComboBoxColumn HeaderText:时间 DataPropertyName:DutyTime Column2: 类型:DataGridViewTextBoxColumn HeaderText:时间 DataPropertyName:DutyTime (4)在Form1类中添加两个私有属性: private DataTable m_Table;//输入组合框控件的下拉数据 private DataTable m_DataTable;//与表格绑定的DataTable,即用户输入的最终数据 (5)在Form1类里面定义一个结构体 public struct MyRowData { public MyRowData(int no, string enDay, string cnDay) { No = no; EnDay = enDay; CnDay = cnDay; } public int No; public string EnDay; public string CnDay; } (6) 在Form1的load事件Form1_Load(object sender, EventArgs e) 加上以下初始化代码: this.dataGridView1.AllowUserToAddRows = true; this.dataGridView1.AllowUserToDeleteRows = true; this.dataGridView1.AutoGenerateColumns = false;
C#中DatagridView单元格动态绑定控件
C#中DatagridView单元格动态绑定控件 C#中DatagridView单元格动态绑定控件 我们在使用DatagridView的列样式的时候很方便,可以设置成comboboxcolumn,textboxcolumn等等样式,使用起来非常方便,但是,这样设置的列都采用同一种样式.对同一列采用多种样式的,就需要单独对单元格进行操作了. 具体方法如下: 1.实例化一个定义好的控件:如combobox 2.初始化combobox 控件3.获取private void dataGridView1_CellClick(object sender, DataGridViewCellEventArgs e) { if (dataGridView1.CurrentCell.ReadOnly == false && dataGridView1.CurrentCell.RowIndex == 2) // combobox显示条件 { comboBox1.Text = dataGridView1.CurrentCell.Value.ToString(); //对combobox 赋值R = dataGridView1.GetCellDisplayRectangle(dataGridView1.Curre ntCell.ColumnIndex, dataGridView1.CurrentCell.RowIndex, false); //获取单元格位置
comboBox1.SetBounds(R.X + dataGridView1.Location.X, R.Y + dataGridView1.Location.Y, R.Width, R.Height); //重新定位combobox.中间有坐标位置的转换 comboBox1.Visible = true; } else comboBox1.Visible = false; } 4.将combobox的值写回到单元格 private void comboBox1_SelectedIndexChanged(object sender, EventArgs e) { dataGridView1.CurrentCell.Value = comboBox1.Text; }
winform中DataGridView实现分页功能
winform中DataGridView实现分页功能 在winform的设计中,要实现对DataGridView控件的分页功能,需要两个控件:BindingSource、BindingNavigator,根据需求可对BindingNavigator进行自由的扩展,下图的示例则是根据一般需求对分页功能的实现。红色区域是对BindingNavigator控件扩展后的效果。 具体实现过程: //窗体构造方法中定义分页所需变量: int pageSize = 0; //每页显示行数 int nMax = 0; //总记录数 int pageCount = 0; //页数=总记录数/每页显示行数 int pageCurrent = 0; //当前页号 int nCurrent = 0; //当前记录行 DataTable dtInfo = new DataTable(); //存取查询数据结果 //分页功能实现
public void InitDataSet() { //判断每页显示记录数是否为空,在初始话窗体时为真 if (txtRecordNumOfPage.Text.Trim() == "") { try { //pageSize = Convert.ToInt16(ConfigurationManager.AppSettings["PageSize"]); //设置页面行数 //读取配置文件中设置的每页显示条数 string szConfigFileName = Application.ExecutablePath + ".config"; XmlDocument doc = new XmlDocument(); doc.Load(szConfigFileName); XmlNode root = doc.SelectSingleNode("configuration"); XmlNode node = root.SelectSingleNode("appSettings/add[@key='PageSize']"); XmlElement el = node as XmlElement; pageSize = Convert.ToUInt16(el.GetAttribute("value")); } catch { } if (pageSize == 0) {
C#用DataGridview 做的表格效果
C#用DataGridview 做的表格效果 private void Form1_Load(object sender, EventArgs e) { DataGridViewComboBoxColumn boxc = new DataGridViewComboBoxColumn();//创建下拉框 boxc.HeaderText = "国家";//设定标题头 boxc.Items.Add("China");//设定下拉框内容 boxc.Items.Add("England"); boxc.Items.Add("U.S.A"); boxc.Items.Add("Japan"); this.dataGridView1.Columns.Add(boxc);//将下拉框添加到datagridview中 DataGridViewTextBoxColumn textc = new DataGridViewTextBoxColumn();//创建文本框字段 textc.HeaderText = "公司"; this.dataGridView1.Columns.Add(textc); textc = new DataGridViewTextBoxColumn(); textc.HeaderText = "描述"; this.dataGridView1.Columns.Add(textc); DataGridViewButtonColumn butc = new DataGridViewButtonColumn();//创建按钮字段 butc.HeaderText = "设置"; butc.Text = "设置"; butc.DefaultCellStyle.ForeColor = Color.Black; butc.DefaultCellStyle.BackColor = Color.FromKnownColor(KnownColor.ButtonFace); butc.AutoSizeMode = DataGridViewAutoSizeColumnMode.AllCells; butc.Width = 150; https://www.360docs.net/doc/a213146578.html,eColumnTextForButtonValue = true;//如果为false,则不显示button上的text this.dataGridView1.Columns.Add(butc); butc = new DataGridViewButtonColumn(); butc.HeaderText = "删除"; butc.Text = "删除"; butc.DefaultCellStyle.ForeColor = Color.Black; butc.DefaultCellStyle.BackColor = Color.FromKnownColor(KnownColor.ButtonFace); butc.AutoSizeMode = DataGridViewAutoSizeColumnMode.AllCells; butc.Width = 150;
