Readme

Nikon Transfer 1.5.2 版
感谢您购买 Nikon 数码相机。请阅读以下最新重要信息。
1. 如果主目标文件夹/备份目标文件夹中已包含同名文件
如果主目标文件夹/备份目标文件夹中包含与正在传送的文件同名的文件,则传送过程中不会覆盖现有文件,而是向这些文件的名称中添加结尾号码(例如:DSC_0001_1.JPG、DSC_0001_2.JPG)。如果选中了"将照片备份"复选框,将检查主目标文件夹和备份目标文件夹,确定其中是否包含与待传输文件同名的任何文件。如果任意一个文件夹中包含同名文件,则在这些文件的名称中添加结尾号码。对于主目标文件夹和备份目标文件夹,添加到文件名中的结尾号码是相同的。
2. 动画文件的拍摄日期
如果从缩略图窗格的"分组:"下拉列表中选择"拍摄日期",或者从"显示"菜单的"分组照片"子菜单中选择"拍摄日期",则缩略图将按照拍摄日期显示。但是,此操作不能应用于动画文件的缩略图。
3. Pictmotion
Nikon Transfer 上显示的 Pictmotion 缩略图并不代表这些图像用于 Pictmotion。这些缩略图只是一些图标,表明它们是动画文件。
4. Windows Vista
如果您正在使用 Windows Vista 计算机,则无法通过将 D1 系列相机连接至 PC 来传送图像。请使用读卡器等设备传送图像。
5. my Picturetown
如果使用不受支持的文件格式,图像文件可能无法正确上传。要了解不受支持的文件格式,请参见 my Picturetown 站点。此外,当在网络中使用代理服务器,并且要上传的图像文件的大小超过了代理服务器的限制设置时,无法上传图像。
当您开始上传文件时,将自动启动 File Uploader。如果出现下列任意错误,则请单击进度对话框中的“取消”按钮取消上传文件。File Uploader 将一直尝试上传文件,直到您取消上传。
- 网络连接错误
- my Picturetown 服务器错误
6. 拍摄日期
在拍摄日期之后修改的影像将转移到其他文件夹中,而不是标有其拍摄日期的文件夹,即使您在指定文件夹名称时在文件夹命名对话框中选择了"拍摄日期"也是如此。这是因为应用程序实际是将影像转移到基于创建日期而不是实际拍摄日期创建的文件夹中。在拍摄之前,请确保相机的日期和时间设置正确。
7. 动画文件
动画文件的缩略图像若为 2GB 或更大,则可能无法正常显示。
****************************************************************
文件版本
****************************************************************
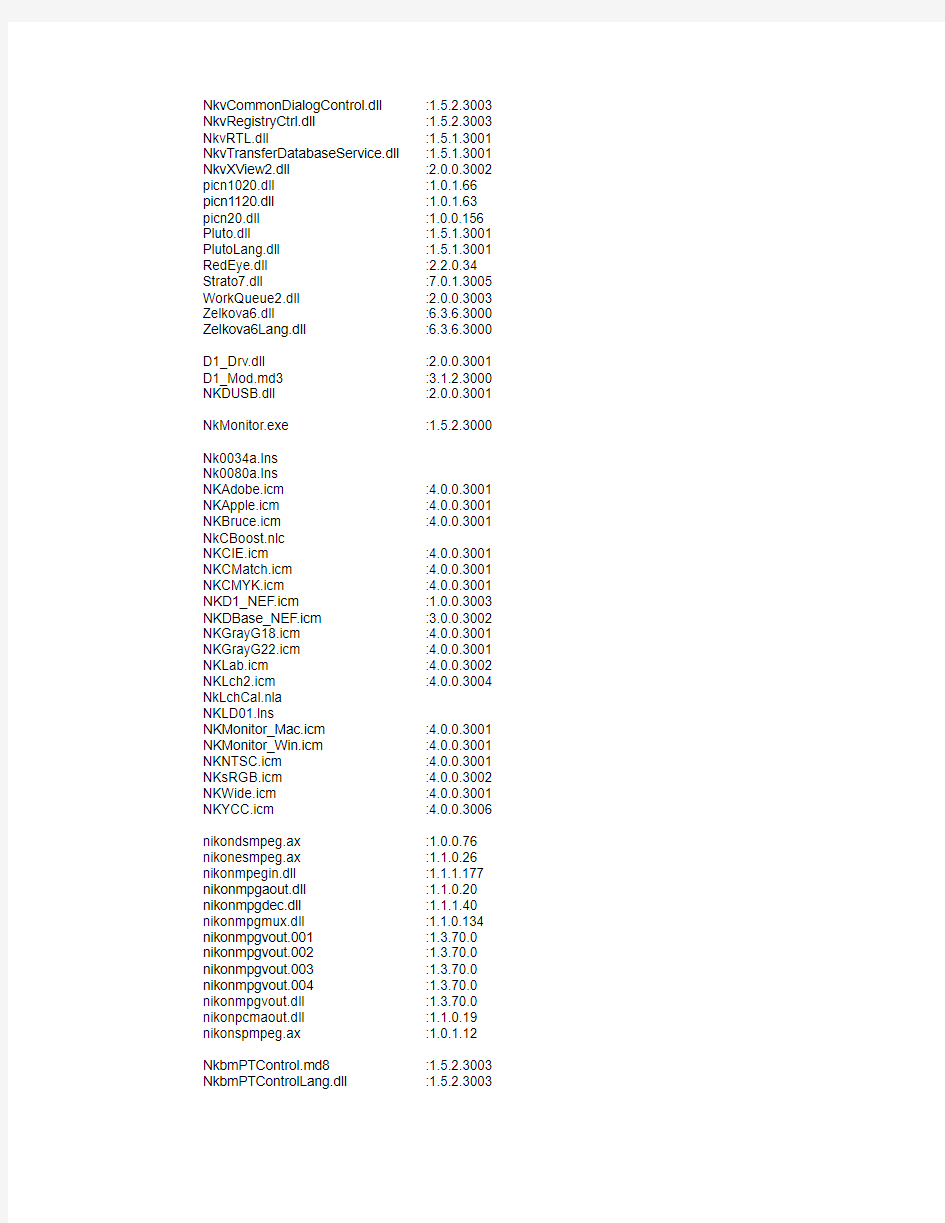
程序文件版本如下:
NktTransfer.exe :1.5.2.3003
NktTransferLang.dll :1.5.2.3003
NktPMConverter.exe :1.5.2.3003
NktPMConverterLang.dll :1.5.2.3003
Asteroid9.dll :9.5.4.3000
CML9.dll :9.2.0.3004
Colorado.dll :1.7.9.3005
DRAGNKL1.dll :2.0.0.14
MCARecLib.dll :1.0.0.3011
mPTAccess.dll :1.1.1.3000
mvEngineUtility.dll :2.0.0.3000
NkPTPLib3.dll :1.0.5.3000
NkvCommonDialogControl.dll :1.5.2.3003 NkvRegistryCtrl.dll :1.5.2.3003 NkvRTL.dll :1.5.1.3001 NkvTransferDatabaseService.dll :1.5.1.3001 NkvXView2.dll :2.0.0.3002 picn1020.dll :1.0.1.66 picn1120.dll :1.0.1.63 picn20.dll :1.0.0.156 Pluto.dll :1.5.1.3001 PlutoLang.dll :1.5.1.3001 RedEye.dll :2.2.0.34 Strato7.dll :7.0.1.3005 WorkQueue2.dll :2.0.0.3003 Zelkova6.dll :6.3.6.3000 Zelkova6Lang.dll :6.3.6.3000 D1_Drv.dll :2.0.0.3001 D1_Mod.md3 :3.1.2.3000 NKDUSB.dll :2.0.0.3001 NkMonitor.exe :1.5.2.3000 Nk0034a.lns
Nk0080a.lns
NKAdobe.icm :4.0.0.3001 NKApple.icm :4.0.0.3001 NKBruce.icm :4.0.0.3001 NkCBoost.nlc
NKCIE.icm :4.0.0.3001 NKCMatch.icm :4.0.0.3001 NKCMYK.icm :4.0.0.3001 NKD1_NEF.icm :1.0.0.3003 NKDBase_NEF.icm :3.0.0.3002 NKGrayG18.icm :4.0.0.3001 NKGrayG22.icm :4.0.0.3001 NKLab.icm :4.0.0.3002 NKLch2.icm :4.0.0.3004 NkLchCal.nla
NKLD01.lns
NKMonitor_Mac.icm :4.0.0.3001 NKMonitor_Win.icm :4.0.0.3001 NKNTSC.icm :4.0.0.3001 NKsRGB.icm :4.0.0.3002 NKWide.icm :4.0.0.3001 NKYCC.icm :4.0.0.3006 nikondsmpeg.ax :1.0.0.76 nikonesmpeg.ax :1.1.0.26 nikonmpegin.dll :1.1.1.177 nikonmpgaout.dll :1.1.0.20 nikonmpgdec.dll :1.1.1.40 nikonmpgmux.dll :1.1.0.134 nikonmpgvout.001 :1.3.70.0 nikonmpgvout.002 :1.3.70.0 nikonmpgvout.003 :1.3.70.0 nikonmpgvout.004 :1.3.70.0 nikonmpgvout.dll :1.3.70.0 nikonpcmaout.dll :1.1.0.19 nikonspmpeg.ax :1.0.1.12 NkbmPTControl.md8 :1.5.2.3003 NkbmPTControlLang.dll :1.5.2.3003
_______________________________________________________________
Adobe 是 Adobe Systems Inc. 的注册商标,Photoshop 是 Adobe Systems Inc. 的商标。Apple 和 Macintosh 是 Apple, Inc. 的注册商标。
Windows 是 Microsoft Corporation 的商标。
本手册中提及的所有其他商标或产品名称均为各自所有者的商标或注册商标。
本软件由 Independent JPEG Group 共同开发。
2009 年 11 月 18 日
CN
readme写法
# markdown自动生成侧边栏TOC /目录 - 声明:本模板是对开源项目i5ting-i5ting_ztree_toc-0.3.0-11 的精简,主要是针对Windows 下无法安装项目作者给出的软件(仅适用于Linux)的问题进行一定的优化。经过精简之后,使用方法非常简单,仅仅是**一次复制&一次粘贴**。 - 示例效果如下图:  - [点击产看项目所在的官方地址](http://i5ting.github.io/i5ting_ztree_toc/) --- ## 使用说明 ### 前期工作 1. 一款好用的文本编辑器,用来编辑html文档。推荐使用sublime text; 2. 你的markdown文件中必须存在目录结构,即不同级别的标题。 3. **把你的markdown文件转化成html,这一步可以使用sublime text的插件`Markdown Preview` 或`OmniMarkupPreviewer` 来完成。推荐使用后者,预览效果相对丰富一些;** --- ### 正式开始 1. 首先下载本模板; 2. 打开下载的文件,可以看到两个文件夹,一个是“officialcasetoc”,另一个是“mycasetoc”,我们只需要使用“mycasetoc”; 3. 将“mycasetoc”复制一份出来,然后用文本编辑器打开其中的`markdownToc.html`。里面标记了两条很明显的内容分割线,你只需要把自己的html文档的正文部分复制到两条内容分割线之间即可,无需进行其他编辑。如下图所示:  4. 保存并在浏览器中打开就可以看到生成了侧边栏目录,效果如下:  ---
SCST中readme的翻译和fc的相关说明
使用SCST通过FC方式进行卷管理之前必须搭建测试环境:以下是搭建测试环境所需硬件及软件。 测试环境列表: 服务器端(target): 服务器型号:NP370D2 光纤卡:1块,型号QLA 2460 内核版本:Linux 2.6.24 所需软件包:scst-1.0.1.1(SCST core ) scstadmin-1.0.6 (简化scst配置的工具软件) qla_isp-1.0.2(针对SCST core的FC卡驱动) 客户端(Initiator): 服务器型号:AS500N2 光纤卡:1块,型号QLA2460 内核版本:Red Hat 企业版5 (kernel 2.6.18) 所需软件包:qlafc-linux-8.02.23-3 (FC卡驱动) standalone_sansurfer5.0.1b57_linux(FC卡管理软件) 环境搭建详细过程: 一.Target端配置 以下是target端的配置方法: (1)首先配置target 端,给内核打补丁: Type: patch -p0 scst_exec_req_fifo-2.6.X.patch patch -p0 io_context-2.6.X.patch 内核必须关闭HIGHMEM(通过make menuconfig中配置),否则scst_user 模块是无法加载上去的 (2)编译和安装SCST模块 进入到scst-1.0.1.1目录中 Type: make make install (3)加载SCST模块(scst.ko) Type: cd /lib/modules/2.6.18-92.e15/extra
ReadmeX
Microsoft Age of Empires III: The WarChiefs ReadmeX File September 2006 Welcome to Microsoft?Age of Empires? III: The WarChiefs! This file contains information to help you install Age of Empires III: The WarChiefs. It also includes late-breaking information not included in the manual or in-game Help. CONTENTS A. Installing Age of Empires III: The WarChiefs B. Starting Age of Empires III: The WarChiefs C. Getting Help D. What's on the Disc? E. Playing on ESO with Age of Empires III: The WarChiefs F. Shortcut Keys G. Manual Corrections H. Quick Reference Card Corrections I. Gameplay Troubleshooting J. Other Trouble shooting K. Age of Empires III: The WarChiefs Information A. Installing Age of Empires III: The WarChiefs To install Age of Empires III: The WarChiefs, you must have Age of Empires III installed and you must have administrator rights on your computer and your computer must be running Microsoft Windows? X P. To install Age of Empires III: The WarChiefs ? Insert the Age of Empires III: The WarChiefs disc into the disc drive. If AutoPlay is enabled, the installation menu will appear; click Install, and then follow the on-screen prompts. —or— ? If AutoPlay is disabled, on the Start menu, click My Computer. In the My Computer window, double-click the disc drive icon, and then double-click Setup.exe. On the Setup screen, click Install, and then follow the on-screen prompts. B. Starting Age of Empires III: The WarChiefs You must have the Age of Empires III: The WarChiefs disc in your disc drive to play. To start Age of Empires III:The WarChiefs ? Insert the Age of Empires III: The WarChiefs disc into the disc drive. On the Start menu, point to Programs, point to Microsoft Games, point to Age of Empire s III: The WarChiefs, and then click Age of Empire s III: The WarChiefs. You can skip the opening cinematics by pressing ENTER, SPACEBAR, or ESC.
MATLAB_readme
MATLAB 2014b安装说明 中国科学技术大学购买的MATLAB软件(授权期:2014年12月1日到2017年12月31日),仅供我校在职员工及在校学生使用,请勿扩散到校外。 一、MATLAB授权的种类及区别 ●校园版:适用于在校内使用并且可以连接到MATLAB授权服务器的用户。 每次启动时都需要连接校内激活服务器验证进行激活,在校外使用时一 般需要登录教工网络通自带的VPN后才可以连接到授权服务器激活。 ●独立版:适用于无法连接校内授权服务器的电脑,激活时无需联网激活, 但license有效期较短,到期后需要重新激活。 ●机房版:适用于机房内部电脑无法连接学校授权服务器的情况,需要在 用户机房内设置一台授权服务器,对内部电脑进行授权。 ●MATLAB? Distributed Computing Server?32 pack需要单独申请安装。 一般用户请直接使用校园版或独立版,如您有特殊需求需要使用机房版或MATLAB? Distributed Computing Server?32 pack,请刘老师(urp@https://www.360docs.net/doc/052233552.html,,63603900)联系申请,并说明充分理由。 二、校园版安装说明 本文档为以在64位Windows系统上安装校园版为例的安装说明,在Linux 等其它系统的安装方式类似。 如果已经安装过测试版,不需要重新安装正式版。运行开始菜单里面MATLAB 子菜单的“激活MATLAB 2014b”,根据提示输入新的license文件即可。 1.登录正版化软件网站(https://www.360docs.net/doc/052233552.html,/),获得相应的安装文件、文 件安装密钥和许可证文件。 2.用虚拟光驱打开下载的ISO安装文件,点击setup开始安装。 3.在“选择安装方法”中选择“使用文件安装密钥”。
ReadMe
1 result/ |-- 00.RawData/ 【原始下机数据和原始拼接后数据】 | |-- Sample_Name/ 【每个样品对应的原始下机数据和原始拼接后数据】 | | |--*_1.fq.gz 【reads1去除barcode 和primer 后得到的序列】 | | |--*_2.fq.gz 【reads2去除barcode 和primer 后得到的序列】 | | |--*.raw_1.fq.gz 【reads1原始下机序列,包含barcode 和primer 】 | | |--*.raw_2.fq.gz 【reads2原始下机序列,包含barcode 和primer 】 | | `--*.extendedFrags.fastq 【原始下机的reads 拼接后的序列】 | |-- SampleSeq_info.xls 【所有样品的barcode 和primer 信息】 | `-- assemble_stat.xls 【所有样品的序列拼接信息统计列表】 |-- 01.CleanData/ 【质控后可用于后续分析的有效数据】 | |-- Sample_Name/ 【每个样品的质控结果】 | | |-- *.fastq 【质控后序列的FASTQ 格式文件】 | | |-- *.fna 【质控后序列的FASTA 格式文件】 | | `-- histograms.txt 【质控后的序列长度分布统计表】 | `-- QCstat.xls 【数据预处理统计及质控信息表】 |-- 02.OTUanalysis/【OTUs 聚类和物种注释结果】 | |-- OTUs.fasta 【OTUs 代表序列】 | |-- OTUs.tax_assignments.txt 【OTUs 物种注释结果】 | |-- all_rep_set_tax_assignments.krona.html 【krona 网页展示】 | |-- OTUs.tre 【OTUs 进化树文件】 | |--otu_table_even.biom 【均一化处理后biom 格式的绝对丰度表】 | |-- taxa_abundance/ 【每个样品中物种丰度信息】 | | |-- evenabs/ 【均一化处理后的绝对丰度(均一化处理使每个样品的OTUs 丰度之和相等)】
使用说明
CJKOS for PalmOS5 V4.63 使用说明Chinese,Japanese,Korean Operation System Readme English Chinese GB Chinese BIG5 感谢您使用CJKOS系统,请先阅读以下使用说明: 目录 1. 系统简介 2. 系统需求 3. 安装说明 r如何升级安装 r如何移除旧版 r使用安装程序 r使用Palm Desktop的安装工具 r将资料库放入Flash ROM r将字体放入VFS标准的外接记忆卡 r档案说明 r安装举例 4. 使用说明 r启动 r系统设定、增强功能设定、输入法设定 r资料库管理 r启动输入法、输入法画面、工具列、其他按键、输入法补充说明 r词语输入、联想输入、反联想功能 r管理词语库、新增词语、删除词语、取出定制词语 r智慧调整字序或词序功能 r中文住址翻译成英文住址功能 r取出编码功能 r使用图标字、图标字一览表 r英文和中日韩文标点符号对照表 r使用外接键盘 r使用SONY CLIE JogDial 5. 登记注册 6. 发布历史 7. 常见问题 8. 未来计划 9. 许可声明 10. 联络方式 系统简介 CJKOS(Chinese,Japanese,Korean Operation System)将英文PalmOS提升为支持中、日、韩文的多国语言支撑系统。 ■ 显示中、日、韩多国文字: r智能识别和同屏显示简体中文(GB-2312)和繁体中文(BIG-5)。 r智能识别和同屏显示日文EUC-JIS和Shift-JIS字。 r显示韩文KSC-5601。 ■ 提供本地化界面:将Palm OS内应用程序界面转换成本地界面,目前只有简体和繁体中文界面。示范图形。 ■ 输入中文字。系统提供以下多种输入法: r繁体中文:仓颉、香港仓颉、简易、注音、广东音、汉语拼音、通用拼音、注音二式、WG拼音、许式、大易、行列、图标字、符号、日文 平假名和片假名。 r简体中文:拼音、双拼、五笔、注音、广东音、图标字、符号、表形码、郑码、日文平假名和片假名。 r韩文:韩文字、图标字、日文平假名和片假名。
Readme安装文档
《《《《《欢迎安装ORION SAP客户端软件》》》》》在安装SAP软件前,请认真阅读本安装说明,否则可能导致软件安装失败!!!红色注意内容请认真阅读! A.开始安装 安装步骤如下:(注意:在安装SAP GUI软件之前,请将360安全卫士,360杀毒,瑞星,金山毒霸等杀毒软件关闭) 1.双击SAPGUI_Setup7200.exe开始安装sap。(如果在win7系统下安装,请右击该程序点击以管理员身份运行) 2.点击接受,进行下个页面安装。
3.点击弹出窗口的安装按钮,稍等片刻等待程序释放安装文件。(注意:请勿更改默认安装目录!) 4.等待sap安装程序释放文件完成,在此期间请勿进行其他操作,这可能持续几分钟的时间。
5. 弹出SAPGUI安装界面后,点击NEXT 进入下一界面。 6.在该界面中在窗口左侧的列表中查看sap_gui_7200 并在该项目前面方框内勾选后点击NEXT 继续安装。
6.等待安装程序复制文件。
7.安装完成,点击Done按钮退出安装。 B.检查安装是否成功: 安装完毕后桌面会生成的SAP Logon 图标,双击查看登录窗口是否正常,如果出现登录窗口为黑色异常,请重新启动计算机,进入系统后进入到C:\SAP文件夹中双击msxml.exe 进行更新系统补丁,即可正常运行。 C .创建登陆SAP登陆组(注意:部分区域用户,需要先登陆SSL VPN,连接成功后继续本操作,否则操作将失败!是否需要使用SSL VPN请与电算部联系) 1.双击桌面生成的图标 2.进入登陆界面,点击红色箭头按钮建立新的sap登陆组。
n2n-readme中文版
n2n配置说明中文版 一:在边界节点(Edge node) --------- 你需要在计划接入"同一个交流空间"的计算机都开启其"边界节点"(Edge node)的工作进程 You need to start an egde node on each host you want to connect with the *same* community. 1. become root 首先,进入特权用户下: 2. create tun device 其次,使用tunctl工具创建一个虚拟网络接口,比如tun0; # tunctl -t tun0 3. enable the edge process 第三,开启边界节点守护进程; # ./edge -d n2n0 -c mynetwork -k encryptme -u 99 -g 99 -m 3C:A0:12:34:56:78 -a 1.2.3.4 -l a.b.c.d:xyw or # N2N_KEY=encryptme ./edge -d n2n0 -c mynetwork -u 99 -g 99 -m 3C:A0:12:34:56:78 -a 1.2.3.4 -l a.b.c.d:xyw 一旦你有这样制定出来的,你可以添加“-f”选项,以使边缘分离,并作为后台进程运行。 请注意,-U,-G和-f选项不适用于Windows。
附:edge 命令格式 edge -d
[赖世雄教你唱歌学英语].ReadMe
现网上可供下载的为WMA文件,只有22Hz,32K,对于歌曲来说,这样的音质实在无法接受,更别说一遍又一遍的学习了。 因此贡献出这套的播音级音质的MP3(44Hz,128K的音质),该版本是电台广播教学时用的。 因文件太大,我的上传水管又太细,所以化整为零,没有压缩打包。大家可以下一个听一个,而不必等上几个礼拜下完后才听。共计50个MP3文件,每个文件大小居于24M至25M,共计1.19G。 赖世雄教授除了在英语方面有极深的造诣外,在音乐和歌曲演唱方面也很有天赋, 为此,中央人民广播电台英语教学组与大连外院图书音像中心为大家编辑、制作了 《赖世雄教你唱歌学英语》的节目和歌集,旨在向英语学习者提供一种新的英语学习样式, 将娱乐和英语学习有机结合起来,使大家在优美的旋律、地道连贯的英语歌词和歌才动人 的演唱所营造出的欢快气氛中学到英语及相关文化。同时赖包雄教授在请大家欣赏本书选 编的50首旋律优美、曲调深情隽永、歌词含义悠远、艺术魅力长存的英语抒情老歌的同时, 详细讲解歌词大意及歌曲词中的单词短语和相关语法。这也是我们这套节目和这本歌集的独特之处。 目录 1.All I Have to Do Is Dream 只有寻梦去 2.Are You Lonesome Tonight? 今晚你寂寞吗? 3.Blowing in the Wind 随风飘荡 4.Breaking Up Is Hanrd to Do 难以分手 5.California Dreamin' 加州之梦 6.Can't Take My Eyes Off You 舍不得不看你 7.Cotton Field 棉花田 8.Dear Heart 甜心 9. Edelweiss 雪绒花 10.El Condor Pasa 老鹰之歌 11.Five Hundred Miles 离家五百里 12.I Can't Stop Loving You 无法停止爱你 13.I Went to Your Wedding 我参加你的婚礼 14.I'll Never Fall in Love Again 不再坠入情网 15.If You Love Me 如果你爱我 16.It's Now or Never 时不再来 17.Jambalaya 什锦烩饭 18.Just Walking in the Rain 走在雨中 19.Lemon Tree 柠檬树 20.Let It Be 顺其自然 21.Love Me Tender 温柔地爱我 22.Moon River月亮河 23.Morning Has Broken 破晓 24.No More不再 25.Oh!Carol 哦,卡罗 26.Only the Lonely惟有孤寂 27.Only You 只有你 28.Puff 波夫 29.Red River Valley 红河谷 30.Release Me 放开我 31.Rhythm of the Rain 雨中旋律 32.Right Here Waiting 33.Rose Garden 34.Sailing 35.Say You, Say Me 36. Seven Lonely Days 37.Smoke Gets in Your Eyes 38.Song Sung Blue 39.Take Me Home, Country Roads 40.Tennessee Waltz
CFC-Readmek【CFC-说明文件】
SIMATIC CFC V8.0 SIMATIC S7/M7 的编程软件 安装及使用说明 这些说明应视为比其它文档中的信息更新。 请仔细阅读这些说明;它们包含了有关安装和使用CFC 的重要信息。 内容 1 交付内容 2 硬件要求 3 软件要求 3.1 操作环境 3.2 存储空间要求 4 安装 4.1 安装CFC 4.2 CFC 许可证密钥 4.3 卸载CFC 4.4 安装Borland C 编译器(针对M7) 使用说明(版本说明) 1 新版本中的新增功能和修改内容 1.1 新增内容 2 软件的组态及操作说明 2.1 来自不同版本CFC 的数据 2.2 常规信息 2.3 针对S7 的CFC 2.4 CFC 中的SFC 实例 3 文档说明 3.1 与文档所述不同的功能 安装说明 这些安装说明包含了安装CFC 所需要的重要信息。请在安装本软件之前阅读这些说明。 CFC 可在以下操作系统上运行: ?MS Windows XP Professional SP3 ?MS Windows Server 2003 SP2 Standard ?MS Windows Server 2003 R2 SP2
?MS Windows 7 Ultimate(32 位) ?MS Windows 7 Ultimate(64 位) ?MS Windows Server 2008(32 位) ?MS Windows Server 2008 R2(64 位) ?MS Windows 7 Professional(32 位) ?MS Windows 7 Professional(64 位) ?MS Windows Vista Ultimate(32 位) ?MS Windows Vista Business(32 位) 注意:不支持MS Windows XP Home 和MS Windows 2000 操作系统。 1 交付内容 您会通过此交付获得下列产品之一: SIMATIC CFC V8.0 订货号:6ES7658-1EX08-2YA5 该产品软件包含有: ? 1 张TIA Engineering Toolset V8.0 CD ? 1 个许可证密钥闪存卡 ? 1 份许可证证书 SIMATIC CFC Upgrade V7.1 -> V8.0 订货号:6ES7658-1EX08-2YE5 该产品软件包含有: ?1张TIA Engineering Toolset V8.0CD ?1个许可证密钥闪存卡 ?1份许可证证书 TIA Engineering Toolset CD(包括CFC)的内容 ? 1 CFC V8.0 软件 ?电子手册《CFC –入门指南》(针对实例项目ZEn04_01_CFC) ?电子手册:《CFC - S7 手册》 ?电子手册:《CFC - M7 手册》 2 硬件要求 要使用CFC,需要满足以下要求的编程设备或PC: ?处理器最小为600 MHz ?主内存最小为512 MB RAM 3 软件要求 3.1 操作环境 CFC 是32 位应用程序,需要使用上文列出的操作系统之一。 CFC 为可选软件包。要想使用CFC,编程设备或PC 上需要具有下列附加软件包:
(论文)光盘根目录下的README文件示例
该光盘是“基于PHP技术的文章发布/管理平台”的电子版,其根目录下有三个文件夹,分别是“源程序”文件夹、“论文”文件夹和“答辩幻灯片”文件夹。 1. “源程序”文件夹:存放所有源程序代码和所用的程序文件,“源程序”文件夹中的内容如下: (1)Lunwen-Code”文件夹:存放所有程序的代码,其中包括如下内容: 目录下的PHP文件:在Lunwen-Code目录下的PHP文件是前台用户页面的文件,Index.php是用户登录的首页,用户可以通过它访问系统的前台。 “Admin”文件夹:存放管理员访问后台页面的所有程序所存的文件夹,其中的Index.php是管理员登录的首页。管理员访问Index.php并提供用户名和密码登陆后可实现对系统的管理。 “Htmlarea”文件夹:存放系统所需的相应的控件。 “Images”文件夹:存放软件界面所用的图片。 (2)“Software”文件夹:存放系统环境所需的配置软件及配置文件。其中主要有三个文件夹,它们分别是: “Apache”文件夹:存放Apache的安装程序和配置文件httpd.conf。 “Mysql”文件夹:存放Mysql数据库的相关程序和配置文件my.ini。 “Php”文件夹:存放PHP程序和相应的配置文件php.ini。 (3)“数据库”文件夹:存放系统用到的所有数据库。 2. “论文”文件夹存放本次毕业设计的论文,包括:任务书.doc、开题报告.doc、中英文摘要.doc、目录.doc、论文正文.doc、参考文献.doc、附录.doc和致谢.doc。 3. “答辩幻灯片”文件夹中存放答辩幻灯片的内容,因为本次毕业设计采用的幻灯片是Flash制作的,所以保存了三个文件。它们分别是:“基于PHP技术的文章发布管理平台_毕欣盛.exe”,“基于PHP技术的文章发布管理平台_毕欣盛.fla”和“基于PHP技术的文章发布管理平台_毕欣盛.swf”。观看时请访问“基于PHP技术的文章发布管理平台_毕欣盛.exe”并选择全屏效果。
readme-journ
Instructions for using the SV-journal template Preliminaries (1) Getting started (1) Using the Toolbars (2) Toolbar Title Page (2) Toolbar Text (3) Toolbar Figures and Tables (4) Lists and Footnotes (4) Preliminaries The journal template has been designed for authors working with Word 2000 or higher. Predefined style formats are available for all the necessary structures to be included in the manuscript, and these formats can be quickly accessed using keystroke combinati-ons or the special toolbars provided. Getting started ?Copy the template sv-journ.dot into the directory where you want to save your manu-script.1 ?Open My Computer or Windows Explorer and double click on the template to create a new document Note Do not open the template out of Word via File→Open. ?Save the document and name it with your name (e.g., Smith.doc). ?To use the template with a document you have already created, copy the existing text into the new document. 1 If you are already familiar with document templates, proceed as follows: Copy the template into the directory containing your Word templates. Open the file you would like to format and select Tools→Templates and Add-Ins. Click "Attach" in the dialog box, highlight the sv-journ.dot template, then click Open. Select the "Automatically update document styles" check box; click OK. (Caution: Do not add the template via “Global templates and add-ins”.)
README-step7 v5.4 安装说明
SIMATIC STEP 7 V5.4 Programming Software for SIMATIC S7 / M7 / C7 Notes on Installation and Usage These notes should be considered more up-to-date than the information in other documents. Read the notes carefully, because they contain information on installing and using STEP 7 V5.4. Note when printing the file that the left and right margins are set to a width of 25 millimeters for A4 portrait format. Contents Notes on Installation 1 Contents of the Consignment 2 Hardware Requirements 3 Software Requirements 3.1 Operating Environment 3.2 Memory Requirements 3.3 Compatibility with Other Software Products 3.3.1 Rational ClearCase 3.3.2 Network Settings when Using other Software Products 3.3.3 Interdependency with An Installed S7 Fault-tolerant System 3.4 Online Documentation 3.5 Upgrading from an earlier STEP 7 version and changing over from STEP 7 Lite 3.5.1 STEP 7 V5.4 Upgrade 3.5.2 STEP 7 V5.4 PowerPack 4 Installation 4.1 Installing STEP 7 V 5.4 4.2 License Key of STEP 7 V 5.4 4.3 Uninstalling STEP 7 V 5.4 4.4 Additional Notes on Installation 4.4.1 Using a Wheel-Mouse 4.4.2 Notes on using Communication Cards in PCs/ PGs 4.4.3 Installing on foreign-language operating systems Notes on Usage (Release Notes) 1 New Features and Changes in the New Version 2 Notes on Configuring and Operating the Software 2.1 How STEP 7 Fulfills the IEC Standard 2.2 General Notes 2.3 Using Network Drives 2.4 Multi-user Operation
sci期刊的说明
Readme World Scientific has produced a style/template document for MSWord, which will allow authors to prepare manuscripts that can be brought directly into the World Scientific production process for CRC titles. This will enable more accurate production of page proofs, reducing your need during proofreading to locate typographic mistakes. Installing the style file The World Scientific Word templates and sample files are located on the website in a zip format called 111-ijcis_doc.zip . Download and unzip this. Once unzipped successfully, you will find the following files: readme.pdf : preliminary guide ws-ijcis.dot : style/template file ws-ijcis.pdf : sample typeset pages using ws-ijcis.dot template Using the style file Please copy the “ws-ijcis.dot” onto your default templates directory (this will normally be something like C:\Program Files\Microsoft Office\Templates). ? To create a new document, choose New from the File menu, then select the ws-ijcis template from the Template list box before clicking OK. ? To attach the template to an existing document, first open the document, and then select the ws-ijcis Template from the Tools -> Templates and Add-ins menu. Press the “Attach Button” in the Templates and Add-ins dialogue and double click the appropriate template/style file from the file selector. Then ensure that the “Automatically Update Document Styles” check box is crossed before clicking on OK in the Templates and Add-ins dialogue. Whichever method you have used, the World Scientific styles will then be available in the Styles list box on the tool bar, and in the Style dialogue box on the “Format” menu. Applying World Scientific styles to your documents To use a style, first select the text to which you would like to attach the style, and then choose the style name from the styles list box on the tool bar or by using w sijcis Toolbar/Menu. WS IJCIS - Toolbar Draw/Remove Text Border Styles for Title, Author, Affiliation, History, Abstract & Keywords Style for Non Indented & Indented text Display Equation Style Styles for Heading 1,2,3 Styles for Table & Figure Captions Style for Appendix Headings Style for Bibliography list List Styles Style for Code/ Algorithm Printable Text Border Figure
cncKad_ReadMe
cncKad Installation Instructions This document explains the basic process of preparing your new cncKad workstation for work. 1 Before Installing Please note the following: 1. If you are installing on Windows? 2000 or Windows? XP: Make sure to login as “ADMINISTRATOR” before installing! 2. For running cncKad (after the installation), we recommend to log-on as a “Power User” at least. 3. cncKad uses the HASP hardlock Key: Installing other applications that use this Key (e.g. Solid Works? or PTC?) may cause problems running cncKad. 4. If you are running an Anti Virus program, you must close it before beginning the installation. 5. It is not recommended to install version 7.00 or higher on Windows? NT or Windows? 98. 6. If using Win 98, only install Shop Floor seats. 7. For Windows? NT and Windows? 98 - after the installation do the following: ?After installation run the Jet40SP8_9xNT.exe program (to find it, use Start => Search) ?Use only text templates for generating Report Files. 2 cncKad Installation Insert the CD, and follow the installation screens. Before starting, remove the HASP Key (dongle) from the computer. During the installation, you will be asked to choose paths for several folders; cncKad will offer you its default settings for these options: ?The installation folder – C:\…\cncKad