希捷硬盘部分指令代码修盘参数说明
希捷硬盘固件指令要领
B级自修复指令:T>后输入N3,,22, 回车载入,再按CTRL+T启动B级自修复。
A级自校准指令:T>后输入N2,,22, 回车载入,再按CTRL+T启动A级自校准。
B级自校准指令:T>后输入N2,AA,22, 回车载入,再按CTRL+T启动B级自校准。
工厂坏道修复指令:T>后输入N30,,22, 回车载入,再按CTRL+T启动工厂坏道修复。
停止自校准指令:T>后输入N50,,22, 按回车执行,停止硬盘自校准。
内部轨
关闭酷鱼4、5、6代磁头指令:T>后输入YA0, 回车载入,关闭损坏磁头。
希捷硬盘固件指令要领
希捷硬盘固件:
希捷盘的固件也是在硬盘的负道区,用十六进制数标记固件的具体位置,通过COM线访问这个区域。在维修时主要用到三个位置的固件,通常叫做ATA模块,CERT模块及VEN模块。
希捷硬盘指令维修:
连好COM线和电源线后(不需要接IDE线)接上后程序出现返回信息,MASTER........,表示硬盘已经认盘。出现MASTER....后,按键盘CTRL+Z,让硬盘进入待命模式,出现T>后,在按键盘的“;”键,COM口就返回硬盘的一些重要信息:AGE=50表示硬盘AGE值是正常的,如果是其他值硬盘就有故障,TYPE=20表示硬盘磁头型号是2型磁头,MxHd=0表示硬盘只有一个磁头,两个磁头就是=1,依次类推。
拿到一个有坏道或者不认盘的希捷盘,都要先接上COM线,看看返回信息是不是正常,返回信息正常后才可以对硬盘进行修复。少量坏道建议用自修复,大量坏道,不稳定坏道需用自校准修复。
希捷硬盘维修指南说明书
HDDSURGERY Tools for data recovery expertsHDDS Sea 2.5” Ramp SetHDDSURGERYTable of contents:1. Introduction ……………………………………………………………….. page 32. HddSurgery ™ head replacement tools ....................……. page 4Choosing the correct tool .................................... page 63. Supported models ..…………………………………………………… page 74. Handling the tools ......................................................... page 85. Head replacement process (7 steps)Step 1 - Mounting the tool on actuator arm ................ page 9 Step 2 - Securing the heads with the tool ..…….……… page 10 Step 3 - Moving the heads off the ramp ...........…… page 11 Step 4 - Dismounting the heads .......................... page 12 Step 5 - Mounting the heads in a patient drive ...... page 13 Step 6 - Moving the heads to the ramp ................ page 14 Step 7 - Dismounting the tool ..……………………… page 156. Head replacement process with Sea 2.5” Ramp p2a tool (7 steps)Step 1 - Mounting the tool on actuator arm ................ page 16 Step 2 - Securing the heads with the tool ..…….……… page 17 Step 3 - Moving the heads off the ramp ...........…… page 18 Step 4 - Dismounting the heads .......................... page 19 Step 5 - Mounting the heads in a patient drive ...... page 20 Step 6 - Moving the heads to the ramp ................ page 21 Step 7 - Dismounting the tool ..……………………… page 22HDDSURGERY 1.IntroductionThis guide is intended as a short course in handling of our tools for professionals in data recovery. It is assumed that the user is experienced in data recovery and familiar with "traditional" ways of saving data. This manual should not be taken as a guide for training.Using these tools without adequate software support is not recommended. It is recommended to use some of the proven systems for cloning, such as Ace Lab, Salvation Data, Copy-r and other products.It is possible to recover data without HddSurgery TM tools. In many cases, the known processes of hard drive head replacement are effective and sufficient. The general idea behind HddSurgery TM tools was to make sure that the process of replacing damaged hard drive heads goes with no errors. The use of HddSurgery TM tools prevents the ferromagnetic read/write heads to come in any kind of contact with the platter i.e. disk surface or other read/write heads. Also, with some basic procedures and short training, it is possible to let junior data recovery technicians handle complex tasks. With the development of these tools, we are trying to eliminate the element of luck that usually accompanies the process of data recovery.Experienced data recovery technicians or engineers can have great success even without our tools, but they can have absolute security only by using HddSurgery TM tools.Non-contact head replacement implies that there is no contact between the heads, or between heads and platters in the process of dismounting the donor heads and mounting heads on the patient drive. Traditional techniques of replacing the heads imply contact between the heads and contact of heads with the platters in data area. These problems especially come to light on drives that have suffered some form of physical damage.This tool doesn’t solve the head compatibility problem. It will only assure that the head replacement goes easily. If you have questions about compatibility, you can send them to HddSurgery TM support team on **********************HddSurgery TM is not responsible for any eventual damage caused by usage of our tools.TMHDDSURGERY2.HddSurgery™ head replacement toolsHddSurgery TM HDDS Sea 2.5” Ramp Set is a set of head replacement tools which can be used to safely and easily replace heads on most of 2.5” Seagate hard drives which “park heads” on a ramp. Set contains 5 pairs of head replacement tools: Sea 2.5” Ramp p1, Sea 2.5” Ramp p2a , Sea 2.5” Ramp p 2b , Sea 2.5” Ramp p 3 and Sea 2.5” Ramp p 4.▪ Sea 2.5” Ramp p1This head replacement tool can be used on 2.5” Seagate hard drive model Momentus Thin with 1 platter.▪ Sea 2.5” Ramp p2aSea 2.5” Ramp p2a head replacement tool can be used on the first type of Seagate 2.5” hard drive mechanics which includes models 4200.2, 5400.2, 5400.3, 5400.4 and Momentus PSD with 1 or 2 platters.▪ Sea 2.5” Ramp p2bSea 2.5” Ramp p2b head replacement tool can be used on the second type of Seagate 2.5” hard drive mechanics which includes models 7200.3, 7200.4, 7200.5, 5400.5 and 5400.6 with 1 or 2 platters.HDDSURGERY▪ Sea 2.5” Ramp p3Sea 2.5” Ramp p3 head replacement tool can be used on older 2.5” Seagate hard drive model FreePlay which has 3 platters. These hard drives usually came in external FreeAgent Go casings and had capacities of 750GB or 1TB.▪ Sea 2.5” Ramp p4This head replacement tool can be used on new 2.5” Seagate hard drive model FreePlay with 4 platters and 7 or 8 heads. These hard drives usually come in external FreeAgent GoFlex casings with capacities larger than 1TB.HDDSURGERYChoosing the correct toolSeagate hard drives with 1 or 2 platters (not Momentus Thin) can have two types of mechanics. These two types of mechanics on can be easily recognized. When you remove the lid from a hard drive, perform a visual check to see which of the tools should be used. ∙ First type of these hard drives usually have one round hole near the center of the head arm through which the tool is mounted. On these hard drives, Sea 2.5” Ramp p2a tool should be used.∙ Second type of these hard drives have one round hole on the head arm near the “tip” where the heads are and the tool is mounted through this hole. Sea 2.5” Ramp p2b tool should be used on these hard drives.In this guide, we will explain only the functioning of Sea 2.5” Ramp p2a head replacement tool separately. For all other tools, the process of head replacement will be explained with Sea 2.5” Ramp p2b tool.HDDSURGERY3. Supported modelsHDDSURGERY4. Handling the toolsWhen not in use, the tools should always be kept in a wooden box delivered with the tools. This way of keeping the tools prevents any possible damage which could appear when not handled properly. When taking the tool out of the box, always hold it for the shank. Never hold the tool in the part where the head lifting snouts are. Due to the sensitivity of hard drive platters to dust and any kind of contamination, be sure to clean the tools before their use. Tools can be cleaned with a piece of cotton wool and alcohol. When cleaning the head lifting snouts, be extremely gentle.Picture 1. (handling the tools)HDDSURGERY5. Head replacement processStep 1 – Mounting the tool on actuator armRemove screws that are holding the flat cable connector and the magnet. Remove the magnet. Push the connector from the bottom upwards to release it. Pressure from below may cause the connector to pop out and possibly damage platters. Because of this, hold the top of connector with another hand while pushing it from the bottom.Carefully center the axis of the tool over the larger round hole near the “tip” of the head arm. Take care that the snouts stand away from the heads, and push the axis of the tool all the way down through the hole. Axis of the tool should go easily through this hole.Picture 2. (mounting the Sea 2.5” Ramp p 2b tool)HDDSURGERYStep 2 – Securing the heads with the toolPush the tool so the snouts go between the heads. These snouts will keep the distance between the heads and assure that the heads don’t touch each other. Secure the tool in this position with provided securing pin. Pin should go through the hole easily.Picture 3. (securing the heads with the tool)HDDSURGERYStep 3 – Moving the heads off the rampRemove the security brake and scroll the heads off the ramp. When heads are off the ramp, tool will prevent the heads from touching each other and head assembly can be safely and easily transferred to another drive.Picture 4. (moving the heads off the ramp)HDDSURGERYStep 4 – Dismounting the headsUnscrew and remove the screw that’s holding the head arm connected to the hard drive casing. While unscrewing this screw, hold the head arm with your other hand to prevent the heads from going back to the ramp area.To lift the head assembly, tweezers are needed. Use tweezers to grab the head assembly through some of the holes on the head arm. Pull the head arm up using the tweezers. To make sure that the head assembly goes straight up, use one finger to pull the back side of the head arm (side where the magnetic coil is) simultaneously. Don’t try to dismount the heads by pulling the tool.When using Sea 2.5” Ramp p1 tool, supported hard drives don’t have a tight connection to the casing (no screw) so the heads are just lifted.Picture 5. (dismounting the heads)HDDSURGERYStep 5 – Mounting the heads in a patient drivePlace the head assembly to its place in a patient hard drive using the tweezers. Assist the process with your other hand.When the head arm is in its place, screw the head arm from the bottom. Be sure to tighten this screw to assure good connection between the head arm and the hard drive casing.Picture 6. (mounting the heads in a patient drive)HDDSURGERYStep 6 – Moving the heads to the rampPush the heads over the ramp. While holding the heads on the ramp, return the security brake to its place.Picture 7. (moving the heads to the ramp)HDDSURGERYStep 7 – Dismounting the toolRemove the security pin from the tool. Scroll the tool away from the heads. While holding the head arm in its place with one hand, pull the axis of the tool out of the hole to dismount the tool.Picture 8. (dismounting the tool)Put the lid back to close the disk. Put PCB back and clone the drive.HDDSURGERY6. Head replacement process withSea 2.5” Ramp p2a toolStep 1 – Mounting the tool on actuator armRemove screws that are holding the flat cable connector and the magnet. Push the connector from the bottom upwards to release it. Pressure from below may cause the connector to pop out and possibly damage platters. Because of this, hold the top of connector with another hand while pushing it from the bottom. Do not remove the magnet yet because it is the only thing holding the heads on a ramp.Carefully center the axis of the tool over the smaller hole near the center of the head arm. Take care that the snouts stand away from the heads, and push the axis of the tool all the way down through the hole. Axis of the tool should go easily through this hole.Picture 9. (mounting the tool on actuator arm)HDDSURGERYStep 2 – Securing the heads with the toolApply light pressure on the tool’s handle and p ush the tool so the snouts go between the heads. These snouts will keep the distance between the heads and assure that the heads don’t touch each other. Secure the tool in this position with provided securing pin. Pin should go through the hole easily.Picture 10. (securing the heads with the tool)HDDSURGERYStep 3 – Moving the heads off the rampRemove the magnet and scroll the heads off the ramp. When heads are off the ramp, tool will prevent the heads from touching each other and head assembly can be safely and easily transferred to another drive.Picture 11. (moving the heads off the ramp)HDDSURGERYStep 4 – Dismounting the headsHead arms on these hard drives have a thread on the bottom which is holding them connected to the hard drive casing. Using a standard flat head screwdriver, unscrew the spindle of the head arm therefore unscrewing the head arm from the casing. While unscrewing, hold the head arm with your other hand to prevent the heads from going back to the ramp area.To lift the head assembly, tweezers are needed. Using the tweezers, grab the head assembly through some of the holes on the head arm and then pull the head arm up. To make sure that the head assembly goes straight up, use one finger to pull the back side of the head arm (side where the magnetic coil is) simultaneously. Don’t try to dismount the heads by pulling the tool.Picture 12. (dismounting the heads)HDDSURGERYStep 5 – Mounting the heads in a patient drivePlace the head assembly to its place in a patient hard drive using the tweezers. Assist the process with your other hand.When the head arm is in its place, screw the spindle of the head arm to mount it to the casing. Be sure to tighten this “screw” to assure good connection between the head arm and the hard drive casing.Picture 13. (mounting the heads in a patient drive)HDDSURGERYStep 6 – Moving the heads to the rampPush the heads over the ramp. While holding the heads on the ramp, return themagnet to its place. Be very careful in this step because the magnet might damage the heads if it lands on the magnetic coil of the head arm.Picture 14. (moving the heads to the ramp)HDDSURGERYStep 7 – Dismounting the toolRemove the security pin from the tool. Scroll the tool away from the heads. While holding the head arm in its place with one hand, pull the axis of the tool out of the hole to dismount the tool.Picture 15. (dismounting the tool)Put the lid back to close the disk. Put PCB back and clone the drive.。
720012指令
查看P表:T级下:V10
查看T表:T级下:V2
查
清P表:i1,1,22
清T表:i2,2,22
清SMART:1级下N1,,22
清除密码:
2级下依次输入:
F3 2>x1
F3 2>?
F3 2>s25C5B,00,22
在不开心做的要价1000元的希捷专修软件中,所有F3T(即7200.11 7200.12 5400.6等指令模式下为F3T的)指令.
用CommMonitor软件跟踪出来的,每个都测试可用.
还原设置:F,,22
代修复通病:m0,2,2,0,0,0,0,22
重建译码表:m0,6,2,,,,,22
好了收工,收钱了,一般的我是收120一片,自己看着收吧!!呵呵
F3 2>r,10d,1
F3 2>B1708,1708
F3 2>C1708,1708,1
F3 2>s25C5B,00,22
F3 2>w,10d,1
F3 2>
当前很多7200.11,12的盘都要过保了,返厂保修期长,客户不愿等,于是自己根据网上的指点,试着去修这些盘,发现用小写的m指令很管用,在不要数据的前提下,3~4小时就能修好一片坏道盘。好了不多说了:开工,首先在XP下建个超级终端发送快捷方式到桌面,将波特率设为38400,然后再接上COM口线并给硬盘加电,于是在超级终端下就会出字,我们直接Ctrl+Z转到T级下,接下来再转到1级下:/1输入N1等它自己做完返回1>然后转到T级下,输F等做完返T后再输入指令m0,8,2,,,,,22这个操作大约要做3~4个小时,做完后再用m0,6,2,,,,,22做一下,这个很快的大约在5~10分钟.所有的做完了后接到MHDD下直接扫描,看看效果!很神奇吧,先前怎么也擦不掉的坏道都没有了!此方法对有明显头坏迹象的盘子不能做,一做可能就完蛋了,切记!! 买了的兄弟们就不要转发了,在此谢过了!!
希捷硬盘维修常用指令

坏道修复操作需在专业指导下进行,以免 造成数据永久丢失或扩大损坏区域。
THANKS FOR WATCHING
感谢您的观看
损坏扩大风险
错误的维修操作可能导致故障扩大,因此应由专业人 员进行维修。
安全风险
在维修过程中应注意安全,避免触电等意外事故发生。
04 硬盘维修案例分析
案例一:硬盘分区表损坏修复
分区表损坏
01
硬盘分区表损坏会导致系统无法正常识别硬盘分区,造成数据
丢失或无法访问。
修复方法
02
使用专业的分区表修复工具,如DiskGenius,进行分区表的修
详细描述
坏道是指硬盘上的物理损坏区域,这些区域 无法正常存储数据。通过坏道检测工具,可 以检测出坏道的位置并标记为不可用区域。 同时,一些工具还可以尝试修复坏道,以恢 复其存储功能。
硬盘数据恢复
总结词
硬盘数据恢复是指从损坏或丢失数据的硬盘中恢复数据的过程。
详细描述
数据恢复通常在数据丢失后进行,如误删除、格式化、病毒攻击等情况下。数据恢复工具可以帮助用户找 回丢失的数据,但需要注意的是,数据恢复的成功率并非100%,且越早进行恢复操作成功率越高。因此, 在数据丢失后应尽快采取措施进行数据恢复。
断电操作
在进行硬盘维修前,务必 先关闭电源,并确保硬盘 处于断电状态。
轻拿轻放
在操作过程中,要轻拿轻 放硬盘,避免剧烈震动对 硬盘造成物理损伤。
遵循维修手册
按照希捷提供的维修手册 或技术指南进行操作,不 要尝试自行解决未提及的 故障。
硬盘维修风险与防范
数据丢失风险
硬盘维修可能导致数据丢失,因此在进行维修前应备 份重要数据。
详细描述
在进行低级格式化之前,需要先备份硬盘上的重要数据,因为低级格式化会清除硬盘上 的所有数据,并且无法恢复。低级格式化通常用于修复一些严重的硬盘故障,例如固件
希捷常见指令集
T>TX(X=2,3...)此为只对某一级进行测试,比如T8,就只在8级进行测试,不会做8级之后的.
T>EX(X=2,3...)此为显示测试结果,比如,T>E5回车,就是显示5级下做的所有流程,通常做T>E4E看校准完成的结果
m0,2,2,,,,,22
查看原始SN号
T级下校准指令
N(X),,22回车之后按CTRL+T运行,此校准会从设定的那一级开始做完之后的流程.
K7盘大致的校准流程,盘和固件版本不同就可能有所出入,用指令T>E4E回车即可看到所有校准流程以及每一级走的时间
02 03 72 04 05 06 07 10 11 12 13 14 15 16 17 18 19 1A 1B 1C 1D 1E 2A 1F 2F 0B 09 58 21 08 0A 0C 0F 0E 0D 40 25 31 32 33 34 36 37 26 3A 38 3B 3C 3D 3E 3F 42 43 20 47 4B 48 41 27 49 4A 4D 39 22 61 28 62 29 63 59 35 56 6F 4E
在K系列中是执行命令
E4E
查看SF(自校准)的流程
k(小写)
查看磁头分布
T>/1 回车转到1级
1>r
回车也可以加载CERT,作用同于CTRL+R
1>t
回车 加载CERT ABLBE
1>/
回车即可返回T>
T>/2 回车转到2级
2>Z
关闭电机
2>U
打开电机
T>V1 回车,查看P表缺陷
希捷常见指令集
希捷硬盘修复指令
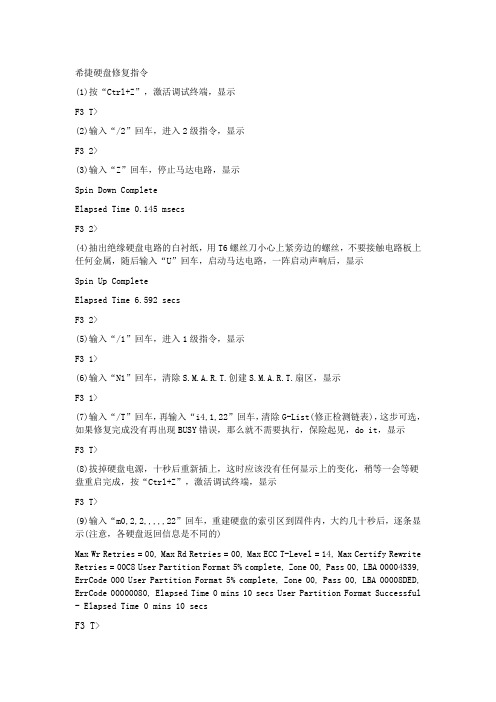
希捷硬盘修复指令(1)按“Ctrl+Z”,激活调试终端,显示F3 T>(2)输入“/2”回车,进入2级指令,显示F3 2>(3)输入“Z”回车,停止马达电路,显示Spin Down CompleteElapsed Time 0.145 msecsF3 2>(4)抽出绝缘硬盘电路的白衬纸,用T6螺丝刀小心上紧旁边的螺丝,不要接触电路板上任何金属,随后输入“U”回车,启动马达电路,一阵启动声响后,显示Spin Up CompleteElapsed Time 6.592 secsF3 2>(5)输入“/1”回车,进入1级指令,显示F3 1>(6)输入“N1”回车,清除S.M.A.R.T.创建S.M.A.R.T.扇区,显示F3 1>(7)输入“/T”回车,再输入“i4,1,22”回车,清除G-List(修正检测链表),这步可选,如果修复完成没有再出现BUSY错误,那么就不需要执行,保险起见,do it,显示F3 T>(8)拔掉硬盘电源,十秒后重新插上,这时应该没有任何显示上的变化,稍等一会等硬盘重启完成,按“Ctrl+Z”,激活调试终端,显示F3 T>(9)输入“m0,2,2,,,,,22”回车,重建硬盘的索引区到固件内,大约几十秒后,逐条显示(注意,各硬盘返回信息是不同的)Max Wr Retries = 00, Max Rd Retries = 00, Max ECC T-Level = 14, Max Certify Rewrite Retries = 00C8 User Partition Format 5% complete, Zone 00, Pass 00, LBA 00004339, ErrCode 000 User Partition Format 5% complete, Zone 00, Pass 00, LBA 00008DED, ErrCode 00000080, Elapsed Time 0 mins 10 secs User Partition Format Successful - Elapsed Time 0 mins 10 secsF3 T>。
希捷硬盘常见内部指令大全
希捷硬盘常见内部指令大全(版)目录希捷(Seagate)硬盘T级常见指令分析(2009-07-09 15:26:11)标签:众所周知,希捷硬盘修复与其它产品的硬盘修复方法有一个独特的地方,指令模式。
指令模式也即是诊断模式,可以直观的检测并监控硬盘的工作状态,通过反馈显示的信息来判断硬盘的故障。
希捷硬盘在设计指令时分为许多模块。
同时对指令又分不同的等级,以方便于工程师的记忆和管理。
本文将重点介绍一些T级模式下所使用的指令和反馈信息。
其他级别的将在后面的文章中介绍。
T级下的指令包括:CERT 进程测试、缺陷参看、日志查看,读取系统参数等。
Bx,设置波特率。
该指令是设置终端程序的接受信号频率,以适应硬盘的频率。
这样才能正常显示指令模式下的信息。
x 为0,表示设置为默认的波特率,默认都是9600。
x 为1,表示显示该硬盘能支持的波特率。
x 大于1时,将设置波特率为指定的x频率。
Vx,查看缺陷列表。
使用该指令前需要加载CERT 模块。
x 为1,表示查看P表缺陷;x 为2,表示查看T表缺陷;x 为4,表示查看G表缺陷。
该指令只在希捷酷鱼系列硬盘中有效,U系列不支持这个指令。
下图是P表的信息P表缺陷的格式为:柱面+磁头+扇区+连续缺陷的个数。
下图为G表的信息:G表的格式为:柱面+磁头+扇区+替换扇区+缺陷标记。
ix,y,z,初始化缺陷表。
使用该指令前需要加载CERT 模块。
x 为1 表示P表;x 为2表示T表;x 为4表示为G表。
y 参数如果不填,表示只在内存中清除,并不写到固件区;如果有输人数据,表示将把初始化后的数据保存到固件区。
z 参数是关键位,当为22的时候,i 指令才有效,否则忽略该指令。
Nx,y,z,设置AGE的值为x。
对于酷鱼系列的盘,在设置AGE的时候,z 参数一定要为22,而对于U系列的硬盘,Nx指令后面就不需要接其他参数。
R,从硬盘读取系统参数到对应的缓存中。
该指令能够从盘体读取系统参数,包括磁头参数,区段参数,SN信息等等,并把读取到的参数信息存放到响应的模块缓存中,以便于内存调用。
S,T维修基础教学
希捷硬盘维修基础教学作者:niotis特别说明:此处只讲基础知识,适合入门级,只讲一般性故障维修,一般性SF流程方法,如需提高,请自行研究,因水平有限,有错误处,请指正,硬盘维修交流群:14595914欢迎你!希捷硬盘分类识别方法:目前希捷硬盘维修中主要有两类:第一类:主要以指令模式下,进入T级的7200.7-7200.10代为主,笔记本硬盘如5400.2也是,此类维修方法基本上都差不多。
第二类:7200.11 7200.12及新式本盘属于此类,进入指令模式为F3T,波特率需设为38400.第一部份我们先看看7200.7-7200.10的基础维修知识。
下面用一张图片来详细介绍ST各种参数。
1标注处,是指ST的系列,这里是一个7200.10的盘2为SN号,这是一个重要的参数,可以利用修改SN号来砍头,SN号的第二跟第三位,决定这个硬盘有几个磁头。
这里的RA表示有两个磁头。
3是硬盘型号,即硬盘ID号,换固件时需要注意。
4是固件版本,换固件时,如不相同,可通过换ROM,换全套固件来维修。
指令下的家族分类:在T经下,按下Ctrl+A键,读出硬盘信息如下:其中3.06Master在TAGE=50Type=A1 A1 MxHd=1123COM介绍ST中一些名词:固件:固件是软件、不是存在电路板上的,是存在盘体上的0 道以前,又称负道、固件区、SA 区、FW 区、服务区等。
一个完整的固件包括APP、Cert、Cert table、ATA (9.10代包含ATA0和ATA1)、Vendor各个模块,固件对应电路板上还包括ROM。
下面介绍一下ST各个模块ROM 包含电路板,磁头等信息,匹配固件时需要找ROM相同的(ROM损坏,硬盘会表现为电机不转)希捷主要是5大模块:1:APP 代码模块(F级引导需要用到)2:CERT 自校准模块3:CERT TABLE 自校准流程模块4:ATA 接口协议模块(SF完成后,需要写ATA)5:VENDOR 信息模块(SF完成后,同样需要写VENDOR)ST各个级别:Seagate 硬盘既可以在Normal mode 常规模式下工作,这时启动时读取盘面固件与数并生成用户接口,也可以在Safe mode 安全模式下工作。
希捷7200.11 指令显示LED:000000CC的错误修复流程
希捷7200.11 指令显示LED:000000CC的错误修复流程希捷7200.11 指令显示LED:000000CC的错误修复流程今天收到客户发来的一个7200.11的希捷硬盘,客户描述一开电脑就会死机,接BIOS中根本识别不到硬盘。
于是接上效率源希捷硬盘维修终端以后,发现硬盘的状态一直显示“忙”,不能就绪。
在装入管理中选择好7200.11系列,再进入指令模式下,关电开电,显示的信息为下图这里显示的是LED:0000000CC错误,与我们在前面发布的7200.11忙的修复流程中出现的错误有点不一样,效率源公布的方法可以处理错误信息为LED:0000000CE的硬盘,但是这种LED:00000CC的错误却做不了。
因为如果单独接电路板,在指令模式下无法数据和显示任何信息。
对于这种错误信息的修复方法是不能单独接电路板,必须将电路板和盘体接在一起,在指令模式下断电开电,并连续按CTRL+Z,将显示“F3 T>”,这时应该用镊子将电路板上两点短路。
如果成功指令下将显示“Input Command Error”.如果不成功还是会显示“LED:00000CC”。
成功以后,还不能松开镊子,在指令下输入/2,回到2级模式,再输入大写的Z指令,电机停转。
等完成以后就可以将镊子松开,不再短路了。
完成以后,输入大写的U指令,电机开始起转。
回到1级模式下,输入N1,等待完成。
完成以后,退出指令模式,断电开电。
发现硬盘已经可以就绪了,并能读取到硬盘的参数了。
到扇区查看中,点查看扇区,已经可以看到扇区数据。
效率源希捷硬盘远程维修案例-K4盘开校准效率源希捷硬盘远程维修案例-K4盘开校准故障盘: 酷鱼四代盘。
SNOWMASS家族 40G 型号:ST340016A故障现象:坏道多,无法开校准。
远程判断的切图与操作:指令下ctrl+r 无法加载CERT TAB 模块处理方法很简单,回写同参数硬盘的该模块即可。
找到了效率源以前的DOS版备份的固件,同样可以使用,但需要修改文件名,把"K4_"去掉只留数字即可,否则无法回写成功。
希捷硬盘的通病指令维修
希捷硬盘的通病指令维修做SC,1.N2,,22 从第二步做起,可修复50%的固件问题,因为ST硬盘在1面有备份。
做完后,大部分不认盘,回写ATA.fls.2.N31,,22只扫坏道。
3。
SC结束显age =50,3.不认。
硬盘不认,1.是age参数错误。
所以在ide中导致不认。
,然后在T级下,改正age值。
age=50,即可。
2有的是pssport出错,有的是CERT CODE 出错等等涉及到一些希捷硬盘的基本概念及原理,本人不做讲述。
4.固件可以代换的,例如3.75和8.75 是可以互用的,5.出现STRUFF UNREADABLE 的解决方法如下:所有的操作均在T级工厂模式下1:在T级工厂模式下输入F指令,出现了struff >的提示时,在其后输入ASCIFE(这个主要是将硬盘的信息恢复的出厂值,输完以后按回车键,2:再次输入F,这时也会出现STRUFF>的提示,在其后输入ASCI1E,并在其后输入硬盘的型号,用ASC码来表示比如ST340016A就输入535433343030313641同时要在所输入的数值后面加上31个203:在第二部完成以后,在输入F指令,然后在STRUFF>后输入ASCI83(...............)在输入F指令然后在STRUFF>后输入ASCI3C(.................)以上括号里面的是硬盘的容量,用的是十六进制的数字来表示的容量的表示方法如下:20G -----5AB8025440G --------B57004A860G---------CFB006FC80G---------6AE009516.以上技巧,可修复通病达到5成,或是更高,具体的使用方法,见说明书。
- 1、下载文档前请自行甄别文档内容的完整性,平台不提供额外的编辑、内容补充、找答案等附加服务。
- 2、"仅部分预览"的文档,不可在线预览部分如存在完整性等问题,可反馈申请退款(可完整预览的文档不适用该条件!)。
- 3、如文档侵犯您的权益,请联系客服反馈,我们会尽快为您处理(人工客服工作时间:9:00-18:30)。
希捷硬盘部分指令代码修盘参数说明-1
使用命令说明
^E 驱动器表面状态: 最大 C.H.S. / 读写多个块尺寸 / 当前传输转译模式设定等^F 读取段寄存器记录
^G 写队列堆栈(跳转)
^I 控制寄存器堆栈(跳转)
^K 保留选项
^Q 保留选项
^R 保留选项(这个指令只有在驱动器马达起转情况下才有效)
^S 当前执行地址段快照(记录logo)
^V Interface Command Echo and Activity Trace Toggle
^X Interface and Niwot Command History
^Y 逐行显示驱动器Smart参数
希捷硬盘部分指令代码修盘参数说明-2
T级别 - Factory tests工厂测试模式命令
--------------------
Dx Dsp cert elogs
Ex Dsp elog
Fx,y Set ftr bit x to y (0,1)
Nx Set drv age(设置驱动器Age)
Tx Run tst x(运行指定测试项目)
Yxx Set drv typ
# Enter ser #
Health bits
15 -Fat r/w err 12 -Hi r/w err rt
11 -Skp asgn err 10 -Hrdwr err
9 -Xecsv skps 8 -Xcesv alts
7 -Act fail 6 -Spn fail
5 -Srv dat fail 4 -Xfer rt warn
1 -Spn warn 0 -Srv warn。