WIN7系统Protel99se添加sch库和pcb库
关于protel99se在win7系统不能添加库的解决方法

关于protel99se在win7系统不能添加库的解决方法在win7中使用protel99se,我们会遇到这中情况。
有时想要添加某个库文件,却会发生错误,导致不能用。
如图:添加库文件时发生的错误这时候是不是觉得很郁闷,不要紧张,在win7里是能添加库的,不过有点麻烦就是。
下面是添加库的方法,想学的可以看一下:第一步:打开系统盘中的window文件夹;在window文件夹中找到AdvSch99SE.ini这个配置文件,(这个是protel99se的配置文件,我们可以通过修改配置文件来达到添加库的目的。
)第二步:用记事本打开AdvSch99SE.ini,找到count=X(X代表一个数)下面还有File0=某某看下图Count=的数就是已添加库的数量。
上面的count=3,最上面的图上的库也是三个。
第三步:添加库我们以添加AMD Asic.ddb为例:先找到AMD Asic.ddb的路径。
我的AMD Asic.ddb 路径是:F:\Program Files\Design Explorer 99 SE\Library\Sch\AMD Asic.ddb如图然后在刚才打开的AdvSch99SE.ini文件中的File下添加一行File3=F:\Program Files\Design Explorer 99 SE\Library\Sch\AMD Asic.ddbcount后的数改为4然后保存。
第四部:打开protel99se可以看到刚才添加的库。
同样pcb的也一样所要更改的文件是window目录下的ADVPCB99SE.iniFile1=D:\Protel99SE\Library\Pcb\Generic Footprints\General IC.ddbFile1=D:\Protel99SE\Library\Pcb\ Generic Footprints\Advpcb.ddbFile1=D:\Protel99SE\Library\Pcb\ Generic Footprints\Miscellaneous.ddbFile0=D:\Protel99SE\Library\Sch\Miscellane ous Devices.ddbFile1=D:\Protel99SE\Library\Sch\MitelAnalog.ddbFile2=D:\Protel99SE\Library\Sch\Mitel Interface.ddbFile3=D:\Protel99SE\Library\Sch\Mitel Logic.ddbFile4=D:\Protel99SE\Library\Sch\Mitel Peripheral.ddbFile5=D:\Protel99SE\Library\Sch\Mitel Telecommunication.ddbFile6=D:\Protel99SE\Library\Sch\Motorola Analog.ddbFile7=D:\Protel99SE\Library\Sch\Motorola Consumer.ddbFile8=D:\Protel99SE\Library\Sch\Motorola Converter.ddbFile9=D:\Protel99SE\Library\Sch\Motorola Databooks.ddbFile10=D:\Protel99SE\Library\Sch\Motorola DSP.ddbFile11=D:\Protel99SE\Library\Sch\Motorola Microcontroller.ddbFile12=D:\Protel99SE\Library\Sch\Motorola Oscillator.ddbFile13=D:\Protel99SE\Library\Sch\NECDatabooks.ddbFile14=D:\Protel99SE\Library\Sch\Newport Analog.ddbFile15=D:\Protel99SE\Library\Sch\Newport Consumer.ddbFile16=D:\Protel99SE\Library\Sch\NSC Analog.ddbFile17=D:\Protel99SE\Library\Sch\NSC Consumer.ddbFile18=D:\Protel99SE\Library\Sch\NSC Converter.ddbFile19=D:\Protel99SE\Library\Sch\NSC Databooks.ddbFile20=D:\Protel99SE\Library\Sch\NSC Industrial.ddbFile21=D:\Protel99SE\Library\Sch\NSC Interface.ddbFile22=D:\Protel99SE\Library\Sch\NSC Miscellaneous.ddbFile23=D:\Protel99SE\Library\Sch\NSC Oscillator.ddbFile24=D:\Protel99SE\Library\Sch\NSC Telecommunication.ddbFile25=D:\Protel99SE\Library\Sch\Philips.ddbFile26=D:\Protel99SE\Library\Sch\PLD.ddb File27=D:\Protel99SE\Library\Sch\Protel DOS Schematic Libraries.ddbFile27=D:\Protel99SE\Library\Sch\Protel DOS Schematic Libraries.ldbFile28=D:\Protel99SE\Library\Sch\99GB4728. ddbFile29=D:\Protel99SE\Library\Sch\Actel User Programmable.ddbFile30=D:\Protel99SE\Library\Sch\Allegro Integrated Circuits.ddbFile31=D:\Protel99SE\Library\Sch\Altera Asic.ddbFile32=D:\Protel99SE\Library\Sch\Altera Interface.ddbFile33=D:\Protel99SE\Library\Sch\Altera Memory.ddbFile34=D:\Protel99SE\Library\Sch\Altera Peripheral.ddbFile35=D:\Protel99SE\Library\Sch\AMD Analog.ddbFile36=D:\Protel99SE\Library\Sch\AMDAsic.ddbFile37=D:\Protel99SE\Library\Sch\AMD Converter.ddbFile38=D:\Protel99SE\Library\Sch\AMD Interface.ddbFile39=D:\Protel99SE\Library\Sch\AMD Logic.ddbFile40=D:\Protel99SE\Library\Sch\AMD Memory.ddbFile41=D:\Protel99SE\Library\Sch\AMD Microcontroller.ddbFile42=D:\Protel99SE\Library\Sch\AMD Miscellaneous.ddbFile43=D:\Protel99SE\Library\Sch\AMD Peripheral.ddbFile44=D:\Protel99SE\Library\Sch\AMD Telecommunication.ddbFile45=D:\Protel99SE\Library\Sch\Analog Devices.ddbFile46=D:\Protel99SE\Library\Sch\Atmel Programmable Logic Device.ddbFile47=D:\Protel99SE\Library\Sch\Burr Brown Analog.ddbFile48=D:\Protel99SE\Library\Sch\Burr Brown Converter.ddbFile49=D:\Protel99SE\Library\Sch\Burr Brown Industrial.ddbFile50=D:\Protel99SE\Library\Sch\Burr Brown Oscillator.ddbFile51=D:\Protel99SE\Library\Sch\Burr Brown Peripheral.ddbFile52=D:\Protel99SE\Library\Sch\Burr Brown Telecommunication.ddbFile53=D:\Protel99SE\Library\Sch\Dallas Analog.ddbFile54=D:\Protel99SE\Library\Sch\Dallas Converter.ddbFile55=D:\Protel99SE\Library\Sch\Dallas Consumer.ddbFile56=D:\Protel99SE\Library\Sch\Dallas Logic.ddbFile57=D:\Protel99SE\Library\Sch\Dallas Interface.ddbFile58=D:\Protel99SE\Library\Sch\Dallas Memory.ddbFile59=D:\Protel99SE\Library\Sch\Dallas Microprocessor.ddbFile60=D:\Protel99SE\Library\Sch\Dallas Miscellaneous.ddbFile61=D:\Protel99SE\Library\Sch\Dallas Telecommunication.ddbFile62=D:\Protel99SE\Library\Sch\Elantec Analog.ddbFile63=D:\Protel99SE\Library\Sch\Elantec Consumer.ddbFile64=D:\Protel99SE\Library\Sch\Elantec Industrial.ddbFile65=D:\Protel99SE\Library\Sch\Elantec Interface.ddbFile66=D:\Protel99SE\Library\Sch\Gennum Analog.ddbFile67=D:\Protel99SE\Library\Sch\Gennum Consumer.ddbFile68=D:\Protel99SE\Library\Sch\Gennum Converter.ddbFile69=D:\Protel99SE\Library\Sch\Gennum DSP.ddbFile70=D:\Protel99SE\Library\Sch\Gennum Interface.ddbFile71=D:\Protel99SE\Library\Sch\Gennum Miscellaneous.ddbFile28=D:\Protel99SE\Library\Sch\Hp-EESOF.ddbFile28=D:\Protel99SE\Library\Sch\Internati onal Rectifier.ddbFile27=D:\Protel99SE\Library\Sch\Intel Databooks.ddbFile72=D:\Protel99SE\Library\Sch\Lucent Analog.ddbFile73=D:\Protel99SE\Library\Sch\Lucent Asic.ddbFile74=D:\Protel99SE\Library\Sch\Lucent Converter.ddbFile75=D:\Protel99SE\Library\Sch\Lucent Consumer.ddbFile76=D:\Protel99SE\Library\Sch\Lucent DSP.ddbFile77=D:\Protel99SE\Library\Sch\Lucent Industrial.ddbFile78=D:\Protel99SE\Library\Sch\Lucent Logic.ddbFile79=D:\Protel99SE\Library\Sch\Lucent Interface.ddbFile80=D:\Protel99SE\Library\Sch\Lucent Memory.ddbFile81=D:\Protel99SE\Library\Sch\Lucent Peripheral.ddbFile82=D:\Protel99SE\Library\Sch\Lucent Miscellaneous.ddbFile83=D:\Protel99SE\Library\Sch\Lucent Telecommunication.ddbFile84=D:\Protel99SE\Library\Sch\Maxim Interface.ddbFile85=D:\Protel99SE\Library\Sch\Maxim Miscellaneous.ddbFile86=D:\Protel99SE\Library\Sch\Microchip .ddbFile87=D:\Protel99SE\Library\Sch\QuickLogi c Asic.ddbFile88=D:\Protel99SE\Library\Sch\RF Micro Devices Analog.ddbFile89=D:\Protel99SE\Library\Sch\RF Micro Devices Telecommunication.ddbFile90=D:\Protel99SE\Library\Sch\SGS Analog.ddbFile91=D:\Protel99SE\Library\Sch\SGSAsic.ddbFile92=D:\Protel99SE\Library\Sch\SGS Converter.ddbFile93=D:\Protel99SE\Library\Sch\SGS Consumer.ddbFile94=D:\Protel99SE\Library\Sch\SGS Interface.ddbFile95=D:\Protel99SE\Library\Sch\SGS Industrial.ddbFile96=D:\Protel99SE\Library\Sch\SGS Memory.ddbFile97=D:\Protel99SE\Library\Sch\SGS Microcontroller.ddbFile98=D:\Protel99SE\Library\Sch\SGS Microprocessor.ddbFile99=D:\Protel99SE\Library\Sch\SGS Peripheral.ddbFile100=D:\Protel99SE\Library\Sch\SGS Miscellaneous.ddbFile101=D:\Protel99SE\Library\Sch\SGS Telecommunication.ddbFile102=D:\Protel99SE\Library\Sch\Sim.ddb File103=D:\Protel99SE\Library\Sch\Spice.dd bFile104=D:\Protel99SE\Library\Sch\TI Databooks.ddbFile105=D:\Protel99SE\Library\Sch\TI Logic.ddbFile106=D:\Protel99SE\Library\Sch\TITelecommunication.ddbFile107=D:\Protel99SE\Library\Sch\SGS Peripheral.ddbFile108=D:\Protel99SE\Library\Sch\SGS Miscellaneous.ddbFile109=D:\Protel99SE\Library\Sch\SGS Telecommunication.ddbFile110=D:\Protel99SE\Library\Sch\Sim.ddb File111=D:\Protel99SE\Library\Sch\Spice.dd bFile112=D:\Protel99SE\Library\Sch\TI Databooks.ddbFile113=D:\Protel99SE\Library\Sch\TI Logic.ddbFile114=D:\Protel99SE\Library\Sch\TI Telecommunication.ddb。
怎样在WIN7下手动添加protel99库文件

下面重点介绍另外一种方法:(直接在win7下进行配置)1.在win7下正确安装PROTELL99SE2.运行一次99,会发现原理图和PCB各已经添了一个库,但是却不能再添加系统默认的别的库(更别说自定义的库了)3.好,接下来找到C盘(系统盘),系统文件夹(c:\windows)下的ADVSch99SE.ini(添加原理图库)和ADVPCB99SE.ini(PCB封装库)文件[每个文件就几K大小]。
在修改ADVSCH99SE.INI和ADCPCB99SE.INI前要退出protel,因为protel退出时会修改这两个文件!!4.我们先配置原理图,用记事本打开ADVSch99S.ini文件,在[Change Library File List]下找到File0,大家可以发现,等号后面的的内容就是默认已经添加的库,把这个改为我们自定义的库(记得路径要正确),再打开99,发现默认添加的就是我们的库了,如果要添加多个怎么办呢?简单,依样画葫芦,在File0后面添File1,File2..依次类推,但注意最后修改File0上面的Count值,如果一共有两个库,就把它的值改为2.举个例子:Count=2File0=d:\Program Files\Design Explorer 99 SE\Library\Sch\DPT8_PCBSch(2007-07-24).ddb File1=d:\Program Files\Design Explorer 99 SE\Library\Sch\Protel DOS Schematic Libraries.ddb保存退出编辑。
需要注意,这里TypeCount=2这一句不要修改!我修改后的示意图:添加后的库:方法二:利用原理图Find Component功能在Path下指定库文件所在的路径,点击Find Now会在FoundLibarias里列出所有找到的库文件,选择需要添加的库,点击Add To Libaray List添加即可5.然后让我们修改PCB的库配置,同样用记事本打开ADVPCB99SE文件,在[PCB Libraries](注意是英文的,不是中文的[PCB库](汉化后会有中文[PCB库]))下找到File0进行修改或添加,我举个例子,大家参考:win7下安装protel99se后再 C:\Windows下找不到Advpcb99se.ini,不是没有安装这个文件,而是这个文件被安装到了用户目录下面去了(C:\Users\(自己的用户名)\AppData\Local\VirtualStore\Windows),将这个文件复制到C:\windowns下。
protel99 se在win7下的安装及加载元件库的方法说明
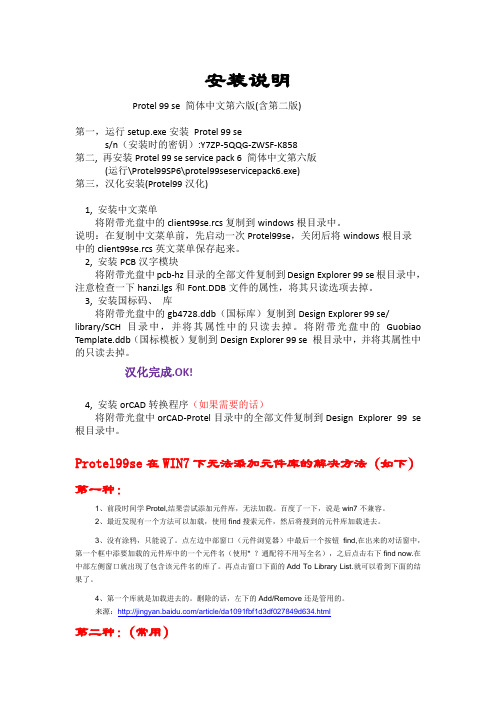
安装说明Protel 99 se 简体中文第六版(含第二版)第一,运行setup.exe安装Protel 99 ses/n(安装时的密钥):Y7ZP-5QQG-ZWSF-K858第二, 再安装Protel 99 se service pack 6 简体中文第六版(运行\Protel99SP6\protel99seservicepack6.exe)第三,汉化安装(Protel99汉化)1, 安装中文菜单将附带光盘中的client99se.rcs复制到windows根目录中。
说明:在复制中文菜单前,先启动一次Protel99se,关闭后将windows根目录中的client99se.rcs英文菜单保存起来。
2, 安装PCB汉字模块将附带光盘中pcb-hz目录的全部文件复制到Design Explorer 99 se根目录中,注意检查一下hanzi.lgs和Font.DDB文件的属性,将其只读选项去掉。
3, 安装国标码、库将附带光盘中的gb4728.ddb(国标库)复制到Design Explorer 99 se/library/SCH目录中,并将其属性中的只读去掉。
将附带光盘中的Guobiao Template.ddb(国标模板)复制到Design Explorer 99 se 根目录中,并将其属性中的只读去掉。
汉化完成.OK!4, 安装orCAD转换程序(如果需要的话)将附带光盘中orCAD-Protel目录中的全部文件复制到Design Explorer 99 se 根目录中。
Protel99se在WIN7下无法添加元件库的解决方法(如下)第一种:1、前段时间学Protel,结果尝试添加元件库,无法加载。
百度了一下,说是win7不兼容。
2、最近发现有一个方法可以加载,使用find搜索元件,然后将搜到的元件库加载进去。
3、没有涂鸦,只能说了。
点左边中部窗口(元件浏览器)中最后一个按钮find,在出来的对话窗中,第一个框中添要加载的元件库中的一个元件名(使用* ?通配符不用写全名),之后点击右下find now.在中部左侧窗口就出现了包含该元件名的库了。
win7下,protel导入元件库的方法
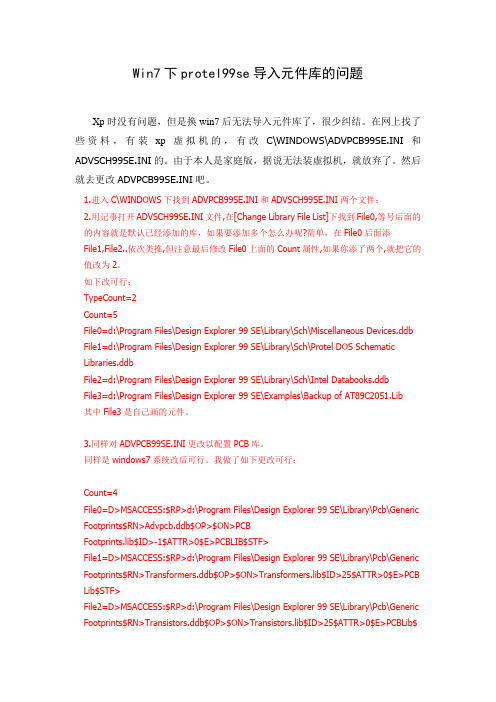
Win7下protel99se导入元件库的问题Xp时没有问题,但是换win7后无法导入元件库了,很少纠结。
在网上找了些资料,有装xp虚拟机的,有改C\WINDOWS\ADVPCB99SE.INI和ADVSCH99SE.INI的。
由于本人是家庭版,据说无法装虚拟机,就放弃了。
然后就去更改ADVPCB99SE.INI吧。
1.进入C\WINDOWS下找到ADVPCB99SE.INI和ADVSCH99SE.INI两个文件;2.用记事打开ADVSCH99SE.INI文件,在[Change Library File List]下找到File0,等号后面的的内容就是默认已经添加的库,如果要添加多个怎么办呢?简单,在File0后面添File1,File2..依次类推,但注意最后修改File0上面的Count属性,如果你添了两个,就把它的值改为2。
如下改可行:TypeCount=2Count=5File0=d:\Program Files\Design Explorer 99 SE\Library\Sch\Miscellaneous Devices.ddb File1=d:\Program Files\Design Explorer 99 SE\Library\Sch\Protel DOS Schematic Libraries.ddbFile2=d:\Program Files\Design Explorer 99 SE\Library\Sch\Intel Databooks.ddbFile3=d:\Program Files\Design Explorer 99 SE\Examples\Backup of AT89C2051.Lib其中File3是自己画的元件。
3.同样对ADVPCB99SE.INI更改以配置PCB库。
同样是windows7系统改后可行。
我做了如下更改可行:Count=4File0=D>MSACCESS:$RP>d:\Program Files\Design Explorer 99 SE\Library\Pcb\Generic Footprints$RN>Advpcb.ddb$OP>$ON>PCBFootprints.lib$ID>-1$ATTR>0$E>PCBLIB$STF>File1=D>MSACCESS:$RP>d:\Program Files\Design Explorer 99 SE\Library\Pcb\Generic Footprints$RN>Transformers.ddb$OP>$ON>Transformers.lib$ID>25$ATTR>0$E>PCB Lib$STF>File2=D>MSACCESS:$RP>d:\Program Files\Design Explorer 99 SE\Library\Pcb\Generic Footprints$RN>Transistors.ddb$OP>$ON>Transistors.lib$ID>25$ATTR>0$E>PCBLib$STF>File3=D>MSACCESS:$RP>E:\自写资料\Protel 99 SE\自制元件$RN>元件库.ddb$OP>$ON>PCB.LIB$ID>85$ATTR>0$E>PCBLIB$STF>注意:file3是自己做的pcb封装库。
Win7、Win10中Protel99se不能加载库文件解决方法
Win7以后系统中Protel99se不能加载库文件解决方法在win7下安装Protel99se会出现无法添加原理图库,元件库的情况.如图,提示“file not recognized”。
解决办法如下:在修改ADVSCH99SE。
INI和ADCPCB99SE.INI前要退出Protel,因为Protel退出时会修改这两个文件!!1)sch库的添加可以分为两种:方法一:C:\Windows\Advsch99se.ini的方法,具体如下:用记事打开ADVSCH99SE。
INI文件,在[Change Library File List]下找到File0,等号后面的的内容就是默认已经添加的库.要添加多个库就在在File0后面添File1,File2。
.依次类推,但注意最后修改File0上面的Count属性,如果你添了四个库,就把它的值改为4。
如下改可行:Count=3File0=d:\Program Files\Design Explorer 99 SE\Library\Sch\Miscellaneous Devices.ddbFile1=d:\Program Files\Design Explorer 99 SE\Library\Sch\Protel DOS SchemaTIc Libraries.ddbFile2=d:\Program Files\Design Explorer 99 SE\Library\Sch\Intel Databooks.ddb保存退出编辑。
方法二:利用原理图Find Component功能:首先,添加原理图库,在**。
sch文件中点击“Find”(下图左)在“Path"中找到存放设计的文件夹,点击“Find now”(下图右)中了,再点击“close"即可;2)PCB库的添加如果在C:\Windows下找不到Advpcb99se。
ini,不是没有安装这个文件,而是这个文件被安装到了用户目录下面去了(C:\Users\(自己的用户名)\AppData\Local\VirtualStore\Windows),将这个文件复制到C:\windows下.修改这个文件,如下内容Count=3File0=D>MSACCESS:$RP〉d:\Program Files\Design Explorer 99 SE\Library\Pcb\Generic Footprints$RN〉Advpcb.ddb$OP>$ON〉PCB Footprints。
Windows7 Protel99SE库的添加解决

关于Protel 99SE在windows 7中不能添加库解决的方法:1.
系统盘内找到
2.看到很多关于99se的系统信息文件,找到:
3.果断打开是这样:
打开
特好找,windows
一打开路过文件
夹就是这哥们
一个文本上面加个齿轮样的东西,嗨,别说,记事本就打开了,在这记住了都:配置文件这种类型果断打开,别害怕,只是这里面全英文有点淡淡的忧伤啊
4.在一大串英文中我们索引到这句:
5.看到这句:
其实也就是上一步复制的那句话和那句话上面的那句话(由于我更改过了,本来Count=1),在这步我们停下一切,看着他们。
6.我们在这两句后面加行我们第四步复制的东西,接下来我们做的更改成这样:
我添加时SIM (杂件)库,我把复制那句话“.ddb ”前面那个库名“Miscellaneous Devices ”给换成“Sim ”,更改后保存这个配置文件,添加即可。
原始的仅有的库
现在Sim 库添加后:就这样我们库添加完成,足以成事
了都。
咱先复制再说了都,看下一步。
Win7下protel99se添加SCH和PCB库
1、如何添加SCH库:网上有两种添加方法:方法一:(推荐)按照上述步骤添加元件库即可。
方法二:(稍后讲)2、如何添加PCB库:先找到以下路径:C: \用户\%用户名%\AppData\Local\VirtualStore\Windows\ADVPCB99SE.ini用记事本打开,找到:这里的Count=6 意思是说你加载了6个PCB库(如果你第一次打开这个文件,Count应该等于1)。
并且下面有有一行File0=D>MSACCESS:……。
步骤一:现在复制file=0这一行的代码,然后像上图这样依次往下粘贴,并且将复制得到的file0依次改为file1,file2……。
步骤二:将复制得到的每一行后面的Advpcb.ddb$OP>$ON>PCB Footprints.lib,依次换成General IC.ddb$OP>$ON>General IC.lib,International Rectifiers.ddb$OP>$ON>International Rectifiers.lib Miscellaneous.ddb$OP>$ON>Miscellaneous.libTransformers.ddb$OP>$ON>Transformers.libTransistors.ddb$OP>$ON>Transistors.lib即:Count=6File0=D>MSACCESS:$RP>D:\Design Explorer 99SE\Library\Pcb\Generic Footprints$RN>Advpcb.ddb$OP>$ON>PCB Footprints.lib$ID>-1$ATTR>0$E>PCBLIB$STF>File1=D>MSACCESS:$RP>D:\Design Explorer 99 SE\Library\Pcb\Generic Footprints$RN>General IC.ddb$OP>$ON>General IC.lib$ID>-1$ATTR>0$E>PCBLIB$STF> File2=D>MSACCESS:$RP>D:\Design Explorer 99 SE\Library\Pcb\Generic Footprints$RN>International Rectifiers.ddb$OP>$ON>InternationalRectifiers.lib$ID>-1$ATTR>0$E>PCBLIB$STF>File3=D>MSACCESS:$RP>D:\Design Explorer 99 SE\Library\Pcb\GenericFootprints$RN>Miscellaneous.ddb$OP>$ON>Miscellaneous.lib$ID>-1 $ATTR>0$E>PCBLIB$STF>File4=D>MSACCESS:$RP>D:\Design Explorer 99 SE\Library\Pcb\GenericFootprints$RN>Transformers.ddb$OP>$ON>Transformers.lib$ID>-1$A TTR>0$E>PCBLIB$STF>File5=D>MSACCESS:$RP>D:\Design Explorer 99 SE\Library\Pcb\GenericFootprints$RN>Transistors.ddb$OP>$ON>Transistors.lib$ID>-1$ATTR> 0$E>PCBLIB$STF>步骤三:将修改好后的整段代码复制粘贴到该文件的末尾并覆盖,即:注意:1、在修改时,关掉Protel99se2、如果你想添加别的PCB库,可自行修改上述库文件的目录,将库的ddb文件名和lib的文件名对应起来即可!即:General IC.ddb$OP>$ON>General IC.lib,International Rectifiers.ddb$OP>$ON>International Rectifiers.lib3、Count的数值要对应好,不要忘了修改Count!4、刚才讲的添加SCH的第二种方法,可以用添加PCB 的方法来添加,是类似的,只需要找准路径添加即可!C:\Windows\用户\%用户名%\AppData\Local\VirtualStore\Windows\ADVSCH99SE.ini不过不建议这样做,浪费时间。
win7下protel99se sch库PCB库添加解决方案
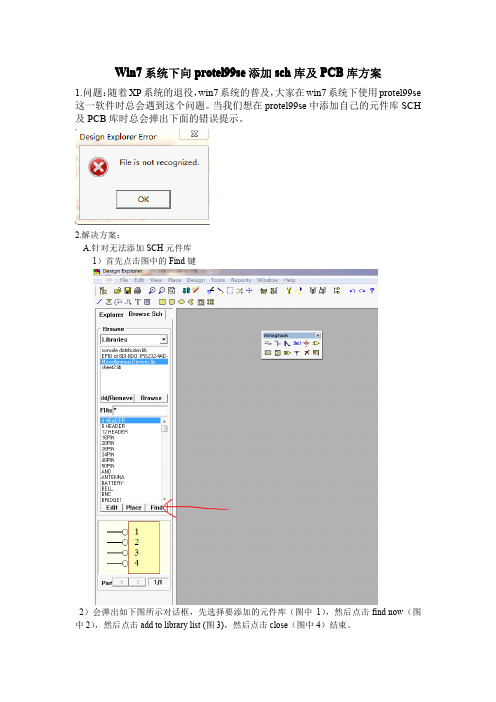
Win7系统下向protel99se添加sch库及PCB库方案1.问题:随着XP系统的退役,win7系统的普及,大家在win7系统下使用protel99se 这一软件时总会遇到这个问题。
当我们想在protel99se中添加自己的元件库SCH 及PCB库时总会弹出下面的错误提示。
2.解决方案:A.针对无法添加SCH元件库1)首先点击图中的Find键2)会弹出如下图所示对话框,先选择要添加的元件库(图中1),然后点击find now(图中2),然后点击add to library list(图3),然后点击close(图中4)结束。
3)这样要添加的SCH元件库就会出现如下图所示(添加SCH库结束)B.针对无法添加PCB库,有两个方案:方案一:修改ADVPCB99SE.INI配置文件1)首先打开C盘windows文件夹,在其中找到ADVPCB99SE.INI配置文件2)打开它并如下图所示修改它(修改的过程中一定要关掉protel,修改完后要保存)3)这样打开protel一般你的PCB库会出现如图中所示4)但是事情会存在个例的,如果你的仍然添加不上,那么再如下图所示操作1>一般总会存在一些固有的库如图2>在ADVPCB99SE.INI配置文件中找到与其对应的语句,如下图所示3>依照这个语句找到与这个固有的库对应的DDB文件4>打开它,将你希望添加的PCB库文件拖进去5>并在ADVPCB99SE.INI配置文件中添加相应的语句并修改count值并保存(当然也是在protel关闭的情况下)6>这样再打开protel,你的库就会如图中显现7>可能某些个例中,只能存在两个PCB库多了会自动去除方案二:直接使用protel元件SCH库及PCB库插件(按上面提示操作就可以)这样这个问题就基本解决了。
- 1、下载文档前请自行甄别文档内容的完整性,平台不提供额外的编辑、内容补充、找答案等附加服务。
- 2、"仅部分预览"的文档,不可在线预览部分如存在完整性等问题,可反馈申请退款(可完整预览的文档不适用该条件!)。
- 3、如文档侵犯您的权益,请联系客服反馈,我们会尽快为您处理(人工客服工作时间:9:00-18:30)。
Win7系统下添加sch,pcb库
此方法我已经证实过了,是可以的添加的之前看的那些有点麻烦特别是pcb库那个修改文件ADVPCB99SE.INI的方法,路径后面的那些地址不知道怎么来的,所以那个不会修改的,现在用这个方法很好的,
添加sch元件库
进入该界面然后点击Find
由于默认元件库所在的文件夹里的元件库文件太多,搜索时后面的元件库不能被搜索到
所以应该先把你所要添加的元件库放到特定的文件夹里,然后再点Find Now搜索。
这样就添加成功了
Pcb库添加:首先先用protel打开自己的pcb 库然后导出lib文件,再把lib文件导入到protel安装文件的library/pcb/Generic Footprints/Advpcb.ddb里,导入后如果不显示就复制粘贴过去(都是在PROTEL里操作的),Advpcb.ddb里就是软件默认的pcb footprints.lib,现在就把pcb footprints.lib随便改个名字,然后把咱们导入进去的自己的库
改成“footprints.lib”。
这样就OK 了!
特此声明:为了方便广大网友,此方法是从两个网友的方法中合并过来的不是本人原创。