ABC系统使用手册
abc诊所管家操作手册

abc诊所管家操作手册尊敬的ABC诊所管家:欢迎您成为ABC诊所的一员!作为管家,您将肩负着重要的责任,为诊所的顺利运营和提供优质的医疗服务贡献自己的力量。
本操作手册将为您提供必要的指导和信息,以确保您的工作高效、规范和顺利进行。
请您仔细阅读并理解以下内容。
一、工作准则和职责作为管家,您需要熟悉并遵守ABC诊所的工作准则,包括但不限于以下内容:1. 保持良好的职业道德和行为操守,对待患者和同事要诚恳、友善、尊重和耐心。
2. 承担起维护诊所安全和秩序的责任,确保设备和用品的安全和卫生。
3. 组织和管理日常工作流程,包括接待患者、预约安排、诊断辅助、医生协助、处方药物管理等。
4. 协助医生和其他医务人员进行检查、治疗和手术,并协调各部门之间的合作和沟通。
5. 进行诊所内的文件管理、档案整理和信息录入,确保数据的安全和准确性。
6. 参与诊所的会议和培训活动,不断提升自己的专业知识和技能。
二、患者接待和服务1. 作为患者接待的第一道门面,您需要以亲切、热情和专业的态度迎接每一位患者,并为其提供必要的帮助和引导。
2. 确保患者的个人信息的隐私和安全,根据诊所要求填写和记录患者的相关表格和资料。
3. 确保患者预约及候诊的顺利进行,与医生和其他工作人员协调好时间和资源的利用。
三、医疗协助和操作流程1. 在医生的指导下,协助医疗操作,包括但不限于患者体检、采集标本、化验操作、常规检查、药物配置等。
2. 遵守医疗操作的规范和流程,保持工作区域的整洁和有序。
3. 协助医生进行诊疗信息的录入和患者健康档案的管理,确保诊所数据的准确性和完整性。
四、设备和用品的管理1. 负责设备和用品的归类、储存和维护,确保正常运作和延长使用寿命。
2. 定期检查设备的功能和安全性,如发现问题及时报告和处理。
3. 负责医疗废物的分类和处理,确保环境和患者的安全。
五、紧急情况和危机处理1. 在突发事件和紧急情况下,要保持冷静、迅速和有效的应对能力,采取必要的紧急救护措施并报告相关负责人。
PCS-9705_ABC_说明书

PCS-9705 系列测控装置
前言 使用产品前,请仔细阅读本章节!
本章叙述了使用产品前的安全预防建议。在安装和使用时,本章内容必须全部阅读且充分理解。 忽略说明书中相关警示说明,因不当操作造成的任何损害,本公司不承担相应责任。 在对本装置做任何操作前,相关专业人员必须仔细阅读本说明书,熟悉操作相关内容。 操作指导及警告 本手册中将会用到以下指示标记和标准定义: 危险! 意味着如果安全预防措施被忽视,则会导致人员死亡,严重的人身伤害,或
南京南瑞继保电气有限公司
i
PCS-9705 系列测控装置
警告! 曝露端子 在装置带电时不要触碰曝露的端子等,因为可能会产生危险的高电压。 残余电压 在装置电源关闭后,直流回路中仍然可能存在危险的电压。这些电压需在数秒钟后才会消失。 警示! 接地 装置的接地端子必须可靠接地。 运行环境 该装置只允许运行在技术参数所规定的大气环境中,而且运行环境不能存在不正常的震动。 额定值 在接入交流电压电流回路或直流电源回路时,请确认他们符合装置的额定参数。 印刷电路板 在装置带电时,不允许插入或拔出印刷电路板,否则可能导致装置不正确动作。 外部回路
当把装置输出的接点连接到外部回路时,须仔细检查所用的外部电源电压,以防止所连接的回 路过热。 连接电缆 仔细处理连接的电缆避免施加过大的外力。
版权声明
版本: R1.03 P/N: ZL_CKZZ5315.1211 Copyright © 2012 NR 南京南瑞继保电气有限公司版权所有 我们对本文档及其中的内容具有全部的知识产权。 除非特别授权, 禁 止复制或向第三方分发。 凡侵犯本公司版权等知识产权的, 本公司必 依法追究其法律责任。 技术支持,请联系: 电话:025-52107703、8008289967、4008289967 传真:025-52100770 或登陆网站:/ser_sup 购买产品,请联系: 电话:025-87178911,传真: 025-52100511、025-52100512 电子信箱:market@
迪夫染色液abc说明书

迪夫染色液abc说明书一、迪夫染色液abc的介绍1.1 迪夫染色液abc的作用1.2 迪夫染色液abc的特点1.3 迪夫染色液abc的适用范围二、使用方法2.1 使用前注意事项2.2 使用步骤2.3 清洗与保养三、常见问题解答3.1 迪夫染色液abc的优势3.2 使用过程中的注意事项3.3 迪夫染色液abc的保存方法3.4 怎样判断颜色的深浅程度四、注意事项与安全警示4.1 使用过程中的注意事项4.2 存储与处理时的安全警示五、迪夫染色液abc的市场前景与发展趋势5.1 市场现状分析5.2 迪夫染色液abc的竞争优势5.3 未来发展趋势展望六、其他相关产品与补充说明6.1 迪夫染色液abc的相关配套产品6.2 其他补充说明一、迪夫染色液abc的介绍1.1 迪夫染色液abc的作用迪夫染色液abc是一种高效的染色液,具有快速染色、高显色度、持久性好等特点。
它可以广泛应用于各种织物、头发和纸张等材料的染色。
1.2 迪夫染色液abc的特点迪夫染色液abc具有以下特点: - 良好的渗透性:能迅速渗透到织物纤维内部,实现均匀染色。
- 鲜艳的色彩:颜色饱满、明亮,不易褪色。
- 高效染色:染色时间短,效果显著。
- 环保健康:采用无害于人体和环境的配方制作。
1.3 迪夫染色液abc的适用范围迪夫染色液abc适用于各类织物、纸张和头发的染色。
它可以在家庭、工作场所和学校等各种场景中使用,满足不同需求的染色要求。
二、使用方法2.1 使用前注意事项在使用迪夫染色液abc之前,请务必注意以下事项: 1. 请确保使用环境通风良好,避免染料对人体构成危害。
2. 请穿戴好防护手套和口罩,避免染料直接接触皮肤和呼吸道。
3. 请仔细阅读产品标签和说明书,按照规定的比例和方法使用。
4. 请勿将染料误食或接触眼睛,如有不适请立即就医。
2.2 使用步骤使用迪夫染色液abc的步骤如下: 1. 准备工作:将要染色的材料准备齐全,清洗干净并晾干。
abc诊所管家操作手册
abc诊所管家操作手册一、引言ABC诊所是一家专业的医疗机构,为了提高工作效率和服务质量,特编写此操作手册,以帮助诊所工作人员更好地使用管家系统,实现规范化的业务管理和高效的服务流程。
二、系统登录1. 打开浏览器,输入ABC诊所的官方网址。
2. 在首页找到并点击“管家系统登录”按钮。
3. 输入用户名和密码,点击“登录”按钮。
三、患者预约管理1. 在管家系统首页,点击“患者预约”选项。
2. 点击“新建预约”按钮,填写预约信息:患者姓名、就诊日期、科室、医生等。
3. 点击“保存预约”按钮,完成预约记录的创建。
4. 预约成功后,点击“打印预约单”按钮,将预约单交给患者或者导医。
四、医生排班管理1. 在管家系统首页,点击“医生排班”选项。
2. 选择需要排班的医生,点击“新建排班”按钮。
3. 填写排班信息:日期、时间段、科室等。
4. 点击“保存排班”按钮,完成医生排班设置。
五、患者信息管理1. 在管家系统首页,点击“患者管理”选项。
2. 点击“新建患者”按钮,填写患者信息:姓名、性别、年龄、联系方式等。
3. 点击“保存患者”按钮,完成患者信息的录入。
4. 可以在系统中搜索患者信息,并进行修改、删除等操作。
六、收费管理1. 在管家系统首页,点击“收费管理”选项。
2. 点击“新建收费”按钮,选择患者或输入患者信息。
3. 填写收费项目、金额等信息。
4. 点击“确认收费”按钮,完成收费操作。
5. 可以打印收费明细并交给患者,同时记录收费信息。
七、报表统计1. 在管家系统首页,点击“报表统计”选项。
2. 可以选择所需的报表类型:预约报表、收费报表等。
3. 根据需要选择日期范围、科室等筛选条件。
4. 点击“生成报表”按钮,系统将自动生成相应的报表结果。
5. 可以将报表导出为Excel或PDF格式进行保存和分享。
八、系统设置1. 在管家系统首页,点击“系统设置”选项。
2. 可以进行系统参数设置、用户权限管理等操作。
3. 注意保护好管理员账号和密码,避免泄露和误操作。
河南风险监测预警系统企业操作手册
危险化学品安全生产风险监测预警系统企业用户操作手册目录1系统登录 (2)2 风险预警 (3)3安全承诺 (7)4巡查报告 (12)1系统登录危险化学品安全生产风险监测预警系统登录地址:http://222.143.32.62:8888(建议使用谷歌浏览器、360浏览器极速版,不支持IE浏览器),输入账号、密码登录(登录账号、密码名单已由河南省应急管理厅下发)。
如图1-1所示:图 1-1系统登录界面输入用户名/密码:登录账号/Abc123456(密码默认,可修改),选择“记住密码”,点击“登录”按钮,进入系统界面,如图1-2所示:图 1-2系统首页2 风险预警风险预警界面默认展示企业的地理信息、风险信息、安全承诺信息、预警推送信息和企业基本信息。
如图2-1所示:图 2-1风险预警图在风险预警界面(图2-1),点击右侧边框处的“企业名称”,弹出企业详情界面,如图2-2、2-3所示:2-2 点击企业名称界面图 2-3企业详情页在企业详情界面,点击“安全承诺”,显示安全承诺详细信息;点击“实时监测”,显示罐与气体监测仪的实时监测信息;点击“基本信息”,显示企业基本信息与知识图谱信息,如图2-4、2-5、2-6所示:2-4 安全承诺详细信息界面2-5 实时监测信息界面2-6 基本信息与知识图谱界面在风险预警界面(图2-1),点击右侧边框处下方的“接入罐”与“气体”,弹出罐与气体监测仪的实时监测信息,如图2-7、2-8所示:图2-7 点击接入罐与气体界面2-8 实时监测信息界面在风险预警界面(图2-1),点击右侧边框处下方的“预警推送”,弹出预警推送界面,可查看推送给企业的预警信息,如图2-9、2-10所示:2-9 点击推送信息界面2-10 预警推送信息界面3安全承诺点击导航栏“安全承诺”进入企业安全承诺操作界面,可查看本企业的安全承诺信息。
如图3-1所示:图 3-1企业安全承诺界面在企业安全承诺界面(图3-1),可按照风险提示、日期进行查询,如图3-2所示:图3-2 安全承诺查询界面在企业安全承诺界面(图3-1),点击右上角的“承诺”按钮,弹出企业安全承诺输入界面,企业可根据实际情况录入企业的安全承诺相关信息。
操作手册(西门子系列)

西门子802D数控铣床第一章数控系统面板1.1数控系统面板按键功能按键功能报警应答键通道转换键信息键未使用翻页键光标键选择/转换键加工操作区域程序操作区域键键参数操作区域键程序管理操作区域键报警/系统操作区域键字母键上档键转换对应字符数字键上档键转换对应字符上档建控制键替换键空格键退格删除键删除键插入键制表键回车/输入键1.2机床控制面板按键功能按键功能增量选择键点动参考点自动方式单段手动数据输入主轴正转主轴翻转主轴停Z轴点动X轴点动Y轴点动快进键复位键数控停止数控启动急停键主轴速度修调进给速度修调1.3屏幕显示区显示屏右侧和下方的灰色方块为菜单软键,按下软键,可以进入软键左侧或上方对应的菜单。
有些菜单下有多级子菜单,当进入子菜单后,可以通过点击“返回”软键,返回上一级菜单。
第二章手动操作2.1返回参考点1.进入系统后,显示屏上方显示文字:0030:急停。
点击急停键,使急停键抬起。
这时该行文字消失;2.按下机床控制面板上的点动键,再按下参考点键,这时显示屏上X、Y、Z坐标轴后出现空心圆(如下图);3.分别按下、、键,机床上的坐标轴移动回参考点,同时显示屏上坐标轴后的空心圆变为实心圆,参考点的坐标值变为0。
2.2 JOG运行方式2.2.1JOG运行1.按下机床控制面板上的点动键;2.选择进给速度;3.按下坐标轴方向键,机床在相应的轴上发生运动。
只要按住坐标轴键不放,机床就会以设定的速度连续移动。
2.2.2JOG进给速度选择使用机床控制面板上的进给速度修调旋钮选择进给速度:右键点击该旋钮,修调倍率递增;左键点击该旋钮,修调倍率递减。
用右键每点击一下,增加5%;用左键每点击一下,修调倍率递减5%。
2.2.3快速移动先按下快进按键,然后再按坐标轴按键,则该轴将产生快速运动。
2.2.4增量进给1.按下机床控制面板上的“增量选择”按键,系统处于增量进给运行方式;2.设定增量倍率;3.按一下“+X”或“-X”按键,X轴将向正向或负向移动一个增量值;4.依同样方法,按下“+Y”、“-Y”、“+Z”、“-Z”按键,使Y、Z轴向正向或负向移动一个增量值;5.再按一次点动键可以去除步进增量方式。
Elekta呼吸门控治疗的ABC系统使用指南说明书
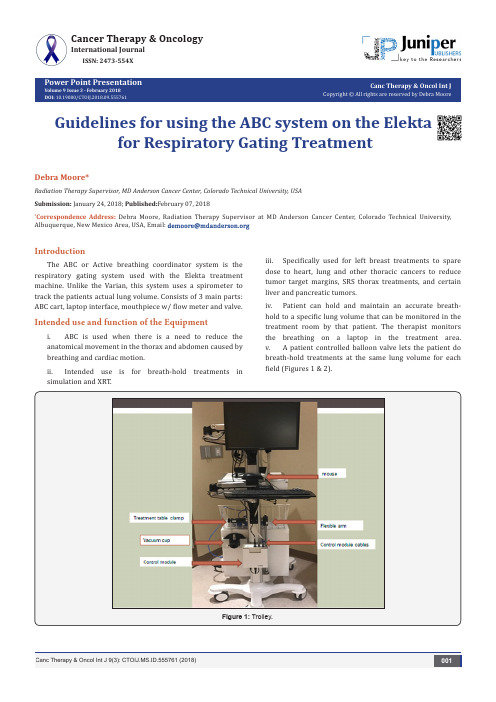
Power Point PresentationVolume 9 Issue 3 - February 2018DOI:Canc Therapy & Oncol Int JCopyright © All rights are reserved by Debra MooreGuidelines for using the ABC system on the Elektafor Respiratory Gating TreatmentDebra Moore*Radiation Therapy Supervisor, MD Anderson Cancer Center, Colorado Technical University, USA Submission: January 24, 2018; Published:February 07, 2018*Correspondence Address: Debra Moore, Radiation Therapy Supervisor at MD Anderson Cancer Center, Colorado Technical University, Albuquerque, New Mexico Area, USA, Email:Cancer Therapy & OncologyInternational JournalISSN: 2473-554XIntroductionThe ABC or Active breathing coordinator system is the respiratory gating system used with the Elekta treatment machine. Unlike the Varian, this system uses a spirometer to track the patients actual lung volume. Consists of 3 main parts: ABC cart, laptop interface, mouthpiece w/ flow meter and valve.Intended use and function of the Equipmenti. ABC is used when there is a need to reduce the anatomical movement in the thorax and abdomen caused by breathing and cardiac motion.simulation and XRT.iii. Specifically used for left breast treatments to spare dose to heart, lung and other thoracic cancers to reduce tumor target margins, SRS thorax treatments, and certain liver and pancreatic tumors.iv. Patient can hold and maintain an accurate breath- hold to a specific lung volume that can be monitored in the treatment room by that patient. The therapist monitors the breathing on a laptop in the treatment area. v. A patient controlled balloon valve lets the patient do breath-hold treatments at the same lung volume for each field (Figures 1 & 2).Figure 1: Trolley.Patient control switch: Patient presses the button during treatment and only releases it to stop the breathold. When the button is released the balloon valve is deflated. If the patient presses the button twice is one second it will send a distress signal that will show upPatient control switchreleases it to stop the breathold. When the button is released the balloon valve is deflated. If the patient presses the button twice is one second it will send a distress signal that will show up on the laptop screen (Figure 3).Patient Respiratory System (Figure 4)a. Sensor pneumatics cable assembly: measures the amount of air the patient breathes that is then sent to the ABC control moduleb. Balloon valve: inflates to prevent air flow through the spirometer when a breathold starts. It deflates when the breathold is completed or interrupted.c. Balloon valve tube: how the ABC control module controls the balloon valve.d. Mechanical connector: attaches to the flexible arme. Filter adapter: mouthpiece and filter kit attaches tothis (Figures 5 & 6).Patient respiratory system.Filter adapter.Figure 6 : Measures the quantity of air a patient breathes through the ABC system. ABC Response Control Box (Figure 7)Figure 7 : ABC Response control Box.i. The response control box enables/disables the response gating control system.ii. Green lights on USB connect, Relay module, Gating on/ off, Gating enabled/fault will allow for the patient loaded into ABC system to be treated. Any red lights and system will not allow treating.iii. Gating enable button: enables/disables gating of the accelerator when pressed continuously for 3 seconds. Also used to change from a fault mode to gating enabled mode.Introduction Recommended cleaning for the ABC is as follows:Clean surfaces using a mild detergent solution then dry with a clean, lint free clothFigure 8 : Laptop Connection to ABC cart using the networkcable.Figure 9 : Connection of the cart to a power outlet and turn thepower to the cart ON.Figure 10 : Turn the Active Breathing Coordinator box ON(green light should be present.)a. Morning QAi. Connect laptop to ABC cart using the network cable. Cable runs from laptop to cart network port located next to ii. Ensure that all cords are firmly attached (Figures 8-10). iii. Turn the Active Breathing Coordinator box ON (green light should be present).iv. Turn on laptop (Figure 11).Figure 11 : Turn on laptop.v. Login to ABC computer (Password: abc lowercase) (Figure 12).Figure 12 : Login to ABC computer (Password: abc lowercase.) vi. Double click on ABC icon.vii. ABC System Check should all be green (connected.)viii. At this time, the laptop should have connected to the mouse and monitor on the cart.ix. ABC will prompt user to load an existing patient. Select the morning QA patient.x. A QA patient should be created by the physicist for daily QA.xi. Once the QA patient is loaded, put in the current date under session ID.Connect the spirometer to the automated morning QA device (Figure 13).Figure 13 : Connect the spirometer to the automated morning the morning QA device (Figure 14).xiv. Press the play button to initiate test.xv.The QA device will run tests and a prompt will come up and tell you if the test has passed or failed (Figure 15). xvi. Record if passed or failed on the daily QA sheetLCD menu to find the manual option (Figure 16).xviii. This setting will give you 3 inhale and exhale cycles for testing.xix. Press the play button each time for an inhale and exhale.xx. This will be done 6 times for 3 inhales and 3 exhales. xxi. Record inhale and exhale volume values on the daily QA sheet.CT Simulation using ABC (Figure 17)a. Turn on computer.b. Take ABC cart into Tx room and connect network cable from the laptop into cart.c. Plug in cart unit to nearest outlet.d. Turn on control module power switch.e. Remove table clamp from cart and attach to superior/Figure 17 : CT Simulation using abc.Figure 18 : Deploy laptop and turn on.f. Deploy laptop and turn on (Figure 18).g. Log into ABC.h. Select Create New.Populate Patient Data (Figure 19)Figure 19 : Populate Patient Data.i. Patient and session Information ii. Session ID is CT Simiii. Gating Option – Manualiv. Select Breath holdv. 30 seconds for full scanvi. Treshold defaults at 1.2Lvii. Inhalationviii. Save.Modification to set up can be made by selecting Patient Settings and clicking and entering desired levels (Figures 20). Physics will provide instructions to the patient explaining the steps to the ABC procedure (Figure 21). Position mouth piece, nose clamp and patient control switch. Ask patient to take in a big breath and take note as to how many liters are inspired. Repeat 3 times and adjust threshold to approximately 80% of maximum volume. Activate System by pressing space bar once. Have patient depress green button and take in a big breath. System will cut up breath upon reaching the preselected volume. Have them let go of the button and breath normally. After patient balloon device and lock in place.Figure 21 : Physics will provide instructions to the patientexplaining the steps to the ABC procedure.Treatment using ABC (Figure 22).Remove Laptop from cart and place on counter. Connect computer to Elekta Response Box and network cable. Turn on 23). Turn on computer. Take ABC cart into Tx room and connect network cable into cart (Figure 24). Plug in cart unit to nearest outlet. Turn on control module power switch. Remove table clamp from cart and attach to superior/top of table. Insert flexible arm into table clamp. Attach patient respiratory device to flexible arm along with mouth piece (Figure 25). Login to ABC computer (Password: abc lowercase). Double click on ABC icon. ABC System Check should all be green (connected) (Figure 26). Trouble shooting (if needed). Load existing patient. Click on ABC patient data (Upper left corner). Select correct patient from existing list. Highlight patient for treatment. Select – open patient (Figure 27). ABC patient setting Box will appear (Figure 28). Under session record today’s date. Click DONE (lower left). Load Patient information (plan) on linac. Highlight field and add pre-port film (must image daily).Figure 23 : Turn on Response Box on (hold down until green light appears).Figure 24 : Take ABC cart into Tx room and connect network cable into cart.Figure 25 : Attach patient respiratory device to flexible arm along with mouth piece.Figure 26 : ABC System Check should all be green (connected).Figure 27 : Highlight patient for treatment.Figure 28 : ABC patient setting Box will appear. Select port needed. Instruct patient to hold control switch (Figures 29-31). 2nd therapist should be providing patient with breathing instructions over intercom. Patient instructed to release green button as needed with breathing crisis, (release of button will necessitate 2nd therapist to hit space bar to reactivate ABC control) Hit space bar to activate breath control with linac. ABC control is represented by green bar. Instruct patient to gently take in a deep breath. ABC control will prevent patient from normal breathing once dose delivery threshold is reached. Treatment delivery achieved within countdown window (Figure 32).Figure 29 : Instruct patient to hold control switch.Figure 30 : Red Line Indicates control Switch is not depressed.Figure 31 : Blue line indicates control switch is depressed.Figure 32 : Treatment delivery achieved within countdown window. Trouble Shooting (Figure 33)Figure 33 : Trouble shooting.Most common problem when launching ABC software is that no USB connections are identified.and network connections.iii. These are the ABC cart connections.the culprit as it works loose with gravity (Figure 35).Figure 35 : Micro USB cable connected on the bottom left is often the culprit as it works loose with gravity.module is located (Figure 36).Figure 36 : Power switch for the control module is located. vi. Green light on top indicates power to the module and control unit are on (Figure 37).Figure 37 : Green light on top indicates power to the module and control unit are on.vii. Red light on top along with audible alarm indicatesFigure 38 : Red light on top along with audible alarm indicates power switch to the module and control unit are off..viii. Power switch for the ABC control cart is located on theFigure 39 : Power switch for the ABC control cart is located on the side of the unit along with the network connector.Figure 40 : Check that the network cable is plugged securely into the correct jack.into the correct jack (Figure 40).Figure 41 : If all connections are securely plugged try to re-launch the USB server from the control laptop.Figure 42 : All green lights indicate ABC is in the correct state for treatment.Figure 43 : Make sure patient is holding the patient control button down. This will change the respiratory indicator line blue.If all connections are securely plugged try to re-launch the USB server from the control laptop (Figure 41). All green lights indicate ABC is in the correct state for treatment (Figure 42). While delivering treatment you find that the space barCancer Therapy & Oncology International Journalwill not activate the system. Make sure patient is holding the patient control button down (Figure 43). This will change the respiratory indicator line blue. If line is blue and space bar still does not work then press pause then record to re-activate system (Figure 44). This is the correct activated treatment state (Figure 45). If beam will not deliver check that the response box is active (Figure 46). Press and hold power switch till light turns green. If light is red, press and hold till light turns off then turn it back on. This is what the response box should look like when ready to deliver beam. If beam will not deliver check that the response box is active. Press and hold power switch till light turns green.Figure 44 : If line is blue and space bar still does not work thenpress pause then record to re-activate system.Figure 45 : This is the correct activated treatment state.Figure 46 : If beam will not deliver check that the response box is active. Press and hold power switch till light turns green.AcknowledgementTherapy Staff – Supervisor – Debra Moore, Roshan Cherian Brandon Held, Leslie Robson Virginia Hernandez Bernal, Ameenah Roybal Janis Roybal Garcia, Dosimetry – Paul Chavez, Erik Frija and Rocio Bergamo, Nursing – Elfrida Bauer, Celina Trujillo and Jayme Runyan, Dr. Ramesh Gopal – Radiation Oncologist, Dr. Amit Garg – Radiation Oncologist, Dr. Kara Bucci – Radiation Oncologist, Special Thanks to Physics – Elder Calderon, Mark Garcia and Mark Marshall.This work is licensed under Creative Commons Attribution 4.0 License DOI: 10.19080/CTOIJ.2018.09.555761。
系统使用手册模板

[本节提供硬件安装的有关信息。本节内容较多时,可以作为单独一章,并置于软件安装之前。本节相关内容在文档的其他部分如有说明,应在本节适当处指明。]
[硬件安装主要说明重要安全说明、安装步骤和硬件技术规格。]
[应在必要的地方用醒目标识提供安全警告。]
4.
[说明软件安装的详细步骤、与软件安装有关的安全和保密信息、安装过程中可能出现的问题和排除方法。
3.
3.1.
[说明在软件安装之前,对系统配置的要求,用户应当完成的其他相关准备活动。]
[系统配置要求应当说明软件正常运行所需的系统(软件和硬件)的最低配置,如:操作系统类型、版本;应用软件及版本;机型、内存与外存大小;外围设备;通讯设备等。建议提供本软件运行的最优系统配置。]
[用户须完成的相关准备活动可能有:预备空白软盘;备份工作;了解存放于本手册之外的最新安装信息等。]
2.3.
[列出本软件用户可以获取的技术支持方式和内容、联系方式、用户为获取技术支持应做的准备工作或注意事项等。技术支持的内容包括:产品升级、用户注册、使用教程与培训、维护、软件错误反馈等。本节内容较多时,其组织方式可以是:按内容分小节叙述;或本节仅做概要的说明,详细内容作为用户手册的附录或指明用户取得详细技术支持信息的渠道(如在线的技术支持、软件的帮助文件等)。]
软件安装的步骤应按照不同的安装方式(首次安装或升级安装)、不同的操作环境或应用软件环境分别进行叙述。安装步骤应当详细,并配合实际的安装界面进行描述。]
[安全与保密信息指在安装过程中或安装后系统首次启动时,用户可见的安全与保密特性。如:登陆密码说明;从何处获得密码;如何添加或删除密码等。]
[示例1:“您可以选择以下方式安装亚德ABC 2000:
5.1.
- 1、下载文档前请自行甄别文档内容的完整性,平台不提供额外的编辑、内容补充、找答案等附加服务。
- 2、"仅部分预览"的文档,不可在线预览部分如存在完整性等问题,可反馈申请退款(可完整预览的文档不适用该条件!)。
- 3、如文档侵犯您的权益,请联系客服反馈,我们会尽快为您处理(人工客服工作时间:9:00-18:30)。
修改ABC状态 修改ABC状态
上海易初莲花连锁超市有限公司 Shanghai Lotus Supermarket Chain store Co., LTD
——VMS系统 ——VMS系统 :7777/forms/frmservlet?config=merchCH) (:7777/forms/frmservlet?config=merchCH)
● 修改Shelf Qty 修改Shelf
● 修改ABC状态 修改ABC状态
● Oracle “F13_ABC_Item.DIS”
——Telxon系统 ——Telxon系统
修改Shelf 修改Shelf Qty
上海易初莲花连锁超市有限公司 Shanghai Lotus Supermarket Chain store Co., LTD
Oracle “F13_ABC_Item.DIS”
上海易初莲花连锁超市有限公司 Shanghai Lotus Supermarket Chain store Co., LTD
Oracle “F13_ABC_Item.DIS”
上海易初莲花连锁超市有限公司 Shanghai Lotus Supermarket Chain store Co., LTD
导出EXCEL
Oracle “F13_ABC_Item.DIS”
上海易初莲花连锁超市有限公司 Shanghai Lotus Supermarket Chain store Co., LTD
上海易初莲花连锁超市有限公司 Shanghai Lotus Supermarket Chain store Co., LTD
ABC项目 ABC项目 系统使用手册
Jan.2011
上海易初莲花连锁超市有限公司 Shanghai Lotus Supermarket Chain store Co., LTD
ABC项目 ABC项目 系hanghai Lotus Supermarket Chain store Co., LTD
2011-5-1
10
——SCS系统 ——SCS系统
修改Shelf 修改Shelf Qty
上海易初莲花连锁超市有限公司 Shanghai Lotus Supermarket Chain store Co., LTD
可选择Telxon号进行查 号进行查 可选择 清除、 看、清除、批准等操作 “已修改”表示门店通过Telxon菜 已修改”表示门店通过 已修改 菜 单进行修改的所有记录 “已批准”表示门店通过SCS系统 已批准”表示门店通过 系统 已批准上传到VMS的记录 已批准上传到 的记录 “全部”包括了已修改和已批准的 全部” 所有记录
——SCS系统 ——SCS系统
修改Shelf 修改Shelf Qty
上海易初莲花连锁超市有限公司 Shanghai Lotus Supermarket Chain store Co., LTD
店长权限进入SCS系统后,可看到 系统后, 店长权限进入 系统后 其他” 在“其他”选项下的第一个菜单 商品数量修改审批” “Shelf商品数量修改审批” 商品数量修改审批