hifiman-HM802产品说明书
HIFIMAN HM1000便携式DAC说明书

User GuideWelcomeThank you for purchasingthe HM1000 Portable DAC(Bluetooth & USB-C) Please read this quick guide before using the HM1000.Quick startExteriorOperationInterface4.4mm wiring specification for balanced line outputDACSpecificationsSupported music formats Safety InstructionsWarranty & customer service 02 03 04 08 09 15 18 19 20 22Table of Contents1. 2. 3.1. 2. 3. 4. 5.Power on and confirm that the Bluetooth light on the main panel is working normally (blue light flashing). Search for devices on a mobile phone or other Bluetooth source device, find HIFIMAN-HM1000 and select itY ou may now enjoy high-definition Bluetooth music with headphones connected to your HM1000.Follow the instructions in the operation guide's DAC Setup to correctly install the driver.Connect the HM1000 to a computer using a USB-C cable. Press the Input button once to turn the light of the main panel green and always on.Set the playback device on the computer to HM1000. Now you can Listen to music from your computer on the HM1000.Note: Please check the Bluetooth connection and supported protocol to ensure the best connection. Bluetooth Direct ConnectionUSB DACQuick StartExteriorCharging SwitchUSB – C power and Data Input3.5mm Balance/Single-ended4.4mm Balanced 4.4mm Balanced LineOut 3.5mm Single-ended OutputPower ButtonVolume+-Micro SD Card slot (Update Firmware Only)InputGain (High/Low/Super low)Power On / Power Off1. Press 3 seconds to turn the HM1000 on or o .Volume+/-1. Press volume+ to increase the volume.Increase the volume one level at a time.The maximum volume is 32.2. Press volume- to decrease the volume.Decrease the volume one level at a time.The minimum volume is 0.3. The body has no screen to show the volume.Output Selection1. When powering on for the first time, the default outputjack is balanced 3.5mm balanced. When this jack isselected, it corresponds to the bottom of the deviceand will display a green light.2. Press the output selection key once. The output jack will remain the same, however the output will change toSingle-Ended. When this option is selected, it corresponds to the bottom of the device output and will displaya red light.3. Press the output selection key again. This will change the output jack to the4.4mm Balanced headphone jack. When this is selected, it will display a green light.4. Press the output selection button again to change the output jack to the 4.4mm Balanced line output / 3.5mm single-ended line output. When selected it will display a green light.5. The HM1000 will remember the most recent outputconfiguration was used when last powered and willresume the same output status.Input Selection1. After powering on, the input defaults to Bluetooth mode. If the blue light is flashing it is in pairing mode, and will remain blue when connected.2. When connecting via USB, press the input selectionkey one time. The input mode will switch to USB AUDIO mode. After switching successfully to USB AUDIO,the light will remain green.Gain Selection1. Gain selection is divided into three options: high, low and super-low. High gain’s driving force is relatively large,suitable for lower sensitivity and higher impedanceheadphones. Low gain’s driving force is relatively small, suitable for matching with headphones of highersensitivity and lower impedance. Super-low gain’sdriving force is smaller still, suitable for in-ear monitors(IEM) with very high sensitivity and very low impedance.2. Selection is made by sliding the switch.Charge1. Connect a charging cable from a power supply to the HM1000. The charging status light will be a steady red. The light will turn green when fully charged.2. Press the charge button to switch to non chargingmode. In this state, the charging status light will flash red and green.3. When the battery is low, the charging status light will flash red. If the battery is too low for operation,it will shut down.InterfaceUSB-C1. Connect a type-C USB data cable to a computer fordata transmission.2. Use a type-C USB power cable with a power supplyto charge the HM1000.3. Use a type-C to type C USB cable to connect to amobile phone for USB DAC Features.Note: Phone must support USB AUDIO OTG. Headphone Sockets/Lineout1. With 3.5mm / 4.4mm headphone outputs, match3.5mm /4.4 mm with the appropriate headphone use. 2. The 3.5mm headphone socket supports balanced andsingle-ended modes, meaning it accepts both TRRS and TRS jacks.3. The4.4mm Headphone socket defaults to balanced mode.4. Never connect headphones before selecting output, and never connect headphones with the line out optionselected as it may damage the headphone or thelistener’s hearing.5. Line-out may be connected to amplifiers or other adapted audio equipment. (Cables must be purchased separately)4.4mm balanced Plug schematic is as follows:For 4.4mm Balanced to dual XLR connections, the balanced output should be as wired as follows:4.4mm balanced to single-ended RCA connections should be made as follows:4.4mm balanced to dual mono 6.3mm connections should be made as follows:4.4mm balanced to dual stereo 6.3mm connections should be made as follows:4.4mm balanced to single-ended 3.5mm connections should be made as follows:Please note:Do not use an ungrounded connector as prolonged use may damage the HM1000.Connect the Type-C USB cable to a computer or phone to enable the USB DAC function. Your phone must support the USB AUDIO and OTG function. For iOS devices, we recommend connecting a Light-ning cable to a USB Camera Converter. (Lightning to USB3 Camera Converter. Type-C to Lighting cables cannot be used. Please use Apple’s Type-C to Type-A adapter when connecting to MAC.)Note: When connecting theHM1000 to products running iOS, first change the charging button to the no-charging mode, then connect the HM1000 to the device, and switch the input mode ofHM1000 to USB AUDIO mode.USB DACUSB DAC DriverFor MAC there’s no need to install the driver.This driver supports Windows XP to Windows 10.Driver installation and usage:1. Please go to HIFIMAN’s O cialwebsite(www.hifi)→Service and support→ Driver, and download the HM1000 driver.2. Unzip the compressed package, select the driver and continue to install the driver.3. Use a type-C USB data cable to connect the HM1000 to the computer.4. Set the HM1000 to USB DAC mode.5. In Windows controls set "Control Panel→Sound→Play," and select "HM1000."6. Now you can use the HM1000 listen to audio from the computer.SpecificationsSize ( LxWxH ) : 115mmx62mmx18mmFrequency Response: 20Hz-40kHzBattery Life : 9.5hOutput Options : 3.5mm Single-ended, 3.5mm balanced, 4.4mm balanced,3.5mm Line output, 4.4mm Line out Bluetooth Version: Bluetooth 5.0Codecs: LDAC, aptX-HD, aptX, AAC, SBCSampling Rate: up to 24bit/384kHzSupported Music FormatsOther Music Formats: MP3, OGG, AAC, WMA DSD file support to DSD64 (DFF and, DSF)Warning1. Do not expose the player to water or other solvents.2. Do not expose the player to humidity, dust, smoke and other harsh conditions.3. A suitable operating temperature environment should be between -6℃ T o 40℃. Storage should be at normal room temperature.4. Do not use any chemicals or detergents to clean the player.5. Do not use while driving or operating motorized vehicles.6. If you experience physical discomfort, pleasediscontinue use and consult your audiologist.Disposal and RecyclingThe disposal of your player should be separated from household waste because the player contains electronic parts a and battery. When your player reaches the end of its life, please contact your local environmental depart-ment for disposal and recycling information or you could simply send it back to us. The battery will be removed and properly recycled.European Union—Disposal information:This symbol means that according to local laws and regulations your product should be disposed of separately from household waste. When this product reaches its end of life, take it to a collection point designated by local authorities. Consumers can be punished by penalty for inappropriate disposal of electronic device. The separate collection and recycling of your product at the time of disposal will help conserve natural resources and ensure that it is recycled in a manner that protects human health and the environment.This device complies with Part 15 of the FCC Rules. Operation is subject to the following two conditions: (1) This device may not cause harmful interference, and (2) this device must accept any interference received, including interference that may cause undesired operation.NOTE 1: This equipment has been tested and found to comply with the limits for a Class B digital device, pursuant to part 15 of the FCC Rules. These limits are designed to provide reasonable protection against harmful interference in a residential installation. This equipment generates uses and can radiate radio frequency energy and, if not installed and used in accordance with the instructions, may cause harmful interference to radio communications. However, there is no guarantee that interference will not occur in a particular installation. If this equipment does cause harmful interference to radio or television reception, which can be determined by turning the equipment o and on, the user is encouraged to try to correct the interference by one or more of the following measures:- Reorient or relocate the receiving antenna.- Increase the separation between the equipment and receiver.- Connect the equipment into an outlet on a circuitdi erent from that to which the receiver is connected. - Consult the dealer or an experienced radio/TV technician for help.NOTE 2: Any changes or modifications to this unit not expressly approved by the party responsible for compliance could void the user's authority to operate the equipment.HIFIMAN warrants this product to be free of defects in material or workmanship for a period of one year from the date of original retail purchase. If your product is found to be defective during the warranty period, HIFIMAN will, at its sole option, either repair the product or replace the product with a new or factory reconditioned or substantially equivalent model. This limited warranty does not apply to any defects attributable to damage beyond the reasonable control of HIFIMAN including damage caused by abuse, misuse, misapplication or modifications performed by anyone other than HIFIMAN.If your product is under warranty and a problem appears, please contact HIFIMAN customer service or your authorized dealer. If necessary, and at our discretion, we will provide a warranty repair or replacement of your product.Caution: do not disassemble or modify the product in any way. Tampering with or modifying your HIFIMAN product will void its warranty.This Limited Warranty does not apply to :1. Defective or discolored parts if damage is caused by fluids, dirt, missing keys, broken plastic parts orimproper use.2. Damage caused by misuse with another product.3. Use of the product for other than its normal intended use, including, without limitation, failure to use theproduct in accordance with the supplied Owner’sGuide.4. Damage caused by accident, abuse, neglect or misuse.5. If you do not have a valid dated receipt showingproof of purchase.6. Damage caused by services / repairs or othermodifications to the system carried out by anyoneother than HIFIMAN or an authorized HIFIMANdistributor or dealer.7. Damage caused by self-repair or if the unit has been disassembled or modified in any way.HIFIMAN greatly desires your satisfaction and will do everything reasonable to achieve that. If you have any questions or concerns with your product, simply contact your authorized dealer or HIFIMAN directly (if purchasedfrom us) and explain the issue in detail. Should a return be required, a Return Authorization will be issued. Return shipping to HIFIMAN or authorized service facility will be at the owner’s expense.The warranty applies to the first purchaser and is not transferable.For further information, please contact your authorized HIFIMAN dealer or email us directly at customerservice @.Customer Service Tel: +1 201-443-4626 E-mail:*************************** Website: 。
专业后级功放HM系列用户手册说明书

产品基本介绍一、概况1、采用标准的2U高度机箱,由1.5毫米钢板经数控加工而成,加之优质的喷涂,提供了一个精确、坚固、美观的构造。
2、本功放采用原装进口元件,并经过严格的测试。
安装时经过特别的加固,以适应震动等恶劣环境。
3、信号采用卡侬座平衡输入输出。
功放输出采用红黑接线柱和speakon插 座。
为固定安装和流动演出提供最可靠最灵活的连接。
4、电源采用优质的环形变压器,大容量音频专用滤波电容,为本机提供的低纹波,高储备的能量来源。
5、本机具有软启动线路,减小开启瞬间的冲击电流,从而有效保护机内元件,并减少对电网的冲击和对其它设备的干扰。
6、大型散热器,左右对称布局,配合优质滚珠轴承风扇形成2个独立风道,能够最有效的降低功放管的温升。
7、内置压限电路,自动监测输出信号,控制输入信号大小,因此本机不会长时间处于削波状态。
并能将功放的输出功率固定在一安全的区域内。
而不受前级输入信号的影响,使用更加放心可靠。
8、完善的保护线路,包括直流中点飘移保护、过热保护、输出过载保护、 软启动保护、大信号保护、欠压保护。
9、输入灵敏度可选择,适应多种音源。
应用参考二、安装与使用1)请将本机放置于平坦,稳固和通风良好的地方。
2)选取外形适配,足够容量的固定插座,连接本机的电源插头,注意一定要牢固可靠,并关闭开关。
3)将音量电位器逆时针旋转到最左边,将信号线通过卡侬公插头平衡式连接到本机的信号输入座。
4)将音箱通过专用的音响线连接至本机的接线柱或者是Speakon输出座。
5)先开启前级信号源的电源后再开启本机电源,顺时针旋转音量电位器,调 整为你所需要的声音大小。
三、注意事项1)请确保机箱上的通风孔没有任何阻塞。
2)请勿在本机上放置重物。
3)移动本机时请小心勿掉落地上或者强烈撞击,并先要确认电源已关闭, 后面板所有连接线已经拔掉。
4)长时间大功率使用后本机将产生一定热量,变速风扇加速散热产生噪声。
但是不属于故障,当温度降低后上述现象将消失。
RME--802中文使用说明书
用户手册Fireface 802再现经典传奇USB 2.0 / 火线400 数字输入/输出系统12 + 16 + 2 通道模拟/ADAT/AES接口24 Bit / 192 kHz 数字音频60 x 30 矩阵路由器MIDI 输入/输出独立工作模式CC模式MIDI远程控制概述 (7)1. 简介 (8)2. 包装清单 (8)3. 系统要求 (8)4. 简介及主要特点 (8)5. 首次使用——快速上手 (9)5.1 接口、控制与显示 (9)5.2 快速上手 (10)安装与操作——Windows (11)6. 硬件、驱动和固件安装 (12)6.1 硬件和驱动安装 (12)6.2 驱动卸载 (12)6.3 固件升级 (12)7. 设置Fireface (13)7.1 Settings(设置)对话框—概述 (13)7.2 设置对话框 – Pitch (15)8. 操作和实验 (16)8.1 播放 (16)8.2 播放DVD (AC-3/DTS) (17)8.3 关于WDM (18)8.4 WDM下的通道数量 (18)8.5 多客户端操作 (19)8.6 模拟录音 (19)8.7 数字录音 (20)8.8 时钟模式 – 同步 (20)9. ASIO下的操作 (22)9.1 概述 (22)9.2 ASIO下的通道数量 (22)9.3 已知问题 (23)10. 使用多个Fireface 802 (23)11. DIGICheck Windows (23)12. 热线 – 故障处理 (24)安装与操作——Mac OS X (26)13. 硬件、驱动和固件安装 (27)13.1 硬件和驱动安装 (27)13.2 驱动卸载 (27)13.3 固件升级 (28)14. 设置Fireface 802 (28)14.1 Settings(设置)对话框 (28)14.2 时钟模式 – 同步 (29)15. Mac OS X FAQ (30)15.2 修复磁盘权限 (31)15.3 支持的采样率 (31)15.4 Core Audio下的通道数量 (31)15.5 各种信息 (32)16. 使用多个Fireface (32)17. DIGICheck Mac (32)18. 热线 – 故障处理 (33)输入和输出 (35)19. 模拟输入 (36)19.1 后面板线路输入 (36)19.2 前面板话筒/线路/乐器输入 (36)20. 模拟输出 (37)20.1 线路输出 (37)20.2 耳机/线路输出 (37)21. 数字接口 (37)21.1 ADAT (37)21.2 AES (38)21.3 MIDI (39)22. 字时钟 (39)22.1 字时钟输入和输出 (39)22.2 技术描述和使用 (40)22.3 布线和终止 (41)22.4 操作 (41)独立工作模式 (43)23. 操作和使用 (44)23.1 概述 (44)23.2 在设备上设置 (44)23.3 从计算机上加载设置 (44)24. 实例 (44)24.1 12通道AD/DA转换器 (44)24.2 4通道话筒放大器 (44)24.3 监听混音器 (44)24.4 数字格式转换器 (45)24.5 模拟/数字路由矩阵 (45)TotalMix (46)25. 路由和监听 (47)25.1 概述 (47)25.2 用户界面 (48)25.3 通道 (49)25.3.1 设置 (51)25.3.2 均衡器 (52)25.3.3 动态 (54)25.4 控制室栏 (56)25.5 控制条 (57)25.5.1 视图选项 (58)25.5.2 快照-组 (59)25.5.3 通道布局-布局预设 (59)25.5.4 滚动位置标记 (62)25.6 混响和回声 (62)25.7 首选项 (65)25.7.1 为当前所有用户保存(Windows) (66)25.8 设置 (67)25.8.1 混音器页面 (67)25.8.2 MIDI 页面 (68)25.8.3 OSC页面 (69)25.8.4 辅助设备 (70)25.9 热键与使用 (71)25.10 菜单选项 (72)26. 矩阵 (74)26.1 概述 (74)26.2 矩阵视图元素 (74)26.3 操作 (74)27. 操作技巧 (75)27.1 ASIO直接监听(Windows) (75)27.2 复制子混音 (75)27.3 删除子混音 (75)27.4 双重输出信号 (75)27.5 录制子混音–回路 (75)27.6 MS 处理 (76)28. MIDI 远程控制 (77)28.1 概述 (77)28.2 规划 (77)28.3 设置 (78)28.4 操作 (78)28.5 MIDI控制 (80)28.6 独立操作的MIDI控制 (81)28.7 回路检测 (83)28.8 OSC (83)CC模式 (84)29. 概述 (85)30. 系统要求 (85)31. 操作 (85)31.1 有用提示 (86)31.2 在Windows和Mac OS X下的CC模式 (87)32. 支持的输入和输出 (87)33. 前面板的操作 (87)技术参考资料 (88)34. 技术指标 (89)34.1 模拟 (89)34.2 MIDI (90)34.3 数字 (90)34.4 数字输入 (90)34.5 数字输出 (91)34.6 通用 (92)35. 技术背景 (93)35.1 锁定(Lock)与SyncCheck(同步检查) (93)35.2 延时(Latency)与监听(Monitoring) (93)35.3 USB音频 (95)35.4 火线音频 (96)35.5 DS – 双倍速 (96)35.6 QS – 四倍速 (97)35.7 DS/QS模式下的噪声电平 (97)35.8 SteadyClock(稳定时钟) (98)36. 图表 (99)36.1 Fireface 802框图 (99)36.2 接口针脚 (99)其他 (101)37. 配件 (102)38. 产品保证 (102)39. 附录 (103)40. CE / FCC符合性声明 (103)重要的安全说明注意! 不要打开底盘,以防触电。
802说明书

YCE C6mini快速入门指南安装使用产品前请先阅读本指南,并请保留备用欢迎使用YCE手机!感谢您选择本公司数字移动电话。
POMP C6mini是由强大团队倾情打造,为您提供高品质的移动通信和娱乐体验。
●您可以通过阅读本手册,全面地了解本智能手机的使用,领略其完善的功能和简洁的操作方法。
使用手机前,请仔细阅读全部安全注意事项和本用户手册,以确保安全和正确使用。
●本用户手册中所用的插图仅作为示意用图,可能与手机有所不同,请以你的手机为准。
●本手册中描述的某些服务和功能取决于网络和预定服务。
●收发信息、上传和下载、进行同步和使用定位服务等可能会产生其他费用。
如欲避免产生额外费用,请选择合适的实际收费计划。
有关详细信息,请联系服务运营商。
安全警告和注意事项将手机放在儿童和宠物等接触不到的地方。
以防可能吞下小零件导致窒息或发生危险。
安全开机,当禁止使用手机或手机的使用会引起干扰或危险时,请不要开机。
请遵守当地的所有相关法律法规。
请使用双手驾驶汽车。
开车时使用手机应首先考虑交通安全。
所有的无线设备都可能受到干扰,从而影响性能。
在医疗或卫生保健机构可能会使用对无线频率敏感的设备。
在飞机上应关机。
请遵守任何的相关的限制规定。
无线设备会对飞机产生干扰。
在加油站或靠近燃料、化学制剂的地方,请不要使用手机。
注意:●您的手机只能使用本公司指定的电池和充电器。
使用其它的产品可能会造成电池漏液、过热、爆裂和起火。
●请使用220V交流电。
使用其它电压会引起漏电、起火和对手机及充电器的损坏。
●禁止短路充电器,否则会引起触电、冒烟和对充电器的损坏。
●请不要在电源线损坏的情况下使用充电器,否则会导致起火和触电。
●请不要拆卸或改装充电器,否则会导致人身伤害、触电、起火和充电器损坏。
●拔插头时要抓住充电器,拉电源线会损坏电线,引起触电和起火。
●手机、电池和充电器无防水性能,请勿在浴室等高湿度的地方使用,同样也要避免被雨淋湿。
●用柔软的干布清洁手机、电池和充电器。
铁路专用手机——OPH802用户手册

i
8.6 短信设置 ______________________________________________________________________ 19
9 呼叫记录 __________ Nhomakorabea________________________________________________________ 20
做一个纯粹的“太上皇” HIFIMAN HM1000播放器体验
做一个纯粹的“太上皇” HIFIMAN HM1000播放器体验作者:来源:《电脑报》2021年第11期2017年HIFIMAN推出的HIFI播放器太子R2R2000,打动了不少人的耳朵,直到现在也是一款被烧友们津津乐道的经典机型。
而HIFIMAN终于也更新了“太子”的升级产品,这次的型号为HM1000,因为外观设计相比R2R2000硬朗稳重,所以它有了一个更加霸气的名字——“太上皇”,下面带来它的使用体验。
HIFIMAN HM1000系列播放器一共有三个版本,分别为胭脂红款、香槟金款和冰霜银款,它们的主要区别是内置的DAC芯片不同。
我们手上拿到的是红太上皇,采用和“紅衣太子”相同的2颗PCM1702,虽然配置上不及金太上皇,性能却依然很强悍。
HM1000和其他播放器最大的不同之处,就是取消了现代播放器与用户实现交互的屏幕,仅保留方便手机控制的蓝牙功能,与各种大屏安卓播放器走了不同的道路理念,正面黑色的玻璃面板下隐约能看见机器的核心——两枚PCM1702芯片。
HM1000机身的边缘部分有做切角处理,大角度多棱角设计让机器整体的层次感更强,拿在手中的感觉也不至于过于“锋利”。
机器的实体按键均分布在机身两侧,同样采用了金色配色,左侧从上至下分别为“OUTPUT”输出模式切换、“INPUT”输入模式切换、“GAIN”增益模式切换,右侧是开机键、音量加减键以及TF卡槽。
由于没有了屏幕桎梏,HM1000探索出了更多玩法。
它可以通过USB直连CD转盘机、电脑、手机,当成有线DAC来使用;也可以通过蓝牙连接手机等音源前端,变身高品质蓝牙播放器;或者仅利用蓝牙连接手机,然后使用手机控制播放本地TF卡内的音乐。
音源输出方面,HM1000除了3.5mm单端/平衡口和4.4mm平衡口之外,还有专供LINE OUT的3.5mm单端/平衡与4.4mm平衡输出接口,输出失真更小,可以作为前端设备,用来外接有源音响、台式功放等。
HIFIMAN SVANAR WIRELESS 用户手册说明书

SV ANAR WIRELESSTopologyDiaphragmOwner’s GuidePower On/Off 123456Touch Pad Microphone Charging Case Indicator Light inside Charging Case Indicator Light outside Charging Case Hard Key③The earbuds will instantly power on when removed from the charging case.The earbuds will automatically start recharging when returned to the charging case, and turn off when fully charged.②②⑥Use Both Earbuds1. To pair with a source device, remove the earbuds from thecharging case, at which point the earbuds will enterpairing mode.2. Open the Bluetooth function menu on your device andselect HIFIMAN SVANAR WIRELESS. Once paired, you will hear "Connected.”Important:You have 3 minutes to connect the earbuds to your device, otherwise the earbuds will exit and automatically power off .Use Left Earbud OnlyLeave the right earbud in the charging case while removing the left earbud, at which point it will automatically enter single-sided mode. The left one taken out from the charging case will enter one-sided mode automatically. To return to stereo, simply remove the right earbud from thecharging case.Use Right Earbud OnlyLeave the left earbud in the charging case while removing the right earbud, at which point it will automatically entersingle-sided mode. The right one taken out from the charging case will enter one-sided mode automatically. To return to stereo, simply remove the left earbud from the charging case.Forced ReconnectionWhen wearing both earbuds, press and hold both earbuds for 3 seconds at the same time to forcibly cancel the last connected device. After canceling the connection, the headset will enter pairing mode with a voice prompt: "Pairing."Return the earbuds to the charging case, press and hold the hard key of the charging case for 3 seconds while the cover is open. The red and green lights on the charging case will flash and enter the forced pairing mode.The mobile phone will find and connect with SVANAR WIRELESS. After the pairing is completed, the green light in the charging case flashes once, for one second, and turns off.Delete Pairings and Restore Factory SettingsReturn the earbuds are placed in the charging case, thenre-open the charging case and press and hold the hard key for 10 seconds. When the reset is completed, the green light in the charging box will flash.MusicCallsAnswer call Double-click either earbud twice to answer the callEnd call While in a call, double -click either earbud twice to end the call Reject call Press and hold either earbud for ~3 seconds to reject the call Long press the right earbud (R) for ~3 seconds to turn on the voice assistant (Note: the device needs to support the Voice Assistant function.)To Play/Pause Touch the right/left earbud to pause the track, and touch it again to continue playing the file or stream. Playing is paused when the earbud leaves the ear, and resumes when the earbud is put back on.To rewind to the previous track With earbuds in operation, double-click the right earbud/left earbud.To Skip to the Next Track With earbuds in operation, triple-click the right earbud/left earbud.Due to the complexity of the electromagnetic environment, the default LDAC high-resolution Bluetooth connection format may freeze or disconnect due to insufficient bandwidth. If this occurs, enter Settings on your device and manually set the Bluetooth format to AAC or SBC. In this mode, the problem of lag/disconnection will be improved, but the sound quality might be less impactful.*Noise Cancellation/HIFI Mode/ Transparency Mode Only when wearing both earbuds:The initial mode is High Fidelity when SVANAR Wireless is turned on.Press and hold the left earbud for 3 seconds to switch to Noise Cancellation mode, which is accompanied bya voice prompt: "ANC ON."Press the left earbud for 3 seconds to switch to the Transparency mode, which is accompanied by a voice prompt: "Transparency."Press the left earbud for 3 seconds to switch to High Fidelity mode, accompanied by a voice prompt: "High Fidelity."Note: When using a single earbud, the current mode remains unchanged, and does not support mode switching between Noise Cancellation /High Fidelity /Transparency. When in Noise Cancellation mode, the microphone is no longer picking up for noise cancellation effect. When both earbuds are worn, SVANAR Wireless will automatically restore the connection andmode-switching function.Low Battery AlertWhen the battery falls below 10% power, you will hear the "Low battery, please charge" prompt every 2 minutes.Return the earbuds to the charging case . The headset will automatically shut down after it is fully charged.Charge the Earbuds Indicator Light Inside the Charging Case for Earbuds Battery StatusFully chargedGreen Light on for 10 seconds Red Light flashes for 10 secondsNot fully chargedRed Light on for 10 seconds When the charging case is opened, there are no earbuds in the case and the inner light is not on.The charging case battery is too low to charge the earbudsIndicator Light Outside the Charging Case for Charging Case Battery StatusBattery >80%Green Light Red Light Light offBattery 20-80%Yellow Light Battery <20%Battery =100%Plug the charging cable into the charger port or place the SVANAR Wireless on a wireless charging plate to charge the charging case and earbuds.When charging, the Indicator Light on the charging box remains illuminated, indicating the battery status of the charging case.Charge the Charging CaseEarphone SpecificationsCharging Case Specifications SizeCharging portUSB Type-C Charging Time 2-2.5 H Charging case Charging Earphone InputWeight83.7g 72x42x50mm 8.0g ~2hrs 3.1-4.2V up to 4H(HIFI Mode)up to 6H(ANC Mode)up to 7H(Transparency Mode)up to 35dB 10Hz-35kHz 45mW Bluetooth 5.2AAC,SBC, LDAC Class 2(-6dbm ± 4dbm)SizeSingle Head WeightBluetooth ProfileWork voltageANC SpecFrequency ResponseBuilt-in amp outputBluetooth versionAudio CodecTransmission Power Transmission Frequency Earbud Charging TimePlay Time32.2x20.4x29.1mm 2.402-2.480GHzWireless Range 15m(barrier free transmission)A2DP 1.3.2/AVRCP1.6.2/HFP1.8/HSP1.25 V 85mA MAX Charger Input5V 500 mA MAX up to three times to earbuds before needing to recharge the caseFCC STATEMENT1. This device complies with Part 15 of the FCC Rules. Operation is subject to the following two conditions:(1) This device may not cause harmful interference, and(2) This device must accept any interference received, including interference that may cause undesired operation. 2. Changes or modifications not expressly approved by the party responsible for compliance could void the user’s authority to operate the equipment.FCC Radiation Exposure Statement:The device has been evaluated to meet general RF exposure requirement.The device can be used in portable exposure condition without RF striction.NOTE: This equipment has been tested and found to comply with the limits for a Class B digital, pursuant to Part 15 or the FCC Rules. These limits are designed to provide reasonable protection against harmful interference in a residential installation. This equipment generates, uses and can radiate radio frequency energy and, if not installed and used in accordance with the instructions, may casue harmful interference to radio communications, However, there is no guarantee that interference will not occur in a particular installation. If the equipment does cause harmful interference to radio or television reception, which can be determined by turning the equipment off and on, the user is encouraged to try to correct the interference by one or more of the following measures:--- Reorient or relocate the receiving antenna.--- Increase the separation between the equipment andreceiver.--- Connect the equipment into an outlet on a circuit different from that to which the receiver is connected.--- Consult the dealer or an experienced radio / TV technician for help.Svanar Wireless is warrantied for a period of 18 months beginning with the original date of purchase. If you join the official HIFIMAN group on Facebook, your product warranty will be extended for an additional six months. Please contact HIFIMAN customer service if you need any assistance.The dated sales or delivery receipt is your proof of purchase. You may be required to provide proof of purchase as a condition of receiving warranty service so please keep it handy.If your product is under warranty and malfunctions occur, please contact HIFIMAN customer service or your authorized dealer.If necessary, and at the discretion of HIFIMAN, the company will provide a warranty repair or replacement of your product.Caution: do not disassemble or modify the product in any way. Tampering with or modifying your HIFIMAN product will voidits warranty.This Limited Warranty does not apply to :1. Defective or discolored parts if the damages are caused byfluids, dirt, missing keys, broken plastic parts or improper use.2. Damage caused by misuse with another product.3. Use of the product for other than its normal intended use,including, without limitation, failure to use the product inaccordance with the supplied “Owner’s Guide”4. Damage caused by accident, abuse, neglect or misuse.5. If you do not have a valid dated receipt showing proofof purchase.6. Damage caused by services/repairs or other modifications to the system carried out by anyone other than HIFIMAN or anauthorized HIFIMAN distributor or dealer.7. Damage caused by self-repair or if the unit has beendisassembled or modified in any way.HIFIMAN guarantees your satisfaction and will do everything reasonable to achieve that. If you have any questions or concerns with your product, simply contact your authorized dealer or HIFIMAN directly (if purchased from us) and explain the issue in detail. Should a return be required, a RA# will be issued. Return shipping to HIFIMAN or authorized service facility will be at the owner’s expense.The warranty applies to the first purchaser and is not transferable. Should you need warranty service please contact your authorized HIFIMAN dealer. Or email us directly at***************************If you have any concerns with your product: please contact usto explain the issue in detail. If a return/refund is required, a RA# will be issued. Return shipping to HIFIMAN or authorized service facility is done at the owner’s expense.For any further information or questions, please contact your authorized HIFIMAN dealer. Or email us directly at customerservice@.Address: 2602 Beltagh Ave, Bellmore, NY 11710, USA。
H802SE说明书
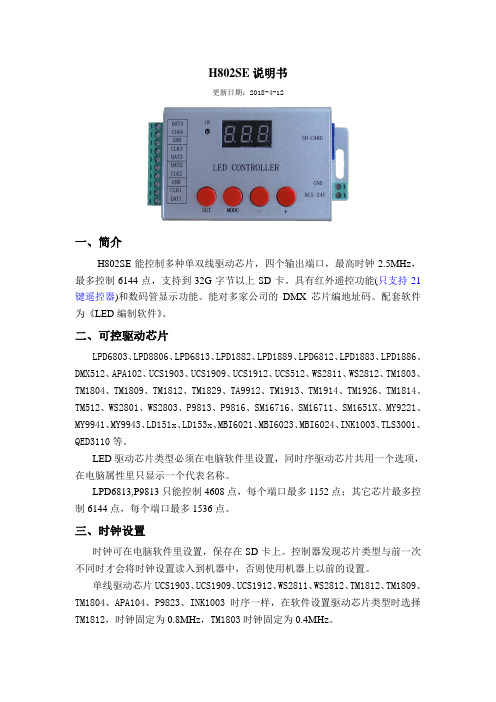
H802SE说明书更新日期:2018-4-12一、简介H802SE能控制多种单双线驱动芯片,四个输出端口,最高时钟2.5MHz,最多控制6144点,支持到32G字节以上SD卡。
具有红外遥控功能(只支持21键遥控器)和数码管显示功能。
能对多家公司的DMX芯片编地址码。
配套软件为《LED编制软件》。
二、可控驱动芯片LPD6803、LPD8806、LPD6813、LPD1882、LPD1889、LPD6812、LPD1883、LPD1886、DMX512、APA102、UCS1903、UCS1909、UCS1912、UCS512、WS2811、WS2812、TM1803、TM1804、TM1809、TM1812、TM1829、TA9912、TM1913、TM1914、TM1926、TM1814、TM512、WS2801、WS2803、P9813、P9816、SM16716、SM16711、SM1651X、MY9221、MY9941、MY9943、LD151x、LD153x、MBI6021、MBI6023、MBI6024、INK1003、TLS3001、QED3110等。
LED驱动芯片类型必须在电脑软件里设置,同时序驱动芯片共用一个选项,在电脑属性里只显示一个代表名称。
LPD6813,P9813只能控制4608点,每个端口最多1152点;其它芯片最多控制6144点,每个端口最多1536点。
三、时钟设置时钟可在电脑软件里设置,保存在SD卡上。
控制器发现芯片类型与前一次不同时才会将时钟设置读入到机器中,否则使用机器上以前的设置。
单线驱动芯片UCS1903、UCS1909、UCS1912、WS2811、WS2812、TM1812、TM1809、TM1804、APA104、P9823、INK1003时序一样,在软件设置驱动芯片类型时选择TM1812,时钟固定为0.8MHz,TM1803时钟固定为0.4MHz。
TLS3001时钟建议不要超过0.8MHz。