UL CIG-022 Pre-licence Factory Inspection Questionnaire Sections A and B
NRF51822 Eval Kit 用户手册说明书

Waveshare
1.1 PC development environment deployments
WindowsXP or Windows 7 nRFgo Studio v1.14 or higher versions Keil MDK-ARM Lite v4.54 or higher versions J-Link Software v4.52b or higher versions
Multi-protocol 2.4GHz radio 32-bit ARM Cortex M0 processor 128-bit AES co-processor 256kB flash / 32kB RAM Programmable Peripheral
Interconnect – PPI Full set of digital interfaces including:
2. Program descriptions ..............................................................................................4 2.1 SDK ..............................................................................................................4 2.2 Example application download explanations ..............................................4 2.3 How to download and conpile blinky_example ...........................................4 2.4 How to download and compile ble_app_hrs ...............................................7 2.5 Functional descriptions of example programs ............................................8
梅特勒托利多 ACT350 ACT350 增强型 ACT350xx 电子称重仪表用户手册说明书

3.4. LED 状态灯 ............................................................................................................ 20 3.5. 拨码开关和主复位................................................................................................ 21
2.3. 连接........................................................................................................................ 10
2.3.1.
电源............................................................................................................. 12
1.4. 包装内容清单.......................................................................................................... 3
1.5. 物理尺寸.................................................................................................................. 4
3.6.5.
去皮............................................................................................................. 23
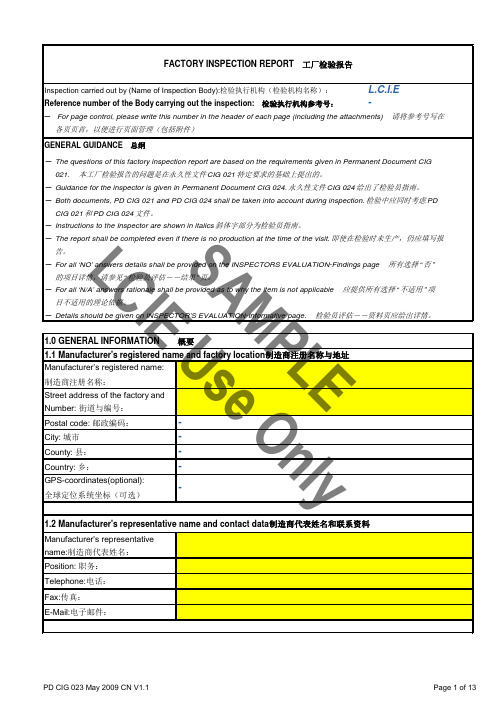
验厂报告范本
检验执行机构参考号:检验执行机构参考号:nly审查员的评估PD CIG 023 May 2009 CN V1.1 Annex IPD CIG 023 May 2009 CN V1.1Annex II审查员的评估A M P L E CI EU s e O n l yTEST DATA SHEET - Product Verification Tests / Periodic Tests (PVT)PD CIG 023 May 2009 CN V1.1Annex III检验执行机构参考号:f. Are all controls and components checked during the test? 所有控制部件和元件在测试中检查吗?W = Test witnessed by the inspector / 工厂审查员目击R =according to records / 根据记录PD CIG 023 May 2009 CN V1.1Annex IV检验执行机构参考号:IDENTIFICATION OF SELECTED SAMPLES at manufacturer Date:yCode letters :P = Sample from Production or S = Stock; F = Forwarded by the Manufacturer; T = Transported to the Certification Body by the InspectorA = Shipped by the Inspection AgencyP = 生产线抽样 S = 仓库抽样; F = 工厂寄样; T = 认证机构的审查人员带样; A = 审查机构寄样PD CIG 023 May 2009 CN V1.1Annex V。
CIG 022_section B(1)

Place:
Date :
Signed for manufacturer:
PD CIG 022 SECTION B
QUESTIONNAIRE
B 1QUESTIONNAIRE TO BE COMPLETED BY THE LICENCE HOLDER
B.1.1Licence holder name and address:
Licence holder name:
Street and No.:
Address:
Telephone:
Fax:
E-Mail:
B.2.4Total number of employees in the factory:
Number of employees engaged in the production of certified products:
B.2.5Specify which safety critical components are purchased from outside suppliers such as switches, lampholder, cord-sets, motors, transformers, sub-assemblies or parts of components such as contacts, etc.
Telephone:
Fax:
E-Mail:
Note: This management representative may be located outside the factory e.g. at the Head Office.
B.2.3Manufacturer's office address and contact data (if different from B.2.1):
National Instruments LabVIEW 8.5 发行说明说明书

LabVIEW发行说明™安装LabVIEW 8.5发行说明包含LabVIEW安装和卸载说明以及LabVIEW对操作系统的要求。
如将LabVIEW从前期版本升级,安装LabVIEW 8.5前请先阅读软件升级包中的LabVIEW升级说明。
如需转换前期版本的VI从而在LabVIEW 8.5中使用,请务必阅读相关注意事项。
安装LabVIEW前,请先阅读本说明的系统要求一节,然后按照安装LabVIEW 8.5中的要求进行安装。
安装LabVIEW后,请阅读参考资料一节,了解LabVIEW入门知识。
目录系统要求 (2)安装LabVIEW 8.5 (4)Windows (4)Mac OS (5)Linux (6)安装LabVIEW附加工具 (7)激活LabVIEW许可证(Windows) (8)许可证激活状态与LabVIEW的使用权限 (8)单用户许可证和多用户许可证 (9)程序库、模块和工具包许可证 (9)激活应用程序生成器 (9)安装与配置硬件 (10)Windows (10)Mac OS (10)Linux (11)参考资料 (11)LabVIEW入门指南 (11)LabVIEW升级说明 (11)LabVIEW帮助 (11)Readme (12) (12)系统要求表1列出运行LabVIEW 8.5对操作系统要求。
表1LabVIEW 8.5的系统要求系统平台系统及硬件要求重要说明所有平台运行LabVIEW至少需要256 MB的随机内存,建议使用1 GB以上随机内存。
运行LabVIEW至少需要1,024×768像素屏幕分辨率。
部署由LabVIEW生成的应用程序时,LabVIEW运行时引擎(Run-Time Engine)至少需要64 MB内存,屏幕分辨率至少为800×600像素;建议使用256 MB以上内存且屏幕分辨率至少为1,024×768像素。
LabVIEW及LabVIEW帮助包含16位分辨率的彩色图形。
FullProf 详细使用教程
New facilities concerning symmetry in FullProf
⇒ The symmetry used within FullProf is totally based in the Crystallographic Fortran 95 Modules Library (CrysFML) (Tuesday 26 ⇒ FA3-MS5, Meeting Room 11B) ⇒ These modules provide better crystallographic information to the user of the program. In particular automatic calculation of the multiplicity of each site is now performed after reading the atoms as well as the calculation of the appropriate coefficients for automatic quantitative analysis of mixture of phases. ⇒ New output files with full information of crystallographic symmetry are produced (extension: sym)
Durban, August 24, 2003
ECM-21 Software Workshop
Last minute changes in FullProf Documented in “fp2k.inf”
冲压产品控制计划(control plan)
Control Plan
Date (Original)/日期(初版) □ Proto-type (样件) Control Plan Number (编号): Part Number/Latest Change Level (产品代号/最新版本) Core Team (核心小组) * Customer Eng'g Approval/Date, If Req'd (顾客工程的承认/日期,需要时) □ Pre-launch (试生产) ■ Production (量产) Key Contact/Phone (关键联系人/电话) Date (Revision)/日期 (改订) * Customer Quality Approval/Date, If Req'd (顾客品质的承认/日期,需要时)
依不合格品管制程序
3 4
一份 两次 100% 100%
100%
每批 每天 每批 每批
每小时
隔离送第三方验证 调整湿度 退料 退料 清理、调整模具
20
入库/贮存 材料投入
托车 托车、放料盘、卡尺 、千分尺
1 1 2 3 4 5 6 7 8 宽度(D4) 宽度(A7) 位置度(D8) 直线度(C3) 长度(C8) 长度(A8) 长度(B8) 宽度(C7) 长度(D8) 对称度(D8) 长度(A5) BURR 扇形 扭曲度 外观 规格
TE03P-0001-0106
泰科电子(苏州)有限公司
* Other Approval/Date, If Required (其他的承认/日期)
* Other Approval/Date, If Required (其他的承认/日期,需要时)
Part/ Process No. (产品/ 工程No.)
光学解决方案组 CODE V 和 LightTools 软件及许可证密钥(2015年12月)说明书
Obtaining CODE V and LightTools Software and License KeysOptical Solutions GroupDecember 2015Copyright Notice and Proprietary InformationCopyright © 2015 Synopsys, Inc. All rights reserved. This software and documentation contain confidential and proprietary information that is the property of Synopsys, Inc. The software and documentation are furnished under a license agreement and may be used or copied only in accordance with the terms of the license agreement. No part of the software and documentation may be reproduced, transmitted, or translated, in any form or by any means, electronic, mechanical, manual, optical, or otherwise, without prior written permission of Synopsys, Inc., or as expressly provided by the license agreement.Right to Copy DocumentationThe license agreement with Synopsys permits licensee to make copies of the documentation for its internal use only. Each copy shall include all copyrights, trademarks, service marks, and proprietary rights notices, if any. Licensee must assign sequential numbers to all copies. These copies shall contain the following legend on the cover page:“This document is duplicated with the permission of Synopsys, Inc., for the exclusive use of______________________________ and its employees. This is copy number __________.”Destination Control StatementAll technical data contained in this publication is subject to the export control laws of the United States of America. Disclosure to nationals of other countries contrary to United States law is prohibited. It is the reader’s responsibility to determine the applicable regulations and to comply with them.DisclaimerSYNOPSYS, INC., AND ITS LICENSORS MAKE NO WARRANTY OF ANY KIND, EXPRESS OR IMPLIED, WITH REGARD TO THIS MATERIAL, INCLUDING, BUT NOT LIMITED TO, THE IMPLIED WARRANTIES OF MERCHANTABILITY AND FITNESS FOR A PARTICULAR PURPOSE.TrademarksSynopsys’ company and certain product names are trademarks of Synopsys, as set forth at:/Company/Pages/Trademarks.aspx. All other product or company names may be trademarks of their respective owners.Obtaining CODE V and LightTools Software and License Keys iiTable of ContentsIntroduction (1)Signing Up for a SolvNet Account (1)Obtaining License Keys (2)License Key Delivery (4)Obtaining Host IDs (5)Downloading CODE V or LightTools from SolvNet (6)Ordering Media (CDs/DVDs) (9)Installing CODE V or LightTools (11)Fixed License Users (11)Floating License Users (11)Definitions (12)Obtaining CODE V and LightTools Software and License Keys iiiObtaining CODE V and LightTools Software and License Keys ivIntroductionCODE V and LightTools software and license keys are available for download from the Synopsys SolvNet website. This document provides instructions on how CODE V and LightTools users can obtain the software and license keys. See Definitions on page 12 if any terminology is unfamiliar to you.Signing Up for a SolvNet AccountAll users who download CODE V and LightTools software and license keys must sign up for a Synopsys SolvNet Account.1.Go to https:// and click the Sign Up For An Account link.2.During the registration process, you will need to enter your company’s Site ID. Ifyou do not know your company’s Site ID, please contact**************************** to request it. Be sure to include your company name and address in the email request.3.SolvNet will send you a confirmation email. Follow the link in the email to completethe registration process.Obtaining CODE V and LightTools Software and License Keys 1Obtaining CODE V and LightTools Software and License Keys2 Obtaining License KeysA License Key is a file containing licensing information for your specific USB dongle (or PC Hardware if no dongle is used). The SmartKeys web interface on the Synopsys SolvNet site can be used to obtain license keys. To obtain your license keys:1. Navigate to the SmartKeys page on SolvNet. You can go to SmartKeys directly usingthis link: https:///SmartKeys . You can also navigate there from the SolvNet Downloads page by clicking the SmartKeys link in the lower right column.2. On the SolvNet SmartKeys home page, click the Key Retrieval link.3.The SmartKeys Key Retrieval page displays. Click the Retrieve Licenses button toreceive an email with the license keys for your company.Note: You will receive separate emails for each Host ID at your company, each witha single license key attached. This will include license keys for all Synopsys productsthat your company licenses. To obtain license keys for a single USB dongle, you can enter the Host ID of your CODE V or LightTools USB dongle in the Host ID(Optional) data field. If you do not know the Host ID value for your USB dongle, see Obtaining Host IDs on page 5.Obtaining CODE V and LightTools Software and License Keys 3License Key DeliveryYour CODE V or LightTools license key will be delivered as a text file attached to an email from the SmartKeys system. The email will include the Host ID for which the license key is valid. Below is a sample License Key email. Save this file to a convenient location on your PC. You will need to access this file to activate CODE V or LightTools.Attachment:Synopsys Key for Site ID 26674 Server 9689 (snpslmd).txt (4 KB)Subject: Synopsys Key for Site 26674 Server 9689 ABC OpticsAttached, in text format, are the current Synopsys license keys for your siteID. These keys are for server 96828 and support host ID 80-A12B5.These keys will not reflect pending orders.Product material numbers which start with "#*" are off-support and thus no keysare provided. To receive these keys, contact your Account Manager to go backon support ("maintenance") or to request "off-support keys."If you feel that your keys are incorrect, please contact your Account Manager.Please save this attachment and install onto your license servers. Forinstallation help, consult the License Installation Guide or go to/Support/LicensingYour use of these keys is subject to your license agreement with Synopsys.Obtaining CODE V and LightTools Software and License Keys 4Obtaining Host IDsThe Host ID is a unique value encoded on the USB dongle (or PC hardware if you are not using a dongle) used to run CODE V or LightTools. Each license key is associated with a specific Host ID. If you have multiple seats of CODE V and/or LightTools at your company, you can identify which license key file is associated with your specific USB dongle using the Host ID value.If you do not know the Host ID value for your USB dongle, you can download a copy of the GetHostID utility from /support/support-host-id.html. Double-click the file GetHostID.exe to launch the utility.In the above example, the Host ID for the USB dongle is 80-2F478. If the GetHostID utility is encountering problems reading the USB dongle, you may need to download and install the Sentinel USB Key driver from /support/support-usb-drivers.html.If you are not using a USB dongle, your license key is associated with a unique Host ID value for your specific PC hardware. In the above example, the Host ID for the PC hardware is 4-1EFDC.Obtaining CODE V and LightTools Software and License Keys 5Obtaining CODE V and LightTools Software and License Keys 6 Downloading CODE V or LightTools from SolvNet1. To download CODE V or LightTools software, log onto your SolvNet account andclick Downloads .2. You can also use this direct link: https:///DownloadCenter .3. Select the product you want to download. All Synopsys products currently licensed atyour company will be listed. The following example shows only CODE V and LightTools.4.Select the specific version you would like to download.The Downloads page displays.5.Click the Release Alerts link to display a Release Alerts pop-up page that allowsyou to subscribe to Release Notification emails from SolvNet. These emails let youknow when a new version of CODE V or LightTools is available for download.a.Click the product name for which you would like to receive notifications orclick ALL to receive notifications for all products in the list.b.Click the Add button.c.Click the Include patch notifications checkbox. This allows you to receivenotifications of CODE V and LightTools service releases.d.Click the Update button.You are returned to the Downloads page.6.On the Downloads page, click Download Here.7.On the Electronic Software Transfer (EST) page, click the button to begindownloading the specified software.Ordering Media (CDs/DVDs)If you unable to download software and would like to order media (CD or DVD), you can do this directly on SolvNet. To order media:1.Click the MediaCenter link in the lower right corner of the SolvNet download page.2.On the Media Center page, select the product (CODE V or LightTools) and click theAdd button.plete the Shipping Address information (most will be automatically filled out foryou) and click Continue.4.Review the shipping request and click Place Order.Installing CODE V or LightToolsComplete installation instructions for both CODE V and LightTools are available at /support/support-install-lic-overview.html. Following is a high-level overview.Fixed License Users1.Install CODE V or LightTools on your PC. After downloading the latest CODE V orLightTools release from SolvNet, double-click the downloaded .exe file to start the installation. You will need administrator privileges on your PC to complete theinstallation process.2.After installing CODE V or LightTools, you will need to obtain your license key.After receiving your license key file from SmartKeys, save it to a convenient location on your PC.3.To apply the license key file, choose:Start > Programs > CODE V 10.x > Fixed License Installeror:Start > Programs > LightTools 8.x.x > Fixed License InstallerBrowse to your license key file and select it.Floating License UsersIf you use CODE V or LightTools with a floating license, the Sentinel License Manager must be installed on the network server. The Sentinel License Manager is also available for download at /support/support-install-lic-overview.html.DefinitionsBelow is a summary of terms used in this document.SolvNet: The Synopsys customer portal (https://). This is where you will go to download CODE V and LightTools, as well as the license keys. SmartKeys: SolvNet page where license key requests are made.License Key: License file containing the encoded information needed to run CODE V or LightTools for a specific USB dongle or PC.Host ID: Hexadecimal value (for example, 80-1A23D) encoded on the USB dongle or specific PC. The Synopsys SmartKeys site and delivery email reference the Host ID value when license keys are requested and delivered.Site ID: Unique number used to identify a specific company. Every company that uses CODE V and LightTools software, or other Synopsys software, will have a unique site ID.。
ISO1050中文资料_数据手册_参数
器件型号 ISO1050
器件信息(1)
封装
封装尺寸(标称值)
SOP (8)
9.50mm × 6.57mm
SOIC (16)
10.30mm x 7.50mm
(1) 要了解所有可用封装,请见数据表末尾的可订购产品附录。
简化电路原理图
CANH RXD
CANL
TXD
1பைடு நூலகம்
PRODUCTION DATA information is current as of publication date. Products conform to specifications per the terms of the Texas Instruments standard warranty. Production processing does not necessarily include testing of all parameters.
English Data Sheet: SLLS983
ISO1050
ZHCS321I – JUNE 2009 – REVISED JANUARY 2015
目录
1 特性.......................................................................... 1 2 应用.......................................................................... 1 3 说明.......................................................................... 1 4 修订历史记录 ........................................................... 2 5 Pin Configuration and Functions ......................... 5 6 Specifications......................................................... 6
LabVIEW Real-Time Module 8.0 安装指南与升级说明说明书
LabVIEW Real-Time Module™Release and Upgrade NotesVersion 8.0This document provides installation instructions, system requirements,upgrade information, and descriptions of the new features for version 8.0of the LabVIEW Real-Time Module.Refer to the Getting Started with the LabVIEW Real-Time Module manualfor exercises you can complete to familiarize yourself with the new featuresand enhancements to the Real-Time Module.ContentsSystem Requirements (2)Installing the Real-Time Module 8.0 (3)LabVIEW Real-Time Module (3)LabVIEW Real-Time Module for RTX Targets (3)RT Target Configuration (4)Upgrade Issues (4)Changes to VIs and Structures (4)Real-Time FIFO VIs (4)Timed Loop (4)Changes to Real-Time Utilities and Dialog Boxes (5)LabVIEW Application Builder (5)RT Communication Wizard (5)Advanced Ethernet Settings Dialog Box (ETS) (5)Changes to the Real-Time Module Documentation (5)Menu Reorganization (6)New Real-Time Module 8.0 Features (6)LabVIEW Projects (6)Real-Time Project Wizard (7)Project Explorer Window (7)Shared Variables for Deterministic Communication (8)RT Target Properties Dialog Box (8)LabVIEW Timed Structures (ETS) (8)Timed Sequence (8)Timed Loop with Frames (9)Real-Time Benchmarking VIs (9)RT Get Timestamp VI (9)RT Timestamp Analysis VI (9)RT Target Errors Dialog Box (9)Dual Ethernet Device Support for NI PXI Targets (ETS) (10)Real-Time Module Examples (10)Known Issues with the Real-Time Module 8.0 (10)System RequirementsTable 1 describes the system requirements to run version 8.0 of theReal-Time Module. The Real-Time Module system requirements are inaddition to the LabVIEW system requirements listed in the LabVIEWRelease Notes.Table 1. System Requirements for the Real-Time Module 8.0Platform Media and SystemRequirements Important NotesWindows 2000/XP National Instrumentsrecommends that you haveat least 200 MB of diskspace for the minimumReal-Time Moduleinstallation or 700 MB ofdisk space for the completeReal-Time Moduleinstallation, which includesthe Real-Time andEmbedded drivers from theNational InstrumentsDevice Drivers CD.(RTX) You must installService Pack 2 forWindows bVIEW does not support Windows NT/Me/9x.You might need more memory than the LabVIEW-recommended minimum of 128 MB of RAM depending on the size of the application you design in LabVIEW on the host computer.To use the LabVIEW Help, the NI Measurement & Automation Explorer (MAX) interactive help system, and the NI Example Finder, you must have Microsoft Internet Explorer 5.0 or later.To view and control the front panel of a VI running on an RT target remotely using a Web browser, National Instruments recommends Internet Explorer 5.5 with Service Pack 2 or later.Real-Time Module Release and Upgrade Installing the Real-Time Module 8.0This section includes information about installing the Real-Time Moduleand the Real-Time Module for RTX Targets on a development, or host,computer.Module 8.0. Refer to the LabVIEW Release Notes for the LabVIEW installationinstructions.LabVIEW Real-Time ModuleComplete the following steps to install the LabVIEW Real-Time Moduleon the host computer.1.Disable any automatic virus detection programs before you install.Some virus detection programs interfere with the installation program.2.Log on as an administrator or as a user with administrator privileges.3.Insert the LabVIEW Real-Time Module installation CD into theCD-ROM drive. The LabVIEW Real-Time Module installationprogram runs automatically.4.Follow the instructions that appear on the screen.5.Install the Real-Time and Embedded drivers and any other drivers thatyou require from the National Instruments Device Driver CD. LabVIEW Real-Time Module for RTX TargetsComplete the following steps to install the LabVIEW Real-Time Modulefor RTX Targets on the host computer.1.Disable any automatic virus detection programs before you install.Some virus detection programs interfere with the installation program.2.Log on as an administrator or as a user with administrator privileges.3.Install the Ardence RTX 6.1 Runtime and restart the computer. Referto the Ardence RTX 6.1 documentation for information aboutinstalling and configuring the RTX 6.1 Runtime on the host computer.4.Insert the LabVIEW Real-Time Module CD into the CD-ROM drive.The LabVIEW Real-Time Module installation program runsautomatically.5.Follow the instructions that appear on the screen.6.Install the Real-Time and Embedded drivers and any other drivers thatyou require from the National Instruments Device Driver CD.© National Instruments Corporation3Real-Time Module Release and Upgrade NotesRT Target ConfigurationUse MAX to configure RT targets and to install software and drivers ontargets.•Networked RT Targets—Refer to the Remote Systems section of theMeasurement & Automation Explorer Help, available by selectingHelp»MAX Help from MAX, for information about configuringnetworked RT targets.•RT Series Plug-in Devices—Refer to the RT Series DAQ Devices(NI PCI-7041/6040E) topic of the Measurement & AutomationExplorer Help for information about configuring RT Series plug-indevices.•Desktop PC Targets—Refer to the Using Desktop PCs as RT Targetswith the LabVIEW Real-Time Module document for information aboutconfiguring a desktop PC as a networked RT target.Upgrade IssuesThe following section provides a description of changes to VIs, structures,utilities, dialog boxes, menus, and documentation resources when youupgrade to version 8.0 of the Real-Time Module from a previous version.Refer to the LabVIEW Help for more information about the followingtopics.Changes to VIs and StructuresReal-Time FIFO VIsThe Real-Time FIFO VIs now support 64-bit signed and unsigned integerdata types. Use 64-bit signed and unsigned integer data types to use, view,and store integers with high precision.Timed LoopYou can set a deadline for the execution of the Timed Loop subdiagram. Ifthe subdiagram does not complete before the deadline, the FinishedLate? [i-1] output of the Left Data node returns TRUE in the next iterationof the Timed Loop. However, missing a deadline does not affect theexecution of the Timed Loop.You can add frames to a Timed Loop that execute sequentially within theloop and use a secondary clock source to control the timing of the framesindependent of the structure timing.Real-Time Module Release and Upgrade Changes to Real-Time Utilities and Dialog BoxesLabVIEW Application BuilderUse Build Specifications, located under an RT target in theProject Explorer window, to create build specifications for and to buildstand-alone real-time applications that can run automatically when youpower on an RT target.Version 8.0 of the Real-Time Module does not support creating installersfor stand-alone real-time applications. You must use LabVIEW to deploy astand-alone real-time application to an RT target.RT Communication WizardThe RT Communication Wizard supports the LabVIEW sharedvariable for sending data to and receiving data from RT target VIs. SelectTools»Real-Time Module»Communication Wizard to launch theRT Communication Wizard.Advanced Ethernet Settings Dialog Box (ETS)Use the Advanced Ethernet Settings dialog box in MAX to configureadvanced Ethernet settings for networked RT targets and to add asecondary Ethernet device on RT Series PXI targets. Refer to theMeasurement & Automation Explorer Help for information about theAdvanced Ethernet Settings dialog box.Changes to the Real-Time Module DocumentationThe LabVIEW Help now contains conceptual content from the LabVIEWReal-Time Module User Manual. The Real-Time Module therefore nolonger ships with a PDF library or with print and PDF versions of theLabVIEW Real-Time Module User Manual. Refer to the Real-Time ModuleConcepts book on the Contents tab of the LabVIEW Help for informationabout the Real-Time Module features.Refer to the Getting Started with the LabVIEW Real-Time Moduledocument for exercises you can complete to familiarize yourself with thenew features and enhancements to the Real-Time Module.© National Instruments Corporation5Real-Time Module Release and Upgrade NotesReal-Time Module Release and Upgrade Notes Menu ReorganizationMenu items have moved or been renamed for version 8.0 of the Real-Time Module. Table 2 lists the menu items that have changed.New Real-Time Module 8.0 FeaturesThe Real-Time Module includes the following new features. Refer to the LabVIEW Help for more information about the following new features.LabVIEW ProjectsUse LabVIEW projects to group LabVIEW files and non-LabVIEW files, create real-time build specifications, and deploy files to an RT target. When you save a project, LabVIEW creates a project file (.lvproj ), whichincludes references to files in the project, configuration information, build information, and deployment information.Table 2. LabVIEW Menu Changes for the Real-Time Module LabVIEW 7.1 Menu ItemEquivalent LabVIEW 8.0 Menu Item File»Exit without closing RT Engine VIs Use the Project Explorer window todisconnect from RT targets and then exitLabVIEW. Right-click an RT target and selectDisconnect from the shortcut menu todisconnect from the target.Operate»Download Application From the Project Explorer window, right-clicka VI and select Deploy from the shortcut menu.Operate»Switch Execution Target Use the Project Explorer window to add andconnect to RT targets. Right-click the projectroot and select New»Targets and Devices fromthe shortcut menu to add RT targets. Right-clickan RT target and select Connect from theshortcut menu to connect to the target.Tools»Build Application or Shared Library (DLL)From the Project Explorer window, right-clickBuild Specifications under an RT target andselect New»Real-Time Application from theshortcut menu.Tools»RT Communication Wizard Tools»Real-Time Module»CommunicationWizardTools»RT Target OptionsFrom the Project Explorer window, right-clickan RT target and select Properties from theshortcut menu.You can create a new project with the Real-Time Project Wizard, availableby selecting Tools»Real-Time Module»Project Wizard from the GettingStarted window. You also can create a project manually by selectingFile»New Project from the Getting Started window and then using theProject Explorer window to add RT targets, VIs, and other support files tothe project. Refer to the Getting Started with the LabVIEW Real-TimeModule document for exercises you can complete to familiarize yourselfwith projects.Real-Time Project WizardUse the Real-Time Project Wizard to create a new project that definesRT targets and includes VIs and other application files. You can createprojects using one of three architectures with the Real-Time ProjectWizard—continuous communication, state machine, or custom.•Continuous communication architecture—Use a continuouscommunication architecture to create data acquisition applications thatlog data to disk and continuously communicate with a host computeror to create applications that perform continuous deterministic tasks.•State machine architecture—Use a state machine architecture toimplement complex decision-making algorithms represented by statediagrams or flow charts. A state machine implements any algorithmdescribed by a Moore machine, which performs a specific action foreach state in the diagram.•Custom project—Use a custom project architecture to add a blank VIor import existing VIs to run on the host computer or RT target.Project Explorer WindowThe Project Explorer window enables you to manage the targets, VIs, andother support files of a project from one location. Use the Project Explorerwindow to connect to RT targets, to set target properties, and to deploy VIsto targets. The Project Explorer window includes the following sections.•Project root—Contains the host computer and the RT targets assignedto the current project.–My Computer—Represents the host computer as a target in theproject.–RT Target—Represents the RT targets in the project. By default,the heading for an RT target is the name of the target as specifiedin MAX.VIs and libraries that you add to an RT target appear under the target in theProject Explorer window.© National Instruments Corporation7Real-Time Module Release and Upgrade NotesShared Variables for Deterministic CommunicationUse shared variables to read and write data from VIs in a project or acrossa network. Shared variables are configured software items that can senddata between two locations in a block diagram that cannot be connectedwith wires, between two VIs running on an RT target, or between two VIsacross a network running on different targets.Use single-process shared variables to share data between two locations ina block diagram or VIs running on an RT target. Use network-publishedshared variables to share data between VIs running on different targets.Right-click an RT target in the Project Explorer window and selectNew»Variable from the shortcut menu to open the Shared VariableProperties dialog box.The Real-Time Module adds a real-time FIFO—first in, first out buffer—tothe shared variable. By enabling the real-time FIFO of a shared variable,you can deterministically share data without affecting the determinism ofVIs running on an RT target. From the Real-Time FIFO page of theShared Variable Properties dialog box, place a checkmark in the EnableReal-Time FIFO checkbox to enable the real-time FIFO for a sharedvariable.RT Target Properties Dialog BoxUse the RT target Properties dialog box to configure the project settingsof an RT target. You can configure general, VI Server, Web Server, access,and miscellaneous target settings. For example, you can enable theVI Server on the RT target from the RT target Properties dialog box.Right-click an RT target in the Project Explorer window and selectProperties from the shortcut menu to open the RT target Properties dialogbox. After configuring the settings of an RT target, you must deploy thesettings to the target by right-clicking the target and selecting Deploy fromthe shortcut menu.LabVIEW Timed Structures (ETS)Use the Timed Structures, located on the Timed Structures palette, whenyou want to develop VIs with precise timing, execution feedback, timingcharacteristics that change dynamically, or several levels of executionpriority.Timed SequenceThe Timed Sequence consists of one or more task subdiagrams, or frames,that execute sequentially. You can control the execution of the TimedSequence using an internal or external clock source.Real-Time Module Release and Upgrade You also can use a secondary clock source to control the timing of theframes independent of the structure timing.Timed Loop with FramesYou can add frames that execute subdiagrams sequentially for every loopiteration to a Timed Loop. You can control the execution of each iterationof a Timed Loop using an internal or external clock source.You also can use a secondary clock source to control the timing of theframes independent of the structure timing.Real-Time Benchmarking VIsUse the Real-Time Benchmarking VIs, located on the Real-Time Utilitiespalette, to benchmark the performance of VIs and sections of VIs runningon an RT target. You can use the benchmark information to optimize thedesign of RT target VIs.RT Get Timestamp VIUse the RT Get Timestamp VI to return a 64-bit timestamp value from ahigh-precision timing source.RT Timestamp Analysis VIUse the RT Timestamp Analysis VI to analyze the timestamp valuesreturned by the RT Get Timestamp VI.RT Target Errors Dialog BoxUse the RT Target Errors dialog box to view error logs for theRT sessions of an RT target. An RT session begins when you power on anRT target and ends when you reboot the target. The RT Target Errorsdialog box displays LabVIEW errors, real-time operating system errors,and crash logs for an RT target. Right-click an RT target in the ProjectExplorer window and select Utilities»View Error Log from the shortcutmenu to view the error logs of the target using the RT Target Errorsdialog box.© National Instruments Corporation9Real-Time Module Release and Upgrade NotesDual Ethernet Device Support for NI PXI Targets (ETS)The Advanced Ethernet Settings dialog box in MAX was updated tosupport configuration of multiple Ethernet devices for RT SeriesPXI targets. You can create applications that use multiple Ethernet devicesto send multiple copies of data over different networks from an RT targetand to prioritize or isolate network traffic. In MAX, click the AdvancedEthernet Settings button on the Network Settings tab of an RT target toopen the Advanced Ethernet Settings dialog box.Real-Time Module ExamplesUse the NI Example Finder, available by selecting Help»Find Examplesfrom LabVIEW, to browse or search for example VIs. You also can accessthe example VIs from the labview\examples\Real-Time directory.The Real-Time Module includes examples of multithreadedcommunication, network communication, and shared memory access.•Multithreaded Communication—Example VIs that use functionalglobal variables, Real-Time FIFO VIs, and shared variables tocommunicate between the sections of a multithreaded application.•Network Communication—Example VIs that use shared variables,TCP, UDP, and the VI Server to communicate between the hostcomputer and an RT target.•Shared Memory—Example VIs that use the Real-Time SharedMemory VIs to communicate between a host computer and anRT Series plug-in device or RTX target.Known Issues with the Real-Time Module 8.0Refer to the readme_RT.html file on the LabVIEW Real-TimeModule 8.0 installation CD for information about known issues with theReal-Time Module 8.0.You also can launch the readme_RT.html file from Windows after youinstall the Real-Time Module. Complete the following steps to access thereadme_RT.html file from Windows.1.Select Start»All Programs»National Instruments»LabVIEW 8.0»Readme to open the labview\readme directory.The labview\readme directory contains the HTML readme files forLabVIEW, the LabVIEW modules, and add-ons installed on thecomputer.2.Double-click readme_RT.html to open the LabVIEW Real-TimeModule Readme.Real-Time Module Release and Upgrade *322733F-01* National Instruments, NI, , and LabVIEW are trademarks of National Instruments Corporation.Refer to the Terms of Use section on /legal for more information about NationalInstruments trademarks. Other product and company names mentioned herein are trademarks or tradenames of their respective companies. For patents covering National Instruments products, refer to theappropriate location: Help»Patents in your software, the patents.txt file on your CD, or/patents.© 2000–2005 National Instruments Corporation. All rights reserved. Printed in Ireland.371374A-01Oct05。
- 1、下载文档前请自行甄别文档内容的完整性,平台不提供额外的编辑、内容补充、找答案等附加服务。
- 2、"仅部分预览"的文档,不可在线预览部分如存在完整性等问题,可反馈申请退款(可完整预览的文档不适用该条件!)。
- 3、如文档侵犯您的权益,请联系客服反馈,我们会尽快为您处理(人工客服工作时间:9:00-18:30)。
Page 4 of 7
CIG 022 Pre-licence Factory Inspection Questionnaire Sections A and B
B.1.4 Control of Production The following questions need only to be answered if the license holder is not the manufacturing site: 1) Are you the owner of the product design? 2) Are you keeping control of design modifications? 3) Do you control the quality system of the manufacturing site? 4) Does your contract with the manufacturing site cover questions 1,2, and 3? yes yes yes yes no no no no
B.1.3 Which Certification Mark is requested according to which standards? Please specify the requested type-approval procedure (CCA, CB or National).
XX-XX-XXXXX, Issue 1.0
B.2.1 Manufacturer's registered name and factory address: Manufacturer’s name: Street and No.: Postal Code: City: County: Country: GPS-coordinates (optional) Directions for reaching the factory (nearest railway station, airport Attach photocopy of local map (if possible): B.2.2 Provide name and contact data of the contact persons located in the factory and the management representative responsible for product certification. Contact person in factory: Function: Telephone: Fax: E-Mail: Deputy contact person in factory Function: Telephone: Fax: E-Mail: Management representative: Function: Telephone: Fax: E-Mail: Note: This management representative may be located outside the factory e.g. at the Head Office.
A.1 A.2 A.3
Requesting Certification Body: Requested Inspection Body:
File Ref. No.:
Manufacturer's registered name and factory address:
Manufacturer’s name Street and No. Postal Code City County: Country: GPS-coordinates: (optional) Manufacturer's representative name and contact data: Name: Function: Telephone: Fax: E-Mail: A.4 Licence holder name and address: Licence holder name: Street and No.: Postal Code: City: County: Country: Telephone: Fax: E-Mail: License holder’s representative name and contact data: Name: Function: Telephone: Fax: E-Mail:
XX-XX-XXXXX, Issue 1.0
Page 5 of 7
CInspection Questionnaire Sections A and B
PD CIG 022 SECTION B QUESTIONNAIRE
B 2 QUESTIONNAIRE TO BE COMPLETED BY THE MANUFACTURER
Please describe briefly how the contract covers these questions or provide a copy: B.1.5 Signed for licence holder: Name and Function: Place: Date:
Signature: .................................
XX-XX-XXXXX, Issue 1.0
Page 2 of 7
CIG 022 Pre-licence Factory Inspection Questionnaire Sections A and B
A.5 Product category:
A.6
Standards:
A.7
Certification Mark(s) requested:
...............................................................................
Note: The signatory to this form declares the accuracy of the information provided.
PD CIG 022 SECTION B QUESTIONNAIRE
B 1 QUESTIONNAIRE TO BE COMPLETED BY THE LICENCE HOLDER
B.1.1 Licence holder name and address: Licence holder name: Street and No.: Postal Code: City: County: Country: Telephone: Fax: E-Mail: License holder’s representative name and contact data: Name: Function: Telephone: Fax: E-Mail: B.1.2 Category(ies), brand(s) and type number(s) of the products for which the Certification Mark has been requested :
XX-XX-XXXXX, Issue 1.0
Page 6 of 7
CIG 022 Pre-licence Factory Inspection Questionnaire Sections A and B
B.2.3 Manufacturer's office address and contact data (if different from B.2.1): Telephone: Fax: E-Mail: B.2.4 Total number of employees in the factory: Number of employees engaged in the production of certified products: B.2.5 Specify which safety critical components are purchased from outside suppliers such as switches, lampholder, cord-sets, motors, transformers, sub-assemblies or parts of components such as contacts, etc. B.2.6 Describe in detail and make reference to documentation (copies may be attached), routine tests and inspections performed in receiving, in-process and final inspection and testing in order to ensure conformity of the end product with the applicable standards. B.2.7 Which Certification Marks are already granted by other Certification Bodies for this product category? B.2.8 Has the manufacturer's quality system been assessed and certified? Please give details. B.2.9 We agree that the Inspector representing the Certification Body may enter all locations of the manufacturing process including receiving inspections which are essential for conformity of the complete product with the relevant standards, during normal working hours, after having contacted the contact person or the deputy contact person. Name and Function: Place: Date :